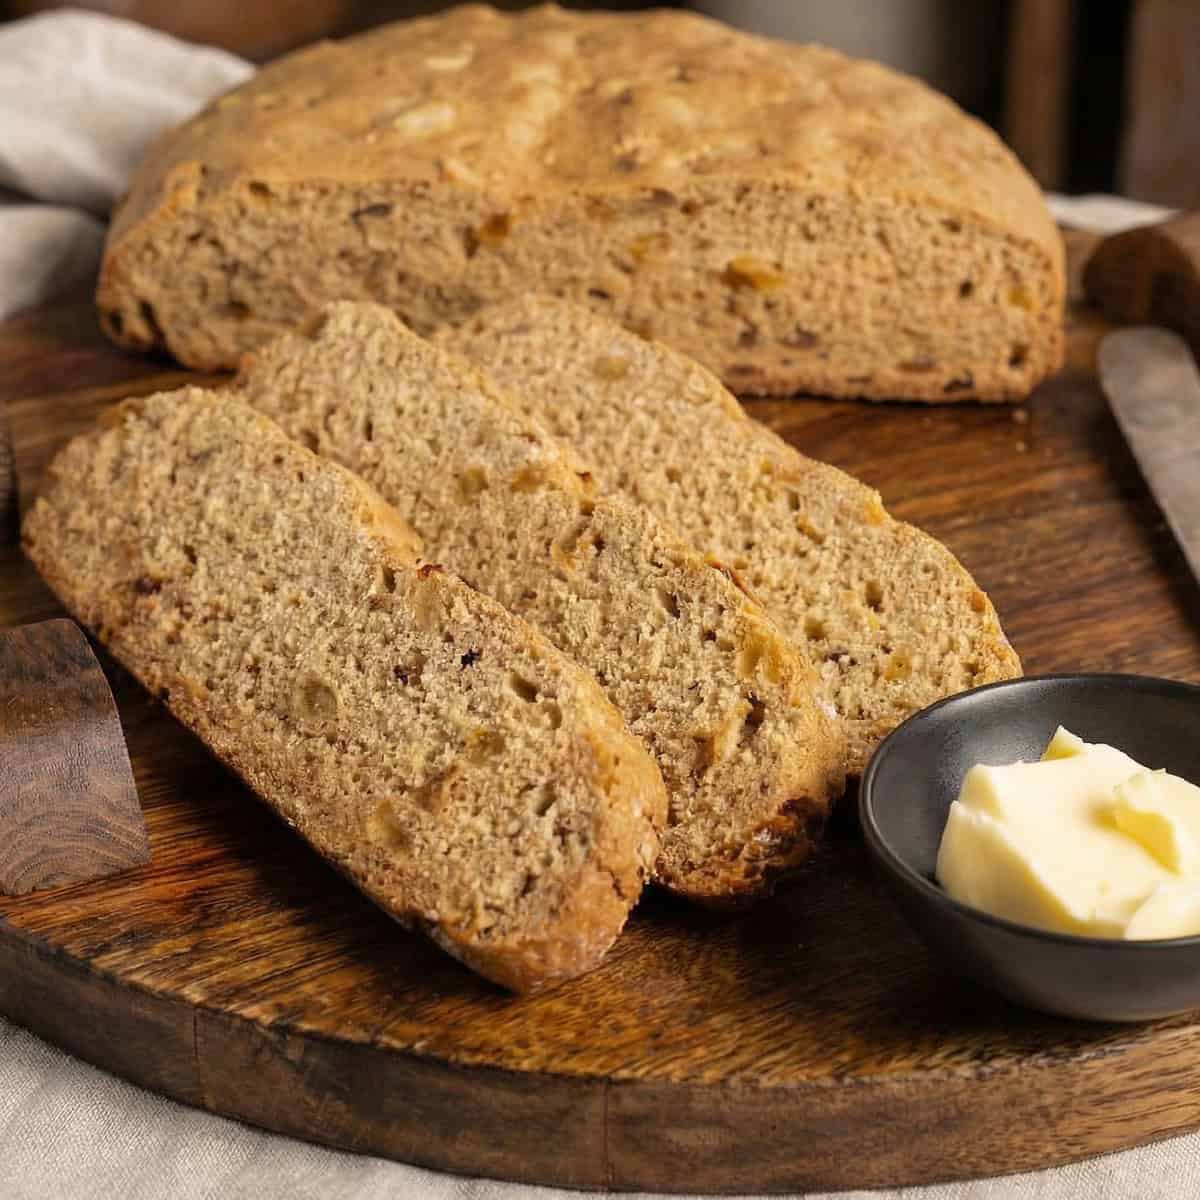
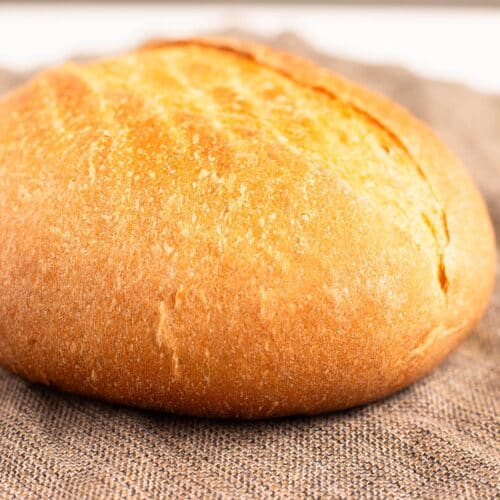
Every time I make this Cinnamon Raisin Quick Bread, I wonder why I don't make it more often.
This no yeast cinnamon raisin quick bread is incredibly easy to mix up, requires no rise time, and bakes up beautifully in the Ninja Foodi Possible Cooker Pro.
Would you like to save this recipe?
It's a variation of an Irish soda bread that I've been making for years, usually around Saint Patrick's Day, but honestly, it's too good to only make once a year and it goes perfectly with my Corned Beef & Cabbage Recipe!
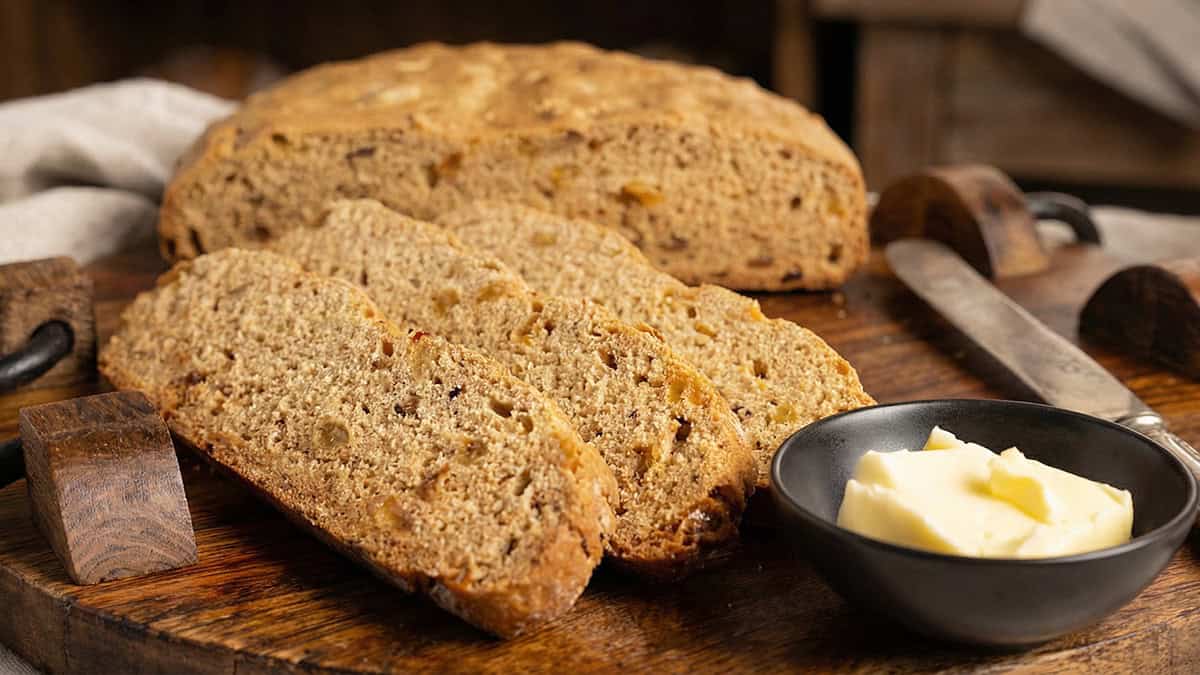
What I really love about making this bread in the Possible Cooker Pro is the steam that builds up inside the appliance while it bakes. That steam makes all the difference and produces a much lighter texture than what you typically get from a traditional soda bread baked in the oven. If you've ever had soda bread that was too dense or heavy, you're going to be in for a treat with this recipe. The inside is soft and tender and the flavor from the cinnamon, brown sugar, and golden raisins is absolutely perfect.
The best part is, It takes just a few minutes to mix up the ingredients and, since there's no yeast involved, you don't have to wait for any rise time.
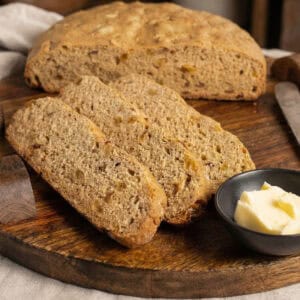
From start to finish, you'll have a beautiful loaf of homemade cinnamon raisin quick bread in about an hour and a half. Slice it up, toast it, slather on some butter, and you'll understand why this is one of my all-time favorite quick bread recipes.
Suggested Kitchen Tools for Cinnamon Raisin Quick Bread
- Ninja Foodi Possible Cooker Pro
- Large Mixing Bowl
- Wooden Spoon or Rubber Spatula
- Cutting Board or Flat Work Surface
- Parchment Paper
- Sharp Knife (for scoring)
- Instant-Read Thermometer (optional but recommended)
- Wire Cooling Rack
Ingredients & Substitutions
The ingredients for this cinnamon raisin quick bread are simple and easy to find. Most of them are pantry staples that you probably already have on hand. Here's what you'll need and what each ingredient does in the recipe.
All-Purpose Flour
Used in Recipe: All-purpose flour is the base of this quick bread.
What it Does: All-purpose flour provides the structure for the bread without developing too much gluten. Since we're not using yeast and there's no rise time, we don't want a high-protein flour that would make the bread tough or chewy. You'll start with a base amount and then add more as needed during the kneading process, because the exact amount varies depending on humidity and other factors.
Substitutions: Do not use bread flour for this recipe, as it will develop too much gluten and produce a tough bread. You can substitute cake flour for a slightly softer crumb. Whole wheat flour can replace up to half of the all-purpose flour, but it will create a denser loaf. This recipe has not been tested with gluten-free flour.
Buttermilk
Used in Recipe: Buttermilk is used as the primary liquid in the bread and also serves as the soaking liquid for the raisins.
What it Does: Buttermilk is an essential ingredient because the acid in the buttermilk activates the baking soda, which is one of our leavening agents. This reaction is what gives the bread its rise without any yeast. The buttermilk also adds a subtle tang and contributes to the tender texture of the bread.
Substitutions: If you don't have buttermilk, you can make a substitute by adding two tablespoons of white vinegar or apple cider vinegar to two cups of skim milk, low-fat milk, or even half and half. Stir and let it sit for a few minutes to curdle before using. You can also use buttermilk powder reconstituted according to the package directions.
Golden Raisins
Used in Recipe: Raisins are added to the bread for sweetness and texture.
What it Does: The golden raisins provide pockets of natural sweetness throughout the bread. Soaking them in the buttermilk before mixing softens them up, especially if they've been in the pantry for any length of time. This ensures a better texture in the finished bread rather than having hard, dry raisins.
Substitutions: Regular dark raisins work just fine. Golden raisins just look a little nicer in the bread in my opinion. You could also use dried cranberries or currants for a different flavor profile.
Brown Sugar
Used in Recipe: Packed brown sugar sweetens the bread.
What it Does: The brown sugar adds a warm, slightly caramelized sweetness to the bread that pairs beautifully with the cinnamon. The perfect amount of sweetness in this bread is noticeable but not overwhelming.
Substitutions: You can use either light or dark brown sugar. Dark brown sugar will give a slightly deeper molasses flavor. White sugar can be used in a pinch, but the flavor won't be quite as rich. If you want less sugar, you can reduce the amount slightly, but don't skip it entirely as it contributes to the overall flavor and texture.
Ground Cinnamon
Used in Recipe: Ground cinnamon is the signature spice in this quick bread.
What it Does: Cinnamon provides that warm, comforting flavor that makes this bread so irresistible. Use good-quality ground cinnamon for the best results. Be careful not to go overboard, though, because cinnamon can overpower other flavors and will also make the bread very dark.
Substitutions: You can increase the cinnamon up to 1½ teaspoons if you want a stronger cinnamon flavor, but I don't recommend going beyond that. You could also add a pinch of nutmeg or cardamom along with the cinnamon for a more complex spice profile.
Baking Soda and Baking Powder
Used in Recipe: Both baking soda and baking powder are used as leavening agents.
What it Does: The baking soda reacts immediately with the acid in the buttermilk, so as soon as the wet and dry ingredients are combined, the leavening starts working. The baking powder provides a longer, secondary activation during the baking process. Using both together gives the bread a better rise and a lighter, less dense texture than using baking soda alone. This is why it's important to get the bread into the Possible Cooker Pro promptly after mixing.
Substitutions: I strongly recommend using both for the best results. Traditionally, Irish soda bread only uses baking soda, but adding the baking powder makes a real difference in the texture.
Fine Grain Sea Salt
Used in Recipe: Salt is used to season the bread.
What it Does: Salt is really important in this bread because it brings out all the other flavors, including the cinnamon, brown sugar, and the raisins. Without it, the bread will taste flat.
Substitutions: Kosher salt works well. If using table salt, reduce the amount by about 25% since it is a finer grind.
Caraway Seeds (Optional)
Used in Recipe: Caraway seeds are an optional addition.
What it Does: Caraway seeds are traditional in Irish soda bread and add a really nice flavor dimension to the bread. It's how my mom always made hers, and I love including them even in the cinnamon raisin version.
Substitutions: These are completely optional. If you don't enjoy caraway seeds, simply leave them out. There is no need to replace them with anything else.
Vanilla Extract (Optional)
Used in Recipe: Vanilla extract is added to the buttermilk mixture.
What it Does: Vanilla adds a subtle warmth and depth of flavor that complements the cinnamon and brown sugar beautifully.
Substitutions: This is optional and can be left out. Vanilla paste can be substituted if you have it on hand.
How to Make Cinnamon Raisin Quick Bread in the Possible Cooker Pro
This cinnamon raisin quick bread recipe comes together fast. The key is to work gently with the dough and avoid overmixing or aggressive kneading, which can develop too much gluten and make the bread tough.
Mise En Place (Prep for Recipe)
Gather all of your ingredients and set them up on your work surface before you begin. Measure out the dry ingredients and have your extra flour nearby because you'll likely need it during the kneading step. Have a piece of parchment paper ready and a cutting board or clean work surface for kneading.
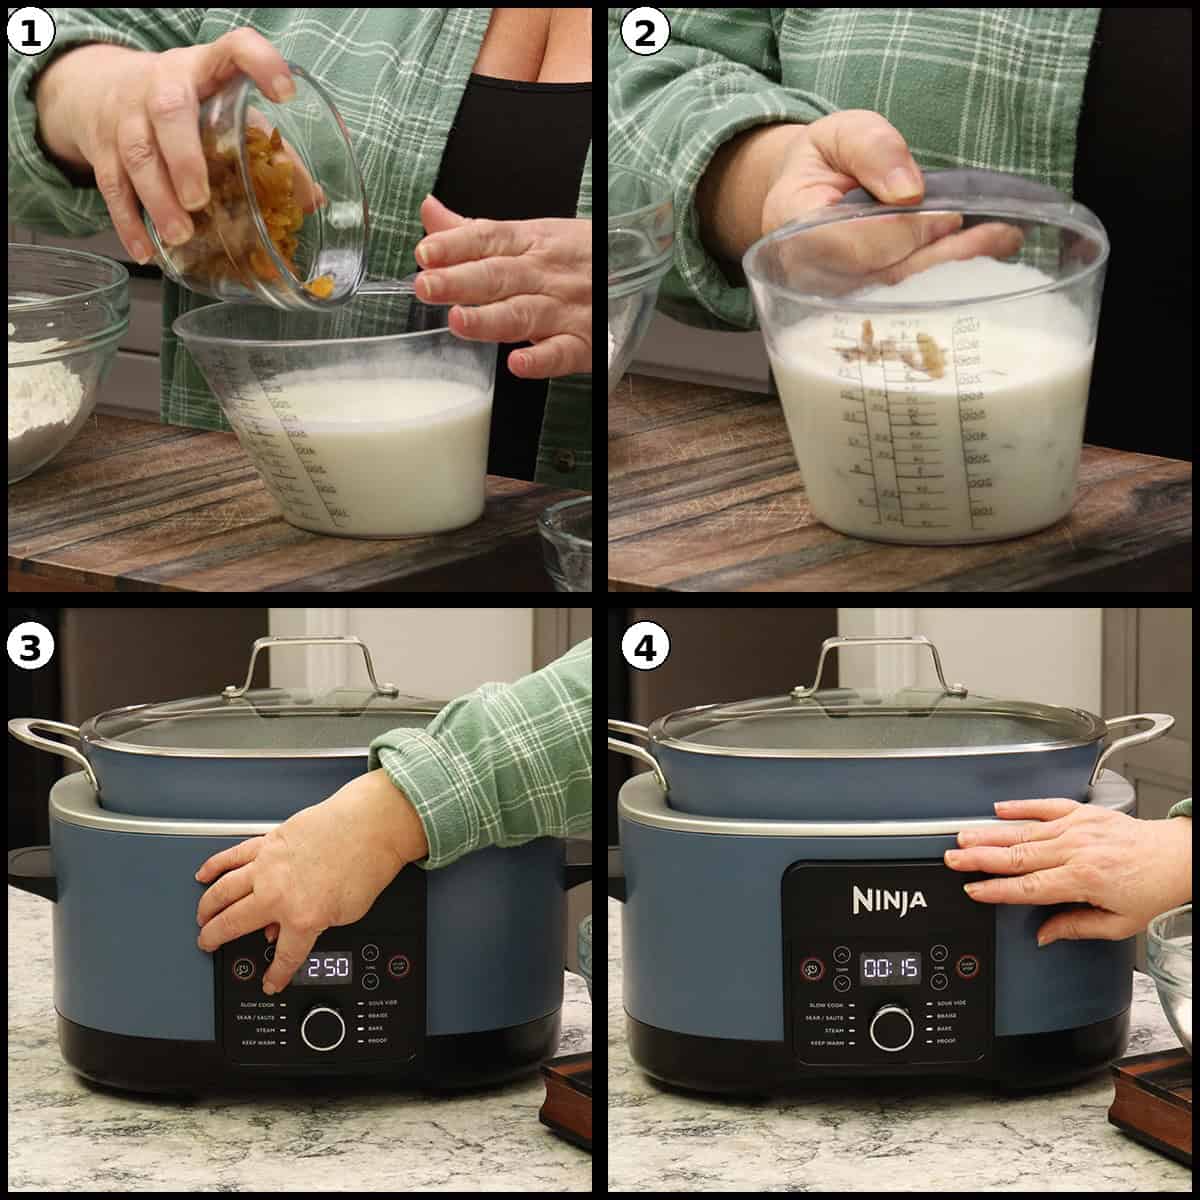
Pour the cup of golden raisins into the buttermilk and let them soak while you prepare the rest of the recipe. This softens the raisins and ensures they have a pleasant texture in the finished bread.
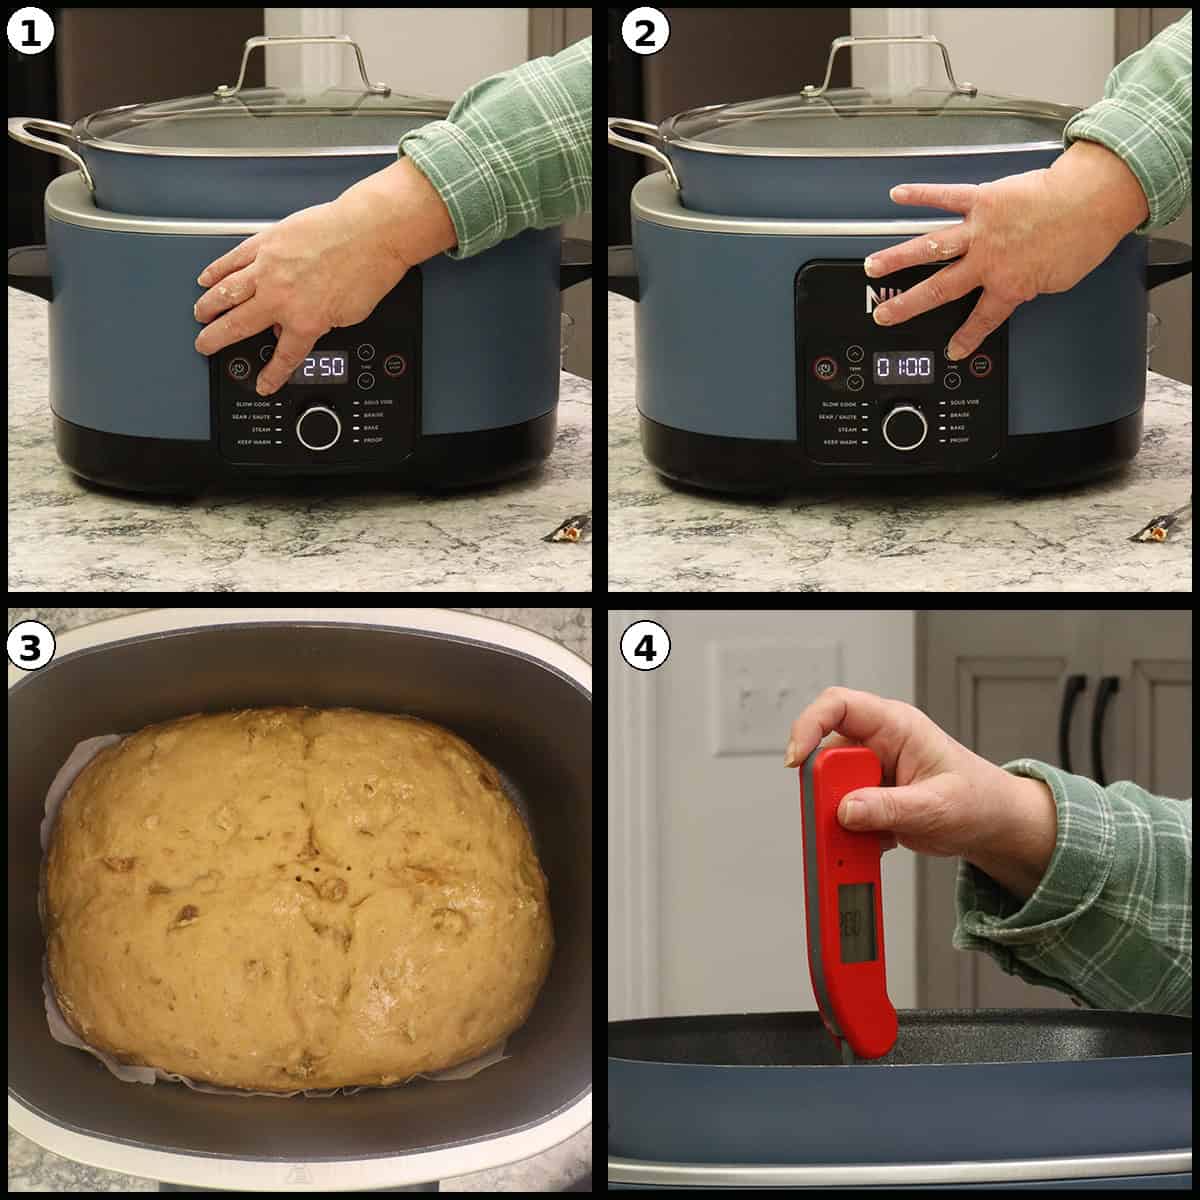
While the raisins are soaking, turn on the Ninja Foodi Possible Cooker Pro with the lid on, set it to Bake at 250℉/120℃, and press start. It will default to 15 minutes, which is plenty of time to preheat while you mix the dough.
Step One: Mixing the Dry Ingredients
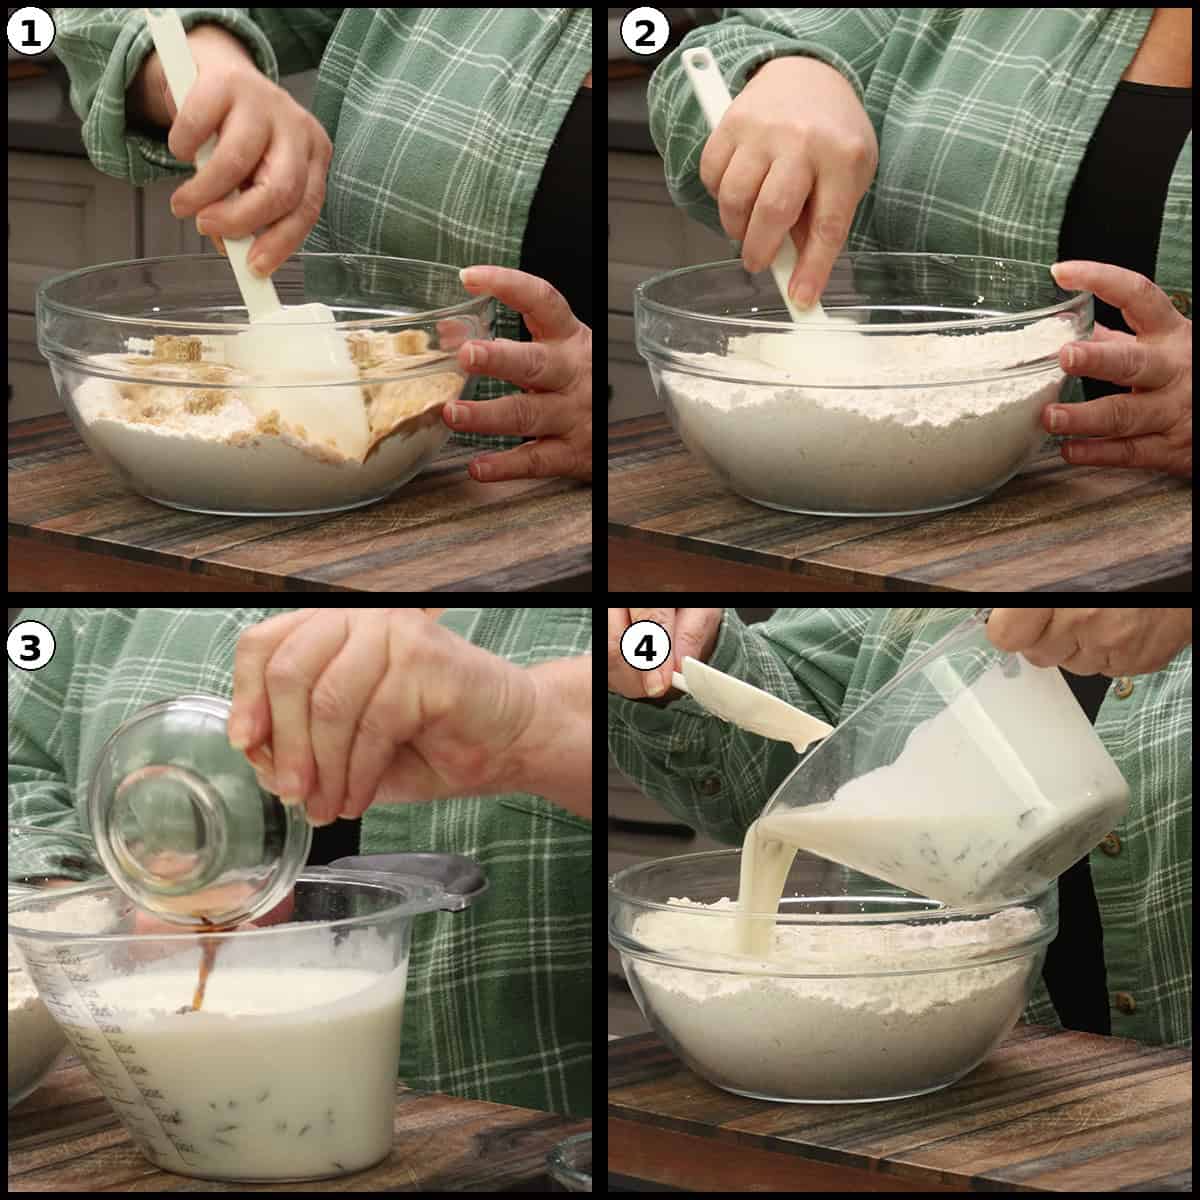
In a large mixing bowl, combine the all-purpose flour, packed brown sugar, fine grain sea salt, ground cinnamon, caraway seeds (if using), baking soda, and baking powder. Mix everything together well, making sure to break up any clumps of brown sugar.
Add the vanilla extract to the buttermilk and raisin mixture and give it a quick stir. Pour the entire wet ingredients into the dry ingredients.
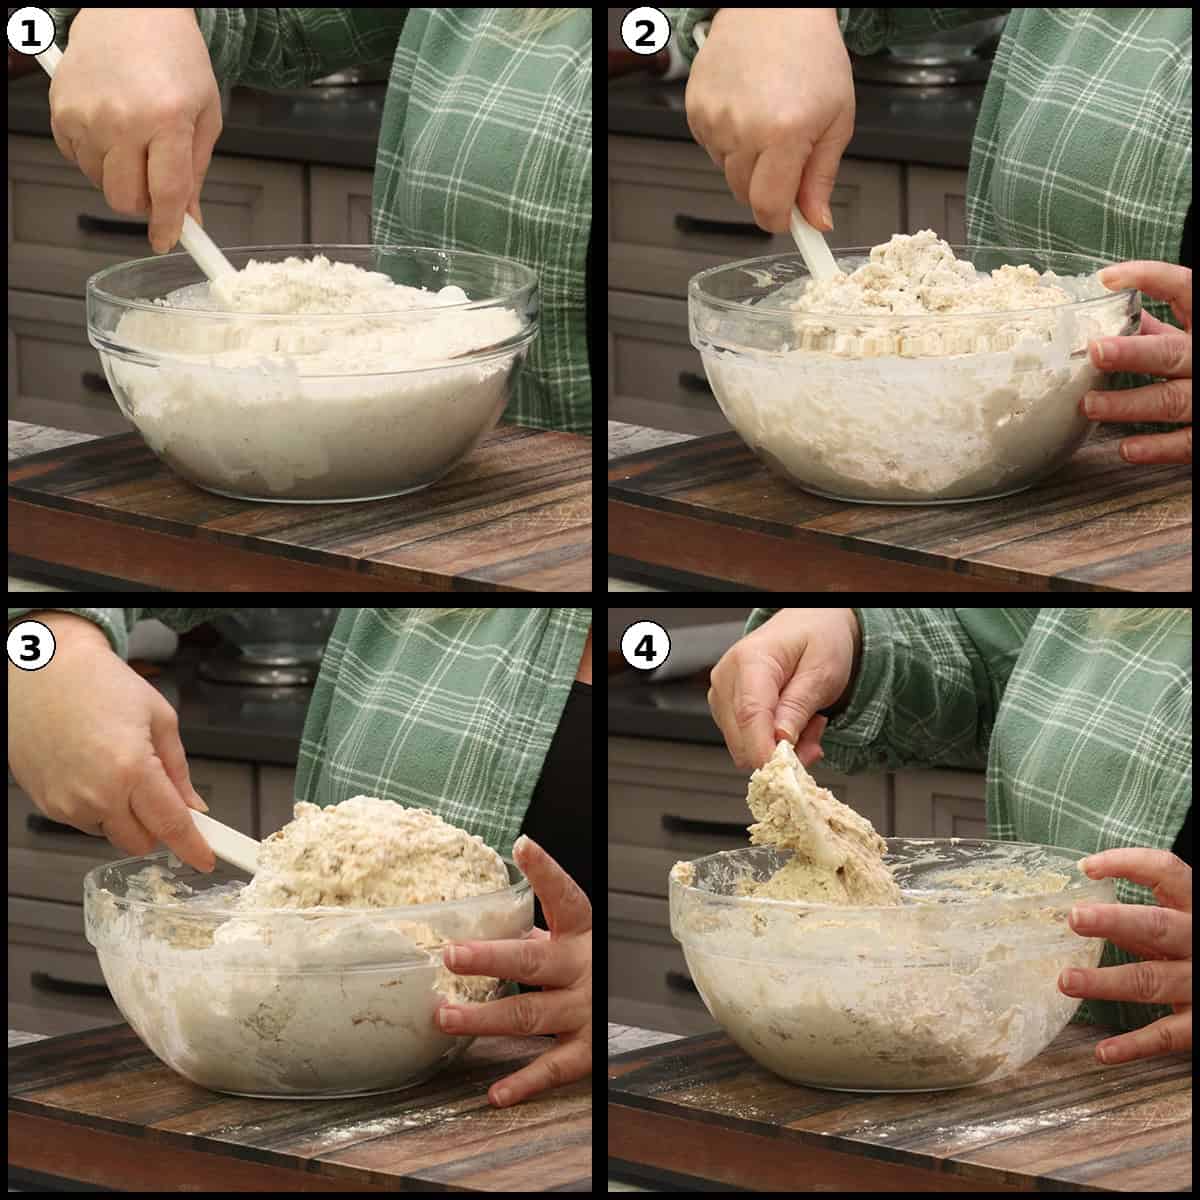
Step Three: Combine Wet and Dry Ingredients
Begin mixing by hand with a wooden spoon or rubber spatula. Use a scraping and folding motion to bring everything together. Do not use a mixer for this bread. A mixer will be too aggressive and can develop too much gluten, resulting in a tough, dense loaf.
Once you can no longer see any loose flour, the mixture is ready to transfer to a floured surface.
Quick Tip:
Do not use an electric mixer or stand mixer for this dough. Mixing by hand with a gentle folding motion is essential to keep the bread light and tender. Aggressive mixing will develop too much gluten and result in a tough, rubbery quick bread.
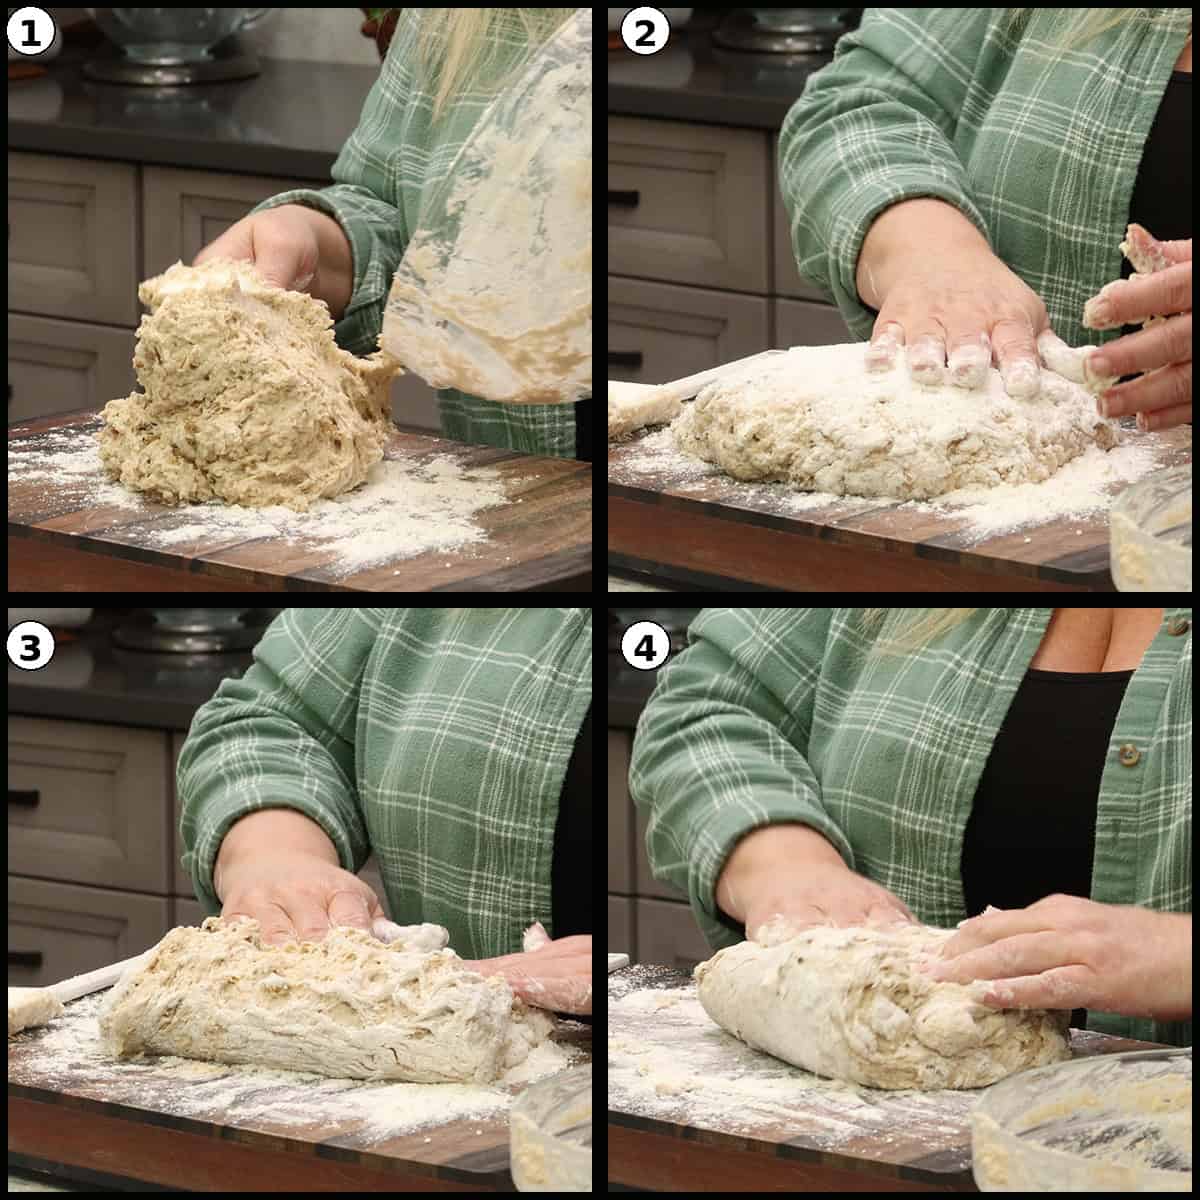
Step Four: Knead the Dough
Sprinkle about a quarter cup of extra flour onto your cutting board or work surface and turn the dough out. The dough will be very sticky at this point, and that's completely normal. Sprinkle a little more flour on top of the dough and on your hands, then begin gently folding and pressing the dough. Add flour in small amounts as needed whenever the dough sticks to your hands. Continue this gentle kneading until the dough is no longer sticky and holds together well. The total amount of extra flour you need will vary depending on humidity and other factors, so go by the texture of the dough rather than exact measurements.
Here is a short video of me adding the flour to obtain the correct dough consistency.
Quick Tip:
Every batch is a little different. Some days you may only need a few extra tablespoons of flour, while other times you might use an additional half cup or more. High humidity days tend to require more flour. Go by the feel of the dough: when it no longer sticks to your hands and feels slightly tacky but manageable, you're done.
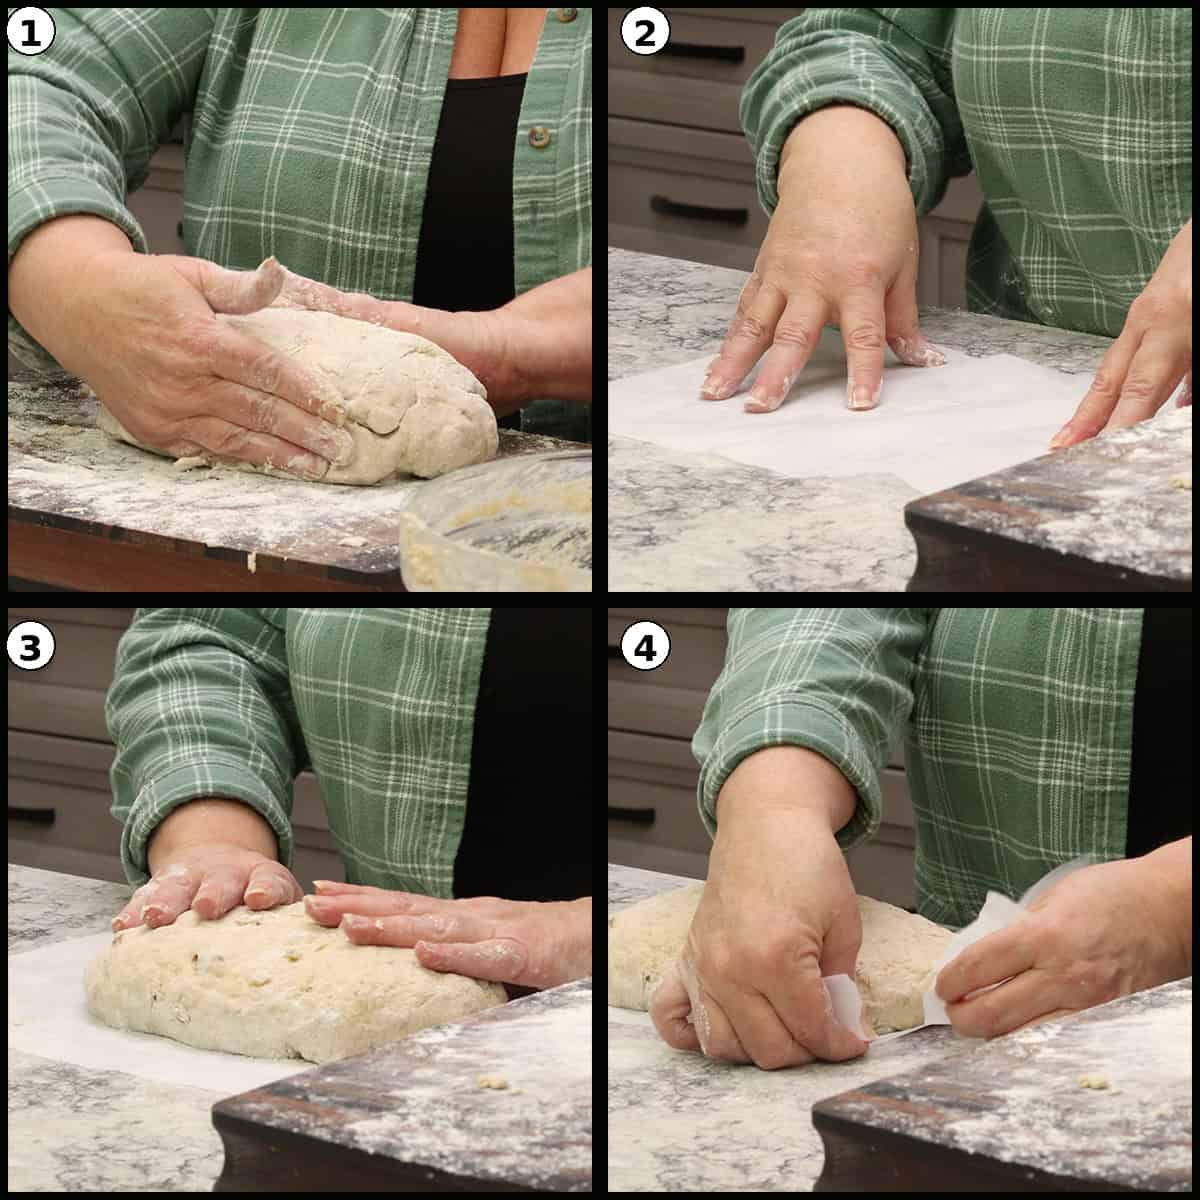
Step Five: Shape, Score, and Bake
When the dough feels soft, but is not sticking to your hands, it is ready to shape into an oblong or round loaf and press it down until it is between 2 and 3 inches high.
Place it on a piece of parchment paper and trim any excess parchment so it doesn't bunch up against the bread inside the cooker, which could impede the rising.
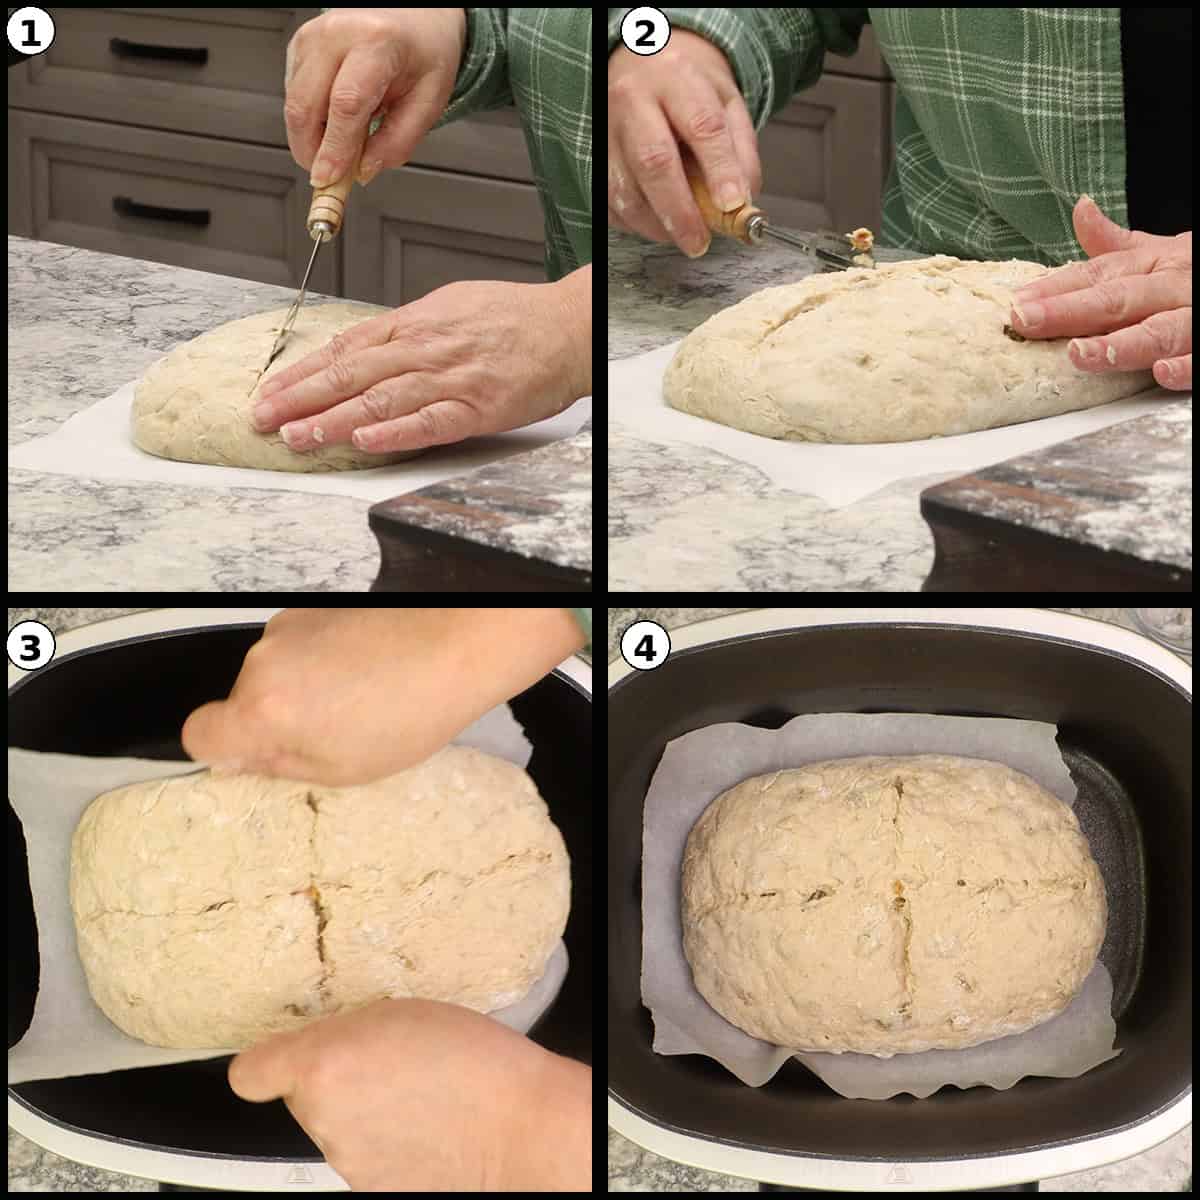
Using a sharp knife, bench scraper, or even scissors, score the top of the loaf in a cross pattern about half an inch deep. Scoring is important because it allows the heat to penetrate the denser center of the bread and ensures even baking.
Carefully lower the bread on the parchment paper into the preheated Possible Cooker Pro. Remember, the pot is hot, so use caution.
Put the lid back on, set it to Bake at 250℉/120℃, set the time for one hour, and press start.
Quick Tip:
Don't panic if the bread seems like it's not cooking fast enough at around the 30-35 minute mark. Things change drastically in the last 10-15 minutes of baking. Trust the process and let it finish.
After one hour of baking, check the internal temperature with an instant-read thermometer. You're looking for 200-210℉/93-99℃. If it hasn't reached temperature yet, continue baking in 10-15 minute increments. Once the bread reaches the target temperature, turn the Possible Cooker Pro off and switch to the Keep Warm function. Put the lid back on and let the bread rest for 15 minutes.
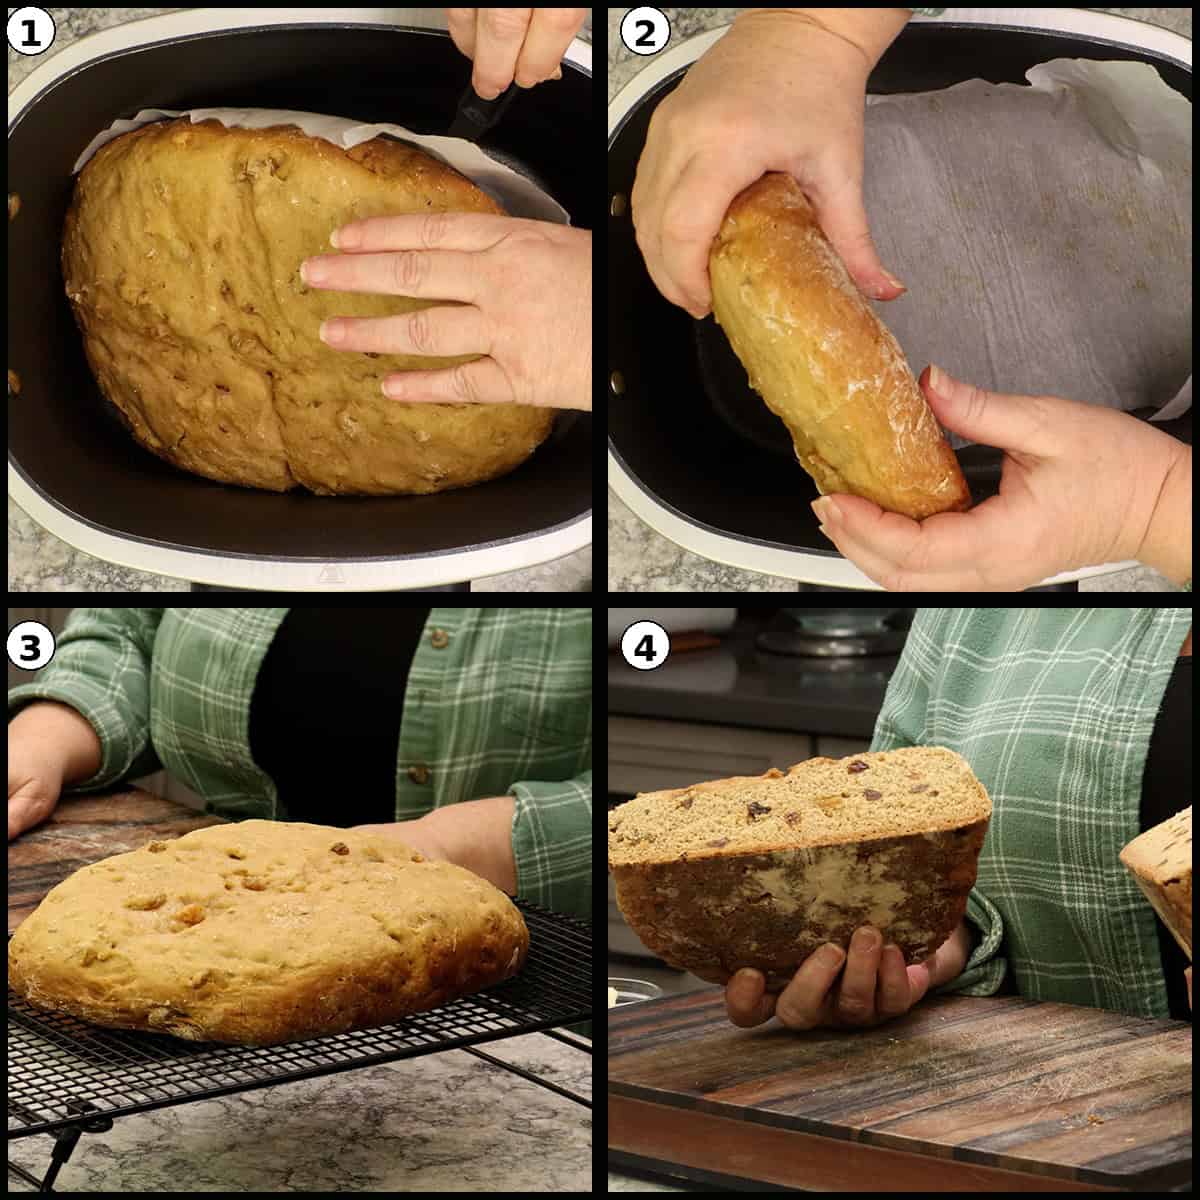
This step is important because the bread is still cooking inside and needs this time to set. If you try to remove it too early, it may bend or even break apart.
Step Six: Rest and Cool
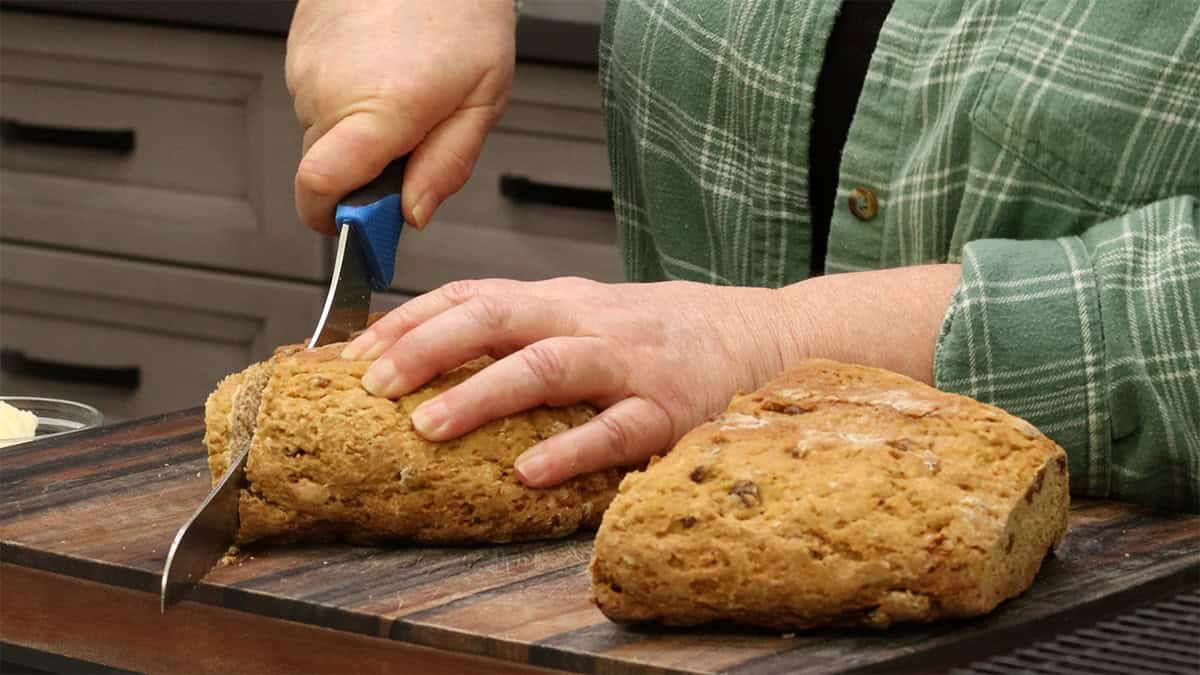
After the keep warm rest, carefully remove the bread using the parchment paper and a spatula, and transfer it to a wire cooling rack. Let the bread cool completely before slicing. I know it's tempting, but cutting into it while it's still warm will give you a gummy interior.
Slice and Serve!
Cinnamon Raisin Quick Bread (Possible Cooker Pro Recipe)
Equipment
- (affiliate link)Possible Cooker Pro
Ingredients
- 2 cups buttermilk see post for substitutions if you don't have buttermilk
- 1 cup golden raisins regular dark raisins work fine too
- 1 teaspoon vanilla extract optional
- 4 cups all-purpose flour plus ½ to ¾ cup extra for kneading, do not use bread flour
- ½ cup brown sugar, packed light or dark brown sugar
- 1 teaspoon fine grain sea salt use ¾ teaspoon if using table salt
- 1¼ teaspoons ground cinnamon do not exceed 1½ teaspoons
- 1 teaspoon caraway seeds optional, traditional in Irish soda bread
- 2 teaspoons baking soda
- 2 teaspoons baking powder
Would you like to save this recipe?
Instructions
- Add the golden raisins to the buttermilk and let them soak while you prepare the rest of the recipe. This softens the raisins for a better texture in the finished bread.2 cups buttermilk, 1 cup golden raisins
- Turn on the Ninja Foodi Possible Cooker Pro with the lid on. Set to Bake at 250℉/120℃ and press start. It will default to 15 minutes for preheating.
- In a large mixing bowl, combine the all-purpose flour, packed brown sugar, fine grain sea salt, ground cinnamon, caraway seeds (if using), baking soda, and baking powder. Mix well and break up any clumps of brown sugar.4 cups all-purpose flour, ½ cup brown sugar, packed, 1 teaspoon fine grain sea salt, 1¼ teaspoons ground cinnamon, 1 teaspoon caraway seeds, 2 teaspoons baking soda, 2 teaspoons baking powder
- Add the vanilla extract to the buttermilk and raisin mixture and stir briefly. Pour the entire wet mixture into the dry ingredients.2 cups buttermilk, 1 teaspoon vanilla extract
- Using a wooden spoon or rubber spatula, mix by hand using a folding motion until the flour is incorporated. Do not use an electric mixer. Scrape the bottom of the bowl and fold to bring dry flour into the mixture.
- Sprinkle about ¼ cup of extra flour onto a cutting board or work surface. Turn the sticky dough out onto the floured surface. Sprinkle flour on top and on your hands. Gently fold and knead the dough, adding small amounts of flour as needed until the dough is no longer sticky. The total extra flour needed varies (typically ½ to ¾ cup extra, sometimes more on humid days).
- Shape the dough into an oblong or round disk about 2-3 inches high. Place on a piece of parchment paper and trim any excess parchment so it won't bunch up against the bread in the cooker.
- Score the top of the loaf in a cross pattern about ½ inch deep using a sharp knife, bench scraper, or scissors. This is important for even baking through the center of the bread.
- Carefully lower the bread on the parchment into the preheated Possible Cooker Pro (the pot is hot, use caution). Put the lid on, set to Bake at 250℉/120℃ for 1 hour, and press start.
- Bake for 1 hour. Check the internal temperature with an instant-read thermometer. You want 200-210℉/93-99℃. If not at temperature, continue baking in 10-15 minute increments.
- Once the bread reaches temperature, turn the Possible Cooker Pro off and switch to Keep Warm. Put the lid back on and let the bread rest for 15 minutes. Do not skip this step, as the bread needs this time to finish cooking and set up properly.
- Carefully remove the bread using the parchment paper and a spatula. Place on a wire cooling rack and let it cool completely before slicing. Slice, toast, add butter, and enjoy!
Notes
• Do not use an electric mixer or stand mixer. Mix and knead by hand using a gentle folding motion to prevent developing too much gluten.
• The amount of flour varies every time based on humidity and other factors. Go by the feel of the dough, not exact measurements. When the dough no longer sticks to your hands, it's ready.
• The height of the loaf determines cook time. Keep it between 2-3 inches for the best results at 250℉/120℃ for one hour.
• Don't panic if the bread seems underdone at the 30-35 minute mark. Dramatic changes happen in the final 10-15 minutes.
• Do not flip the bread unless the top feels firm and set. Flipping too early will cause the bread to flatten. STORAGE
• Counter: Store in an airtight container or sealable bag at room temperature for 2-3 days.
• Freezer: Slice first, wrap individual slices in plastic wrap, and place in a freezer bag. Freeze for up to 2 months. Toast directly from frozen. NUTRITIONAL DISCLAIMER
Nutritional information provided is an estimate based on typical ingredient values and standard portion sizes. Actual nutritional content may vary significantly depending on specific brands used, ingredient substitutions, preparation methods, portion sizes, and individual cooking techniques. For precise nutritional information tailored to your specific ingredients and preparation, please consult with a registered dietitian or use laboratory analysis. This information should not be used for medical nutrition therapy or to manage medical conditions without professional guidance.
Nutrition
Storage & Reheating Instructions
How to Store Leftover Cinnamon Raisin Quick Bread
Because this is a homemade bread without preservatives, it won't have the long shelf life of store-bought bread. Proper storage will help keep it fresh and delicious.
Counter
Store the bread in an airtight container or sealable bag at room temperature for 2-3 days. This bread can dry out quickly if left uncovered, so make sure it's well sealed. It is best enjoyed toasted with butter after the first day.
Freezer
Before freezing, it is very important that the bread is completely cooled. If the bread is warm when packaged for freezing, steam can be produced inside the container or freezer bag, resulting in ice crystals forming.
The bread will keep in the freezer for up to 6 months.
Quick Tip
Slicing the bread before freezing makes it easy to toast individual slices straight from the freezer. No need to thaw first!
How to Reheat Cinnamon Raisin Quick Bread
Toaster or Toaster Oven
This is my preferred method. Simply toast individual slices until golden brown and top with butter.
Oven
Wrap the bread loosely in aluminum foil and warm in the oven at 300℉/150℃ for about 10-15 minutes. This works well if you're reheating a larger portion or the entire loaf.
Variations
This cinnamon raisin quick bread recipe is very forgiving and easy to customize. Here are some ways to change it up.
Oven Method: If you don't have a Possible Cooker Pro, you can bake this bread in a conventional oven. Place the shaped loaf on a parchment-lined baking sheet and bake at 350℉/175℃ for 45-55 minutes or until the internal temperature reaches 200-210℉/93-99℃. For a lighter texture similar to what the Possible Cooker Pro produces, place a small pan of ice on the rack below the bread to create steam during the first 15-20 minutes of baking.
Higher Temperature in Possible Cooker Pro: You can bake at 300℉/150℃ from start to finish in the Possible Cooker Pro. The bread will get done a little quicker, but the bottom may get a little too dark and thick for some people's liking. My preference is to stick with 250℉/120℃ for the full hour.
Flipping the Bread: If you want browning on the top, you can flip the bread during the last 15 minutes of baking. However, only flip if the top feels set and firm. If the top is still soft, flipping will cause the bread to collapse under its own weight.
Traditional Irish Soda Bread: For a more traditional version, leave out the cinnamon, raisins, vanilla, and brown sugar. Traditional Irish soda bread is simply flour, buttermilk, baking soda, and salt.
Add-Ins: Try adding dried cranberries, currants, or even chocolate chips for a different twist. Orange zest is another wonderful addition that pairs well with the cinnamon.
Frequently Asked Questions
Soaking the raisins in the buttermilk softens them, especially if they have been sitting in the pantry for a while. This ensures a better texture in the finished bread rather than biting into hard, dry raisins. If your raisins are very fresh, soaking is less critical but still recommended.
This is a quick bread, not a yeast bread, and we don't want to develop gluten. Using an electric mixer or a stand mixer with a dough hook would be too aggressive and would develop too much gluten, resulting in a tough, dense bread. Mixing and kneading by hand with a gentle folding motion keeps the bread light and tender.
The amount of flour you need depends on several factors including humidity, the moisture content of your buttermilk, and even the brand of flour you use. On a really humid day, you might need up to five or even five and a half cups total. Start with the base amount and add more during kneading until the dough is no longer sticky and holds together well.
Scoring the bread allows heat to penetrate the denser center of the loaf and ensures even baking throughout. Without scoring, the center may not cook all the way through. A cross pattern about half an inch deep works perfectly.
Yes! Place the shaped loaf on a parchment-lined baking sheet and bake at 350℉/175℃ for 45-55 minutes or until the internal temperature reaches 200-210℉/93-99℃. For a lighter texture similar to what the Possible Cooker Pro produces, place a small pan of ice on the rack below the bread to create steam.
The 15-minute rest on keep warm allows the bread to finish cooking through carryover heat and lets the interior set up properly. If you try to remove the bread immediately after baking, it may be too soft to hold its shape and could bend or break apart. This step also ensures the center is fully cooked.
More Possible Cooker Recipes
Try these recipes out in your Possible Cooker Pro!

About the Recipe Author, Louise Long
Louise is a full-time recipe creator and food blogger @ The Salted Pepper. She has over 30 years of experience with cooking and recipe development. She owned a restaurant for several years and was a full-time RN until retiring to blog full-time.

She published her first cookbook in the Fall of 2018 and is very interested in writing several more.
Louise is also the creator of an online Ninja Foodi Pressure Cooking Course with over 100 instructional step-by-step videos. People absolutely rave about the course and all the value they have received from it.
Louise has several very active Facebook groups that help people with the basics of cooking and learning more about the appliances they love.
Ninja Foodi Pressure Cooker & Air Crisper 101
Ninja Woodfire Outdoor Grill & Smoker
Louise is also a YouTube creator and you can find most of her recipes in video format on The Salted Pepper YouTube channel.
She is very responsive to messages and eager to help in any way she can. Get more Information about Louise & contact information
I WOULD LOVE TO SEE WHAT YOU ARE COOKING UP IN YOUR KITCHEN! TAG ME @THESALTEDPEPPER ON YOUR FAVORITE SOCIAL MEDIA PLATFORM WHEN YOU MAKE A DISH!
BE SURE TO FOLLOW THE SALTED PEPPER RIGHT HERE ⇓⇓⇓⇓⇓
Leave a Reply