- 8½ x 4½-inch light-colored metal loaf pan
- Parchment Paper
- Medium mixing bowl
- Large Mixing Bowl
- Small bowl (for tossing the cherries)
- Whisk
- Rubber spatula
- Measuring Cups and Spoons
- Fine-mesh sieve or sifter (for powdered sugar)
- Instant-read thermometer
- Wire Cooling Rack
- Sharp serrated knife
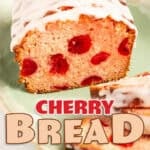
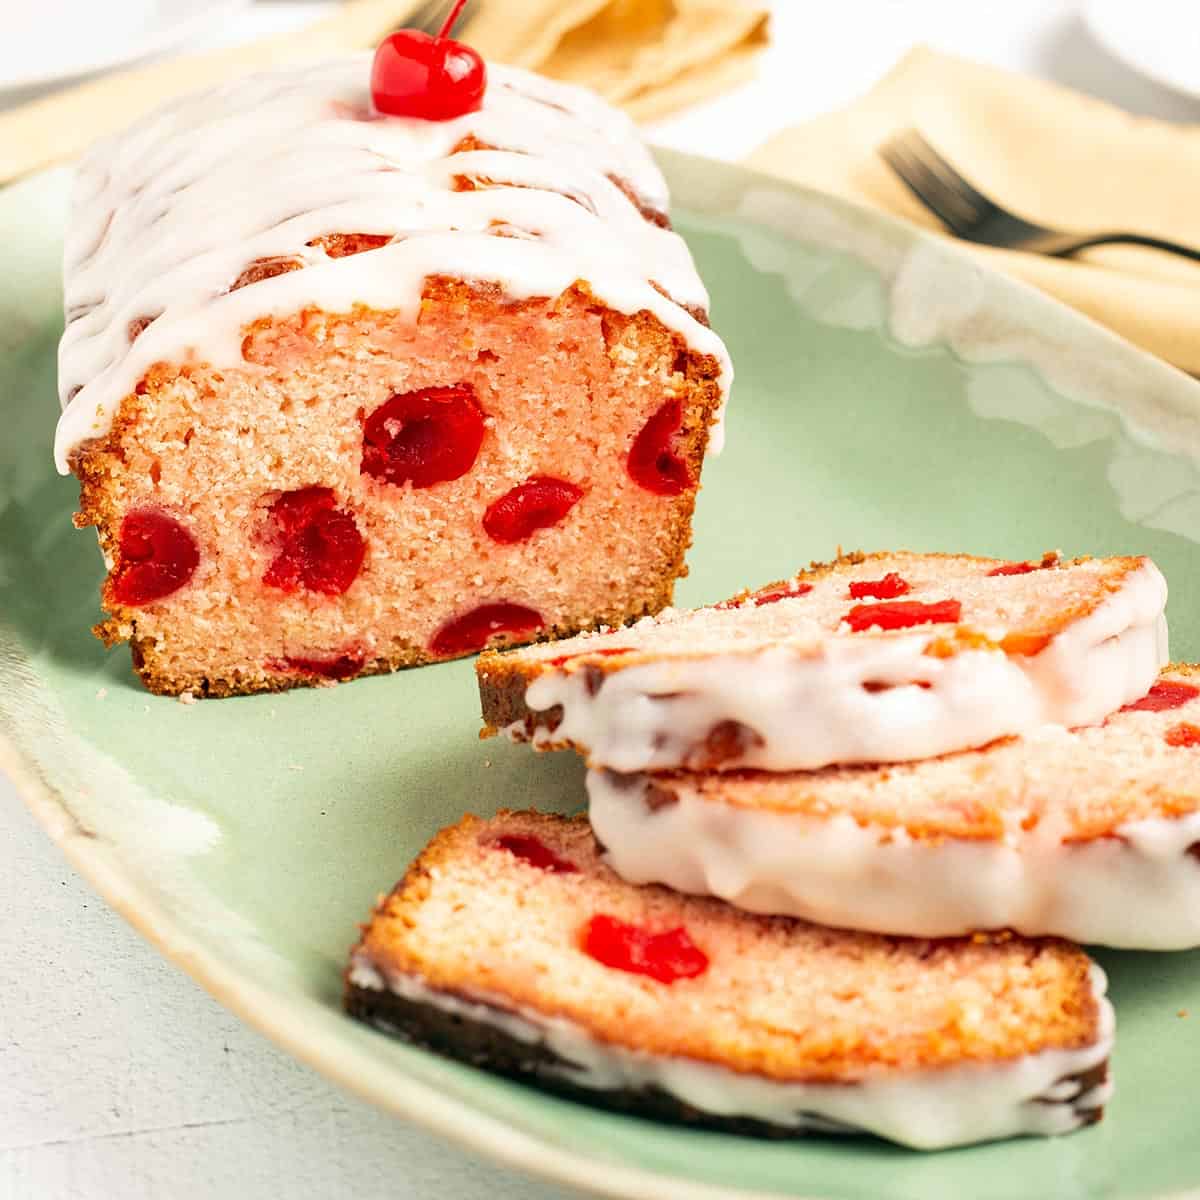
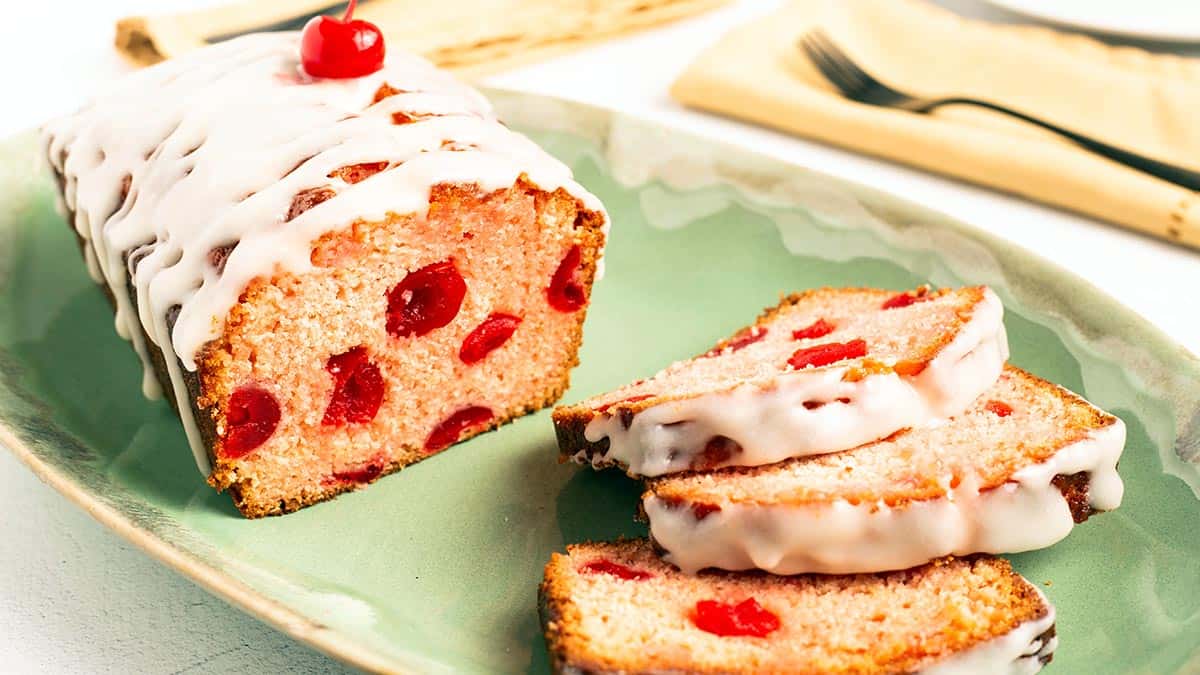
This easy maraschino cherry bread is a sweet, tender quick bread you are absolutely going to love. Halved maraschino cherries get folded into a soft, vanilla-rich batter, the loaf bakes up with a beautiful golden top, and a warm cherry glaze soaks right into the cracks for big cherry flavor in every bite. A final cold white drizzle finishes the loaf with that gorgeous bakery-style cascade.
I have been working on this cherry bread recipe for 11 years. After testing about ten loaves in just the past week, I am confident this is the best version. It tastes like a copycat of the famous Bob Evans cherry bread, with a tender crumb, a buttery vanilla flavor, and pops of sweet maraschino cherry in every slice. It is delicious for breakfast, perfect with afternoon coffee, and beautiful enough for a Mother's Day brunch or Valentine's Day dessert table.
If you love a good cherry dessert, you have to try my Mini Cherry Cheesecakes too. They are the perfect bite-sized treat for a brunch or holiday spread.
Would you like to save this recipe?
Even better, this is a quick bread, which means no yeast and no waiting for dough to rise. Two mixing bowls, a whisk, a spatula, and a loaf pan are all you need. The whole thing comes together in about 20 minutes of hands-on work, and then the oven does the rest. Trust me, you are going to want to make this delicious cherry loaf again and again.
Suggested Kitchen Tools for Cherry Bread
- 8½ x 4½-inch light-colored metal loaf pan (avoid stoneware for this recipe)
- Parchment paper (cut to fit the bottom of the pan with tall handles on the long sides)
- Medium mixing bowl for the wet ingredients
- Large mixing bowl for the dry ingredients
- Small bowl for tossing the cherries
- Whisk and rubber spatula
- Measuring cups and measuring spoons
- Fine-mesh sieve or sifter (for the powdered sugar)
- Instant-read thermometer (the most reliable doneness test)
- Wire cooling rack
- Sharp serrated knife (for clean slices)
Ingredients & Substitutions
This delicious cherry bread is made with simple pantry staples and one jar of maraschino cherries. Let me walk you through each ingredient, what it does in the recipe, and what you can substitute if needed.
All-Purpose Flour
Used in Recipe: 2¼ cups of all-purpose flour total. 2 cups go into the dry ingredient bowl and ¼ cup is reserved to toss with the maraschino cherries before folding them into the batter.
What it Does: All-purpose flour provides the structure for this quick bread. Tossing the halved cherries in a little reserved flour before folding them in helps keep them evenly distributed throughout the loaf instead of sinking to the bottom.
Substitutions: A measure-for-measure gluten-free flour blend works as a direct swap. Avoid bread flour; the higher protein content can make this loaf tough.
Granulated and Powdered Sugars
Used in Recipe: 1 cup of white granulated sugar in the batter, ¼ cup of sifted powdered sugar in the warm cherry glaze, and 6 tablespoons of sifted confectioners' sugar in the final white drizzle.
What it Does: Granulated sugar sweetens the batter and slows gluten development for a tender crumb. The powdered sugars in the two glazes give them their smooth, pourable texture and that beautiful glossy finish on top of the loaf.
Substitutions: Cane sugar can be swapped 1:1 for granulated. Always sift the powdered sugar before measuring for both glazes, the volume changes after sifting and the difference shows up in the final texture.
Eggs, Butter, and Half and Half
Used in Recipe: 2 large eggs and ¼ cup of melted salted butter in the batter, ¼ cup of half and half in the batter, plus an additional 2 tablespoons of melted butter in each glaze and 1 tablespoon of half and half in the white drizzle.
What it Does: Eggs add richness, structure, and that beautiful tender crumb. Salted butter gives the bread big buttery flavor and the half and half adds creaminess and just enough fat to keep the loaf moist for days.
Substitutions: Unsalted butter works fine, just add an extra pinch of salt to the dry ingredients. Whole milk can stand in for half and half in the batter and the glaze, the loaf will still be delicious.
Neutral Oil
Used in Recipe: ⅓ cup of a neutral oil such as avocado, canola, or vegetable oil.
What it Does: Combining oil with the butter is one of the biggest secrets to this cherry bread. Oil stays liquid at room temperature, which keeps the loaf incredibly moist for days. The butter still gives the bread that rich, buttery flavor. This was the ratio that worked best after years of testing.
Substitutions: Light refined coconut oil also works. Avoid olive oil and sesame oil, the flavors are too strong for this delicate cherry loaf.
Maraschino Cherries and Cherry Juice
Used in Recipe: 1 cup of halved maraschino cherries (about 6 ounces drained), ½ cup of maraschino cherry juice in the batter, and 2 tablespoons of cherry juice in the warm cherry glaze. A 16 ounce jar gives you plenty of juice for both the batter and the glaze.
What it Does: Maraschino cherries are the star of this loaf. They give the bread its signature pink-tinged crumb, those gorgeous pops of fruit in every slice, and a sweet bakery flavor that tastes exactly like the famous Bob Evans cherry bread. The cherry juice in the batter and glaze deepens the cherry flavor and adds that pretty pink color.
Substitutions: This recipe is specifically built for maraschino cherries and has not been tested with fresh, frozen, or tart cherries. Other cherry types have very different sweetness, juice content, and color and will completely change the recipe.
Vanilla and Cherry Flavorings
Used in Recipe: 1 teaspoon of vanilla extract and 1 teaspoon of cherry baking emulsion in the batter, plus an optional ½ teaspoon of cherry baking emulsion in the white drizzle glaze.
What it Does: Vanilla rounds out the buttery base of the cake batter. Cherry baking emulsion gives the bread a delicious extra boost of cherry flavor without any of that artificial taste that cherry extracts can sometimes have. It is one of my favorite ways to amplify cherry flavor in a baked good.
Substitutions: The cherry emulsion is totally optional, the cherries and cherry juice give you plenty of cherry flavor on their own. If you want to use cherry extract instead, start with just ½ teaspoon since extracts can taste artificial when overused. A flavored cherry oil also works. Almond extract is a delicious alternative since cherries and almond are a classic flavor pairing.
Salt and Baking Powder
Used in Recipe: ½ teaspoon of fine grain sea salt and 2 teaspoons of baking powder in the dry ingredients.
What it Does: Salt balances all the sweetness and brings out the cherry and vanilla flavors. Baking powder is the leavening that gives this quick bread its rise and tender, cake-like texture.
Substitutions: Kosher salt can be used at the same measurement. If using fine table salt, cut the amount to ¼ teaspoon since it packs more salt per teaspoon. Make sure your baking powder is fresh, an old container can leave the loaf flat.
How to Make Cherry Bread
From start to finish, this delicious cherry bread takes about 20 minutes of hands-on work, 60 to 75 minutes in the oven, and a couple of hours of cooling and glazing time. Here is everything you need to know!
Prep the Loaf Pan
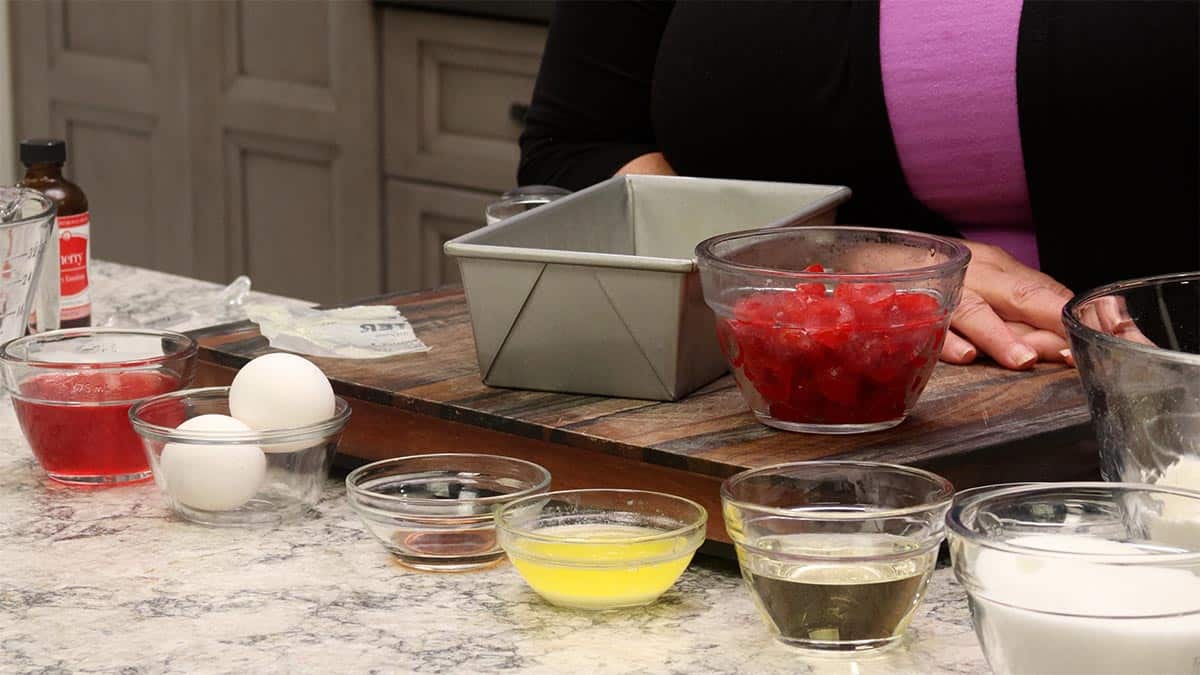
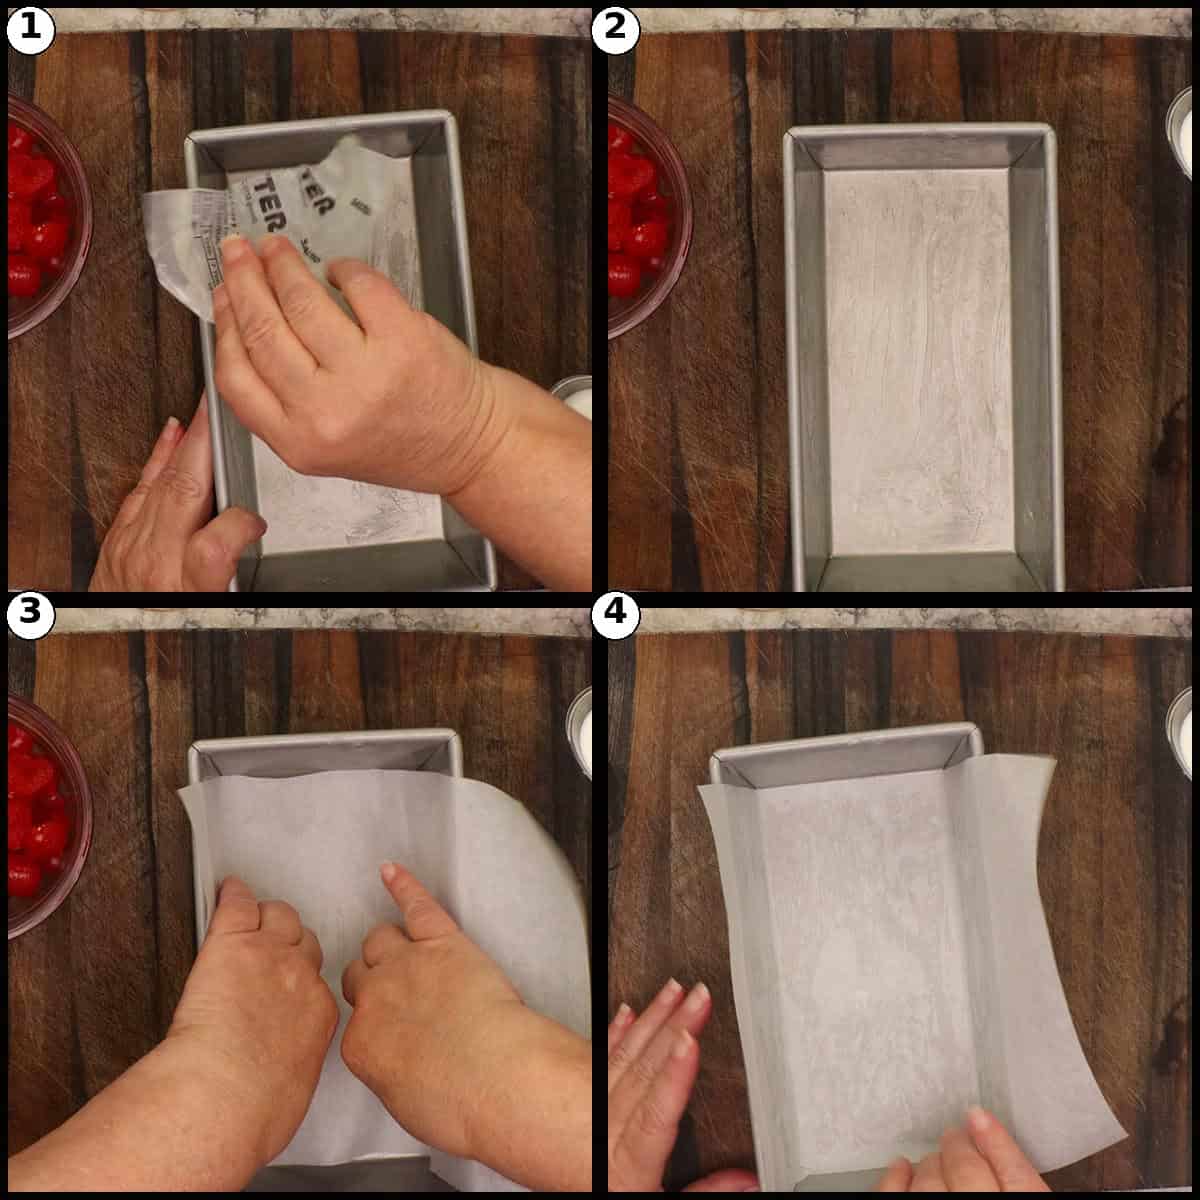
Lightly butter the bottom and sides of an 8½ x 4½-inch light-colored metal loaf pan, then line the bottom with parchment paper. Cut the parchment to fit the bottom with a small gap at each short end and tall handles up the long sides. Those handles make it easy to lift the loaf out of the pan after baking, so do not skip them.
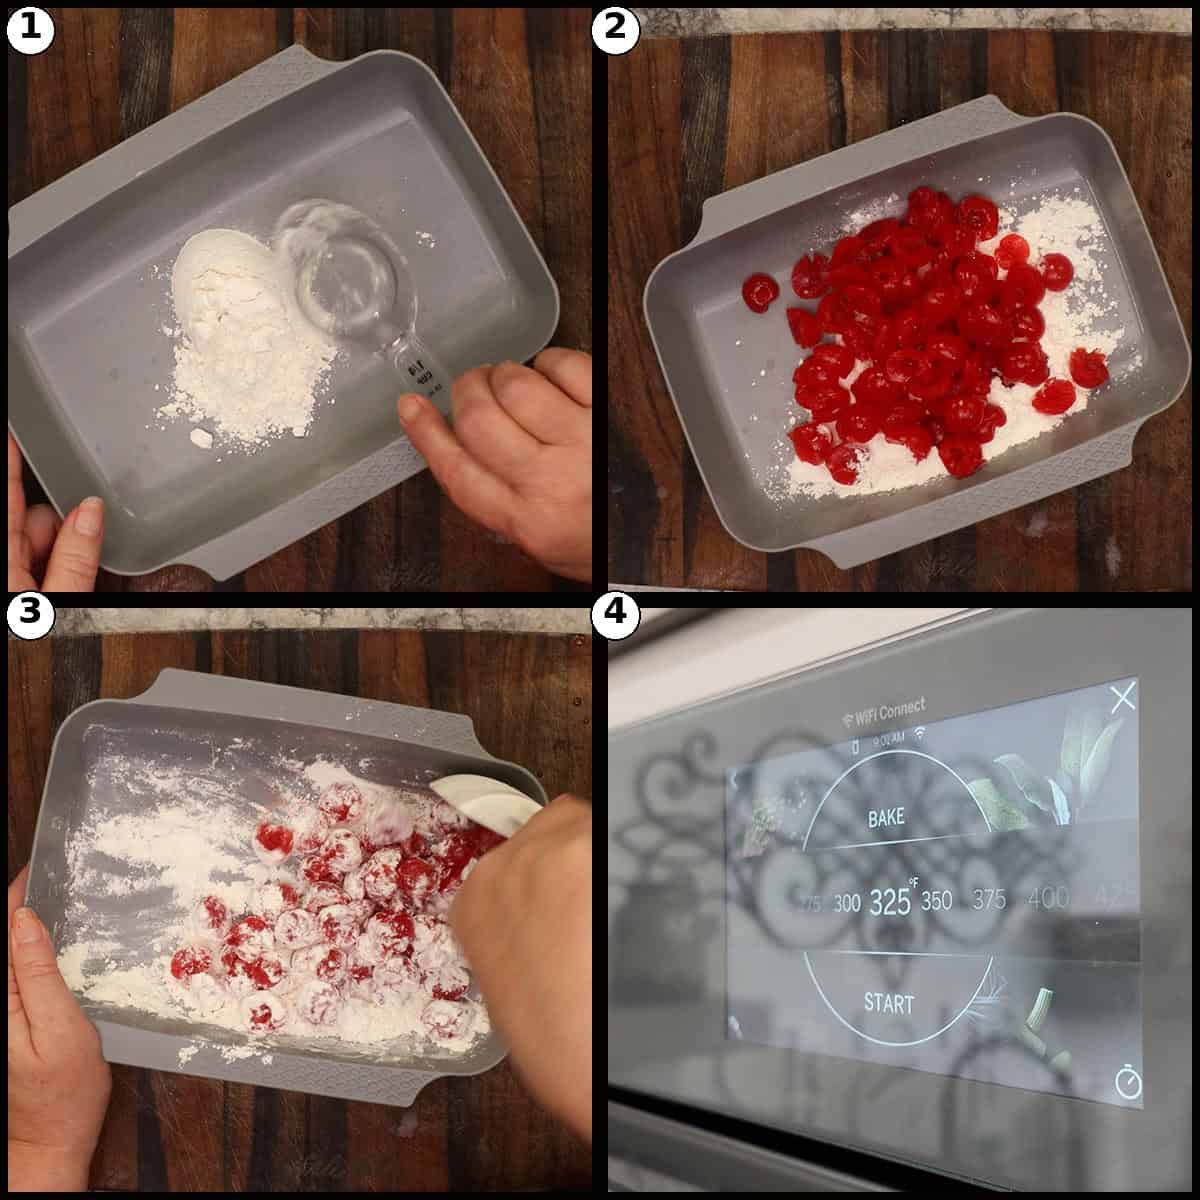
While the pan is set up, go ahead and gather and measure everything else: 2 large eggs, 1 cup of granulated sugar, ¼ cup of melted salted butter, ⅓ cup of neutral oil, ¼ cup of half and half, 1 teaspoon of vanilla extract, 1 teaspoon of cherry baking emulsion (if using), and ½ cup of maraschino cherry juice for the wet bowl. For the dry bowl, you will want 2 cups of all-purpose flour, ½ teaspoon of fine grain sea salt, and 2 teaspoons of baking powder, with an extra ¼ cup of flour set aside for the cherries. Have your instant-read thermometer close by for testing doneness.
Toss the Cherries and Preheat the Oven
Preheat the oven to 325℉/165℃ on conventional bake (not convection; if convection is your only option, drop to 300℉/150℃) and place the rack in the middle position.
Drain a 16 ounce jar of maraschino cherries, reserving the juice for the batter and the cherry glaze. Halve 1 cup of cherries (about 6 ounces drained). Add the halved cherries to a small bowl with the reserved ¼ cup of flour and toss gently with a spatula until the cherries are lightly coated. Tossing the cherries in flour is what keeps them evenly distributed throughout the loaf instead of sinking to the bottom.
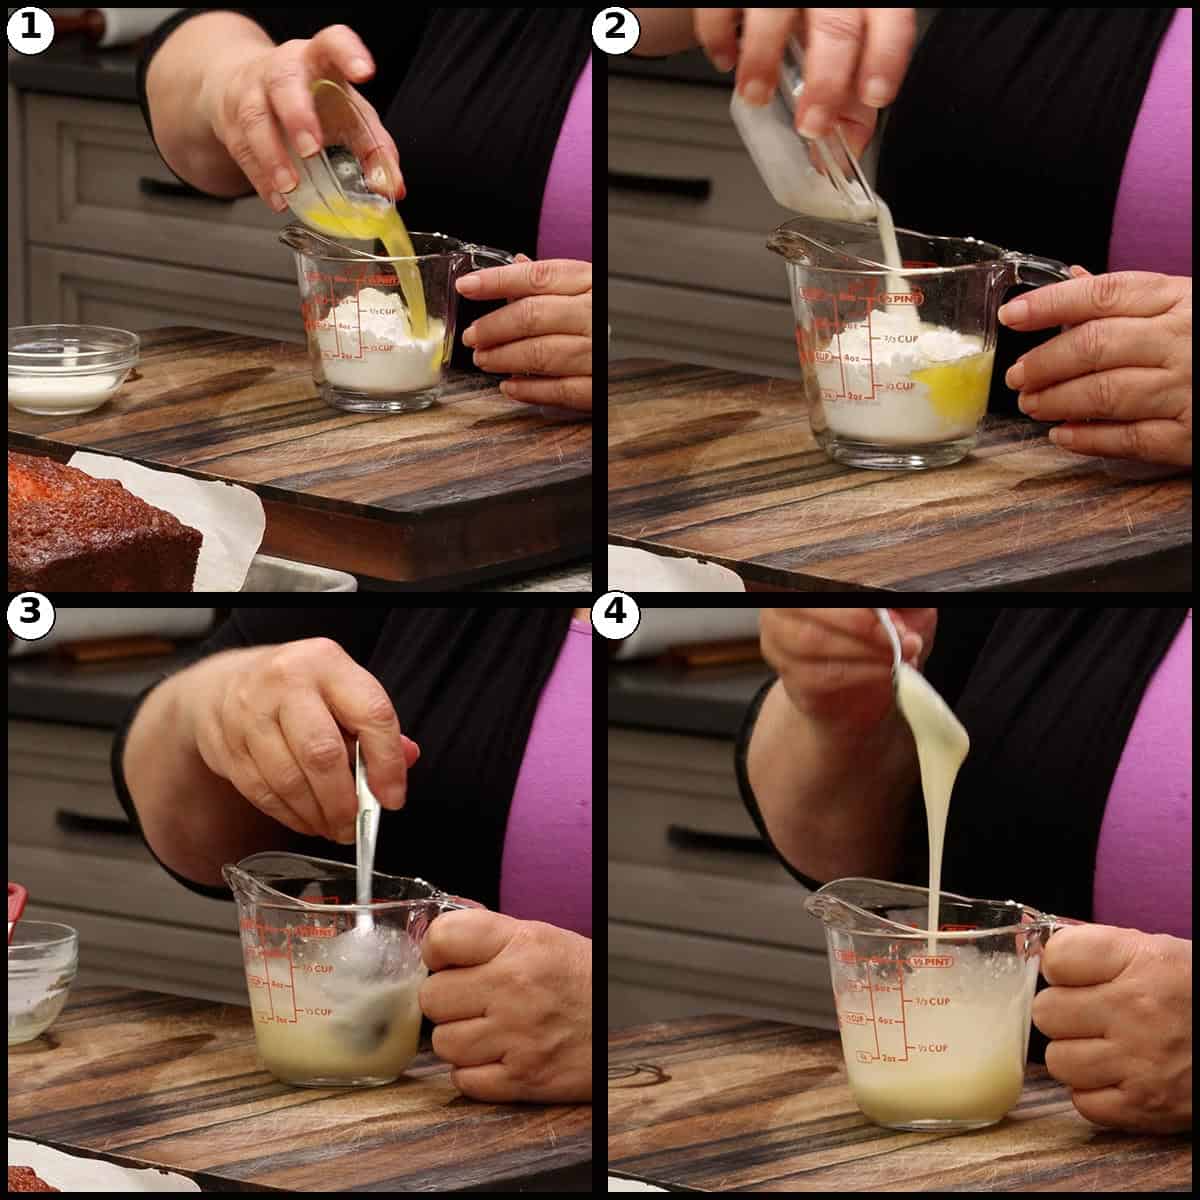
Whisk the Eggs, Sugar, Butter, and Oil
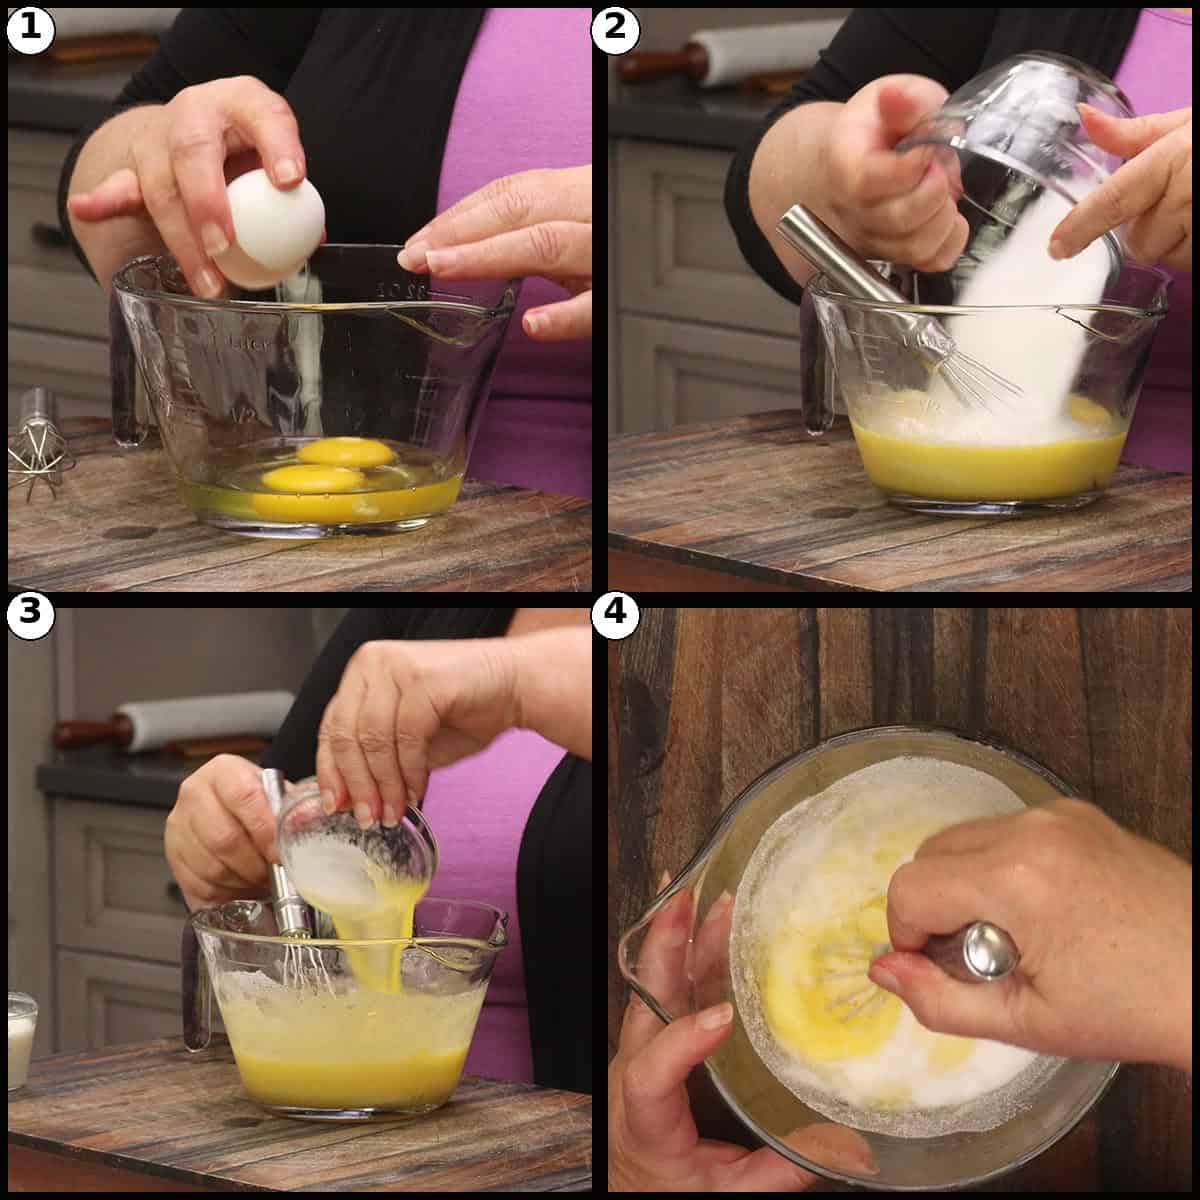
In a medium mixing bowl, whisk the 2 large eggs just until lightly broken up. Whisk in the granulated sugar, the melted salted butter, and the neutral oil until the mixture is smooth and pourable. Whisk by hand only, gentle whisking by hand keeps the bread tender. Resist the urge to grab an electric mixer.
Whisk in the Remaining Wet Ingredients
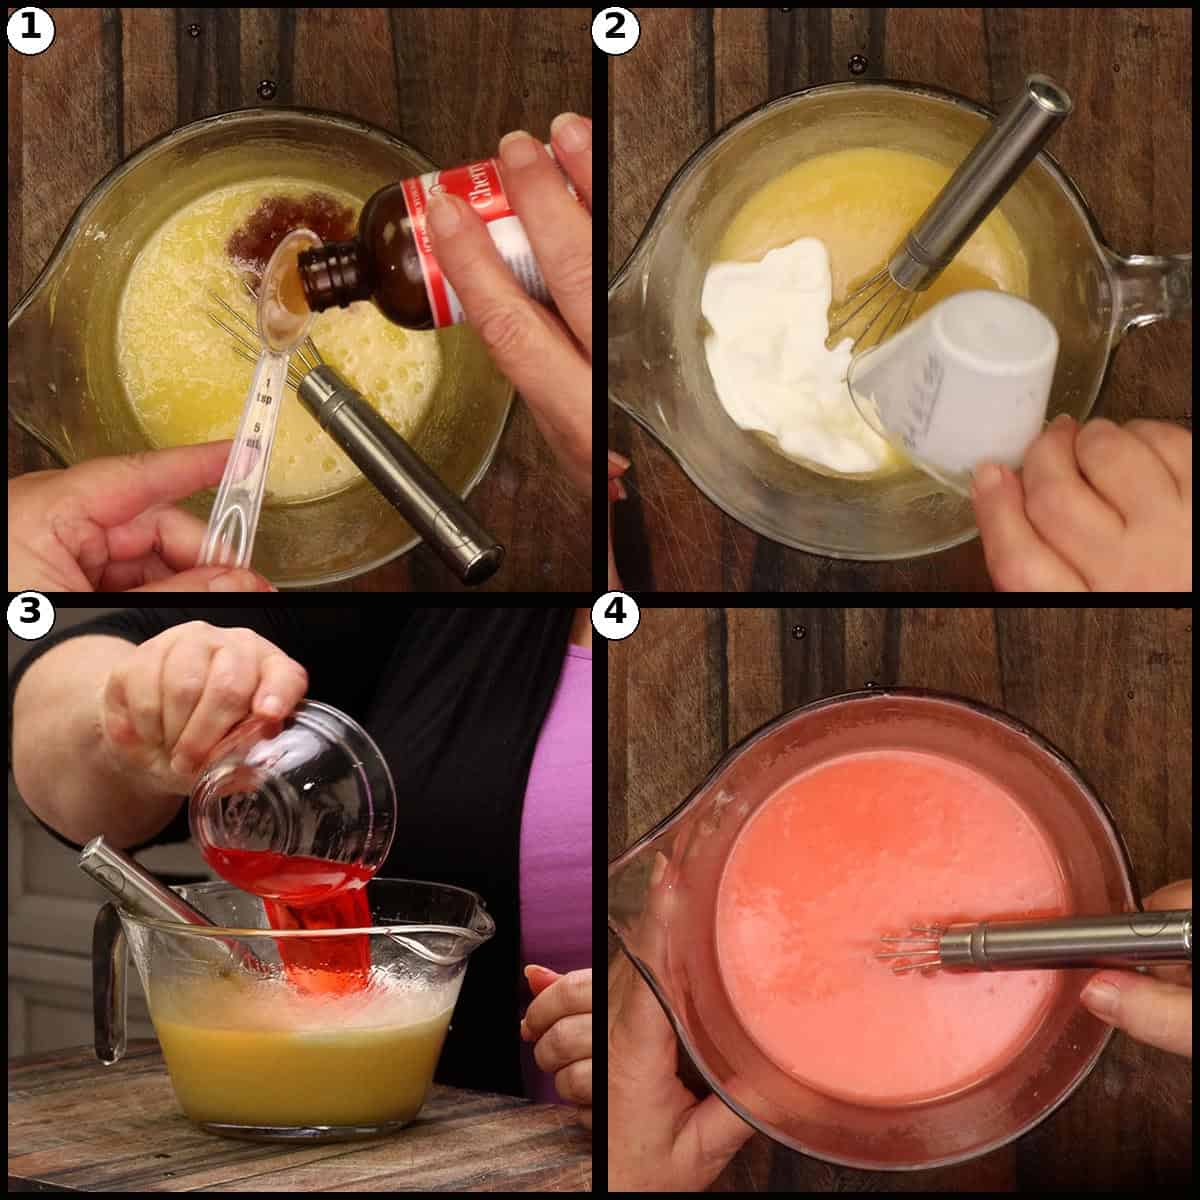
To the same bowl, whisk in the half and half, the vanilla extract, the cherry baking emulsion (if using), and the ½ cup of maraschino cherry juice. Whisk just until everything is smooth and a pretty pale pink. The cherry juice gives the bread that signature pink-tinged crumb and a deeper cherry flavor in the finished loaf.
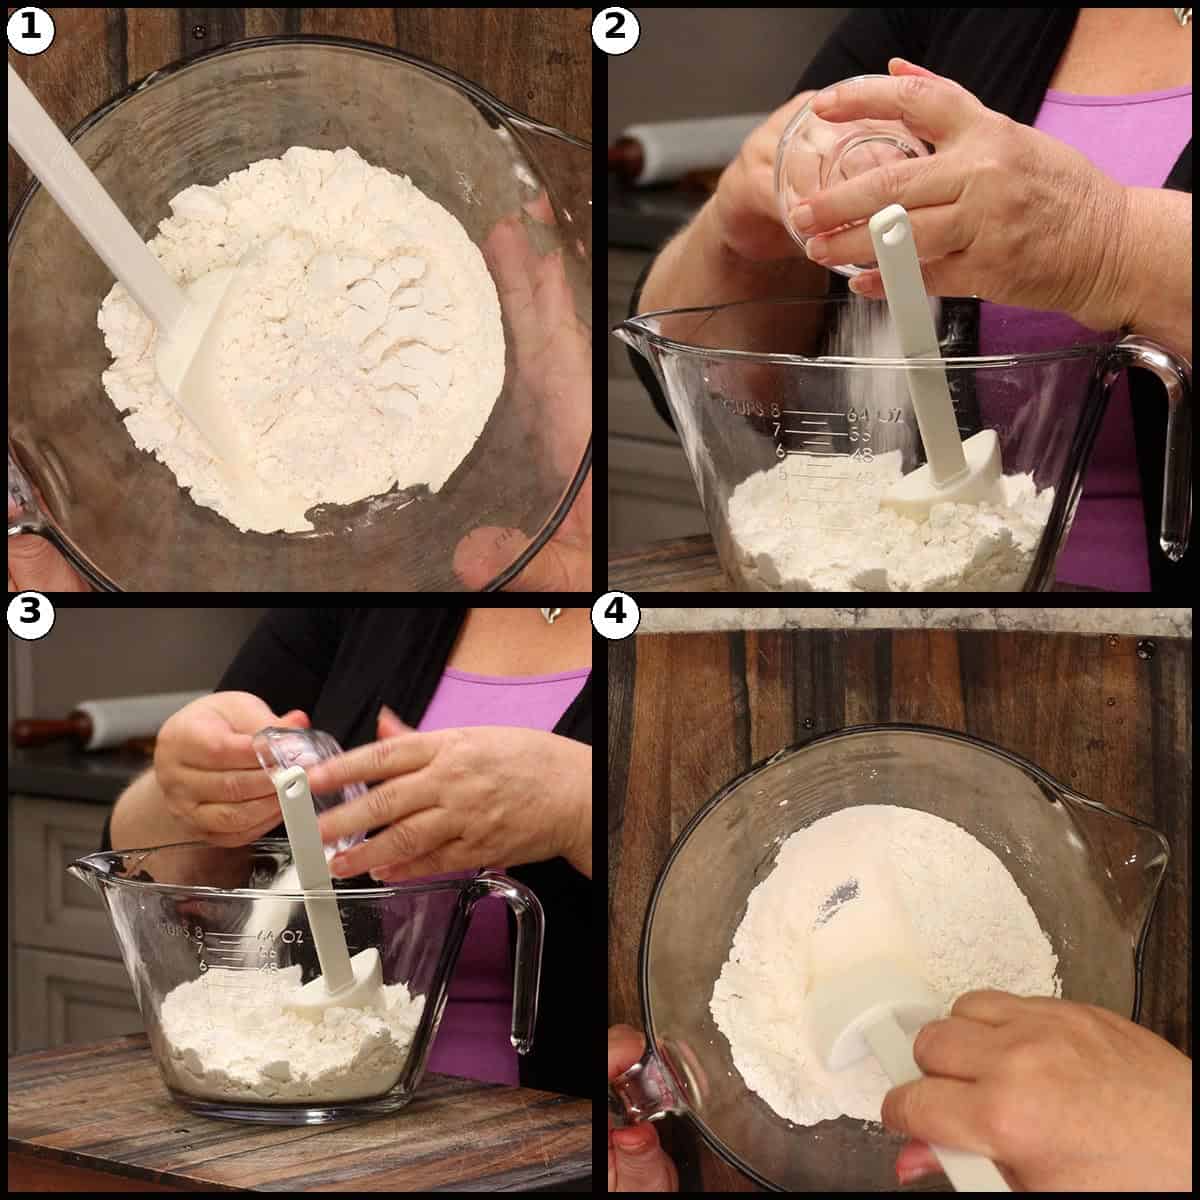
Mix the Dry Ingredients
In a separate large mixing bowl, whisk together 2 cups of all-purpose flour, ½ teaspoon of fine grain sea salt, and 2 teaspoons of baking powder. The remaining ¼ cup of all-purpose flour stays in the small bowl with the cherries from the previous step.
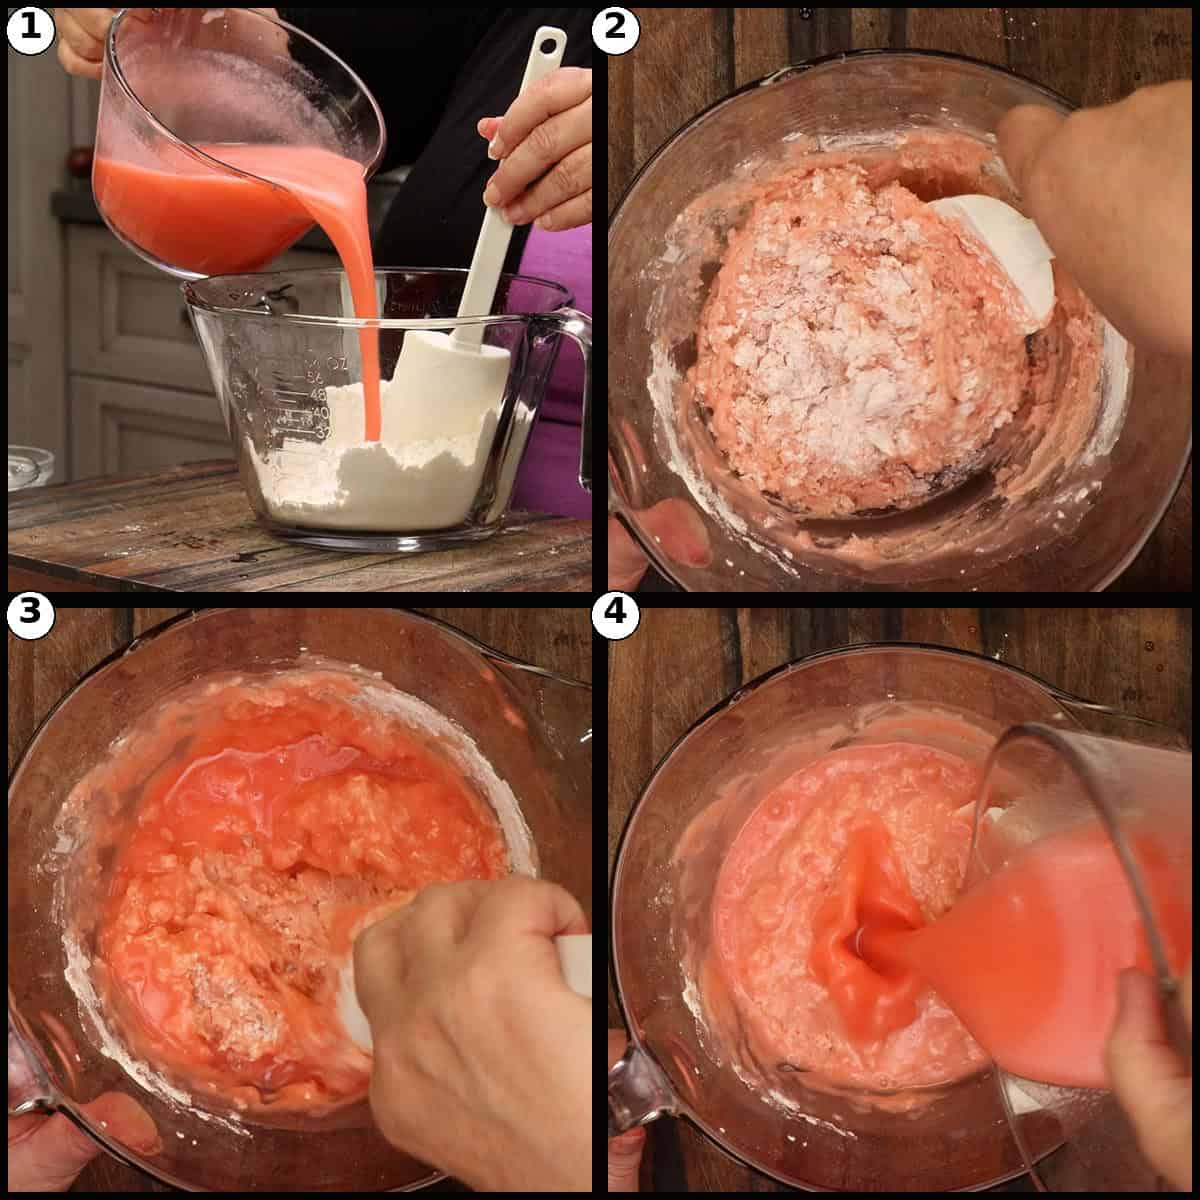
Fold the Wet Ingredients into the Dry
Add about ⅓ of the wet ingredients to the dry ingredients and gently fold with a rubber spatula. Add another ⅓ and fold again. Add the final ⅓ and fold just until no streaks of dry flour remain. The batter will be very wet and a little lumpy; that is exactly what you want.
Set the batter aside to rest for 10 to 15 minutes while you finish prepping the cherries. This rest hydrates the flour and gives you a beautifully tender loaf.
Quick Tip
Fold, do not whisk or beat. Overworking the batter develops too much gluten and that will give you a dense, tough loaf. A few small lumps in the finished batter are perfectly fine, do not try to smooth every one of them out.
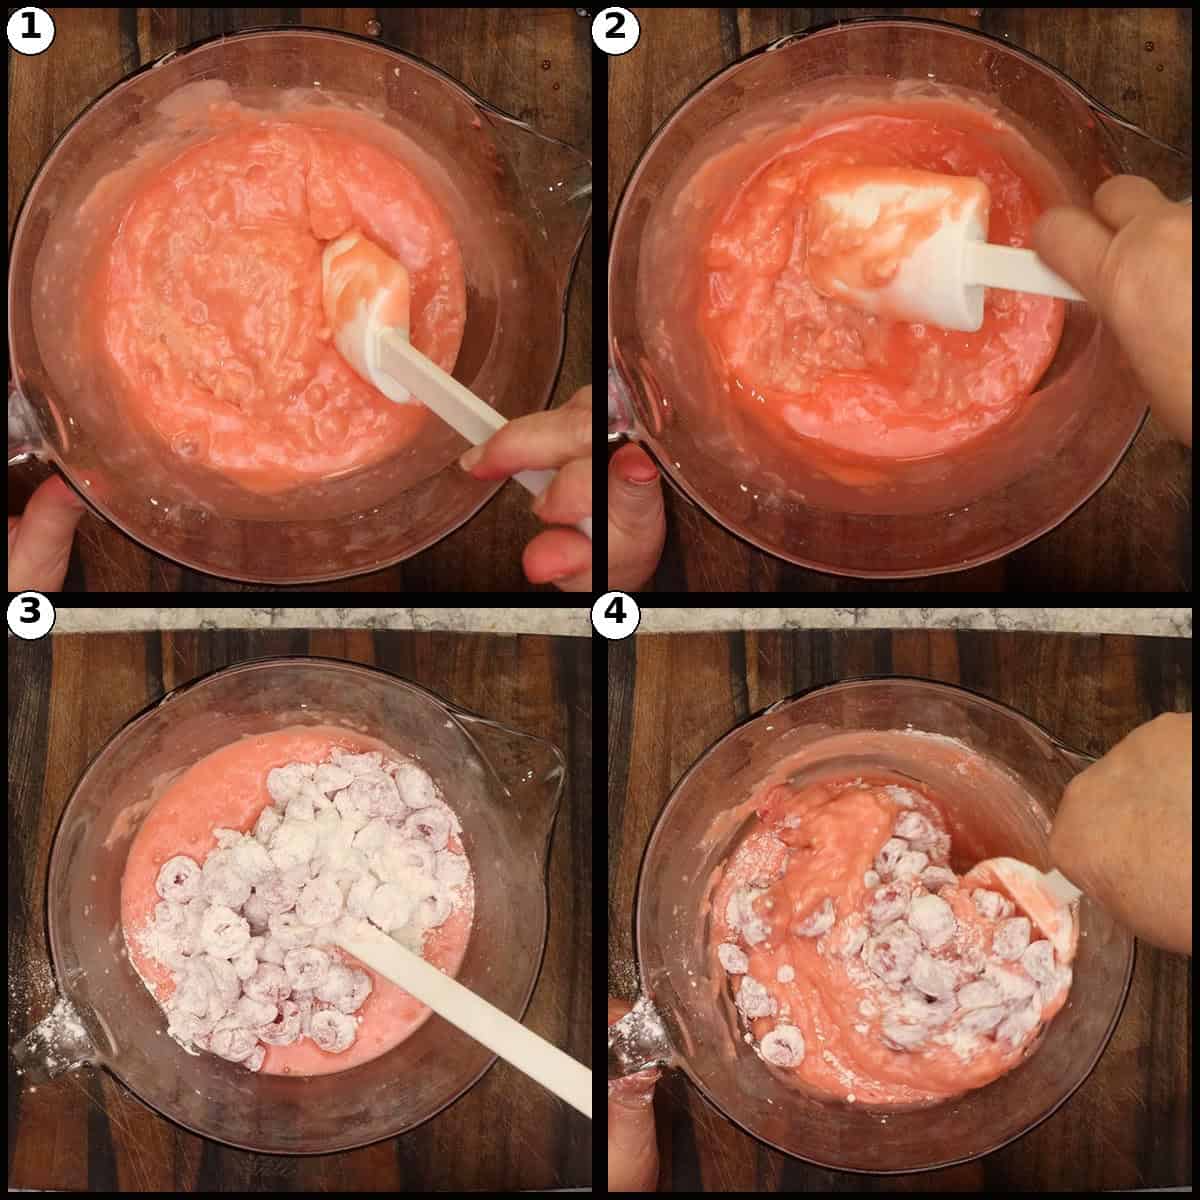
Fold in the Floured Cherries
Pour the floured cherries (and any loose flour in the bowl) into the rested batter. Fold gently with the spatula, going all the way down to the bottom of the bowl, just until the cherries are evenly distributed and most of the flour is incorporated. A few small streaks of flour are perfectly fine.
Quick Tip
Letting the batter rest for 10 to 15 minutes after the wet ingredients go in is one of the biggest secrets to a tender loaf. The flour fully hydrates during the rest time, which keeps the texture soft and prevents you from being tempted to overmix.
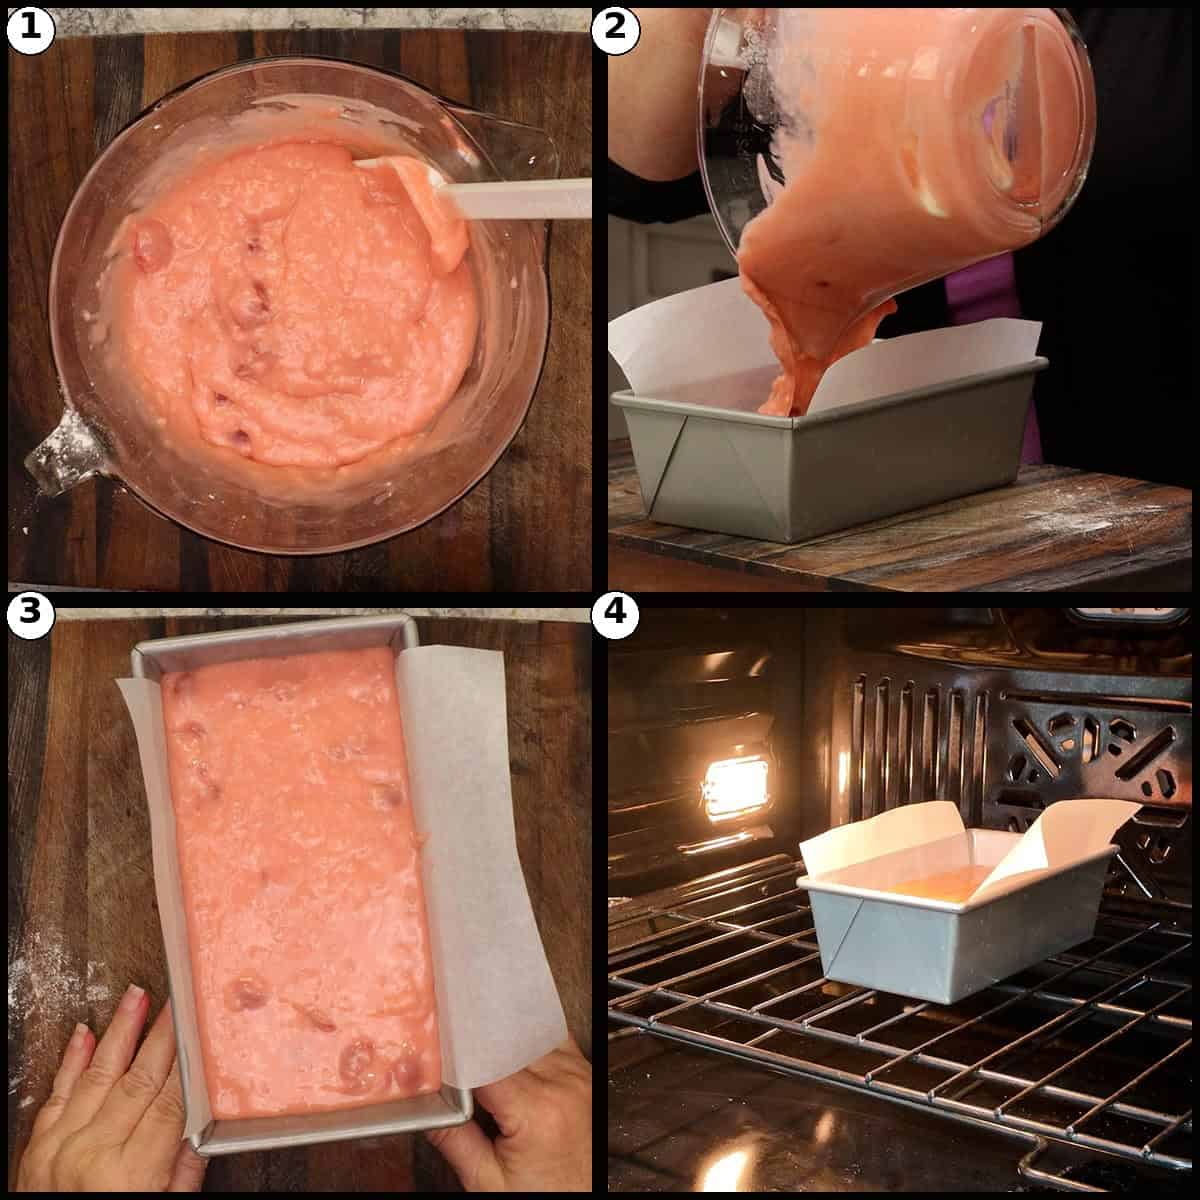
Pour the Batter and Bake
Pour the batter into the prepared loaf pan and gently smooth the top with a spatula. Bake on the middle rack at 325℉/165℃ for 60 to 75 minutes, or until an instant-read thermometer inserted in the center of the loaf reads 205-210℉/96-99℃.
The top will crack a little toward the end of the bake time, that adds character. If the top is browning too quickly, drop the temperature to 300℉/150℃ for the last 10 to 15 minutes, or simply turn the oven off and let the loaf finish in the residual heat with the door closed.
Make the Cherry Glaze
While the bread bakes, make the warm cherry glaze. In a small bowl, stir 2 tablespoons of melted salted butter together with ¼ cup of sifted powdered sugar to form a smooth paste. This step prevents lumps. Stir in 2 tablespoons of maraschino cherry juice until the glaze is combined. It may look like it has split and isn't smooth, that is fine. Set aside until the bread comes out of the oven.

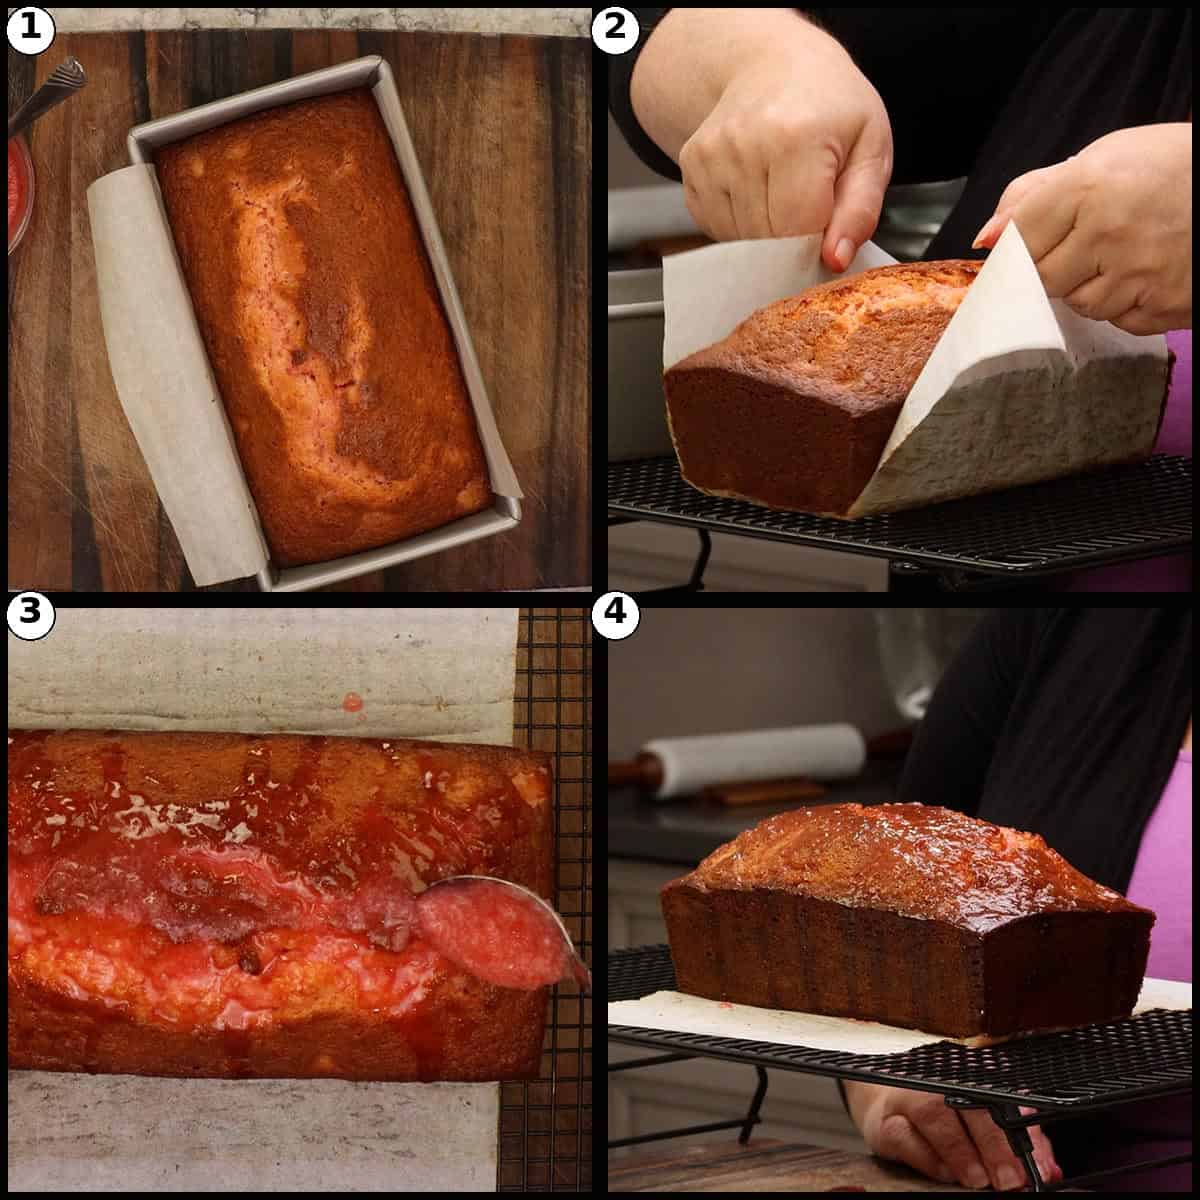
Cool and Apply the First Glaze
When the bread is done, remove it from the oven and let the loaf rest in the pan for about 10 minutes. Use the parchment handles to lift the loaf out of the pan and onto a wire cooling rack. Discard the parchment.
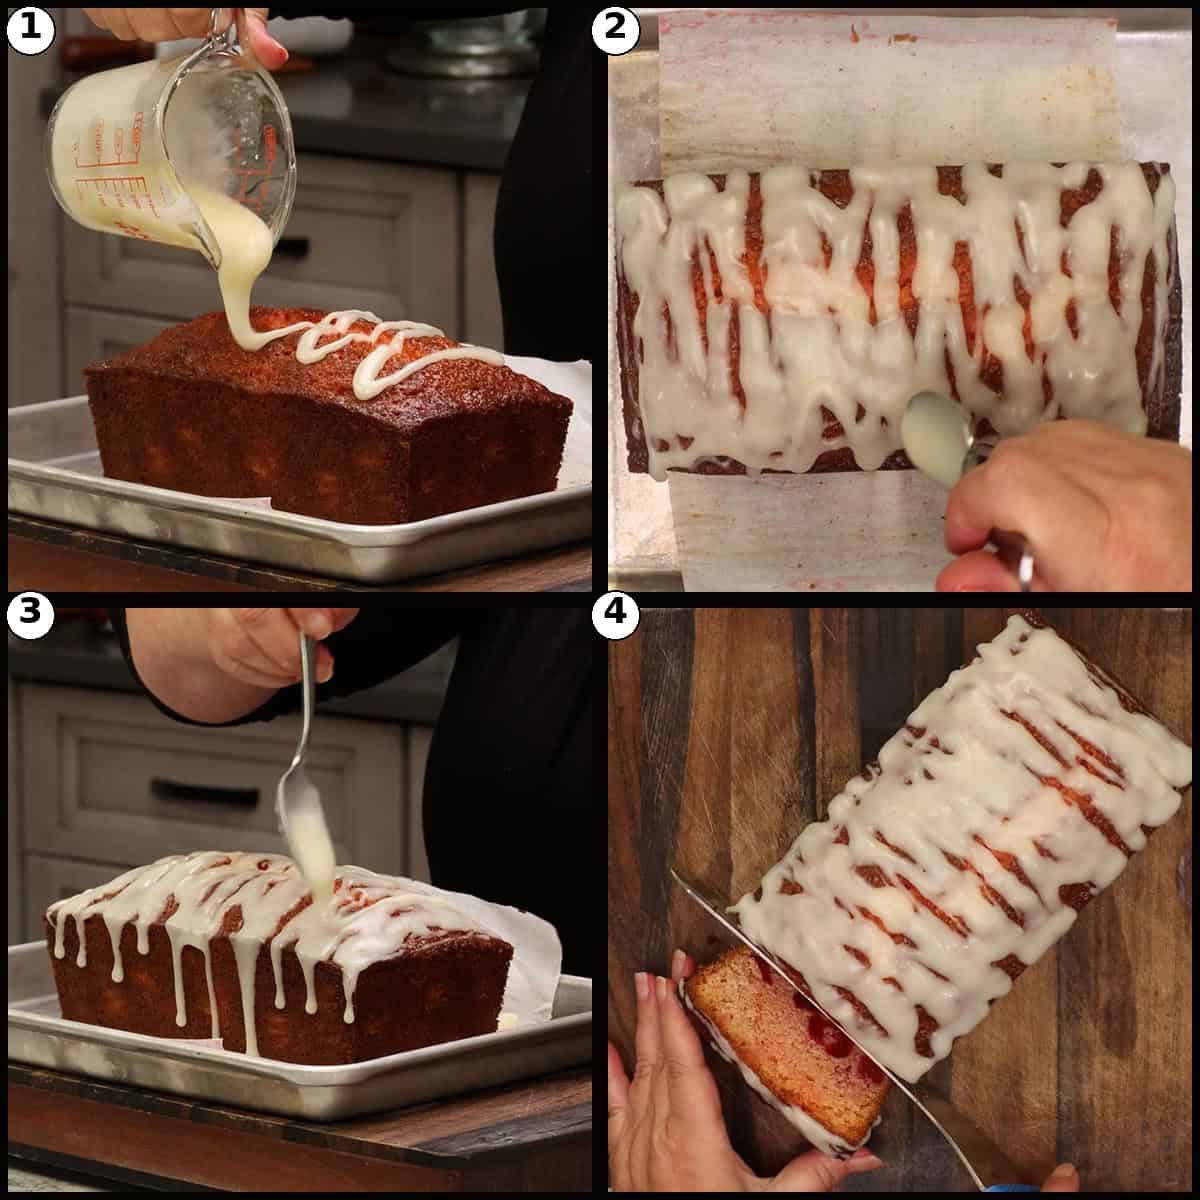
While the bread is still warm, give the cherry glaze a quick stir and pour it slowly over the top of the loaf, paying special attention to any cracks so the glaze can soak right in. This first glaze flavors and moistens the bread and creates a beautiful base for the white drizzle on top.
Make the White Drizzle
Let the loaf cool to room temperature for at least 1 hour before adding the white drizzle. For the prettiest white drizzle of all, refrigerate the cooled loaf overnight so the bread is completely cold before this final glaze.
To make the white drizzle, stir together 2 tablespoons of melted salted butter, 1 tablespoon of half and half, 6 tablespoons of sifted confectioners sugar, and ½ teaspoon of cherry baking emulsion (if using) until perfectly smooth. The drizzle should be thick but pourable.
Drizzle and Slice
Drizzle the white glaze back and forth over the cold loaf, letting it cascade naturally down the sides. Resist the urge to smooth it. Turn the loaf around and drizzle the other side too.
Let the glaze set for a few minutes, slice with a sharp serrated knife, and enjoy. A cold loaf slices much more cleanly than a warm one, so the wait is worth it.
Cherry Bread
Equipment
- 8½ x 4½-inch light-colored metal loaf pan
- Parchment Paper
- Medium mixing bowl
- Large Mixing Bowl
- Small bowl (for tossing the cherries)
- Whisk
- Rubber spatula
- Measuring Cups and Spoons
- Fine-mesh sieve or sifter (for powdered sugar)
- Instant-read thermometer
- Wire Cooling Rack
- Sharp serrated knife
Ingredients
- 2 large eggs room temperature is best
- 1 cup granulated sugar white
- ¼ cup salted butter, melted or unsalted butter
- ⅓ cup neutral oil avocado, canola, or vegetable oil; do not use olive oil
- 1 teaspoon vanilla extract
- 1 teaspoon cherry baking emulsion optional but recommended; or substitute ½ teaspoon cherry extract
- ¼ cup half and half
- ½ cup maraschino cherry juice from the jar of cherries (16 ounce jar is enough for both the cherries and juice)
- 2 cups all-purpose flour plus an additional ¼ cup reserved for tossing the cherries (2¼ cups total)
- ½ teaspoon fine grain sea salt or kosher salt; use ¼ teaspoon if using table salt
- 2 teaspoon baking powder not baking soda
- 1 cup maraschino cherries, halved about 6 ounces drained; from a 16 ounce jar so you have plenty of juice for the batter and the glaze
- ¼ cup all-purpose flour, reserved from the 2¼ cups total flour above; used to lightly coat the cherries
- 2 tablespoon salted butter, melted
- ¼ cup powdered sugar sifted, then measured for an accurate amount
- 2 tablespoon maraschino cherry juice from the same jar used in the batter
- 2 tablespoon salted butter, melted
- 1 tablespoon half and half
- 6 tablespoon confectioners sugar sifted, then measured for an accurate amount
- ½ teaspoon cherry baking emulsion optional; almond extract or vanilla extract also work beautifully
Would you like to save this recipe?
Instructions
- Preheat the oven to 325℉/165℃ on conventional bake (not convection; if convection is your only option, drop to 300℉/150℃) and place the rack in the middle position. Lightly butter an 8½ x 4½-inch light-colored metal loaf pan, then line the bottom with parchment paper sized to fit the bottom of the pan with a small gap at each short end so it does not crinkle into the batter. Leave the long sides taller to create handles for lifting the loaf out later.
- In a medium mixing bowl, whisk 2 large eggs just until lightly broken up. Whisk in 1 cup of granulated sugar, ¼ cup of melted salted butter, ⅓ cup of neutral oil, 1 teaspoon of vanilla extract, 1 teaspoon of cherry baking emulsion (if using), ¼ cup of half and half, and ½ cup of maraschino cherry juice. Whisk by hand just until smooth and set aside. Do not use an electric mixer for this step, gentle whisking keeps the bread tender.2 large eggs, 1 cup granulated sugar, ¼ cup salted butter, melted, ⅓ cup neutral oil, 1 teaspoon vanilla extract, 1 teaspoon cherry baking emulsion, ¼ cup half and half, ½ cup maraschino cherry juice
- In a separate large mixing bowl, whisk together 2 cups of all-purpose flour, ½ teaspoon of fine grain sea salt, and 2 teaspoons of baking powder. Place the remaining ¼ cup of all-purpose flour in a small bowl for tossing the cherries.2 cups all-purpose flour, ½ teaspoon fine grain sea salt, 2 teaspoon baking powder
- Add about ⅓ of the wet ingredients to the dry ingredients and gently fold with a rubber spatula. Add another ⅓ and fold again. Add the final ⅓ and fold just until no streaks of dry flour remain. The batter will be very wet and a little lumpy, that is exactly what you want. Do not try to smooth out every lump or you will overwork the gluten. Set the batter aside to rest for 10 to 15 minutes while you prep the cherries.
- Cut 1 cup of maraschino cherries in half (about 6 ounces drained). Reserve the remaining juice in the jar for the cherry glaze and any future batches. Add the halved cherries to the small bowl with the reserved ¼ cup of flour and toss gently with a spatula until the cherries are lightly coated. This helps keep the cherries evenly distributed in the loaf instead of sinking to the bottom.1 cup maraschino cherries, halved, ¼ cup all-purpose flour, reserved
- Pour the floured cherries (along with any loose flour in the bowl) into the rested batter. Fold gently with the spatula, going all the way down to the bottom of the bowl, just until the cherries are evenly distributed and most of the flour is incorporated. A few small streaks of flour are perfectly fine.
- Pour the batter into the prepared loaf pan and gently smooth the top. Bake on the middle rack at 325℉/165℃ for 60 to 75 minutes, or until an instant-read thermometer inserted in the center of the loaf reads 205-210℉/96-99℃. The top will crack a little toward the end of baking, that adds character. If the top browns too quickly, drop the temperature to 300℉/150℃ for the final 10 to 15 minutes or turn the oven off and let the loaf finish in the residual heat with the door closed.
- While the bread bakes, make the cherry glaze. In a small bowl, stir 2 tablespoons of melted salted butter together with ¼ cup of sifted powdered sugar to form a smooth paste. This step prevents lumps. Stir in 2 tablespoons of maraschino cherry juice until silky and pourable. Set aside.2 tablespoon salted butter, melted, ¼ cup powdered sugar, 2 tablespoon maraschino cherry juice
- When the bread is done, remove it from the oven and let it rest in the pan for about 10 minutes. Use the parchment handles to lift the loaf out of the pan and onto a wire cooling rack. Discard the parchment.
- While the bread is still warm, give the cherry glaze a quick stir and pour it slowly over the top of the loaf, paying special attention to any cracks so the glaze can soak in. This first glaze flavors and moistens the bread and creates a base for the white drizzle on top.
- Let the loaf cool to room temperature for at least 1 hour before slicing. For the prettiest white drizzle, refrigerate the cooled loaf overnight so the bread is completely cold before adding the second glaze. A cold loaf is also much easier to slice cleanly.
- To make the white drizzle glaze, stir together 2 tablespoons of melted salted butter, 1 tablespoon of half and half, 6 tablespoons of sifted confectioners sugar, and ½ teaspoon of cherry baking emulsion (if using; almond extract or vanilla extract also work) until perfectly smooth. The glaze should flow off a spoon in a smooth ribbon, not too thin and not too thick.2 tablespoon salted butter, melted, 1 tablespoon half and half, 6 tablespoon confectioners sugar, ½ teaspoon cherry baking emulsion
- Drizzle the white glaze back and forth over the cold loaf, letting it cascade naturally down the sides. Resist the urge to smooth it. Turn the loaf around and drizzle the other side so both long sides have drips. Let the glaze set for a few minutes (or pop the loaf back in the refrigerator briefly), then slice with a sharp serrated knife and serve.
Notes
• Use a light-colored metal loaf pan for the best results. Dark-colored pans will brown the outside more quickly and you may need to lower the temperature or shorten the bake time. Avoid stoneware for this recipe
• Save the wrapper from the stick of butter and use it to grease the pan, no extra cleanup needed. Greasing the pan when using parchment just helps it stay in place.
• Cut the parchment paper to fit the bottom of the pan with a small gap at each short end so it does not crinkle into the batter. Leave the long sides taller to create handles for lifting the loaf out later.
• Let the batter rest for 10 to 15 minutes after mixing before pouring it into the pan. The rest hydrates the flour and gives you a more tender finished loaf.
• Plan for additional hands-off cooling time after baking: at least 1 hour at room temperature for the first glaze to soak in, plus an overnight chill in the refrigerator for the cleanest white drizzle. COOKING TIPS
• Bake on the middle rack at 325℉/165℃ on conventional bake. The middle rack is the most important spot for even heat from above and below.
• Do not bake at a higher temperature to speed things up. The top seals off too quickly, traps steam underneath, and cracks more dramatically. Low and slow is the way for a tender, evenly baked loaf.
• An instant-read thermometer is the most reliable doneness test. Look for an internal temperature of 205-210℉/96-99℃ in the center of the loaf.
• If the top is getting too brown before the inside is fully set, drop the oven to 300℉/150℃ for the last 10 to 15 minutes or simply turn the oven off and let the loaf finish in the residual heat with the door closed.
• A small amount of cracking on top is expected and adds character. The glaze covers it beautifully and even soaks into the cracks for extra flavor. GLAZE TIPS
• Sift the powdered sugar before measuring for both glazes. The volume changes after sifting and the difference shows up in the texture of the finished glaze.
• Apply the first cherry glaze while the loaf is still warm so it can soak into the cracks and the top of the bread.
• Apply the second white drizzle only after the loaf is fully cold. A cold loaf lets the drizzle cascade down the sides and set up cleanly without melting in.
• Skipping the white drizzle is perfectly fine. The first cherry glaze on its own is delicious.
• For more cherry flavor in the white drizzle, add ½ teaspoon of cherry baking emulsion. Almond extract or vanilla extract also work beautifully and give a slightly different finish. STORAGE
• Room Temperature: Store the cooled, glazed loaf in an airtight container at room temperature for up to 2 days.
• Refrigerator: For best texture and longer storage, wrap tightly or place the loaf in an airtight container in the refrigerator for up to 5 days.
• Freezer: Wrap individual slices or the whole loaf tightly in plastic wrap and a layer of aluminum foil, then place in a freezer-safe container or bag. Freeze for up to 2 months. Thaw overnight in the refrigerator. NUTRITIONAL DISCLAIMER
Nutritional information provided is an estimate based on typical ingredient values and standard portion sizes. Actual nutritional content may vary significantly depending on specific brands used, ingredient substitutions, preparation methods, portion sizes, and individual cooking techniques. For precise nutritional information tailored to your specific ingredients and preparation, please consult with a registered dietitian or use laboratory analysis. This information should not be used for medical nutrition therapy or to manage medical conditions without professional guidance.
Nutrition
Alternate Cooking Instructions
- 9 x 5-inch loaf pan: A slightly larger loaf pan works fine, though the loaf will be a touch shorter. Bake at the same 325℉/165℃ on the middle rack and start checking for doneness around 55 minutes since there is a little less depth of batter.
- Two mini loaf pans: Divide the batter evenly between two greased and parchment-lined mini loaf pans. Bake at 325℉/165℃ for 35 to 45 minutes, checking with the instant-read thermometer for an internal temperature of 205-210℉/96-99℃.
- Muffin pan: Spoon the batter into a paper-lined or greased muffin pan, filling each cup about ⅔ full. You should get 12 to 14 cherry muffins. Bake at 325℉/165℃ for 22 to 28 minutes, until the tops spring back to a light touch and a toothpick comes out clean.
- 9-inch round cake pan: Pour the batter into a buttered, parchment-lined 9-inch round cake pan and bake at 325℉/165℃ for 35 to 45 minutes, until the center reaches 205-210℉/96-99℃. The cherry bread cake is also delicious finished with both glazes.
- A note on multi-cookers and air fryers: While this batter could likely work in a Ninja Possible Cooker Pro or Ninja Combi, the recipe was developed and tested specifically for a conventional oven. The all-around heat from the oven walls is what gives this loaf its even bake and tender crumb. If you experiment with another appliance, the times and temperatures here are not tested for those models.
Storage & Reheating Instructions
How to Store Leftover Cherry Bread
Let the cherry bread cool completely (and ideally let the white drizzle set up) before storing so the glaze does not smear inside the container.
- Room Temperature: Store the cooled, glazed loaf in an airtight container at room temperature for up to 2 days.
- Refrigerator: For best texture and longer storage, place the loaf in an airtight container in the refrigerator for up to 5 days. The texture is actually delicious cold, almost like a pound cake.
- Freezer: Wrap individual slices or the whole loaf tightly in plastic wrap, then a layer of aluminum foil, and place in a freezer-safe container or bag. Freeze for up to 2 months. Thaw overnight in the refrigerator before serving.
Quick Tip
A cold loaf slices much more cleanly than a warm one. If you want neat, picture-perfect slices for serving, refrigerate the cherry bread overnight before slicing and use a sharp serrated knife. Trust me, the wait is worth it.
How to Reheat Cherry Bread
- Room Temperature: If the loaf has been refrigerated, let slices sit out for 10 to 15 minutes before serving. The bread softens beautifully and the cherry flavor really comes through at room temperature.
- Microwave: Place a single slice on a microwave-safe plate and warm for 10 to 15 seconds. This softens the white drizzle slightly and gives you that just-baked feel.
Frequently Asked Questions
Stick with the conventional oven for this one. Cherry bread really benefits from the all-around heat the oven walls provide, which is what gives it that even bake and tender crumb. The Ninja Foodi, Combi, and Possible Cooker Pro could probably bake some version of this batter, but the times and temperatures have not been tested in those appliances and the result will be different.
This recipe is specifically built for maraschino cherries and has not been tested with fresh, frozen, or tart cherries. Fresh and frozen cherries have very different sweetness and juice content, so swapping them in would completely change the recipe. If you want to experiment, you would need to add cherry juice or another liquid to make up for the lost ½ cup of maraschino juice and likely adjust the sugar and flour as well.
A little cracking on top is completely normal for any quick bread. It happens because the batter is very wet, the loaf bakes for a long time, and steam needs to escape. Cracking gets worse if the oven temperature is too high because a hotter oven seals off the top of the loaf before the steam can escape. To minimize cracking, bake at 325℉/165℃ on conventional bake (not convection), and if the top starts browning too quickly, drop the heat to 300℉/150℃ or turn the oven off and let the loaf finish in the residual heat. A small amount of cracking adds character and the glazes cover it beautifully.
Yes, absolutely. The first warm cherry glaze on its own is delicious and gives the bread plenty of flavor and moisture. If you prefer a simpler, less sweet finish, stop after the cherry glaze and let the loaf cool completely before slicing. The white drizzle is for that extra bakery-style look on top.
For best results, stick with a light-colored metal loaf pan. Stoneware is not recommended for this recipe because it heats slowly and unevenly and the loaf will not bake the same way. Glass pans can work if that is all you have, but glass holds heat differently than metal and you will need to keep a close eye on the bake. The internal temperature target of 205-210℉/96-99℃ is your most reliable indicator of doneness no matter what pan you use.
The most reliable test is an instant-read thermometer inserted into the center of the loaf. You are looking for an internal temperature of 205-210℉/96-99℃. You can also tell visually: lighter spots on the top should look set and dry, not wet, and the loaf should not jiggle when you gently shake the pan. A toothpick or skewer inserted in the center should come out clean or with just a few moist crumbs.
Variations
- Cherry almond bread: Sprinkle 2 to 3 tablespoons of sliced almonds across the top of the white drizzle while it is still wet. Cherries and almonds are a classic flavor pair and the almonds add a beautiful texture.
- Lemon cherry loaf: Stir 1 teaspoon of finely grated lemon zest into the wet ingredients. The bright citrus note plays beautifully with the sweet maraschino cherries.
- White chocolate finish: Drizzle the cooled loaf with melted white chocolate in place of (or in addition to) the white drizzle glaze. The richer finish is beautiful for special occasions.
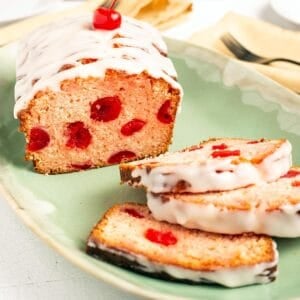
- Holiday topper: After the white drizzle has set, top the cooled loaf with a single stem-on maraschino cherry right in the center. It is a delicious, simple way to finish the bread for Valentine's Day or Mother's Day.
- Extra cherry punch: Increase the cherry baking emulsion in the batter from 1 teaspoon to 1½ teaspoons for a deeper cherry flavor and a slightly pinker crumb.
- Cherry vanilla muffins: Use the muffin pan version from the Alternate Cooking Instructions and finish each muffin with a small drizzle of the white glaze. They are perfect for brunch buffets and bake sales.
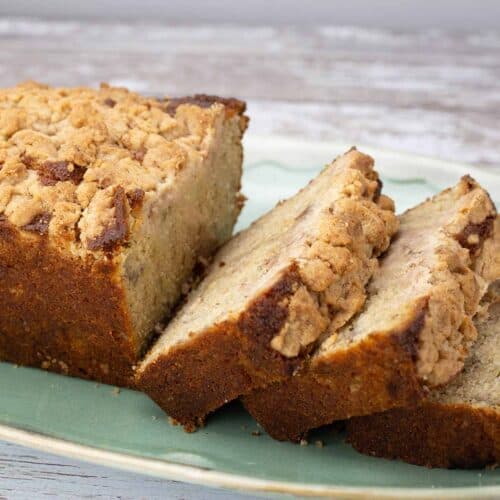
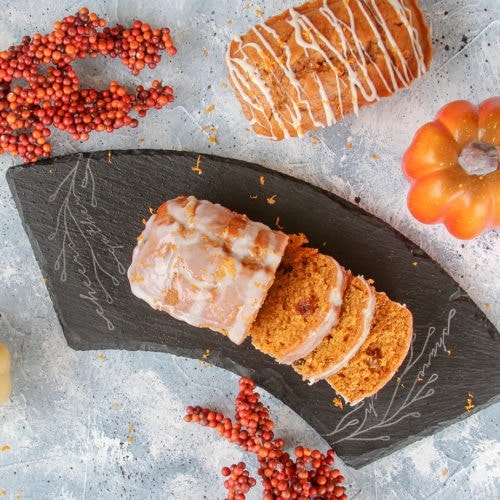
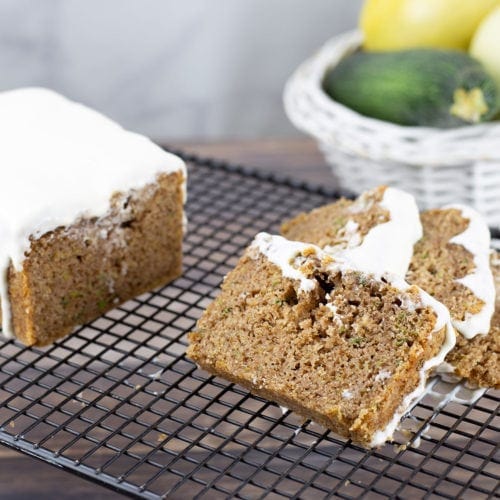
More Quick Bread Recipes
If you love this Cherry Bread, you are going to want to bake your way through a few more easy quick breads. Each one comes together with simple pantry ingredients, no yeast, and no waiting for dough to rise. Pick whichever one calls to you next, they are all delicious.

About the Recipe Author, Louise Long
Louise is a full-time recipe creator and food blogger @ The Salted Pepper. She has over 30 years of experience with cooking and recipe development. She owned a restaurant for several years and was a full-time RN until retiring to blog full-time.

She published her first cookbook in the Fall of 2018 and is very interested in writing several more.
Louise is also the creator of an online Ninja Foodi Pressure Cooking Course with over 100 instructional step-by-step videos. People absolutely rave about the course and all the value they have received from it.
Louise has several very active Facebook groups that help people with the basics of cooking and learning more about the appliances they love.
Ninja Foodi Pressure Cooker & Air Crisper 101
Ninja Woodfire Outdoor Grill & Smoker
Louise is also a YouTube creator and you can find most of her recipes in video format on The Salted Pepper YouTube channel.
She is very responsive to messages and eager to help in any way she can. Get more Information about Louise & contact information
I WOULD LOVE TO SEE WHAT YOU ARE COOKING UP IN YOUR KITCHEN! TAG ME @THESALTEDPEPPER ON YOUR FAVORITE SOCIAL MEDIA PLATFORM WHEN YOU MAKE A DISH!
BE SURE TO FOLLOW THE SALTED PEPPER RIGHT HERE ⇓⇓⇓⇓⇓
Patricia says
It looks super delicious cannot wait to try it. Thank you for sharing.
Louise Long says
I hope you love it!