
- Ninja Combi (or conventional oven, or any appliance with a low bake setting)
- Probe thermometer or instant read thermometer
- Small bowl (for the seasoning blend)
- Small tray or plate (for the fridge rest)
- Sharp Knife
- Kitchen twine (optional, only if you remove the netting)
If you're tired of dry turkey, this low roasted turkey technique is going to change everything for you. It starts with a boneless turkey breast, the bagged kind you can find all year round, seasoned simply with salt and coarse ground pepper and cooked low and slow until it's unbelievably juicy. This is the turkey I make all the time, not just for the holidays, because it's perfect for sandwiches, salads, and easy meal prep throughout the week.
Here's the thing, this is really more of a technique than a recipe. The magic is in the temperatures, not a long ingredient list. A simple dry brine the night before, a low oven temperature of 225-250℉/107-120℃, and pulling the turkey at the right internal temperature is the foolproof method for juicy turkey breast every single time. I use the Ninja Combi with a little steam, but you can get the same results with a conventional oven, a Ninja Foodi, or just about any appliance you have.
Would you like to save this recipe?
Once you understand why we pull the turkey at 145℉/63℃ instead of the 165℉/74℃ you've always heard, you'll never look at cooking white meat the same way again. The result is tender, flavorful, delicious turkey with no dry meat in sight, and it works whether you're feeding a smaller group for Thanksgiving dinner or just want leftover turkey for the best sandwiches all week long.
Suggested Kitchen Tools for Low Roasted Turkey
- Ninja Combi (or a conventional oven, Ninja Foodi, or any appliance with a low bake setting)
- Probe thermometer or instant read thermometer
- Small bowl for mixing the seasoning
- Small tray or plate for the refrigerator rest
- Sharp knife for slicing
- Kitchen twine (optional, only if you remove the netting)
Ingredients & Substitutions
This turkey breast recipe keeps it as simple as it gets, just a few ingredients and the right technique. Let's take a closer look at each one.
Boneless Turkey Breast
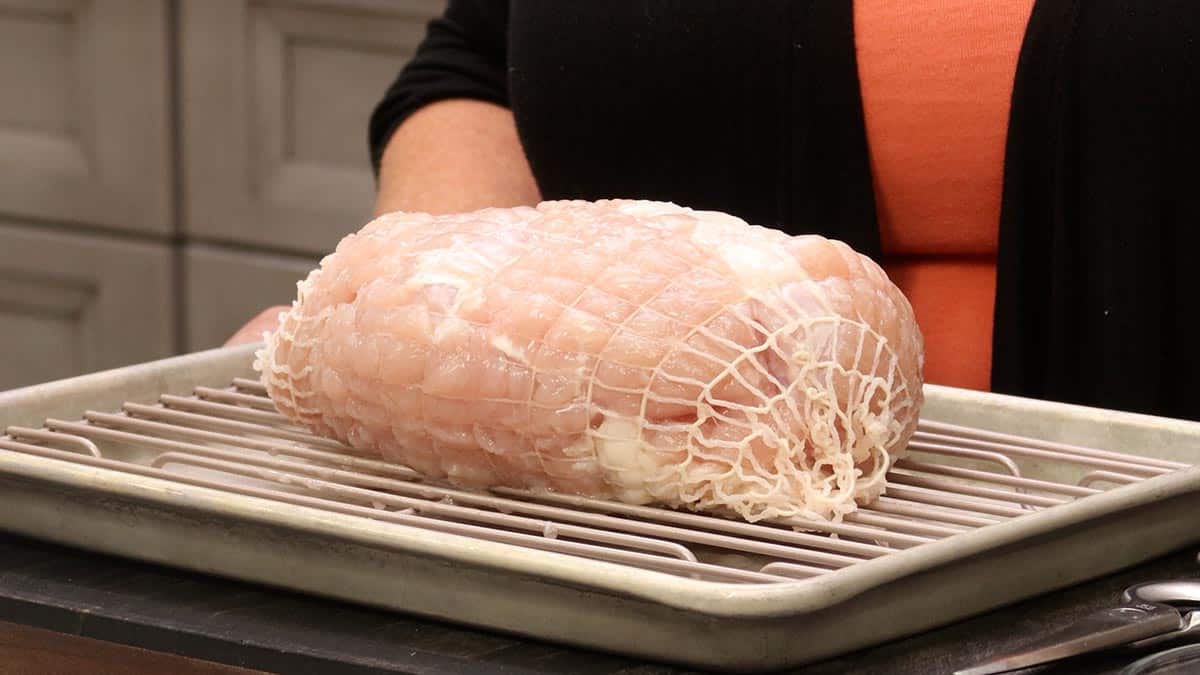
Used in Recipe: One boneless turkey breast in the netting, about 2 to 2¼ pounds of meat. These are the bagged ones, like the Butterball brand, and you can find them all year round.
What it Does: This is the star of the show, all white meat that stays juicy with this low roasting method. One quick note: the bag might say 3 pounds, but that weight includes the gravy packet inside, so you're really getting a little over 2 pounds of turkey. Keep the netting on while it cooks because these breasts are usually two pieces joined together, and the netting holds everything in one neat roast.
Substitutions: A bone-in turkey breast can be cooked with the same low temperature method, though the timing will be longer, so rely on your thermometer rather than the clock. If your boneless breast doesn't come in netting, tie it with kitchen twine to keep it together.
Fine Grind Sea Salt
Used in Recipe: One tablespoon of fine grain sea salt goes into the dry brine seasoning.
What it Does: The salt is doing much more than seasoning the surface. When it sits on the turkey overnight, it slowly penetrates the meat and flavors it from within, essentially a dry brine. That's why seasoning ahead of time makes such a big difference in flavor.
Substitutions: Kosher salt works at the same measurement. If table salt is all you have, cut the amount roughly in half since it's much finer and packs more salt per tablespoon.
Coarse Ground Black Pepper
Used in Recipe: One tablespoon of coarse ground black pepper, sometimes labeled restaurant grind, rounds out the dry brine seasoning.
What it Does: A larger grind of black pepper is closer to freshly ground pepper and gives the turkey a bolder flavor than fine table pepper. The pepper flavor does carry through, so if you're not a big pepper fan, drop it down to ½ tablespoon.
Substitutions: Grind your own with a peppermill for the same effect. You can also swap in any seasoning blend you like, I prefer dry herbs for this cooking method.
Water
Used in Recipe: One cup of plain water goes into the bottom of the Ninja Combi pan for the steam portion of the cook.
What it Does: The steam gently brings the turkey up to temperature before the dry bake time, which helps keep the meat moist and speeds things up a bit. The water doesn't touch the turkey, so it won't wash off any seasoning.
Substitutions: Don't waste money on chicken broth or turkey broth here. It won't impart any flavor during steaming, so plain water is all you need. If you're using a dry heat method like the oven, skip the water entirely.
How to Make Low Roasted Turkey
The hands-on time here is just minutes. The night-before dry brine does most of the work, and the cooking process is about 55 minutes in the Ninja Combi plus a short rest. Here is everything you need to know!
Season and Dry Brine the Turkey Breast
- Plan ahead: the turkey needs to be seasoned at least 4 to 6 hours before cooking, and overnight is even better.
- Measure out 1 tablespoon of fine grain sea salt and 1 tablespoon of coarse ground black pepper.
- Have a small tray or plate ready for the turkey to rest on in the refrigerator.
- On cooking day, have 1 cup of plain water and your probe thermometer ready.
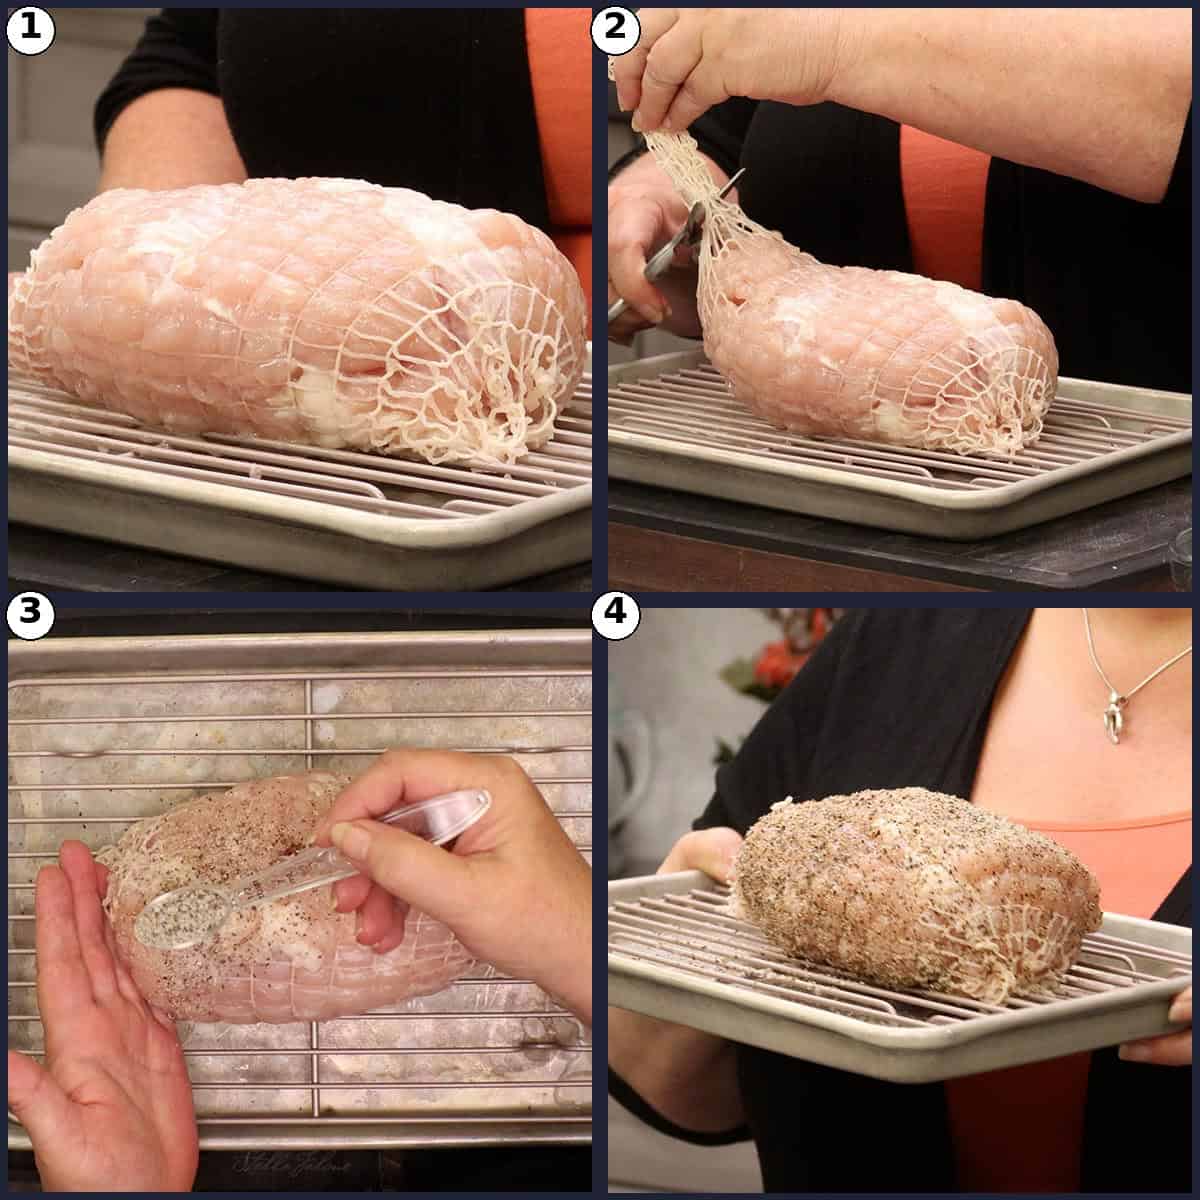
Mix the salt and pepper together really well in a small bowl. Trim off any extra bag material, but leave the netting on the turkey breast. Season liberally over the entire turkey breast, including the ends. It might seem like a lot of seasoning, but remember, even a thick slice only picks up a little bit of it, and thin slices get even less, so be generous and coat it really well.
You might be tempted to take the netting off and season inside where the breast is split. Trust me, it's not worth the hassle, and the seasoning looks a little odd running through the middle when you slice it. If you do want to go that route, take the netting off, season, and tie the breast back together with kitchen twine instead of wrestling the netting back on.
Place the seasoned turkey breast on a small tray to catch any juices and refrigerate it uncovered for at least 6 hours, or overnight. Leaving it uncovered helps dry out the outside a little, which gives the finished turkey a better texture. If life gets busy and it needs to wait longer than a day, loosely cover it or slip a bag around it so it doesn't dry out too much. Either way is perfectly fine.
Insert the Probe and Set Up the Ninja Combi
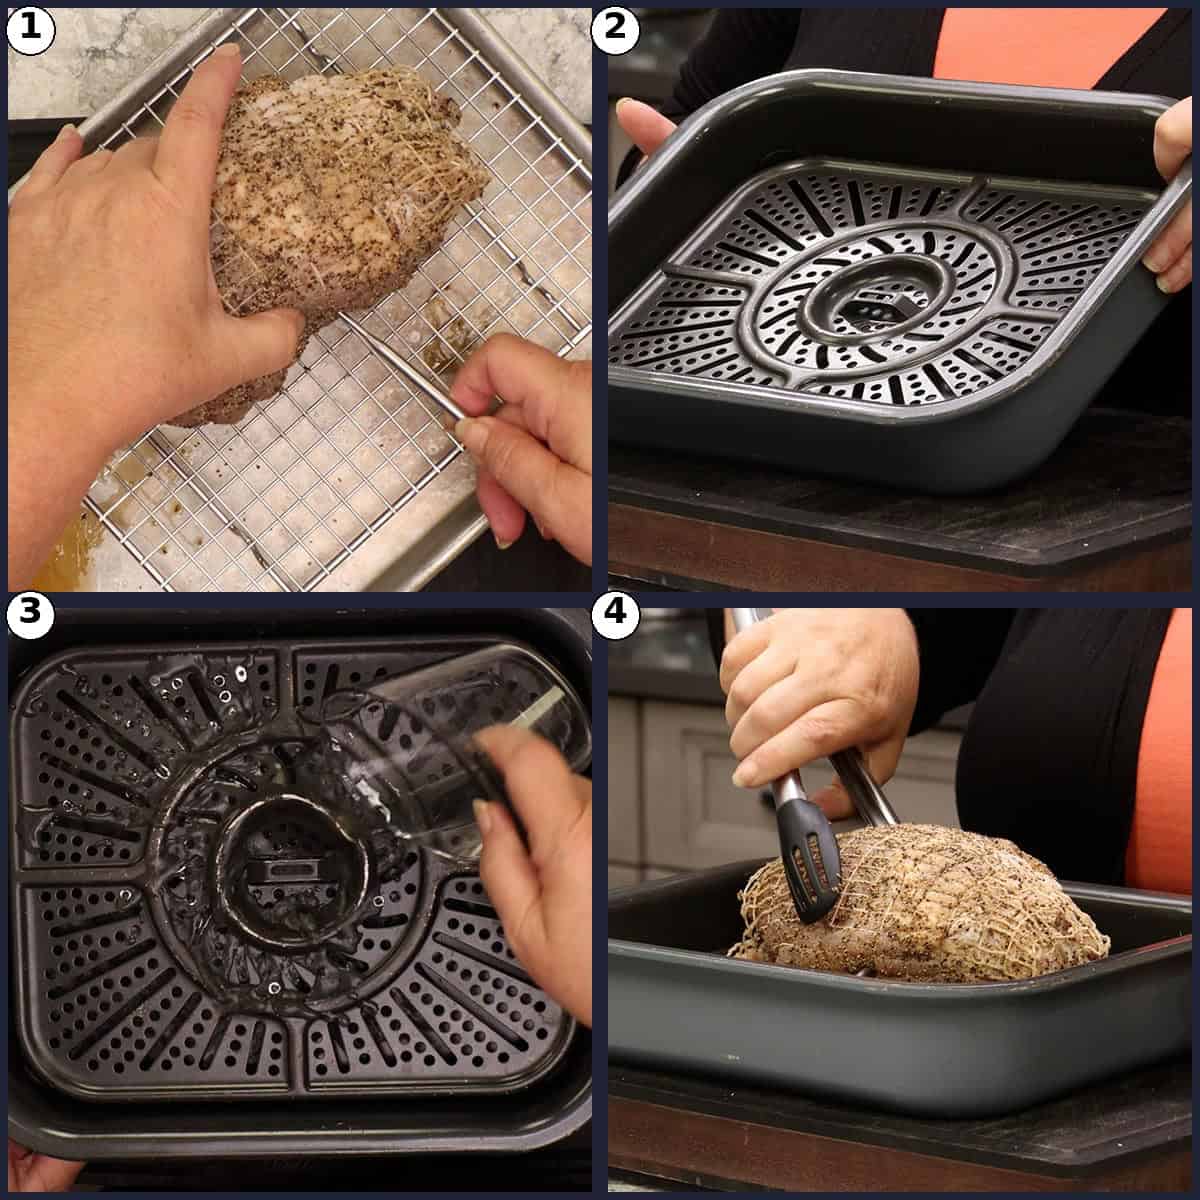
Insert your probe thermometer into the thickest part of the breast, going in from the side rather than straight down the middle. These breasts are often two pieces joined together, so make sure the probe tip is sitting in a solid piece of meat and not in a gap between two cuts.
Pour 1 cup of plain water into the bottom of the Combi pan and set the roasting insert in place. Use tongs to place the turkey breast right on top. If your turkey breast has skin, place it skin side up. If it doesn't have much skin, don't worry about that, it will still be absolutely delicious.
Cook Low and Slow
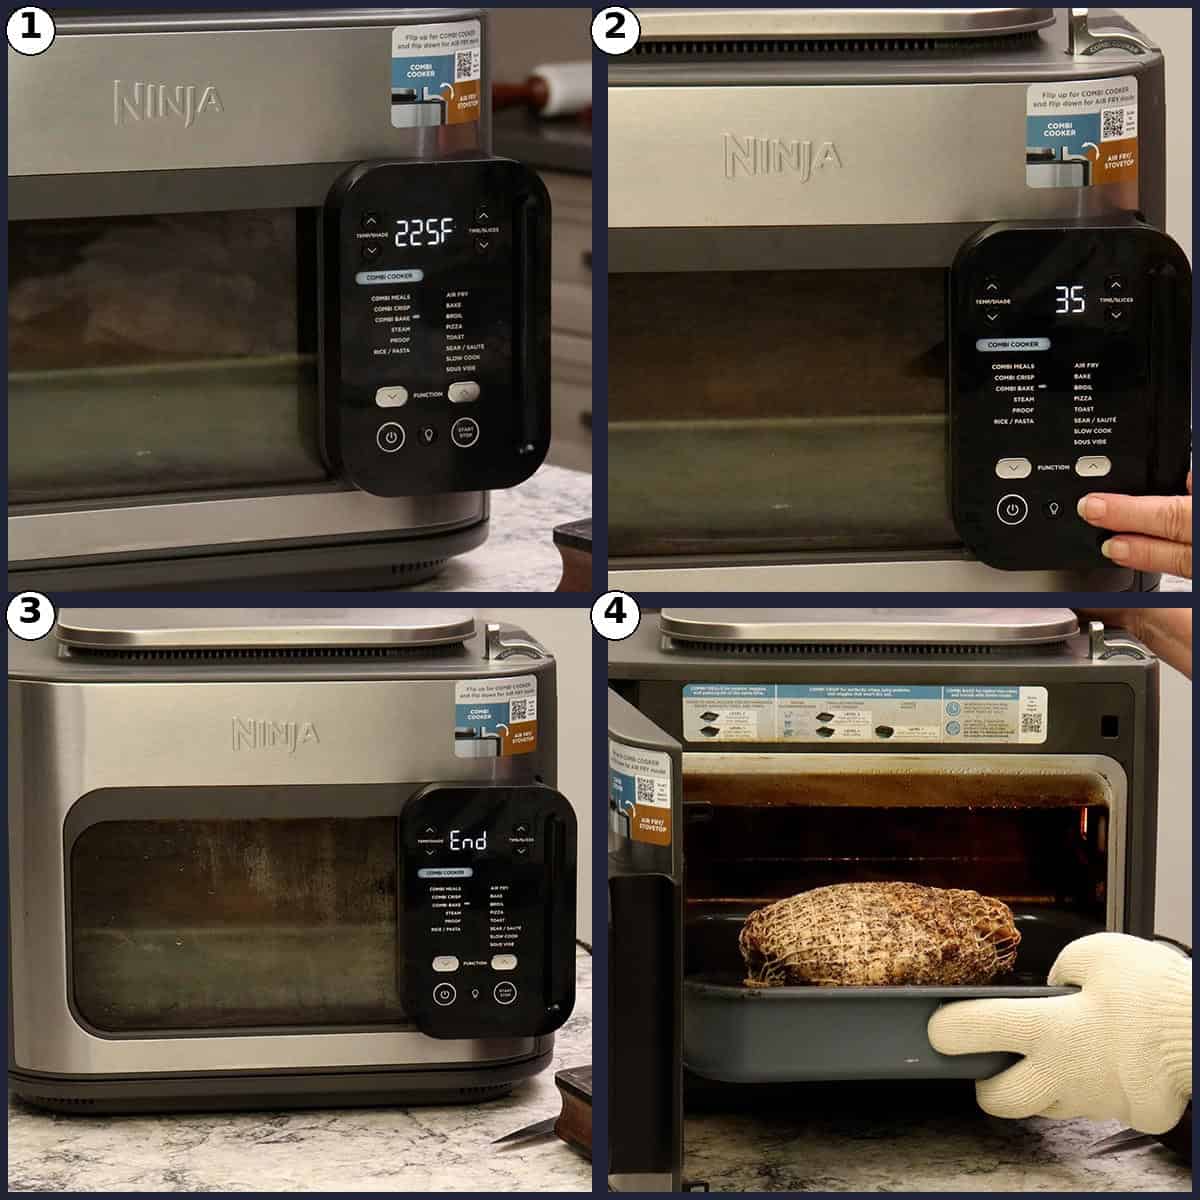
Close the door and select Combi Bake. Set the temperature to 225℉/110℃ and the time for 35 minutes, then hit start. Combi Bake steams for about 20 minutes before the bake time begins, so plan on about 55 minutes total, and the display will show End when the cook finishes. This low temperature is the same range we use when smoking meat, and it's exactly why the juices stay in the turkey instead of ending up in the bottom of the pan. If you'd rather cook at 250℉/120℃, that works too, just shorten the time a little and let your thermometer be the guide. If you love smoky flavor, my Smoked Boneless Turkey Breast on the Ninja Woodfire uses this same low and slow temperature range with real wood smoke.
Quick Tip
The starting temperature of your turkey affects the total cooking time. Straight out of the refrigerator, the internal temperature is around 40℉/4℃. If your turkey has been sitting at room temperature for an hour or so, cut about 5 minutes off the cook time.
Rest the Turkey, Then Remove the Netting and Probe
When the time is up, do not open the door, and don't take the turkey out. The internal temperature should be right around 145℉/63℃. Leave the turkey inside the closed appliance for 10 minutes. This is the secret to the whole method. Holding at 145℉/63℃ for about 10 minutes pasteurizes the meat, the same principle used in sous vide cooking, so it is completely safe to eat. During that hold, carryover heat brings the turkey up to about 155-157℉/68-69℃, which is where the texture is at its very best. It also doubles as the rest time, so it's perfect. I've even left it in for 15 minutes and it's perfectly fine.
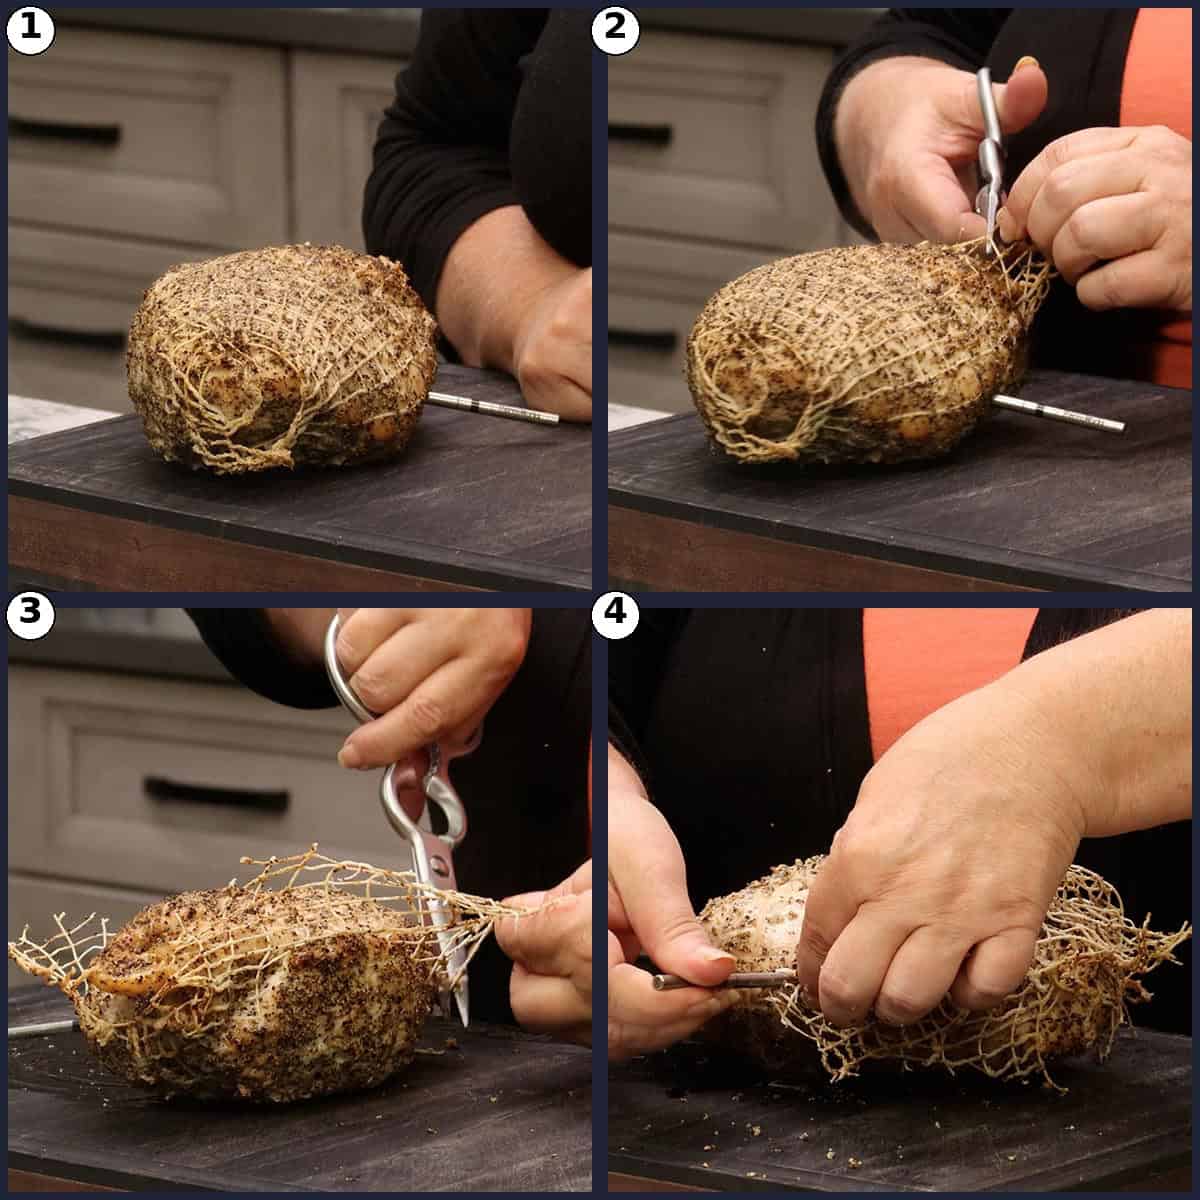
After the rest, take the turkey out and let it sit for about 5 minutes. Snip the netting with kitchen shears and pull it away, then remove the probe thermometer. Because the turkey rested inside the appliance, you won't see a flood of juices escaping, they've all settled back into the meat.
Slice and Serve
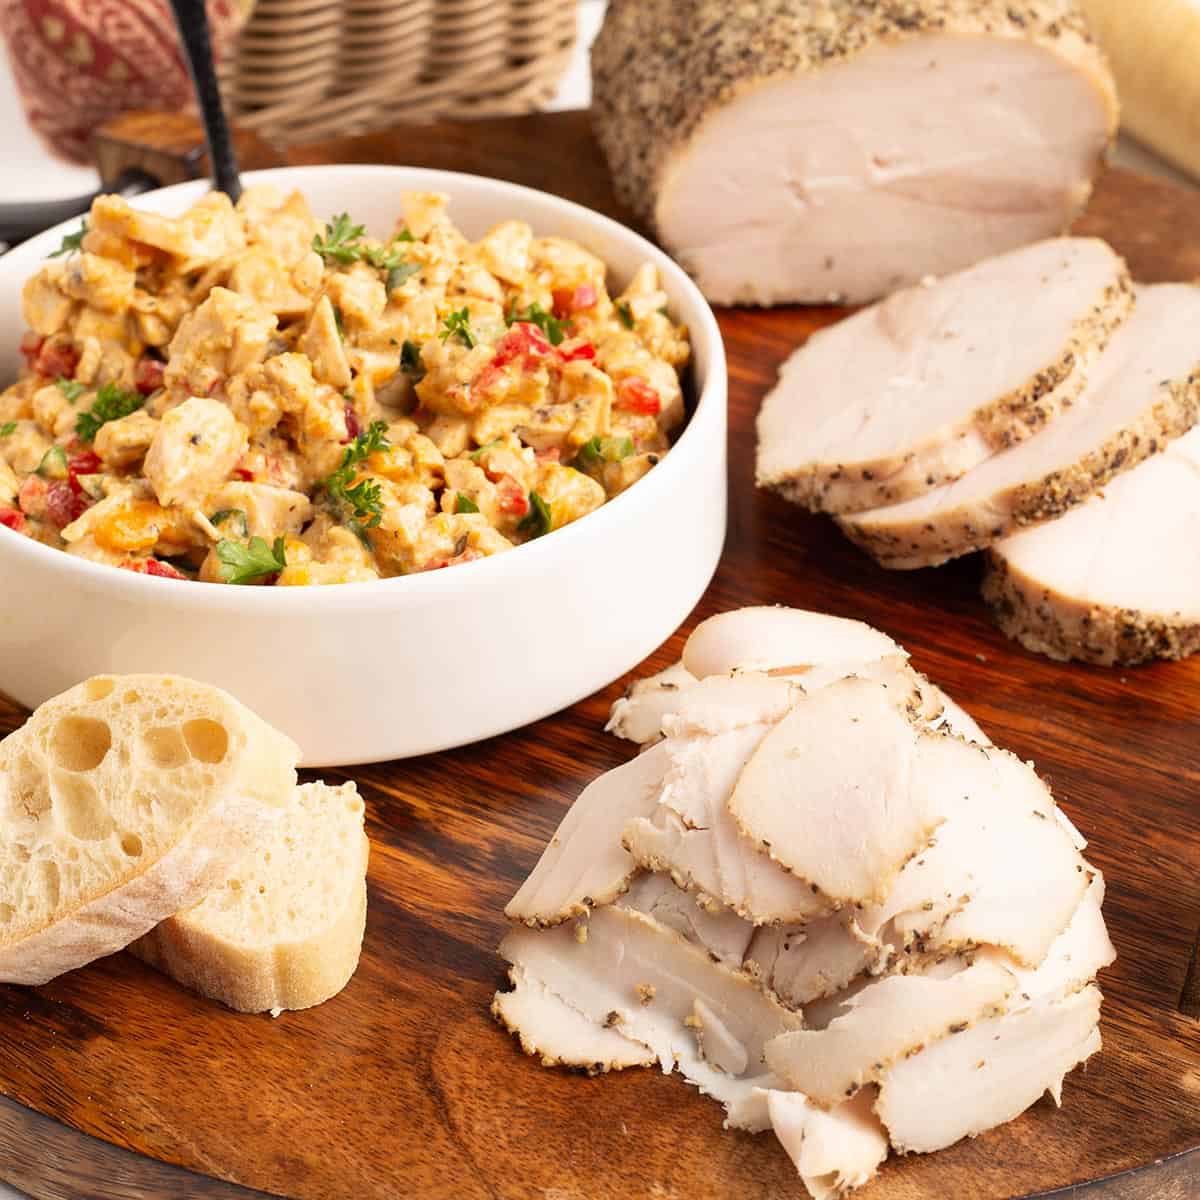
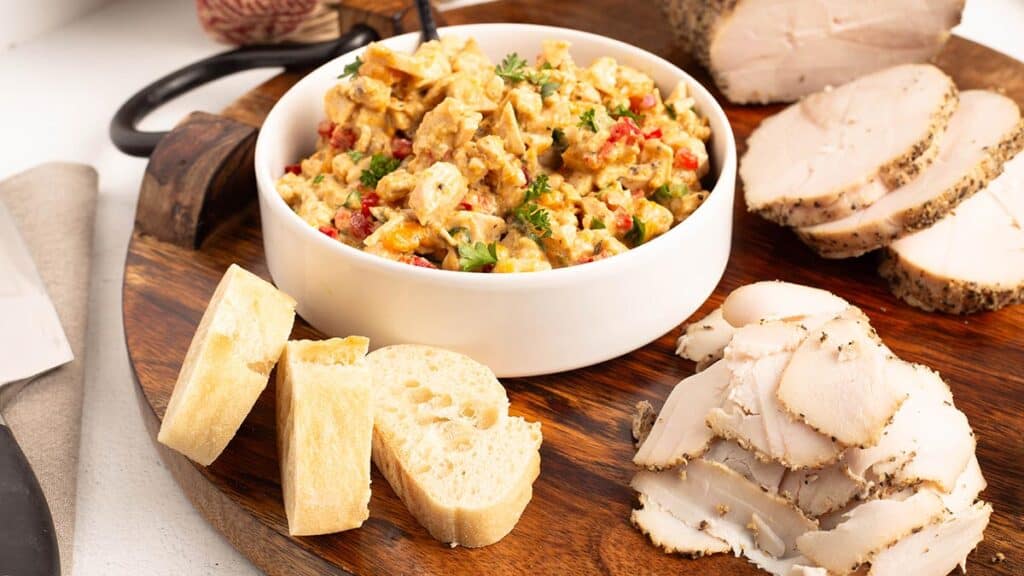
Slice it thick and serve it hot with turkey gravy, or slice it thin for hot turkey sandwiches. If you're planning on sandwiches later, let it cool for a good 30 minutes, then wrap it and refrigerate. And if you were lucky enough to get a breast with plenty of skin, you can pop it under the broiler for a few minutes to get that crispy skin.
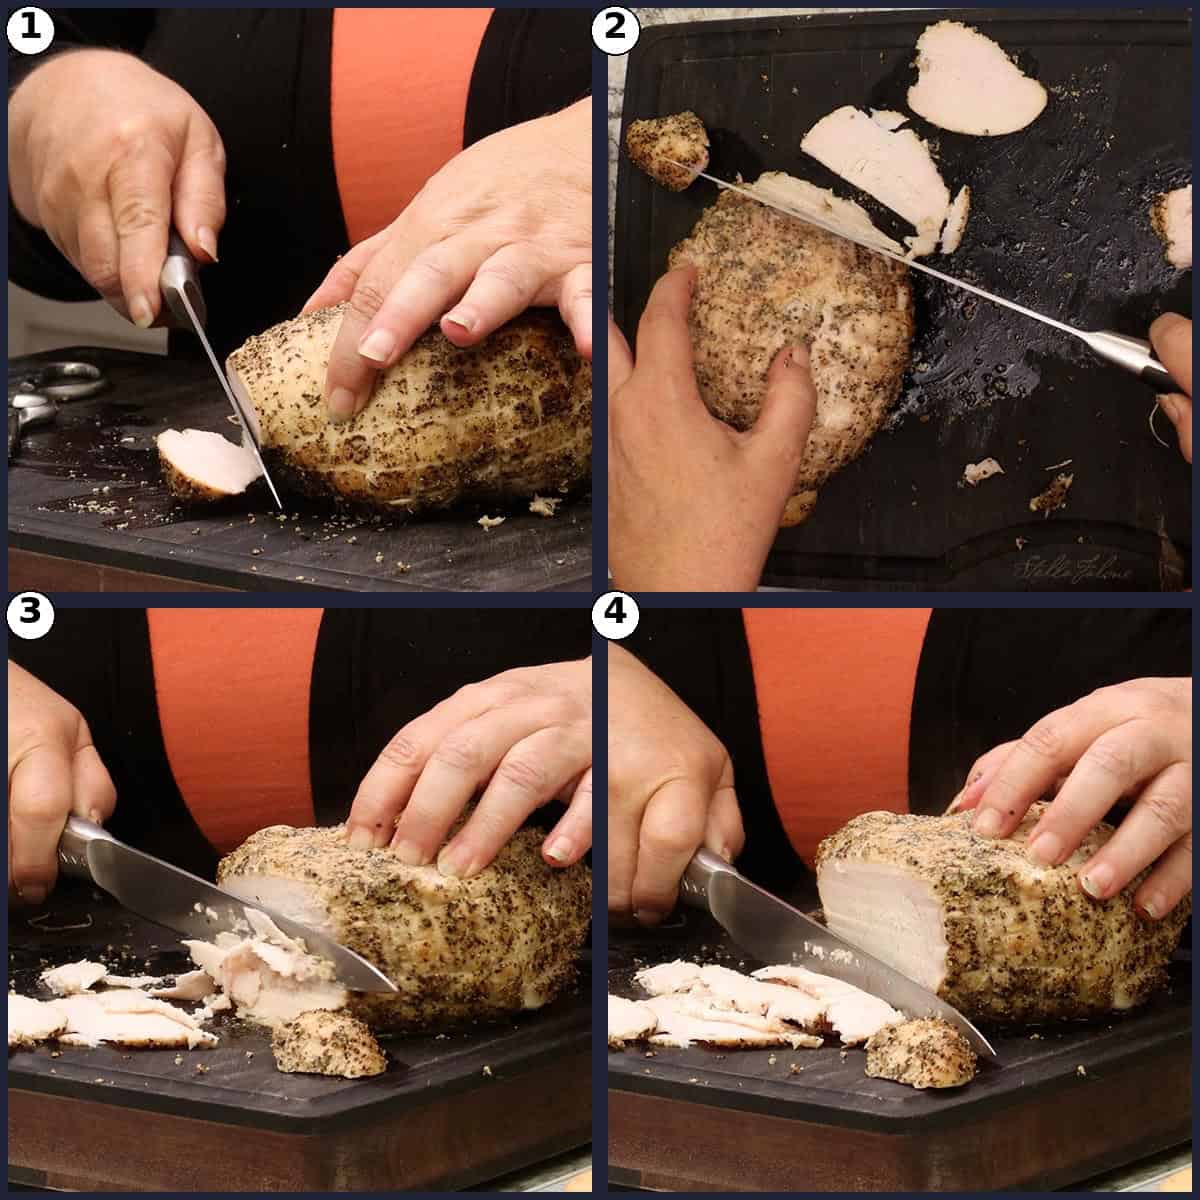
This turkey breast is perfect for thick slices served with gravy for dinner or thinly sliced for sandwiches or cubed for turkey salad!


Low Roasted Turkey
Equipment
- Ninja Combi (or conventional oven, or any appliance with a low bake setting)
- Probe thermometer or instant read thermometer
- Small bowl (for the seasoning blend)
- Small tray or plate (for the fridge rest)
- Sharp Knife
- Kitchen twine (optional, only if you remove the netting)
Ingredients
Turkey
- 2-21/2 lbs boneless turkey breast, netting left on the bagged kind, like Butterball; often labeled 3 lbs, but that weight includes the gravy packet
Dry Brine Seasoning
- 1 tablespoon fine grain sea salt or kosher salt
- 1 tablespoon coarse ground black pepper restaurant grind or freshly ground; use ½ tablespoon if you prefer a milder pepper flavor
For Cooking
- 1 cup water plain water for the Ninja Combi; no need to use stock, it won't add flavor here
Would you like to save this recipe?
Instructions
- The night before, or at least 4 to 6 hours before cooking, combine 1 tablespoon of fine grain sea salt and 1 tablespoon of coarse ground black pepper in a small bowl and mix well. This head start acts like a dry brine, letting the salt penetrate the meat and flavor it from within.
- Trim off any extra bag material, but leave the netting on the turkey breast. The netting holds the pieces of turkey together while it cooks, since these breasts are often two pieces joined together. Season liberally over the entire turkey breast, including the ends. It looks like a lot of seasoning, but each slice only picks up a little.
- Place the seasoned turkey breast on a small tray or plate to catch any juices and refrigerate uncovered for at least 6 hours, or overnight. Leaving it uncovered helps dry the outside for better texture. If it will be in the refrigerator longer than a day before cooking, loosely cover it or place it in a bag so it doesn't dry out too much.
- When you're ready to cook, pour 1 cup of plain water into the bottom of the Ninja Combi pan and set the rack in place. Place the turkey breast on the rack, skin side up if yours has skin.
- Insert a probe thermometer into the thickest part of the turkey breast, going in from the side. Since these breasts can be two pieces joined together, make sure the probe is in a solid piece of meat and not sitting in a gap between two cuts. You can also thread the probe like a needle, up and over and back in, for the most accurate reading.
- Close the door and select Combi Bake. Set the temperature to 225℉/107℃ and the time for 35 minutes, then hit start. The Combi steams for about 20 minutes before the bake time begins, so plan on about 55 minutes total. If your turkey sat out at room temperature for an hour before cooking, cut about 5 minutes off the cook time.
- When the time is up, do not open the door. The turkey should be at about 145℉/63℃. Leave it in the closed appliance for 10 minutes. This hold time keeps the turkey at a safe temperature long enough to be fully pasteurized, and it doubles as the rest period. Carryover heat will bring it up to about 155-157℉/68-69℃, which gives you the best texture. Even 15 minutes in there is perfectly fine.
- Remove the turkey and let it sit for about 5 minutes while you cut the netting off. Slice and serve it hot with gravy, or let it cool at room temperature for a good 30 minutes before wrapping and refrigerating. Chilled turkey slices beautifully thin for sandwiches and salads.
Notes
• Season the turkey breast the night before, or at least 4 to 6 hours ahead. This dry brine time is hands-off and is not included in the total time on the recipe card, but it makes the biggest difference in flavor.
• Leave the netting on. These bagged turkey breasts are usually two pieces joined together, and the netting keeps everything in one neat roast. If you do remove the netting to season inside, tie the breast back together with kitchen twine before cooking. Cooking Tips
• Holding the turkey at 145℉/63℃ for about 10 minutes pasteurizes it, the same principle used in sous vide cooking, so it is perfectly safe to eat. By the time it climbs to 155℉/68℃, the required hold time is only about a minute.
• If you're using a regular oven with dry heat only, don't go by time. Use a thermometer and expect roughly an hour at 250℉/120℃ to reach 145℉/63℃.
• Probe placement matters. Go in from the side into a solid piece of meat, or thread the probe through so it isn't sitting in a gap between two pieces. STORAGE
• Refrigerator: Let the turkey cool at room temperature for about 30 minutes before wrapping, so trapped steam doesn't keep cooking the meat. Store wrapped or in an airtight container in the refrigerator for up to 4 days.
• Freezer: Wrap slices or portions tightly and freeze in an airtight container or freezer bag for up to 2 months. Thaw overnight in the refrigerator.
• Reheating: Warm slices gently, covered, with a splash of broth in a low oven or short bursts in the microwave so the turkey stays moist. NUTRITIONAL DISCLAIMER
Nutritional information provided is an estimate based on typical ingredient values and standard portion sizes. Actual nutritional content may vary significantly depending on specific brands used, ingredient substitutions, preparation methods, portion sizes, and individual cooking techniques. For precise nutritional information tailored to your specific ingredients and preparation, please consult with a registered dietitian or use laboratory analysis. This information should not be used for medical nutrition therapy or to manage medical conditions without professional guidance.
Nutrition
Alternate Cooking Instructions
You do not need a Ninja Combi to make this low roasted turkey. The temperatures are what matter, not the appliance. Whatever you use, cook low, pull at 145℉/63℃, and let carryover heat finish the job.
- Conventional Oven: Roast the turkey breast on a rack in a pan at 250℉/120℃. Dry heat doesn't conduct heat as quickly as steam, so plan on about an hour, but do not go by timing alone. Use a thermometer and pull the turkey when it reaches 145℉/63℃, then tent it loosely with aluminum foil and let it rest 10 minutes so carryover heat brings it up to about 155℉/68℃.
- Ninja Foodi: Use the Bake function at 250℉/120℃ and follow the same internal temperature targets. Start checking the temperature around the 45 minute mark.
- Ninja Combi at a higher temperature: If you want to shave a little time off, run Combi Bake at 250℉/120℃ instead of 225℉/107℃ and shorten the cook time slightly. Watch the probe and hold everything else the same.
- Any other appliance: Slow cooker style appliances and toaster ovens with a low bake setting work as well. Keep the temperature in the 225-250℉/107-120℃ range, use a thermometer, and follow the same pull and rest targets.
If you have a bone-in turkey breast, my Ninja Foodi Turkey Breast recipe walks you through cooking it in the Ninja Foodi step by step.
Storage & Reheating Instructions
How to Store Leftover Low Roasted Turkey
If you're not serving the turkey right away, let it cool at room temperature for a good 30 minutes before wrapping it. Wrapping it while it's still steaming traps heat and keeps the turkey cooking a little longer than you want.
- Refrigerator: Wrap the turkey or store it in an airtight container in the refrigerator for up to 4 days. Whole pieces stay moister than slices, so slice as you go if you can.
- Freezer: Wrap portions tightly and store in an airtight container or freezer bag for up to 2 months. Thaw overnight in the refrigerator.
Leftover turkey is exactly what you want for my Quick & Easy Turkey & Rice Soup, and it comes together in no time.
Quick Tip
For deli-style thin slices, refrigerate the turkey first. Cold turkey slices beautifully thin with a sharp knife, no meat slicer needed, and you can even chip away at it for little shaved bits that are perfect on sandwiches and lettuce wraps.
How to Reheat Low Roasted Turkey
- For sandwiches and salads: No reheating needed! Cold sliced turkey is exactly what you want for sandwiches, lettuce wraps, and topping salads.
- Microwave: Place slices on a microwave-safe plate with a splash of broth or water, cover, and heat in short 20 to 30 second bursts just until warmed through. Overheating is what dries out leftover turkey, so go gently.
- Oven: Place slices in a covered baking dish with a splash of broth and warm at 300℉/150℃ for about 10 minutes, just until heated through. Smother them in gravy for a hot turkey sandwich that tastes brand new.
Frequently Asked Questions
Yes, when you combine temperature with time. The 165℉/74℃ number is the point where bacteria are killed instantly, but pasteurization also happens at lower temperatures held for longer. At 145℉/63℃, turkey held for about 10 and a half minutes is fully pasteurized, and by the time it climbs to 155℉/68℃, the required hold time is only about a minute. It's the same principle used in sous vide cooking. Resting the turkey inside the closed appliance for 10 minutes takes care of that hold time for you.
It almost always comes down to pulling it from the heat too late. Meat keeps cooking after it comes out of the appliance, and a thick, cylindrical roast like a turkey breast can climb almost 15 degrees while it rests. If you cook to 165℉/74℃ and then rest it, you end up close to 180℉/82℃ and the turkey is dry. Pull it at 145℉/63℃, let it rest in the closed appliance, and it finishes right around 155-157℉/68-69℃ for juicy meat every time.
Yes, leave the netting on. These boneless turkey breasts are usually two pieces joined together rather than one whole breast, and the netting is what holds everything together into one neat roast while it cooks. If you'd rather season inside the split, remove the netting, season, and tie the breast back together with kitchen twine instead of trying to get the netting back on.
Seasoning at least 4 to 6 hours ahead, and ideally overnight, works like a dry brine. The salt slowly penetrates the meat and flavors it from within instead of just sitting on the surface. Store-bought turkey breasts are often injected with a solution, but a dry brine gives you that same from-the-inside flavor naturally. Leaving it uncovered in the refrigerator also dries the surface a little for better texture.
Absolutely. The appliance doesn't matter, the temperatures do. Use a conventional oven, a Ninja Foodi, or any appliance with a low bake setting. Keep the temperature in the 225-250℉/107-120℃ range and cook until the internal temperature reaches 145℉/63℃, then rest for 10 minutes. Dry heat conducts more slowly than steam, so an oven takes about an hour. Don't go by timing, use a thermometer.
The label weight on these bagged turkey breasts includes the gravy packet tucked inside the bag. A breast labeled 3 pounds usually gives you a little over 2 pounds of actual turkey, closer to 2 to 2¼ pounds. It's a little tricky of the brands, but it's good to know so you can plan your servings.
Variations
- Change up the seasoning: Salt and pepper is all this turkey needs, but any seasoning blend you love works with the same technique. Just be sure to use dry herbs rather than fresh, since the seasoning sits on the turkey for hours during the dry brine.
- Milder pepper: The coarse ground pepper flavor carries through the finished turkey. If you're not a big pepper fan, cut it down to ½ tablespoon and you'll still get delicious flavor.
- Crispy skin finish: If your turkey breast came with a good amount of skin, cook it skin side up and then pop it under the broiler for a few minutes after the rest to crisp up that skin.
- Twine instead of netting: If you want to season inside the split breast, remove the netting, season everywhere, and tie the breast back into shape with kitchen twine before the fridge rest.
- Make it a meal prep staple: Cook two breasts back to back, keep one for hot dinners and chill the other for a week of sandwiches, salads, and turkey salad.
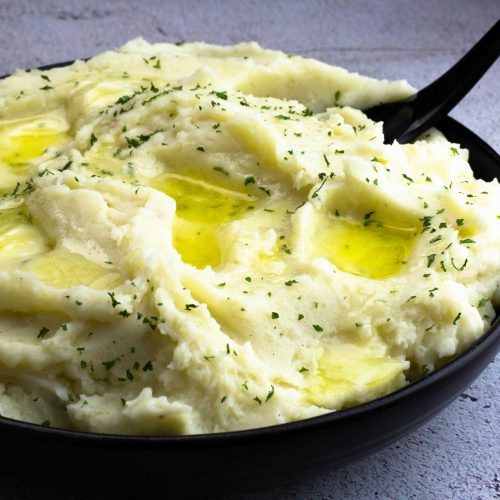
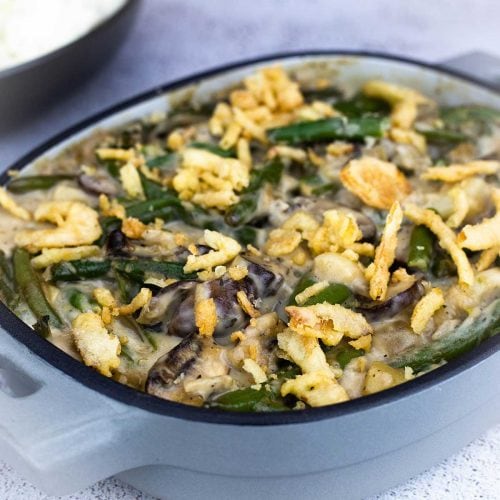
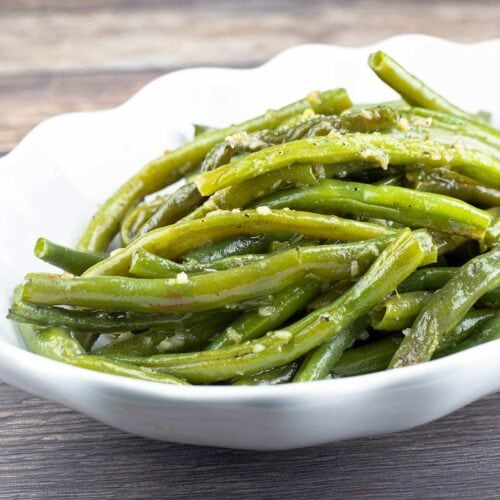
Perfect Sides for a Turkey Dinner
A turkey dinner deserves delicious sides to go with it, and these are some of my favorites. Each one comes together easily and pairs perfectly with those juicy slices of turkey. Give one or two a try and make it a complete meal!

About the Recipe Author, Louise Long
Louise is a full-time recipe creator and food blogger @ The Salted Pepper. She has over 30 years of experience with cooking and recipe development. She owned a restaurant for several years and was a full-time RN until retiring to blog full-time.

She published her first cookbook in the Fall of 2018 and is very interested in writing several more.
Louise is also the creator of an online Ninja Foodi Pressure Cooking Course with over 100 instructional step-by-step videos. People absolutely rave about the course and all the value they have received from it.
Louise has several very active Facebook groups that help people with the basics of cooking and learning more about the appliances they love.
Ninja Foodi Pressure Cooker & Air Crisper 101
Ninja Woodfire Outdoor Grill & Smoker
Louise is also a YouTube creator and you can find most of her recipes in video format on The Salted Pepper YouTube channel.
She is very responsive to messages and eager to help in any way she can. Get more Information about Louise & contact information
I WOULD LOVE TO SEE WHAT YOU ARE COOKING UP IN YOUR KITCHEN! TAG ME @THESALTEDPEPPER ON YOUR FAVORITE SOCIAL MEDIA PLATFORM WHEN YOU MAKE A DISH!
BE SURE TO FOLLOW THE SALTED PEPPER RIGHT HERE ⇓⇓⇓⇓⇓
Leave a Reply