Smoking a boneless turkey breast is a great way to infuse smoke flavor into the breast while locking in all the juices.
This cooking technique for smoking a boneless turkey breast is perfect for thick cut slices served with gravy and your favorite sides like sweet potatoes and green beans, OR it makes the perfect smoked turkey breast for slicing thin for sandwiches.

Would you like to save this recipe?
No matter how you serve it, I know you will agree this is the best smoked turkey breast recipe!
Suggested Equipment and Kitchen Tools for Smoked Turkey Breast
- Ninja Woodfire Grill/Smoker or another brand of electric pellet smoker
- Instant-read thermometer or probe thermometer (for food safety reasons, this is not optional if you want to achieve the best results and not overcook the turkey)
- Sharp Knife OR Meat Slicer (optional)
Safe Internal Temperature for Turkey Breast
The secret to achieving a juicy turkey breast is to smoke it at low temperatures and remove it from the smoker when it reaches an internal temperature of 155℉/69℃.
That may go against everything you've been taught about cooking poultry, but stay with me a minute and let me explain the science behind cooking at lower temperatures for longer periods of time.
Pasteurization (killing of pathogens) is both about temperature AND time. The higher the temperature, the shorter amount of time the food has to stay at that temperature to effectively kill harmful pathogens to a degree that is considered safe by the USDA.
This is right in line with the principles of Sous Vide Cooking where it is very common to cook at lower temperatures for longer periods of time. Take my Sous Vide Chicken Breast Recipe as an example. In that recipe I use even lower sous vide temperature and bring the chicken breast to an internal temperature of 145℉/65℃ and keep it there for at least 15 minutes, which effectively kills pathogens in the chicken meat to a safe level.
Safety Tip
If you are pregnant, under the age of 12, or in any way immunocompromised, you may want to consult with your physician or do independent research to determine if you are comfortable following these cooking guidelines.
In this recipe, the internal temperature of the turkey breast reaches 155℉/68℃ and we hold it there for a total of 8 minutes. According to the USDA meat and poultry guidelines, this is plenty of time to effectively pasteurize the breast meat.
There is another safety factor to consider when low and slow smoking with the Ninja Woodfire and that is the time it takes for a piece of meat to reach an internal temperature of 140℉/60℃ which brings the meat out of the danger zone of temps between 40℉/4℃ and 139℉/59℃.
It is in this danger zone where pathogens/bacteria can rapidly multiply and it is considered standard practice with smoking meats that the internal temperature of whatever you are cooking is brought up from less than 40℉/4℃ (refrigeration temp) to 140℉/60℃ within 4 hours.
I tested this recipe using higher cooking temperatures (200℉/95℃) and I thought the breast meat was just a tad drier than when I smoked it at 175℉/80℃, but it did get up to 140℉/60℃ in 2 hours instead of 3 hours.
The other difference is, with the higher smoking temp of 200℉/95℃, there were a lot more juices that came out of the turkey into the drip pan. With the lower smoking temperature, the drip pan was clean. There was only a small amount of dried on juices on the grill grate which is why the turkey cooked at lower temperatures remained moister.
If you are concerned with it taking 3 hours to get out of the danger zone, feel free to smoke at 200℉/95℃ instead of 175℉/80℃.
You can also smoke the turkey a little longer so the internal temperature reaches 165℉/74℃. Just know the turkey will be drier.
Ingredients & Substitutions
Boneless Turkey Breast
You can use a boneless turkey roast or a bone-in turkey breast that you remove from the bone before smoking.

You can also smoke a bone-in whole bird or bone-in turkey breast, but the instructions are going to be a bit different, and you want to smoke at higher temperatures for food safety reasons. You can find those video instructions here: Smoked Whole Turkey on Ninja Woodfire
The most economical choice is going to be the bone-in turkey breast where you remove the breast meat from the bone and then use the bone to make Turkey bone broth.
The easiest choice is a boneless turkey breast roast found in most grocery stores. They are usually in the freezer section and come with a gravy packet inside.
Here are the main differences between the bone-in turkey breast that you remove the bone and the boneless roasts:
Bone-In Turkey Breast
- You have to remove the turkey breast from the bone
- More cost effective especially if you use the carcass for bone broth
- Intact turkey breast instead of in pieces
- Has a more traditional turkey texture
Turkey Breast Roast
- Ready to Smoke right from the package
- Comes in various marinade flavors
- Turkey breast pieces are held together by netting (keep the netting on while smoking it)
- Has more of a processed lunch meat texture (probably because of salt injection into the roast at the processing plant)
Chicken breasts can also be used instead of turkey, but they will cook much faster, even at lower temps. I recommend wrapping the chicken in bacon or some sort of fat prior to smoke so the outside doesn't harden too much.
Seasonings
I like to keep the seasonings very simple and use a combination of kosher salt (diamond crystal is my preference) and a coarse grind black pepper, which is sometimes called restaurant pepper.
The ratio of salt to pepper I like for this recipe is two parts salt to one part coarse pepper. I use about 1 Tablespoon of (affiliate link)Diamond Crystal Salt and ½ Tablespoon of (affiliate link)coarse black pepper.
You can use any dry rub you like, and use enough to lightly coat the entire outside of the turkey roast.
If you use a marinated boneless turkey breast roast, you don't need to season with anything, it is already done for you.
Wood Pellets
The best woods or wood pellets for smoking turkey breast is very subjective. You can use stronger woods like mesquite or a nice mild apple wood. I encourage you to try different types of pellets and even combine a few until you find what you love the most.
I have tried several different types of pellets, and my favorites are (affiliate link)apple wood, (affiliate link)cherry wood, and maple wood pellets. Pecan wood is also a nice choice.
Use oak for a more traditional wood flavor that isn't too strong, or hickory for a stronger flavor.
You will use between ¾-1 cup of pellets when smoking the turkey breast on the Ninja Woodfire if you want to keep the smoke going the entire time the turkey is on the Woodfire. How many times you refill the pellet box is completely up to you, but I achieved the best flavor when I kept the smoke going the entire time.
How & When to Refill the Ninja Woodfire Pellet Box
Some say that you only need to fill the pellet box once when smoking with the Ninja Woodfire and this may very well be true IF you are smoking for less than 1 hour OR if you prefer a VERY subtle hint of smoke.
I have found this not to be true when smoking larger pieces of meat like pork shoulder, brisket, whole chicken or turkey breast.
The major difference between the Ninja Woodfire Grill & Smoker compared with other pellet smokers is the Ninja Woodfire is heated by electric and not the pellets.
In other brands of pellet smokers, the hopper must stay smoking for the entire smoking process because it is what is generating the heat to cook the food.
With the Ninja Woodfire, there is an electric heating element that provides the majority of the heat that cooks the food and the pellets are only for infusing the smoke flavor. While the burning pellets do generate some heat, how many times you fill the pellet box will not affect how long your food takes to cook. It will affect the degree of smoke flavor, though.
The first hopper (pellet box) full of pellets will burn faster because of the ignition process when you first start the Ninja Woodfire.
Plan on about 30-45 minutes for the first hopper full and I recommend filling the hopper once the burning pellets have burned down to about half a hopper full.

Before adding more pellets, make sure the remaining pellets in the hopper are burning/smoking and sometimes you can even see them glowing red, meaning they are burning very nicely. Then you can top them off with new pellets to fill the box.
Don't compress them down, just lightly pour more pellets in to fill it.
The pellets will ignite on their own as long as the existing pellets in the hopper are burning and producing smoke. You do not need to press the Woodfire flavor button IF you catch the pellets before they burn to ashes.
For the smoked turkey, I did this a total of 3 times and used a total of about ½-¾ cup of pellets for the 4-hour smoking time.
Here is the breakdown of of pellets added and the times I added them.
- ¼ cup added at the start which fills the hopper box.
- 2 Tablespoons to top off the hopper box when I added the turkey after the ignition and 15 minute burn off period.
- ⅛ cup added about 90 minutes into the smoking time.
- ⅛ cup added about 3 hours into the smoking time.
Plan on using ½-¾ cups of pellets for 4 hours of smoking time. This is only an average and there are many variables. Here are some common things affect the pellet burn rate.
- The Function being used. The smoker function will burn the pellets at a slower rate than the air fry function because of the fan speed. The fan is slower on the smoker function than air fry.
- The Cooking Temperature set. In the experiments I've done, there has been a correlation between higher cooking temperatures and a faster pellet burn.
- Weather Conditions. I have found that if it is windy, the pellets burn faster. Rain can also have an effect and it is harder to keep the pellets burning when raining if the Woodfire is not in a covered space.
What to do if the Pellets have burned out?
If the pellets have burned out and all that is left is ashes, you can refill it during the smoking process and press the flame icon (Woodfire Flavor) for about 2-3 seconds or until it starts blinking. This will start the ignition process.
During the ignition process quite a bit of heavy white smoke is produced and this can impart a bitter (acrid) flavor into foods, especially smaller and more delicate meats, fish, fruit and veggies.
To limit the amount of heavy white smoke, you can open the lid of the Woodfire periodically during the ignition process to let it out when you need to ignite pellets with food on the smoker.
Depending on your Ninja Woodfire model, you may have a heating element that is a bar that sits about ⅓ from the top of the pellet box and to successfully ignite the pellets the hopper needs to full.
Other models have a coil heating element that ignites the pellets and the pellet box does not have to be full to ignite the pellets on these models.
To check which kind of pellet ignition you have, open the pellet box, remove the metal pellet hopper (if the pellets are burning or just burned out, the metal hopper is hot, so use needle nose pliers or wait until it has cooled down) and look at the heating element behind the metal box.
Below is the bar heating element used for igniting the pellets on my Ninja Woodfire Proconnect. I have learned that most UK models have the bar element instead of the coil.

Below is the coil heating element in my original Ninja Woodfire Grill.

It doesn't really matter which style of pellet ignition element you have, but make sure you completely fill the hopper if you have the bar style.
How to Smoke Boneless Turkey Breast in the Ninja Woodfire Grill & Smoker
Prep the Turkey
If you are using a bone-in turkey breast, you will need to remove the breast meat from the rest of the carcass.
This is much easier than you may think.
- Pull the skin off of the breast meat so you can see the breast bone.
- Insert a sharp knife to the right or left of the breast bone and make a small slit.
- Insert your fingers into the slit and pull back on the breast meat so you can see where to cut.
- Make small cuts until the breast meat is removed completely from the bone.

Here is a short video showing the process I used and I am no butcher! I promise it is easy.
If you are using a boneless turkey roast that comes in netting, you don't have to do anything except season the turkey roast (unless it is already seasoned) and leave it in the netting.
Quick Tip
The turkey breast (no matter which kind) must be completely thawed before smoking at low temperatures for food safety reasons.
Set Up The Ninja Woodfire for Smoking
I recommend setting up the Ninja Woodfire about 25-30 minutes prior to when you want to start smoking your turkey breast.
It takes between 5-8 minutes for the ignition process to finish and then you want to burn off the heavy smoke for about 15 minutes before adding the food.
- Fill the hopper (pellet box) with the pellets you are using. You will use about ¼ cup of pellets to fill it.
- Select the Smoker Function
- Set the smoking temperature to 175℉/80℃
- Set the time for 5 hours and 15 minutes*
It will take between 3-4 hours on average to smoke the turkey breast, but I like to have an extra hour set just in case it takes longer. I don't want to have the smoker shut off requiring me to restart it and go through the ignition process again.
*The extra 15 minutes is set so I can keep track of the burn-off period. I will put the turkey on the smoker anytime after the countdown has reached 5 hours (or less), which allows enough time for the heavy smoke to dissipate.

Don't forget to hit start!
Seasoning the Turkey Breast
Turkey breast removed from the bone
When you debone the turkey breasts there will be two of them. You can smoke each one individually or stack them and wrap in butchers twine, which is what I do.
I season both sides of each breast with a salt and pepper mixture (the ratio is 2 parts kosher salt to 1 part coarse pepper), stack the breasts on top of each other, and secure them in a few places with cooking twine.

Believe it or not, as the turkey breasts cook, they bind together, and you end up with a nice turkey roast to slice.
If you want to avoid having a ribbon of seasoning in the middle of the finished turkey breast, stack and tie the turkey breasts before seasoning the outside.
You can put some of the skin you removed earlier on top of the turkey breast after securing with twine to keep it moist while smoking, but I recommend removing it 1-2 hours into the smoking time so you have even color and the smoke penetrates the top of the turkey breast.

Turkey Breast Roast in Netting
When you get the turkey breast roast in netting, oftentimes there are several different pieces of turkey in the netting. You can leave the netting on and season the outside only, or pull the netting off and season the different pieces and then put the netting back on.
*If you season the pieces, you will have ribbons of seasoning going through the turkey breast.
You definitely want to smoke the turkey roast in the netting so you have nice slices of turkey when serving.
You can also leave the netting on and season the outside of the turkey roast before smoking it.
You can insert a probe thermometer into the thickest part of the turkey breast or monitor the internal temperatures with an instant-read thermometer. I usually do both.

Smoking the Turkey Breast
Once the smoker has gone through the 15 minute burn off period, open the lid and let the heavy white smoke out.

Place the turkey breast either directly on the grill grate or elevate it on a rack.
Make sure your drip pan is installed in the back, but don't be surprised when it is empty at the end of smoking. These low temperatures allow the turkey to cook without losing juices.
Check the pellet box and if the pellets have burned down by 25% or more, go ahead and top them off with more pellets.
Close the lid and let it smoke for 1-2 hours before opening the lid to remove the skin.
Fill the hopper with pellets as needed and smoke until the internal temperature in SEVERAL places reaches 155℉/68℃.
Once the internal temperature reaches 155℉/68℃ keep the turkey on the smoker for another 8 minutes with the smoker still on.
It is fine if the temperature rises a few degrees during the 8 minutes.

Remove the smoked turkey breast from the smoker and remove the twine. Let it rest for about 10-20 minutes and then you can either slice it, if you are serving it warm, or wrap it in plastic wrap and refrigerate overnight which makes it much easier to slice thin for lunch meat.
Slicing the Turkey Breast
You can cut the turkey while it is warm for thick slices that you serve with gravy (or not), delicious mashed potatoes, and a side veggie OR slice it thin for sandwiches.
You can see the ribbon of seasoning going through the stacked turkey breast below. That can be avoided if you don't season until after you secure it with twine or use the roast in the netting.

If you have a meat slicer, let the turkey breast get cold for easier slicing.

Storage & Reheating Instructions
How to Store Leftover Sliced or Unsliced Turkey Breast
Refrigeration
Smoked turkey will last in the refrigerator for up to 5 days when stored in an airtight container or plastic sealable bag.
Freezer
I don't recommend freezing thinly sliced turkey breast because the texture becomes mushy when thawed. Instead, freeze the turkey before slicing or slice in thick slices.
Quick Tip
Make sure the turkey breast is cold before freezing to avoid ice crystals from forming.
Smoked turkey will last at least six months in the freezer when properly stored.
How to Reheat Thickly Sliced Turkey Breast
Oven
Wrap the turkey slices in foil or place them in a covered oven proof container and reheat at a temperature of 300℉/150℃ until warmed through.
Steam
Steaming is one of my favorite ways to reheat lean meats like turkey breast because it warms it up without drying it out.
Place your turkey breast in a covered container that can withstand steaming temperatures (metal, oven-proof glass, and silicone are good choices).
Place 2 cups of water in the bottom of your steaming appliance (Ninja Foodi, Ninja Speedi, Ninja Combi, or any other appliance with steam capabilities) and set the covered container of turkey on a rack above the steam. Steam for 10-15 minutes or until warm.
Frequently Asked Questions
Absolutely! You can use whatever turkey breast brine solution you want and brine it for about 8-16 hours prior to smoking it. You can use this recipe for a nice apple cider brine: Whole Turkey with brine recipe
Yep! As long as they fit on the smoker and aren't too crowded (leave enough room for the smoke and heat to flow around each one), you can smoke as many turkey breasts as you want and the times and temperatures will stay the same.
I don't recommend freezing thinly sliced turkey because as it thaws, the texture changes, and it becomes a little mushy. Instead, freeze the turkey breast in larger slices or chunks for a better outcome.
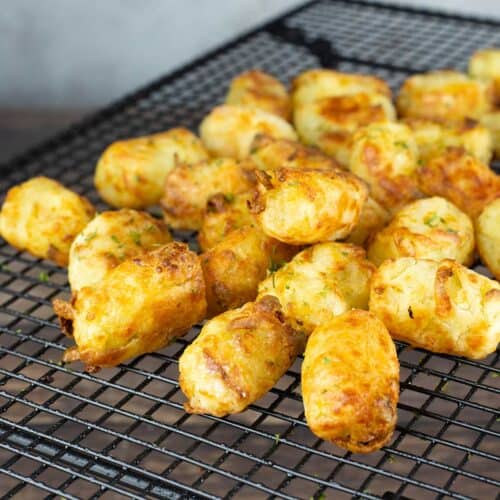
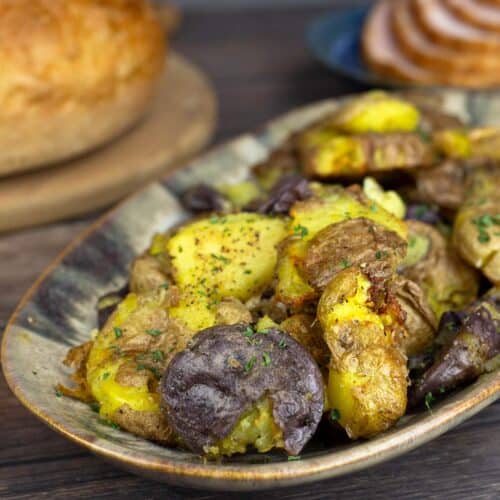
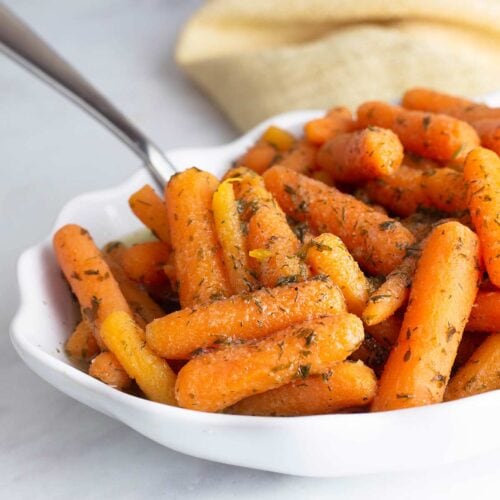
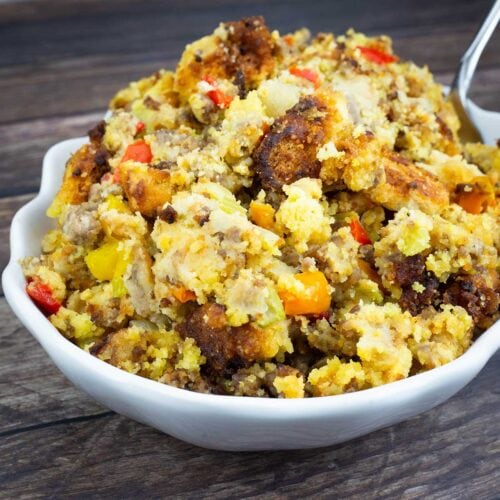
What to serve with Smoked Turkey Breast
What you serve alongside your smoked turkey breast depends on if you are serving it thick sliced for a hot meal or thinly sliced for sandwiches.
Here are some great side dishes for both!

Smoked Boneless Turkey Breast Recipe
Equipment
- Ninja Woodfire Grill and Smoker
Ingredients
- 2-3 pounds boneless turkey breast Can be a turkey roast in netting or two turkey breasts that you remove from the bone and rib cage.
- 1 Tablespoon kosher or sea salt
- ½ Tablespoon coarsely ground pepper sometimes called restaurant pepper
Smoking Pellets
- ½-¾ cup apple wood pellets or your pellets of choice
Would you like to save this recipe?
Instructions
Starting the NInja Woodfire Grill & Smoker
- Install the grill grate or griddle plate. Install the drip pan in the back of the smoker. Fill the pellet box with pellets.Turn the Woodfire on and select the Smoker Function.Set the smoking temperature to 175℉/70℃ and the time for 5 hours and 15 minutes (It will only take between 3-4 hours for most turkey breasts)Hit start and let the smoker go through the ignition process. You should see the flame icon flashing. You do not need to press the Woodfire Flavor button when on the smoker function.Once the ignition process is complete, let the smoker run for 15 minutes prior to adding food. This will burn off the heavy white smoke that can leave a bitter/acrid flavor on your food.½-¾ cup apple wood pellets
Bone-In Turkey Breast
- Make sure your turkey breast is completely thawed before smoking. Remove the turkey breasts from the rib cage and breastbone. Season with salt and pepper or your favorite seasoning blend. Stack the two breasts on top of each other and secure in 3- 4 places with butcher's twine.You can use some of the skin to cover the breast for the first 1-2 hours of the smoking process if desired. I have done it both ways (with and without skin) and both work great.2-3 pounds boneless turkey breast, 1 Tablespoon kosher or sea salt, ½ Tablespoon coarsely ground pepper
Boneless Turkey Roast
- Make sure your turkey breast is completely thawed before smoking. Leave the turkey breast in the netting and season the outside with salt and pepper or your favorite seasoning blend. *if you see any skin, you can remove it by pulling back the netting. On the turkey roasts, there will be varying amounts of skin left on the breast meat. It is also fine if you leave it on; it won't hurt anything.2-3 pounds boneless turkey breast, 1 Tablespoon kosher or sea salt, ½ Tablespoon coarsely ground pepper
Smoking the Turkey Breast on the Ninja Woodfire
- The instructions are the same for either type of turkey breast, but the turkey breast roast usually takes about 3 hours to smoke, while the double-stacked turkey breast takes about 4 hours. Place a thermometer probe (if using) into the thickest part of the turkey breast.
- Place the seasoned turkey breast on a rack on the grill or griddle plate or you place it directly on the grill or griddle plate. Elevating it a bit does allow the smoke to flow around the meat better, but it is not necessary.
- Check the pellet box and top off with pellets if needed. You want to keep the pellets burning and smoking the entire time the turkey breast is smoking for the best smoked flavor.
- Periodically check the internal temperature and when the temperature reaches 155℉/69℃ (make sure to check the internal temperature in several spots), keep the Woodfire on and let the turkey cook an additional 8 minutes. It is fine if the temperature increases a bit, but it should not decrease. If it decreases for some reason, bring it back up to 155℉/69℃ and start the 8-minute period again. This is important for food safety, and you can read all about it in the article above this recipe.
- Remove the turkey breast and set it on a cutting board or cooling rack. While it is warm, remove the twine or netting for easier removal. Let it sit about 20 minutes,wrap it in plastic wrap and put it in the fridge IF you are going to use it for sandwiches. This will soften the outside "crust" and make it much easier to slice thinly for sandwiches. If you want to serve it warm and in thick slices, you can do that 10 minutes after the turkey comes off the smoker. Enjoy!
Notes
Nutrition
About the Recipe Author, Louise Long
Louise is a full-time recipe creator and food blogger @ The Salted Pepper. She has over 30 years of experience with cooking and recipe development. She owned a restaurant for several years and was a full-time RN until retiring to blog full-time.

She published her first cookbook in the Fall of 2018 and is very interested in writing several more.
Louise is also the creator of an online Ninja Foodi Pressure Cooking Course with over 100 instructional step-by-step videos. People absolutely rave about the course and all the value they have received from it.
Louise has several very active Facebook groups that help people with the basics of cooking and learning more about the appliances they love.
Ninja Foodi Pressure Cooker & Air Crisper 101
Ninja Woodfire Outdoor Grill & Smoker
Louise is also a YouTube creator and you can find most of her recipes in video format on The Salted Pepper YouTube channel.
She is very responsive to messages and eager to help in any way she can. Get more Information about Louise & contact information
I WOULD LOVE TO SEE WHAT YOU ARE COOKING UP IN YOUR KITCHEN! TAG ME @THESALTEDPEPPER ON YOUR FAVORITE SOCIAL MEDIA PLATFORM WHEN YOU MAKE A DISH!
BE SURE TO FOLLOW THE SALTED PEPPER RIGHT HERE ⇓⇓⇓⇓⇓







Leave a Reply