You are cordially invited to take a bite of Christmas joy with this simple recipe for Christmas Biscotti.
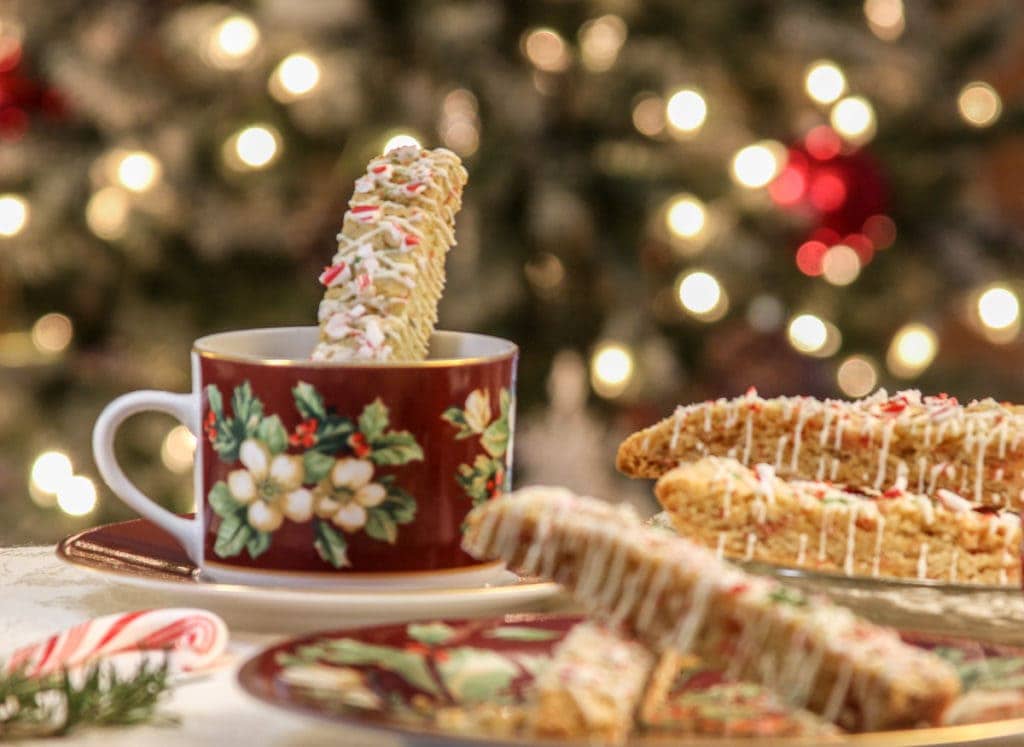
Two magical flavors come together and they taste just like Christmas in a cookie! A cookie that is encouraged to be eaten for breakfast!
The hint of savory rosemary paired with peppermint is superb in this easy-to-make cookie.
This post may contain affiliate links. If you make a purchase after clicking a link, I may earn a small commission. Thank you for your support!
Christmas baking has never been easier!
It's that time of the year: when ovens are baking up some delicious treats, and our oven at The Salted Pepper has been in overdrive. I have made several varieties of cookies, baked many loaves of quick breads, and then I got hooked on making biscotti.
Every year I latch onto a type of goody and make multiple varieties to give as food gifts. Sometimes it's cookies or candy. One year it was truffles. And this year, it looks like it's Biscotti World in my kitchen! I'm not complaining, though; because they are super easy to whip up. Each batch makes a little over 2 dozen individual biscotti; but if you are anything like me, count on 2 dozen because you will eat the extras!
The first recipe I developed was for Gingerbread Biscotti (recipe coming soon) and I just couldn't get over how easy it was to make. The taste was amazing and you get to eat cookies for breakfast! Yes, biscotti are pretty spectacular... and this Christmas Biscotti will have you singing Christmas tunes for sure!
How do you make biscotti?
Very easily. Seriously. It's pretty foolproof. The basic ingredients are sugar, flour, baking powder, eggs, butter and a flavoring. Depending on what variety you are making will depend on the flavoring or spices you will use. You start off by combining the wet ingredients, add in the dry. Mix. Add in whatever mix-ins you are using, form the dough into logs. Bake. Cut. Bake. Flip. Bake. Decorate. Done. Easy Peasy.
A few tips when making biscotti
- Depending on the recipe, the batter can be fairly thick so it helps to use a stand mixer if you have one. If not, a hand mixer will do. This recipe can easily be made with a bowl, whisk, and a sturdy spatula.
- Don't freak out when the loaves spread and look flat. This recipe spreads more than my gingerbread biscotti, but I promise it's all good. I put two on the same sheet pan and they spread and touched a bit, no worries.
Just let them cool all the way and your biscotti will be fine. Better than fine. After all it is Christmas Biscotti, gloriously yummy Christmas Biscotti.
- Allow the loaves to cool completely before cutting. This is important. Cut into it too soon and you may squish your biscotti or have crumbly mess on your hands. Ask me how I know... yep, I'm inpatient. Cut two slices and had to reprimand myself. Just wait until it's cool. It makes life way easier.
- Use a sharp knife to cut the biscotti loaves. I prefer to use a serrated bread knife, but any sharp knife should work fine. If you are having trouble cutting the loaf, try putting it in the freezer for a few hours.
- Line a cool baking sheet with parchment paper. This helps move the logs to the cooling rack and makes clean up a breeze. It also helps to prevent burning the bottom.
- Don't use a warm cookie / baking sheet. If you place the raw logs of dough on a warm cookie sheet they will spread before they start to bake.
- Humidity makes a difference when baking. Biscotti are supposed to be a dry, crunchy cookie; perfect for dipping in coffee, hot tea or hot chocolate. If it is really humid, you may have to bake the biscotti a tad longer on the second bake.
- Enjoy the process, bring the kids into help you. Have fun decorating. Get creative with toppings. Be jolly and enjoy your Christmas Biscotti!
What you'll need for Christmas Biscotti
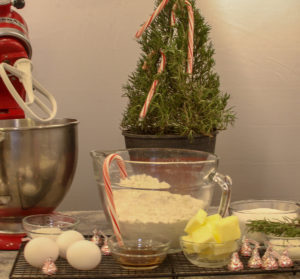
Fresh Rosemary
Heavy Cream
Butter
White Sugar
Eggs
Vanilla Extract
Flour
Baking Powder
Salt
Candy Cane Kisses
For Decorating
White Melting Chocolate
Candy Canes
Red & Green sugar
Step One:
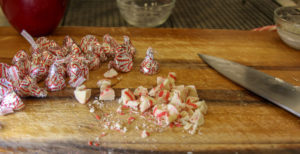
Finely chop 1 Tablespoon of fresh rosemary and combine with heavy cream in small bowl. Allow to sit while you gather your ingredients and prepare the batter. Preheat oven to 350° F. Roughly chop the candy cane kisses. I usually chop them into 5-7 pieces for each kiss. I used about a cup of chopped peppermint kisses. You can also use peppermint bark or make your own by melting white chocolate and combining it with crushed candy canes and peppermint oil. You can use peppermint extract, but it is a little trickier to work with because the alcohol in the extract can cause the chocolate to seize up on you.
Step Two:
In a large bowl or stand mixer, combine butter and sugar. Mix until combined. Add eggs & vanilla and mix until incorporated.
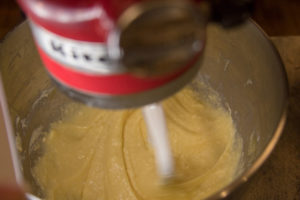
Your batter may look lumpy, that's fine.
Step Three:
Combine flour, salt, and baking powder in a mixing bowl. Whisk to combine. Add ½ flour mixture to the wet ingredients and mix on low until incorporated. Repeat with remaining flour mixture.
Step Four:
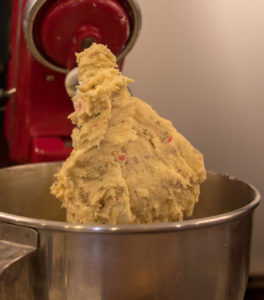
Add rosemary and cream and mix on medium until incorporated. Add chopped candy cane kisses and mix on low until they are mixed into the batter. Don't over mix.
Step Five:
Line a cookie sheet or sheet pan with parchment paper. If using a pan without a lip, I recommend using two pans; one for each biscotti log. This batter will spread and you don't want to have a mess to clean up if you are using a flat cookie sheet pan. The one I use has about a ¼ inch lip on all sides. You can find a similar one here. The ones I have are from Sams Club.
Step Six:
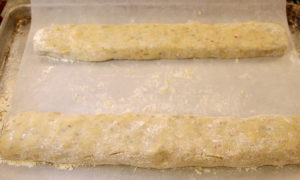
This is where the fun starts! Lightly flour the parchment paper or if you aren't using parchment, flour the pan. Dump the batter onto the pan and divide in half. No need to get too technical here, just eyeball it. Flour your hands and start forming a log out of half the batter. If the batter is sticking, add more flour. I probably use ¼ cup of flour between both logs. I roll the batter back and forth in a push pull movement and allow it to get thinner and longer. Then I press it down slightly to make a rectangular shape. I'm not precise as you can see and you don't need to be either. This is fun remember! Just try to get your logs to be around 10-12 inches long and about 2-3 inches wide. Truth be told, I made mine too long and too wide and that's why they spread so much. Guess what? Don't care, they still look beautiful and taste amazing. Don't worry, be happy, you are making Christmas Biscotti! It will be fine and if you run into any issues, send me a message in the comment section or on Facebook! I'm always happy to help.
Step Seven:
Put the pan(s) in the oven (preheated of course) for 30 minutes. I usually start checking around minute 25 just to make sure they aren't burning on the bottom. Everyone's oven is a little different, so if you know your oven tends to cook faster they might be done in 25 minutes. They are ready to come out of the oven when they look slightly golden and a toothpick comes out clean when inserted into the log. They will be soft at this point, so don't poke at them or you will leave an imprint.
Step Eight:
Remove from oven. Don't freak out. WHAT!!!... they are too flat and spread too much (see picture above). Relax, it's all good. Trust me this was my exact reaction and I almost scrapped the recipe, but they ended up beautiful and delicious. After I remove them from the oven, I let them sit on the baking pan for about 5 minutes and use the parchment paper to help me gently guide the cooked log onto a cooling rack. This is optional, but it does prevent further cooking from the residual heat of the pan. Then, just let them cool. LET THEM COOL. I know, it's hard. The temptation is so great, but they will be easier to deal with after a nice cooling off period. Go get a drink. Put your feet up. This will take a few hours. Or, you can throw those pans in the freezer and speed it up! Your choice, I always choose a beverage and feet up.
Step Nine:
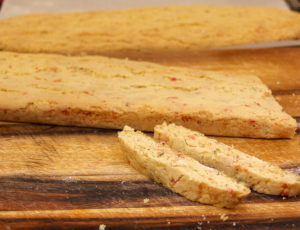
With a sharp (serrated is my choice) knife, cut the biscotti straight down like you are cutting bread. I do this on a diagonal, but that is not necessary. In fact, I usually start out on the diagonal and they end up being straight by the end of the biscotti loaf. It happens. No worries. Each loaf (I call them loaves because they look like unrisen bread) will give you between 12 and 16 biscotti, depending on how thick you cut them. I like to cut mine about ¾ to 1 inch thick.
Step Ten:
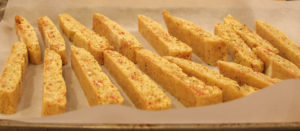
Place each piece of cut biscotti cut side down on the cookie or sheet pan lined with parchment (it does help) and bake for 7 minutes. Remove from oven and gently flip them over. You can let them cool a bit before doing this. I don't recommend using tongs are even a spatula to do this. Use your hands. They are very fragile at this point and can break easily. Use both hands to flip each one gently over. The side of the biscotti that was facing up should now be facing down. Bake for 7 minutes. Remove from oven and allow to cool. I usually transfer the parchment paper with the biscotti onto a cooling rack, but you don't have to. The bottoms might get a little browner, but it shouldn't be a problem.
Step Eleven:
Decorate, Decorate, Decorate! The fun part. I was all fun though, wasn't it? It's Christmas Biscotti... of course it's fun! Melt some white chocolate, I used about 1 cup of Ghirandelli white chocolate. Crush about 4 candy canes. Spoon the melted chocolate into a baggie with the corner clipped or a decorating bag and drizzle back and forth on one of the cut sides of the biscotti. You can also just take a spoonful of chocolate, hold it above the cookie and drizzle it that way. Sprinkle crushed candy canes and colored sugar over the biscotti. Keep in mind it will only stick where the chocolate is. I only decorate a few at a time with chocolate so I can add the crushed candy canes and colored sugar before the chocolate sets. You can also use the remaining peppermint kisses to decorate by melting them and drizzling them over the biscotti. I tried this and wasn't happy with the pink color after the red mixed with the white, but it does cut out a step!
Melting Tips for White Chocolate
Microwave: Heat for very short periods of time, I usually do 30 seconds the first time and 15 each additional time. Remove from microwave and stir in between heating. When 60-75% of the chocolate is melted, stir and let the residual heat melt the rest of the chocolate. White chocolate should not get about 110º F or it will become very thick and difficult to work with.
Stove top: Place a saucepan filled with just a small amount of water on the stove to simmer. Place a double boiler pot on top, making sure it does not touch the water. Gently melt the chocolate over a low simmer, stirring occasionally until chocolate is smooth.
Sous Vide: Okay, guys! This method seriously changed my life! No joke. It keeps your chocolate at exactly the right temperature for as long as you want and you are able to reuse and reheat the chocolate so there is hardly any waste. Fill a pot with water, place the Sous Vide appliance into the pot per its instructions. Set the temp to 110º F. Place melting chocolate in a plastic sealable bag. Get the air out and place in the water bath. When ready to use, clip the corner of the bag with scissors and decorate. If you need to re-heat the chocolate, place bag with clipped corner into a second seal-able baggie, remove air and return to water bath. You do need to be careful not to get water into the bag. Water and chocolate don't mix well. If you melt chocolate a lot, I really recommend purchasing these disposable decorating bags. They are the perfect size for melting chocolate or for when you are using multiple colors when decorating. Simply place chocolate in bag, secure with a clip like these. Place decorating bag into pot allowing the clip to rest on the edge so no water gets in. If you need to reheat after you have clipped the bottom of the decorating bag, simply put the bag of chocolate into a new bag that hasn't been clipped on the end (the bag of chocolate rests inside the clean one) and re-secure with clip, place in water bath until melted.
Colored Sugar: You can buy colored sugar here. Or make it yourself by simply combining white sugar with food coloring of your choice and shake, shake, shake. I had the best luck with gel or paste food coloring because if you add too much liquid to the sugar it gets very tacky and clumpy. My favorite gel food coloring for icings/sugar/chocolate are these: Americolor Food Coloring.
Step Twelve:
Once the chocolate has set, place the biscotti in an air tight container. They will stay fresh on the counter for about 1-2 weeks... if they last that long. Don't refrigerate them, the humidity in the fridge can cause them to get soft. You can also freeze them in an air tight container. Enjoy!
Let me know if you make this recipe by leaving a comment in the comment section below and/or tagging me @thesaltedpepper on your favorite social channel. As always, I am here to help you achieve the best cooking and baking results, so don't hesitate to reach out to me if you run into any issues! I look forward to hearing from you!

Christmas Biscotti
Ingredients
- 1 tablespoon Heavy whipping cream
- 1 tablespoon Rosemary chopped fine
- 9 tablespoon Butter salted
- 1 ¼ Cup White Sugar
- 2 teaspoon Vanilla Extract
- 3 Large Eggs
- 3 ¼ Cups Flour All Purpose
- 1 tablespoon Baking Powder
- ½ teaspoon Sea salt
- 1 Cup Peppermint Kisses chopped
Toppings for Decorating
- ½ Cup White melting chocolate
- 5 Candy Canes
- 1 tablespoon red colored sugar
- 1 tablespoon Green colored sugar
Instructions
- Finely chop 1 Tablespoon of fresh rosemary and combine with heavy cream in small bowl. Allow to sit while you gather your ingredients and prepare the batter. Preheat oven to 350° F. Roughly chop the candy cane kisses.
- In a large bowl or stand mixer, combine butter and sugar. Mix until combined. Add eggs & vanilla and mix until incorporated.
- Combine flour, salt, and baking powder in a mixing bowl. Whisk to combine. Add ½ flour mixture to the wet ingredients and mix on low until incorporated. Repeat with remaining flour mixture.
- Add rosemary cream and mix on medium until incorporated. Add chopped candy cane kisses and mix on low until they are mixed into the batter. Don't over mix.
- Line a cookie sheet or sheet pan with parchment paper. Lightly flour the parchment paper or if you aren't using parchment, flour the pan. Dump the batter onto the pan and divide in half.
- Flour your hands and start forming a log out of half the batter (see post for more details). Your logs should be around 10-12 inches long and about 2-3 inches wide.
- Put the pan(s) in the oven (preheated of course) for 30 minutes. When done, remove from oven and allow to cool completely.
- With a sharp (serrated is my choice) knife, cut the biscotti straight down like you are cutting bread. I do this on a diagonal, but that is not necessary.
- Place each piece of cut biscotti cut side down on the cookie or sheet pan lined with parchment (it does help) and bake for 7 minutes. Remove from oven and gently flip them over. Bake an additional 7 minutes. Remove from oven and allow to cool.
- Crush candy canes & Melt white chocolate (see post for tips). Drizzle over cut side of biscotti. Sprinkle with crushed candy canes and colored sugar if desired. Enjoy!
Notes
Nutrition
If you enjoyed this recipe and have the baking bug like I do, check out this recipe for the BEST Cowboy Cookies EVER!
Thanks for visiting The Salted Pepper and don't forget to subscribe to our email list! You can also follow us on these channels below.

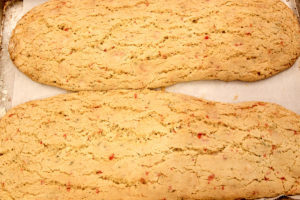 Just let them cool all the way and your biscotti will be fine. Better than fine. After all it is Christmas Biscotti, gloriously yummy Christmas Biscotti.
Tisha
Love the idea of having one of these with a nice cup of hot cocoa! Looks so amazing!
Catherine Brown
This looks like the perfect Christmas biscotti! I can't wait to try the peppermint and rosemary together... something I'd never thought of!
Louise
The peppermint and rosemary work perfectly together. The rosemary flavor is subtle, but balances the peppermint! Hope you like them!
Mike Hultquist
This is a great post on biscotti in general. There will be no questions about how to make biscotti after this! The rosemary-peppermint combination is outstanding.
Jamielyn
Yum, this is so fun to make for the holidays! I love biscotti!
Louise
Jamielyn, They were a lot of fun to make and they taste amazing!
Erin
I LOVE biscotti and this Christmas biscotti sounds so good! Perfect for breakfast or afternoon treats during the holiday.
Louise
Thank you, I had one for breakfast today! 😋
Louise
Erin, Thank you so much!