

- Ninja Foodi Pressure Cooker & Air Crisper
Ah... the glorious Cinnamon Roll. Light and airy with that buttery cinnamon center, doused in a sugary glaze. Better than a donut, for sure! Now, you can make delicious Cinnamon Rolls in the Ninja Foodi and it's surprisingly easy!

Would you like to save this recipe?
Cinnamon Rolls aren't something I make from scratch all the time and, let's face it, it's easier to pop the can open then it is to make them homemade... but, this recipe is very easy to follow and the results are fantastic!
Personally, the glaze that comes in the can of cinnamon rolls is way too sweet for me, so I created a slightly different version that really compliments the flavors in the cinnamon roll perfectly.
Even if you have never made homemade bread, rolls, or cinnamon rolls in the Ninja Foodi (or the oven, for that matter), you will be able to make these with the step-by-step instructions! First, let's start off with some baking tips specific for the Ninja Foodi.
I bake all kinds of things in the Ninja Foodi, but it has taken some trial and error and I am happy to share some tips so that your baked goods come out perfect every time!
First, let me clarify that when I say "baking in the Ninja Foodi," I'm referring to baked goods, like; cakes, muffins, corn bread, rolls, and, of course, these delicious Cinnamon Rolls!
How do I Adjust the Temperature for baking Cinnamon Rolls in the Ninja Foodi?
The Ninja Foodi on the bake/roast function is essentially a small convection oven. This means that air circulates around the food as it cooks.
The rule of thumb with a full-size convection oven is to decrease the temperature by 25° and many times the food will also cook faster.
Often times when baking in the Ninja Foodi, you will need to decrease your temperature even lower. In the case of these Cinnamon Rolls, I would ordinarily bake them in the oven at 350℉/176℃, but I decided to start out with decreasing that temp by 75°.
When I first started testing this recipe, I used a starting temp of 275℉/135℃ and then increased it to 300℉/150℃. This worked, but took a really long time. When I increased the temperature to 300℉/150℃ from the beginning, the tops of the rolls were too brown. So, to fix this I decided to cover the rolls for a period of time and then uncover to brown them. This worked!
The reason I'm explaining my process is because there is no one right or wrong way to bake in the Ninja Foodi. The trick is to manage the time and temp so your baked goods cook perfectly.
The type of pan you use also plays a role in determining temperature and timing.
What Pan Should I use for these Cinnamon Rolls?
I used my (affiliate link)All Purpose Baking Pan from Ninja and it worked perfectly. If you don't have a dark coated pan that is about 8.75" in diameter and 3" tall, then follow these suggestions for the pan you have.
Keep in mind the color of the pan matters! Dark coated pans cook faster, so you will need to make some adjustments depending on the pan you use.
If you have an 8"x3" dark coated pan, I think you will be fine if you follow the same instructions as I did with the Ninja Foodi All Purpose Pan. Your rolls will rise a tad bit taller, so you might need a few more minutes of baking time. I would do this at the lower temp while they are covered to avoid over-browning of the tops.
If you have a dark coated pan that is 7" in diameter and 3" tall, like a springform pan, I would only make 6 rolls at a time. If you try to get all 8 rolls in the 7" pan, they will be too crowded and rise too tall. This will make it difficult to get them cooked in the center. If that is the only pan you have and you want to try to make the whole batch, lower your temp to 275℉/135℃ and cook longer.
While I absolutely LOVE the Fat Daddio pans, the ones I have are only 2" high and when I tested the recipe using the (affiliate link)8"x 2" Fat Daddio pan, the rolls rose up over the edge and created a funny shape.
If you have either a Fat Daddio 8" pan that is 3" high or another light colored pan of the same size, you will want to increase your heat in the beginning to 325℉/160℃ and then use your judgement towards the end and adjust the temperature to get the perfect browning on the rolls for you.
Can I change the spices in these Cinnamon Rolls?
Of course! I chose the spice blend that appealed to me and I encourage you to change it up to best suit your preferences.
I used a blend of cinnamon, sugar, nutmeg, and cloves which I absolutely love in these cinnamon rolls, but it is perfectly fine to switch those up.
The thing to remember though, is cinnamon is a powerful spice. I don't recommend just increasing the amount of cinnamon to replace the other spices. Instead, I would either just omit the nutmeg and cloves OR if you increase the cinnamon, also increase the sugar to balance it out.
Can I Proof the Rolls in the Ninja Foodi without the Dehydration Function?
Yes! The only thing the rolls need to rise is a warm environment. This can be done right on your counter, but it usually takes a little longer.
I always use the Ninja Foodi to proof breads and, while the dehydration function is the easiest in my opinion, it can be done using the bake/roast function.
What I suggest is turning the Ninja Foodi on, with nothing in it, select bake/roast on 325℉/160℃ and let it heat up for about 5 minutes. Then turn it off and let it sit with the lid closed for 5-10 minutes. You can form your rolls during this time.
When your rolls are ready to go into the Ninja Foodi for proofing, just set the pan on the rack and lower into the warm Foodi. Close the lid and keep it off. The residual heat will proof the rolls.
Can I Make the dough without a KitchenAid Mixer?
Yes, of course! I used my KitchenAid Mixer because it makes it a little easier, but it is not necessary at all.
You can use a bread machine to do the kneading or you can do it by hand. I actually love kneading dough by hand and it gives you a great idea how your dough is coming together.
The process is very simple and will only take about 10-15 minutes, so if you haven't kneaded dough by hand before, check out this short video and you'll be a pro in no time at all!
How to Make Cinnamon Rolls in the Ninja Foodi
The first thing you want to do is get your yeast proofing. There are different types of yeast and if are using one that doesn't require proofing, you can skip this step.
Even though I stock the yeast that doesn't have to be proofed, I do it anyway just to make sure it's working. I would hate to take the time to make homemade dough of any kind and have it not rise.
So, if you are in doubt and don't know how old your yeast is or if it needs to be proofed, just proof it to be sure it is going to do its job.
As the yeast sits, combine the eggs and the sugar in a bowl of a stand mixer and mix on medium speed until combined. You don't have to whip it up, like you do with a cake batter.
Heat your milk and butter in the microwave or on the stove or in the inner pot of the Ninja Foodi just until it is warm. Let it sit to cool down.
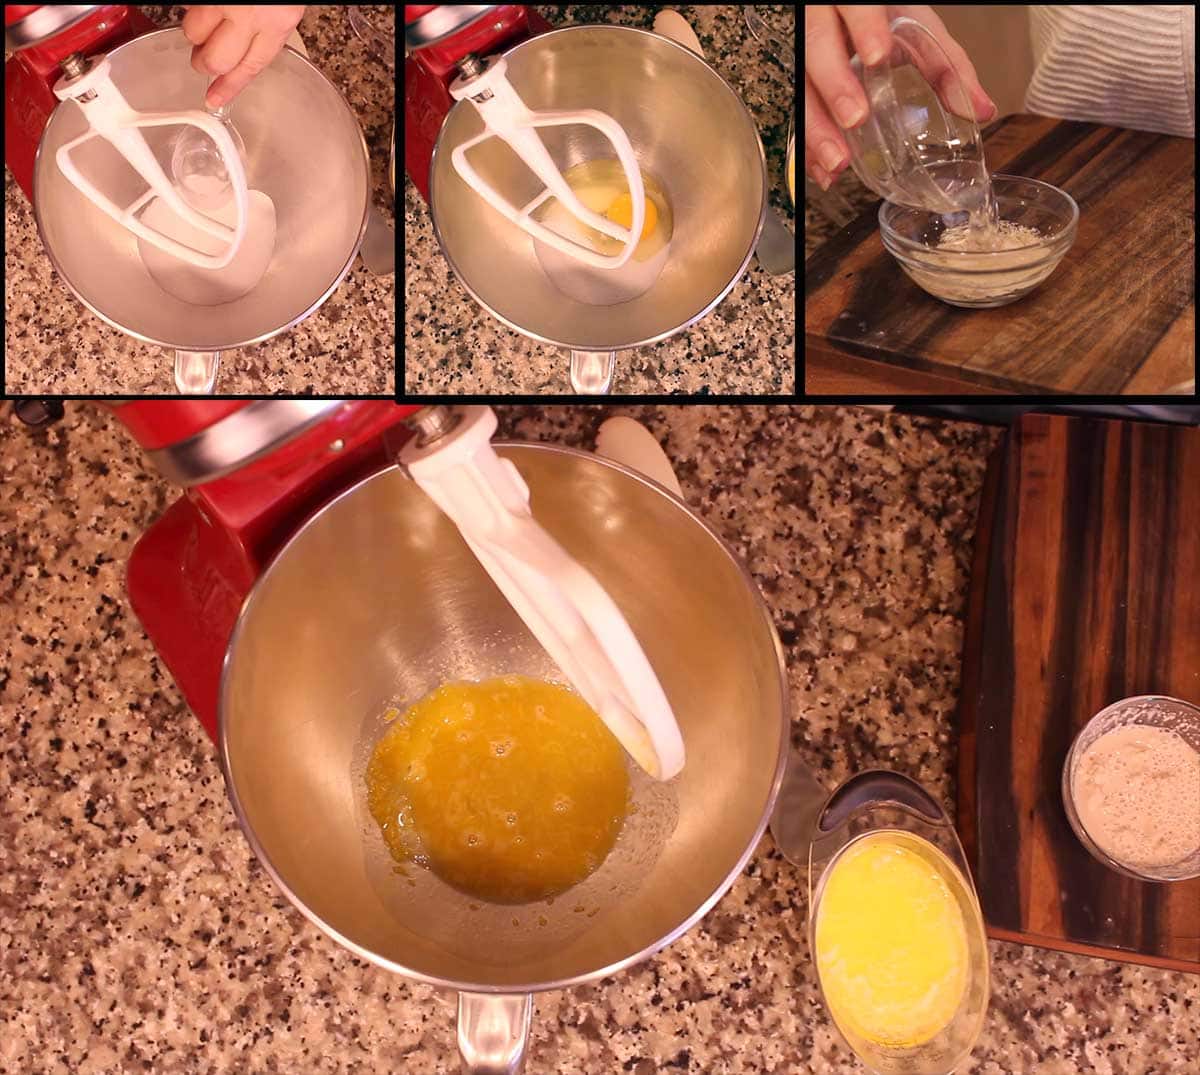
Then, sift your bread flour. I do recommend using bread flour in this recipe, but all-purpose will work. The reason you want to sift the flour is to aerate it. This will help your rolls to be very light and melt-in-your-mouth delicious!
Add your flour all at once and mix with the paddle attachment on low. Slowly add in the melted butter/half & half while the mixer is running. Then, add in the yeast.
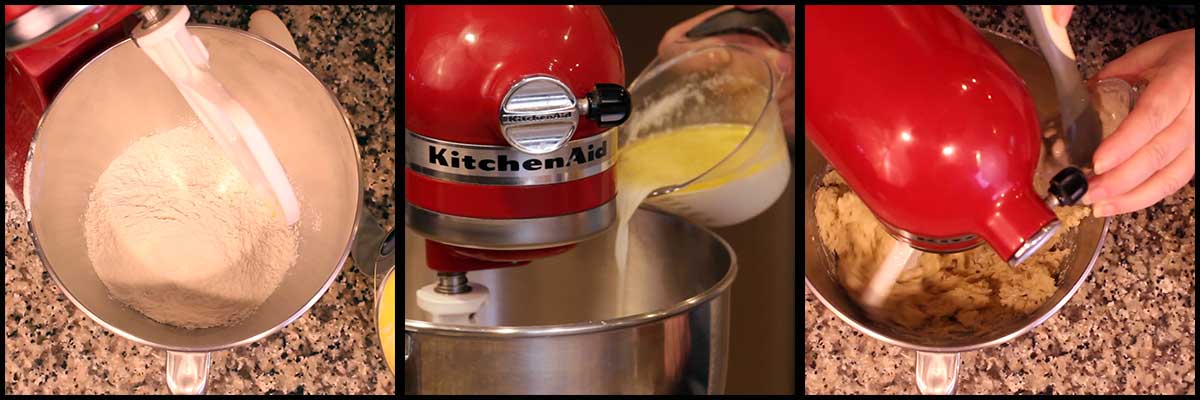
The dough should be very soft and tacky, but not stick to your fingers. If the dough is too sticky, add 1 tablespoon at a time until it no longer sticks to your fingers.
Below is an example of my dough when it was too wet and sticky. I ended up adding another ¼ cup of flour.
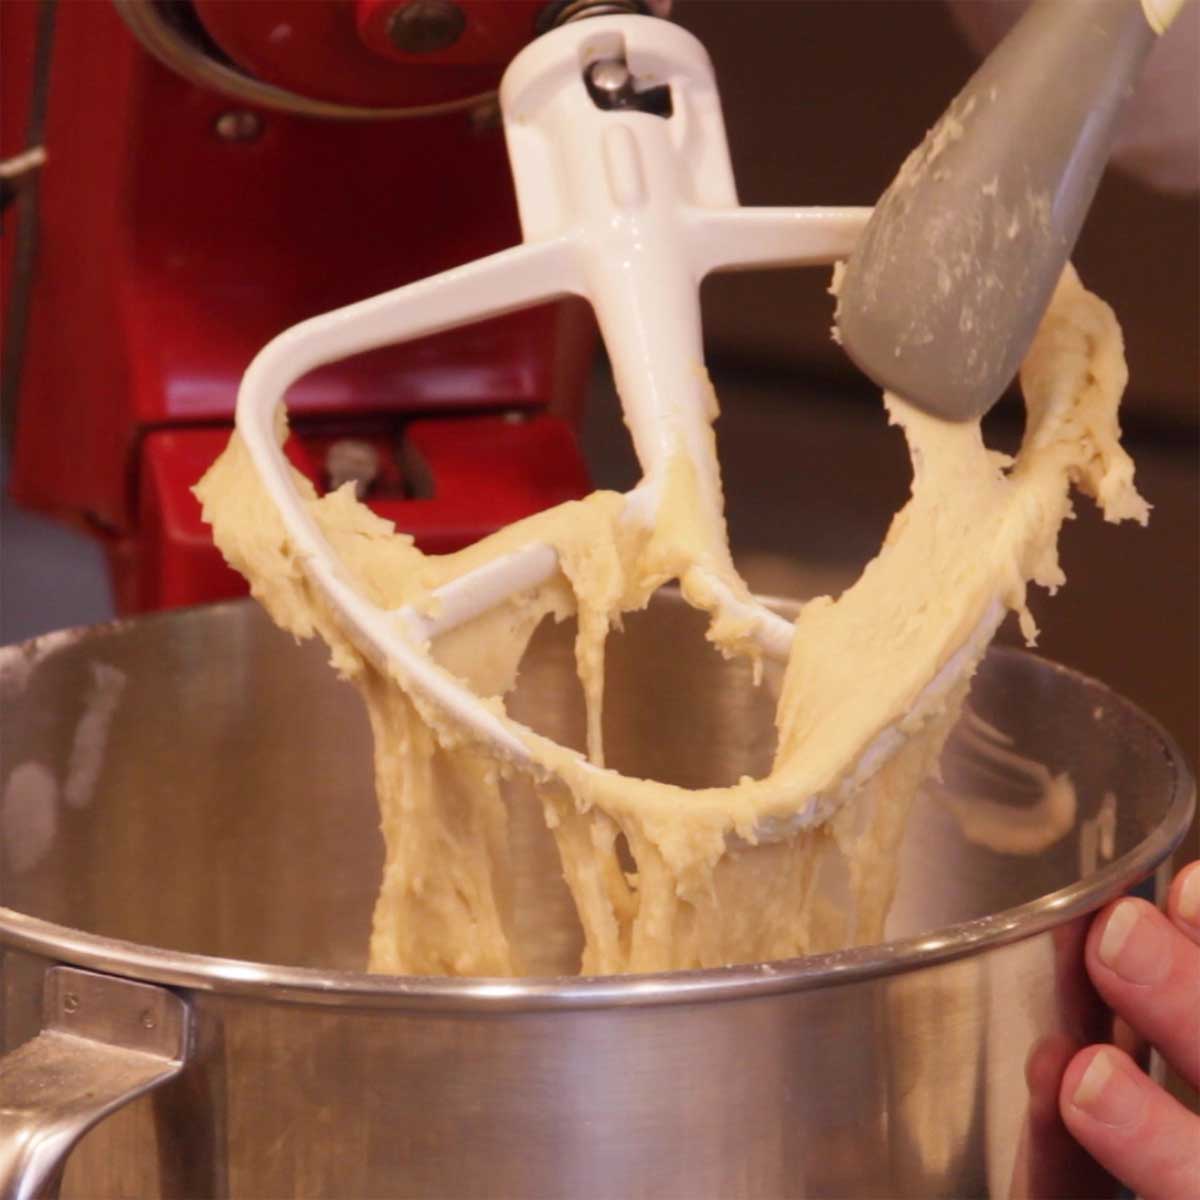
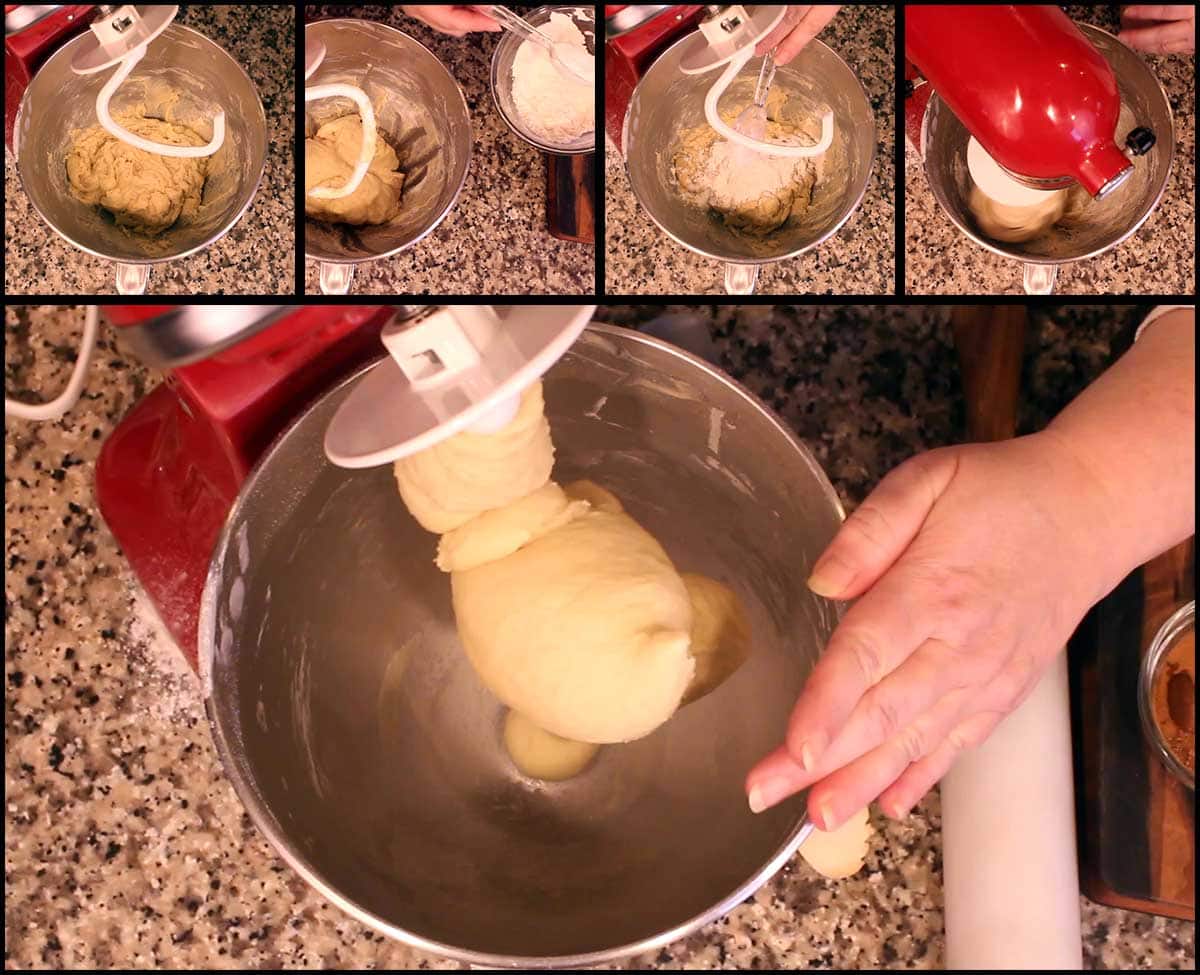
Remove the paddle attachment and switch over to the dough hook.
I wish I could be more specific about the amount of flour needed, but with dough it will vary each time you make it. In my test batches, I needed anywhere from 2 cups to 2¼ cups. You will have to use your judgement and only add as much as you need.
Knead the dough on medium speed for 5 minutes. Your dough should be nice and smooth and soft, but not sticky. Set on your clean work surface and let the dough rest for about 10 minutes.
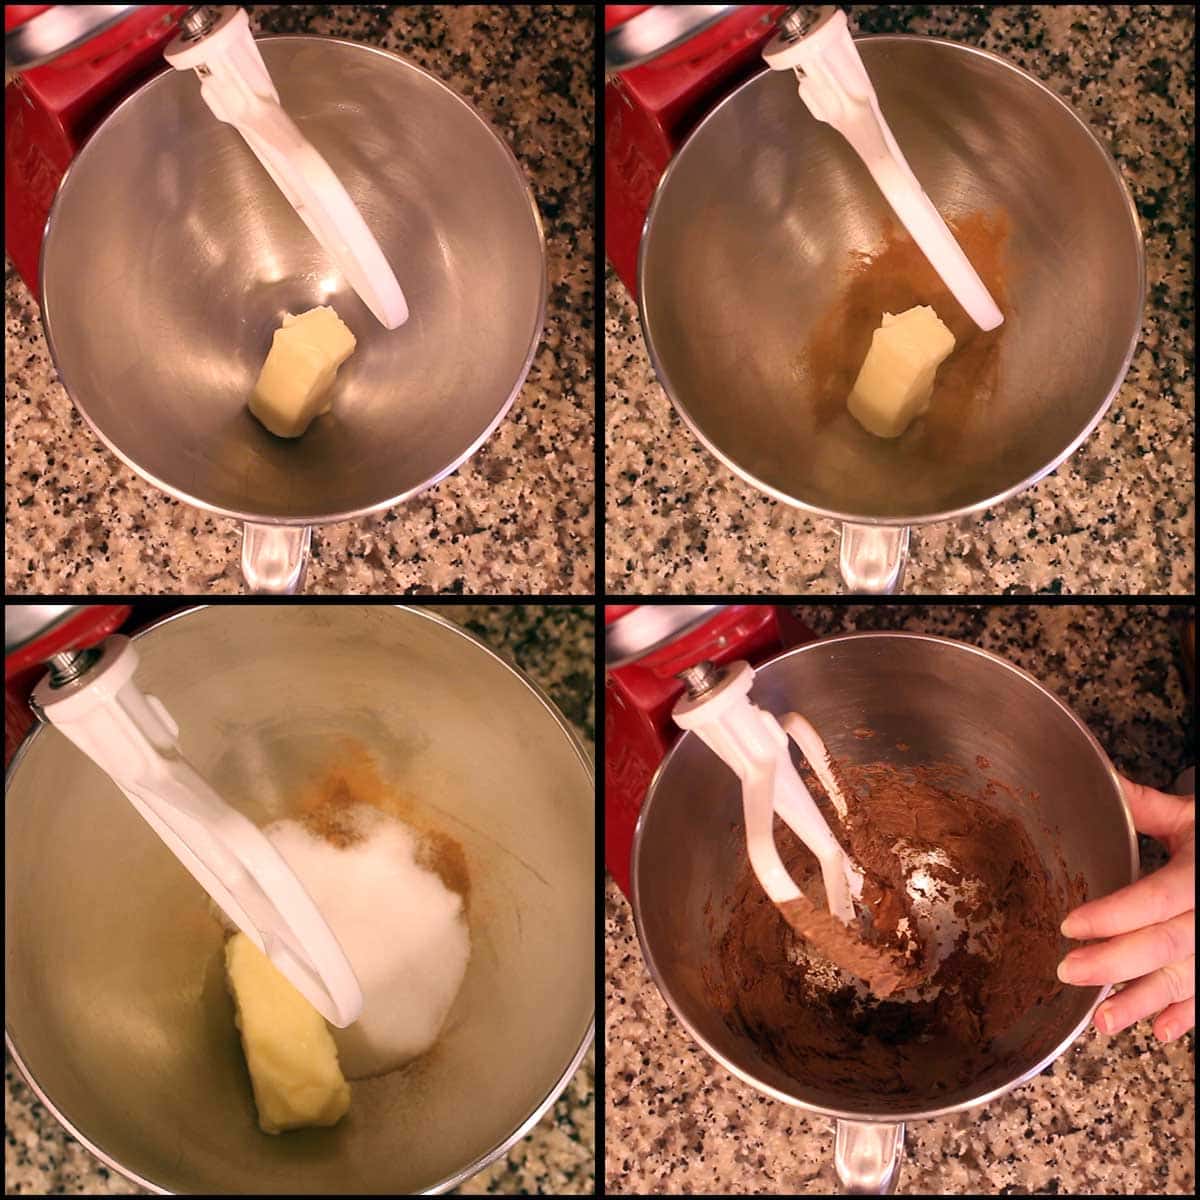
Clean and dry the bowl to the stand mixer and let's make the filling. Combine room temperature butter, ⅓ cup sugar, and spices in the bowl of the stand mixer. Use the paddle attachment to mix on medium speed until combined.
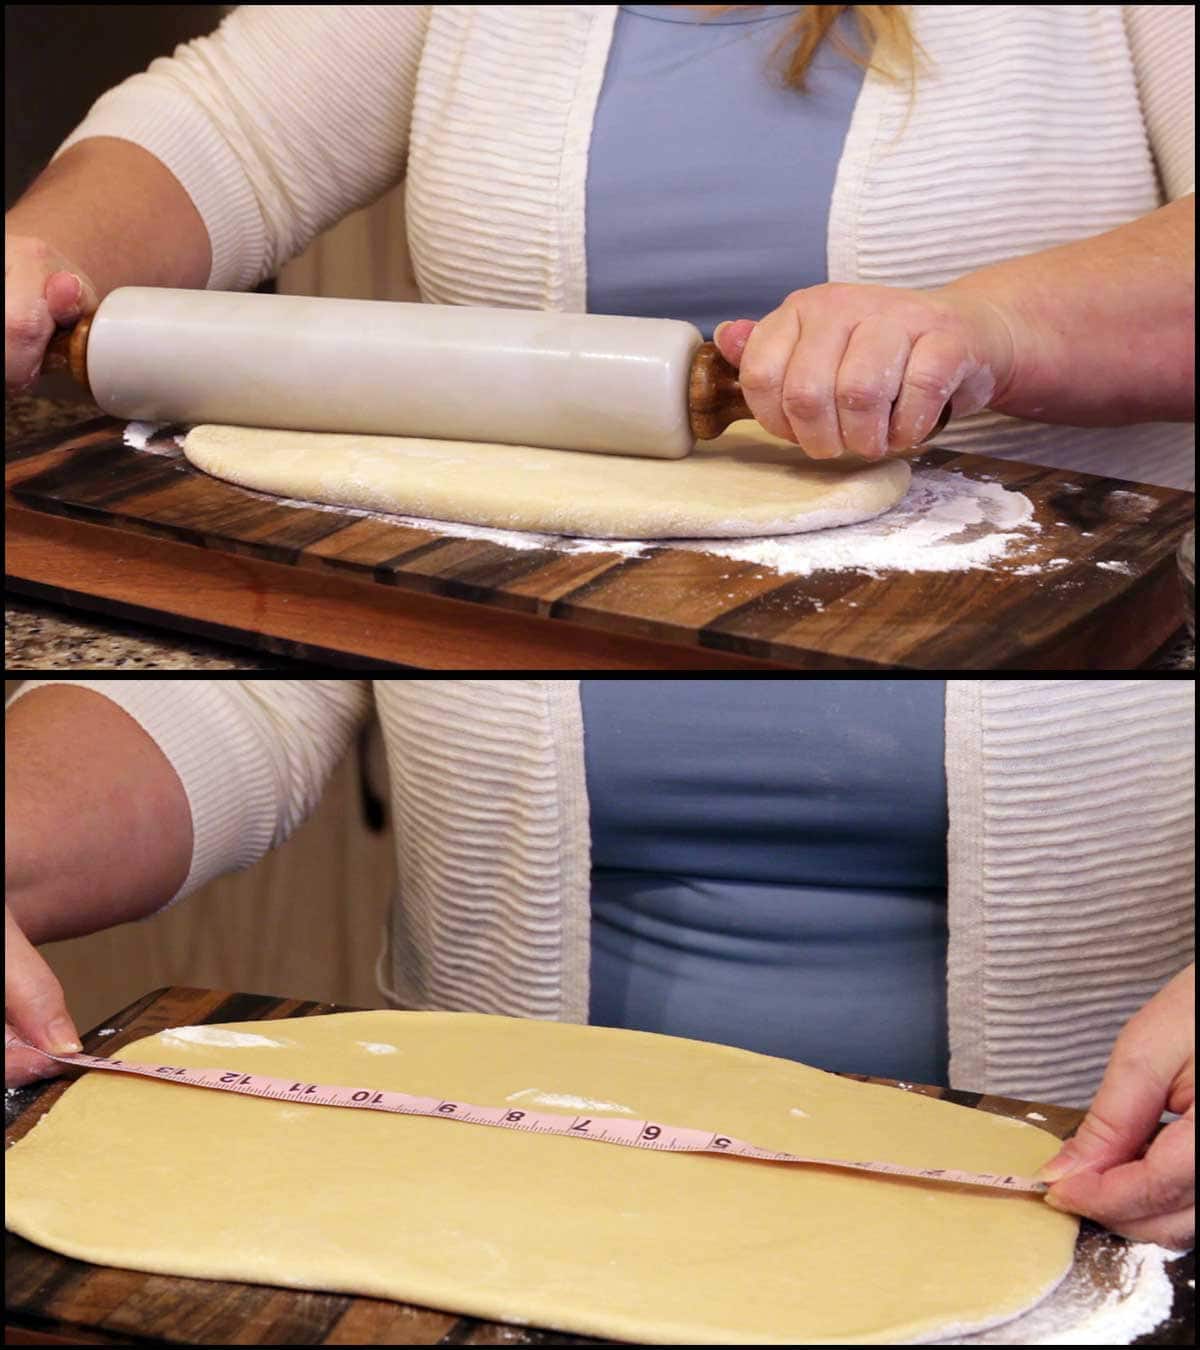
Roll out the dough on a floured, clean work surface. I used a large cutting board, but you can use an flat surface as long as it is at least 15" x 10".
The size you want the dough sheet to be is 14"x 9" and try to get it to an even thickness.
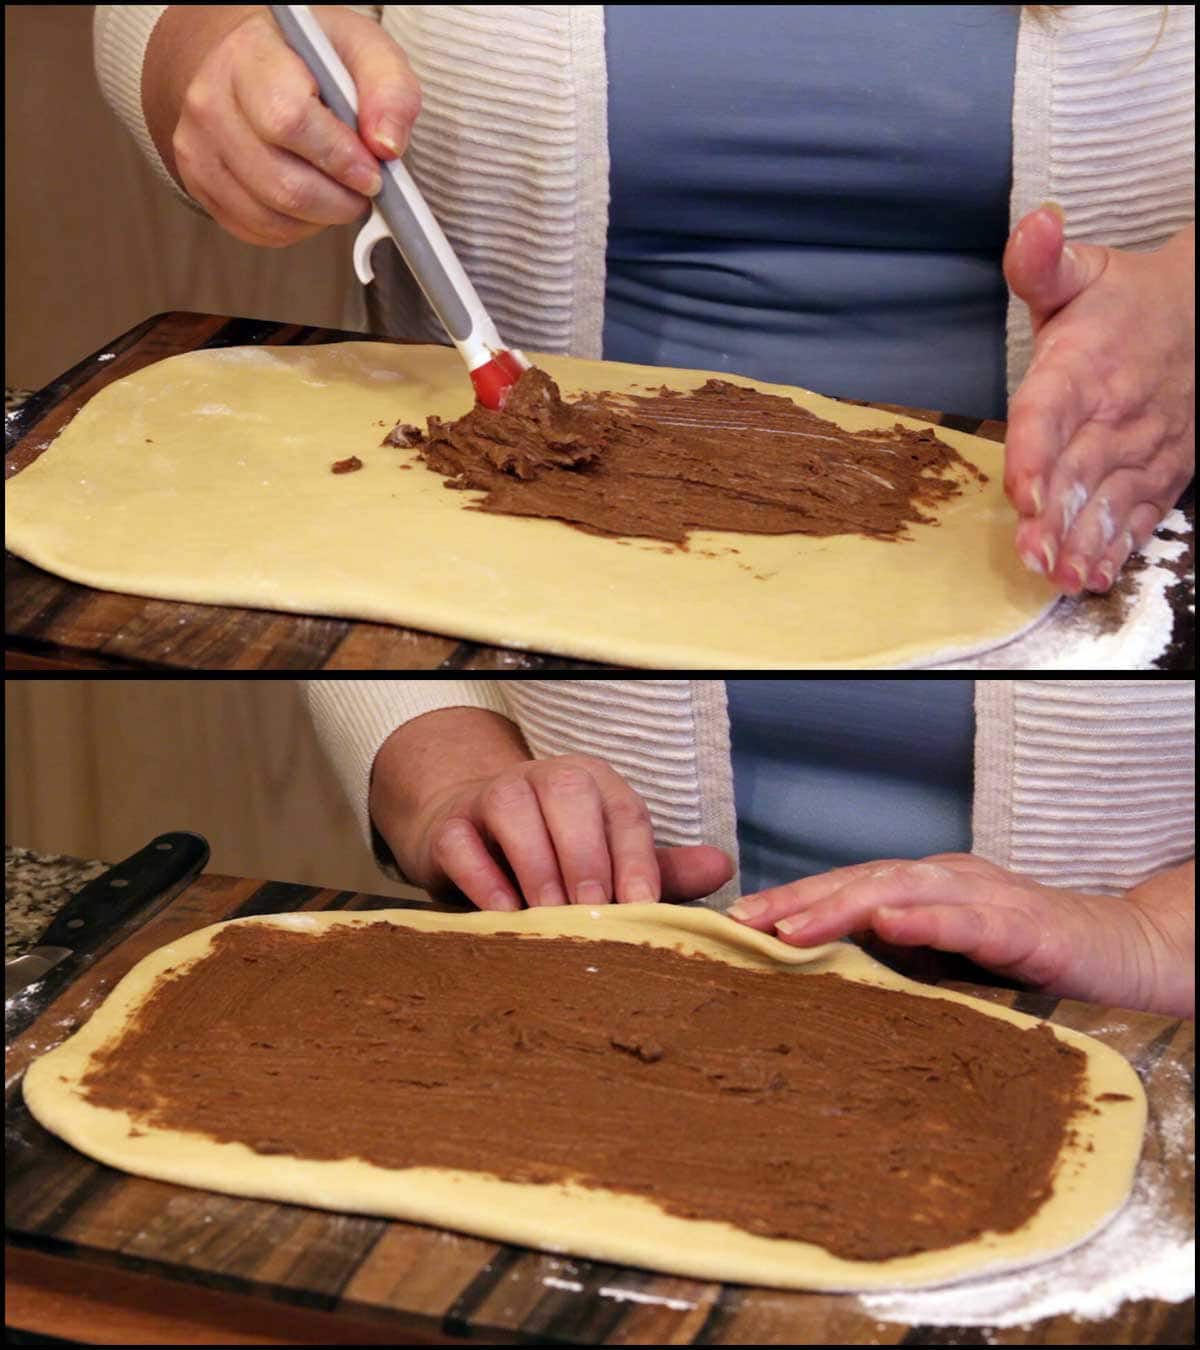
Once the dough is rolled out, spread the filling over the dough. I keep about ½" around the edges free from the filling so it doesn't leak out during baking.
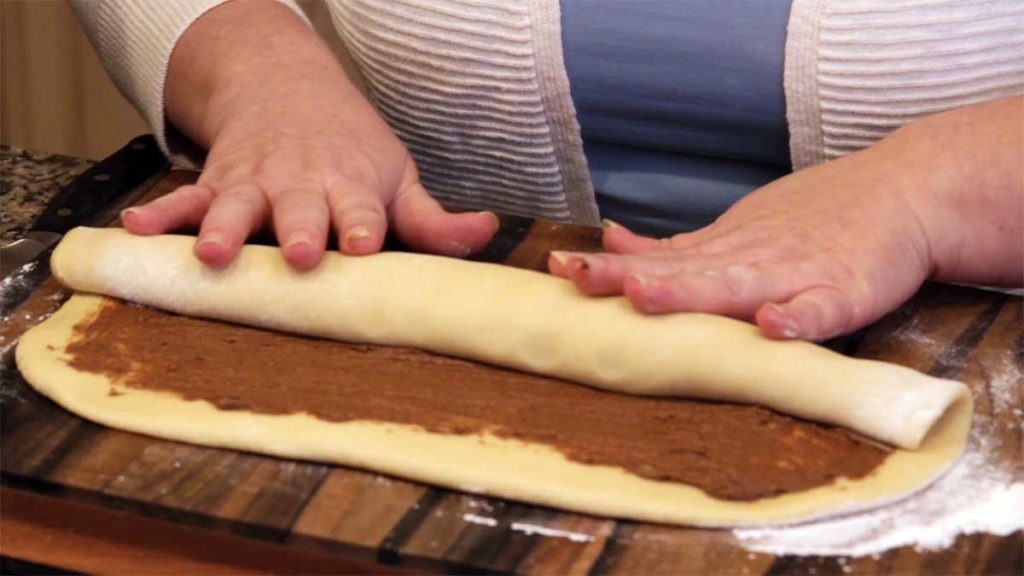
After the filling is evenly spread over the dough, begin to roll the dough into a log. Starting with the long side, tightly roll. Try to not to put too much pressure when rolling.
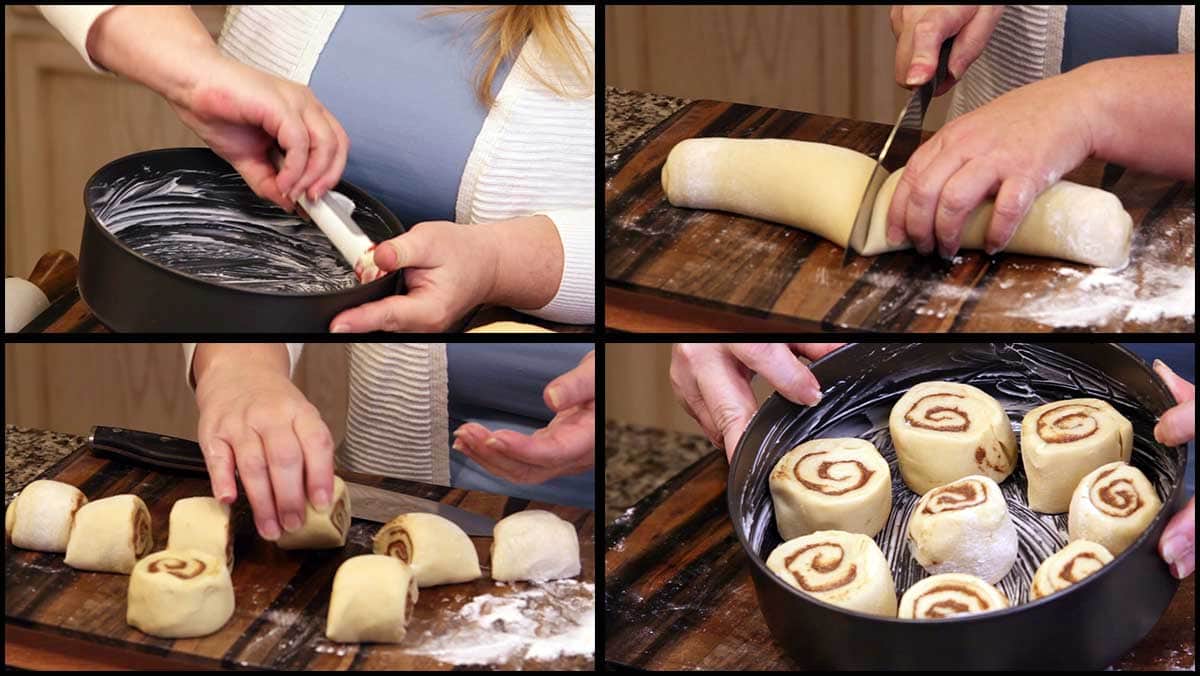
The easiest way to cut the rolls is to estimate where the middle is and cut the log in half with a very sharp knife. I use my (affiliate link)Chef's Knife from Pampered Chef and it works great!
Once you cut the log in half, cut each half in half. Then cut each of the 4 pieces in half and you will have 8 rolls. Do not worry if they aren't all exact. The ends are usually a little smaller because the log tends to taper.
Butter your pan well. I use my (affiliate link)Silicone Chef's Brush for this and so many other things! If you don't have a pastry brush that is silicone, get one and you will love it!
Arrange the rolls about ½" apart. I put 7 around the outside and 1 in the middle. Try to put the smallest roll in the middle since it has the hardest time getting fully done.
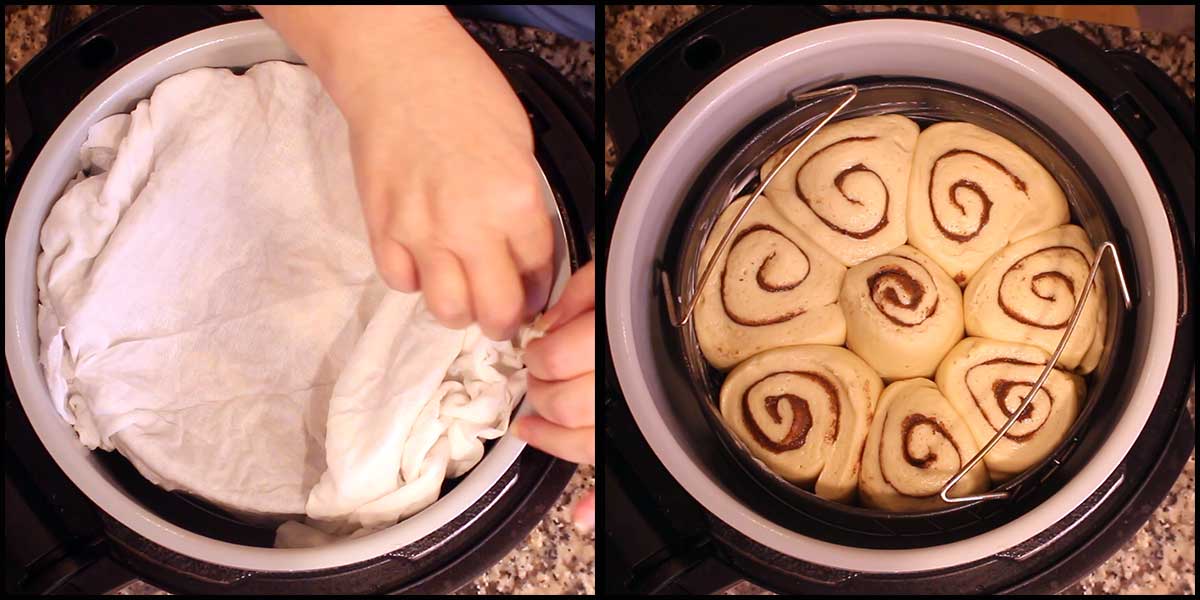
Cover the dough with a damp cloth. I use a (affiliate link)flour sack that I cut down in size for this and they work fantastic. The are also great for straining yogurt.
Place the covered pan on the rack in the low position and put it into the inner pot of the Ninja Foodi. Put the TenderCrisp lid down and select dehydrate on 105℉/40℃. Dehydrate to proof the cinnamon rolls for 1 hour. If you don't have the dehydration function, see the section above on how to do this using bake/roast.
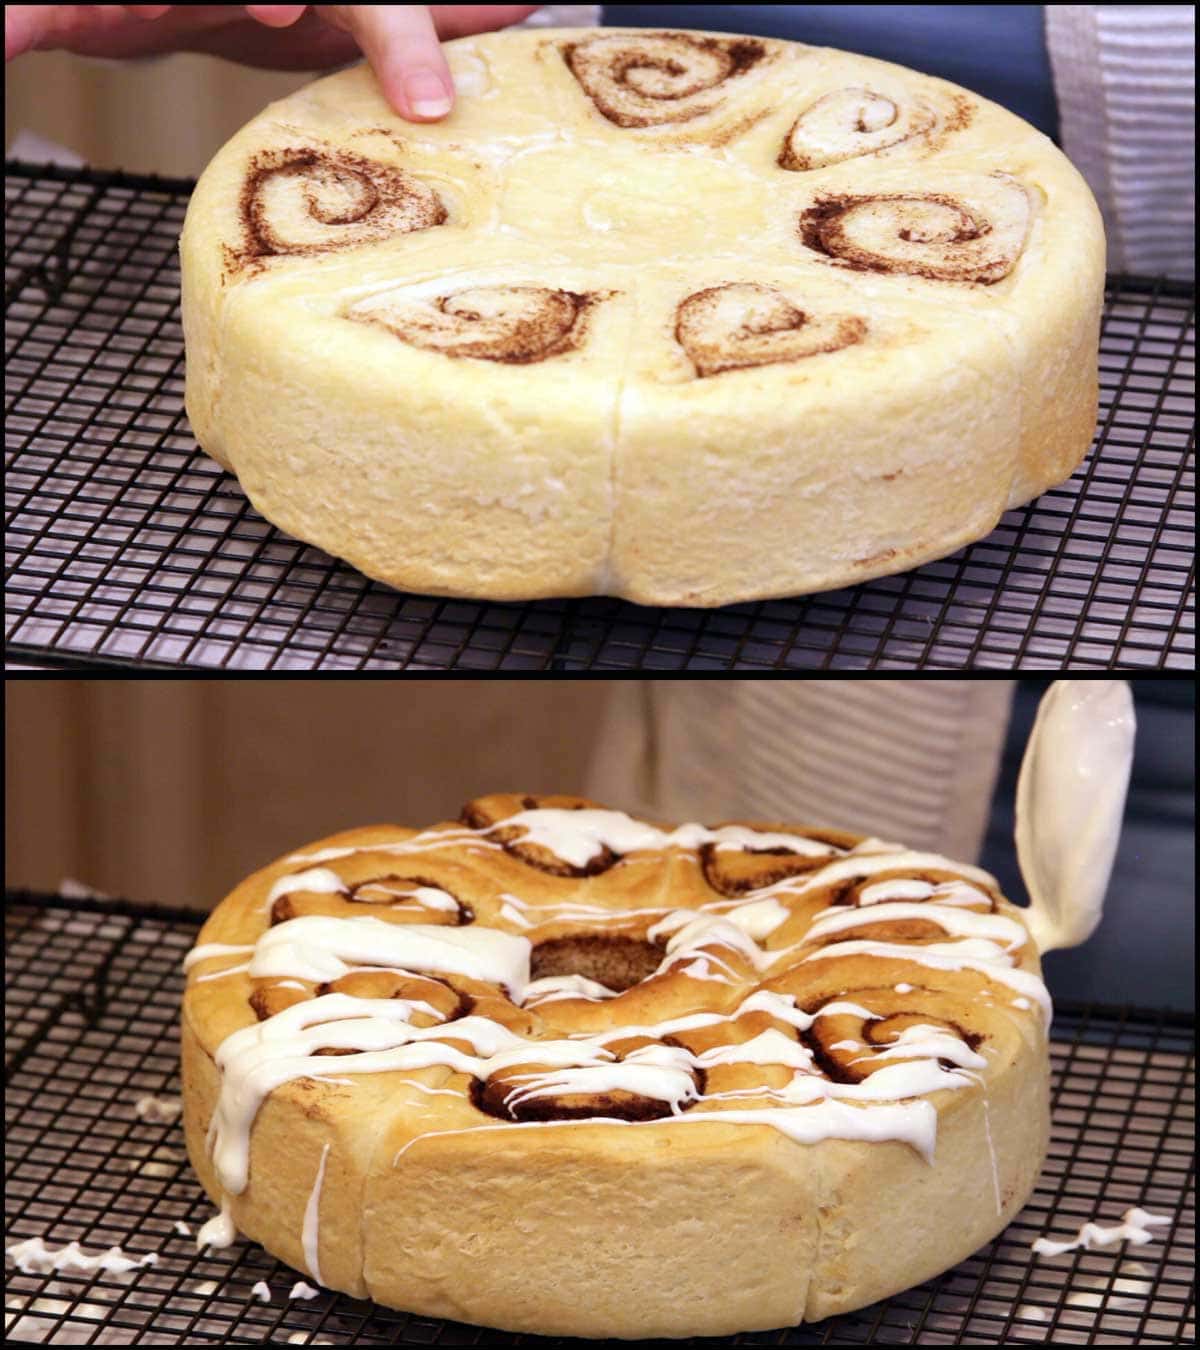
The rolls will rise up and come together as they proof. The picture below is what they should look like after 1 hour. If for some reason, they are not joined together yet, try proofing longer.
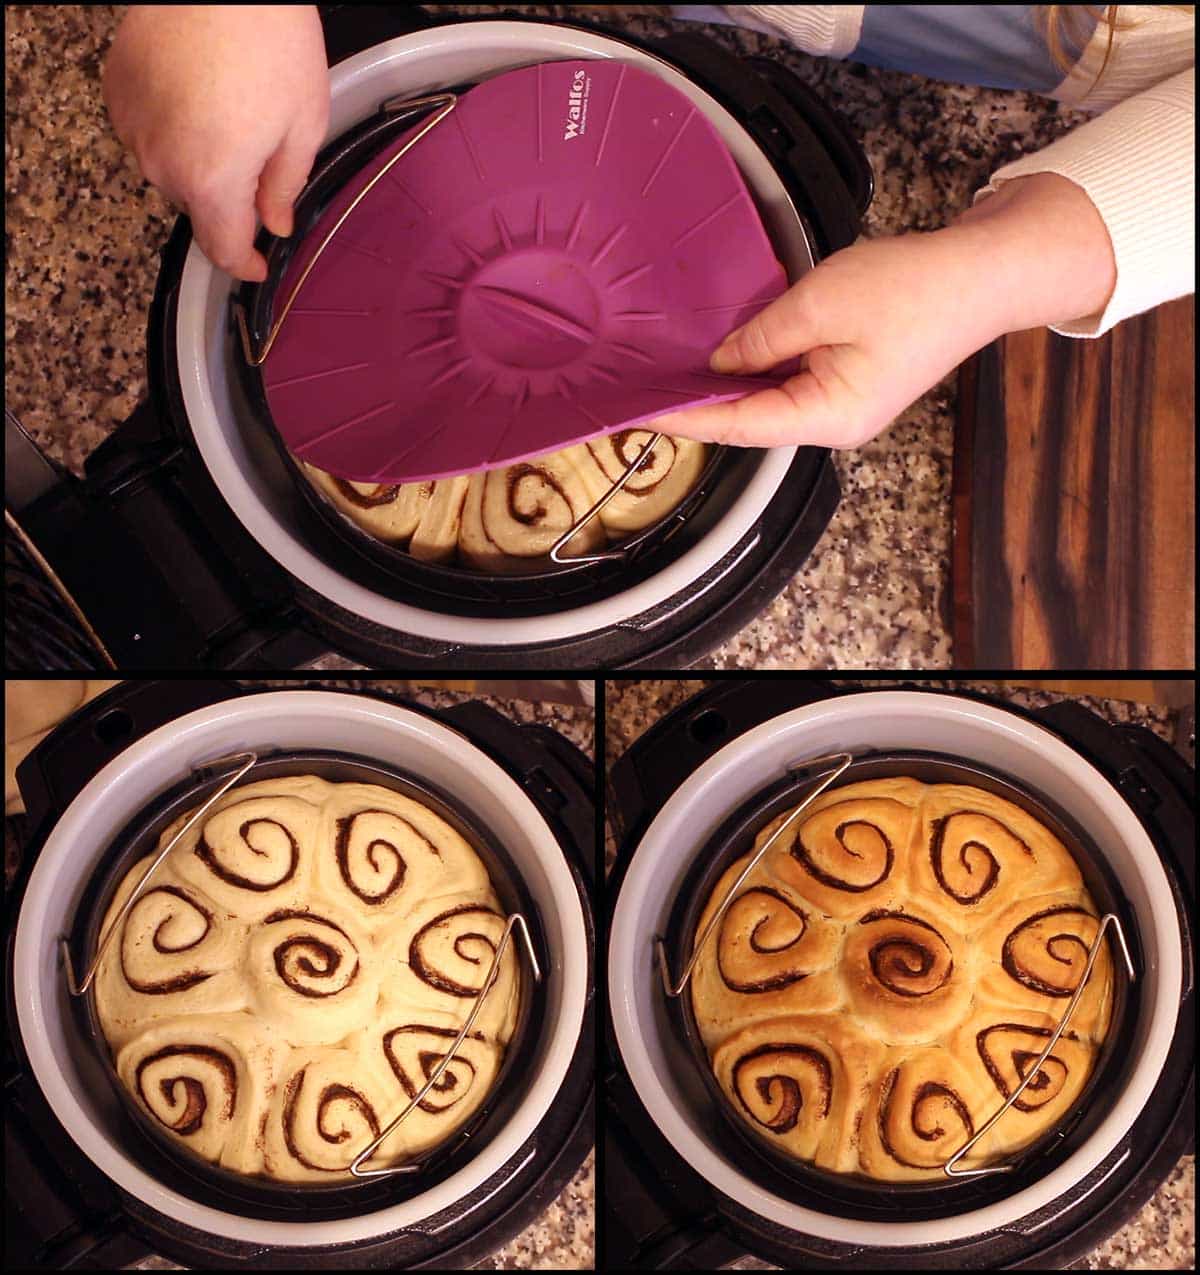
I leave the pan and rack right in the Ninja Foodi and cover with a (affiliate link)Silicone Cover, but you can also cover with foil. You do want to cover for the first 30 minutes of cooking because the tops will get too brown if you don't.
Select the bake/roast function and bake on 300℉/150℃ for 35 minutes. At the 30-minute mark, check on your rolls and decide if you want to uncover them to brown up the tops for the last 5 minutes or if you want to leave them covered. This is completely up to you. I usually uncover them because I like the tops to get a little brown and crisp.
Once the cinnamon rolls are done, allow them to cool on a rack, in the pan for at least 10 minutes. This is a perfect time to make up the glaze!
I decided to use a cream cheese glaze instead of the straight powdered sugar/water glaze because I just don't like the intense sweetness of that type of glaze. You can glaze the rolls with any type of glaze you want, but if you want to try mine, I'll bet you'll love it!
Simply combine room temperature cream cheese with cream or half and half, add a little orange extract and some powdered sugar and you are done! I used my (affiliate link)Ninja Foodi Cold & Hot Blender to warm the cream cheese and cream, then added the remaining ingredients and pulsed.
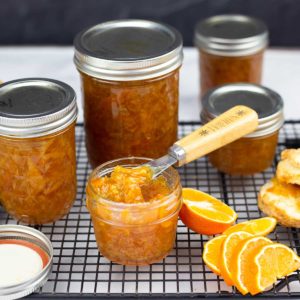
I have also substituted the orange extract and powdered sugar with 1 tablespoon of my Homemade Orange Marmalade and it was fantastic!
It was so easy! If you don't have the NF Cold & Hot Blender, you can warm the cream cheese and cream/half and half in the microwave for about 15-30 seconds and then blend with the other ingredients in a regular blender or in the bowl of your stand mixer.
Once the pan with the cinnamon rolls has cooled enough to handle without gloves, your rolls are ready to be removed from the pan. The easiest way I've found to do this is to put a cooling rack on top of the pan and flip the whole thing over. The rolls will release. Then, gently flip them over.
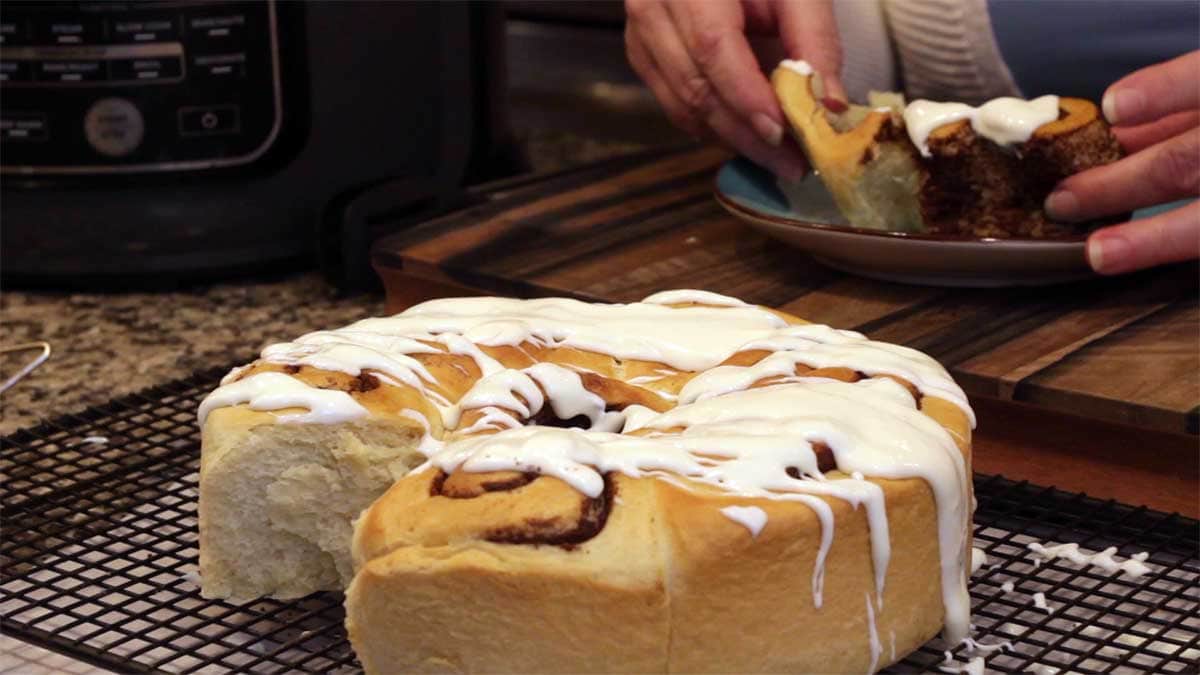
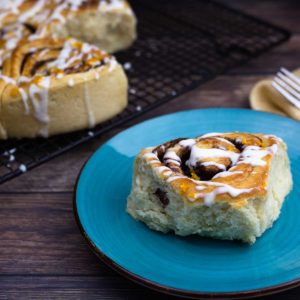
Drizzle or spread the glaze over the rolls.
Serve & Enjoy!
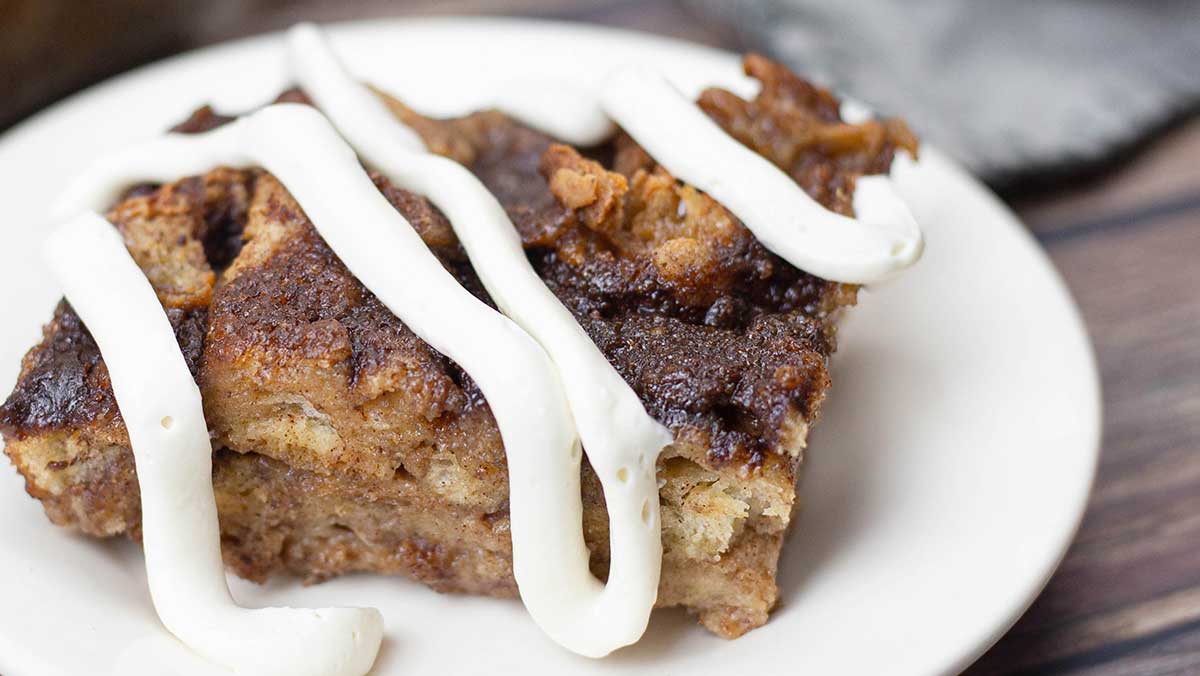
If you have any cinnamon rolls left over, freeze them until you want to make this delicious cinnamon roll bread pudding!
Homemade Cinnamon Rolls in the Ninja Foodi
Equipment
- Ninja Foodi Pressure Cooker & Air Crisper
Ingredients
Cinnamon Roll Dough
- ¼ cup sugar
- 1 large egg
- 2 tablespoon warm water 110°
- 1 tablespoon yeast
- ½ cup half and half
- 4 tablespoon butter salted
- 2 cups bread flour sifted, plus more for cutting board or for the dough.
- ¼ teaspoon sea salt fine grind
Cinnamon Roll Filling
- 5 tablespoon butter salted, room temperature
- ⅓ cup sugar
- 1½ tablespoon cinnamon
- ½ teaspoon nutmeg
- ¼ teaspoon cloves
Pan Prep
- 2 teaspoon butter salted or unsalted, room temperature
Cinnamon Roll Glaze
- ¼ cup heavy cream
- 4 ounces cream cheese
- ¼ teaspoon orange extract
- 2-4 Tbsp powdered sugar
Would you like to save this recipe?
Instructions
Cinnamon Rolls
- Proof the yeast by combining warm water (110°-115°F) with the yeast and allow it to sit for 5-10 minutes. It will bubble and foam.
- Warm the butter and the half and half in the microwave, on the stove, or in the inner pot. You only need to get it warm enough to melt the butter. Let it sit while the yeast proofs
- Add sugar and egg to the bowl of your stand mixer with the paddle attachment and mix on low speed.
- Add the sifted bread flour and salt to the sugar and egg mixture and mix on low speed for about 1 minute.
- When the butter/half and half mixture has cooled down some (it needs to be less than 115℉) add it to the bowl of the stand mixer. Mix on low and then add the proofed yeast.
- Mix on low for about 1 minute. Your dough should be soft and tacky, but not sticking to your fingers. If your dough is too wet, add 1 tablespoon of extra flour at a time until it is the right texture. (see post for more details)
- Replace the paddle with the dough hook and turn the mixer on medium speed for about 5 minutes. The dough should be very soft, and a little tacky, but does not stick to your fingers. Form the dough into a ball and set it on your cutting board or work surface to rest for 10 minutes. Clean and dry the bowl of the stand mixer
- Combine 5 tablespoon of butter, spices, and ⅓ cup sugar in the bowl of the stand mixer. Use the paddle attachment to mix on medium speed until well combined.
- Butter the Ninja Foodi All Purpose Pan.
- Flour a work surface or cutting board that is at least 14" x 9" in size. Place the dough in the center and use a rolling pan to roll out the dough to about 14" long and 9" wide. Try to make sure your dough is even in thickness.
- Spread the filling over the surface of the dough up to ½" from the edges. Roll the dough, starting at the long side, into a log. Cut 8 equal rolls. The easiest way to do this is to estimate the middle and cut the log in half. Then cut each half in half again, then cut those pieces in half. That will give you 8 equal size rolls.
- Arrange the rolls in the prepared pan, leaving about ½"-1" of space between them. Put a smaller roll (one of the ends usually) in the center. They will come together as they proof. Cover with a moist towel and place on the rack in the low position. Place the rolls into the Ninja Foodi and proof on dehydrate at 105°F for 1 hour.
- Remove the moist towel and cover with foil or a silicone cover. I leave the pan right in the Foodi while doing this. No need to preheat, just put the TenderCrisp lid down and select the bake/roast function on 300℉/150℃ and bake for 35 minutes. I check them at the 30 minute mark and uncover to brown the tops. This is optional.
- Remove the pan from the Ninja Foodi and allow to cool in the pan while you make the glaze.
Glaze Instructions
- Heat the cream and the cream cheese in the Ninja Foodi Cold & Hot Blender on high until the cream starts to bubble slightly. Turn the heat off. *you can do this on the stove or in the microwave and then blend it up if you don't have the Cold & Hot Blender.
- Add in the orange extract and 2-4 tablespoon of powdered sugar. Pulse blend until smooth.
- When you can comfortable touch the pan that the cinnamon rolls are in, they are ready to be glazed. Remove the rolls by flipping them over onto a platter or cooling rack. Turn them right side up and glaze.
- Serve & Enjoy!
Notes
Nutrition
About the Recipe Author, Louise Long
Louise is a full-time recipe creator and food blogger @ The Salted Pepper. She has over 30 years of experience with cooking and recipe development. She owned a restaurant for several years and was a full-time RN until retiring to blog full-time.

She published her first cookbook in the Fall of 2018 and is very interested in writing several more.
Louise is also the creator of an online Ninja Foodi Pressure Cooking Course with over 100 instructional step-by-step videos. People absolutely rave about the course and all the value they have received from it.
Louise has several very active Facebook groups that help people with the basics of cooking and learning more about the appliances they love.
Ninja Foodi Pressure Cooker & Air Crisper 101
Ninja Woodfire Outdoor Grill & Smoker
Louise is also a YouTube creator and you can find most of her recipes in video format on The Salted Pepper YouTube channel.
She is very responsive to messages and eager to help in any way she can. Get more Information about Louise & contact information
I WOULD LOVE TO SEE WHAT YOU ARE COOKING UP IN YOUR KITCHEN! TAG ME @THESALTEDPEPPER ON YOUR FAVORITE SOCIAL MEDIA PLATFORM WHEN YOU MAKE A DISH!
BE SURE TO FOLLOW THE SALTED PEPPER RIGHT HERE ⇓⇓⇓⇓⇓
Lesley says
Hi Louise, could i add some raisins or sultanas to the recipe
Louise says
Absolulely!
Dawn says
Can you make the dough (or the whole log) the night before? Would I just need to get the dough bake to room temperature if refrigerated over night?
Dawn says
The dough back to room*
Louise says
You can make the dough, let it rise and refrigerate it. Bring it out for about 30 minutes and then form the rolls. Or, you can make the rolls and put them in the pan, cover with plastic wrap and do the second rise in the fridge overnight. Bring them out for about 30 minutes before baking.
Jodi Chase says
Awesome it was the best ! the bread was cooked but so moist without any uncooked this is a first for me, Thank you Louise for all your perfect recipes, I'm becoming a cook in my later days and am so enjoying it. I love that they were also not so sweet which made it melt in your mouth and so much more enjoyable.
Louise says
I'm so glad you liked them!
Christine says
Is the 2 tablespoon water, 1 tablespoon yeast correct? I tried 3 times using this ratio, and when I stirred the mixture, it turned into a paste. The yeast was just bought the day before. After wasting allot of yeast, I just guestimated. Also, the cooking time; i covered with foil and cooked for 30 minutes, uncovered and cooked for another 10 (@ 300), and they were doughy when cut.
Louise says
That's what I used and it worked out fine, but you can always use more liquid in the yeast, just make sure to subtract that same amount from the recipe. In this recipe, I would use the 2 Tablespoons of water and add in a little extra of the half and half if you need to. Also, if your yeast turns to a paste in the future, you don't have to waste it, just add a little extra liquid and it will be fine. The cooking time really depends on the pan you use and the size of your rolls, so it's never going to be exact each time. They also continue to cook as they cool, so if you cut into them right away, they might be a little doughy. In order to help you troubleshoot, I would really need to know the type of pan you used and how many rolls you put in the pan. Also, what size Ninja Foodi did you use. I hope you popped them back in the Foodi and cooked them a little longer and were still able to enjoy them!
Christine says
Thank you for your reply. I have an 8 quart Foodi. I used the dark Ninja Foodi round pan. I tossed the yeast, and didn't cook them any longer, I didn't know they weren't done till I cut into them. At that point I was over it. Thanks again.
Cassandra says
Does it depend which type of yeast you use?