
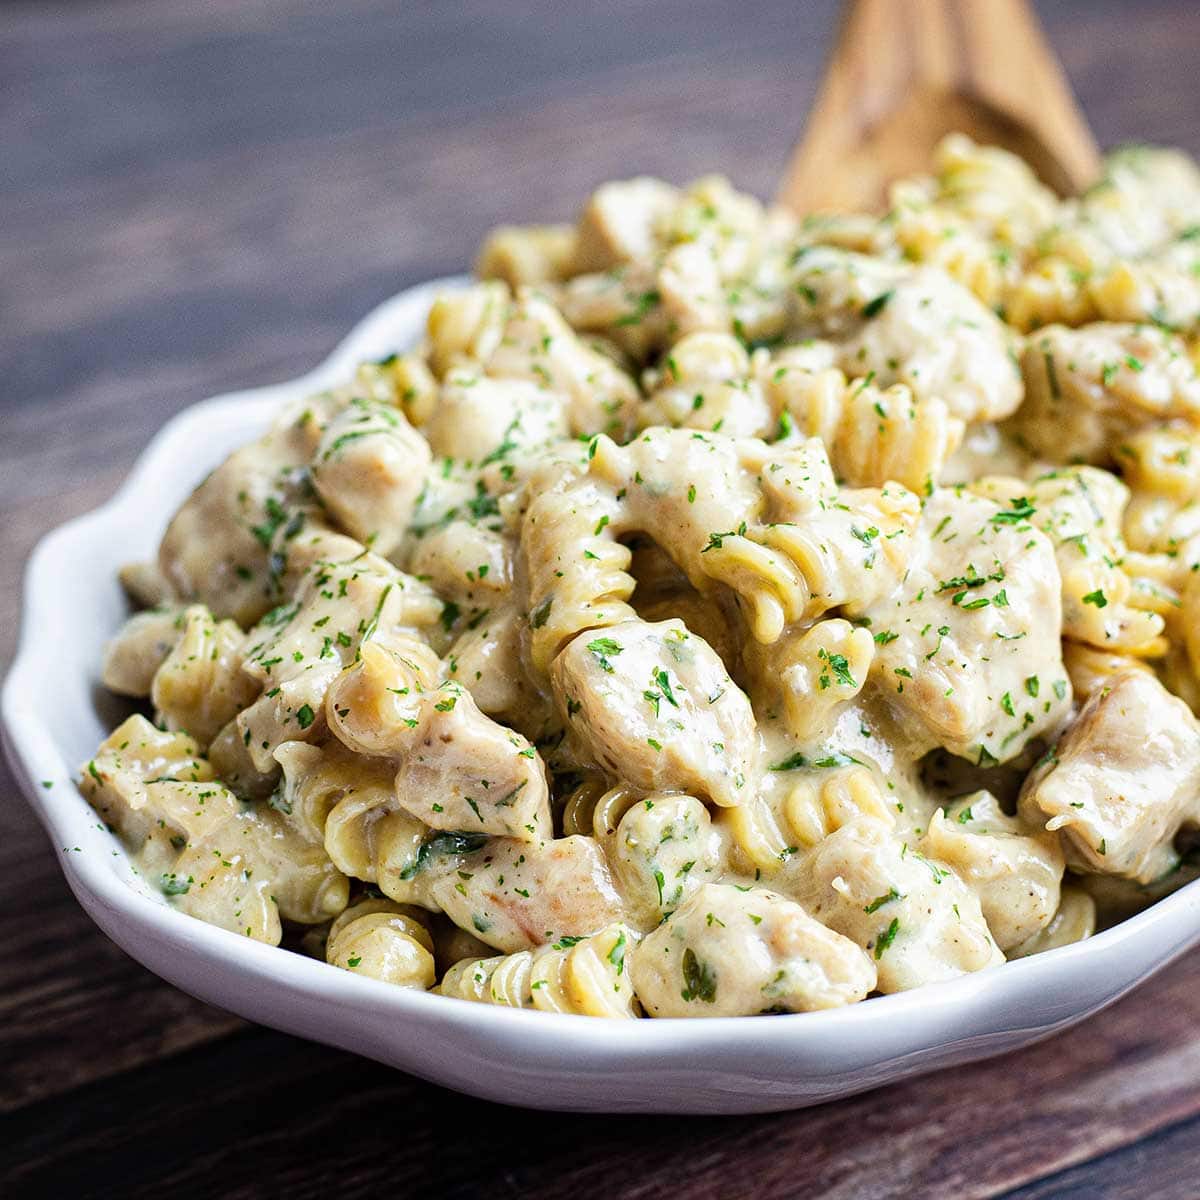
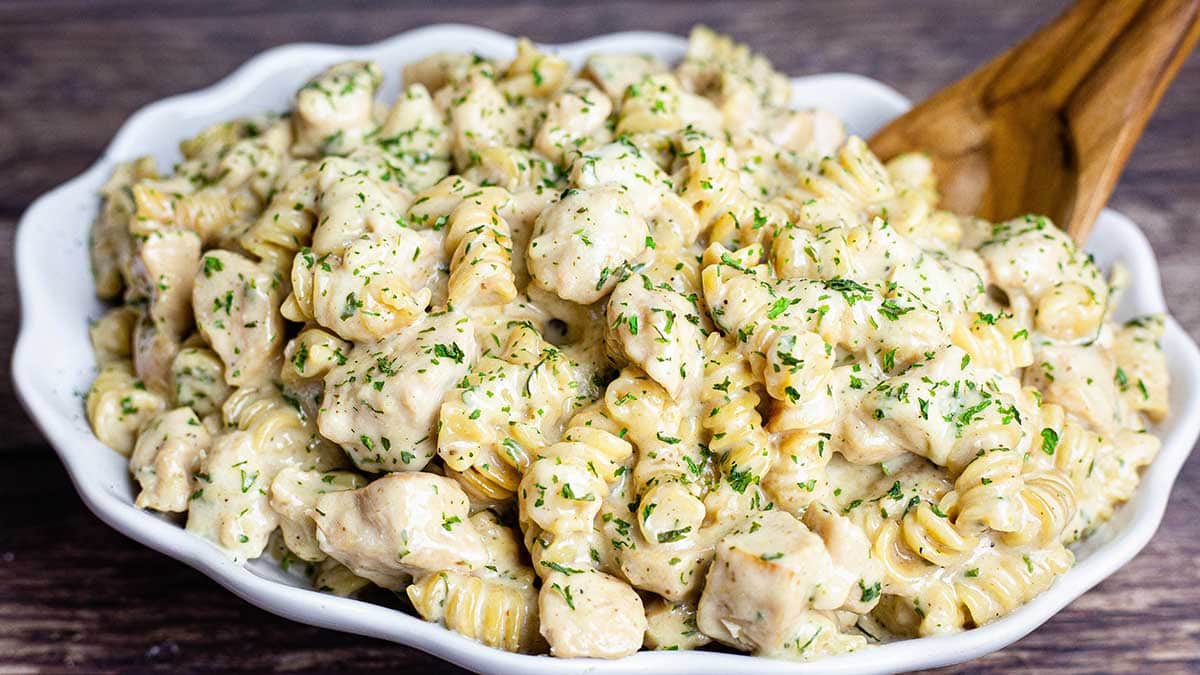
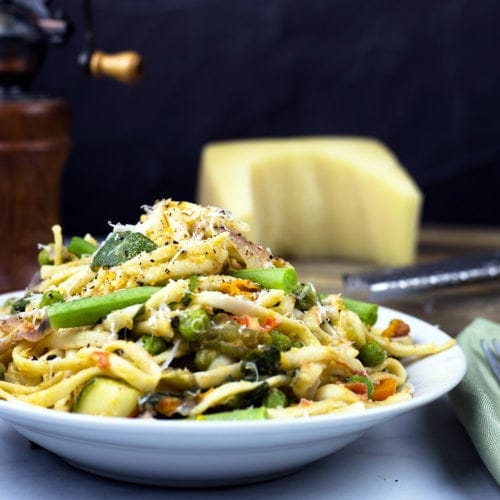
Garlic Parmesan Chicken Pasta is one of the easiest meals you can make in your pressure cooker! It's ready in no time, uses fresh ingredients and it's bursting with flavor! The combination of three types of garlic along with the parmesan cheese and perfectly cooked chicken will be a hit with the entire family and it's a beautiful dish that is perfect for your garlic-loving company!
If you don't have a pressure cooker, no worries! You can make this delicious recipe on the stove or in a slow cooker or crock pot! It only requires a few ingredients and lots and lots of garlic! In fact, I use 3 different preparations of garlic in this recipe and the result is a perfectly balanced dish full of garlic flavor without being bitter or overwhelming.
Would you like to save this recipe?
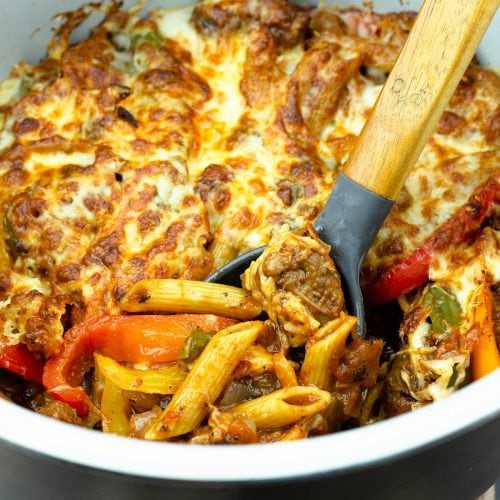
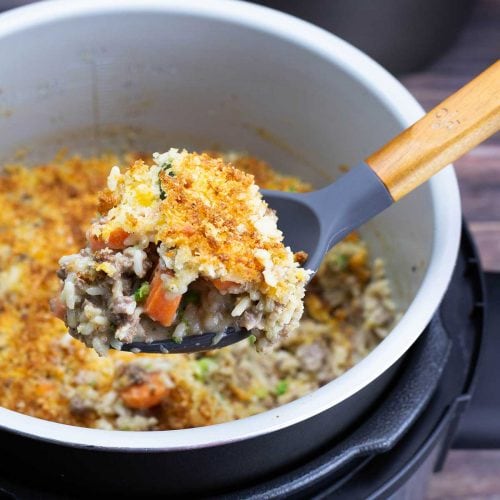
If you love one-pot meals like this one, check out these recipes for more inspiration!
Frequently Asked Questions
Yes, absolutely! Make sure it has completely cooled and then put into an airtight container or a freezer bag. You can reheat from frozen using steam on the Ninja Foodi or using slow cook on high with some additional cream or milk.
Can I double the recipe?
Yes, you can. I would double all of the ingredients and decrease the pressure cook time to about 2 minutes. Keep the delayed release time the same. Because you are adding more to the pot, the time to pressure will increase and this is cook time, so by lowering your PC time, you will avoid overcooking your pasta. If, after the initial PC time, the pasta isn't cooked enough for you, then you can use the sear/sauté on medium (stir frequently) until it is cooked the way you like it. You can also add more liquid, if needed. I would also consider decreasing the liquid amount by a few Tablespoons, but that is optional.
When a recipe calls for a bulb (or 4) of garlic, it is asking for the entire head of garlic which usually is made up of about 14-20 individual cloves. The cloves are inside the garlic bulb and they are individually wrapped in a paper skin.
Ingredients & Substitutions
Garlic, Garlic, and more Garlic!
This recipe is a garlic lover's dream come true. There are three different preparations of garlic used; garlic powder, minced garlic, and roasted garlic. I urge you to use all three for the most balanced dish. They all add garlic flavor, but in a different way. If you were to just add garlic powder or minced garlic, it would be a little flat tasting. The combination of all three brings the strong garlic flavor without being overpowering or bitter.
I really recommend using roasted garlic in this recipe and you can easily make it in your air fryer or in the Ninja Foodi Pressure Cooker & Air Crisper. Here are the recipes.
Ninja Foodi PC & AC Roasted Garlic
However, if you are short on time, you can skip the roasted garlic and instead put the whole cloves from 3-4 bulbs of garlic into the pressure cooker with the rest of the ingredients and pressure cook them. They will not have the same exact flavor as roasted, but will soften and sweeten up during the cooking process.
The minced garlic is used as that punch of garlic flavor and it's best if it's sautéed with the chicken. The more surface area of the garlic exposed, the more pungent the flavor, so minced garlic is going to be stronger than the roasted garlic and the garlic powder is going to be even stronger, but I promise they all work together to deliver the best garlic flavor in this recipe.
Pasta
I used rotini pasta that look like little corkscrews, but you can use any kind of pasta you have on hand. Other great choices that would not change the cook times in the recipe are; farfalle (bow ties), fusilli, rigatoni, or penne pasta. I will say that I LOVE the ridges in the rotini or fusilli for this recipe because it catches and holds the creamy garlic sauce perfectly! However, any type of short, thick pasta will work just fine. The pressure cooking time of 4 minutes with a 10-minute natural release for the rotini pasta produces an al dente pasta. If you like your pasta softer, add another minute of PC time.
Other Pasta Shapes: If you wanted to use elbow macaroni, I would decrease the pressure cooking time to 2-3 minutes and do a 5-minute natural release. Thinner and longer pastas like spaghetti would be okay, as well. The timing would depend on the pasta. If using Angel Hair, it cooks very quickly so you would want to make sure to sauté your chicken until it is almost done and then PC for zero minutes with a quick release.
Low Carb Options: I have not tested the recipe with any kind of keto pasta, so I don't know the timings. What you may want to do is cook the keto pasta how you normally do and then add in the pasta at the end. Make sure to decrease the liquid to just ¼ cup or just use sear/sauté to cook the chicken.
You can even skip the pasta if you want a low carb recipe that would be absolutely delicious over spaghetti squash or zucchini noodles. You don't even have to pressure cook the recipe, you can simply sauté the chicken until it's done and then add in the cheese and cream. I would also cut down on the butter to 4 tablespoon since you don't have the pasta to absorb it.
Gluten Free Pasta: You can absolutely use gluten free pasta, but you want to decrease your PC time to 2 minutes because it cooks faster.
Chicken
I use boneless skinless chicken breasts in the recipe, but you can use thighs or any cut of chicken or turkey as long as it's cubed or sliced so it cooks in the pressure cook time. You can even use leftover rotisserie chicken instead of raw chicken. I don't think the pressure cook time will dry it out, even though it's already cooked, but you can add it in at the end before you add the cream and cheese and use the sear/sauté on medium heat to warm it through.
You can also use shrimp instead of or in addition to the chicken. I would probably add the peeled and thawed shrimp at the end and let the residual heat cook the shrimp. If using frozen shrimp, it will probably be fine to add in before pressure cooking.
Or, skip the chicken and make it vegetarian! If you omit the chicken, switch the chicken stock to a vegetable stock or water and increase it to 1 cup since you won't have the liquid from the chicken.
Dairy
I use a combination of butter, parmesan cheese, and heavy whipping cream to make the parmesan sauce and it's absolutely delicious! I have seen other recipes that use an entire bottle of parmesan garlic sauce, but there is nothing like homemade! If you do want to use bottled sauce from the grocery store, I would taste it first and then adjust your garlic amounts based on how the sauce tastes.
Heavy Cream: you can use half and half or whole milk in place of the heavy cream, but the sauce won't be as thick. start off with less and add just enough to get the consistency you want. You can also use cream cheese if you prefer, but it will change the flavor considerably.
Parmesan Cheese: You don't have to use parmesan cheese, you can grate any hard cheese or combination of cheeses that you like. It won't be a parmesan cheese sauce, but that's fine!
Butter: I didn't skimp on butter in this recipe, but using all of it is absolutely not necessary. You can even use olive oil instead of butter to sauté the chicken and then omit the butter altogether. You can use salted or unsalted butter in this recipe, I used salted.
Other Ingredients
Liquids
If you wanted to add in some white wine, you absolutely can. Just substitute ¼ cup of the chicken broth or stock for white wine. I would use a pinot grigio, but you can use any white wine that you enjoy drinking.
You can also use water instead of chicken broth, but you may need to add some additional salt.
Vegetables
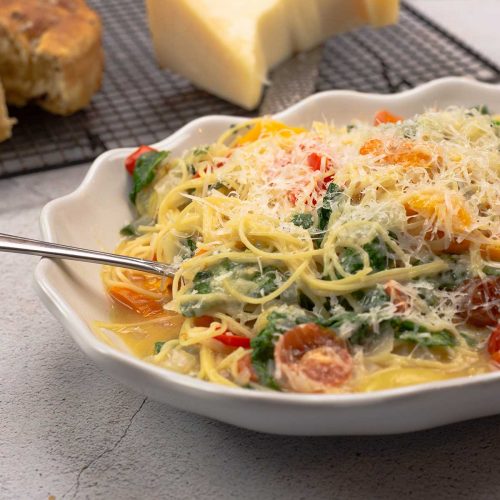
You can easily turn this into a complete one-pot meal by adding some fresh spinach at the end. Spinach cooks so quickly that the residual heat from the pasta and cream sauce will cook it in just a few minutes.
You can also add in mushrooms and they do great under pressure, so dump those right in with the chicken!
If you wanted to add in vegetables like broccoli, I would cook them separately and then add in at the end. The pressure cook time will be too long for broccoli and it will turn to mush.
Spices
I kept the spices quite simple in this recipe, but you can add anything you like. Italian seasoning would be great and if you like a little heat, consider adding a pinch or two of red pepper flakes.
I added some dried parsley at the end mostly for looks, so if you aren't adding in a green vegetable, adding that in does give a boost of color to the dish.
Stove Top or Crockpot Garlic Parmesan Chicken Pasta Directions
If you don't have an Instant Pot or Ninja Foodi pressure cooker, no worries! You can still make the recipe.
Stovetop Directions
Heat the oil or butter in a large skillet and add the seasoned chicken cubes when the pan is hot. Brown the chicken on both sides and add in the minced garlic. Sauté for 3-5 minutes over medium high heat, reduce the heat if the garlic is getting too brown. Add in the roasted garlic, pasta, and 2 cups of chicken stock or broth. Cover and adjust the heat until the liquid is simmering. Cook until the pasta is just done, maybe 10-12 minutes. Uncover and add grated parmesan cheese and cream.
You can also make the pasta separately on the stove and cook pasta according to the directions. Then toss the pasta in with the cooked chicken and garlic. Add the cream and cheese and keep on low heat until the cheese has melted and the sauce has warmed through.
Slow Cooker or Crock Pot Directions
Brown the seasoned chicken chunks in oil either on the stove or in your slow cooker if it has that option. Add in the minced garlic and sauté for a few minutes. Add in the cloves from the roasted garlic and then the pasta.
Since you are slow cooking the pasta, you will have more evaporation than when pressure cooking and will need at least 1½ cups of chicken broth or stock. The amount needed really depends on the style of slow cooker you have. For example, there is less moisture loss when using the Ninja Foodi Pressure Cooker & Air Crisper with the pressure lid on slow cook than there is with my stand-alone slow cooker. I would start out with 1½ cups and check on it after about 1-2 hours and see how it's doing. Add more liquid if needed.
Cook on high for 1-2 hours or until the pasta is cooked to your liking and most of the liquid has been absorbed OR cook on low for 3-4 hours.
When the pasta is cooked to your desired texture, add in the cheese and the cream. Stir and Serve!
How to Make Pressure Cooker Garlic Parmesan Chicken Pasta
Prep
The first thing to do, if you haven't already, is roast the garlic. You can do this in the oven or in your air fryer (recipe link).
Cut the chicken breasts into 1" cubes.
Grate the parmesan cheese.
Mince the raw garlic and gather the rest of your ingredients.
Sauté
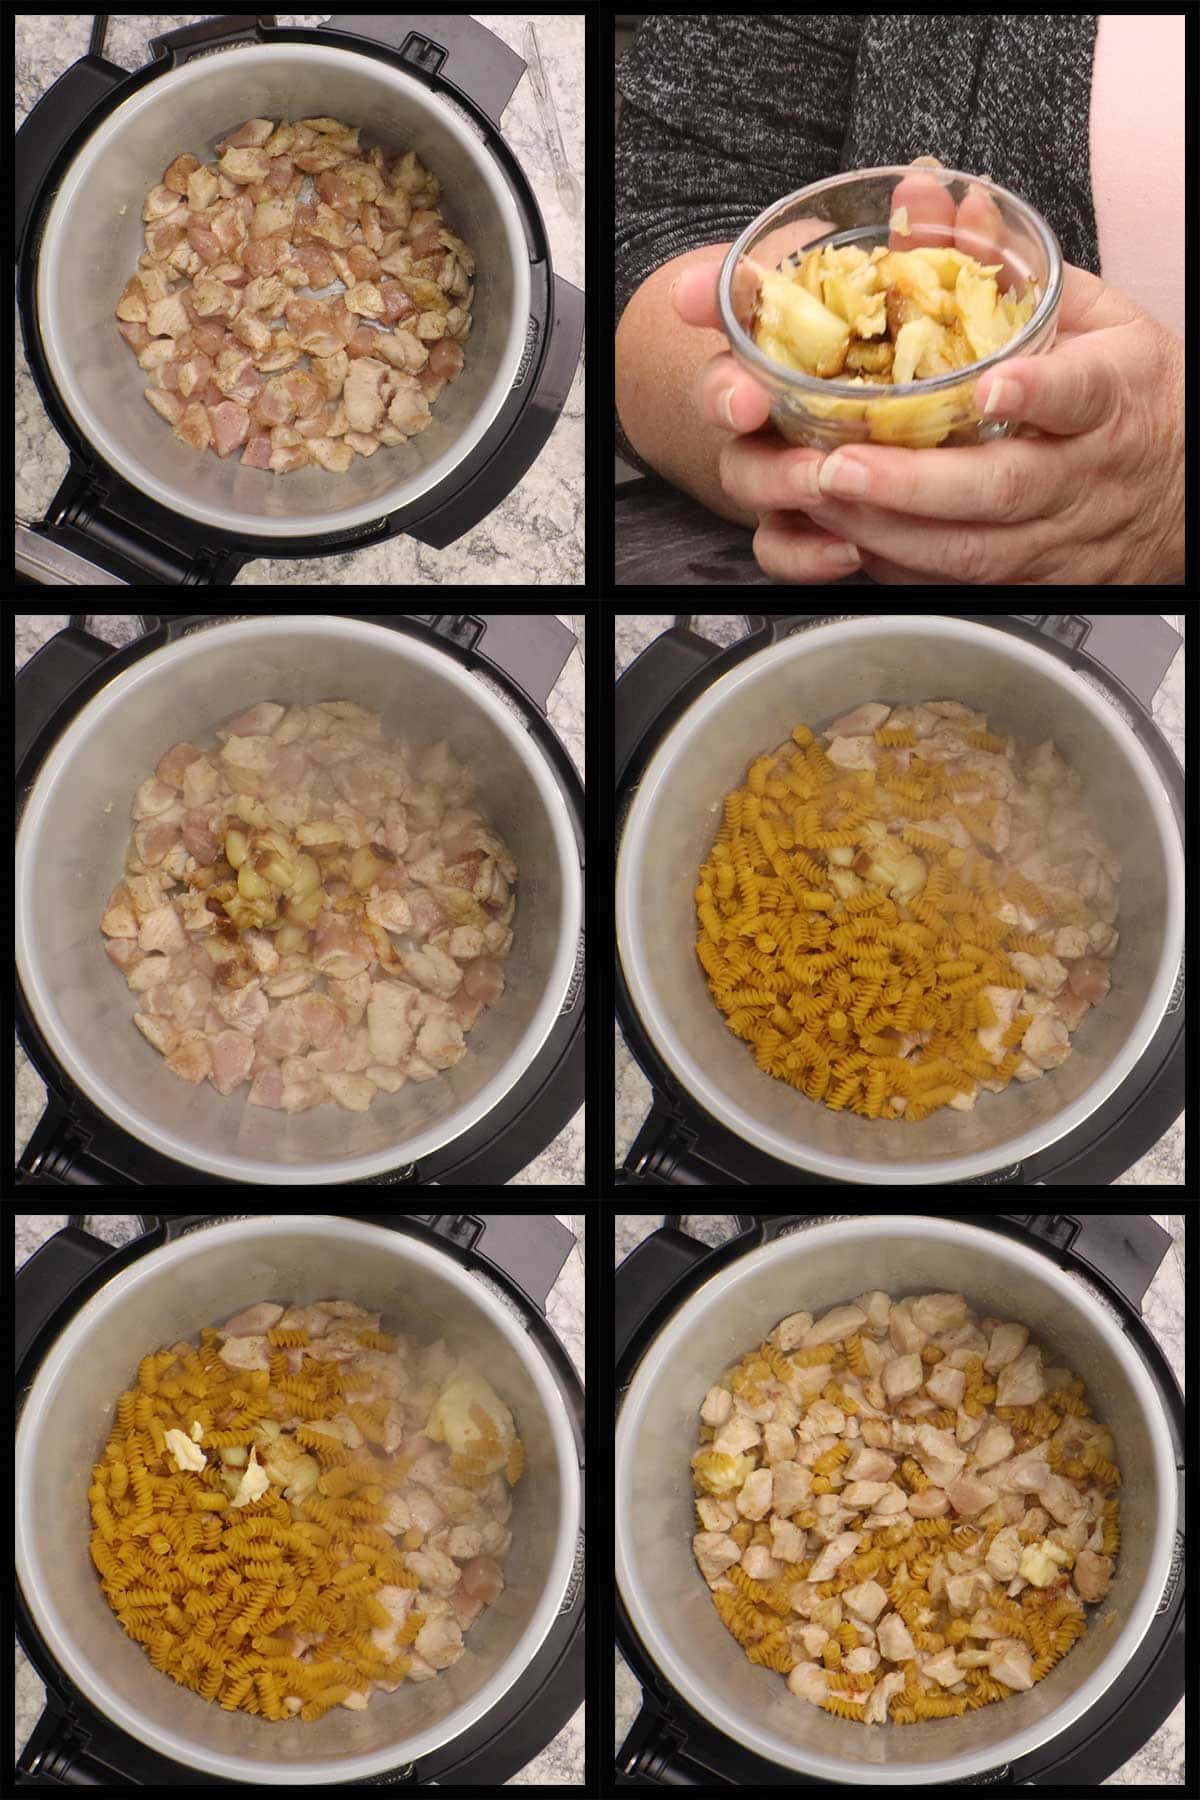
Turn the IP or NF on high sear/sauté. Add 2-4 Tablespoons of salted or unsalted butter or olive oil to the inner pot of your Ninja Foodi or Instant Pot. Once the pot is hot, add in the chicken pieces and the seasonings.

Stir and allow to brown on one side which will take about 2-3 minutes. Flip the chicken over, add in the minced garlic and brown on the other side. Stir frequently and sauté for another minute or two. If the garlic looks like it's getting too brown, reduce the temperature to medium-high heat.
Pressure Cook
Add in the pasta, roasted garlic, and remaining butter. Pour in the chicken stock/broth to deglaze the pot, make sure to scrape the bottom of the pot to get off anything that might be stuck on the bottom.
Put the pressure lid on and turn the valve to seal. Set the pressure to high for 4 minutes. When the time is up, allow the pot to natural release the pressure for 10 minutes, then release any remaining pressure.
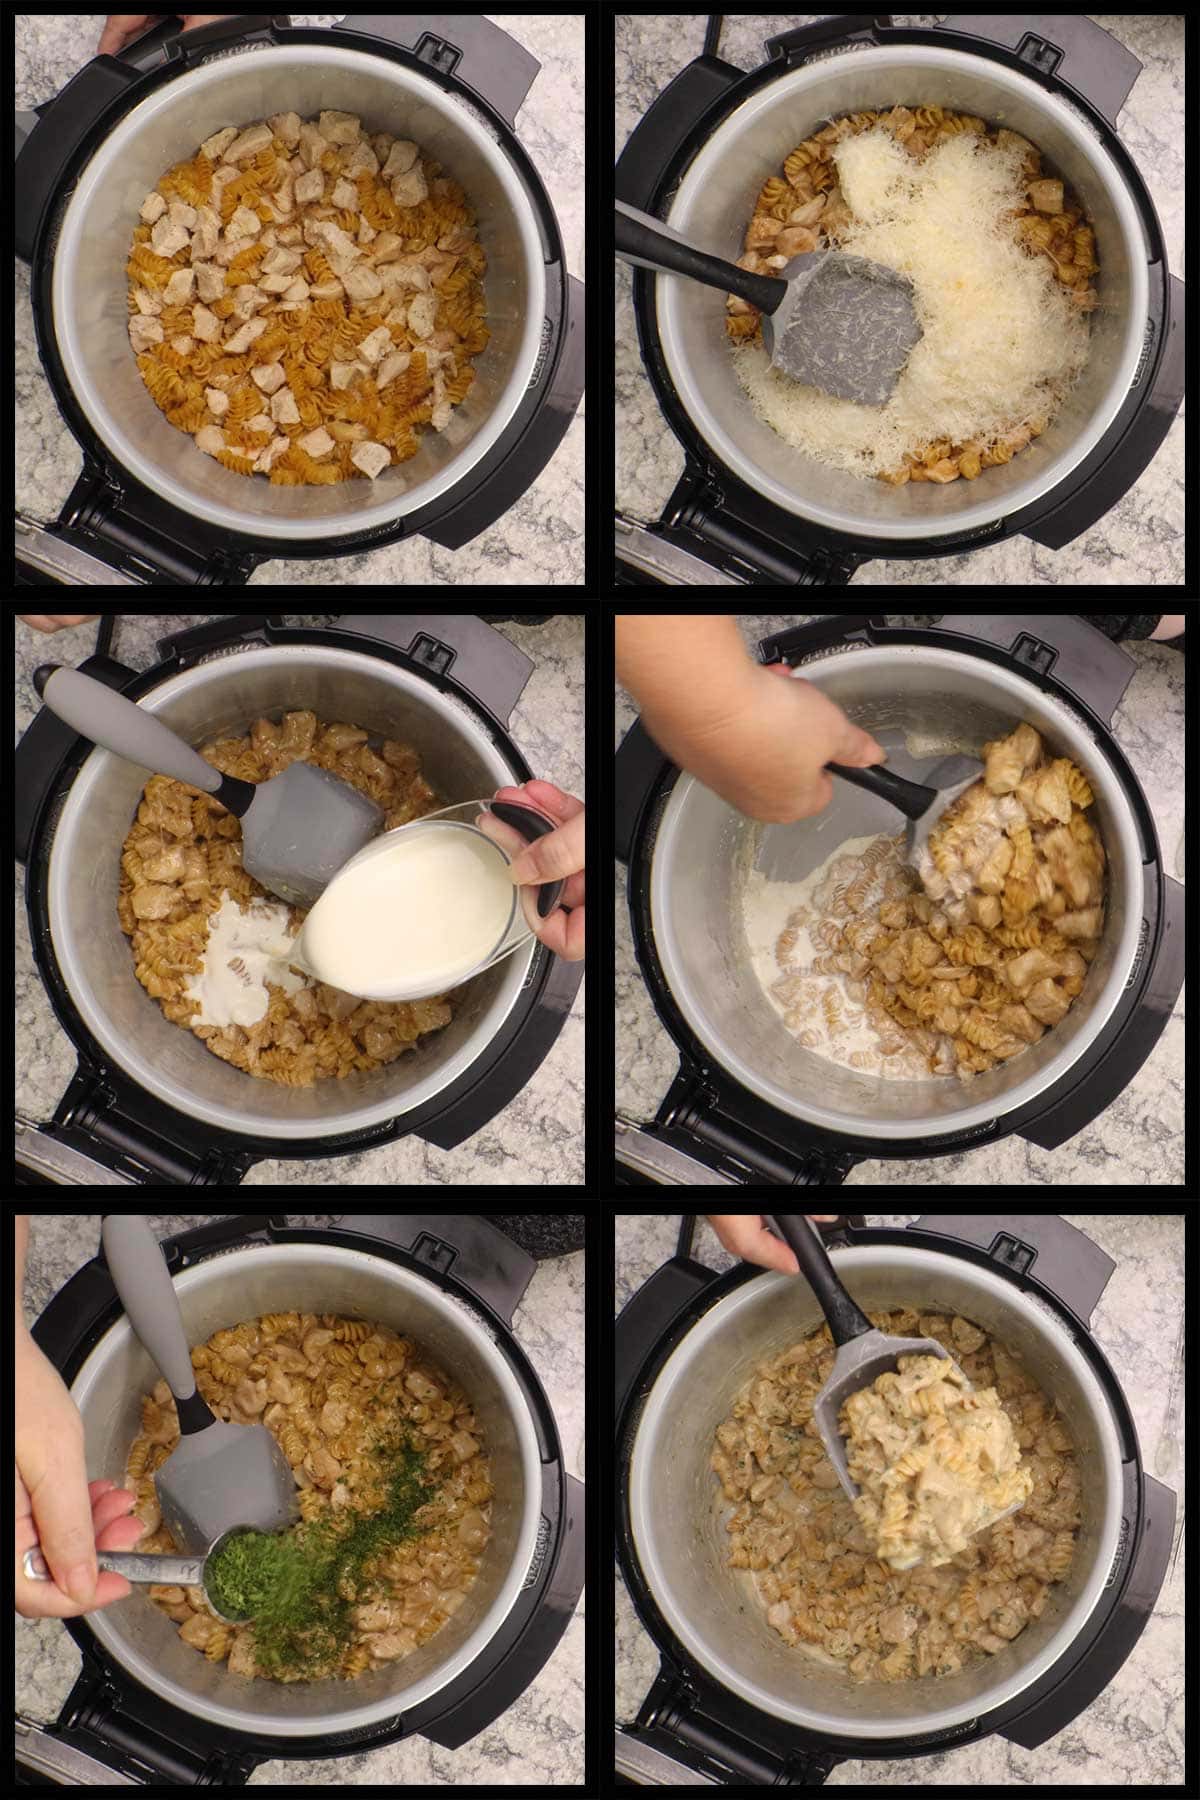
Open the lid and stir.
Finishing Touches
Add in the grated parmesan cheese and stir to allow the cheese to melt. Add in half of the cream and stir. Continue to add the cream until your sauce is as creamy as you like it.
Stir in fresh spinach or any other vegetables (cooked) that you like or simply add about 1 Tablespoon of dried parsley for color.
Serve and Enjoy!

Garlic Parmesan Chicken Pasta Recipe
Equipment
- Pressure Cooker
Ingredients
- 8 Tablespoons salted butter divided in recipe (you can use less)
- 24 ounces chicken breast boneless skinless (about 3 medium size chicken breasts)
- 1½ teaspoons fine grind sea salt
- 1 teaspoon onion powder
- 1 teaspoon garlic powder
- ½ teaspoon black pepper
- ½ Tablespoon minced garlic about 6 cloves
- 8 ounces rotini Pasta
- 4 bulbs roasted garlic
- ¾ cup chicken stock or broth
- 4 ounces parmesan Cheese about 1¼ cups finely grated
- ½ cup heavy cream
- 1 Tablespoon dried parsely optional
- 8 ounces fresh spinach optional
Would you like to save this recipe?
Instructions
Prep
- Roast the garlic if you haven't already. Let it cool and squeeze the garlic cloves out into a small bowl.
- Trim and cube the chicken breasts into 1" pieces.
- Mince raw garlic, shred the parmesan cheese, and gather the remaining ingredients.
Sauté
- Turn the Ninja Foodi or Instant Pot on high sear/sauté. Melt 2-4 Tablespoons of butter and add the chicken pieces and seasonings (except parsley). Stir and brown the chicken on one side.
- Flip the chicken and add in the minced garlic. Stir frequently and sauté for 2-3 minutes. If the garlic is browning too quickly, turn the heat down.
- Add in the pasta, roasted garlic and the chicken broth or stock. Scrape the bottom of the pot to make sure nothing is stuck. Add in the remaining butter.
Pressure Cook
- Put the pressure lid on turn the valve to seal. Set the pressure on high for 4 minutes. When the time is up, allow the pot to naturally release the pressure for 10 minutes, then manually release any remaining pressure. Remove the lid and stir.
Finishing Touches
- Add in the grated cheese and stir. Add in ¼ cup of heavy cream and stir. Continue to add the cream until the sauce is the consistency you like. Add in the dried parsley and stir.
- If you want to add in fresh spinach, add it in now and stir. Close the lid and let sit for a few minutes so it can wilt.
- Serve & Enjoy!
Notes
Stovetop Directions
Heat the oil or butter in a large skillet and add the seasoned chicken cubes when the pan is hot. Brown the chicken on both sides and add in the minced garlic. Sauté for 3-5 minutes over medium high heat, reduce the heat if the garlic is getting too brown. Add in the roasted garlic, pasta, and 2 cups of chicken stock or broth. Cover and adjust the heat until the liquid is simmering. Cook until the pasta is just done, maybe 10-12 minutes. Uncover and add grated parmesan cheese and cream. You can also make the pasta separately on the stove and cook pasta according to the directions. Then toss the pasta in with the cooked chicken and garlic. Add the cream and cheese and keep on low heat until the cheese has melted and the sauce has warmed through.Slow Cooker or Crock Pot Directions
Brown the seasoned chicken chunks in oil either on the stove or in your slow cooker if it has that option. Add in the minced garlic and sauté for a few minutes. Add in the cloves from the roasted garlic and then the pasta. Since you are slow cooking the pasta, you will have more evaporation than when pressure cooking and will need at least 1½ cups of chicken broth or stock. The amount needed really depends on the style of slow cooker you have. For example, there is less moisture loss when using the Ninja Foodi Pressure Cooker & Air Crisper with the pressure lid on slow cook than there is with my standalone slow cooker. I would start out with 1½ cups and check on it after about 1-2 hours and see how it's doing. Add more liquid if needed. Cook on high for 1-2 hours or until the pasta is cooked to your liking and most of the liquid has been absorbed OR, cook on low for 3-4 hours. When the pasta is cooked to your desired texture, add in the cheese and the cream. Stir and Serve!Nutrition
About the Recipe Author, Louise Long
Louise is a full-time recipe creator and food blogger @ The Salted Pepper. She has over 30 years of experience with cooking and recipe development. She owned a restaurant for several years and was a full-time RN until retiring to blog full-time.

She published her first cookbook in the Fall of 2018 and is very interested in writing several more.
Louise is also the creator of an online Ninja Foodi Pressure Cooking Course with over 100 instructional step-by-step videos. People absolutely rave about the course and all the value they have received from it.
Louise has several very active Facebook groups that help people with the basics of cooking and learning more about the appliances they love.
Ninja Foodi Pressure Cooker & Air Crisper 101
Ninja Woodfire Outdoor Grill & Smoker
Louise is also a YouTube creator and you can find most of her recipes in video format on The Salted Pepper YouTube channel.
She is very responsive to messages and eager to help in any way she can. Get more Information about Louise & contact information
I WOULD LOVE TO SEE WHAT YOU ARE COOKING UP IN YOUR KITCHEN! TAG ME @THESALTEDPEPPER ON YOUR FAVORITE SOCIAL MEDIA PLATFORM WHEN YOU MAKE A DISH!
BE SURE TO FOLLOW THE SALTED PEPPER RIGHT HERE ⇓⇓⇓⇓⇓
Karen Crook says
I made this last night and it was sooo good. I used 2 pounds of boneless skinless chicken thighs. The problem that I had was that it wasn’t enough. By the time my daughter and my husband went to get some, it was all gone. I promised my daughter that I will make this again next week so she can get some. I think I’ll try using the whole pound of pasta.
Louise says
I'm glad you enjoyed it! You can definitely double it, just increase the liquid and decrease your PC time by about 1 minute.
IC says
Love getting new recipes in my inbox! This was a quick and delicious meal. I did prepare the pasta the traditional way, because my pasta never turns out firm in the Foodi (always hard); and I added less Parmesan (2 oz). Thanks, Louise.
Louise says
I'm glad you enjoyed it! I would give the pasta another chance with this recipe, it's firm and if you are concerned it won't be firm enough, decrease the time by 1 minute. I can't stand soft pasta, so I totally understand where you are coming from.
Barb says
I agree Will! The Salted Pepper is the first place I check when I'm looking for a recipe! Made this last night and it went over so well!! I did use the spinach and it added such pretty color to ti! Thanks, Louise, for another great one!
Louise says
Thank you so much! I'm so glad you enjoyed it!
Will says
Another amazing recipe to add to the rotation! The garlic flavor is perfect! Soon all of our recipes are going to be from the incredible Louise.
Louise says
Thank you so much and I'm thrilled you enjoyed the recipe!
Anita says
The roasted garlic chicken & pasta is so simply & easy. I replaced the heavy cream with no sodium chicken broth It's super delicious!
Louise says
I'm so glad you enjoyed it!