Making Thai Green Curry Chicken in the Ninja Foodi or any electric pressure cooker is incredibly simple and you can make the rice at the same time!

Would you like to save this recipe?
I love those kinds of meals! Simply add the ingredients, close the lid and let the pressure cooker do the work.
This post may contain affiliate links. If you make a purchase after clicking a link, I may earn a small commission. As an Amazon Associate, I earn from qualifying purchases.
The inspiration for this recipe came from a Thai resturant that Jeff and I used to frequent when we lived in Maryland. While Jeff would often get different items on the menu, I almost always ordered the Green Curry Chicken, because it's a dish so packed with flavor that I simply craved it.
I tried to make it once, years ago, and didn't even come close. When we moved to Tennessee, out in the middle of nowhere, it's almost impossible to find good curry, especially Green Curry Chicken!
So, one day, I wanted it. I decided to use my Ninja Foodi pressure cooker and when I lifted that lid, the look and smell of this curry was EXACTLY how I remembered it being at the Thai restaurant.
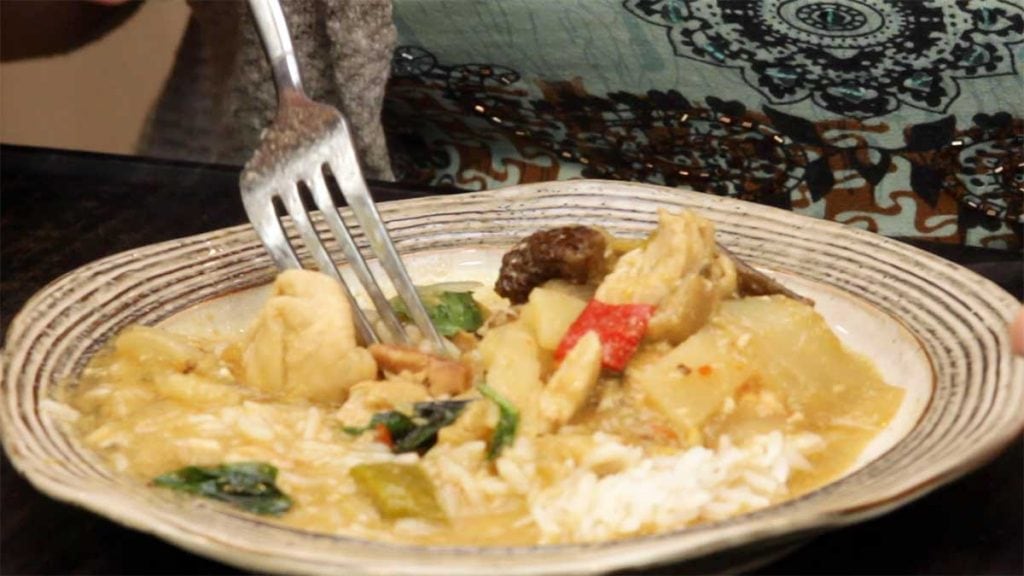
I quickly dished up some rice and ladled the green curry over top. One bite and Jeff and I both looked at each other and smiled. I nailed it!
I am certainly not making any claims that this is an authentic Thai Green Curry, but I can claim that it's delicious!
That was the test run. Then I tested it a few more times (including when I made the video) and was a bit perplexed as to why the appearance wasn't the same. Then it hit me!
I pressure cooked the eggplant with the curry in the last 2 test batches and not in the first one. The flavor was perfect, but the eggplant did muddy up the beautiful green color of the curry.
So, I'm going to add the eggplant as an optional ingredient and keep this curry super simple, beautiful, and unbelievably tasty!
Frequently Asked Questions
Yes, that is not a problem. I would use a flank steak or another quick cooking steak. Make sure to slice it thin against the grain and the PC time will be the same.
If you use a tougher cut of beef, you will need to PC longer and add the vegetables and rice after the beef is tender.
Yes, you can double the recipe. Because the time to pressure will increase when the volume in the pot increases, either add the vegetables at the end and simmer until cooked how you like them OR bring the curry to a full boil before going under pressure to speed up the process.
Yes, you can. What I have noticed in dishes like this one is they do become a little thinner when you reheat them. The flavor is not affected though.
If you can't find lemongrass paste, then simply skip it. You can also use the zest of a lemon at the end of cooking. That will provide the brightness that lemongrass paste gives to the dish. 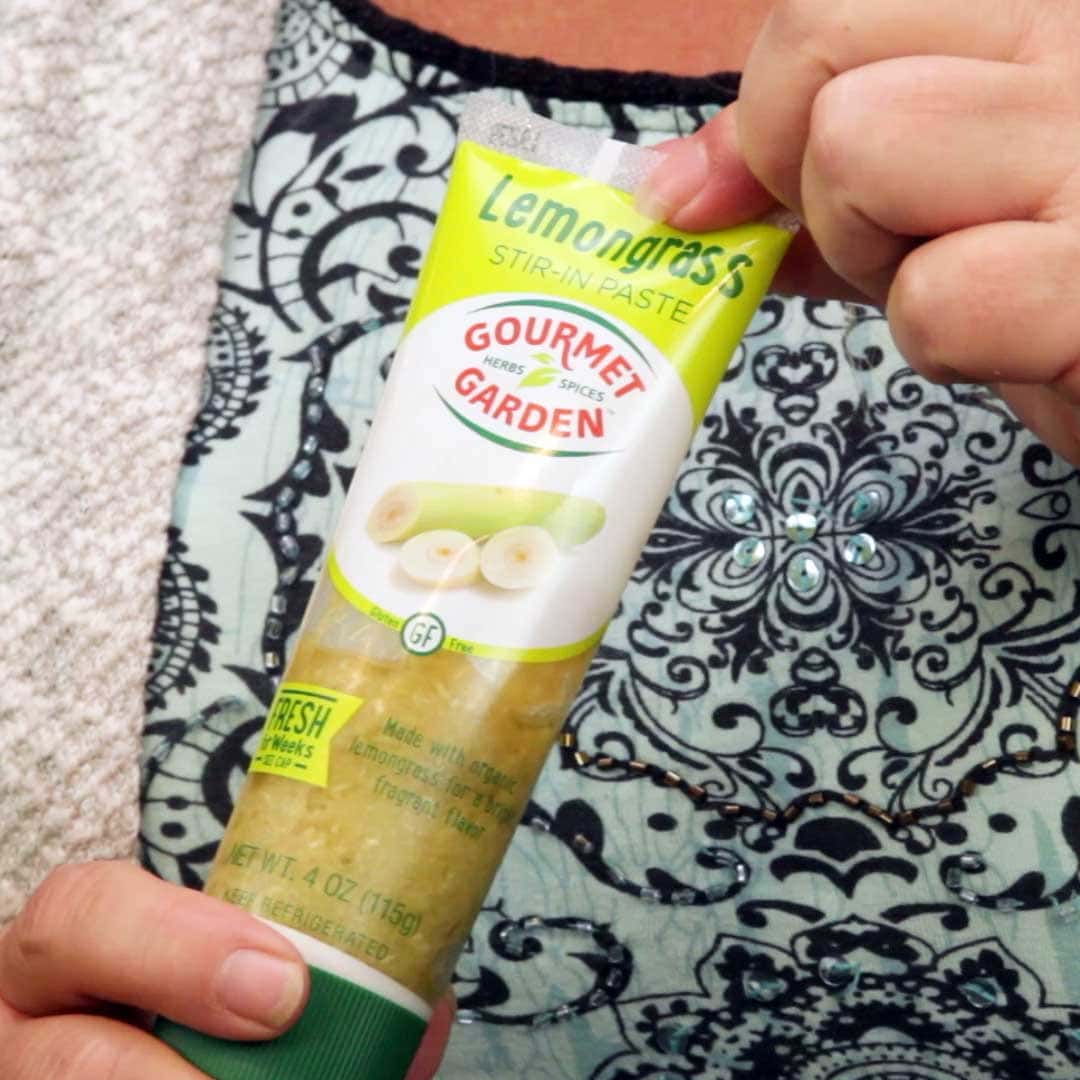
More Curry Recipes made in the Ninja Foodi!
If you love curry as much as I do, you will definitely enjoy these recipes. They are all made in the Ninja Foodi and are super easy to make.
This Curry Chicken Chili has won first place in several chili cook-offs! Everyone loves it, even people who say they don't like curry!
It's super easy to make and is a great alternative to a regular chili.
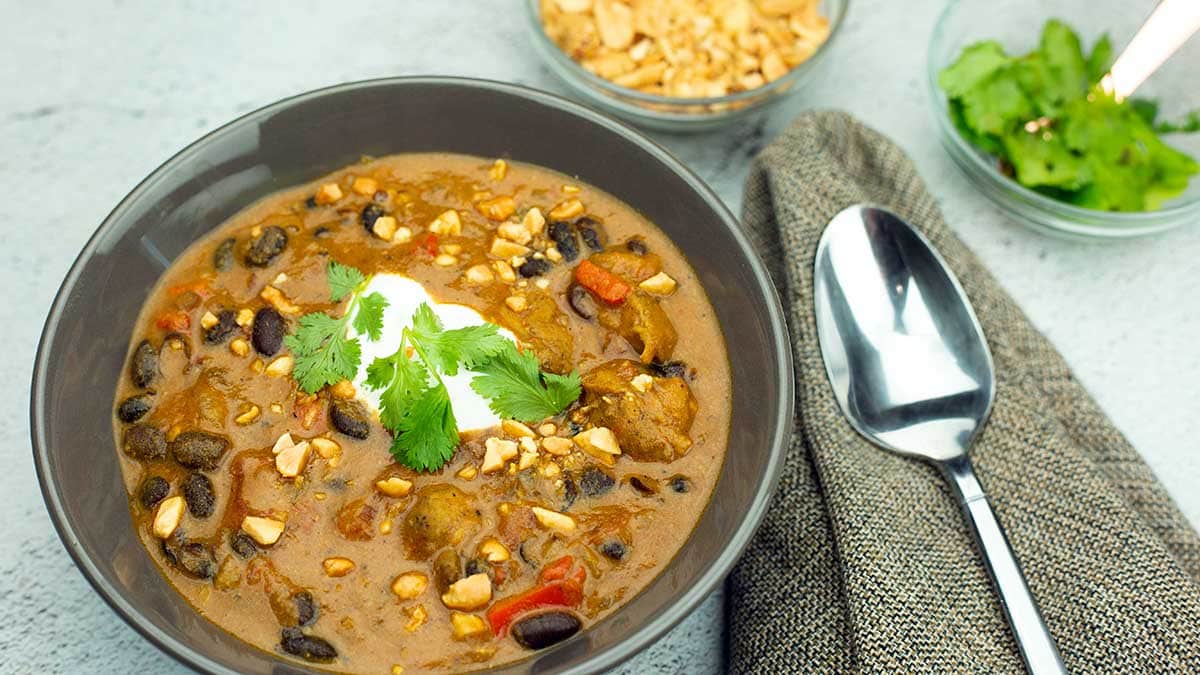
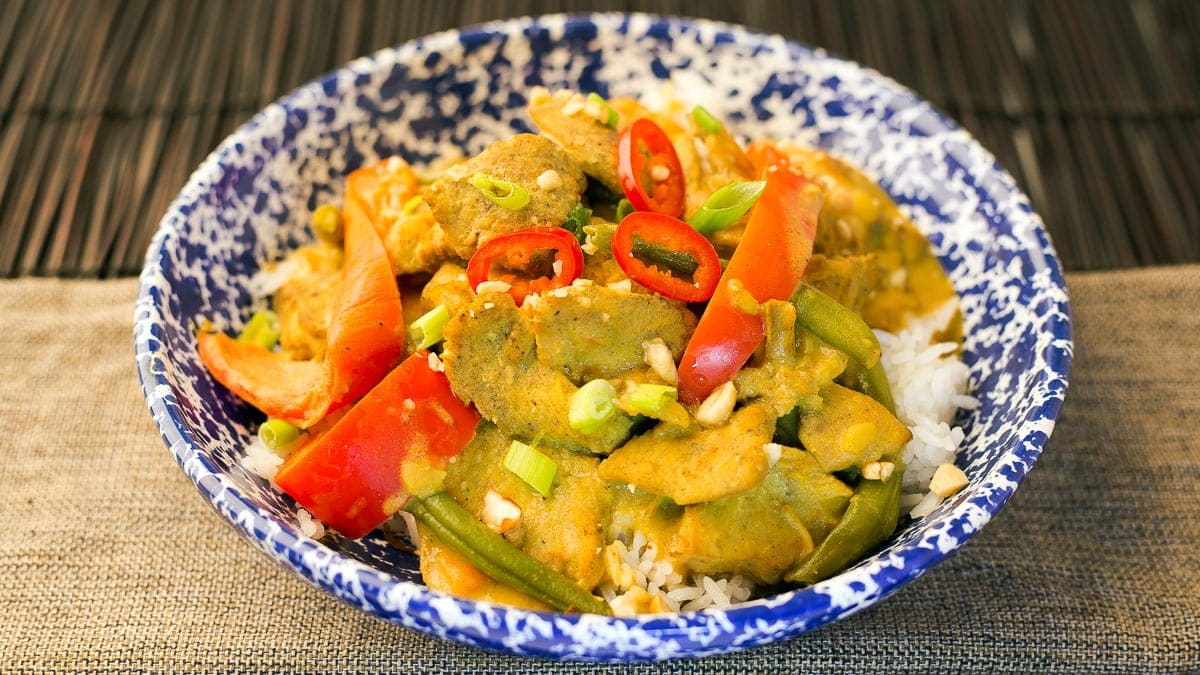
The picture of this Thai Chicken Curry simply doesn't do it justice. This curry is made with coconut milk and peanut butter for a thick and creamy curry that you can pair with any vegetables you like!
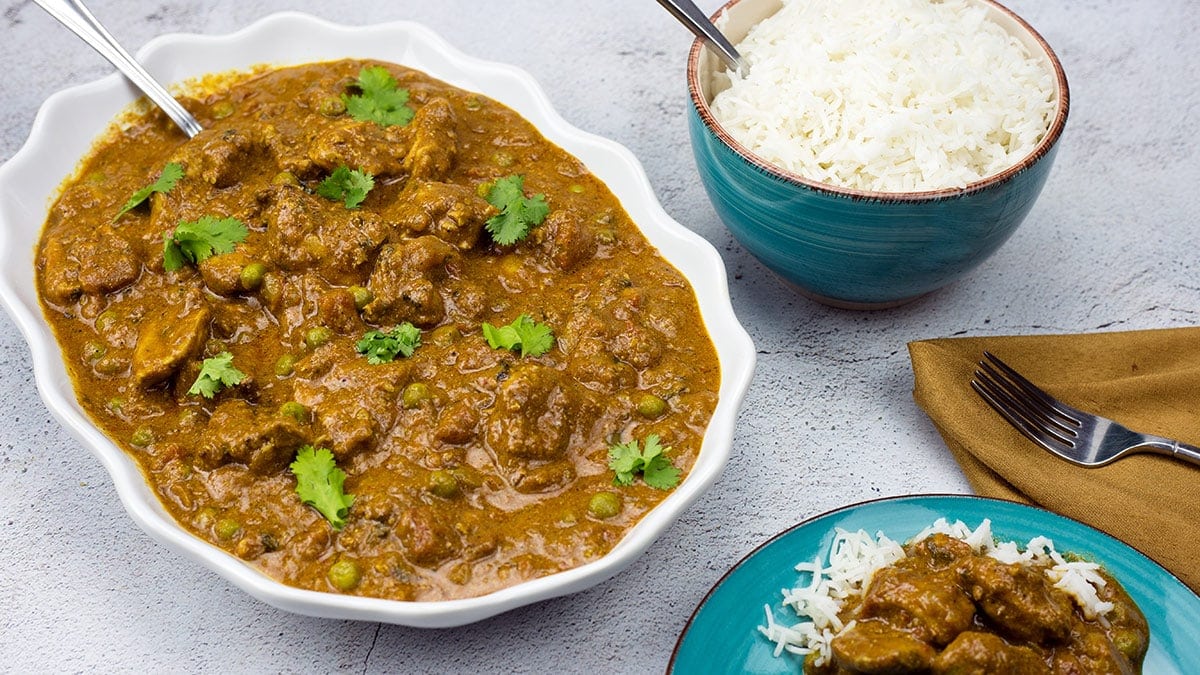
A slightly different, but just as delicious curry is this Tikka Masala! This recipe screams flavor and comfort food to me!
What Vegetables can I use in this Green Curry Chicken Recipe?
The vegetables that I typically see in a green curry dish is eggplant, onions, and sometimes snow/sugar peas.
However, you can put whatever you like in there! I've seen recipes using kale, spinach, carrots, and even asparagus.
I thought about using asparagus instead of eggplant, but thought the flavor of the asparagus might alter the curry too much.
I've tried both zucchini and eggplant and felt like the eggplant maintained a better texture after pressure cooking, but it did seem to muddy the color of the green curry.
The one thing to keep in mind when choosing vegetables is their cook time. Even though we set the high pressure to zero, the time to pressure is cook time and it takes about 13 minutes for the display to register that the pot is under pressure (then it immediately begins counting up on keep warm while the pot natural releases). 13 minutes of cook time is a lot for many veggies.
I would suggest adding in delicate veggies like spinach and snow or sugar peas after the PC time and simmer until cooked the way that you like them.
What Peppers Should I Use?
I use a combination of hot and sweet peppers when I make this dish, but you can use any kind of peppers you like in the quantities you like.
I have used fresh green and red hot peppers from my garden and dried red chili peppers with great results.
Dried thai chili peppers can be found in a lot of grocery stores, I picked up some last year at Aldi. This year, I grew them and dehydrated them myself. If you want to use fresh, I'd use a combination of a thai red chili peppers and sweet red pepper.
Peppers vary so much in heat levels that if you are sensitive to spice, start out with only 1 pepper. If it isn't spicy enough, try adding some crushed red chili pepper after cooking and simmer for a few minutes.
Can I make this Green Curry Chicken without an Electric Pressure Cooker?
Sure! You can make it on the stove very easily by following the same instructions and, instead of pressure cooking, you would simmer the curry for about 20 minutes or until the chicken is cooked through.
Either use a large skillet or a a deep pot for the best results.
Pressure cooking has a way of infusing more flavor into dishes in a shorter time, so definitely taste the sauce to make sure it has the flavor you want. You can always simmer on low for longer, if needed.
Enjoy!
How to Make Green Curry Chicken in the Ninja Foodi
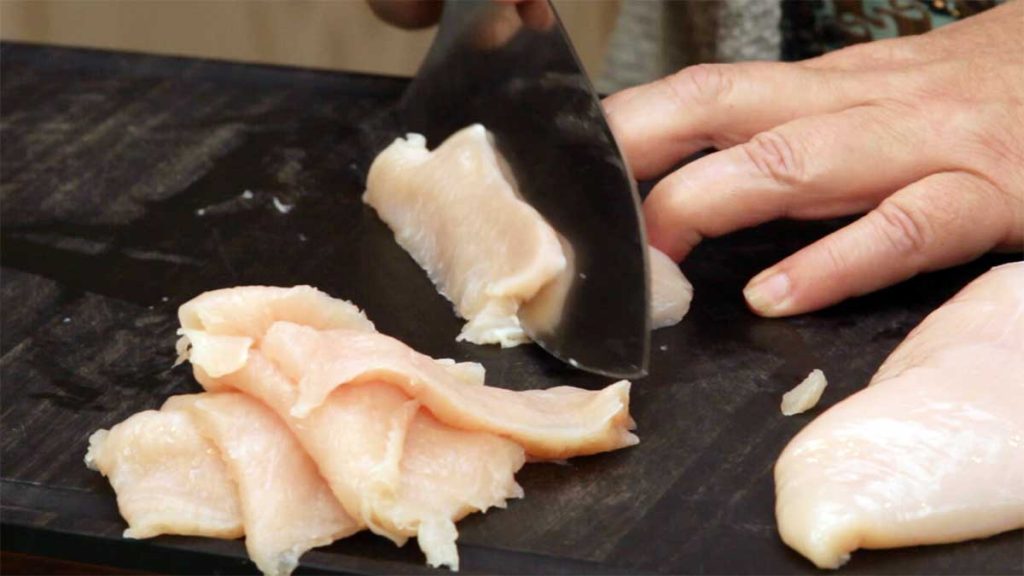
Slice your chicken breast into thin slices. Try freezing the chicken on a parchment-lined tray for 30-40 minutes before slicing to make it easier.
You can also use chicken thighs or beef in this recipe.
Once sliced, lightly salt the chicken and set aside.
I would take the time to prep the other ingredients now because once the coconut milk reduces, the rest of the recipe goes really fast.
Peel and slice the ginger into thin slices or grate it if you prefer.
Measure out the other ingredients. Wash and chop the basil. Rinse the rice and place in (affiliate link)6" Fat Daddio Pan, but don't add the water yet. Cut the onion into large chunks.
Slice the peppers and cut the eggplant or zucchini, if using. I use a combination of sweet and spicy peppers when making Green Curry Chicken, but you can use whatever peppers you enjoy.
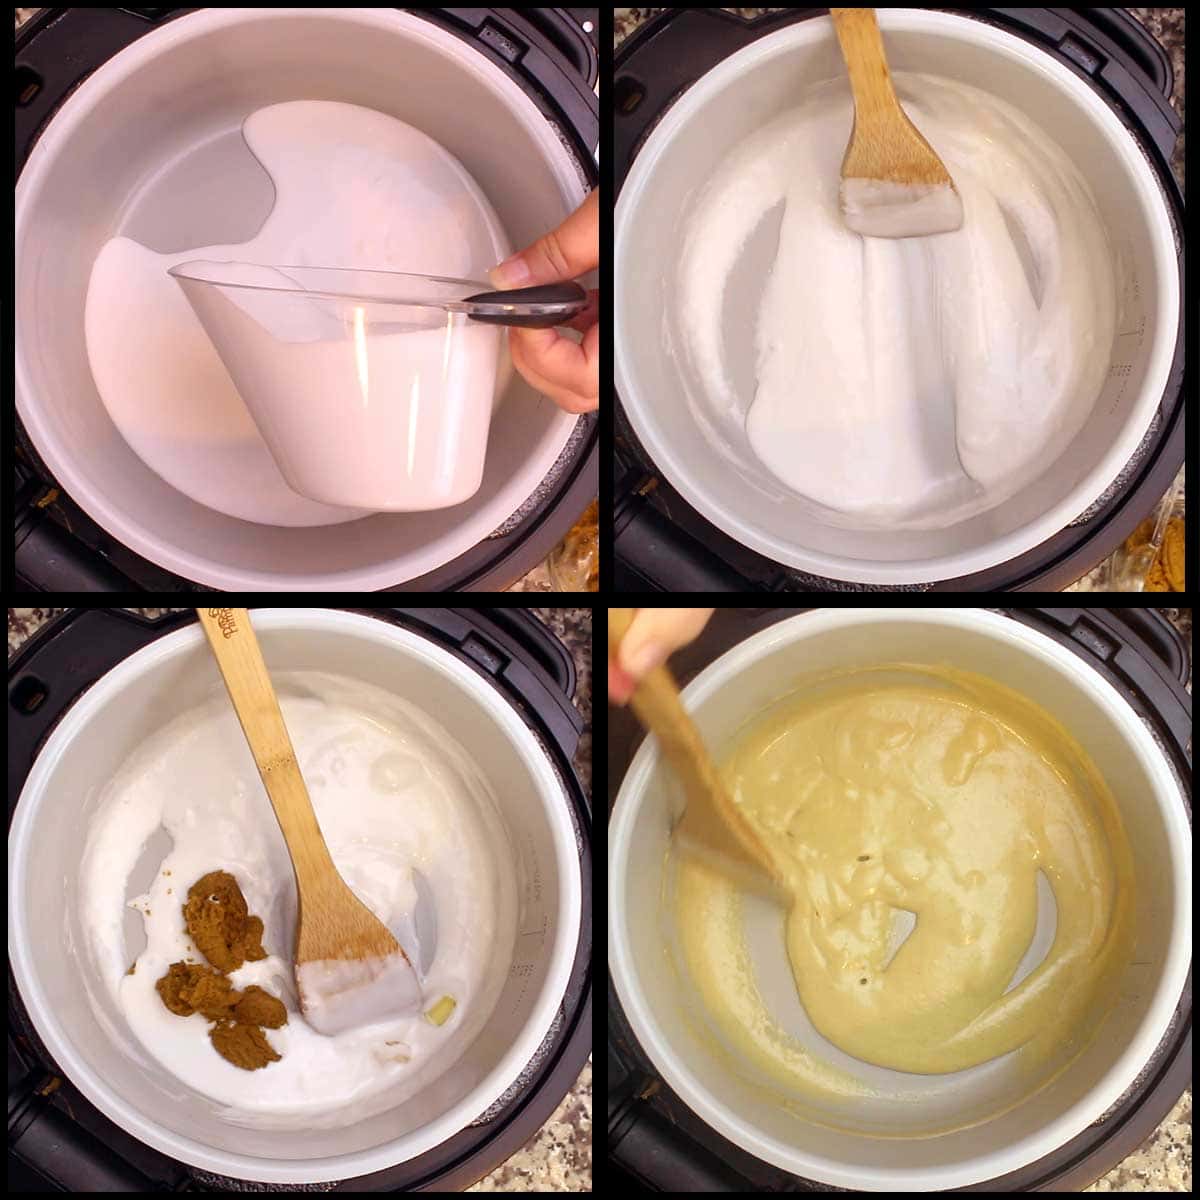
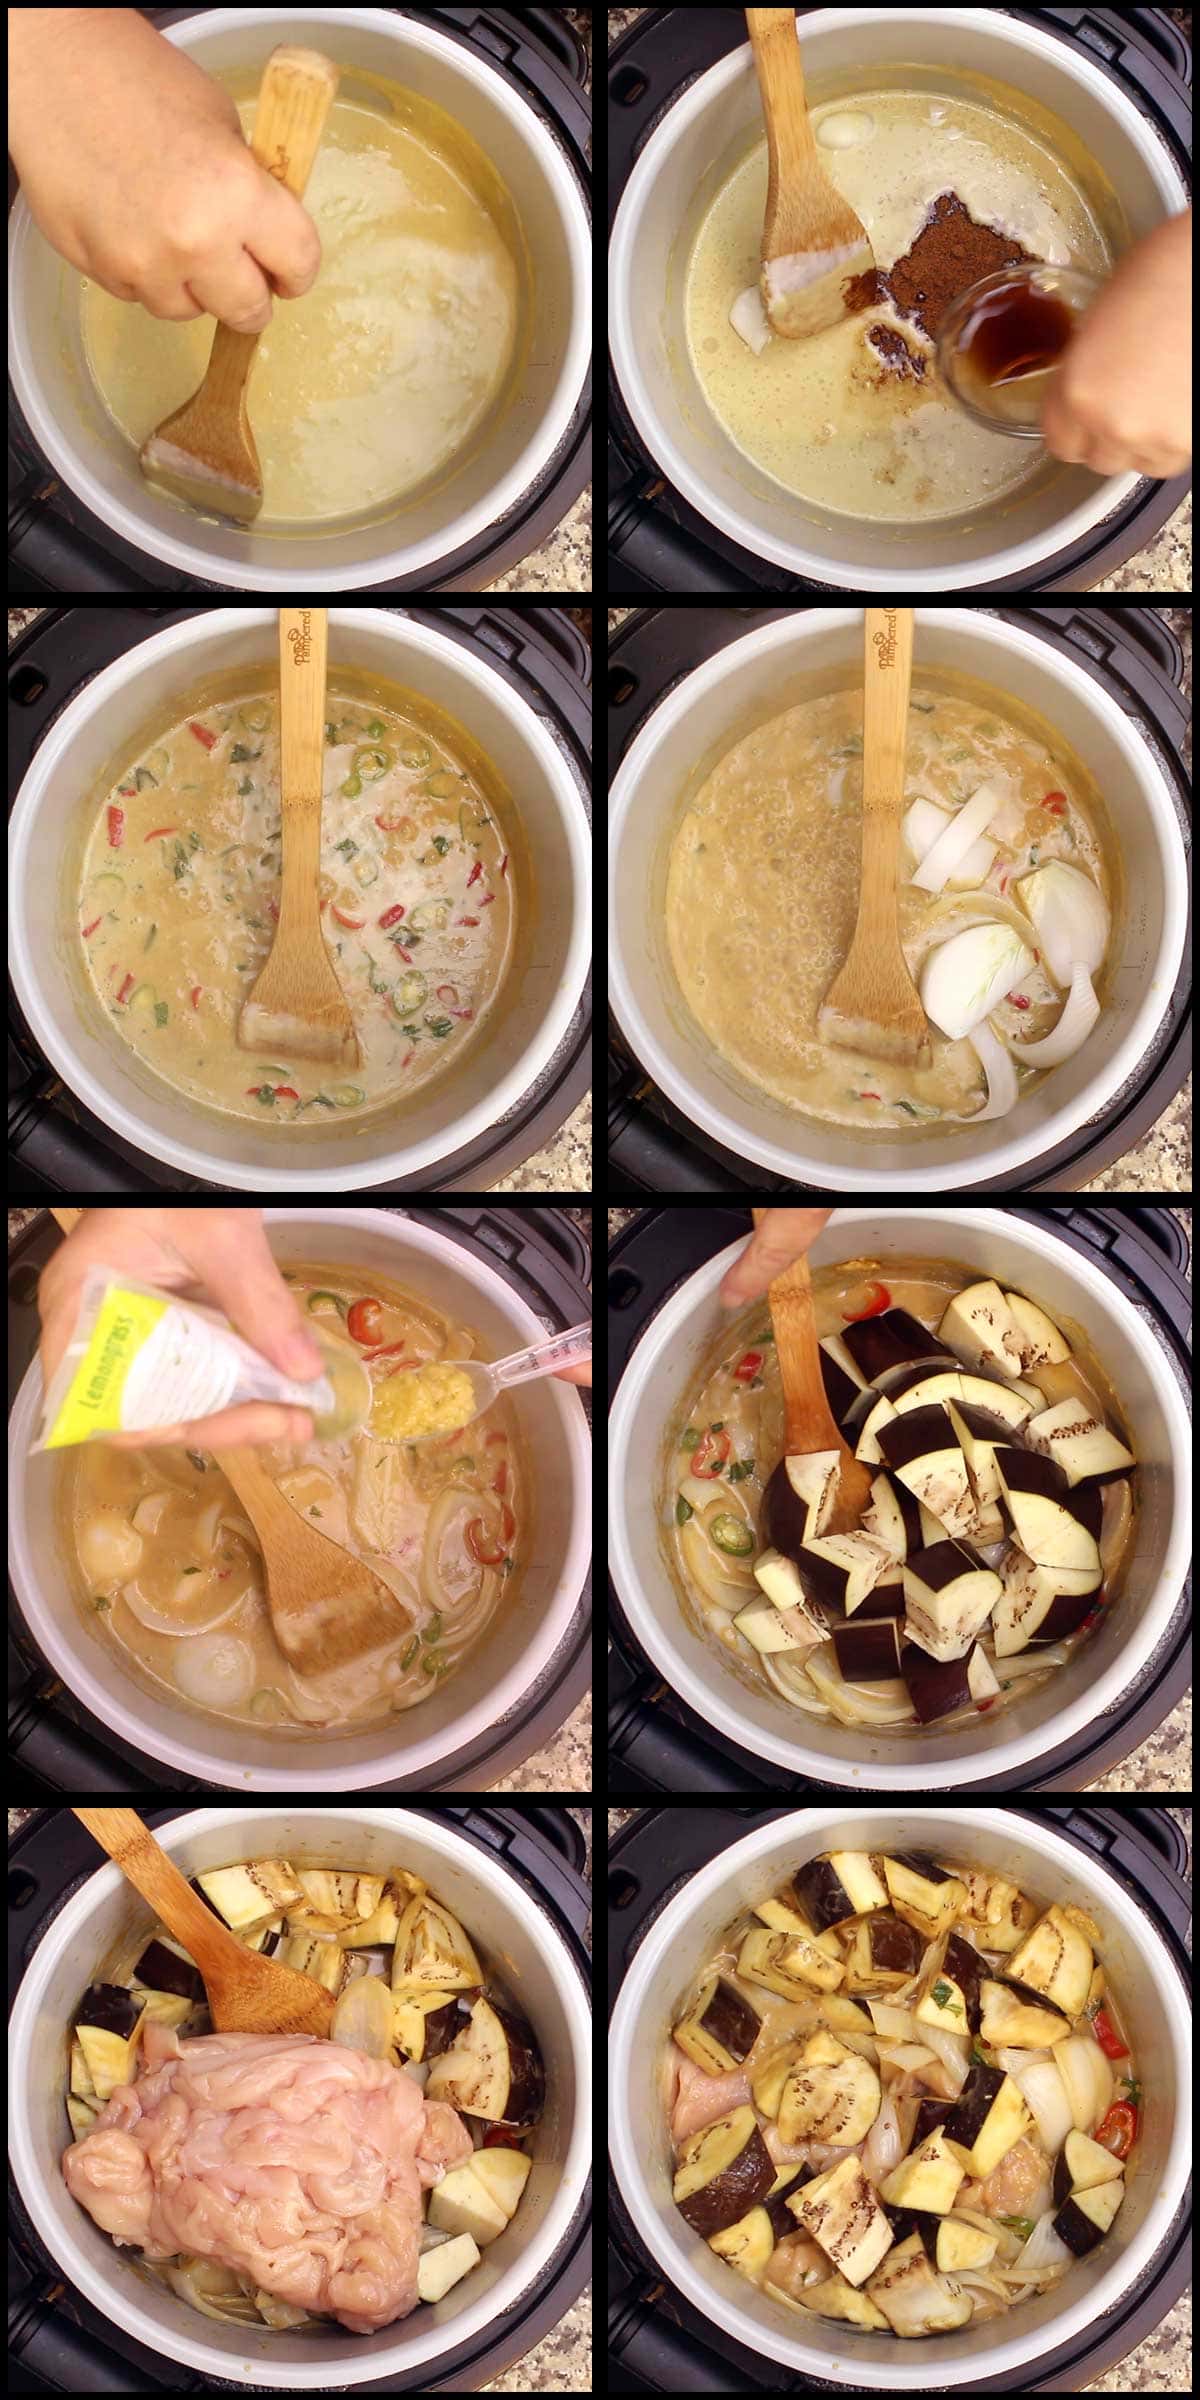
Pour the can of coconut milk into the inner pot of the Ninja Foodi. The type of coconut milk used in this recipe can be found in the Asian aisle of your grocery store. It is not the same as the coconut milk found in the milk section of the grocery store.
Turn the Ninja Foodi on high sear/sauté and reduce the coconut milk until it thickens. Stir frequently and scrape the bottom of the inner pot. You will know it has reduced enough when you scrape the bottom and it doesn't flow back together quickly.
Next add the sliced ginger and green curry paste. Stir constantly for about 2-3 minutes. If you are worried about burning the mixture, turn the heat down to medium. You will begin to really smell the coconut and the curry and that's when it's time to add the other ingredients.
Deglaze the inner pot with the chicken stock and scrape the bottom of the inner pot really well to make sure nothing is stuck to the bottom. If any of the coconut milk is stuck to the bottom, you could get the water notice, so this is very important.
Then add in the remaining ingredients, except for ½ of the basil and the bamboo shoots. We will add those after pressure cooking.
When adding in the chicken, make sure to break it up so it doesn't clump when cooking. Mine was in a bag and I didn't separate the slices enough and had some clumping when I filmed the video.
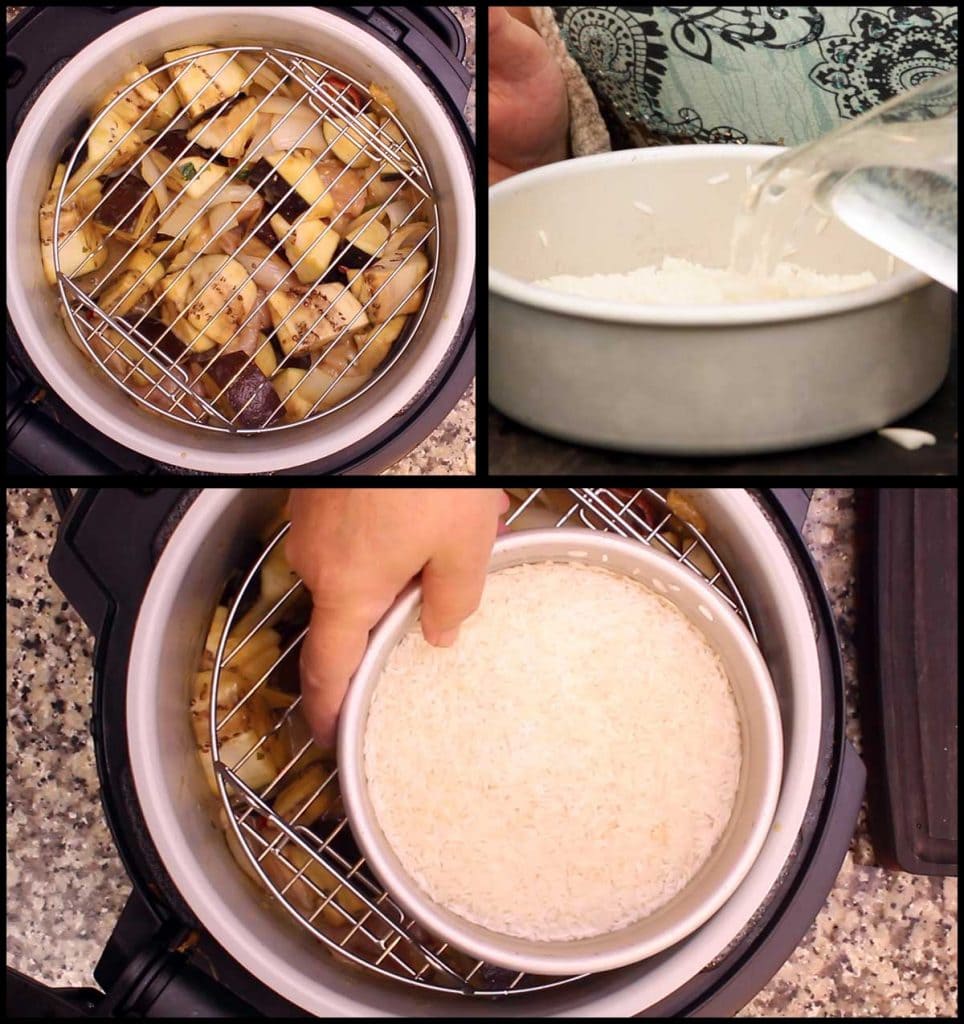
Stir well and then put the rack into the pot in the high position if you are making the rice at the same time.
Add the water to the rice and place the pan on top of the rack, but pushed towards the front of the Ninja Foodi. Leave the rice uncovered.
Place the lid on the Ninja Foodi and turn the valve to seal. Set the pressure on High for Zero minutes. This means that once the pot reaches pressure, it will begin the Natural Release right away. If you are decreasing the amount or not using the eggplant or zucchini, you can PC for 1 minute.
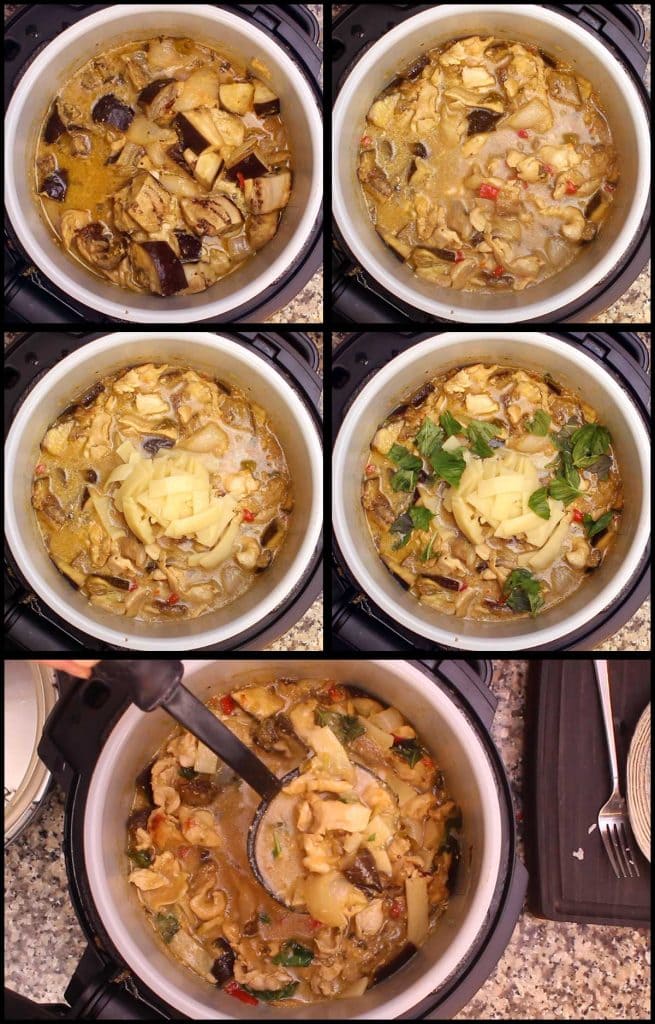
Allow the Ninja Foodi to Natural Release for 8 minutes and manually release the remaining pressure.
Remove the rack and fluff the rice. Cover the rice until you are ready to serve it. I use these (affiliate link)silicone covers by Walfos and love them!
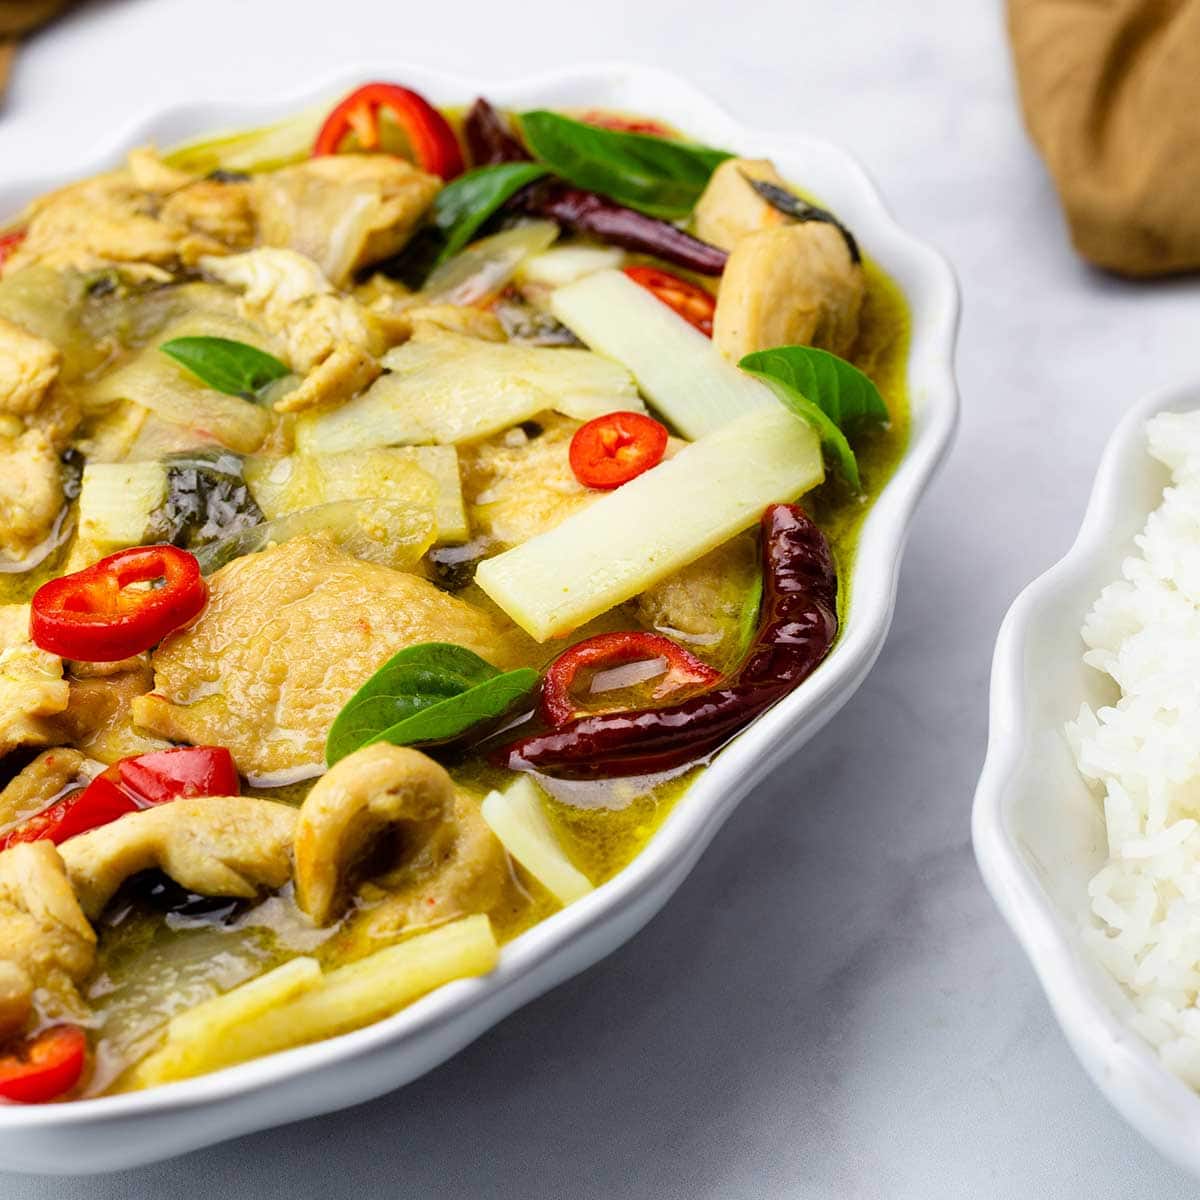
Stir in the drained bamboo shoots and the fresh basil. Green curry is usually thinner than other curries, so don't be alarmed that it looks thin. You can always thicken it with a cornstarch slurry if you want it thicker.
Ladle over rice and enjoy!

Green Curry Chicken with Rice in the Ninja Foodi
Ingredients
- 2 pounds chicken breasts thinly sliced
- ½ tsp salt
- 13.5 ounces coconut milk
- 2½ tablespoon green curry paste
- 1" ginger root
- 1 tablespoon coconut oil
- 1 cup chicken stock
- 1 tablespoon lemongrass paste
- 1 tablespoon fish sauce
- 2 tablespoon coconut or palm sugar
- 20 leaves basil divided in recipe
- 2 sweet onions
- 2-4 hot peppers fresh or dried is fine
- 1 sweet red pepper or 4 small sweet red peppers
- 5 ounce bamboo shoots
- 1 medium eggplant or 2 zucchini (optional, see post for details)
- 1 cup jasmine rice
- 1 cup water
Would you like to save this recipe?
Instructions
- Thinly slice the chicken breast and lightly salt. Set aside for later.
- Peel and thinly slice the ginger root. Chop the basil. Slice the red peppers. Measure out the other ingredients.
- Add the 1 can (13.5 oz) of coconut milk to the inner pot and turn the sear/sauté on high. stir frequently until the coconut milk thickens. When you can run your spatula or spoon along the bottom of the pot and the coconut milk doesn't flow back together quickly, it is thick enough.
- Add the sliced ginger and the green curry paste. Stir to combine and cook for 2-3 minutes. Stir constantly so nothing burns. Lower the heat if you need to.
- Deglaze the pot with 1 cup of chicken stock and make sure to scrape the bottom well to get off anything that might be stuck.
- Add the coconut oil, coconut sugar, lemongrass paste, fish sauce, ½ of the chopped basil, hot and sweet peppers, onion chunks, eggplant chunks, and the sliced chicken. Stir to combine. Make sure the chicken is separated to avoid it clumping during the cooking process.
- Put the rack in the high position. Rinse one cup of rice and place it in the (affiliate link)6" Fat Daddio Pan along with 1 cup of water. Place the pan on top of the rack and leave it uncovered.
- Put the pressure lid on and turn the valve to seal. Set the pressure on high for ZERO minutes. Allow the pressure to natural release for 8 minutes and then release any remaining pressure.
- Remove the rice and fluff with a fork. Cover until ready to serve.
- Stir the curry and add in the remaining basil and drained bamboo shoots. Stir and allow to sit for a few minutes to warm up the bamboo shoots.
- Serve the curry over rice. Enjoy!
Notes
Nutrition
About the Recipe Author, Louise Long
Louise is a full-time recipe creator and food blogger @ The Salted Pepper. She has over 30 years of experience with cooking and recipe development. She owned a restaurant for several years and was a full-time RN until retiring to blog full-time.

She published her first cookbook in the Fall of 2018 and is very interested in writing several more.
Louise is also the creator of an online Ninja Foodi Pressure Cooking Course with over 100 instructional step-by-step videos. People absolutely rave about the course and all the value they have received from it.
Louise has several very active Facebook groups that help people with the basics of cooking and learning more about the appliances they love.
Ninja Foodi Pressure Cooker & Air Crisper 101
Ninja Woodfire Outdoor Grill & Smoker
Louise is also a YouTube creator and you can find most of her recipes in video format on The Salted Pepper YouTube channel.
She is very responsive to messages and eager to help in any way she can. Get more Information about Louise & contact information
I WOULD LOVE TO SEE WHAT YOU ARE COOKING UP IN YOUR KITCHEN! TAG ME @THESALTEDPEPPER ON YOUR FAVORITE SOCIAL MEDIA PLATFORM WHEN YOU MAKE A DISH!
BE SURE TO FOLLOW THE SALTED PEPPER RIGHT HERE ⇓⇓⇓⇓⇓
Annette Hart says
This was good, but I was disappointed that the coconut milk split & zucchini turned to mush.
Louise says
I'm surprised about the coconut milk splitting, I don't remember that happening when I have made it. Thankfully, that won't affect the flavor or the texture, just stir it and it will come back to together. As far as the zucchini goes, I did talk about that in the written post and that is why I used eggplant, it held it's texture better. There are a few things you can do to prevent that; add the zucchini after pressure cooking and simmer until they are the texture you like, or you can pre cook the zucchini and add them in at the end just to warm through.
Lisa Hawkins says
This was amazing! My family ate it up so fast. Would this work with yellow curry paste too?
Louise says
I have a yellow curry recipe, so I would use that one for the best flavor. I'm so glad you enjoyed the green curry!
Emily says
how much curry paste do you use? your Youtube video states 2 1/2 but here you state 1 1/2tbs.
I love all your recipes and just want to make sure I follow it correctly!
Louise says
Thanks for letting me know about the error. I used 2 1/2 tablespoons.
Susan says
This was delicious! Your step-by-step directions and pictures were great! My peppers all got mushy though. Next time, will keep them out (other than hot peppers) and add them in at the end with the bamboo shoots and basil, and let the heat of the sauce cook them slightly. Just out of curiosity - what does the coconut oil do for the recipe? Could I have substituted something else?
Louise says
I'm so glad you enjoyed it! You can omit the coconut oil if you like, it gives the sauce a shimmer mostly.
Courtney Fox says
Trying this recipe right now... One thing I don't understand, how on EARTH could I possibly put the rack in low position for step 7? There is way too much in there... So I put it in the high position, I hope it works out!
Louise says
oops! That is my error. It should be in the high position with the 6x2" pan on top with the rice. So sorry about that!