
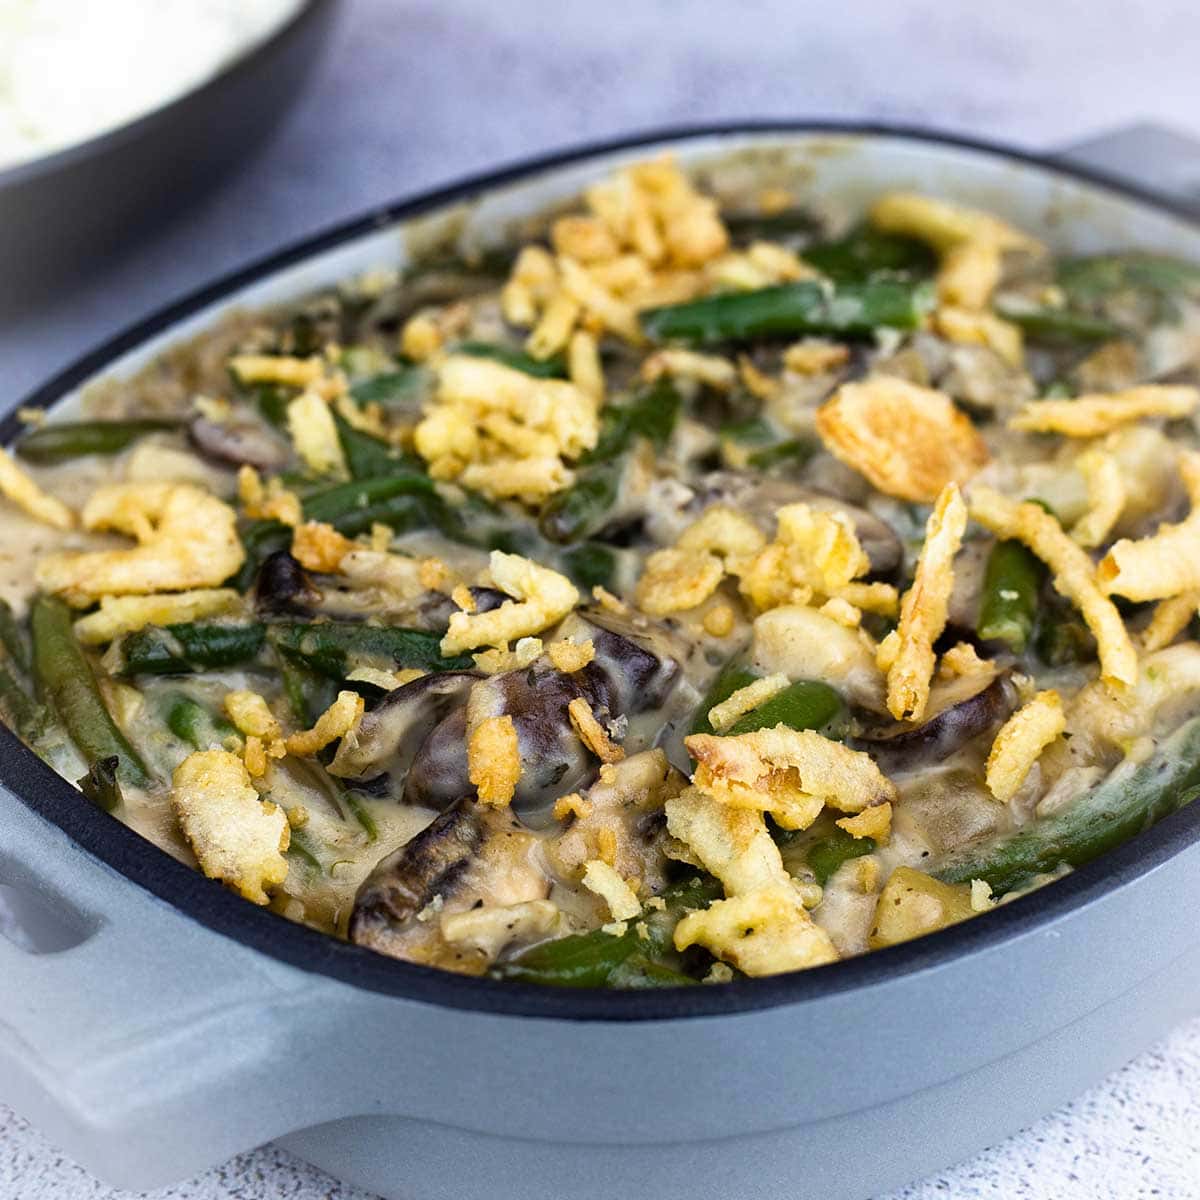
Not only is this green bean casserole EASY to make, it's QUICK! It also happens to be delicious, and this is coming from someone who is not a fan of green bean casserole!
Would you like to save this recipe?
You only need a few fresh ingredients to make the best tasting homemade green bean casserole AND we even air fry our own onions, so this is 100% scratch made.
This post may contain affiliate links. If you make a purchase after clicking a link, I may earn a small commission. As an Amazon Associate, I earn from qualifying purchases.
I think green bean casserole is a lot like cranberry sauce, you either LOVE it or you don't. I've never been a fan of either one, but, when I don't particularly like something, I try to switch it up so that I do like it and that's what I've done in this recipe.
If you want to try a delicious take on a cranberry sauce, check out my recipe for Cranberry Apple Chutney. It's so good!
I switched out the canned soup and canned green beans in favor of fresh green beans and letting the pressure cooker make the condensed mushroom soup at the same time it cooks the beans. I can't begin to tell you how easy it is... and so quick!
You can even make it ahead of time, warm it through and then add the homemade air fried onions on top, pop it under the broiler for a few minutes and it's ready to serve.
Frequently Asked Questions
You can, but fresh is going to work better and taste better in my opinion. I haven't tested the recipe with frozen green beans, but that would be my next choice if you can't find fresh ones. I would put the beans in frozen at the same time as the recipe says to add the fresh beans and follow all the same instructions.
As far as canned green beans go, I would drain the liquid and add them in AFTER the pressure cook time and just warm them through. They are fully cooked already and I'm not sure how well they would fair being pressure cooked.
You can, but you don't want to pressure cook it in the inner pot or you most likely will get the water notice. You would also want to cut the salt back in the recipe because the canned soup has a lot of sodium in it already.
If you wanted to use fresh beans, but a can of cream of mushroom soup, I would put the mushroom soup in the 6" Fat Daddio pan, covered, instead of the roux that the recipe calls for. Then, when the PC time is up, stir the contents of the pan into the green bean/broth mixture. Honestly, it's so easy to make this recipe as written, I would really suggest doing that before using canned soup.
You can omit the mushrooms if you don't like them. You can also add in chopped celery in place of them if you like.
I would only make it up a day or two ahead of time. I've noticed that after a few days, the sauce becomes more liquidy and you would have to drain off that extra liquid before warming and serving.
Is it Worth it to Make Homemade Air-Fried Onions?
I'm sure the sale of French's Crispy Fried Onions is at an all-time high around Thanksgiving & Christmas, in part to being used by households all over the US to top their Green Bean Casseroles!
Let's face it they are tasty and easy to sprinkle on top. No work, No fuss. BUT, I wanted to try my hand at homemade air fried crispy onions. I wasn't sure if they would turn out, but I gave it a shot and here are my thoughts.
I used the Ninja Foodi Pressure Cooker & Air Crisper to make them and it took two batches to get ½ of a thinly sliced onion air crisped because I didn't want to crowd the basket. Had I used the Ninja Foodi XL grill, I think I would have been able to get it all done in one batch.
They are super easy to make and each batch only takes about 5 minutes or so to air crisp, so it doesn't take too long.
They can be made ahead of time, so that is a plus.
They were a little messy, but not too bad.
Taking all of that into consideration, are they worth making homemade or would I buy them prepared next time?
I would definitely make them myself and this is why.
The FLAVOR is unbelievable. I know exactly what is in them. You can taste REAL onions!
I know they say that French's Crispy Onions are made from real onions, but you can't see any onions. I'm guessing they are dehydrated and in powder form.
While French's are a little crispier than my homemade kind, I will always make them myself from now on.
The directions for making them are in the recipe card and detailed instructions with pictures are below.
Can I Serve the Green Bean Casserole in a Casserole Dish instead of the Inner Pot?
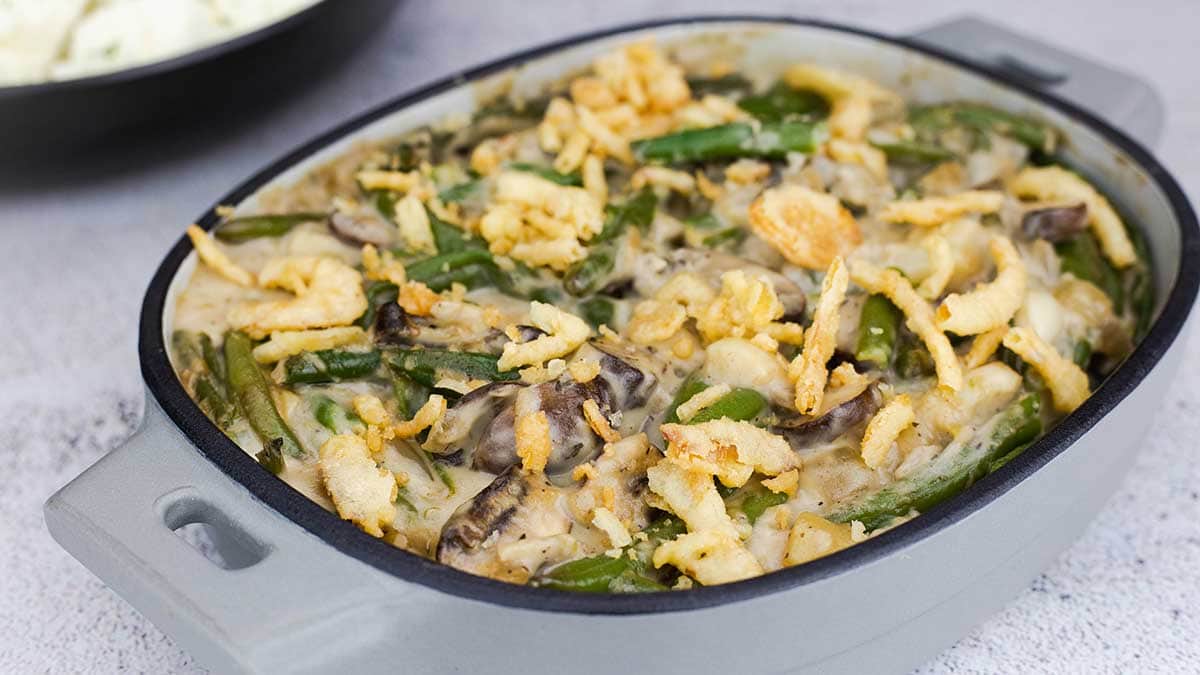
YES! Using the Pressure Cooker to make the Green Bean Casserole is quick and easy, but you don't always want to serve right out of the inner pot when you are entertaining.
Simply make the green bean casserole as instructed in the recipe and, after you thicken with the cream and the roux, transfer it to your casserole dish.
I just recently received a new line of casserole dishes from Pampered Chef and they are BEAUTIFUL!
Here is the link if you want to check them out, they come in 3 sizes.
(affiliate link)1 Qt Enamel Cast Iron Baker
(affiliate link)2 Qt Enamel Cast Iron Baker
(affiliate link)6 Qt Enamel Dutch Oven
Then, you can either refrigerate it (covered) if you aren't serving it that day or place the crispy onions on top and broil for a few minutes in your oven just before serving.
How to Make Green Bean Casserole in an Instant Pot
If you have an Instant Pot Duo Crisp or a Crisping lid for your Instant Pot, simply follow the same instructions in the recipe.
If you don't have a crisping lid, then after you stir in the roux and cream and the sauce thickens, transfer to your oven-proof serving dish and put the crispy onions on top. Broil just for a few minutes before serving.
How to Make Homemade Air Fried Crispy Onions
Step One
First thing to do is preheat the Ninja Foodi on broil or Air Fryer on the hottest air fry setting for 10 minutes. Make sure the basket or cooking surface is in during the preheat.
Thinly slice ½ of an onion. I used a Vidalia onion, but you can use any type of onion you like. You want the onions to be about 2 millimeters in thickness, almost thin enough to see through.
It really helps to use a mandoline OR a very sharp Chef's knife to get the slices thin and even so they cook evenly.
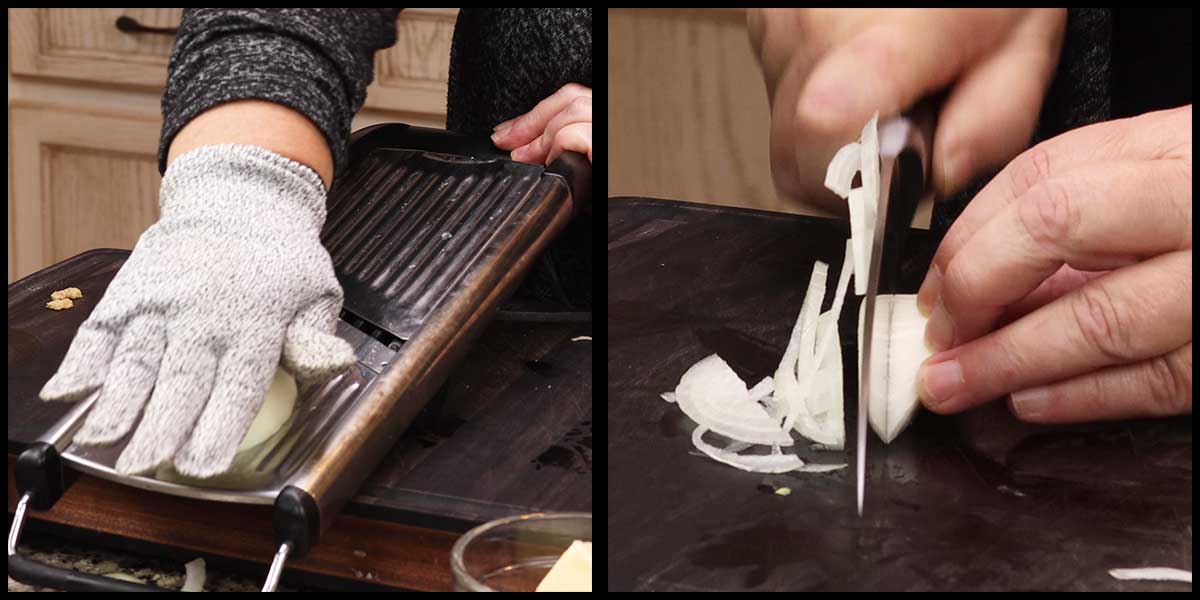
The mandoline I use works great, it's the best mandoline I've ever purchased and I love that it comes with a guard and a cutting glove. Mandolines are super sharp, so you really have to keep safety in mind when using them.
Here is a link to the mandoline I use: (affiliate link)Mandoline Slicer with Cut-Resistant Gloves and Blade Guard
If you would rather look into getting a good quality knife, the one I use is right here: (affiliate link)Pampered Chef Chef's Knife
Step Two
Melt ¼ cup of butter in a small bowl.
In a medium size bowl or (affiliate link)coating tray, mix ⅔ cup of all purpose flour with 1 teaspoon sea salt, and 1 teaspoon onion powder.
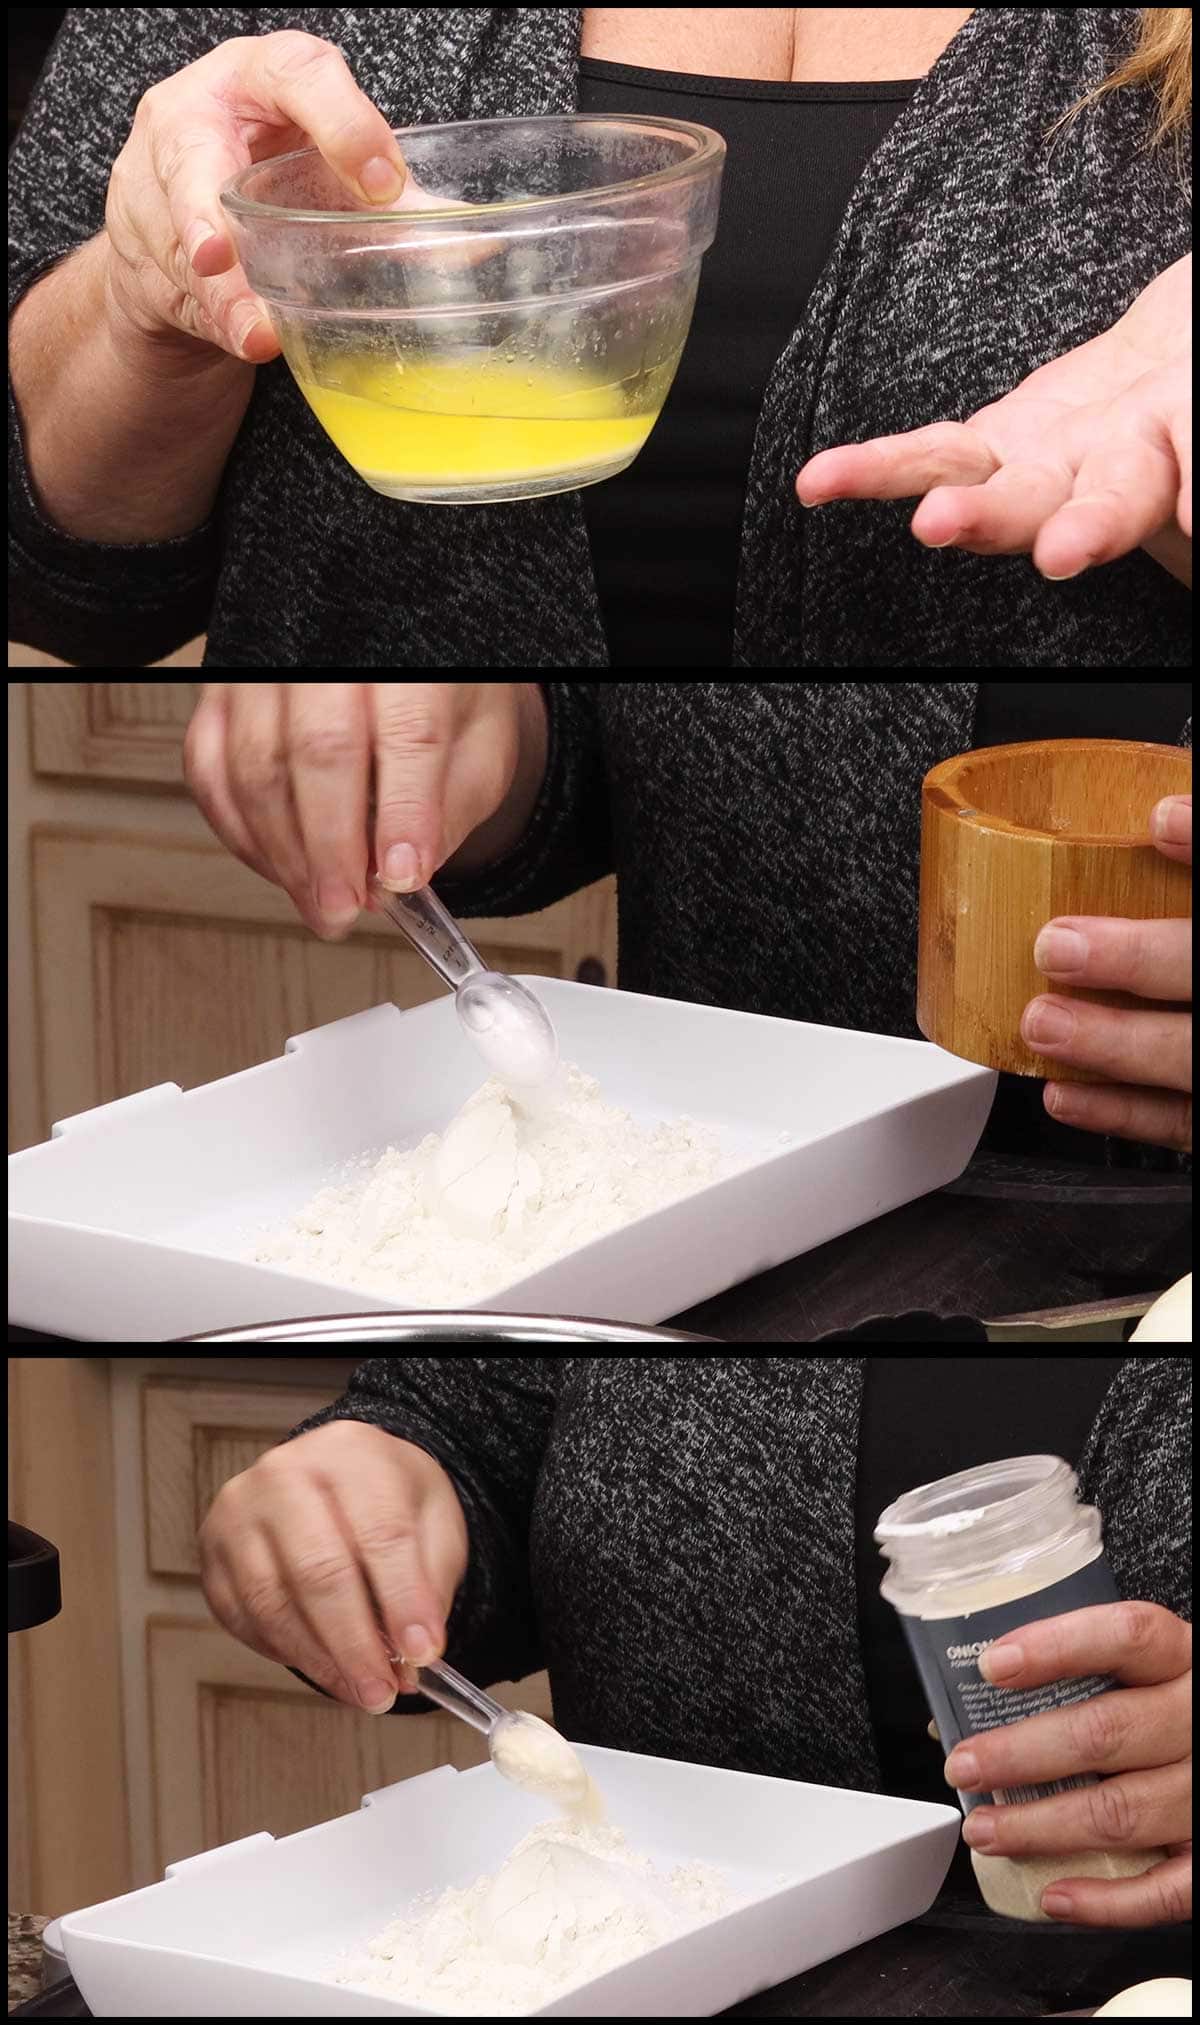
Make sure to mix the flour mixture well so the onion powder and salt are equally dispersed throughout the flour. Nothing worse than having a salt pocket on your air fried crispy onions.
Step Three
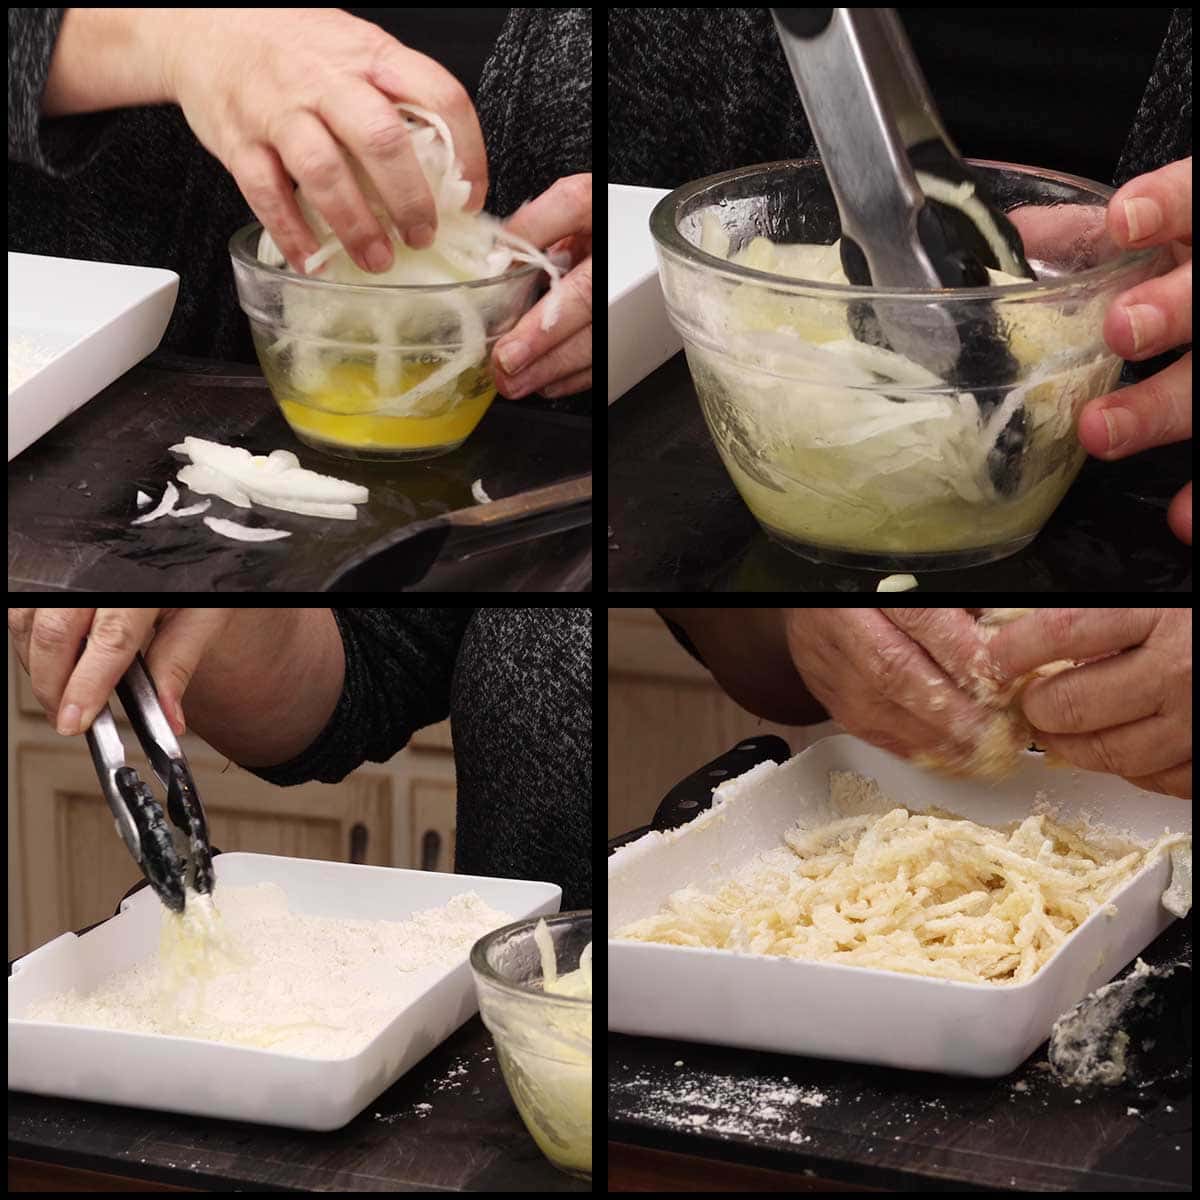
Coat the onions in the melted butter and dredge through the flour mixture. Try to avoid having the onions clump, they tend to want to stick together.
Step Four
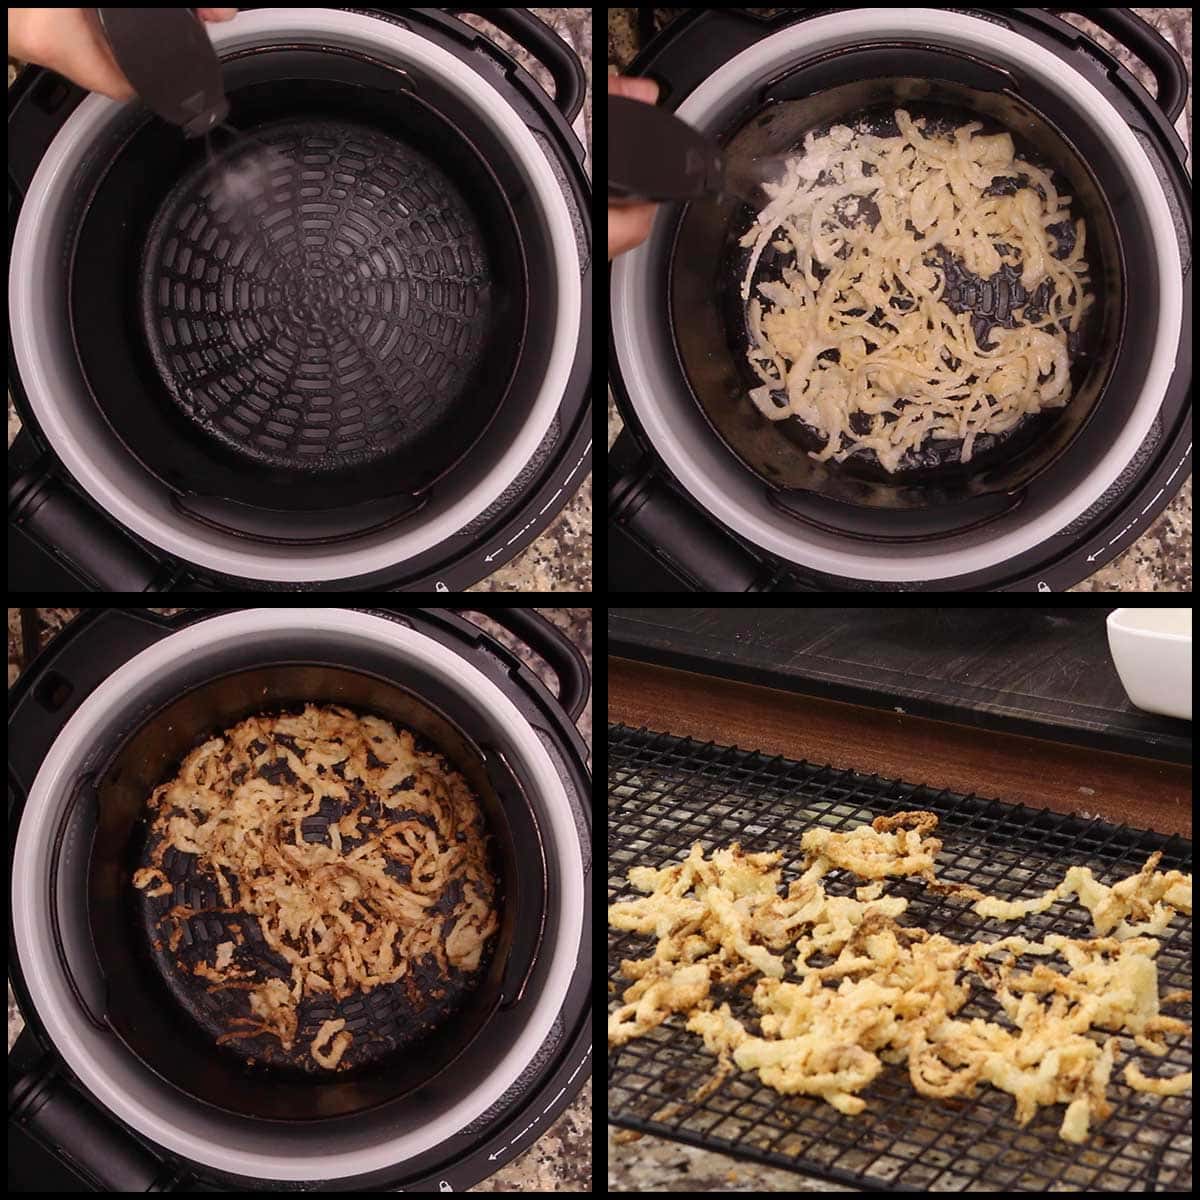
Spritz the basket of the Ninja Foodi or your Air Fryer cooking surface with oil of choice and lay a single layer of the onions in the basket. Spritz the top of the onions with oil.
Air Crisp on 375℉/190℃ for about 7-10 minutes, tossing them to separate any that are sticking together after 5 minutes.
Remove from the basket and let cool on a cooling rack. It's important that you don't put them on a plate or they will steam on the bottom and become soggy.
Allow the onions to cool completely before bagging them up if you aren't using them on the same day.
How to Make the Ninja Foodi Green Bean Casserole
Step One:
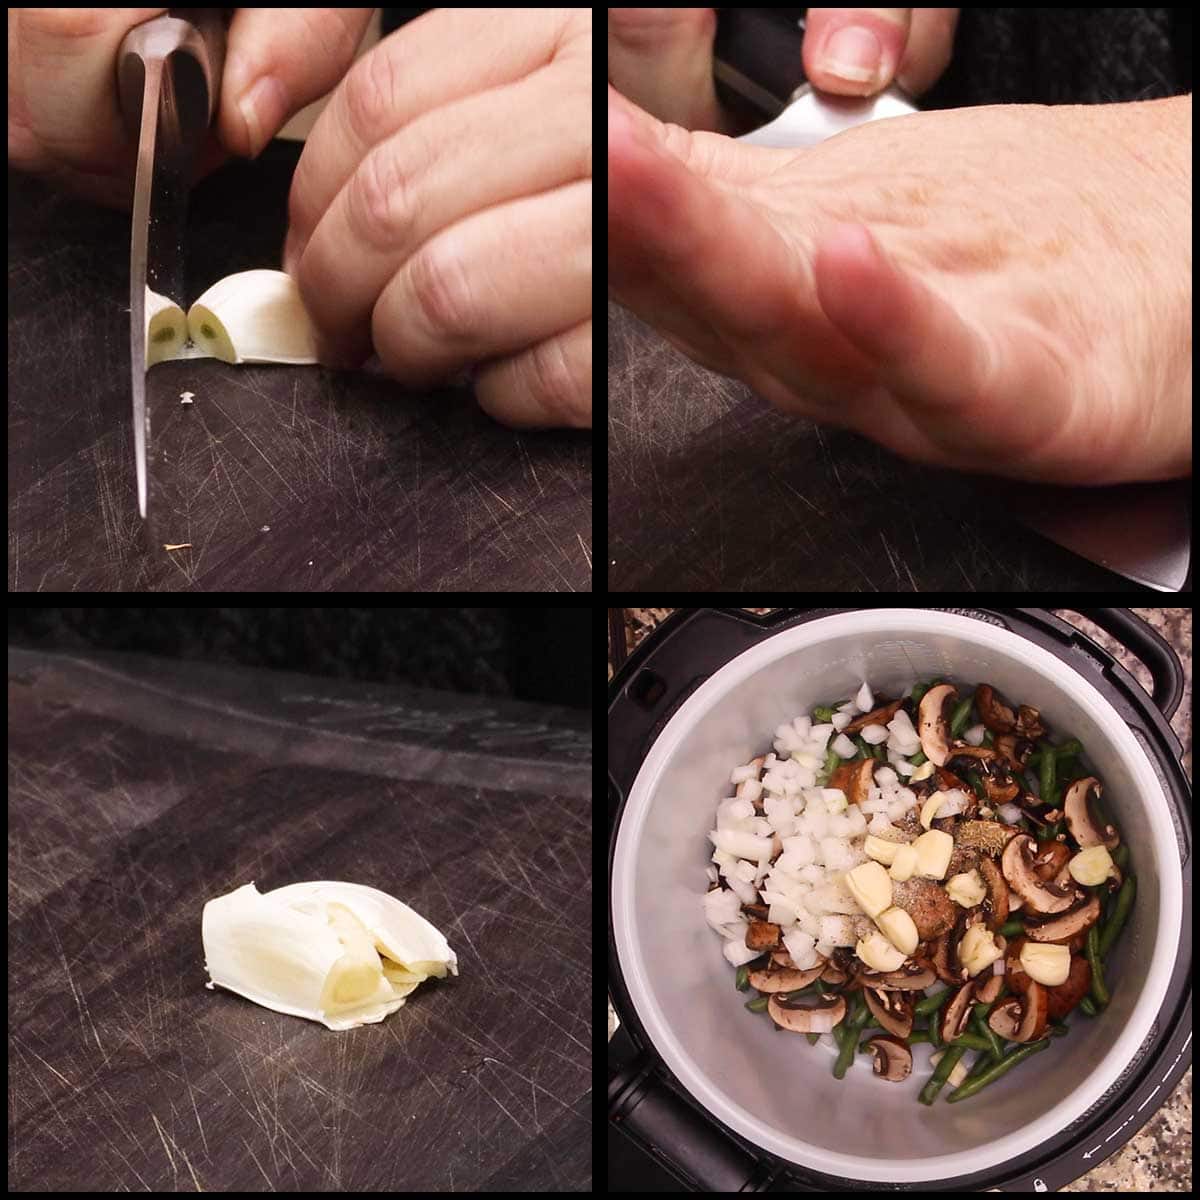
Cut the ends off of the fresh green beans and place them in the inner pot. Slice the mushrooms and add them to the inner pot. I used baby portobello mushrooms, but you can use white button if you prefer.
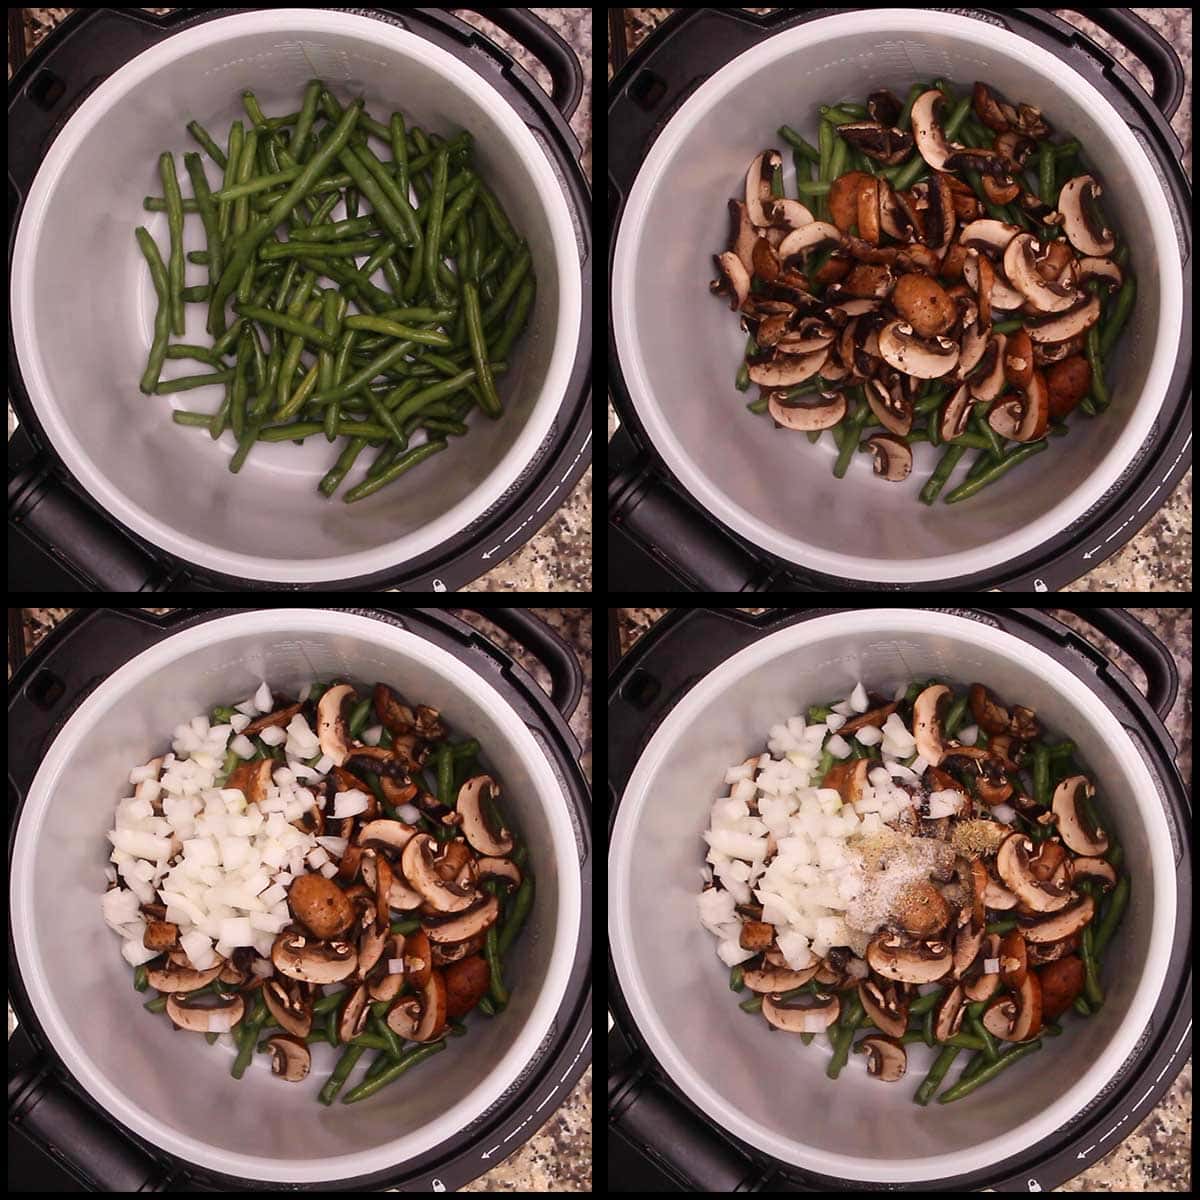
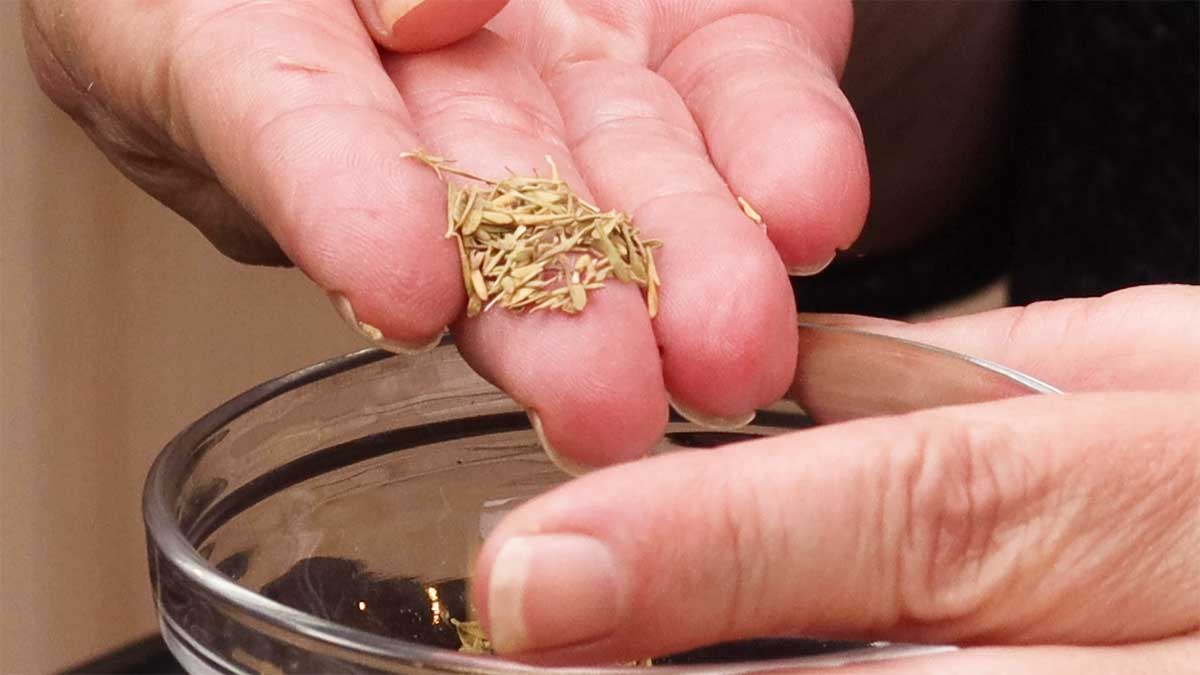
Dice the onion into about ½" dice and add to the pot. Add the salt, pepper, and dried thyme leaves. I used dried thyme leaves in this recipe, if you wanted to use fresh, I would add 2-3 sprigs. If you have dried ground thyme, only use a pinch because a little goes a long way.
Step Two
Peel and smash a bulb of garlic. I know, I know... that's a TON of garlic! Of course you don't have to use all or even any garlic if you don't want, but a whole bulb works perfectly in this dish BECAUSE we only smash it AND we pressure cook it.
Minced garlic is VERY different from whole cloves that are just smashed and minced is much more powerful in flavor. I've used anywhere from 5-10 whole cloves that I smashed and the garlic flavor in the green bean casserole is subtle. I promise!
If you want to use minced garlic instead, I would use about 1 tsp.
Add the peeled and smashed garlic to the inner pot.
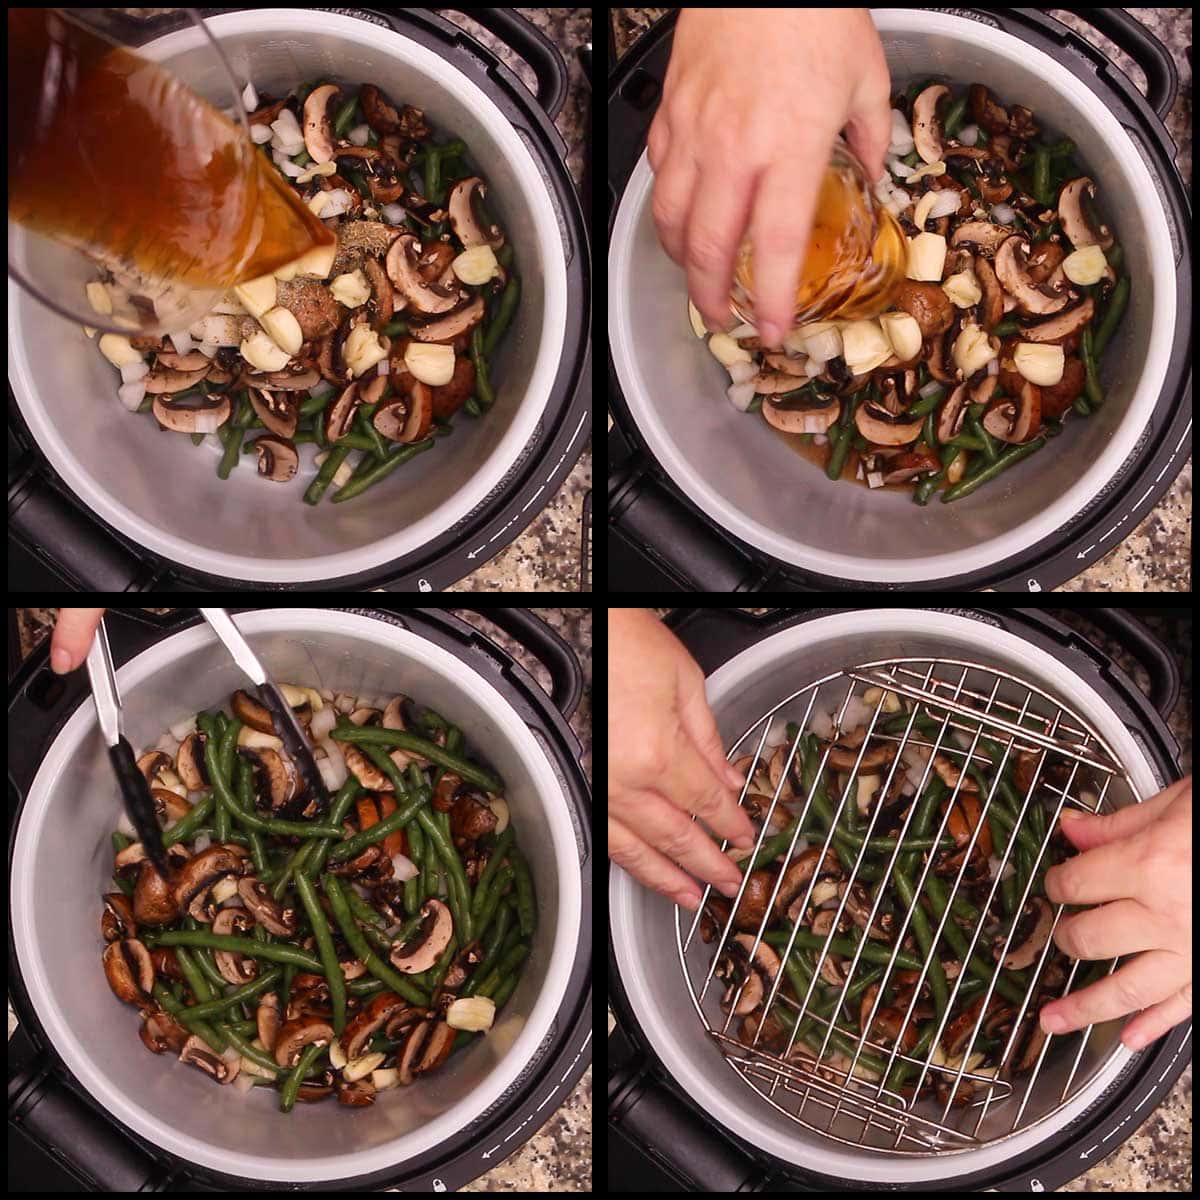
Next add the beef broth and sherry and stir. The sherry is optional, but it really gave a great flavor. I used the cooking sherry from the grocery store, so you don't need to get fancy. Unless of course you enjoy cooking with sherry and then you probably have a nice bottle already!
Place the rack in the high position in the Ninja Foodi. Move the stringbeans around if needed.
Step Three
Time to make the roux! Don't worry though, it's super easy and doesn't involve the stove at all.
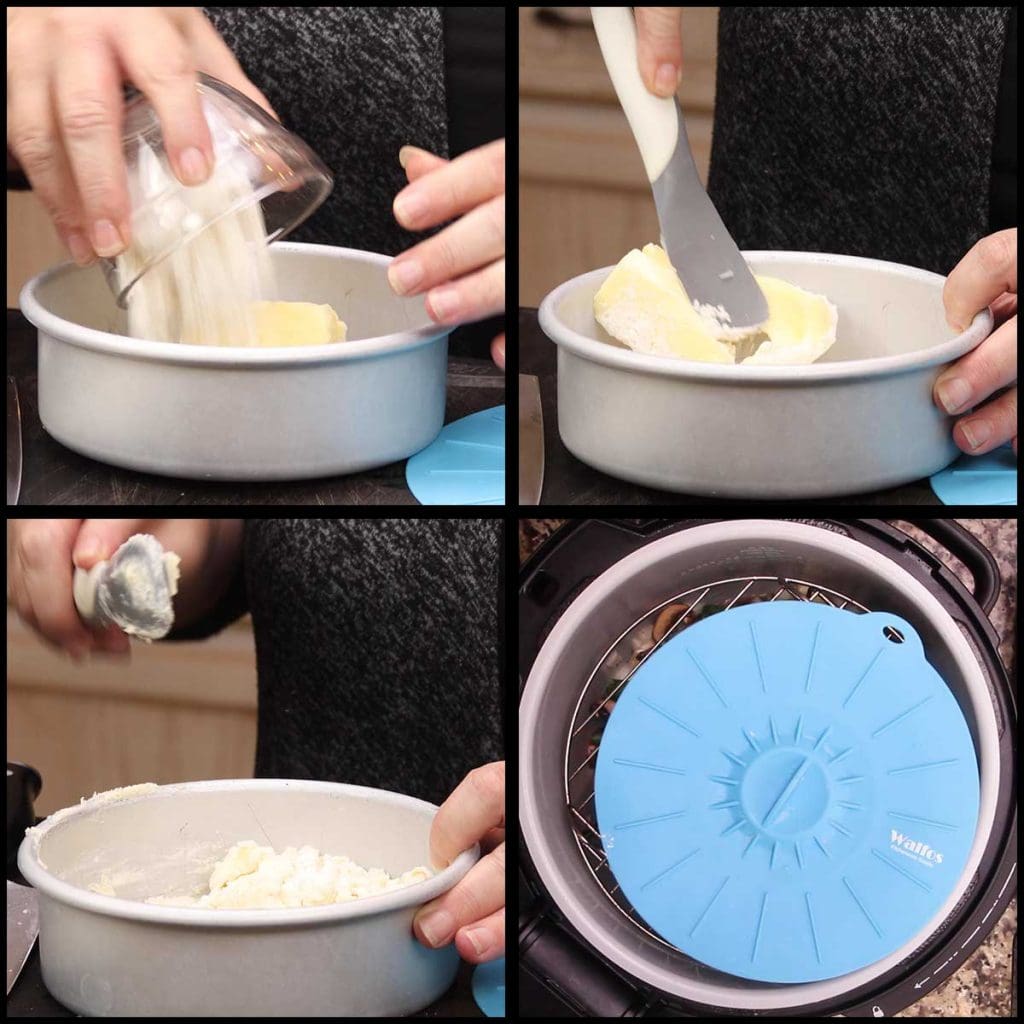
Simply mix ¼ cup of butter and ¼ cup of flour together to form a paste. I do this right in the (affiliate link)6" Fat Daddio pan that I'll use to pressure cook the roux. You can use any pan that fits on the top of the rack as long it's pressure safe.
Put the pan on top of the rack (it needs to be 2" or less for the 6.5qt Ninja Foodi) and cover it with foil or these handy (affiliate link)silicone covers.
Put the pressure lid on and pressure cook on high for ZERO minutes. Take the time down until it reads zero and press start. When the time is up, do an immediate release.
Step Four
Remove the pressure lid when the pin in the back drops and remove the covered pan from the rack. Remove the rack. Mix the flour/butter mixture so it is all combined and add to the inner pot.
Add ½ cup of heavy cream or half & half and stir. Turn the heat on low-medium and heat just for about a minute or two. Stir and you will see the sauce thicken.
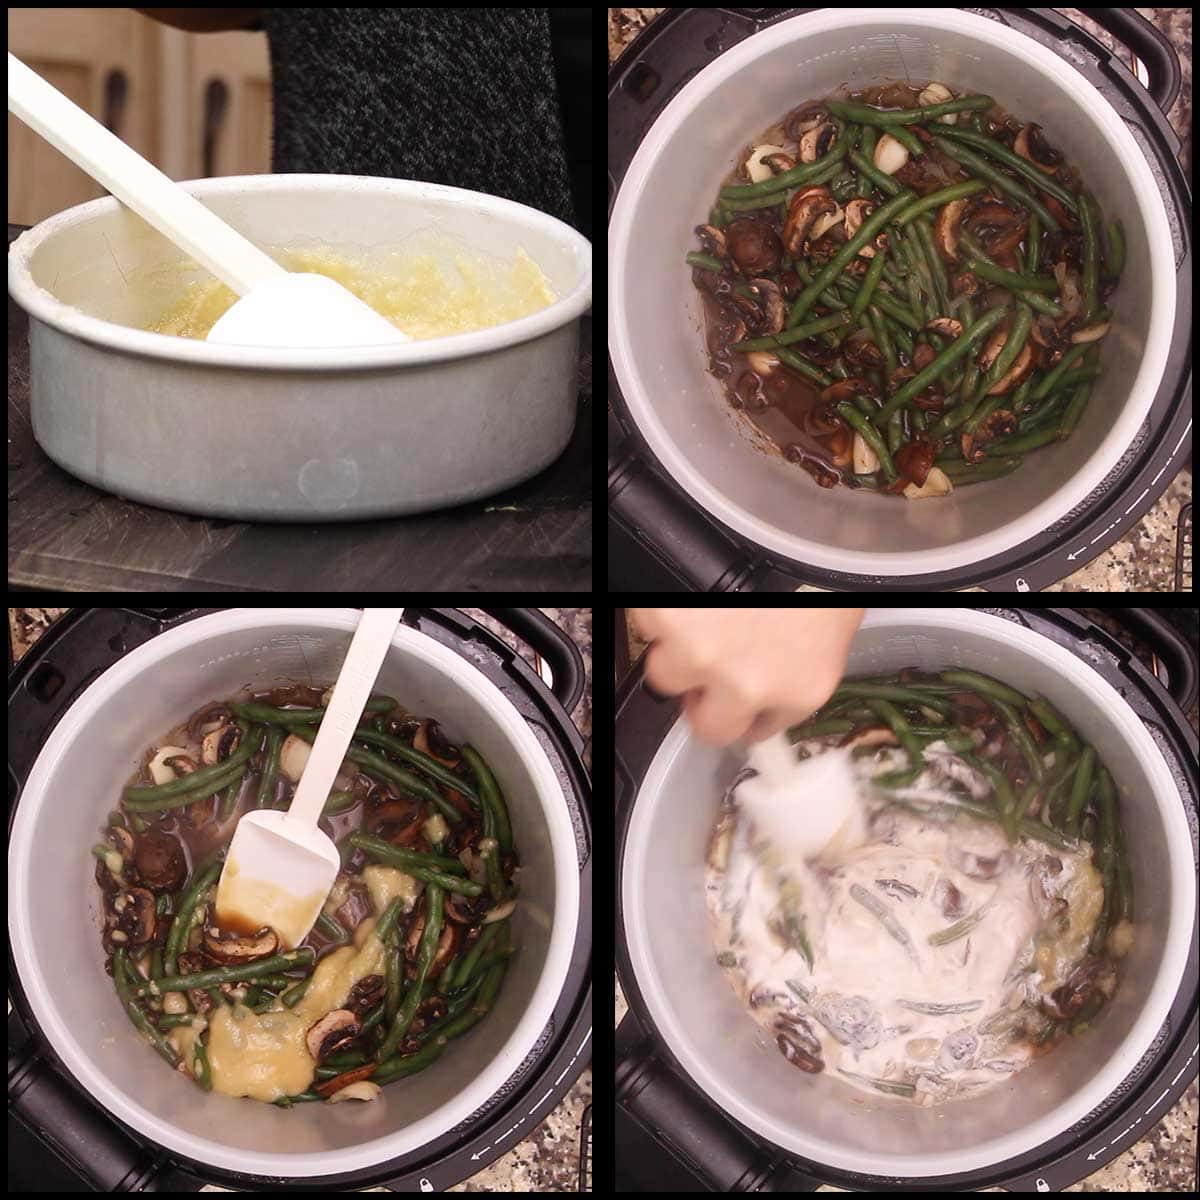
When it is as thick as you want it to be, turn the Ninja Foodi off.
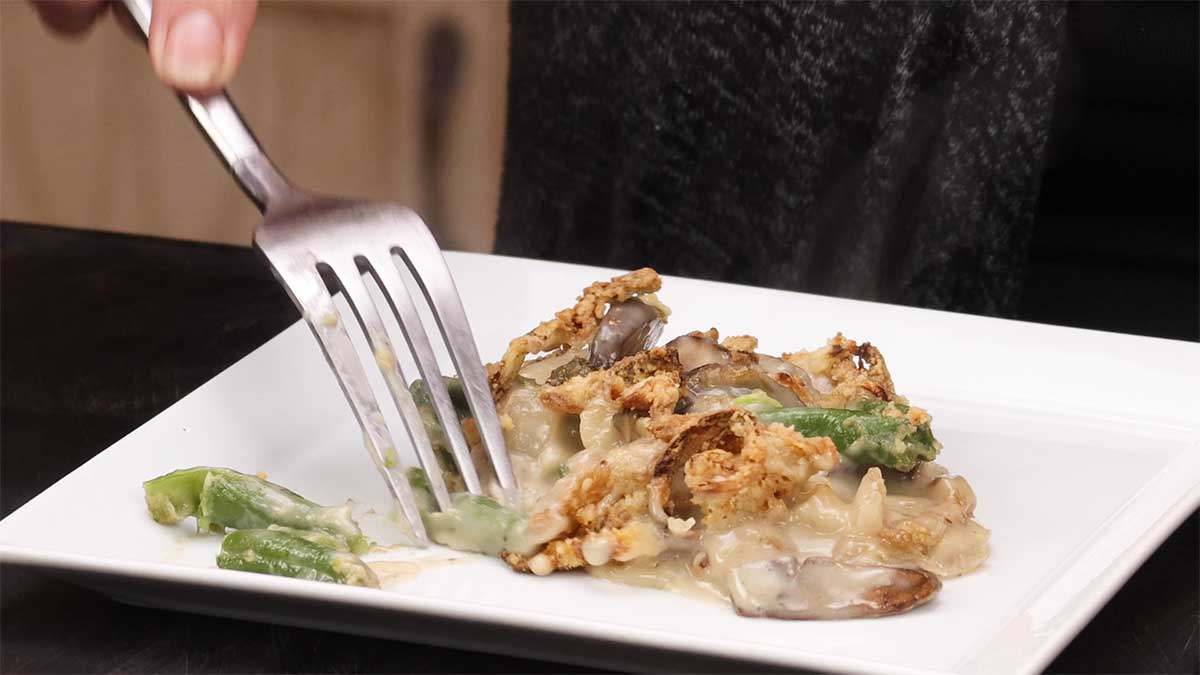
Either transfer the mixture to a casserole dish or simply top with the crispy onions and Air Crisp on 400℉/200℃ for 3-5 minutes.
Serve & Enjoy!
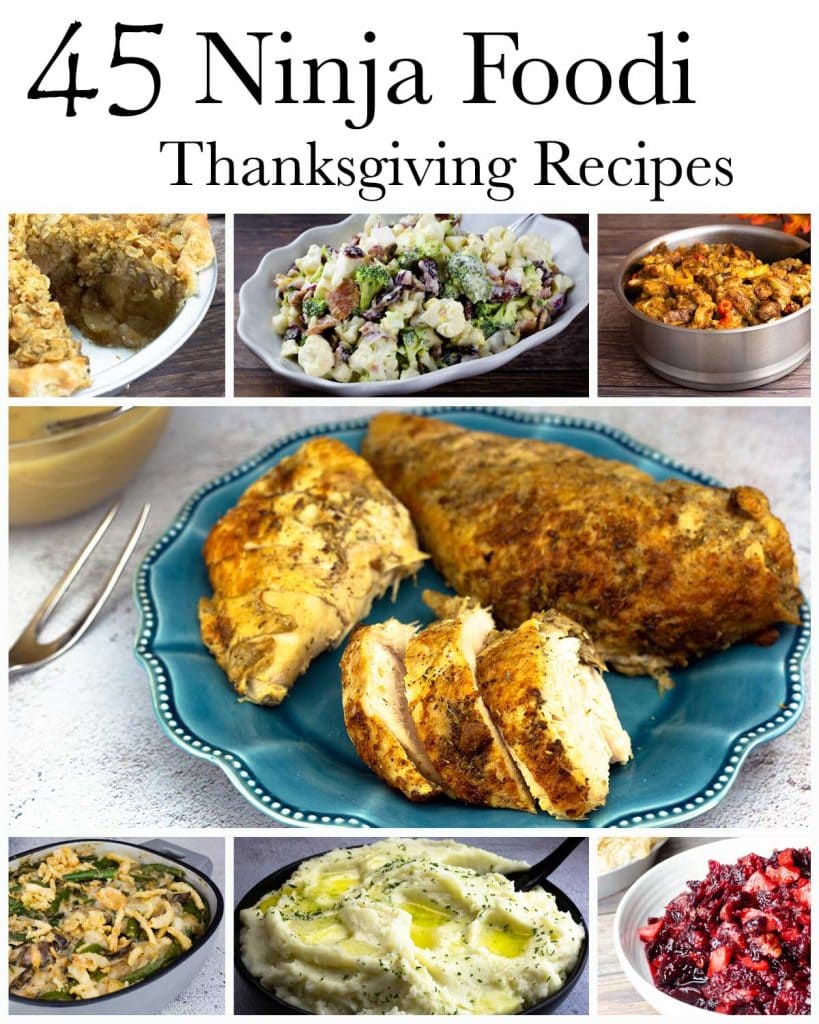
Be sure to check out these other fantastic Thanksgiving or Holiday Recipes by The Salted Pepper!
Ninja Foodi Green Bean Casserole w/ Air Fried Crispy Onions
Ingredients
Air Fried Onions
- ½ onion
- ¼ cup butter melted
- ⅔ cup flour
- 1 teaspoon sea salt, fine grind
- 1 teaspoon onion powder
- ½ tablespoon oil for spritzing
Green Bean Casserole
- 12 ounces fresh green beans
- 8 ounces portobello mushrooms
- ½ onion
- 1 teaspoon sea salt, fine grind
- ½ teaspoon black pepper
- ½ teaspoon thyme leaves, dried
- 1 small bulb garlic
- ¾ cup beef or chicken stock
- ¼ cup sherry
- ½ cup heavy cream
Roux
- ¼ cup butter room temp
- ¼ cup flour
Would you like to save this recipe?
Instructions
Homemade Air Fried Crispy Onions
- Preheat the Ninja Foodi using Broil for 10 minutes with the basket in. If using a different air fryer, preheat with the basket or cooking surface in the air fryer on the hottest setting for 10 minutes.
- Thinly slice the onion into strips. A (affiliate link)mandoline works best for this and I set mine on 2 mm.
- Melt the butter in a medium size bowl and add the onions.
- Combine ⅔ cup of flour with 1 teaspoon fine grind sea salt and 1 teaspoon onion powder. Mix well. I like to use these (affiliate link)coating trays, but a large shallow container of any kind will work.
- Place a few onion strips at a time into the flour mixture to coat. Try to keep them from clumping together. Repeat until all onions are coated.
- Spritz the basket with oil of your choice and place the coated onions in a single layer. Spritz the top with oil. Air Crisp/Air Fry on 375°F/190°C for 5 minutes. Toss the onions around a bit and separate them if needed. Air Crisp/Air Fry for another 1-2 minutes. Remove the onions and let them cool on a cooling rack. Repeat if needed for the remaining onions.
Green Bean Casserole
- Add fresh green beans, sliced mushrooms, ½ onion diced, and 1 teaspoon sea salt, ½ teaspoon black pepper, ½ teaspoon dried thyme leaves to the inner pot.
- Cut the end off of the bulb of garlic. Peel and smash the garlic cloves, add to the pot.
- Add ¾ cup of beef stock (or chicken stock) and ¼ cup of sherry OR 1 cup of beef or chicken stock. Stir and place the reversible rack in the high position.
- In a 6" Fat Daddio pan, add ¼ cup of room temp butter and ¼ of flour and make a paste. Cover the pan and put on the rack.
- Put the pressure lid on and turn the valve to seal. Pressure cook on high for ZERO minutes. Do an immediate release. Remove the pan with the butter/flour and the rack.
- Stir the butter/flour so it is well combined and add it to the inner pot. Add in ½ cup of heavy cream and stir. Turn the sear/sauté on low-medium and heat just until the sauce thickens. Stir and top with air fried onions. Air Crisp/Air Fry on 400°F/200°C for 5 minutes.
- Serve & Enjoy!
Karen Crook says
Wow! This was sooo good! I made this as a test to see if I wanted it for Thanksgiving. I used the canned French fried onion rings because I didn’t have enough time to try to make my own. My kids kept telling me how good it was. There was none left.
Louise says
I'm so glad you enjoyed it!
Jean Toll says
I made a mistake and put the cream in too early. Is that going to plug up the machine? Drat? I read the recipe about 10 times! I can’t believe I did that.
Louise says
The thing that might happen is it won't come to pressure or it will scorch on the bottom. I hope it all works out!
Barbara Huft says
I want to make this for Christmas and was wondering if I can just double it. Would the cook time be the same?
Louise says
If you double it, the time to pressure will be longer and that might overcook the green beans. If you don't mind them really soft, then you can absolutely double the recipe and PC for zero minutes.
Niki says
Is there a replacement for the paste? I have a 5 quart and don’t have a way to make the roux on top? Thanks and happy holidays
Louise says
Make the roux first by using sear/sauté on medium. Melt the butter, then add the flour, stir to combine and cook for about 2 minutes to get the flour taste out. Remove it from the pot and wash the pot. Proceed with the recipe and then stir in the roux when it says to. Enjoy!
Sharon Fisk says
Hey Louise! I just wanted to say thanks so much for this recipe! I made this a few days ago, but for health reasons I substituted soy milk for heavy cream and it was still a huge hit with my family. I will definitely be making this for thanksgiving.
Louise says
I'm so glad to hear that!