Is it better to Pressure Cooker & Air Crisp or just Air Crisp a whole chicken? That is one of the most frequently asked questions in the Ninja Foodi Facebook groups. Guess what? I found an even BETTER way to make the PERFECT Whole Chicken in the Ninja Foodi!
You may have heard about the newest Ninja Foodi model that has one lid. It's a pretty cool design and the chicken turned out great using the steam & crisp function, so I thought I'd give the same technique a try using my 8qt Ninja Foodi with two lids and it turned out amazing!
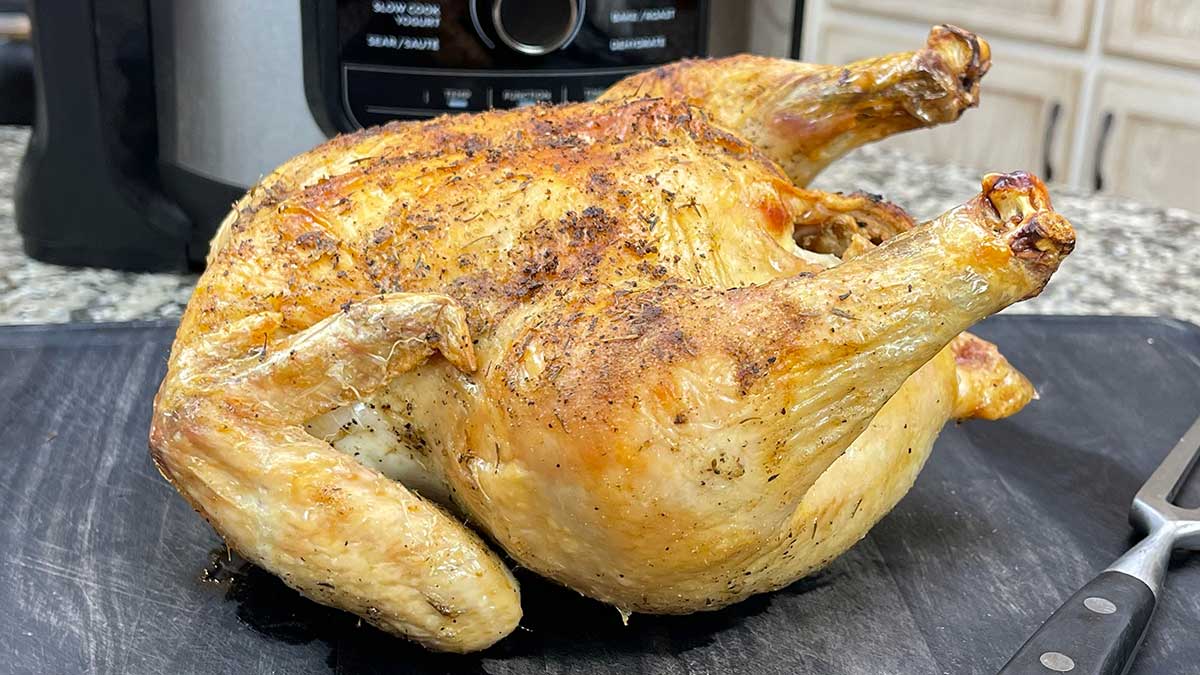
Using both the steam function and the air crisp function on the Ninja Foodi the whole chicken was perfectly cooked with crispy skin. I will say that the chicken I cooked using the steam & crisp function was slightly crispier, but I think that is due to me turning down the temperature while air frying using the older model.
In the video demonstration, I started out on 375℉/190℃ and decreased down to 350℉/175℃. I recommend staying on 375℉/190℃ the entire time as long as you are not seeing any evidence of the skin burning.
Frequently Asked Questions
While you can usually fit a whole chicken up to 6-7 pounds in the 6.5qt, it is difficult to use the crisping lid to crisp the skin because the chicken will usually sit up too high and is too close to the heating element.
For the best results, I would stick to a 4-5 pound whole chicken. This size chicken will fit on the rack to keep it from sitting in juices and you can use the steam function or the pressure cook function followed by air crisping.
If you really want to make sure the chicken will fit, take the inner pot and the rack to the grocery store with you!
The increase in height allows for larger chickens up to 8 or 9 pounds, but I recommend sticking with chickens that are between 4-6 pounds for the best results. Depending on the shape of the chicken, larger chickens can often sit up too high in the pot making it difficult to get even crisping.
You can always dump the liquid out of the pot and put the chicken right on the bottom of the inner pot when crisping larger chickens.
Recipes Using Leftover Whole Roasted Chicken
If you have leftovers from your Ninja Foodi Whole Chicken, no worries! There are so many recipes you can make.
Number one, don't throw away the bones! You can make a delicious bone broth with just one chicken! Here is a quick and easy bone broth recipe.
- Bones and cartilage from 1 whole chicken
- 6 cups of water
- 1-2 teaspoons of salt
- 1 Tablespoon of apple cider vinegar (or white vinegar is fine)
- 1 carrot
- 1 celery rib (stalk)
- Any other seasonings or aromatics you like
Directions: Place the chicken bones, water, vinegar (this helps break down the cartilage and creates a very nutrient rich bone broth), carrot and celery, salt and any other seasoning you like.
Put the pressure lid on and turn the valve to seal. Pressure cook on high for 90 minutes and let the Ninja Foodi do a full natural release. Strain the broth and discard the bones and vegetable scraps. Refrigerate or freeze the bone broth.
More Ninja Foodi Chicken Recipes that you can make with leftover chicken.
What You'll Need for this Recipe
Whole Chicken
I recommend a chicken that weighs between 4-5 pounds (1.8-2.2kg) for the best results. While you can go larger in the 8 quart Ninja Foodi, you want to make sure you can keep the chicken elevated and out of the liquid during the cooking process.
If your chicken is too big to fit on the rack, you can cook it with it sitting on the bottom of the inner pot, but the underside of your chicken will boil instead of steam and crisp.
You can also make a whole turkey in the Ninja Foodi, so if you want to try that, here is my recipe: How to Cook a Whole Turkey in the Ninja Foodi
You will want your chicken to be thawed completely before cooking for the best results. The best way to thaw a chicken is in the refrigerator and it can take several days. If your chicken is partially thawed and you want to speed up the process, place the wrapped chicken (If your chicken didn't come wrapped in a heavy plastic wrapping, then make sure to wrap it really well or put it in a large bag that won't leak) in a large pot of cold water and put it in the fridge. This will speed up the thawing process. *Don't use hot water to thaw your chicken or it could become too warm in areas and bacteria could begin to multiply.
I also recommend seasoning your chicken 8-24 hours before cooking and letting it sit out at room temperature for about 30-90 minutes prior to cooking. I will discuss this in more detail below.
Accessories
You don't need any special accessories to make a whole chicken in the Ninja Foodi Pressure Cooker & Air Crisper. No matter which model you have, it came with either a reversible rack, crisping plate, crisping basket, or another type of rack.
I recommend using the rack over the crisping basket because it allows for better airflow around the chicken which results in more even cooking. This is especially true for larger chickens.
If your Ninja Foodi came with a crisping plate and a rack, I would use the rack over the crisping plate if at all possible so it is easier to remove the chicken at the end.
If you are cooking a larger chicken, you might want to use a (affiliate link)silicone sling which will allow it to sit a little lower in the pot.
Seasonings
In this recipe, I used a very simple spice blend of dry seasonings including fine grind sea salt, pepper, onion powder, garlic powder, thyme leaves, and poultry seasoning. I like to use a mild seasoning blend on my chicken so I can turn the leftovers into anything and not have the spices compete with each other.
You can use a combination of any of your favorite seasonings to create your own original spice blend or use one that is already prepared. You will need about 1-2 Tablespoons of the rub to lightly coat the chicken.
I strongly recommend seasoning your whole chicken 8-24 hours in advance of cooking. I recently made 2 whole chickens and seasoned one the day before and one just a few minutes before cooking. The one that was pre-seasoned was much more flavorful than the one I seasoned just before cooking. The spice blend and especially the salt was able to penetrate into the chicken and each bite of meat was tender and delicious.
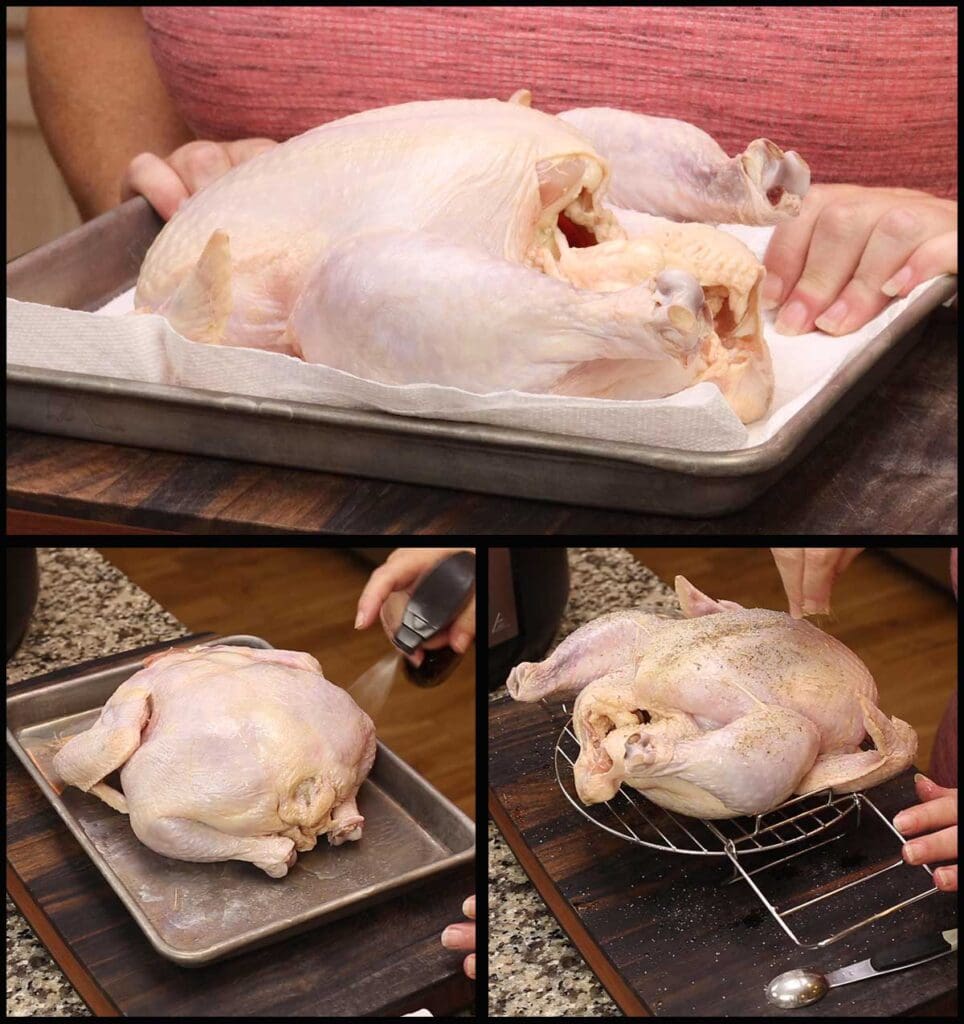
What I usually do is allow the chicken to thaw completely and I salt the inside of the cavity. It is no longer recommended to rinse your chicken in the sink due to the potential cross contamination. Then I place it on a tray with a paper towel under the chicken and blot it dry all over.
To season the chicken, I spritz it with olive oil (you could use any oil you like or even melted butter would be great) and then apply the rub all over the chicken. I start with the underside and then flip the chicken onto the rack that I'm going to cook it on and repeat on the breast side. I place the rack on a plate or tray and put the chicken into the fridge until about 60-90 minutes before I am going to cook it.
Liquid
If you are pressure cooking or steaming your chicken, you will need some liquid. You can use 1 cup of water or chicken broth as the thin liquid.
You can also use beer, wine, or a combination of liquids that equal 1 cup.
If you are Air Crisping ONLY, you do not need to add liquid to the inner pot.
How to Determine if your Chicken is Done
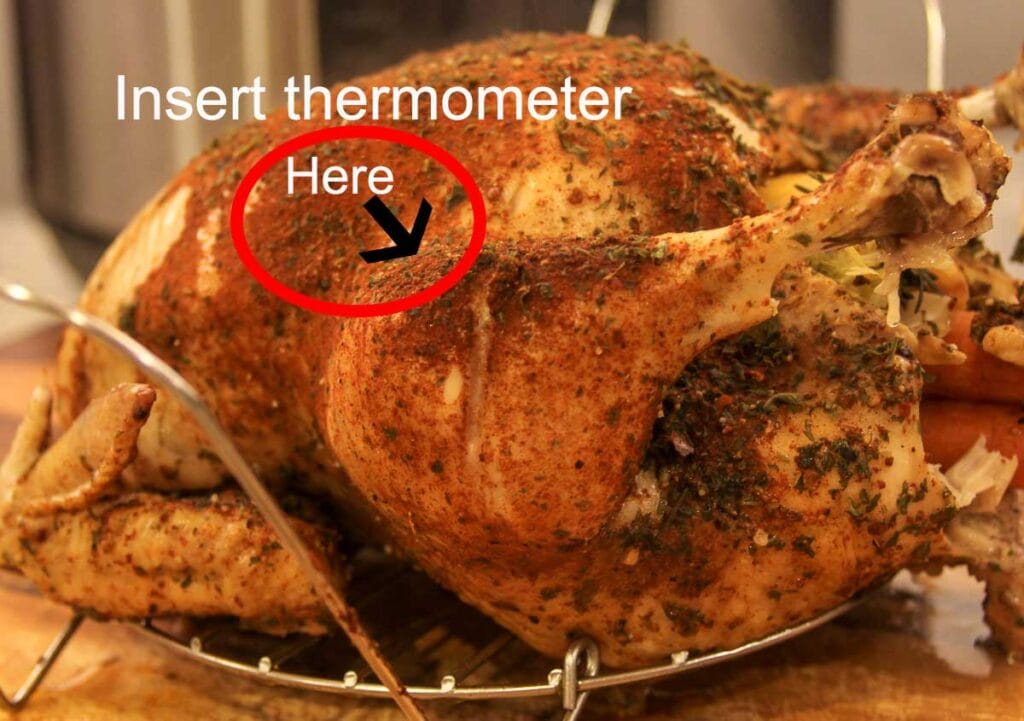
The most accurate way to determine if your chicken is done is to take a temperature of the meat between the leg and the breast. The picture below shows you the proper placement of a probe or instant read thermometer.
The internal temperature should reach at least 165℉/74℃ to effectively and instantly kill any bacteria that could be present. The temperature will continue to rise while the chicken rests and it can rise by as much as 15-20°, so I aim to remove the chicken when it reaches 155-160℉ and let it rest for a full 10 minutes. During this resting time, the internal temperature will reach 165℉ at the minimum and I check that with an (affiliate link)instant read thermometer.
There is no set time that will ensure the chicken is cooked to the FDA recommendations for food safety, so it is important to have an accurate thermometer.
Contrary to the belief of many, the color of the juices are not an accurate indicator of doneness in chickens. Nor is a slight pink tinge to breast meat an accurate indicator that it is undercooked.
You can have a fully cooked chicken that looks slightly pink or the juices are pink tinged and this is because of myoglobin. The myoglobin is also responsible for the darker color of the legs, wings, and thighs. These are more frequently used muscles than the breast and therefore contains more of the myoglobin than the underworked muscles, like the breasts.
Myoglobin is also responsible for pink or red tinged juices that run out of meat. So, that rare steak isn't leaking blood, it's myoglobin-tinged juices.
Same with chicken. In fact, all chickens are drained of their blood during the processing, so it's not blood at all. Here is an article that explains this a little bit more: The Truth About Eating Pink Chicken
So, before you overcook your chicken, take a temperature with a reliable thermometer in several places. Make sure to penetrate the meat, but don't hit the bone or the temperature will not be accurate.
Preparing Your Chicken Before Cooking
There are a few things you can do to prepare your chicken before cooking and this applies to any cooking method, but is really important when you want nice and crispy skin and flavorful meat.
The first thing is always fully thaw your chicken. Do this in the refrigerator and plan on it taking a few days. You can speed up the process by placing a fully wrapped chicken in a large pot of water in the fridge.
Another suggestion is to brine or season your chicken 24 hours in advance. This will give you the best tasting meat. Your brine can be simply salt and cold water or you make it flavorful with lemons and herbs.
If you want to use a dry seasoning blend, then I recommend placing your thawed chicken on a paper towel lined tray and blot it dry as much as possible. Spritz the outside with oil or brush with butter and sprinkle the seasoning blend all over the chicken.
Ninja Foodi Pressure Cooked Whole Chicken
Sometimes you might prefer to skip the crisping of the skin and simply pressure cook a whole chicken. This is a great way to cook a chicken that you want to use for chicken salad, to put into soups, or shredded chicken.
It is also a great way to meal plan because you can fit a larger chicken in the 6.5 or 8 quart Ninja Foodi and as long as you keep the seasonings simple, like salt and pepper, you can then use the chicken in different recipes throughout the week. AND, don't forget about that liquid! Strain it and use is as the liquid for soup or another meal that you are pressure cooking.
When determining the PC time, you will mostly rely on the weight of the chicken. My rule of thumb is 4 minutes per pound. So, for a 5 pound chicken, you would set your time for 20 minutes of high pressure. Put on the pressure lid and make sure your pressure release valve is turned to the sealed position for pressure cooking.
It is also important to allow for a natural release after Pressure Cooking. Doing a quick release when the time is up can result in your chicken splitting or drying out. I recommend a minimum of a 10-minute natural release.
There are factors other than weight that will affect the cook time of your chicken, so you will want to adjust accordingly. I have found that organic chickens take a little longer to cook, so you might want to plan on 5 minutes per pound. If in doubt, stick to the 4-minute-per-pound time because you can always cook the chicken longer, but you can't fix it once it's overcooked. What I would do in this case is to use the 4-minute-per-pound rule of thumb for my organic chicken and do a full natural release instead of just 10 minutes.
Another factor that will GREATLY affect the timing is the temperature of the chicken to start with. If your chicken is straight out of the refrigerator or partially frozen, it is going to take longer than if it had sat out for 90 minutes prior to cooking. If you are starting out with a cold chicken, I would calculate the time based on 4 minutes per pound and then add 1-2 minutes to the total time.
Another factor that will affect cook time is if the chicken is stuffed with anything. This can be lemon, garlic, or vegetables like carrots or celery. If the cavity of the bird is stuffed full, it will take longer to cook completely. When using aromatics and other vegetables or fruit in the cavity, use moderation and make sure the steam from pressure cooking can circulate around the cavity for even cooking.
Remember, all timing suggestions are just that, suggestions. There is no way to determine an exact cooking time because there are so many variables. I always recommend underestimating your time rather than overestimate because you can always cook longer. Always cook chicken until the internal temperature reaches 165℉ for food safety.
Ninja Foodi Air Crisped Whole Chicken
Another popular way to cook a whole chicken in the Ninja Foodi is by Air Crisping ONLY.
I recommend using the rack for this method or the basket if you have a very small bird. But, remember that air flow is key to properly cooking your chicken, so if you have to stuff the chicken in the basket, it most likely won't cook evenly.
Many people suggest cooking your chicken breast side down for the first 20 minutes or so to prevent the breast meat from drying out. What I've noticed is that it will leave marks from the rack or basket on your chicken, so if you are okay with that then this is a fine way to cook it.
Personally, I don't like to have flip it over mid way through the cooking process so I cook mine breast side up at a lower temperature and sometime even cover the breast with some foil towards the end of cooking. To secure foil over the breast, you will want to hook it around the wings or the legs.
You also want to make sure you have enough clearance between the top of the chicken and the heating coil. I recommend at least 3" if possible. That means you will want to use the lowest rack you have. If you don't have the reversible rack, but you have a dehydration rack, you can use that and only use the bottom rack. You can also use a silicone sling.
You don't need to use any liquid when air crisping, but your chicken will give off juices so I don't recommend just putting it in the inner pot unless that is your only choice to keep it far enough away from heating coil.
The rule of thumb for air frying a whole chicken is about 12-15 minutes per pound at a temperature of 325℉/163℃. Remember, the temperature of your chicken when you start cooking will affect the cooking time, so it is best to check your chicken with a thermometer and not rely solely on time.
There are several approaches to roasting a chicken using the air crisp function on the NInja Foodi. You can start off at a higher temp of 400℉/200℃ for about 15 minutes and then lower the temperature to finish cooking, OR you can do the opposite and start off at the lower temp of 325℉/163℃ and then increase the temp, if needed, towards the end of the cooking time. You can also stay on the same temperature of around 325℉/163℃ until the chicken is fully cooked.
Always remember, there isn't a right or wrong way to cook something. It's all about getting the results you want. I encourage you to try different approaches to air frying a whole chicken and see what works best for you.
Ninja Foodi Pressure Cooked & Air Cripsed Whole Chicken
I will be completely honest here, this is the cooking technique that I have had the hardest time getting right. I have probably cooked over 25 whole chickens using pressure cook and air crisp and have not had consistent results.
Many people have been very successful using these two functions, but my chickens either are undercooked, overcooked, or they split open and look terrible.
Still, I know this is a very popular way to cook a whole chicken, so I wanted to make sure to include my suggestions.
The idea when using pressure cook and air crisp to cook a whole chicken in the Ninja Foodi is to partially cook it using pressure cook and then crisp up the skin without overcooking it. This can be a little more difficult to achieve than some of the other methods, but hopefully these tips and suggestions will help you achieve perfect results. Up until this point, I just "guessed" at the timing, but once I started thinking about it, I realized we can use simple calculations to determine the pressure cook time more accurately. I have a chicken thawing right now and I will be testing out my theory soon!
It takes about 20 minutes on 375℉/190℃ to crisp up the skin on a whole chicken, so when you are figuring out your pressure cook times, you want to adjust for that. My rule of thumb for pressure cooking a whole chicken to cook fully is about 4 minutes per pound. So, let's use a-6 pound chicken in this example to calculate how long we should pressure cook it before air crisping.
Pressure cook only for a 6 pound chicken would be 24 minutes, but we have to reduce that time so the chicken finishes cooking without overcooking during the air crisp time. To do that we will need to make some calculations, the same way we would if we wanted to convert an oven recipe to pressure cooking using the ⅓ rule.
When calculating oven recipes to pressure cook, we reduce the time by ⅔ as a general rule. So 20 minutes of oven time becomes about 6.5 minutes of pressure cooking time. This same rule can be applied to air crisping. So, if it takes about 20 minutes to crisp up the skin of a chicken, then we want to undercook it by that much when pressure cooking. This means we can use the same rule of thumb of 4 minutes per pound, but then subtract 6.5 minutes.
For a 6 pound chicken, the calculation looks likes this: 6 pounds x 4 minutes per pound = 24 minutes - 6.5 minutes = 17.5 minutes of pressure cook.
We also have to consider our natural release time because that is still cook time. The time to pressure is also cook time, but as long as you only start off with 1 cup of liquid, that is not going to matter too much. The natural release of 10 minutes is still cooking the chicken with the trapped steam, but the temperature gradually lowers. I would use the ⅓ rule here as well and say that 10 minutes of natural release is equal to about 3 minutes of higher temperature pressure cooking. So, that means we need to shave off 3 minutes from our 17.5 minutes would be 14.5 minutes of pressure cook time.
Now, we can't set the time for 14.5 minutes and I always suggest undercooking rather than overcooking, so I would pressure cook my 6-pound chicken for 14 minutes with a 10-minute natural release and air crisp for 20 minutes. You will pressure cook on high and turn the valve to the seal position.
Remember, the starting temperature of your chicken will make a difference. The colder the chicken is to start, the longer it will take to cook. I have also noticed that organic chickens take a little bit longer to cook.
If you need to air crisp longer to get your chicken fully cooked, but the skin on top is getting too brown, lower your temperature or protect the top with foil or even a silicone cover layed over the rack handles will work.
Always let your chicken rest for a full 10 minutes and make sure the internal temp has reached 165℉/74℃.
Ninja Foodi Steam & Crisped Whole Chicken
This is my FAVORITE way to cook a whole chicken in the Ninja Foodi and if you haven't tried it yet, give it a try! No splitting open from the high heat of pressure cooking, no drying out of the meat when air crisping only. It's simply perfection!
I have been trying to perfect a whole chicken in the Ninja Foodi for years and I have no idea why I didn't think about using these two functions before, I guess I was stuck on the Pressure Cook & Air Crisped Whole Chicken.
Then, the new Ninja Foodi with Steam & Crisp came out and I thought, this is it! I made a whole chicken using the Steam & Crisp function and it turned out perfectly. However, I don't want anyone to feel like they have to run out and upgrade their Ninja Foodi for the new feature when I was fairly certain that we could achieve the same results and it worked perfectly!
Now, if you have the newer model of the Ninja Foodi with the Steam & Crisp function, you can simply add 1 cup of broth or water to the inner pot, put the chicken on the rack and select the steam & crisp function and set the time to 50-60 minutes and check on the chicken every 5 minutes after the first 40-45 minutes. The time will depend on the size and of course starting temperature of your chicken.
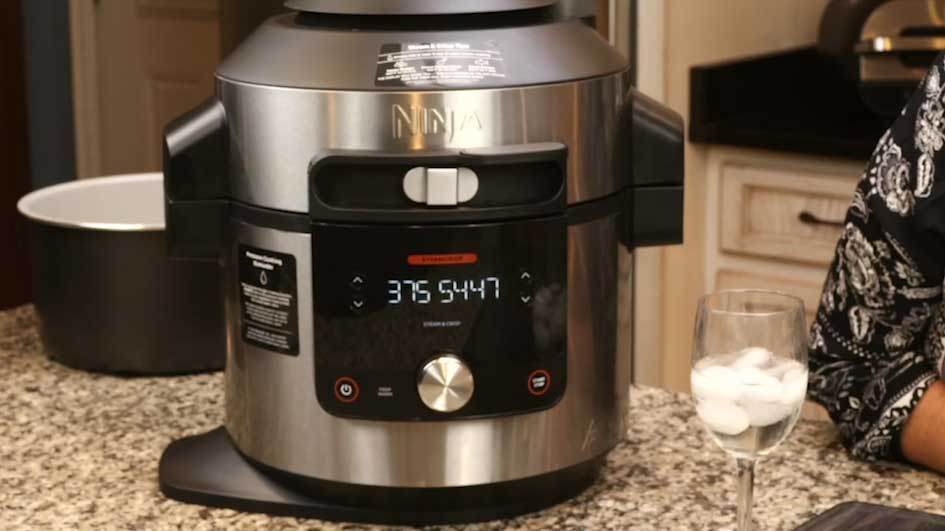
Using the older models of the NInja Foodi, we have an extra step, but it isn't a big deal at all. First, let me explain how the steam & crisp function works on the new model so you can understand how we are going to mimic it using the steam function and the air crisp function.
When you select the steam & crisp function on the new model of the Ninja Foodi, you place liquid in the inner pot and set your temp & time for the chicken. The liquid heats up and produces steam and this process lasts about 12 minutes with 1 cup of liquid in the inner pot, then the countdown starts for the crisping lid function.
So, to duplicate this process on the models without the steam & crisp feature, we simply steam first and then switch lids and air crisp until our chicken is cooked perfectly.
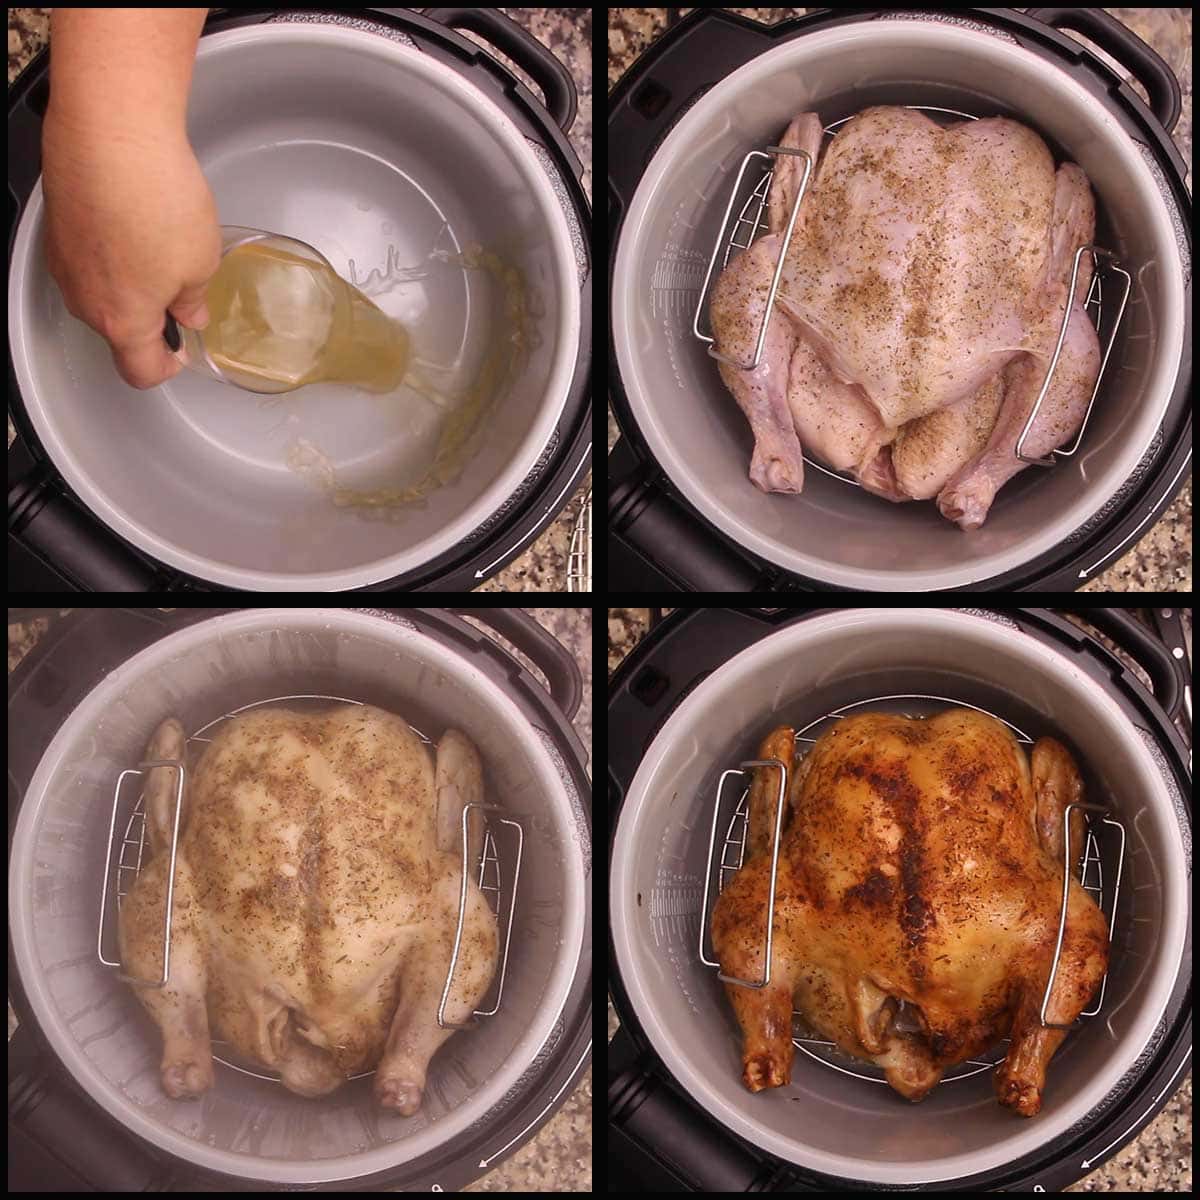
To steam the chicken, place 1 cup of water or chicken broth in the inner pot, place the chicken (on the rack) into the Ninja Foodi, put the pressure lid on and make sure the valve is turned toward the vent postion.
It takes about 6-7 minutes for the countdown to start with 1 cup of liquid, so you will want to set your steam time for 6 minutes. This will steam the chicken for approximately the same amount of time as the steam & crisp function does. Remember to keep the valve to the vent position when steaming. Once the time is up, remove the lid and close the crisping lid. You do not need to empty the liquid.
Close the air fryer lid and set the temperature to 375℉/190℃ for 1 hour. The time it takes for your chicken to cook completely will vary based on weight, but an average 4-5 pound chicken will take around 50 minutes of air crisp time at 375℉/190℃.
In my video demonstration, I lowered my temperature after the first 30 minutes to 350℉/175℃ and my 4.5 pound chicken took a total of 55 minutes to completely cook. I don't recommend lowering your temperature unless the top of your chicken is getting too brown or you see areas that are burning. I think the higher temps produce a crisper skin.
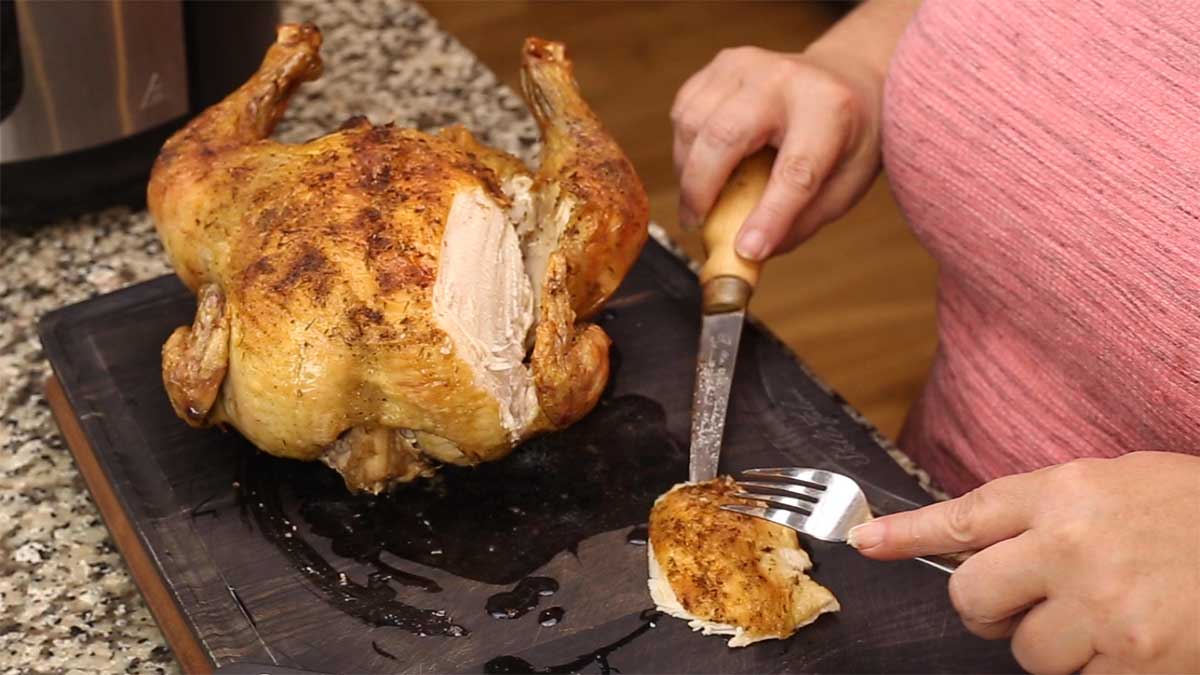
When the chicken is done, remove it from the Foodi and let it rest a full 10 minutes. Then I transfer it to a cutting board for carving. Enjoy.
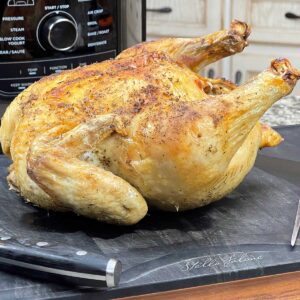
Steam & Crisped Whole Chicken in the Ninja Foodi
Ingredients
- 4-5 pound chicken thawed
- 1 Tablespoon olive oil
Seasoning Blend
- 1 teaspoon fine grind sea salt
- ½ teaspoon black pepper
- ½ teaspoon onion powder
- ½ teaspoon garlic powder
- ¼ teaspoon dried thyme leaves
Instructions
- Make sure your chicken is completely thawed and I recommend seasoning it 8-24 hours in advance. To season the chicken, blot dry with paper towels and lightly spritz the chicken with oil. Sprinkle the seasoning blend on the underside of the chicken first and then place it on the rack that you are going to cook it on. Season the top of the chicken. Refrigerate on the rack (I put a tray or plate under it) until 90 minutes before you want to cook your chicken.
- Remove the chicken 90 minutes before cooking and allow to come to room temp. If you have not seasoned your chicken yet, do that now.
- Add 1 cup of chicken broth to the inner pot and place the rack with the chicken into the inner pot. Put the pressure lid on and make sure the valve is to the vent position. Select the steam function and set the time for 6 minutes. When the time is up, remove the pressure lid and close the crisping lid. You do not need to remove the liquid.
- Select the air crisp function and the temperature of 375℉/190℃ for 60 minutes. Do not open the lid for at least 30 minutes. Begin checking the temperature after 40 minutes and at least every 5-10 minutes until it reaches an internal temperature of 165℉/74℃. It may not take the entire 60 minutes, so make sure to use a thermometer so you don't overcook your chicken. Allow the chicken to rest for a full 10 minutes before carving. Enjoy!
Notes
Nutrition
ABOUT THE RECIPE AUTHOR, LOUISE LONG
Louise is a full-time recipe creator and food blogger @ The Salted Pepper. She has over 30 years of experience with cooking and recipe development. She owned a restaurant for several years and was a full-time RN until retiring to blog full-time.

She published her first cookbook in the Fall of 2018 and is very interested in writing several more.
Louise is also the creator of an online Ninja Foodi Pressure Cooking Course with over 100 instructional step-by-step videos. People absolutely rave about the course and all the value they have received from it.
Louise has several very active Facebook groups that help people with the basics of cooking and getting the most out of the Ninja Foodi.
Louise is also a YouTube creator and you can find most of her recipes in video format on The Salted Pepper YouTube channel.
She is very responsive to messages and eager to help in any way she can. Get more Information about Louise & contact information
I WOULD LOVE TO SEE WHAT YOU ARE COOKING UP IN YOUR KITCHEN! TAG ME @THESALTEDPEPPER ON YOUR FAVORITE SOCIAL MEDIA PLATFORM WHEN YOU MAKE A DISH!
BE SURE TO FOLLOW THE SALTED PEPPER RIGHT HERE ⇓⇓⇓⇓⇓

Fred
I put a piri piri marinade rub on it and did 375 first 35 min and 350 for the last 15 min. The chicken ended well apart the skin, which was way too overburnt. I wonder what to change for the next time.
Louise
When you say marinade rub, do you mean it was a wet marinade or a dry rub or both? Wet marinades are usually used for marinating meat in and then the meat is patted dry before cooking to avoid burning the marinade onto the meat. If you wanted to add a wet sauce, do that towards the end of cooking so it sets, but doesn't burn. Hope that helps!
Moriah
Hello!
I noticed in my ninja with the attached lid with thermometer in the instruction book they had the steam crisp and the tender crisp options for a whole chicken. I see you've tried both the steam & Crisp and the pressure cook & airfry with a whole chicken and I was wondering which one of these tasted better to you? steaming and pressure cooking are the main difference in the cooking and I was wondering if 2 successful attempts were compared if one tasted better than the other? Thanks! I was surprised in my book to have a TenderCrisp chart and steam & crisp chart and started getting confused on which method would be better for a whole chicken.
Louise
That's a good question and it's been a long time since I cooked them, so it's hard to remember. I think I prefer steam/crisp over pressure/crisp because the meat was juicy without the worry of the chicken being overdone or falling apart like it can do with pressure cooking. Both are good though!
TuniNor
I did the steam and crisp whole chicken recipe with my 8 qt 1 lid foodi it was truly wonderful. I did use the temp probe set to 280f it was a 5#+ whole chicken. Not dried out at all. Thank you
Sara
I have a smaller bird at 2.5 lbs. I will be using the older 2 lid model. do I cut steam and crisp time in half? Thank you!