I've seen many questions in Facebook groups about making pot roast in the Ninja Foodi Indoor Grill. The answers have mostly been suggestions to slow cook or pressure cook the pot roast. Guess what??? Pot Roast is AMAZING in the Ninja Foodi Indoor Grill!
Would you like to save this recipe?
I think sometimes our brains get stuck in what we are used to, and how we are used to making a certain dish and we just don't see any benefit to changing that. I can relate to this, certainly.
This post may contain affiliate links. If you make a purchase after clicking a link, I may earn a small commission. As an Amazon Associate, I earn from qualifying purchases.
At first, I was thinking that using the Ninja Foodi Indoor Grill to make a pot roast wasn't the best use of the appliance or the best use of time for that matter. Then, I got to thinking. Wouldn't a pot roast in the Ninja Foodi Grill turn out like a slow roasted piece of meat? Nothing wrong with that!
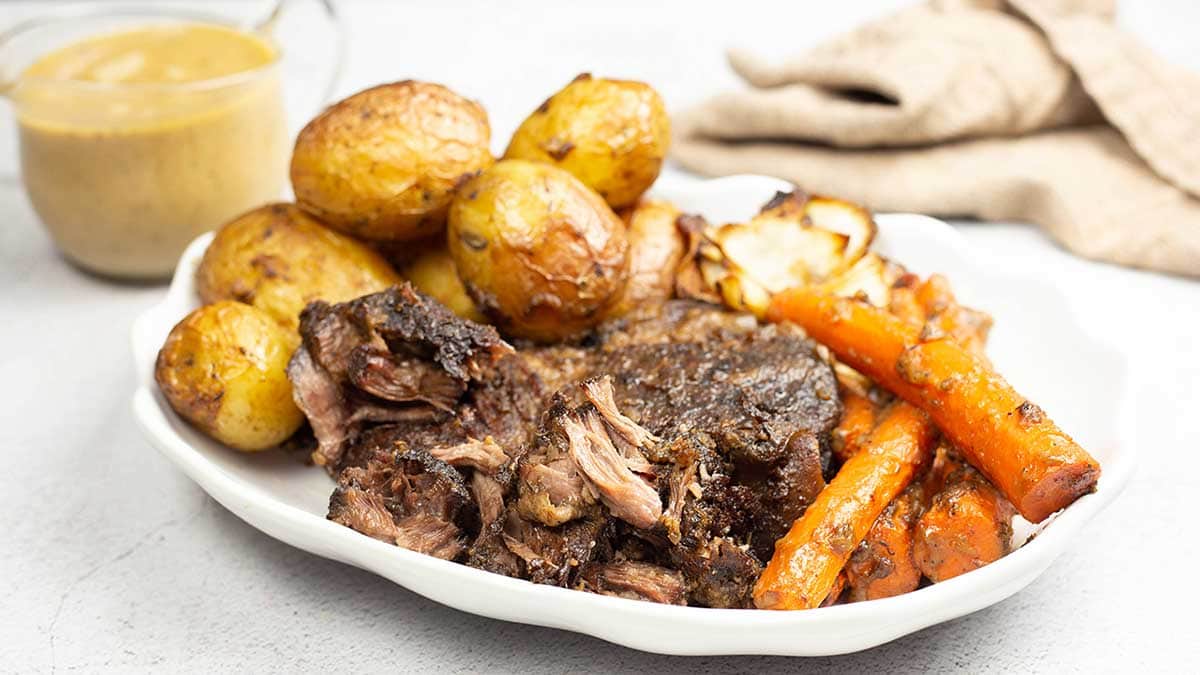
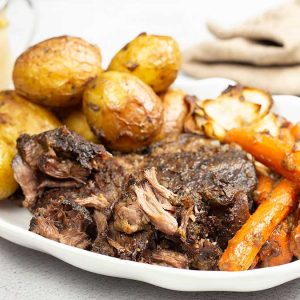
After the first test, I was a believer! The meat was perfect. It had a nice bark on the outside; meaning it was brown and just a tad crispy. The meat itself was tender, juicy, and so full of flavor.
Jeff, my husband, is a big beef lover and he said it was the best roast he ever had. That is really saying something because I didn't think it could get any better than the Pot Roast in the Ninja Foodi Pressure Cooker & Air Crisper.
People, including Jeff and me, love that recipe in the pressure cooker. We still do, but I have to say, I like the texture and flavor of the meat and vegetables just a tad bit more in the Indoor Grill.
What is the Difference Between Pressure Cooking a Pot Roast and Slow Roasting a Pot Roast?
The #1 thing that comes to mind is time. Pressure cooking is a whole lot faster. So, for the times you need dinner in about an hour, pressure cooking is the way to go, for sure!
The Pot Roast recipe that I have for the Ninja Foodi Pressure Cooker and Air Crisper is only a 30-minute cook time, so it's definitely quicker and it's delicious.
If you want to check out that recipe, you can find it here:
Quick & Easy Pot Roast in the Ninja Foodi
However, if you have the time and the Ninja Foodi Indoor Grill, I really encourage you to give this recipe a try. It takes about 6 hours, but is mostly hands-off.
The biggest difference, besides time, is the texture and flavor of the meat and veggies. This is true no matter which vegetables you want to add because you control when you add them without worrying about releasing pressure or having to build pressure again. That's a huge bonus, in my opinion.
Because we use a drier heat when cooking in the grill, the surface of the meat develops what is called bark in the smoking world. This is basically a char of sorts and, more technically, is called a Maillard reaction.
A Maillard reaction is a chemical reaction that happens when the surface of the food meets a (usually) high heat. We create this reaction when we sear meat or roast vegetables at a high heat.
The Maillard reaction can also be achieved at lower temps with long cooking times. This is part of what happens when we smoke meat.
In this recipe, we do a combination of both. First we sear the meat, then we do a low and slow roast. The end result is fantastic.
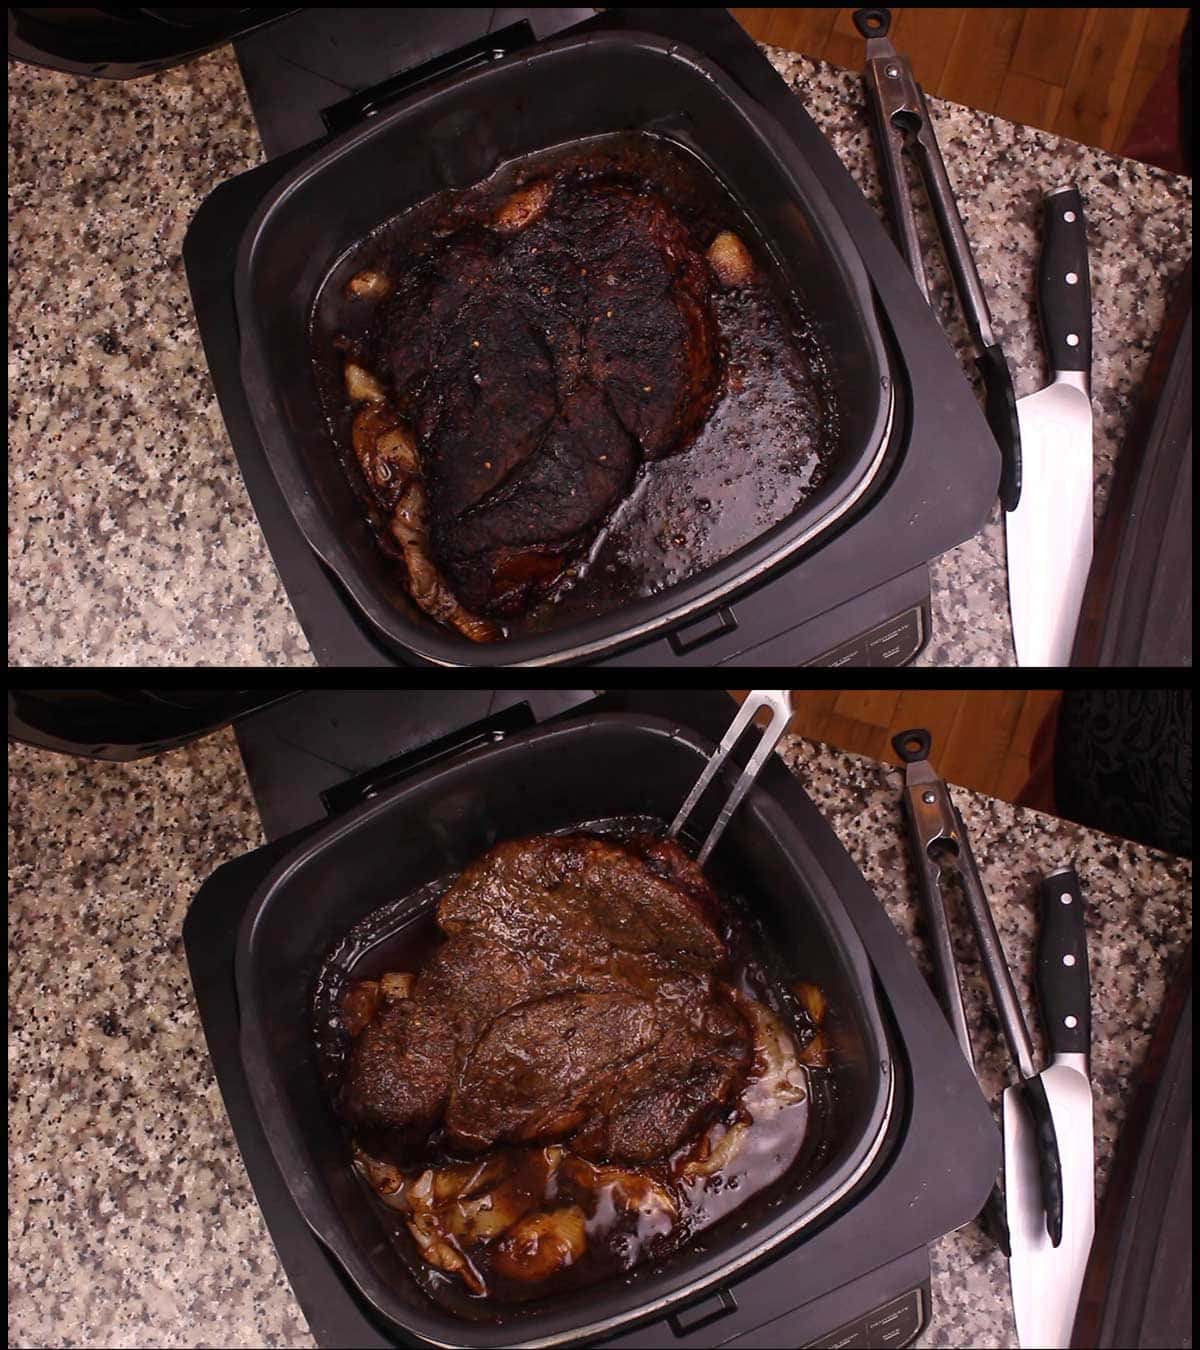
Don't be alarmed when you go to flip your pot roast and the surface is very dark, it is NOT burning. That is the Maillard reaction happening and, I promise, the meat does not taste burnt at all. It's the same principle as burnt ends.
Another big difference (and worth the 6 hours in my opinion) is the veggies. Since they are slow roasted, they get this deep flavor of deliciousness that only comes with roasting.
Slightly sweet on the outside and tender on the inside. Honestly, the carrots and potatoes were the best I've ever had. Simply amazing.
How Do I Make This Pot Roast Keto Friendly?
Easy Peasy! When I started testing this recipe, I really wanted it to be a low-carb version of a pot roast with gravy. Then I realized it can be both!
So, in the YouTube video, I made the low-carb version and in the recipe card below, I list both versions.
Honestly, the only difference is in the vegetables and flour.
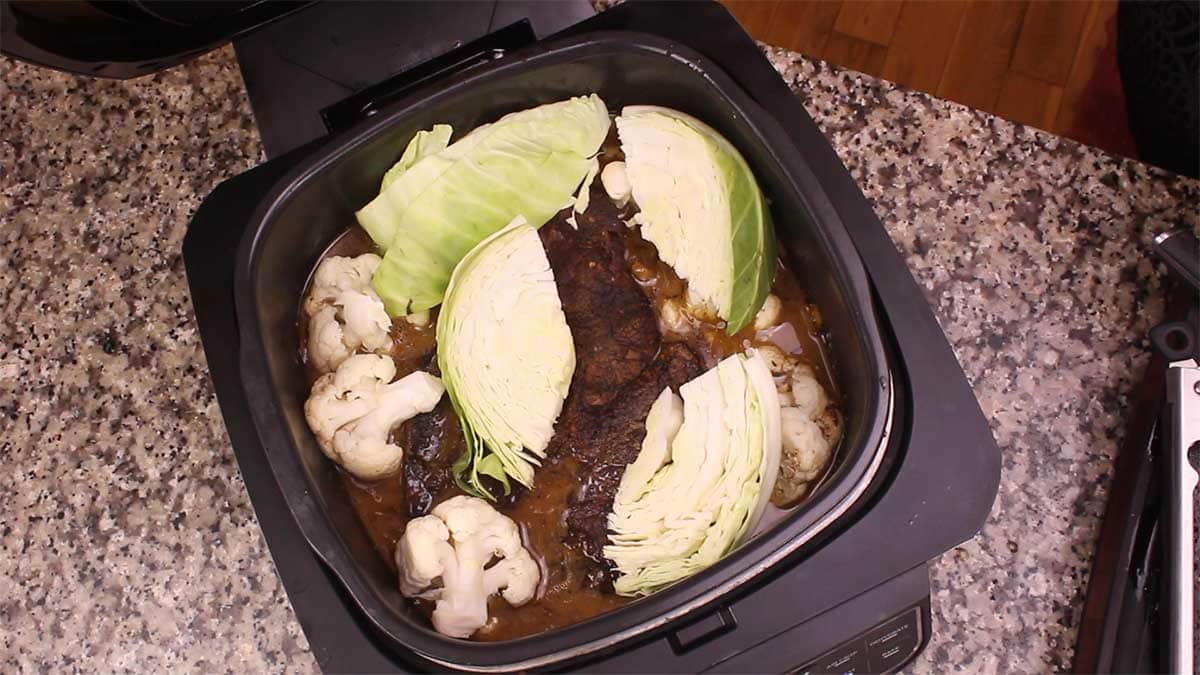
I chose cabbage and cauliflower for my vegetables, but you can choose anything you like. Just keep in mind cook time and add them when appropriate.
I kept the cauliflower in large pieces, about the size of a small potato so that they didn't get too soft. The cabbage was cut into wedges about an inch thick or so.
The gravy is what surprised me the most. It was delicious! I used coconut flour as the thickener, because coconut flour is very absorbent; so I knew it would pull in the rendered fat and the juices nicely.
What I was concerned about was the flavor. Coconut flour can create an "off" flavor to me in baked goods and other foods, so I was VERY leary going in. I tried a few different ways of adding it and determined that it has to cook with the meat the vegetables for several hours to really take on the flavor of the seasonings and taste like a flour gravy.
I was also concerned that it would be gritty. I didn't use almond flour for two reasons, it isn't as absorbent AND it stays very gritty. The coconut flour was surprising smooth. Not as smooth as a flour gravy, but smooth enough that it had a good mouth feel. I hope that makes sense!
Anyway, you really can't go wrong with this recipe whether you make it the traditional way with carrots and potatoes or with lower carb veggies.
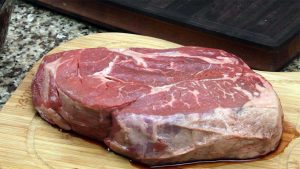
What Cut of Beef is Best for a Pot Roast?
Hands down, a chuck roast is the best choice, in my opinion. I go into all the details in this recipe post, if you want to read more.
Ninja Foodi Quick & Easy Pot Roast
You can use other cuts of beef, but I'm not sure on the timing for a fall-apart pot roast because I haven't tested other types.
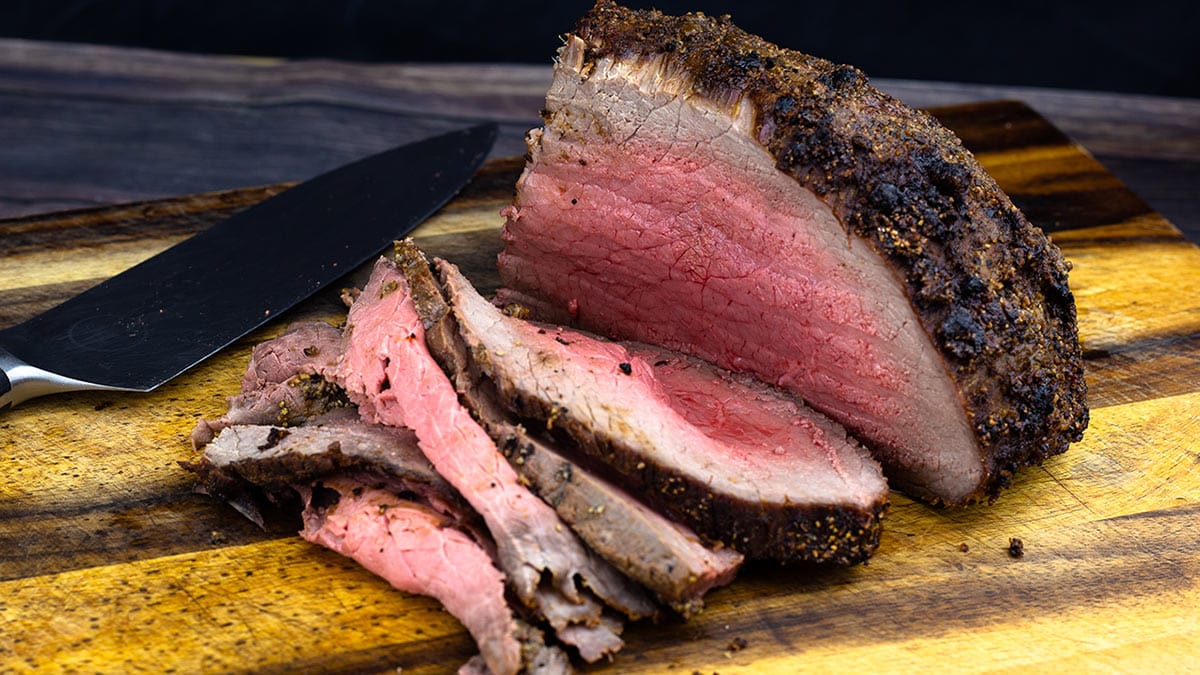
If you want more of a roast beef style where you slice it thinly across the grain, I would definitely follow my recipe for Perfect Roast Beef.
The roast beef recipe can be made in the grill by following the same instructions. Instead of broil, use the roast function on 450℉/232℃.
Can I use Rutabaga instead of Potatoes?
I definitely think so! In fact, that would have been my first choice, but I can't find them where I live. Isn't that funny? I have not seen one rutabaga in 18 months! Sad, but true.
I would probably put the rutabaga in at the beginning (depending on the size of your chunks) and let them roast the whole 5-6 hours. Rutabaga will take a while to become tender at that low of a temp.
Please let me know if you try this. I'm really curious how it turns out.
Can I Make This in the Ninja Foodi Pressure Cooker & Air Crisper?
Sure! I haven't tested the recipe that way, but you should be able to put everything in the inner pot and set the bake/roast function to 250℉/121℃ and follow the same instructions.
Because the diameter is slightly smaller, you will have more food stacked on top of each other. I would definitely recommend flipping the roast and moving the vegetables around during the cook time so they get equal browning.
How to Make Pot Roast in the Ninja Foodi Grill
Start by letting your meat come to room temp for about 30 minutes. This will help get a good sear on the meat.
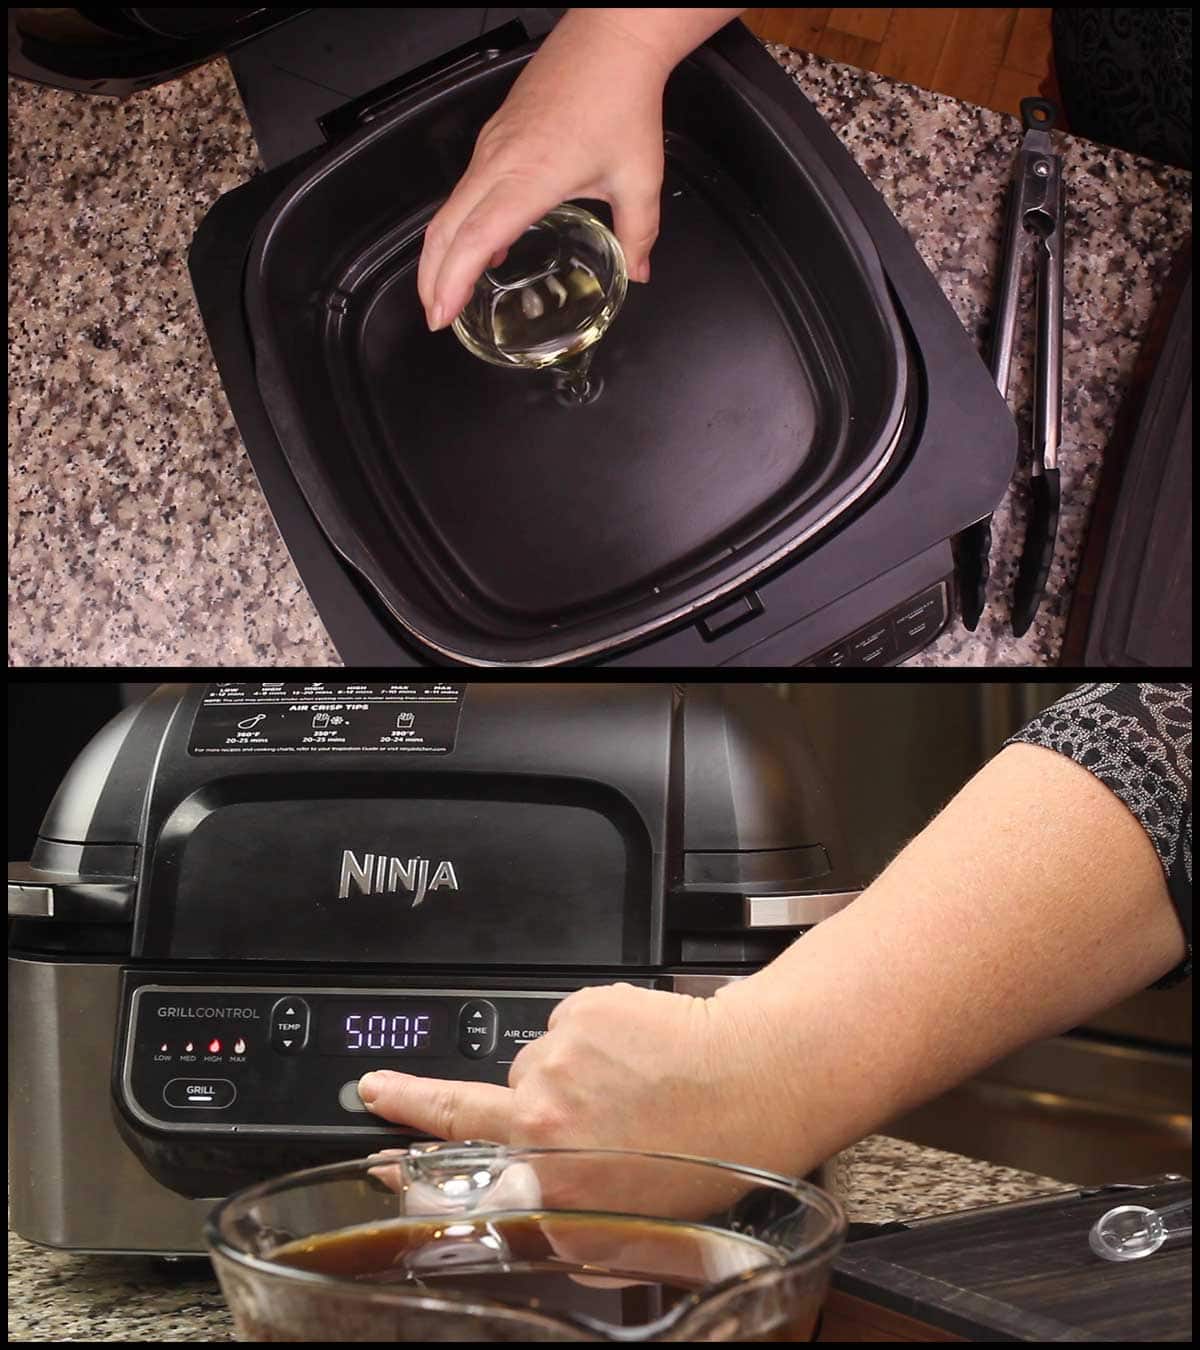
Put about 1 Tablespoon of avocado oil or another oil that has a high smoke point into the inner pan of the Ninja Foodi Grill. We aren't using the basket or the grate for this recipe.
Although I love using olive oil, and you certainly can use it, you might notice more smoking than if you use avocado oil.
Preheat the Ninja Foodi Indoor Grill on the high grill setting
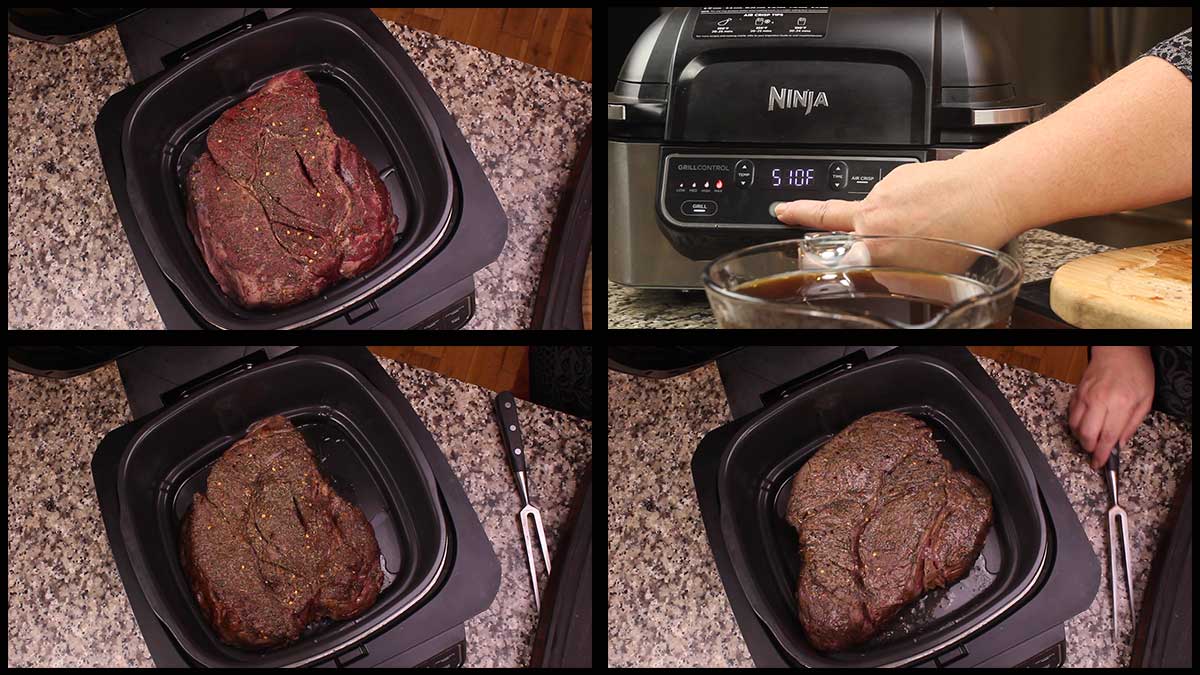
Make up the seasoning blend and rub it all over the meat on both sides. When the grill is preheated and says to add meat, place the chuck roast in the inner pan of the grill. You should hear it sizzle.
Close the lid and increase the grill setting to the max grill (510℉/265℃) for 5 minutes. Flip the meat over and grill another 5 minutes. The reason I don't preheat on the max setting is to avoid any smoking from the oil.
While the roast is searing, cut your onion into chunks. I only used one onion, but you can use 2 or 3. Just keep in mind that there is only so much room, so you don't want to take up too much of it with onions.
When the roast has been seared, add in the onion chunks and pour in 3 cups of the beef stock, reserving the 4th cup for making the gravy. *If you are making the gravy with coconut flour, only pour in 2 cups because you will need a full 2 cups to mix with the flour.
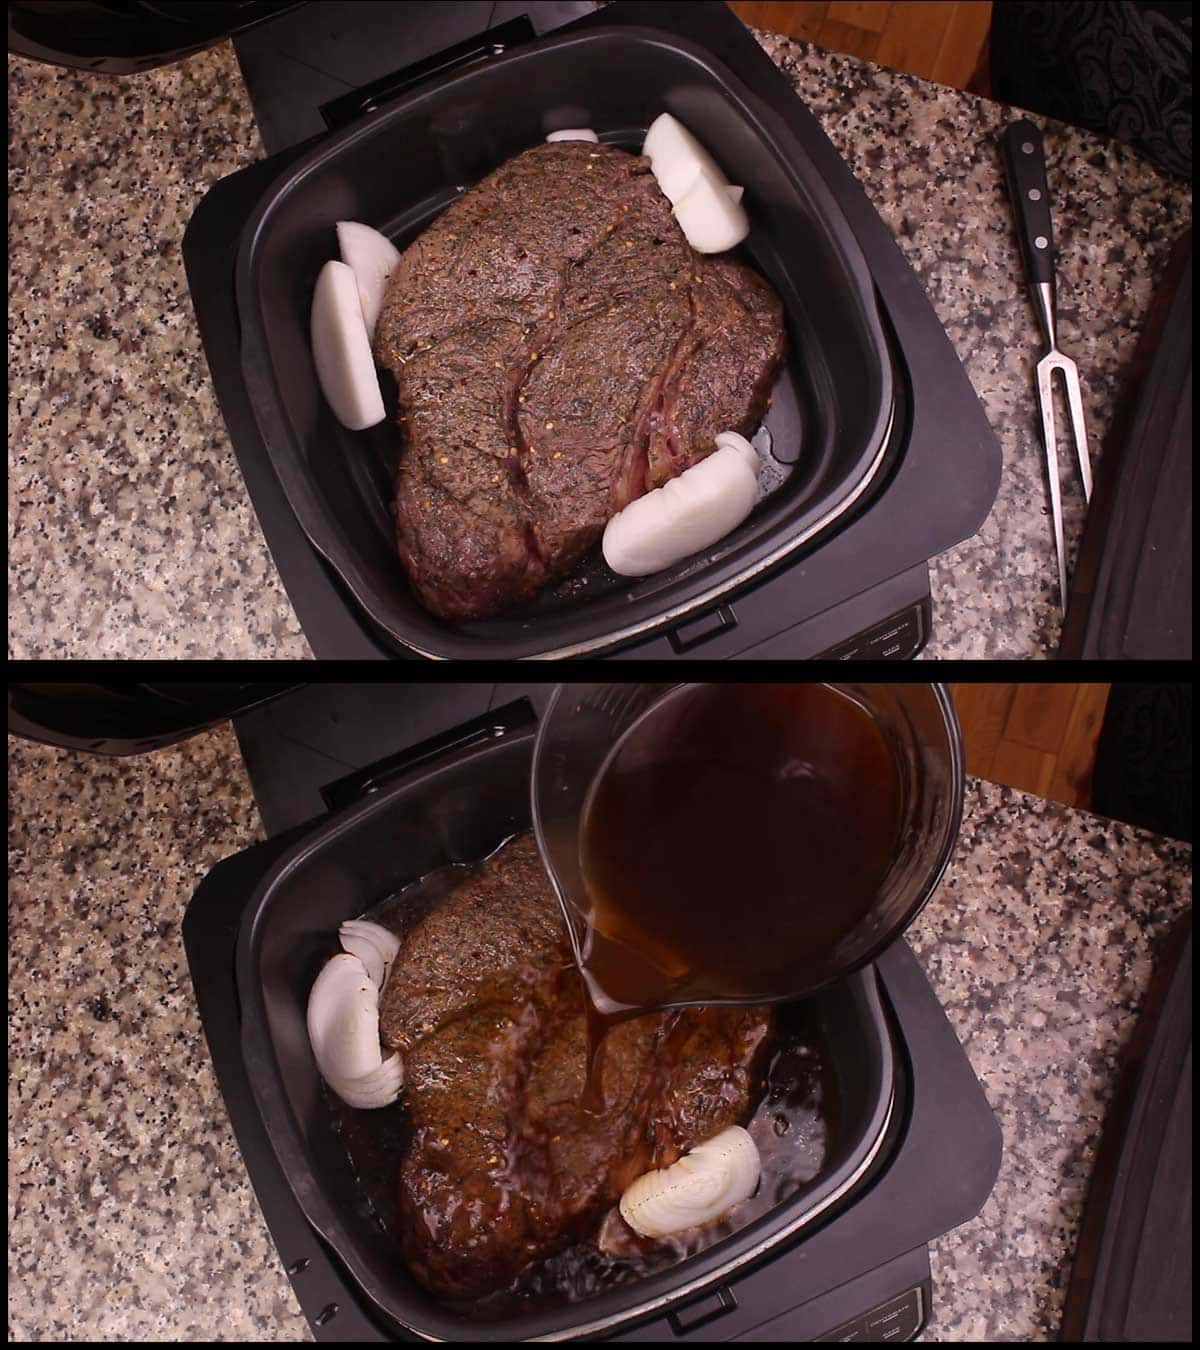
Close the Grill lid and select the Roast function on 250℉/121℃ and set the time for 3 hours.
I like to flip the roast a few times during the cooking time to evenly brown both sides, but this isn't absolutely necessary.
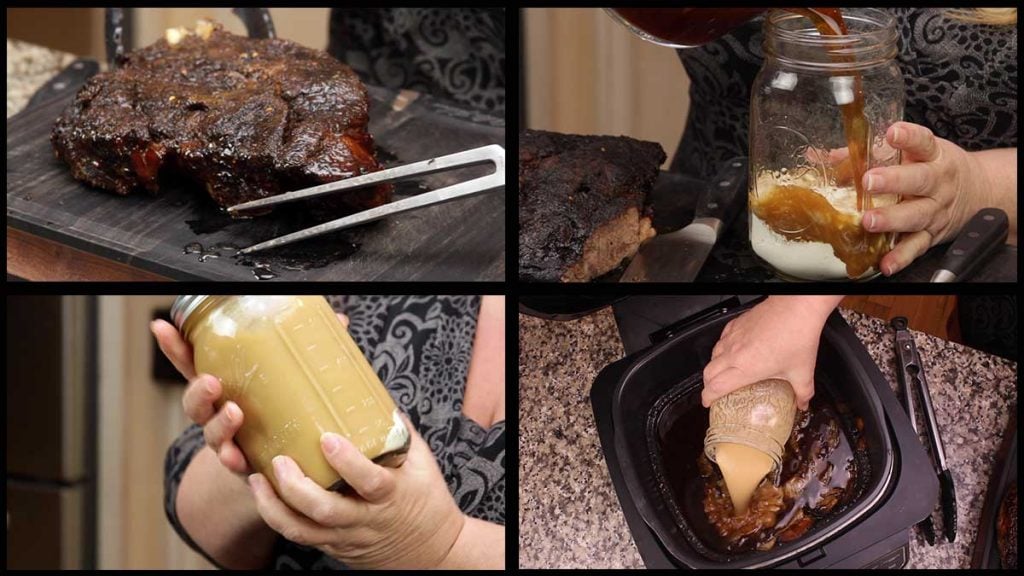
If you are making gravy, when the 3 hours is up, remove the roast and move it to a cutting board. Mix the remaining broth with the flour in a large glass mason jar with a lid. Shake to combine. I usually scoop some of the broth from the pan and add it to the jar because the flour combines better when there is a fat. Pour back into pan and stir to combine. Place your roast and vegetables into the pan.
*I tested the recipe with ½ cup of flour and had to add more stock, so I've reduced it to ¼ cup, but you can more to make it thicker, if need be.
*For the low carb gravy, mix the coconut flour and the 2 cups of beef stock in a large Mason jar or other container with a lid. Shake until well-combined and pour it into the pan. Stir and add in the roast as well as whatever vegetables you are using.
*If you aren't making gravy, just add in your vegetables and the remaining broth.
Close the lid and select the roast function on 250 ℉ and set the time for another 3 hours. I usually flip and check on everything every hour or so. Your roast might be ready in 5 hours or might need 6, so definitely plan on the 6 hours just in case.
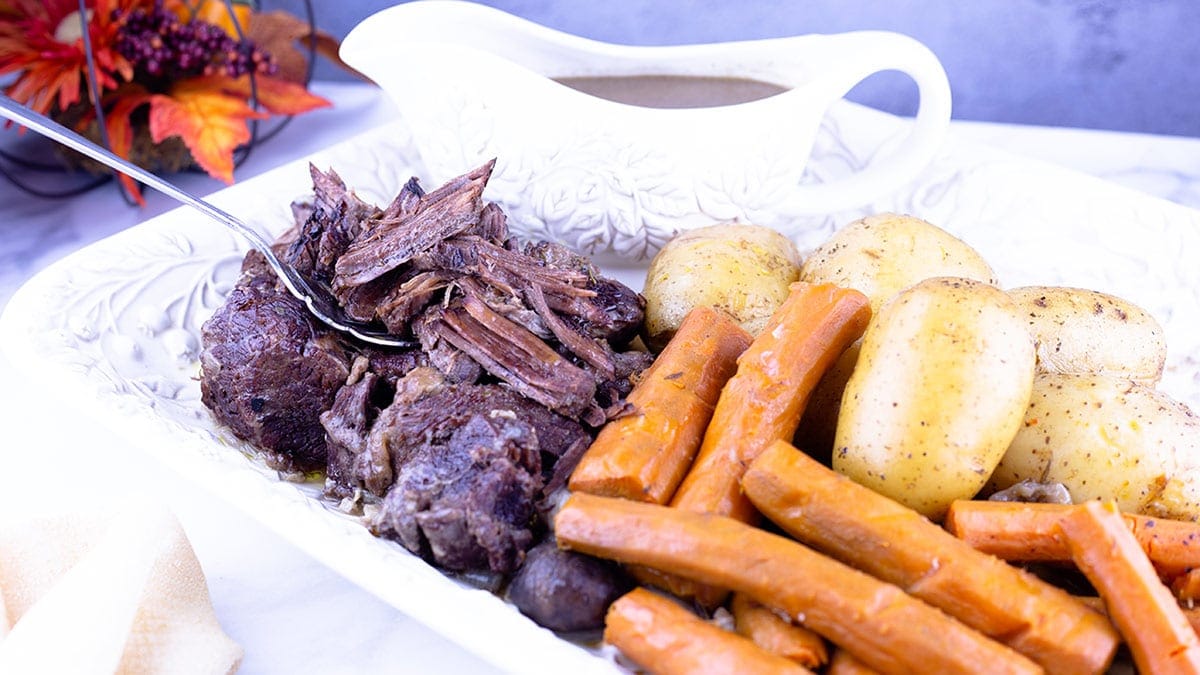
Serve & Enjoy!
Here is the Keto Style Pot Roast in the Ninja Foodi Grill. It was really delicious!
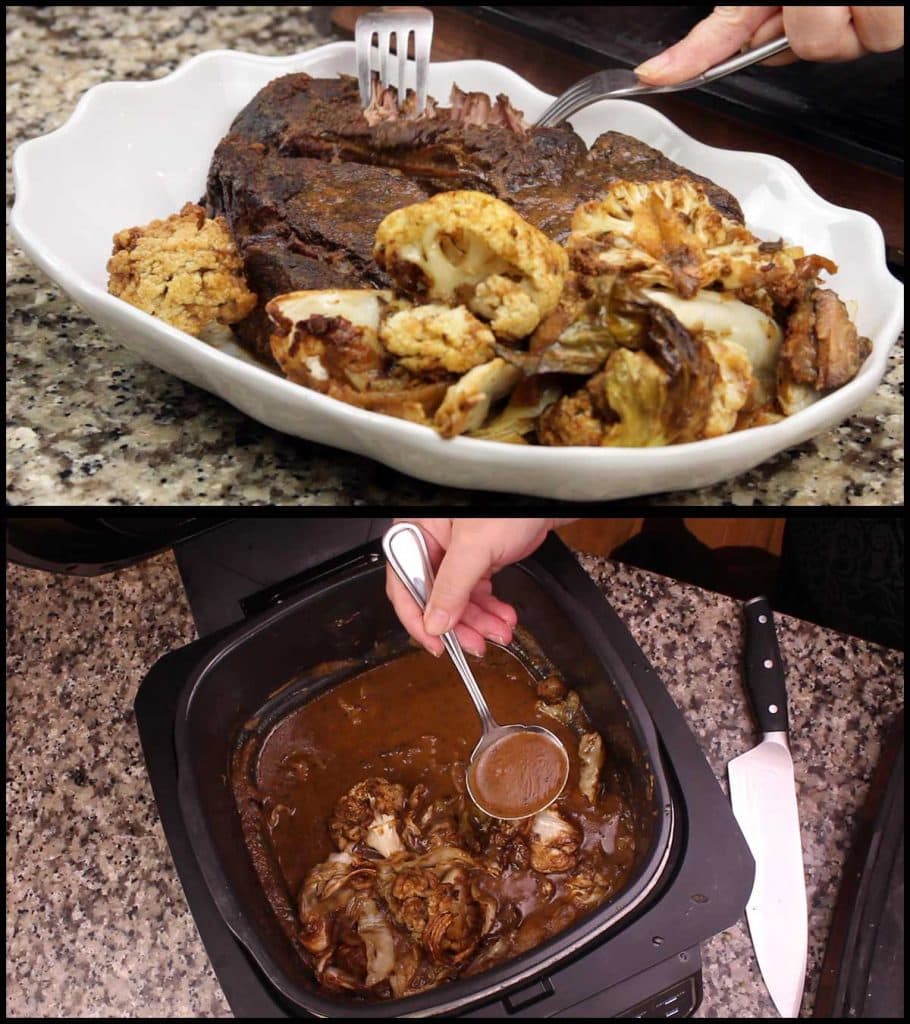
Pot Roast in the Ninja Foodi Grill
Equipment
- (affiliate link)Ninja Foodi Indoor Grill
Ingredients
Seasoning Blend
- 2 teaspoon thyme leaves dried
- 2 teaspoon sea salt
- 1 teaspoon black pepper
- 1 teaspoon garlic powder
- 1 teaspoon onion powder
- ½ teaspoon red pepper flakes optional
Pot Roast Ingredients
- 1-2 tablespoon avocado oil or any oil you like
- 3-4 lbs Chuck Roast
- 1 onion I used a Vidalia
- 4 cups beef stock divided
- ¼ cup flour optional for gravy *see post for details
- 6 carrots
- 6 small potatoes I used gold potatoes
Would you like to save this recipe?
Instructions
- Add the oil to the inner pan of the Indoor Grill and preheat on high grill (500°F/260°C).
- Combine the seasoning in a bowl and rub onto both sides of the chuck roast. When the grill has preheated and says, "add food," place the roast on the bottm of the inner pan. Close the lid and grill on high (or max grill if you want) for 5 minutes. Filp and grill another 5 minutes.
- Cut your onion into chunks and add to the pan. Pour in 2 cups of beef stock and select the Roast function on 250°F/121°C and set the time for 3 hours.
- I usually flip the roast every hour or so, but this isn't completely necessary.
- After the 3 hours, remove the meat and make the gravy by combining the remaining beef stock and flour with some of the liquid in the pan into a large glass Mason jar or another glass container with a lid and shake until well combined. Pour into the pan. Put the roast in along with the vegetables and set the grill to the roast setting on 250°F/121°C for another 3 hours. The total cook time will depend on your roast, so start checking it after the 1st hour and give it a flip. It is ready when the meat is fork tender and the vegetables are done to your liking.
- Serve & Enjoy!
Notes
Nutrition
About the Recipe Author, Louise Long
Louise is a full-time recipe creator and food blogger @ The Salted Pepper. She has over 30 years of experience with cooking and recipe development. She owned a restaurant for several years and was a full-time RN until retiring to blog full-time.

She published her first cookbook in the Fall of 2018 and is very interested in writing several more.
Louise is also the creator of an online Ninja Foodi Pressure Cooking Course with over 100 instructional step-by-step videos. People absolutely rave about the course and all the value they have received from it.
Louise has several very active Facebook groups that help people with the basics of cooking and learning more about the appliances they love.
Ninja Foodi Pressure Cooker & Air Crisper 101
Ninja Woodfire Outdoor Grill & Smoker
Louise is also a YouTube creator and you can find most of her recipes in video format on The Salted Pepper YouTube channel.
She is very responsive to messages and eager to help in any way she can. Get more Information about Louise & contact information
I WOULD LOVE TO SEE WHAT YOU ARE COOKING UP IN YOUR KITCHEN! TAG ME @THESALTEDPEPPER ON YOUR FAVORITE SOCIAL MEDIA PLATFORM WHEN YOU MAKE A DISH!
BE SURE TO FOLLOW THE SALTED PEPPER RIGHT HERE ⇓⇓⇓⇓⇓
Earlene Becker says
I saw one of these in Sao Tome and Principe and I bought one.
Paul L. says
Made this today, and loved it. I make a mean oven pot roast, but the dark crust on this and the easy cook in the Foodi grill makes this special. Only change I made was to use 1 cup of beer in the braising liquid...adds flavor and depth to both meat and gravy! Family loved it too, and I didn't have to heat up my kitchen running the oven for 4-5 hours! Thanks!!
Louise says
I'm so glad everyone loved it!