
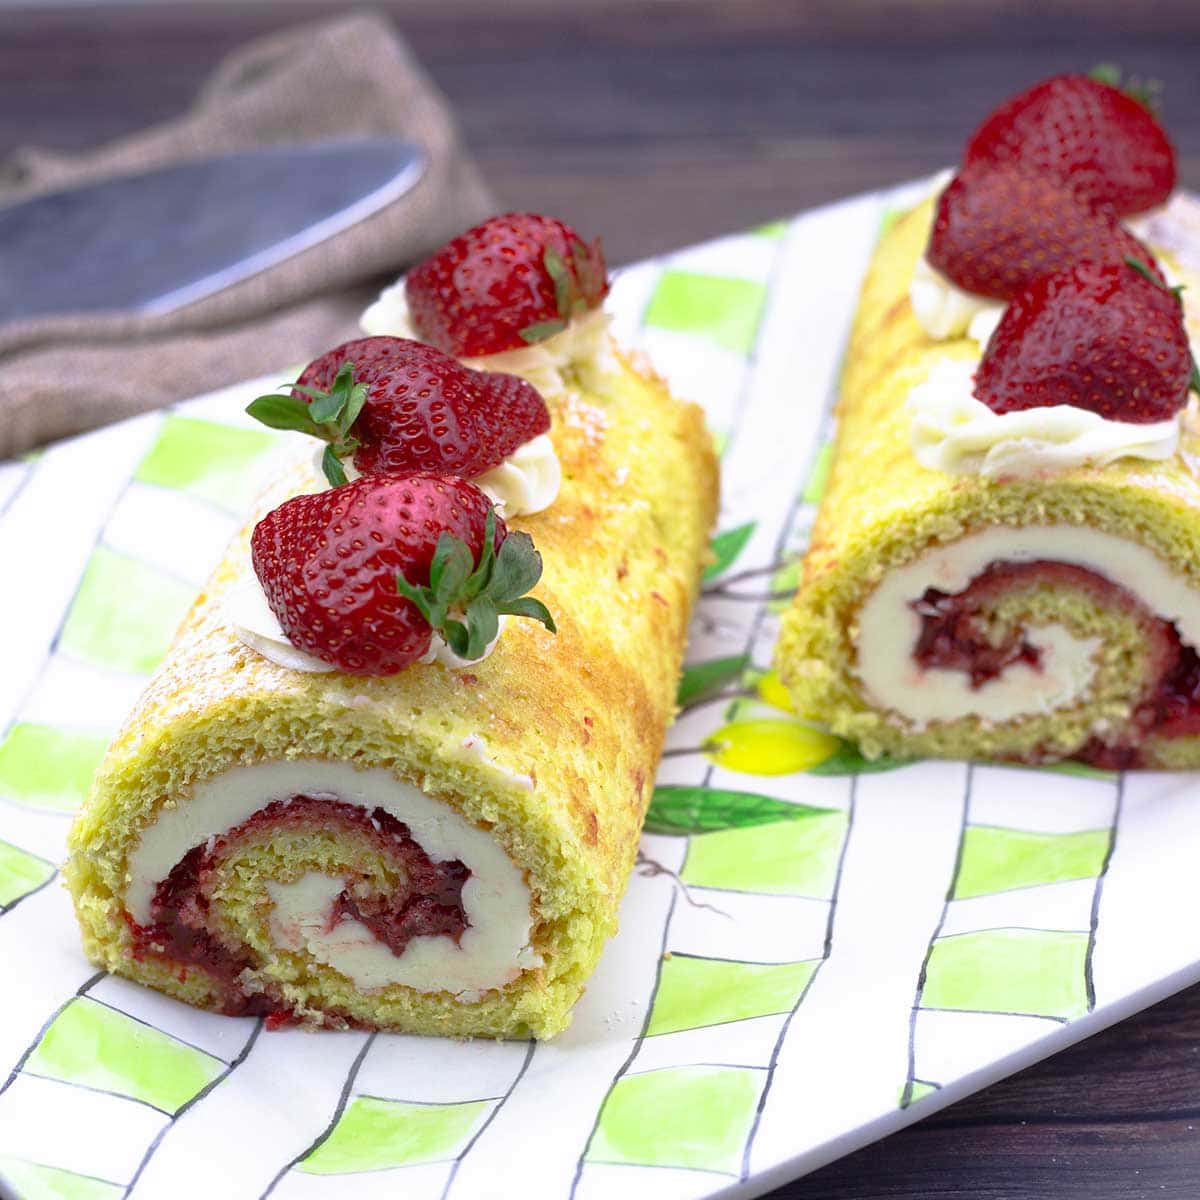
I've made a lot of desserts in my day. In fact, I was the dessert maker for the BBQ Restaurant I owned many moons ago. I have to say, I've never had more fun or enjoyed making a dessert more than this Strawberry Roll Cake!
This post may contain affiliate links. If you make a purchase after clicking a link, I may earn a small commission. As an Amazon Associate, I earn from qualifying purchases.
Would you like to save this recipe?
Not only is it beautiful, it tastes amazing! There is something about the combination of flavors that screams summer to me! While this cake may take a little more time to make, it is completely worth it and each step is very easy.
What is a Strawberry Roll Cake?
I would describe it as a strawberry shortcake rolled up. The cake is a basic sponge cake, the filling is a simple buttercream and strawberry preserves.
The icing on the inside is not overly sweet and it pairs with the strawberry preserves perfectly.
It's fun to make and is really impressive to serve. It will certainly be a hit at your next summer gathering!
You can get as fancy as you want with decorating it, or just keep it simple like I did. Either way, you are going to love it!
Can I Use Fresh Strawberries Instead of the Strawberry Preserves?
I haven't tested the recipe that way, but I think you could chop them fine and fold them into the buttercream just before spreading over the cake.
Or put a layer of thinly sliced strawberries over the icing. Just make sure the slices aren't too thick or you might have trouble rolling them.
You can even lighten it up by using whipped cream instead of the buttercream, just know that the filling won't be as stiff when chilled and the slices might not be as clean.
Do I Have to Use Strawberries?
Nope. The beauty of this cake roll is you can take the basic sponge cake and fill it with anything you want, then just roll it up.
You could fill it with a chocolate ganache or a chocolate buttercream for a vanilla and chocolate flavor.
Blueberry preserves would be incredible or any type of preserves you like.
You can even turn it into an ice cream cake if you want. I plan on trying this soon!
Do I Have to Have the Ninja Foodi Digital Oven to Make This Strawberry Roll Cake?
Not at all! You can bake the sponge cake right in the oven and follow the rest of the directions in this recipe.
I would preheat your oven to 325℉/165℃ and use a sheet pan size as close to 13x13 as you can.
I think an 11x13 pan would be just fine, but don't go too much smaller or your cake layer will be to thick and hard to roll.
Bake the cake 12-15 minutes or until the top is starting to brown and then just follow the rest of the directions.
How to Make Strawberry Roll Cake in the Ninja Foodi
The first thing to do is make the cake. This is a simple 3-ingredient sponge cake and I add some vanilla to it for flavor. You can also make it with another extract if you want a hint of another flavor. Lemon would be nice, so is almond.
Since this recipe has 3 steps to it -- the cake, the icing, and the assembly -- I'm breaking it down in easy to follow steps.
How to Make the 3-ingredient Cake
This is probably the most technical part of the recipe because if you don't beat the batter long enough or to the right stage, your cake might fall too much.
The use of a large flat pan that is about 13x13 makes this style of cake much easier, but you still need to follow some basic steps. Don't worry though, I'm going to walk you through it step-by-step.
Important Tips for making 3-ingredient cake
- Beat the eggs and sugar for at least 5 minutes in a stand mixer, 8-10 minutes when using a hand mixer, and 15-20 when whipping by hand.
- Make sure the eggs and sugar reach the ribbon stage. More on that below, including a video showing exactly what the batter should look like.
- Sift the flour. It's imperative that you do this or you will have a lot of issues with clumping.
- Use room temp eggs. They will whip up faster and easier for you.
- Don't slam the oven door and don't open the oven door for at least 10 minutes once you put the cake in.
The easiest way to make this cake is with a stand mixer, but it is not absolutely necessary. You can make it with a hand held mixer or even by hand.
I don't suggest trying to use a blender or a food processor though, you just won't be able to get the mixture whipped enough in my experience.
Combine 4 eggs and the sugar into the bowl of a stand mixer or a large mixing bowl if using a hand held mixer or whipping by hand. Use the whisk attachment and whip on the highest speed for at least 5 minutes.

You will see the mixture lighten up to a pale yellow and increase in volume. After the 5 minutes, do the ribbon test.
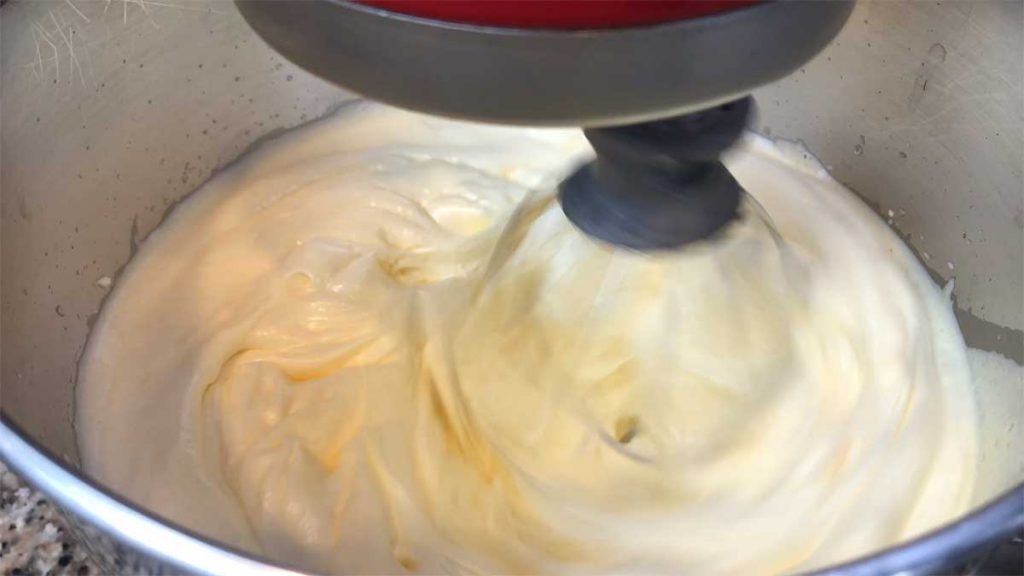
The ribbon test is when you allow some of the batter from the whisk to fall back over the top of the batter and it holds it shape for about 3-5 seconds or so. If the batter disappears quickly, you need to whisk the mixture longer.
Here is the video clip that shows you what to look for:
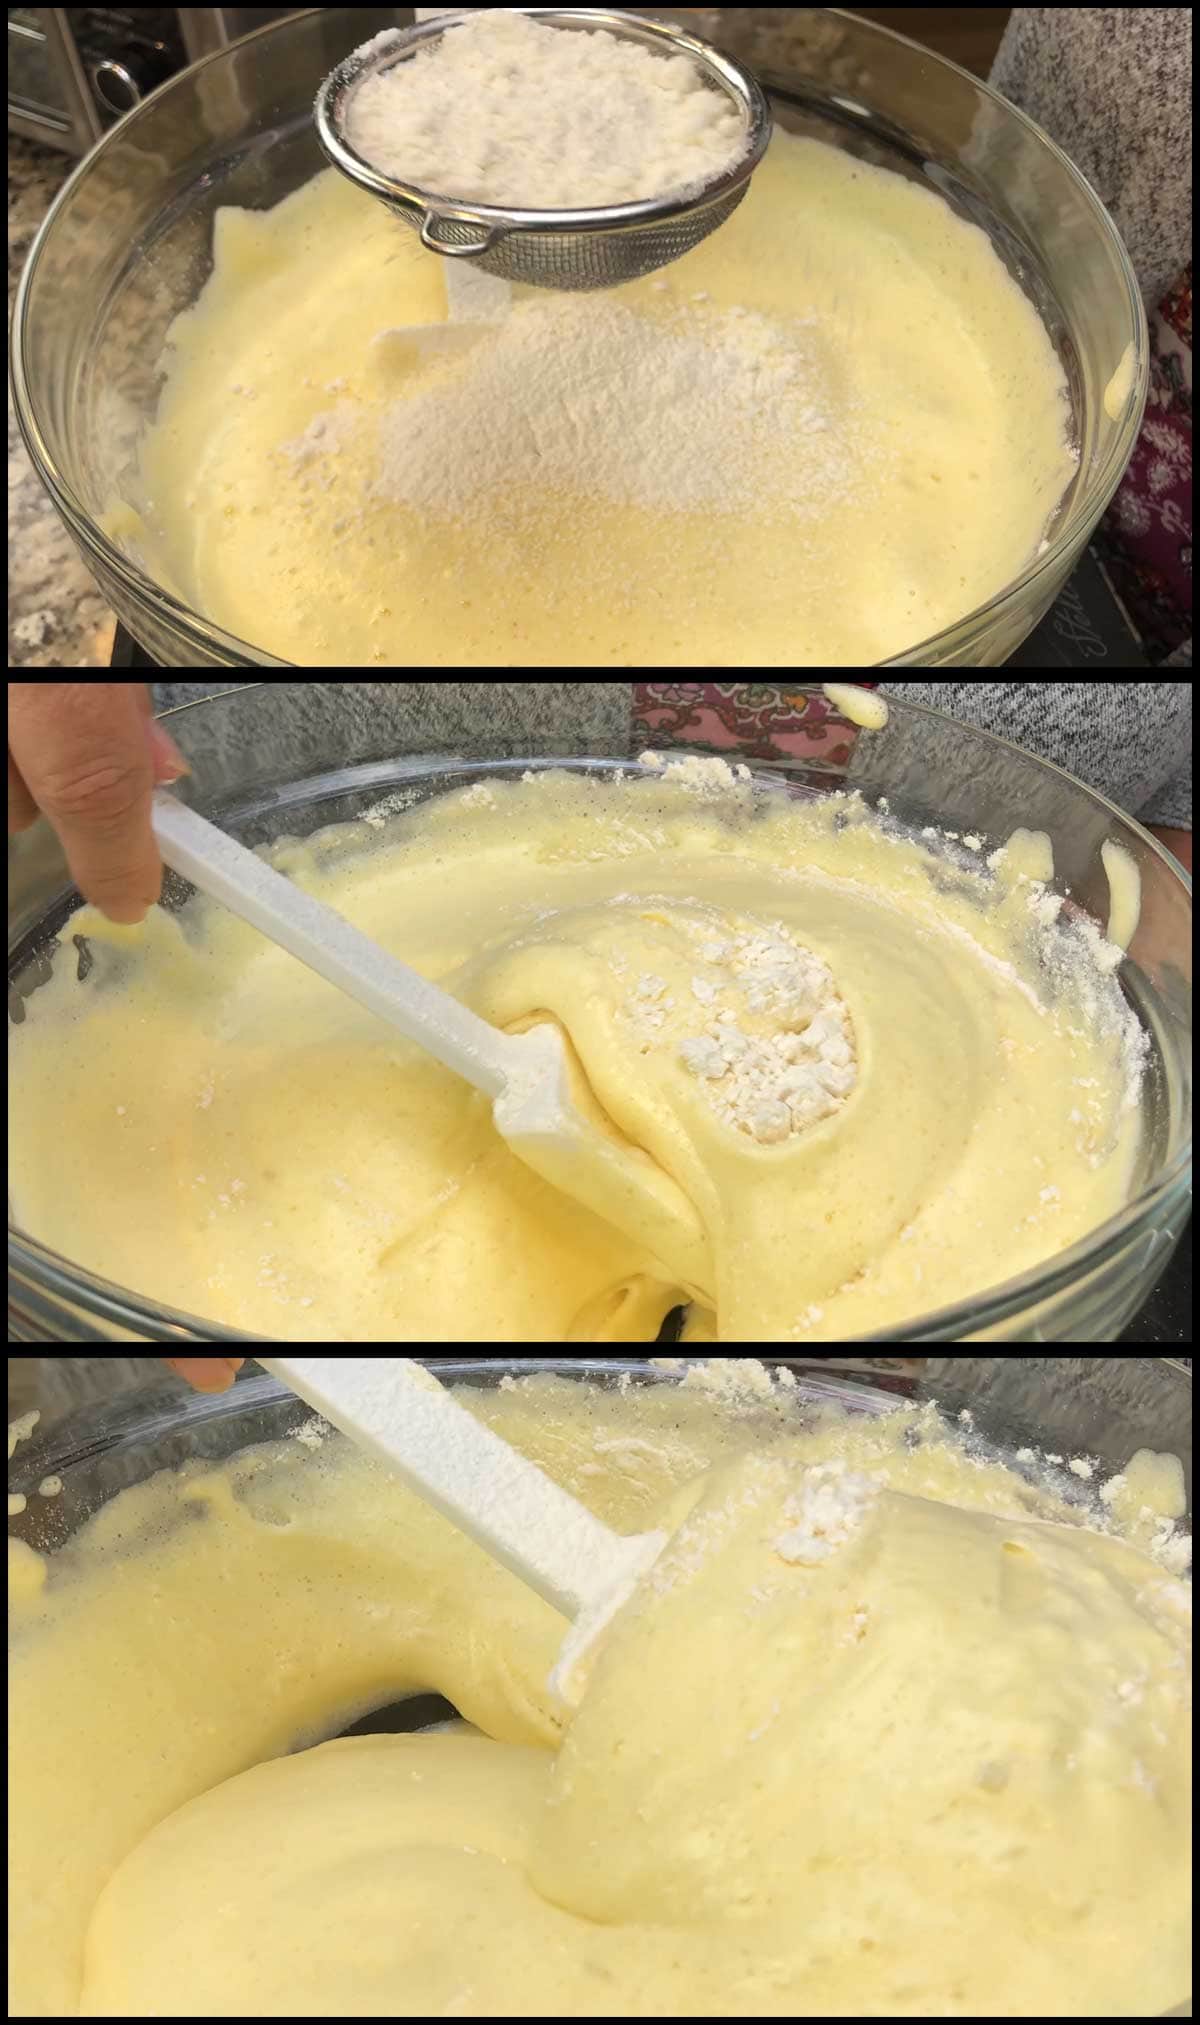
Once you have achieved the ribbon stage, add in the vanilla and whisk just for a few seconds. Remove the bowl from the stand mixer and sift in the flour ¼ cup at a time.
After each addition of the flour, you will fold the cake batter to incorporate the flour. Don't beat it or stir, gently fold it. It takes a little time, so be patient. I use a (affiliate link)large Mix 'N Scrape from Pampered Chef, but any large spatula will work.
You only want to fold each addition of the flour until you can no longer see flour.
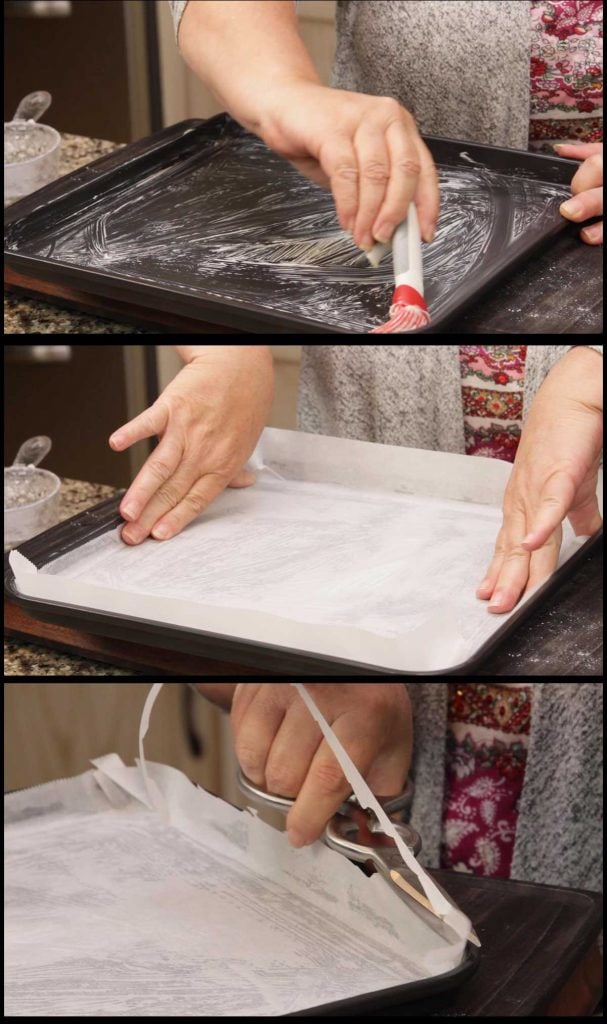
Prep your pan by spreading some butter or crisco or even spritzing with oil over the surface and then cut a piece of parchment to fit the pan, including the sides.
*when using the Digital Air Fry Oven, make sure to trim the sides of the parchment so that it won't hit the upper heating elements.
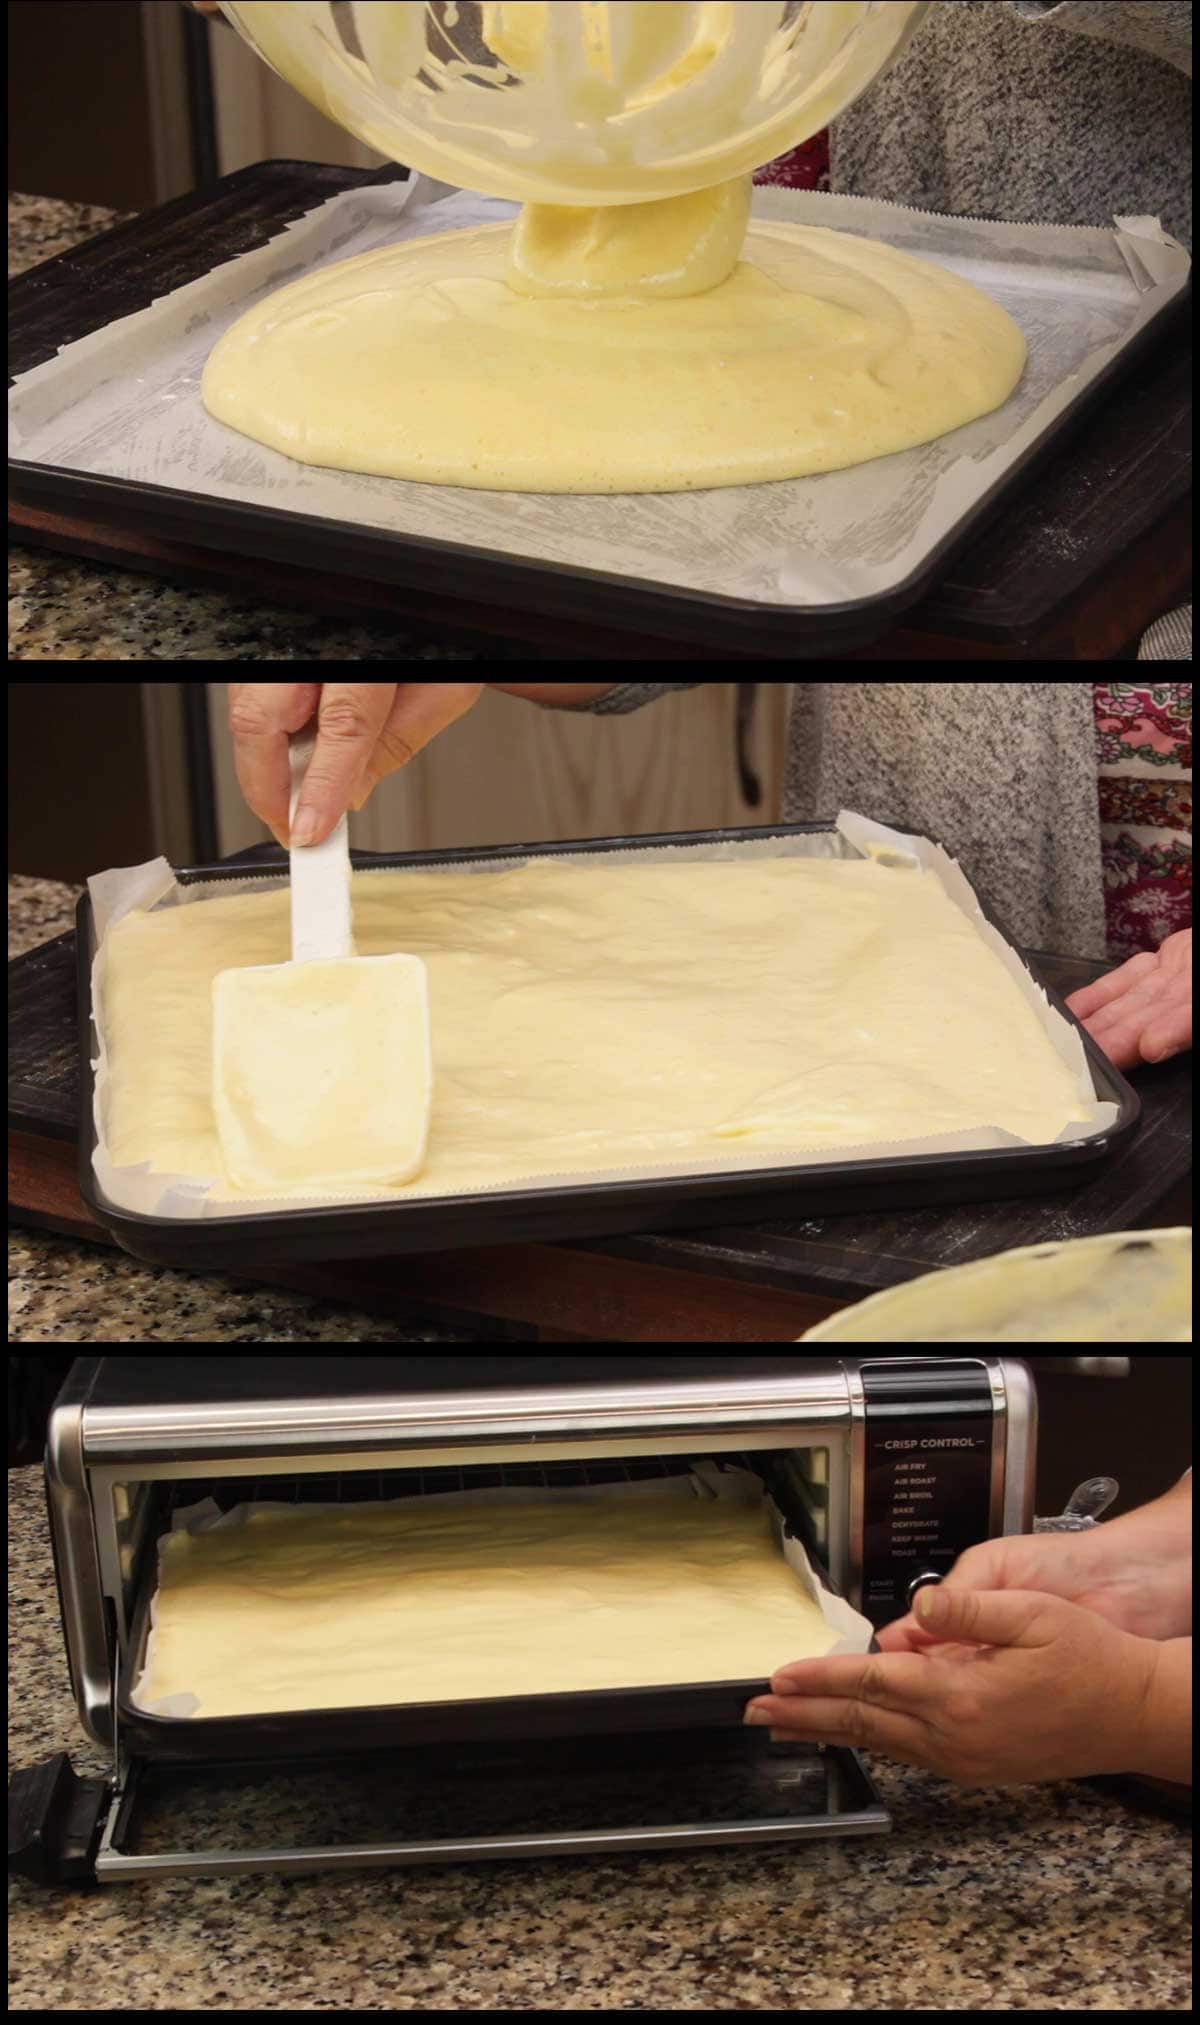
Once the parchment is lining your pan, gently pour the cake batter onto the pan and spread gently to the edges. Smooth it out so it is even.
Place the pan in the Ninja Foodi Digital Air Fry Oven and set the temp to 325℉/160℃ and the time for 12 minutes. Most test batches of this recipe took the entire 12 minutes to cook, but when I filmed the video, I took it out after 11 minutes.
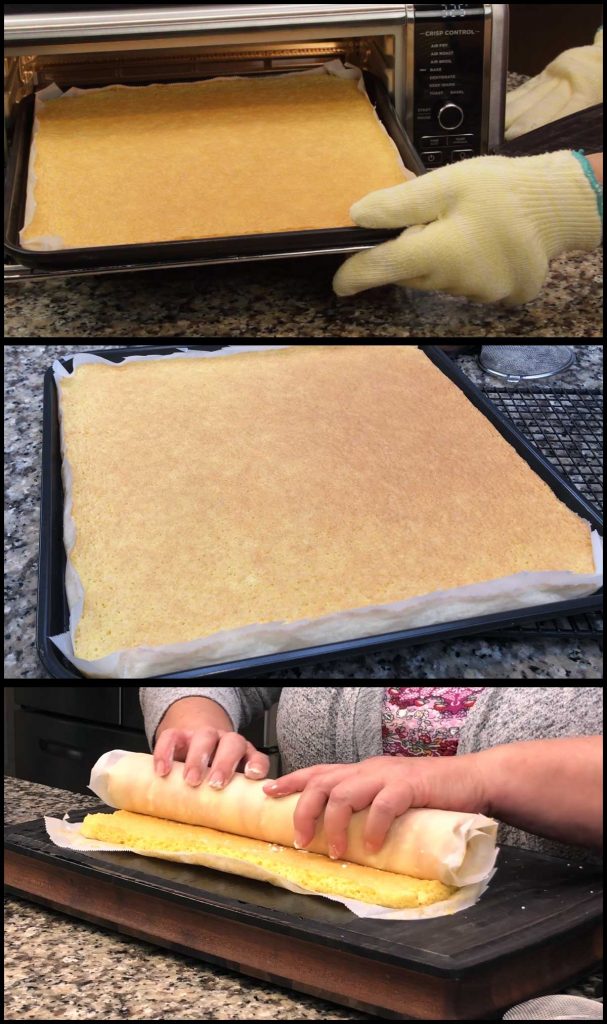
So, check on the cake starting at about 10 minutes and remove it when it is lightly browned on the top. You do not want to open the oven door prior to 10 minutes and it is also important that you don't slam the door shut. These things can cause your cake to fall and become dense.
Allow the cake to cool on a cooling rack for about 5 minutes. Just long enough so it isn't too hot for you to work with. Don't let it cool completely or you will have trouble rolling it.
Using the parchment as handles, slide the cake from the pan onto a flat surface. Your kitchen counter or a large cutting board will work great. Peel back the parchment paper from the outer edges and then roll the cake with the parchment paper still attached to the bottom. This will keep it from sticking. You can also sprinkle the surface with powdered sugar, but I haven't found this necessary.
Place the rolled cake onto a cooling rack and let it cool completely while you make the icing.
How to Make the Buttercream for Strawberry Roll Cake
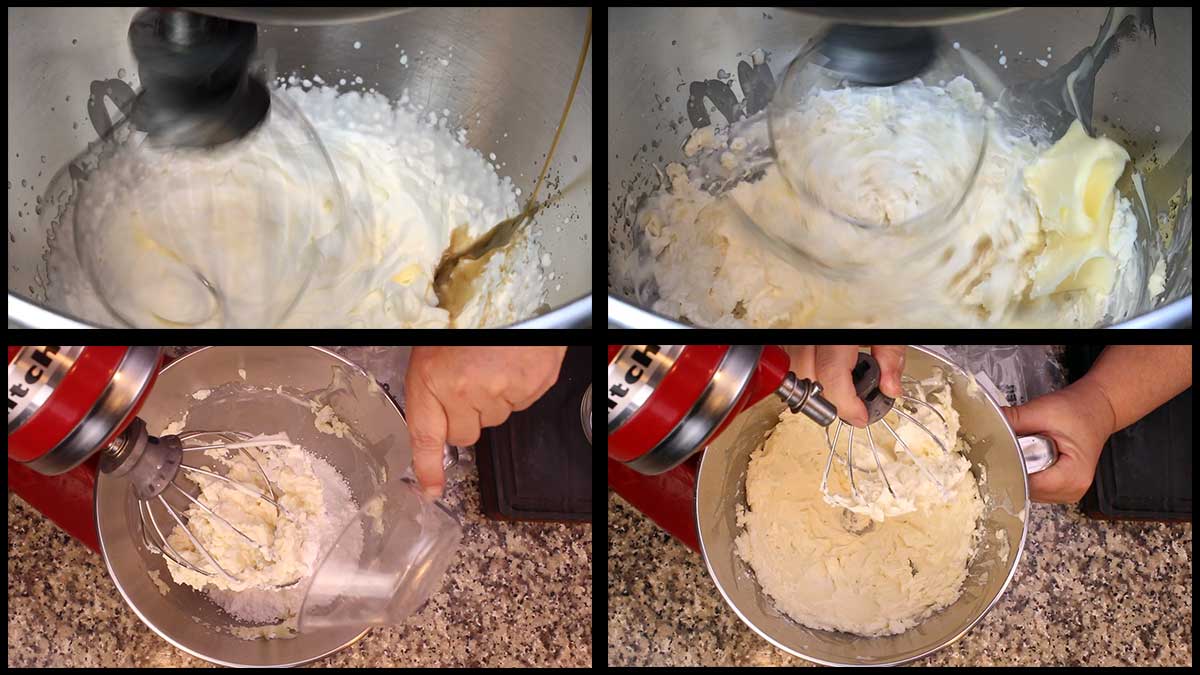
In the bowl of a stand mixer, add the whipping cream or heavy cream. Use the whisk attachment and turn the mixer on the high speed.
When the heavy cream starts to thicken like whipped cream, add the butter all at once and continue mixing with the whisk attachment. Add in the vanilla extract and whisk until combined.
Dump in the powdered sugar and continue to whisk on a medium-high speed until the buttercream is nice and smooth.
How to Assemble the Strawberry Roll
Reserve about ½ cup of the icing and set aside if you want to use any of it for the decorations on top.
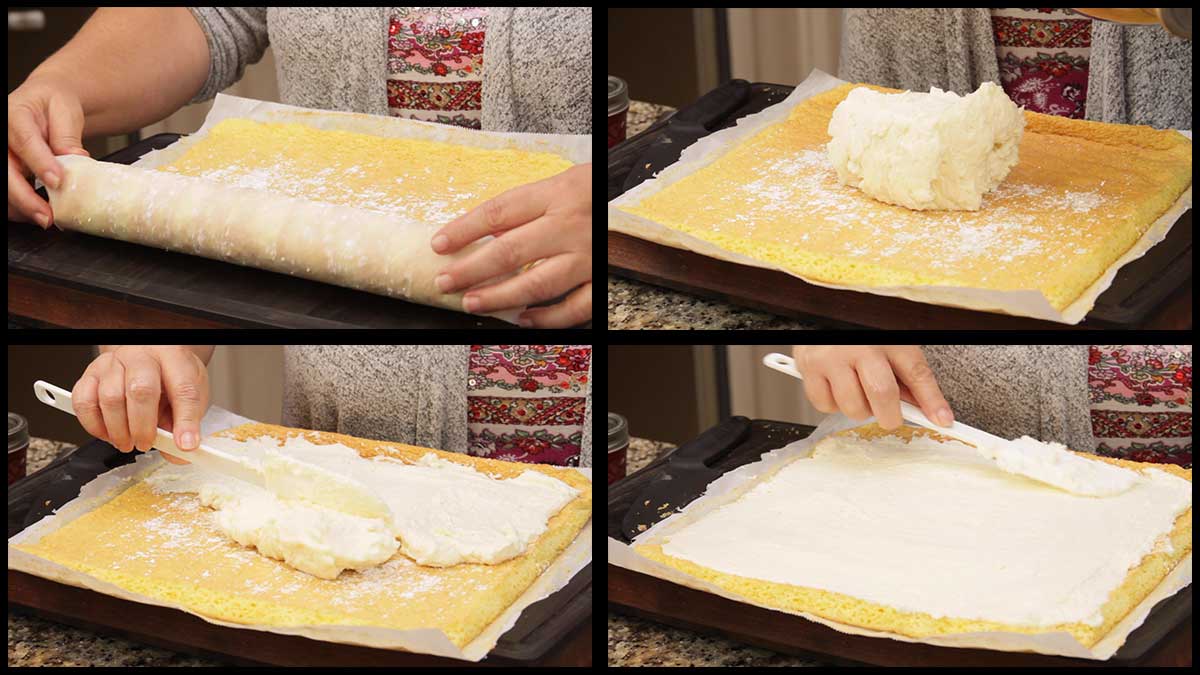
Unroll the cake layer and gently peel back the parchment paper from the cake and if it is sticking at all, use a knife to loosen it. I remove the parchment as I roll because that is easier for me, but you can flip the cake over and remove all of it. I would sprinkle the work surface with confectioner's sugar if I did that.
Spread the buttercream icing in an even layer across the top of the cake roll.
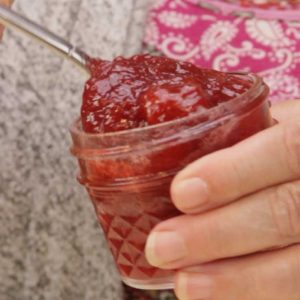
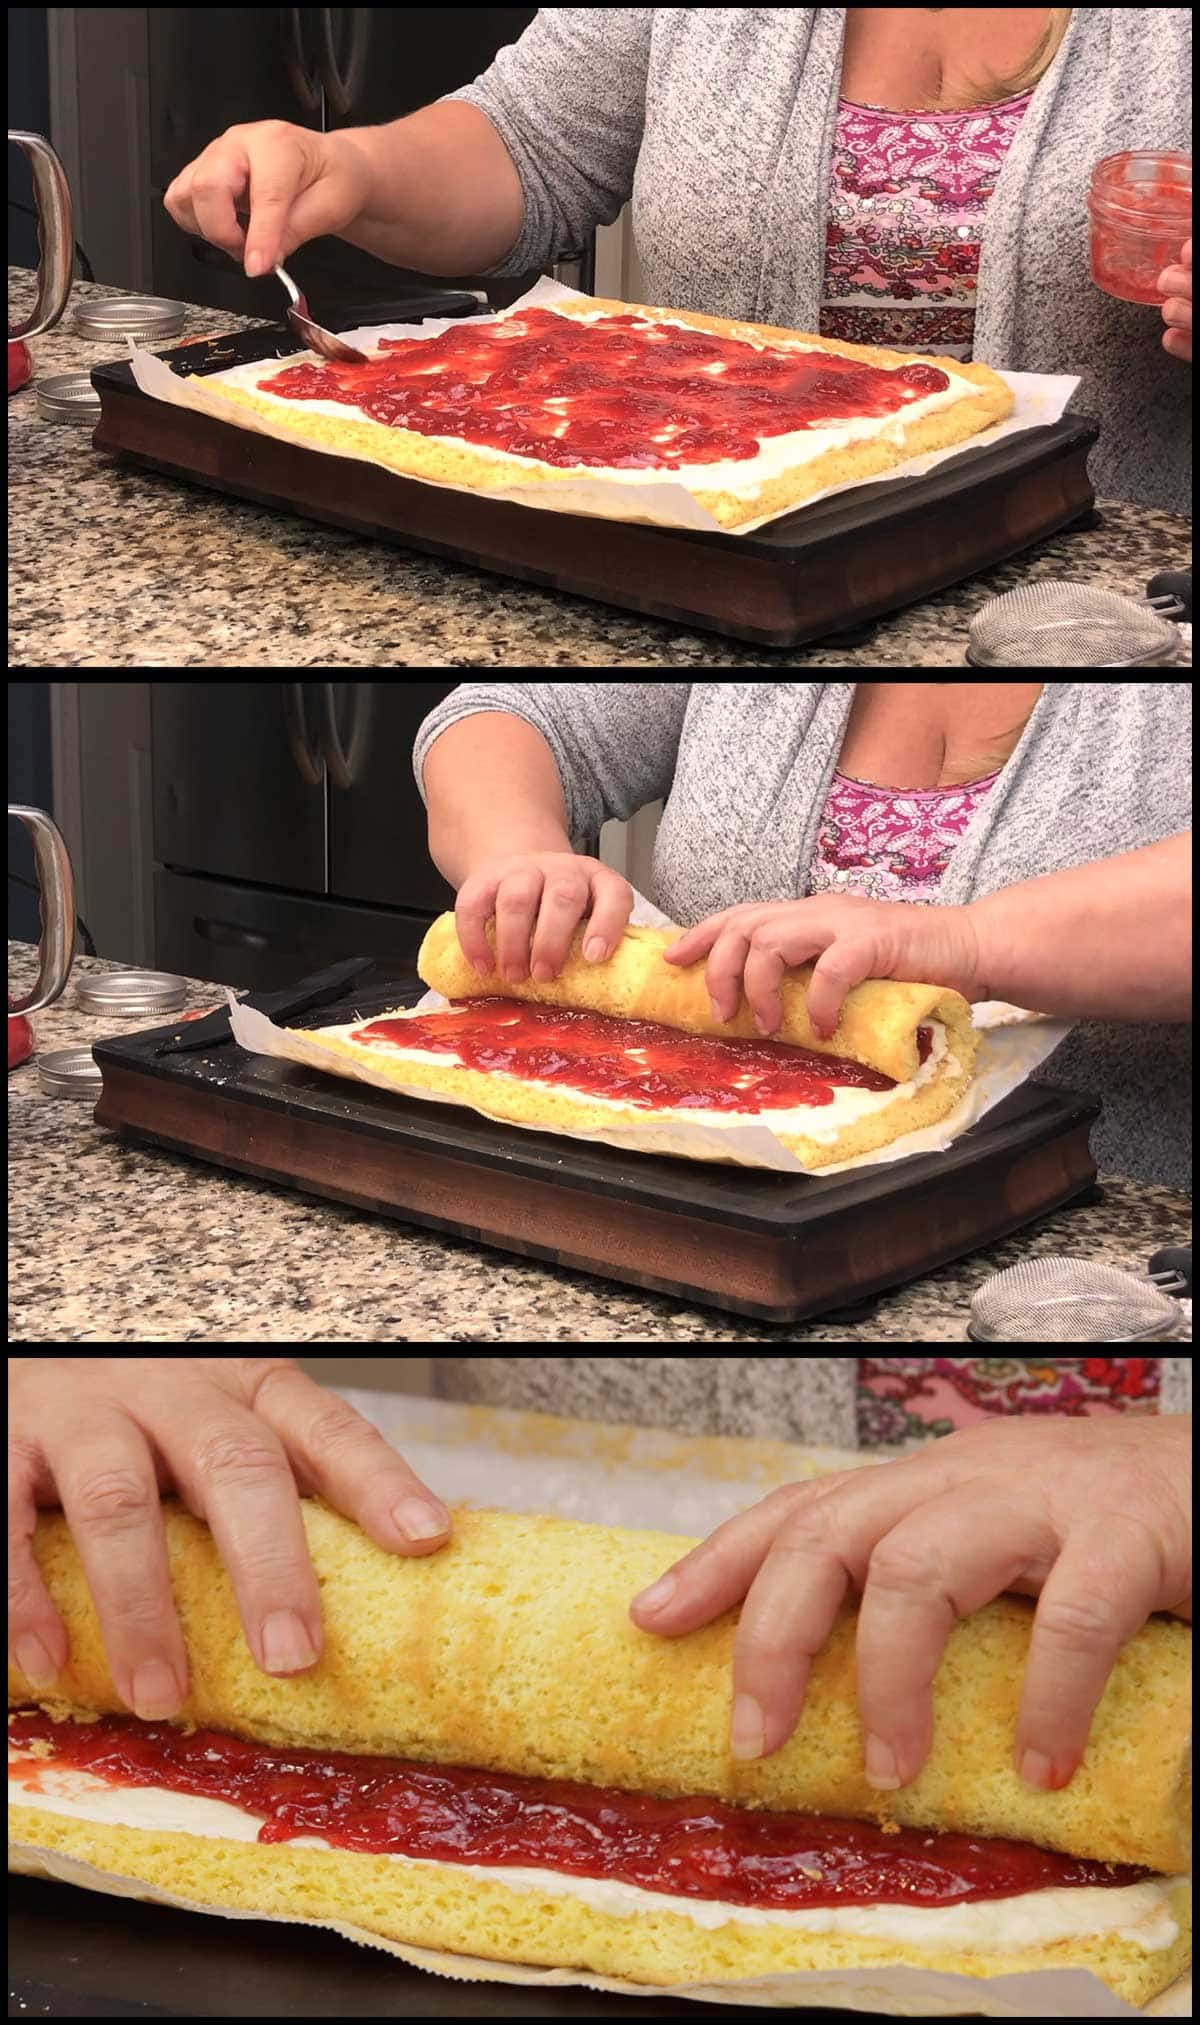
Then spread the strawberry preserves on top. I stop about ½" from the far edge because, as you roll the cake, you will push the preserves out and this prevents too much from leaking out.
I make my own strawberry preserves for this recipe and the link to the recipe is above if you want to make some from frozen strawberries. If you prefer using fresh strawberries, here is a video for Strawberry Basil Preserves.
Then start rolling from the edge closest to you, removing the parchment as you roll. I found that if I lift the cake up slightly and then roll, it helps to keep the strawberry roll nice and round.
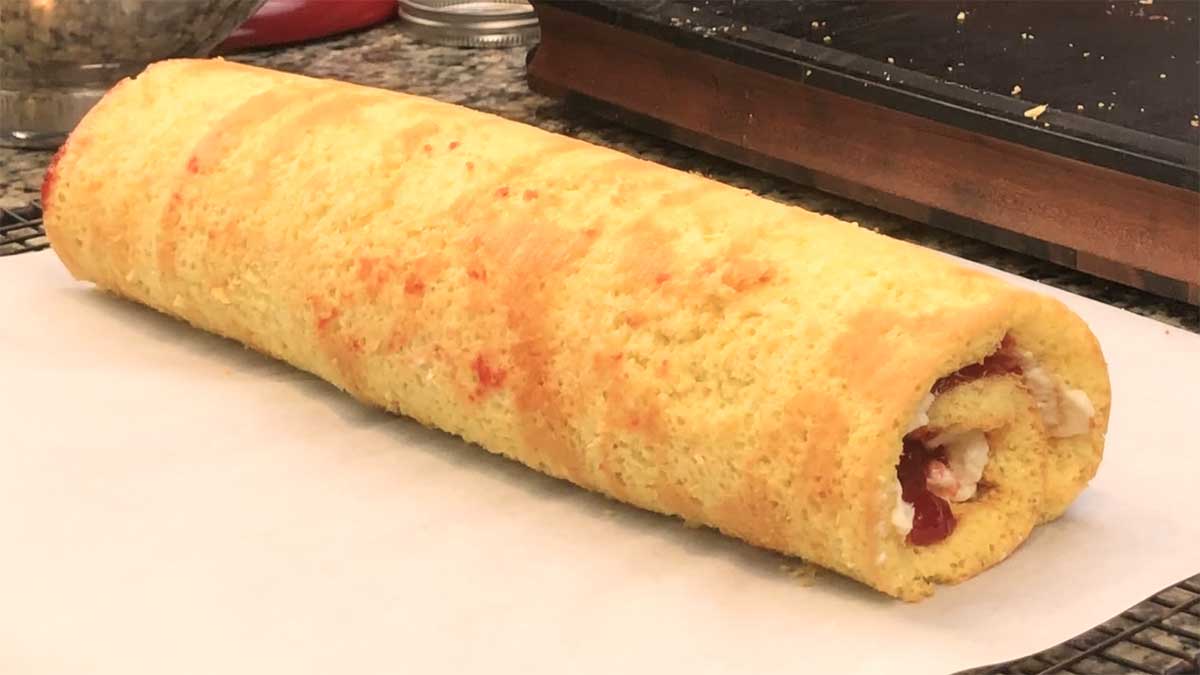
Once rolled, transfer to another piece of parchment or directly to the platter that you want to serve it on and chill for at least 4 hours.
It is perfectly fine to eat the cake right now, but it cuts much easier and cleaner when chilled. If you want to make this the night before, wrap in parchment and then plastic wrap to prevent it from drying out too much.
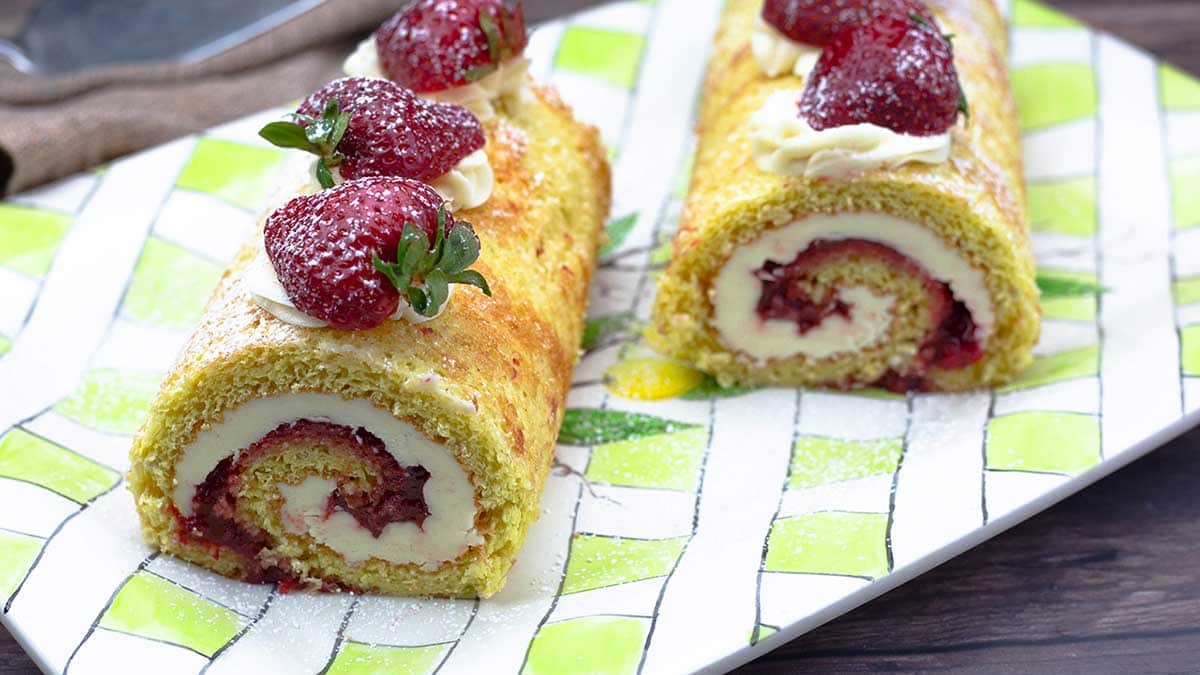
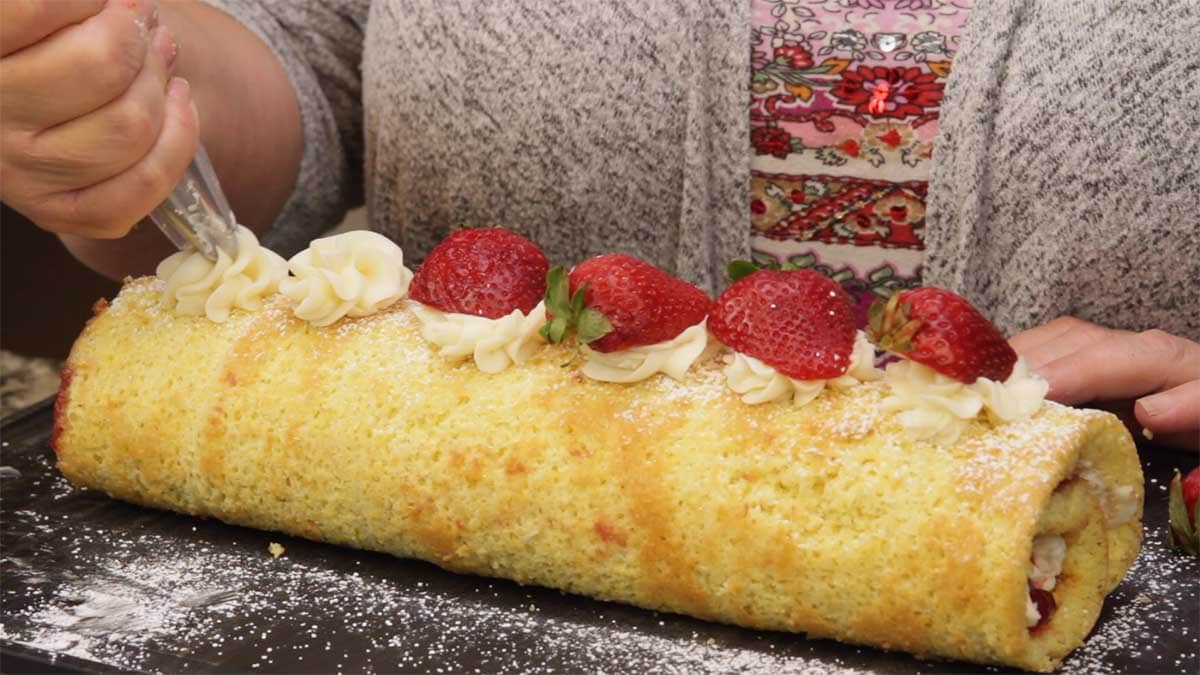
Decorate the top however you want. I sifted some powdered sugar and placed strawberries that were cut in half on top of dollops of the buttercream.
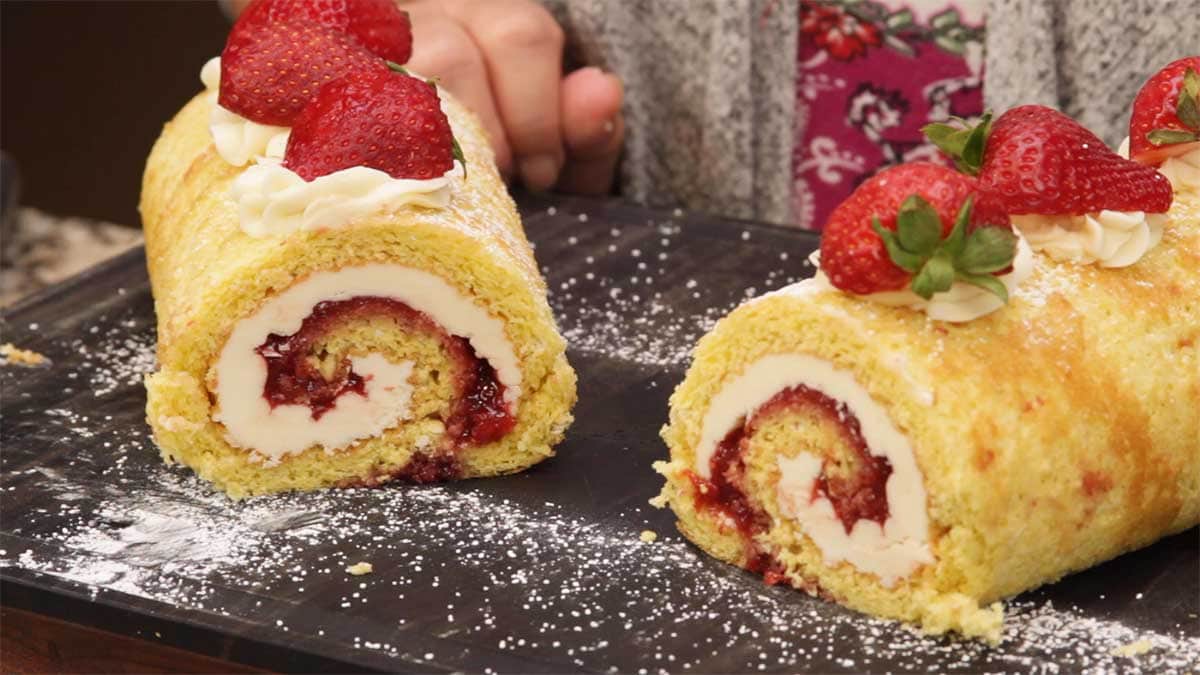
Slice thin slices after it chills. Serve & Enjoy!

Strawberry Cake Roll
Equipment
- (affiliate link)Ninja Foodi Digital Air Fry Oven
Ingredients
Sponge Cake
- ½ cup sugar
- 4 Large Eggs
- ¾ cup flour all purpose
- 1 teaspoon vanilla extract optional
Filling Ingredients
- ½ cup heavy whipping cream
- 1 cup butter salted & room temp
- 1 cup confectioner sugar
- 2 teaspoon vanilla extract
- 8 ounces strawberry preserves
Would you like to save this recipe?
Instructions
- Combine 4 eggs and the sugar into the bowl of a stand mixer or a large mixing bowl if using a hand held mixer or whipping by hand. Use the whisk attachment and whip on the highest speed for at least 5 minutes.
- You will see the mixture lighten up to a pale yellow and after the 5 minutes, do the ribbon test (see notes). If the batter is not quite at the ribbon stage, continue beating for another few minutes or until it gets to the ribbon stage
- Once the batter is to the ribbon stage, add in the vanilla and mix for a few seconds until combined.
- Sift ¼ cup of flour at a time and gently fold the flour into the batter. You do not want to mix this batter with the mixer, the folding technique is important to keep the batter aerated so your cake doesn't fall. Fold just until you can no longer see the flour and then continue with these steps until all the flour is incorporated.
- Spread some butter or oil on a 13x13 pan and place a piece of parchment on top allowing the parchment to also cover the edges. Trim of any excess.
- Pour the batter onto the parchment paper and gently spread the batter so it is even. Place the pan into the Ninja Foodi Digital Air Fry Oven and bake on 325°F/160°C for 10-12 minutes or until the top is lightly brown and the cake is fully cooked.
- Cool for about 5 minutes and then roll the cake with the parchment on. Place on a cooling rack and let cool while you make the filling.
Vanilla Buttercream
- Add the heavy cream to the bowl of a stand mixer and with the whisk attachment beat on high speed until the cream thickens into whipped cream
- Add the butter and the vanilla and beat until combined.
- Add the powdered sugar and beat on medium high speed until the buttercream is smooth.
Assembly
- Unroll the cooled cake and spread the buttercream all over the cake. Reserve about ½ cup if you want to put some of the buttercream on top for adding decorations. Spread the strawberry preserves over the top of the buttercream.
- Roll the cake and remove the parchment paper as you go. If the parchment is sticking, use a knife to gently separate it from the cake.
- Once the cake is rolled, place it seam side down on a platter or on parchment on a cooling rack and chill for about 4 hours.
- Slice into thin slices and serve. Enjoy!
Amanda says
I found this recipe to be very disappointing. The cake lacked flavour and the filling was difficult to make.
Louise says
I'm sorry to hear you didn't like it. What was hard about the filling for you? Perhaps I can improve my instructions to make it easier.
Rosanna says
Louise did you make a video of the strawberry roll, I can't seem to find the video
Louise says
Yes, Here is the link. I forgot to update the recipe with it, I'll do it now: https://www.youtube.com/watch?v=acuEzicO8co