Ninja Possible Cooker Pro Bread
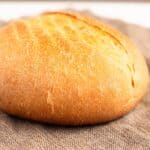
A simple lean dough bread baked entirely in the Ninja Possible Cooker Pro using the bake function. Just four ingredients produce a gorgeous, golden-brown loaf with a perfect crust and tender crumb, no oven or dutch oven required.
Servings: 10 slices
Calories: 142kcal
Ingredients
- 3 cups all-purpose flour, fluffed and measured Do not exceed 3 cups. Bread flour may be substituted but may require slightly more water.
- 1½ teaspoons instant yeast If using active dry yeast, dissolve in a portion of the warm water and let bloom for 5-10 minutes before adding.
- 1½ teaspoons kosher salt or fine grain sea salt Reduce slightly if using table salt due to smaller grain size.
- 1 cup warm water (approximately 110℉/43℃) Water must be below 120℉/49℃. You may need a little more or less depending on humidity.
- olive oil spray or light coating of olive oil For coating the dough before proofing. Any neutral oil or cooking spray works.
- parchment paper Used to line the rack for the second proof and baking. Foil can be used but may change the bottom crust.
- flour for dusting parchment A small amount to keep the parchment from getting damp during the second proof.
Instructions
- Add the flour, salt, and instant yeast to a large mixing bowl or the bowl of a stand mixer fitted with a dough hook. Stir to combine. Pour in approximately 1 cup of warm water (110℉/43℃) and mix on low speed for about 1 minute until a shaggy dough forms. Scrape down the sides and let the dough rest for 10 minutes to allow the flour to hydrate.3 cups all-purpose flour, fluffed and measured, 1½ teaspoons instant yeast, 1 cup warm water (approximately 110℉/43℃), 1½ teaspoons kosher salt or fine grain sea salt
- After the 10-minute rest, mix on low speed again. The dough ball will start to form and pull in the remaining flour from the edges. Once all the flour is incorporated, continue kneading on low speed for 10-15 minutes. If kneading by hand, work the dough on a clean surface for 10 minutes.
- The dough should feel smooth, slightly stretchy, and no longer tacky. To check, perform the windowpane test: pinch off a small piece of dough and gently stretch it. If you can see light coming through without it tearing, the gluten is properly developed.
- Form the dough into a ball and lightly coat with olive oil. Place the dough directly in the bottom of the Ninja Possible Cooker Pro pot. Put the lid on and select the Proof function. Set the temperature to 90-95℉/32-35℃ and the time to 1 hour. Check at 45 minutes. The dough should double in size. If it hasn't doubled, let it continue for the full hour.olive oil spray or light coating of olive oil
- Once doubled, gently remove the dough and place it on a clean, unfloured surface. Bring the edges into the center to lightly deflate, then flip it over. Using the bottom edges of your hands, push underneath and rotate the dough repeatedly to create tension on the surface. Continue shaping until you have a smooth, round ball of dough with a taut top. Tuck the bottom seam in neatly. Spritz the top lightly with olive oil.olive oil spray or light coating of olive oil
- Lightly wipe out the pot. Place the rack in the bottom of the pot and center a piece of parchment paper on top, securing the edges with the rack handles. Trim excess parchment. Dust a small amount of flour on the parchment, then place the shaped dough ball in the center.
- Put the lid on and select the Proof function again. Set the temperature to 105℉/41℃. The second proof takes approximately 30 minutes. The dough does not need to double this time, just show noticeable growth.
- Remove the dough (on the rack) from the pot and set aside. Put the lid back on the pot and select the Bake function. Set the temperature to 425℉/218℃ and preheat for 15 minutes. While preheating, score the dough down the center about ½ inch deep using a bread lame, sharp knife, or scissors.
- Once preheated, carefully lower the rack with the scored dough into the pot. Put the lid on and bake at 425℉/218℃ for 45 minutes. If you notice uneven browning around the 30-minute mark, briefly remove the lid and rotate the rack.
- After 45 minutes, carefully flip the bread on the rack using oven mitts. Remove the parchment paper. Place the bread back in the pot with the lid OFF. Bake at 425℉/218℃ for an additional 15 minutes to brown the top. The total bake time is 1 hour.
- Remove the bread from the pot and place on a cooling rack. Let it cool completely before slicing, which can take several hours. For a softer crust, brush with butter immediately after removing from the pot and wrap loosely in a tea towel while cooling.
Notes
PREP TIPS
• Do not exceed 3 cups of flour. More flour will cause the dough to expand too close to the sides of the pot and burn during baking.• If using active dry yeast instead of instant, dissolve it in the warm water and let it bloom for 5-10 minutes until frothy before adding to flour. KNEADING TIPS
• After the initial 1-minute mix, let the dough rest for 10 minutes before kneading. This hydration rest makes kneading much easier.
• Use the windowpane test to confirm proper gluten development. Properly kneaded dough will stretch thin enough to see light through without tearing. PROOFING TIPS
• Spray olive oil on the dough BEFORE placing it in the pot, not while it's inside. Oil that drips into the pot will bake on during the bake cycle. BAKING TIPS
• Preheat the Possible Cooker Pro on the Bake function at 425℉/218℃ for 15 minutes before adding the dough. This produces a better bottom crust.
• Do NOT add water to the pot for steam. The enclosed pot with the lid on creates enough moisture. Extra water prevents proper rise.
• If one side is browning faster than the other, briefly rotate the rack at the 30-minute mark. STORAGE
• Room Temperature: Store in a bread bag, bread box, or wrapped in a tea towel for up to 3 days. Avoid sealed plastic bags on the first day to preserve the crust.
• Freezer: Slice first, then wrap tightly in plastic wrap followed by foil or a freezer-safe bag. Remove as much air as possible. Freezes well for up to 3 months. Toast straight from frozen. NUTRITIONAL DISCLAIMER
Nutritional information provided is an estimate based on typical ingredient values and standard portion sizes. Actual nutritional content may vary significantly depending on specific brands used, ingredient substitutions, preparation methods, portion sizes, and individual cooking techniques. For precise nutritional information tailored to your specific ingredients and preparation, please consult with a registered dietitian or use laboratory analysis. This information should not be used for medical nutrition therapy or to manage medical conditions without professional guidance.
Nutrition
Serving: 1slice | Calories: 142kcal | Carbohydrates: 29g | Protein: 5g | Fat: 1g | Saturated Fat: 0.1g | Polyunsaturated Fat: 0.2g | Monounsaturated Fat: 0.1g | Sodium: 352mg | Potassium: 57mg | Fiber: 1g | Sugar: 0.1g | Vitamin C: 0.01mg | Calcium: 7mg | Iron: 2mg