
Believe me when I tell you that not only do these Chimichangas taste as good as the deep fried kind, they taste BETTER! I love fried Chimichangas and honestly didn't think these Air-Fried Chimichangas would measure up... I was wrong!
Would you like to save this recipe?
My husband and I debated whether we could really call these Chimichangas because by definition that means deep fried and, of course, these are air-fried chimichangas.
I briefly thought of changing the name to Air-Fried Burritos, but that isn't how burritos are usually made either. Burritos are usually lightly grilled or even steamed to soften the outer tortilla to make them easier to eat.
This post may contain affiliate links. If you make a purchase after clicking a link, I may earn a small commission. As an Amazon Associate, I earn from qualifying purchases.
Dilemmas, dilemmas, dilemmas. Well, in the end, Air-Fried Chimichangas won! Not only is it a fun name, I think it best represents what this recipe is and I know you are going to love it!
What is a Chimichanga?
A Chimichanga is a burrito that has been deep fried (traditionally). There are many stories about how this deep fried burrito became known as a chimichanga.
Some say that someone accidentally dropped a burrito into a deep fryer and the cook yelled, "Chimichanga!" as a way to express frustration in what would be considered a cuss word in English.
Others claim that chimichanga translates to golden monkey or golden donkey. I'm not sure anyone really knows how the chimichanga got its name, but what I do know is that they are delicious!
They are definitely one of my favorite Mexican-inspired foods. I say Mexican-inspired because, while I don't know how it got its name, I'm pretty sure the Chimichanga is 100% an American creation based on Mexican flavors.
Honestly, it doesn't matter what it's called or if it's Mexican or American, I'm just thrilled that I can make Air-Fried Chimichangas at home, any time I want! The Ninja Foodi Pressure Cooker and Air Crisper does a fantastic job at crisping up the flour tortilla so it turns out better than the deep fried version.
Do I have to have the Ninja Foodi to make Air-Fried Chimichangas?
No, you don't. You can make them in any air fryer or even in your oven.
I haven't tested the recipe in other air fryers, but I would follow the same instructions and just keep an eye on them. Adjust your temperature and time according to how they are browning and, for the best results, spritz or brush with oil.
In a regular oven, I would preheat on 400℉/205℃ and then bake at the same temperature for 15-20 minutes, flipping halfway through.
If you have a convection setting on your oven, definitely use that and you might need to decrease your temperature by 25°
As with any food, just keep an eye on it and make adjustments as needed.
If your filling is cold, it will take longer to warm through, so a lower temperature for longer might work better.
* The chimichangas won't be as crunchy baked in the oven, but they will still be delicious!
Another way to make them is to skillet fry them. To do this, I would make sure that the filling is at least warm and then add 1-2 tablespoon of oil into a frying pan and heat on high.
Place the chimichanga seam side down and reduce the heat to medium or even medium-low. Let the chimichanga cook for a good 3-5 minutes and then flip to brown and crisp the other side.
What fillings do I use to make Chimichangas?
Anything you want! Seriously, you don't even have to make them with Mexican inspired ingredients! I wouldn't call them Chimichangas, but I would still call them delicious!
Traditionally, a chimichanga is made with beans, rice, cheese, and some kind of meat, but that doesn't mean you have to make your Air-Fried Chimichanga that way!
I did, because I love all those flavors and textures, but you can pick and choose your ingredients.
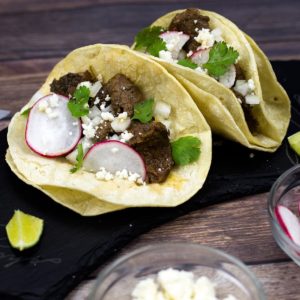
The meat in my recipe for Carne Asada Tacos would make a great filling for Air-Fried Chimichangas! I would just cut it a little smaller after cooking.
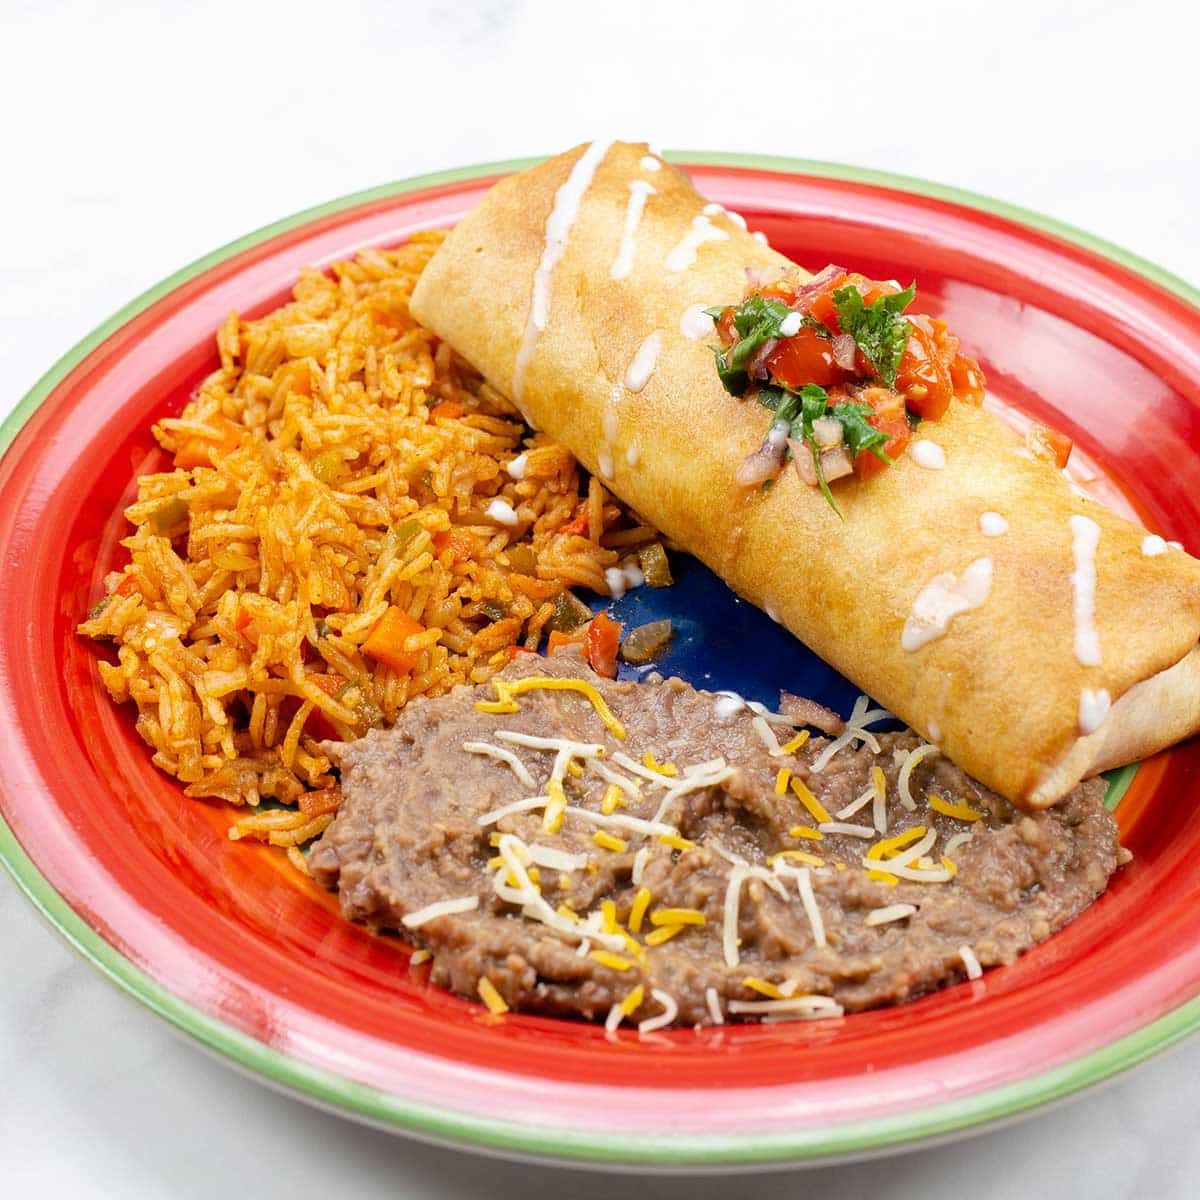
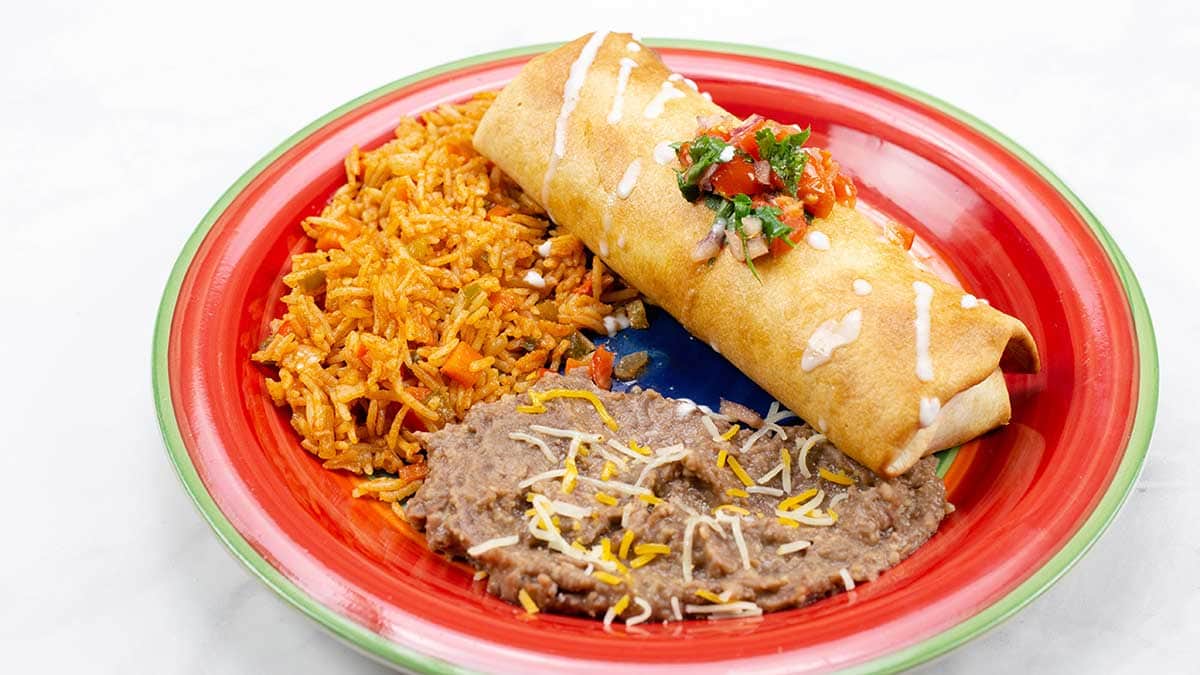
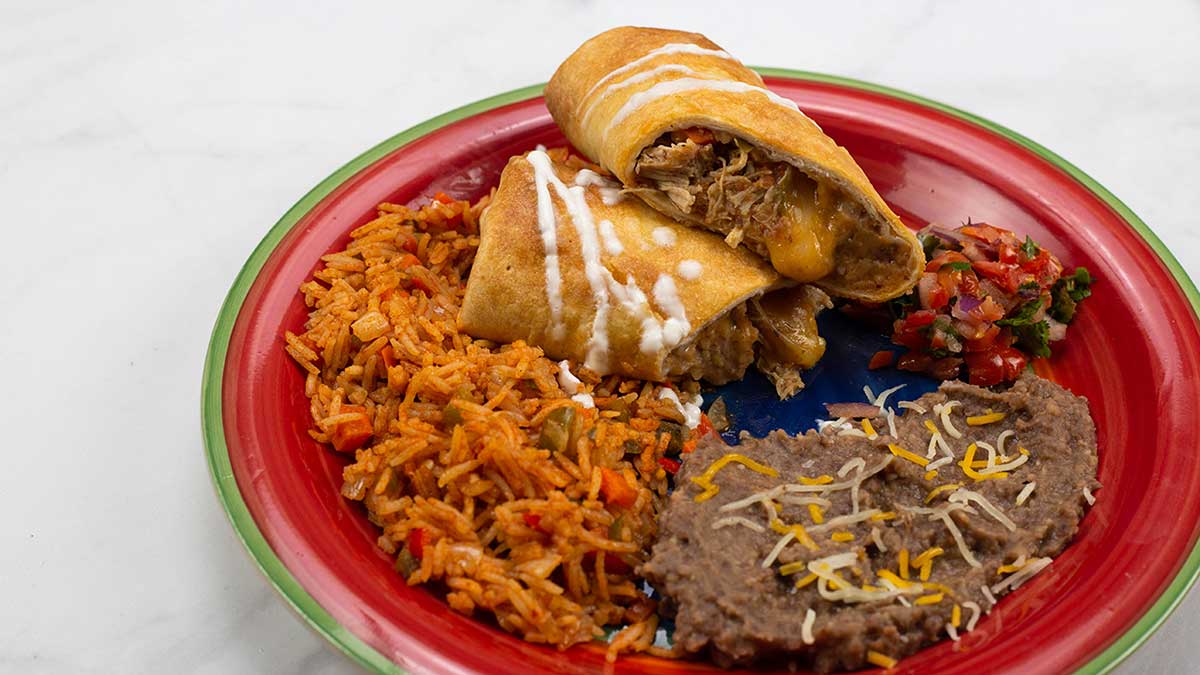
For this recipe I used several of my recipes and wrapped them up inside a flour tortilla and air fried them until they were crispy and brown. If you want to make them like I did, I'll link to all the components that I used below.

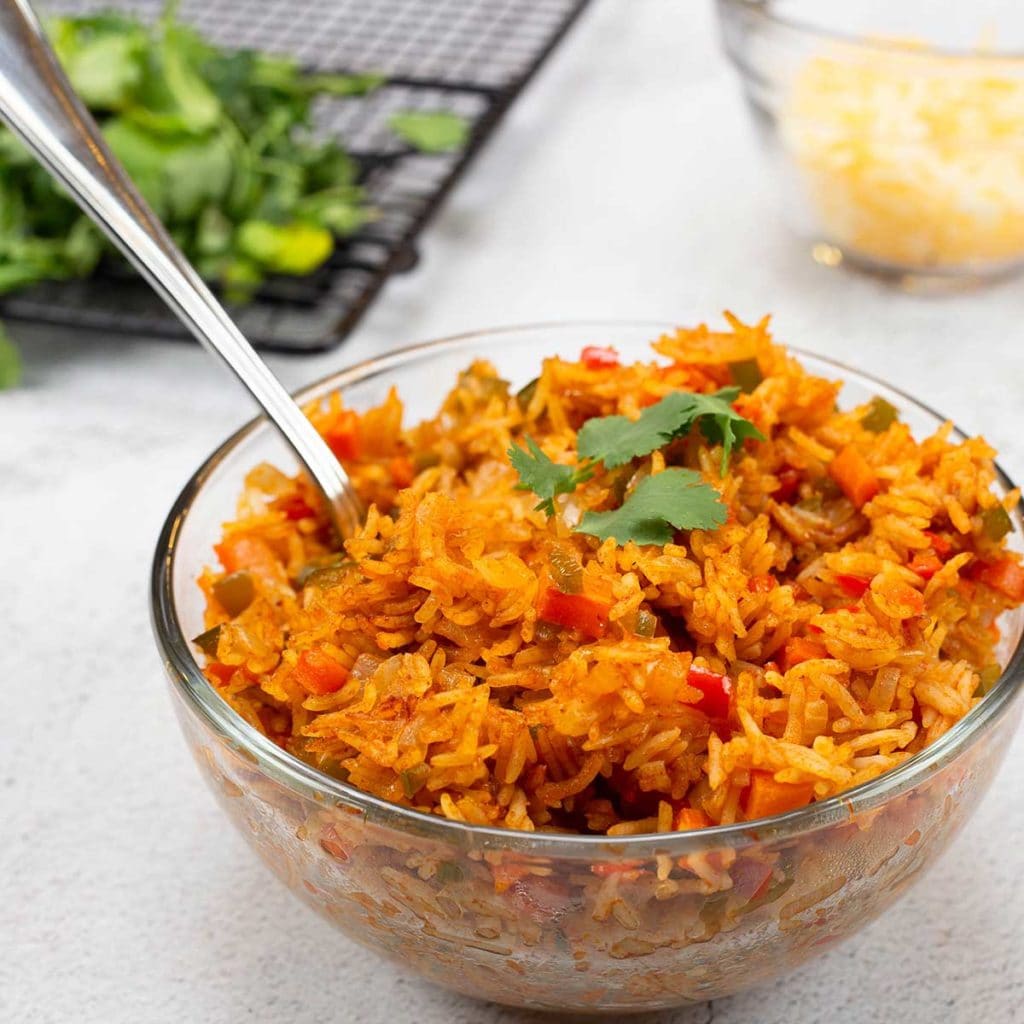
Mexican Shredded Chicken Homemade Refried Beans Mexican Rice
Air-Fried Chimichangas are completely customizable, so you can use ground beef with taco seasoning, ground chicken or turkey with some seasonings, any kind of rice or beans or leave them out.
You can make them vegetarian or all meat. The instructions are the same no matter what filling you choose to use.

You can even make them for breakfast like I did in this recipe for Breakfast Burritos!
The breakfast burritos are a great make-ahead breakfast and they reheat really well in the Ninja Foodi or Air Fryer!
Tips for Making Air-Fried Chimichangas
Use 10" flour tortillas for the best outcome
You can use smaller ones, but you will really have to decrease the amount of filling so you can roll them, and they end up being on the small side.
Don't overfill the flour tortillas
This is probably the biggest mistake people make and the main reason that the tortillas are hard to fold. If you do overfill them and are having a hard time rolling the tortillas, just remove some of the filling. You want about ¾-1 cup of filling at the most. That includes all the various components.
Bring your flour tortillas to room temp first
Cold flour tortillas are hard to roll, so allowing them to come to room temp first really helps. You can always put them in the microwave for a few seconds, as well.
Preheat. Preheat. Preheat.
I can't stress this enough. You want whatever air fryer or oven you are using to be hot BEFORE you start to cook the chimichanga.
Simply let your appliance heat up for 10 minutes on the hottest setting or with an oven, preheat as you normally would.
Preheating will start to cook the outside of the tortilla before the filling has a chance to really heat up and become moisture. Slow heating can cause a soggy Air-Fried Chimichanga.
Don't use wet fillings
For the same reason as you preheat, you don't want to use really wet ingredients because the moisture will get into the flour tortilla and make it soggy.
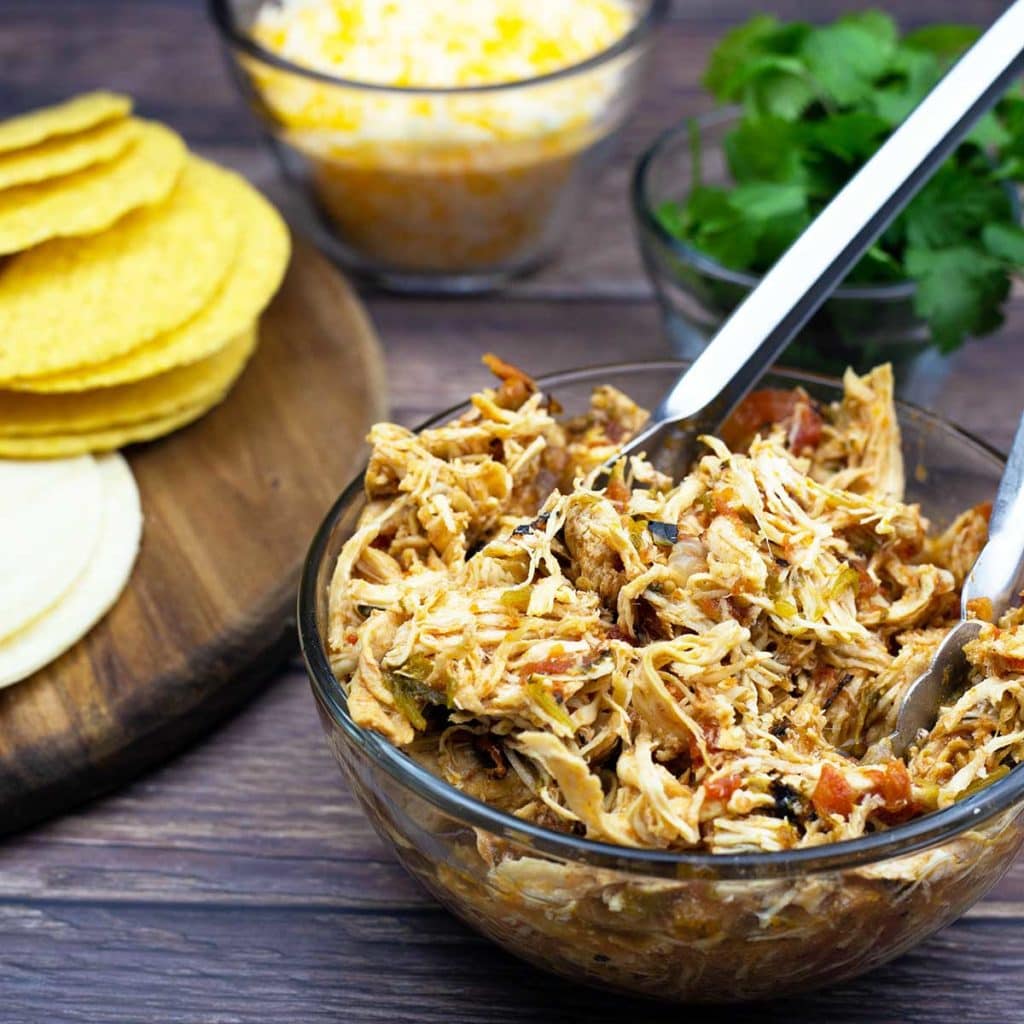
If you have a wet filling, like my Mexican Shredded Chicken, just use tongs and let as much juice drip off as you can before placing it on the tortilla.
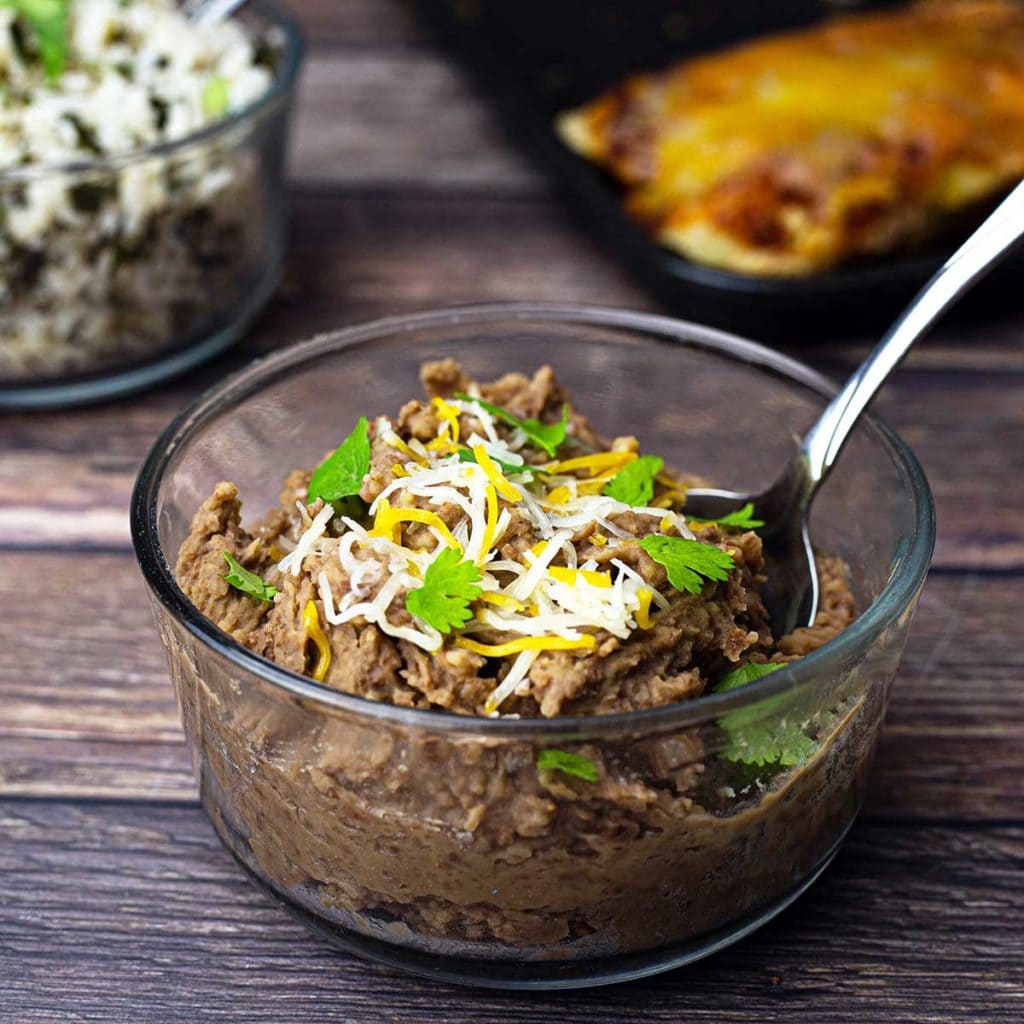
Also, place a drier ingredient down first. I usually spread my refried beans first and then layer the other toppings.
What Accessories do I need for this recipe?
You really don't need anything special to make these Air-Fried Chimichangas, but I did use my Sear 'N Sizzle Grill Grate on the flat side.
I find that the grill grate really retains the heat and does a beautiful job of crisping the outside of the chimichanga. If you haven't heard of the (affiliate link)Sear 'N Sizzle Grill Grate before, check it out!
It is, hands down, my favorite accessory for the Ninja Foodi! I've used it in a ton of ways and have done a video review on it that you can find here ⬇︎⬇︎
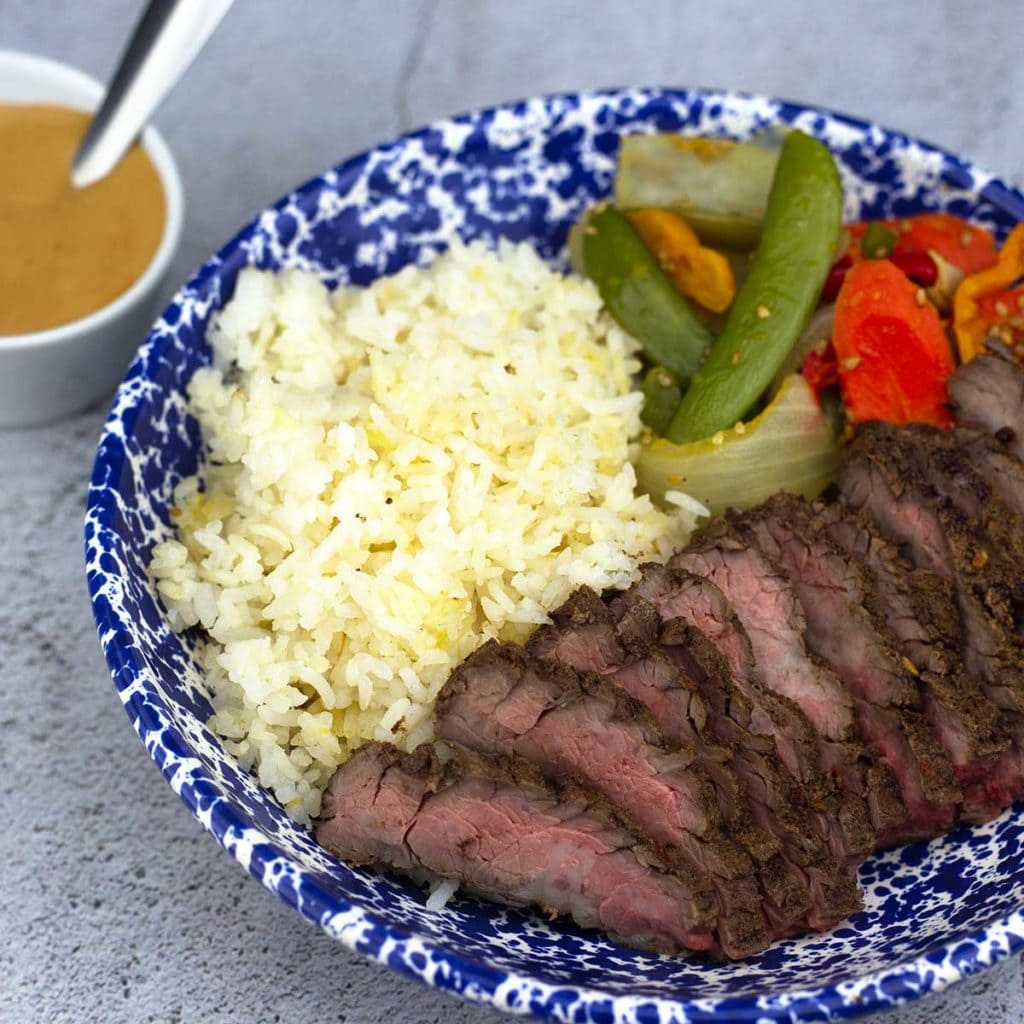
One of my favorite recipes that uses the Sear 'N Sizzle grate is this 360 meal where I use the grill grate above the rice to cook the steak while the rice is also cooking below. It's amazing how well the grill grate works!
Asian Steak Stir Fry with rice
How to make Air-Fried Chimichangas in the Ninja Foodi
The first thing is to decide on your fillings. I used refried beans, rice, cheese, and Mexican Shredded Chicken, but you can use any combination of fillings that sounds good to you!
You don't even have to make these Mexican if you don't want to! Simply stuff them with anything you have left over and turn your leftovers into a crispy and delicious meal!
Preheat the Ninja Foodi with either the grill grate (flat side up) resting on the diffuser legs from the basket inside or the rack in the low position. Use broil (or grill in the UK models) for 10 minutes to get the Ninja Foodi really hot.
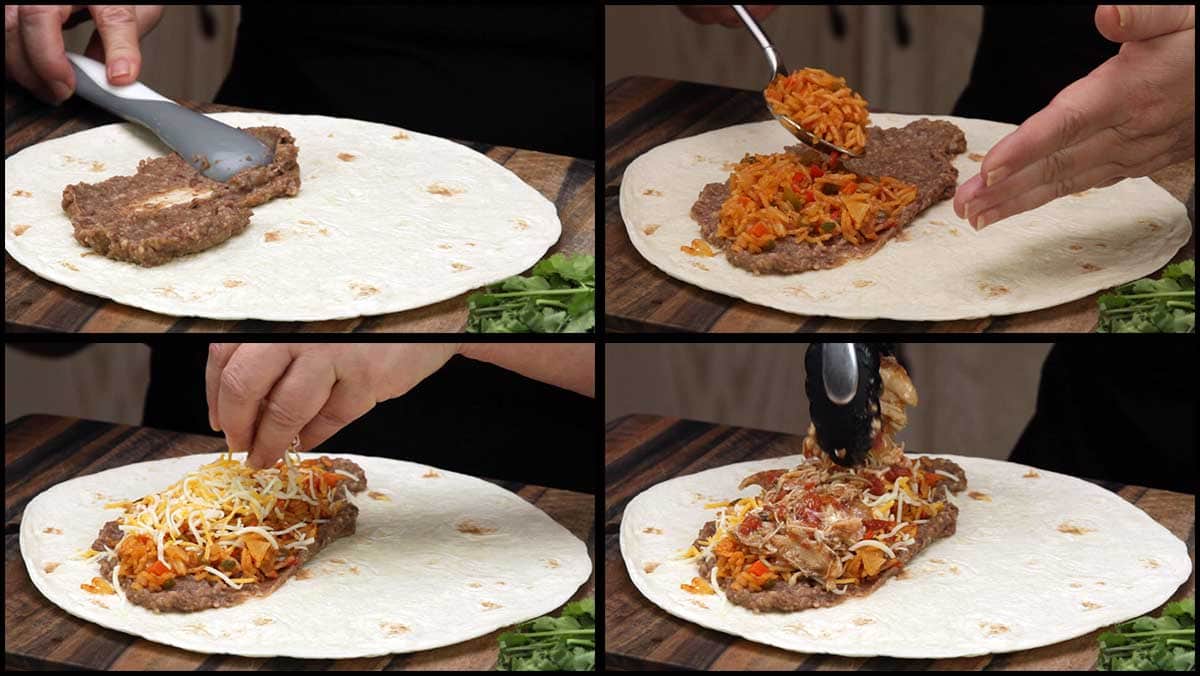
While that is preheating, lay out your 10" flour tortilla on a clean and very dry work surface. Spread out the refried beans, about 2 tablespoon is enough. If you aren't using refried beans, put down cheese or rice first before your meat mixture because the meat mixture will be a little wet and you don't want it to make your tortilla soggy.
Next, layer the rest of your fillings. I put the refried beans down first, followed by, rice, cheese, and then the chicken. No matter what fillings you are using, make sure they are not super wet.
You can see below how the fillings are on one side of the tortilla. That is going to make it easier to roll.
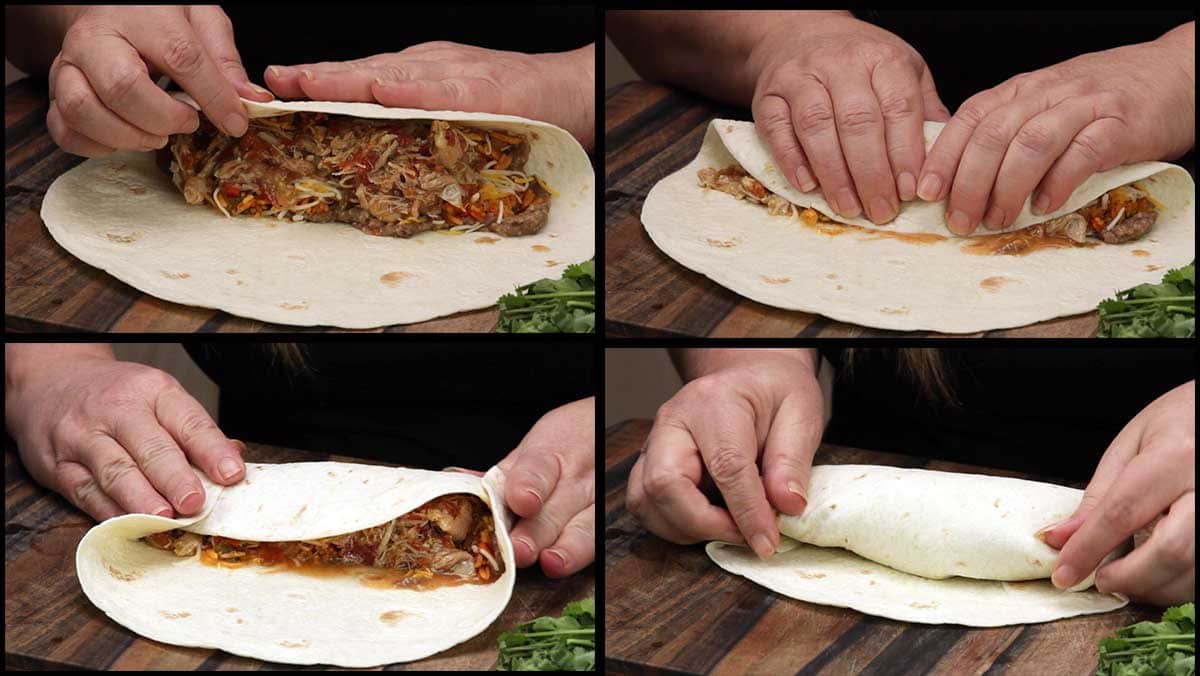
Rolling the chimichanga can be the most challenging part of making them. Trust me, I have been frustrated many times until I started doing it this way and then it was super easy.
Roll the side that has the filling over the filling and pull back towards you to tighten it up. Then, fold in each end and continue to roll. I actually had a little too much filling in mine and it did leak a little, but worked out just fine.
Here is a quick video on how to roll your Air-Fried Chimichanga
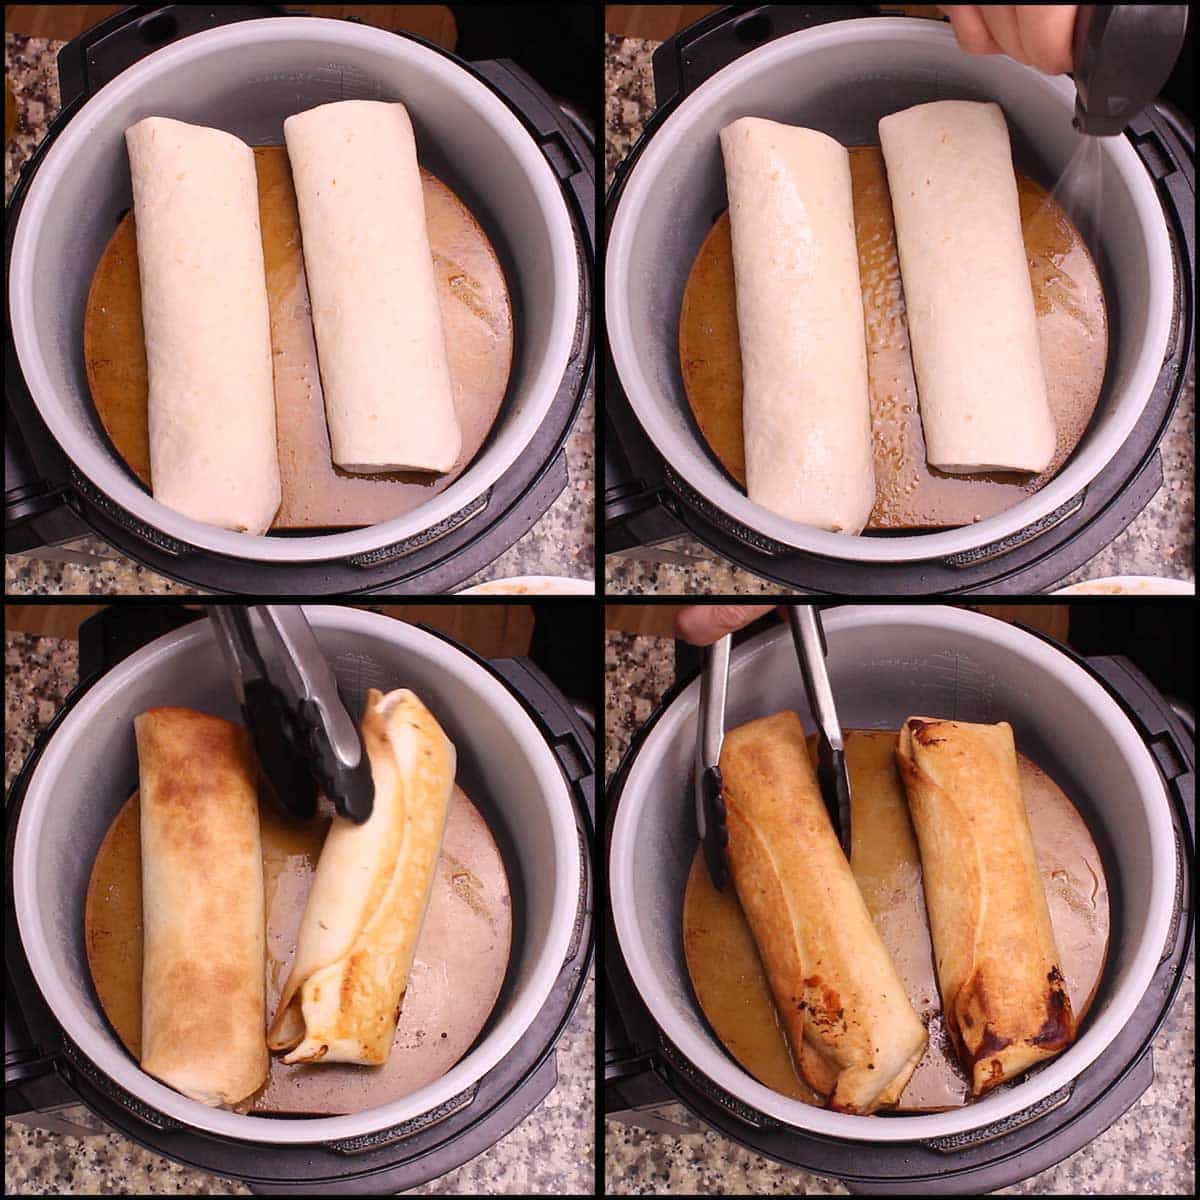
When the Ninja Foodi has preheated for a minimum of 10 minutes, spritz the grill grate with oil. Place the chimichangas seam side down and spritz the top with oil.
If you are using the rack, simply spritz the seam side of the chimichanga before placing on the rack. You can use the rack in either position based on the size of your chimichangas.
Close the TenderCrisp lid and select the Air Crisp function on 375℉/180℃ and Air Crisp for 5 minutes. Flip and spritz with oil. Air Crisp another 5 minutes.
Always keep an eye on your food and you can increase or decrease the temperature as needed to get the browning and crispiness you want.
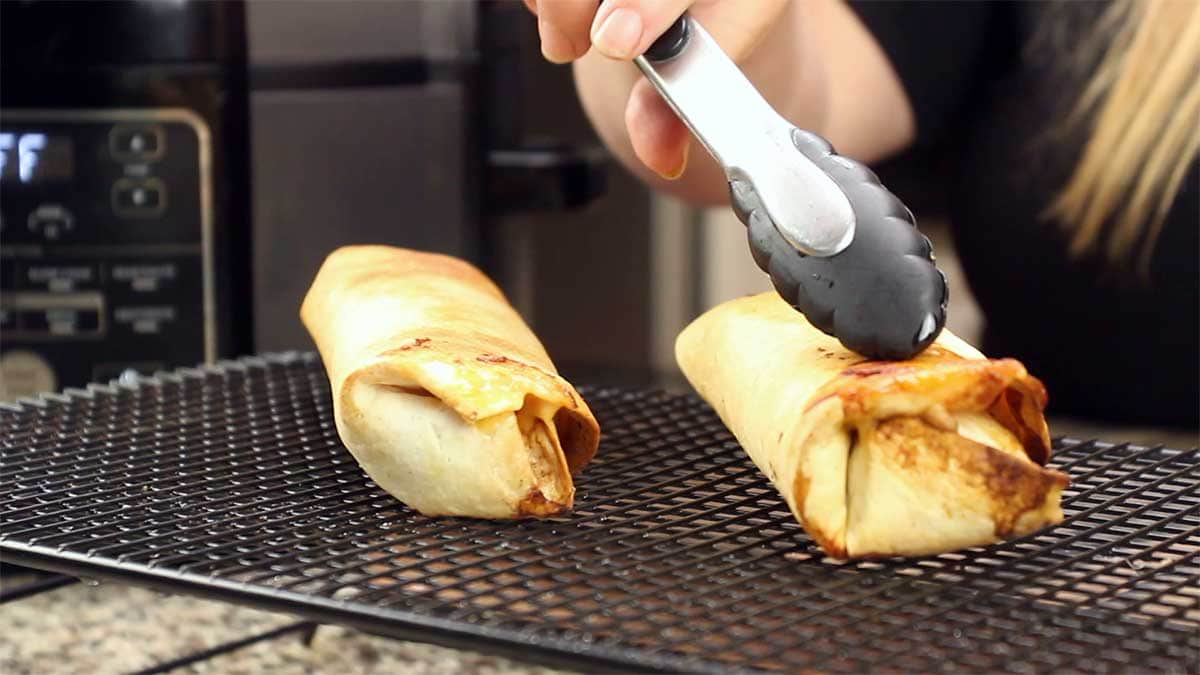
When they are done, remove them and let them cool for a few minutes on a cooling rack. Placing them on a plate can cause the bottoms to steam and become less crispy.
Cut and top with any toppings you like.
Serve & Enjoy!

Air-Fried Chimichangas
Ingredients
- 1 10" flour tortilla
- 2 tablespoon Refried Beans
- ¼ cup Mexican Rice
- 2 tablespoon Shredded Mexican Cheese Blend
- hot sauce optional
- ¼ cup Mexican Shredded Chicken
- oil of choice for spritzing
Would you like to save this recipe?
Instructions
- Preheat the Ninja Foodi on broil for 10 minutes with the grill grate on the flat side on or use the rack on the low position.
- Spread about 2 tablespoon of refried beans on the right side of a 10" flour tortilla. Top with about ¼ cup Mexican Rice, 2 tablespoon of shredded Mexican Cheese, hot sauce if using, and finally about ¼ cup of Mexican Shredded Chicken.
- To roll the chimichanga, fold the flour tortilla over the fillings and pull it back towards you so you get a tight roll. If you have filling that is coming out of the ends, you have overstuffed your tortilla and it will be difficult to seal completely. Remove some of the filling if this happens. Fold each end towards the center and then finish rolling. *See quick video in post for demonstration
- Spritz the flat size of the grill grate with oil and place the chimichanga seam side down and spritz the top with oil. Close the TenderCrisp lid and Air Crisp on 375°F for 5 minutes, flip and spritz again if needed and Air Crisp another 5 minutes. If using the rack instead of the grate, spritz the seam side of the chimichanga before placing it on the rack.
- Remove and allow to cool for a few minutes on a cooling rack.
Notes
- Use 10" flour tortillas for the best outcome
- Don't overfill the flour tortillas
- Bring your flour tortillas to room temp first
- Preheat. Preheat. Preheat.
- Don't use wet fillings
Nutrition
About the Recipe Author, Louise Long
Louise is a full-time recipe creator and food blogger @ The Salted Pepper. She has over 30 years of experience with cooking and recipe development. She owned a restaurant for several years and was a full-time RN until retiring to blog full-time.

She published her first cookbook in the Fall of 2018 and is very interested in writing several more.
Louise is also the creator of an online Ninja Foodi Pressure Cooking Course with over 100 instructional step-by-step videos. People absolutely rave about the course and all the value they have received from it.
Louise has several very active Facebook groups that help people with the basics of cooking and learning more about the appliances they love.
Ninja Foodi Pressure Cooker & Air Crisper 101
Ninja Woodfire Outdoor Grill & Smoker
Louise is also a YouTube creator and you can find most of her recipes in video format on The Salted Pepper YouTube channel.
She is very responsive to messages and eager to help in any way she can. Get more Information about Louise & contact information
I WOULD LOVE TO SEE WHAT YOU ARE COOKING UP IN YOUR KITCHEN! TAG ME @THESALTEDPEPPER ON YOUR FAVORITE SOCIAL MEDIA PLATFORM WHEN YOU MAKE A DISH!
BE SURE TO FOLLOW THE SALTED PEPPER RIGHT HERE ⇓⇓⇓⇓⇓
Victoria says
I made this for my husband and I a while ago with the Mexican chicken and rice was soooo delicious I'm making it gain for dinner. Excellent recipes & full of flavors. Thank you Wish I could post a picture it all turned out so good.
Louise says
I'm so glad you both enjoyed it!
Cheryl says
Do you have a receipt to make salsa with fresh tomotoes in Ninja
Foodi Blender Cold and hot machine.
Louise says
No, I don't, sorry. I need to put that on my list.
Stephen says
All these recipes are all well and good, but for people who live outside the USA, most of the ingredients you share are unavailable.
Louise says
I'm sure that can be frustrating for you, but there are a lot of people who live outside of the US who make my recipes and use what they have available in their country. I'm always happy to help with substitution suggestions and try to give many in the written post.
Beverly says
I just made this today and we are all LOVING it!! Absolutely delicious and so easy to put together. Thank you for doing what you do!!
Louise says
I'm so glad to hear that! I love that recipe, too!