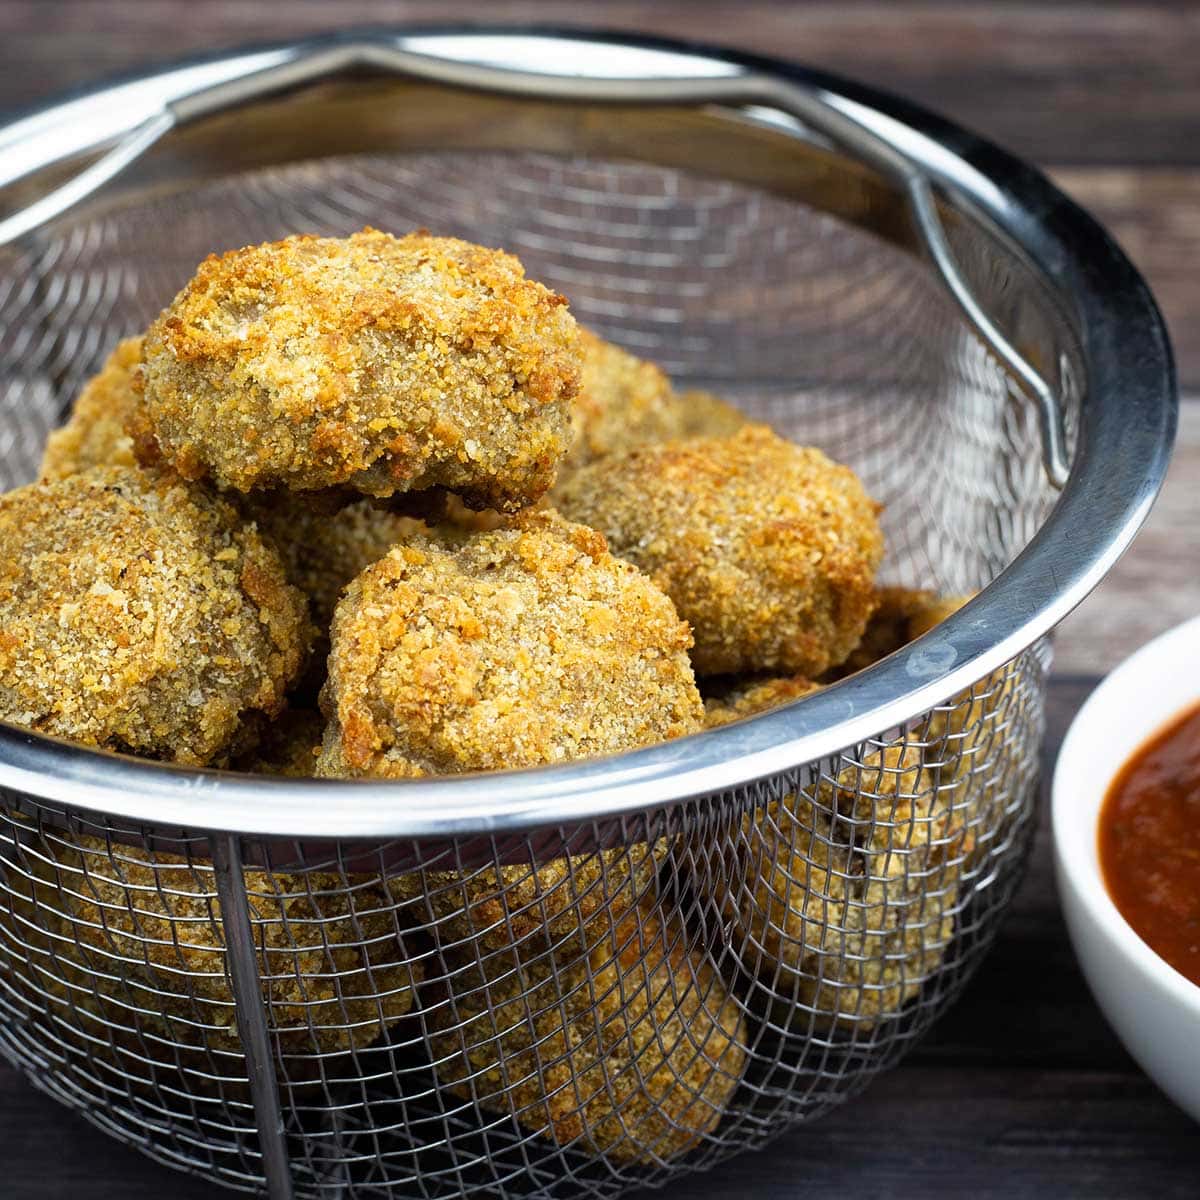
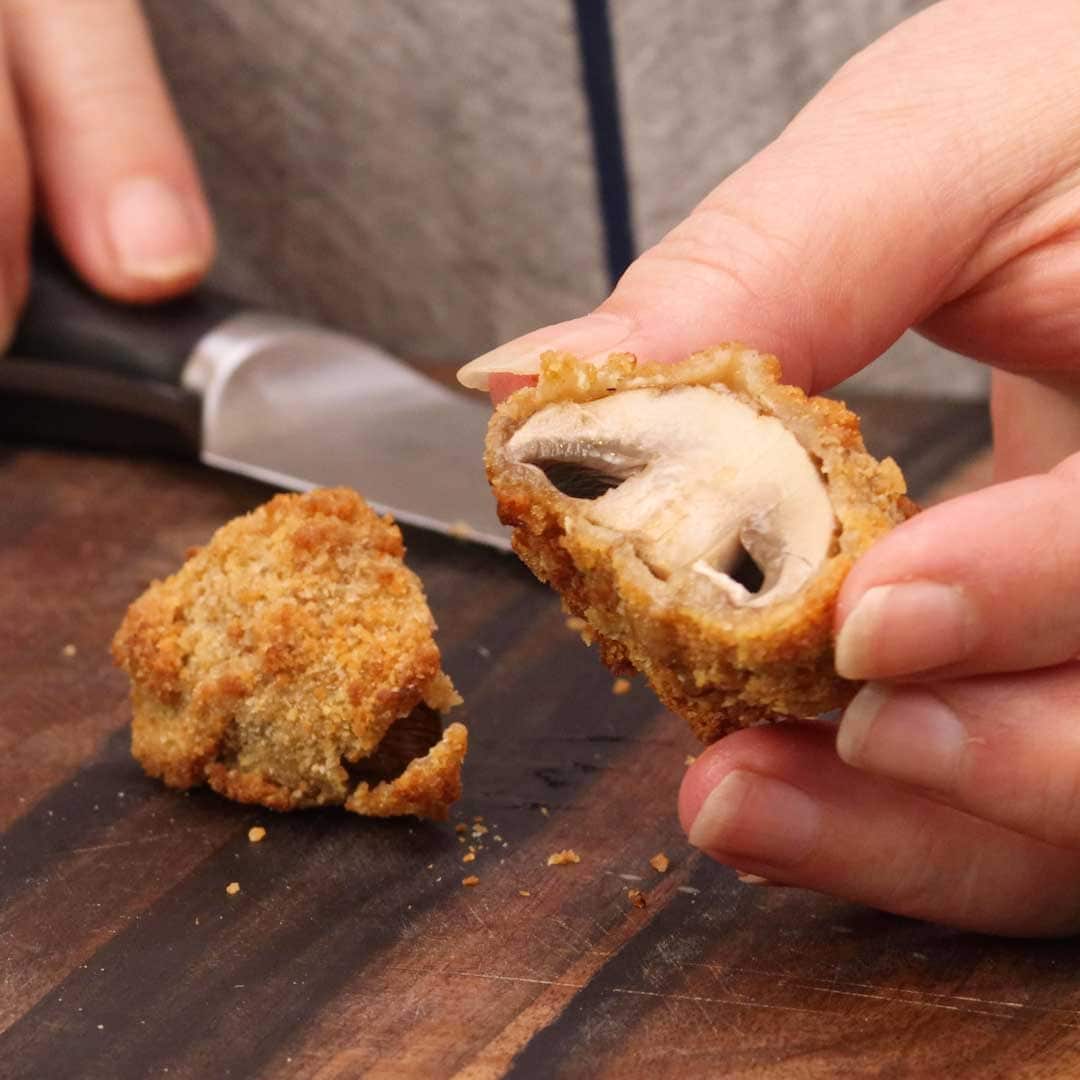
I did it! I finally did it! I made air fryer fried mushrooms that taste just like they were deep fried. No joke! In fact, they are better.
Would you like to save this recipe?
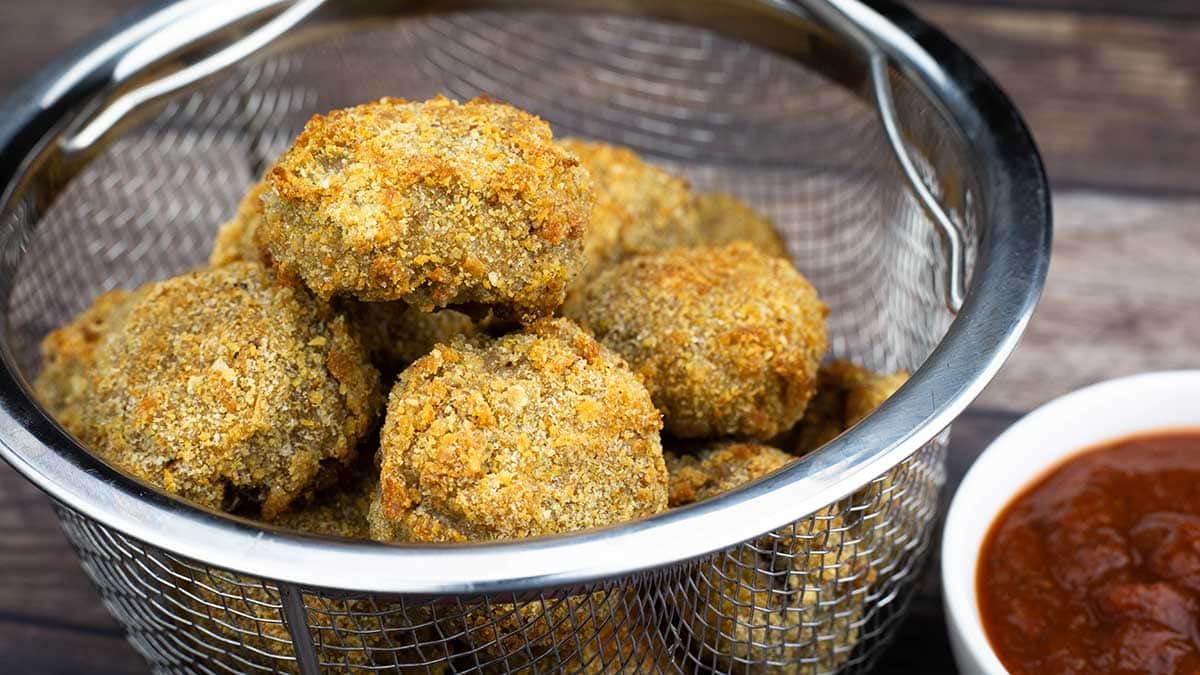
If you are looking for crispy fried mushrooms with perfectly cooked mushrooms and don't want to deep fry them, grab your air fryer and make this recipe!
I've been working on it for about a year now! Again, no joke. Not every day, of course. How many mushrooms can one eat, even if they are (air) fried? Not that many!
This post may contain affiliate links. If you make a purchase after clicking a link, I may earn a small commission. As an Amazon Associate, I earn from qualifying purchases.
I would make a few batches testing various techniques/ingredients/seasonings every few months, but I was never 100% happy with the results. I knew they could be better. Crispier. You know, like the deep fried ones... but better!
That's exactly what this recipe is. Air Fryer Fried Mushrooms that are BETTER than deep fried.
Frequently Asked Questions
They can be dipped in the wet batter and bread crumbs and stored in the fridge for several hours or even overnight, then air fried.
They can also be air fried and stored in the refrigerator in a covered container (let them cool first) and then reheated using the air fry setting on 390-400℉/200℃ for about 4-5 minutes. They will taste great, but won't be as crunchy as they were when they are fresh out of the air fryer.
I would not recommend freezing them before they are cooked because mushrooms get a funny texture when frozen and they also release a lot more liquid when cooked from frozen and I think it would ruin the crunch of the breading.
You might be able to air fry them, let them cool completely and then freeze them, but I haven't tried this yet. Let me know if you do.
Certainly! You can make as few or as many air fryer fried mushrooms as you like. While you could certainly scramble an egg and use half of it, I recommend making the entire amount of wet batter, even if you want to make 12 mushrooms. It's going to make it a little easier to get them coated. It's up to you if you use half of the dry breading or make the whole batch.
If you want to make double or even triple the amount of mushrooms, I only recommend making 1 batch of the wet batter at a time. This is so it doesn't warm up too much. Warm batter does not stick as well to the mushrooms as a cold batter will.
I'm sure it can be done by changing a few things, but in my test batches of trying to make them keto, I was not able to get the flavor and crunch correct. I'll continue to work on this and post a recipe if I get it right!
Ingredients & Substitutions
Baby Portobello Mushrooms
I prefer the baby portobello mushrooms, but that is just a personal preference. I have also tested the recipe with white button mushrooms and it works just the same.
I have not found that nickle size mushrooms cook any differently from half dollar size mushrooms, so don't worry about the sizes of the small mushrooms.
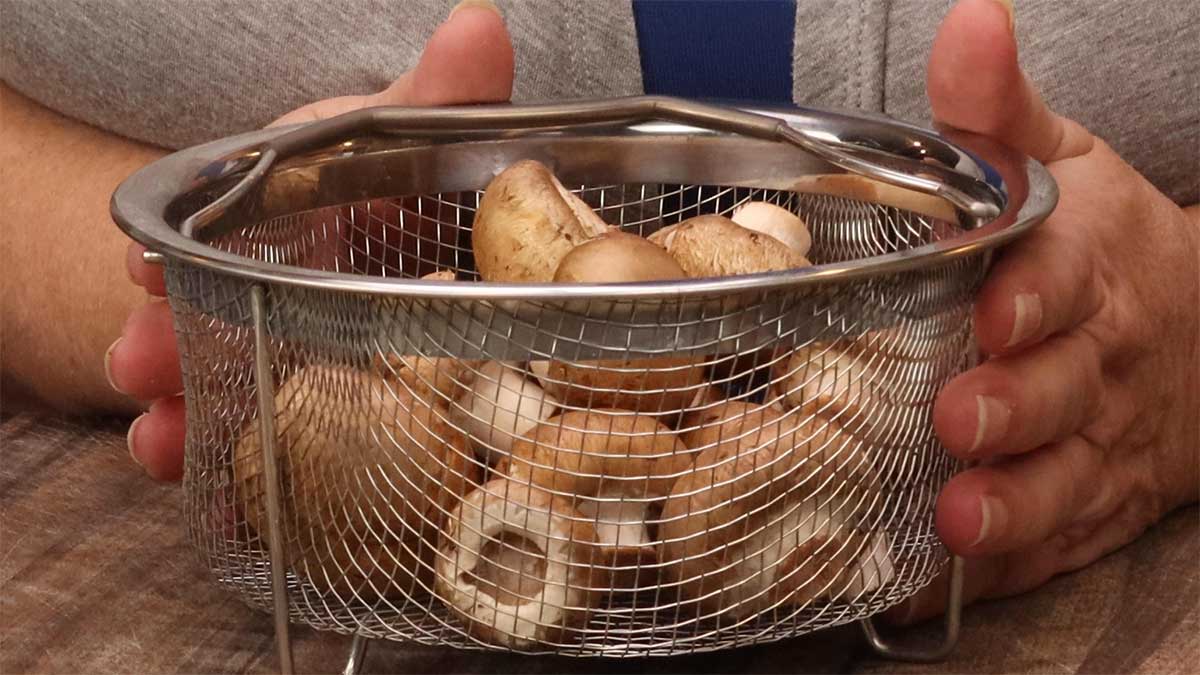
Either of those two are my top choices, but you could even try it with larger portobello mushrooms and increase your cooking time to between 12-15 minutes to make sure the larger mushroom is cooked through.
Flour
Flour is used in this recipe to create the tempura-like batter as well as to coat the mushrooms. I have tested coconut flour as a substitute because it is very absorbent, but the flavor was way off to me.
If you do use coconut flour in the egg mixture, reduce it by half (about 6 Tbsp) because it absorbs more liquid than all purpose flour. I'd probably start with 4 tablespoon and go from there.
I do not recommend using almond flour because it is not absorbent and you most likely won't get the final results you want.
Corn starch would work fine (I think) to toss the mushrooms in to coat them, but it will not work in the wet batter because corn starch has to be heated to thicken.
If you need a gluten free option, I would try Bob's Red Mill Gluten Free Flour because it is designed to work as a 1:1 ratio to all purpose flour. I haven't tested the recipe this way, so please let me know if you try it!
I know there are going to be a lot of people who want a keto or low carb version and I'm working on it! I just haven't found the perfect blend of ingredients to achieve this yet.
The next thing I'm going to try is to replace the flour with some xanthan gum (not a 1:1 ratio!), but I'm still working out the details.
Egg
The egg is used as a binding agent in the wet batter and, while I haven't tested the recipe using a substitute, I'm sure it can be replaced or possibly even omitted.
I've seen Vegan tempura batters that use flour, water, corn starch, and baking powder, but I honestly cannot tell you how that will work. I would probably try omitting the egg and see how it works.
Bread Crumbs
The bread crumbs are used to combine with the wet batter to create a coating that is suitable for air frying. A wet batter alone is very difficult to air fry because the temperatures are not hot enough to set the batter quickly.
I chose plain bread crumbs because it's the closest texture to deep fried mushrooms, but you can absolutely use panko (larger, Japanese-style bread crumbs).
A half-and-half mixture of bread crumbs and panko would be my suggestion if you want the texture of panko. The regular bread crumbs will adhere to the wet batter easier and create the crust. Panko alone doesn't seem to adhere as well.
Crushed pork rinds will also work, but they don't seem to get as crunchy in my test batches.
Spices
I kept this recipe VERY simple and used only sea salt and onion powder. That was intentional because I really wanted the mushroom flavor to pop and give everyone a blank slate on which it build their favorite flavor.
Get creative and use whatever spices you want in the dry breading. I think a little cayenne or chipotle powder would be great.
You could add some Italian seasoning, some garlic powder, really anything you want.
If you aren't sure how much of a spice to add, start out with less than you think you need. Mix it up and taste the breading to see how you like it. The flavor will change some once the mushroom enters the equation, so the best way to see if your spices are perfect is to make up one fried mushroom and taste it.
Various Air Fryer Temperatures and Times
All air fryers do not cook the same and it's important to use the correct temperatures and times that will work best in your air fryer.
The biggest tip I can share is to PREHEAT your air fryer! No matter which one you are using. I like to preheat on the hottest setting for a full 10 minutes. Smaller air fryers will not take as long, but you can't hurt anything by going the full 10 minutes.
I also preheat with the basket/tray in the appliance to heat the surface. This will give you the best result when air crisping anything that is breaded.
I have tested this recipe with 4 styles of air fryers, pressure cooker with crisping lid, basket air fryer, indoor grill with air fryer setting, and an oven style air fryer.
The recipe is written for the Ninja Foodi Pressure Cooker & Air Crisper, but will work the same in the Instant Pot Duo Crisp or a pressure cooker with a crisping lid.
I found that the same times and temps worked fine in the basket style air fryer as well as the Ninja Foodi Indoor Grill air fryer.
I did change the temperature setting on the oven style air fryer. I used the (affiliate link)Ninja Foodi XL Digital Air Fry Oven which is a larger style air fry oven. I increased the temperature by 50 degrees and they worked pretty well.
I have not been a huge fan of the oven style air fryers because I don't think they work as well as other styles of air fryers, but making this adjustment did help quite a bit. I may even try going up 75 degrees in the large oven.
If you have a smaller oven style air fryer, like the Ninja Foodi Digitial Air Fry Flip Oven, I would only increase the temperature by 25 and see how they do.
The timing was the same for each air fryer I tested.
Tips for Making Air Fryer Fried Mushrooms
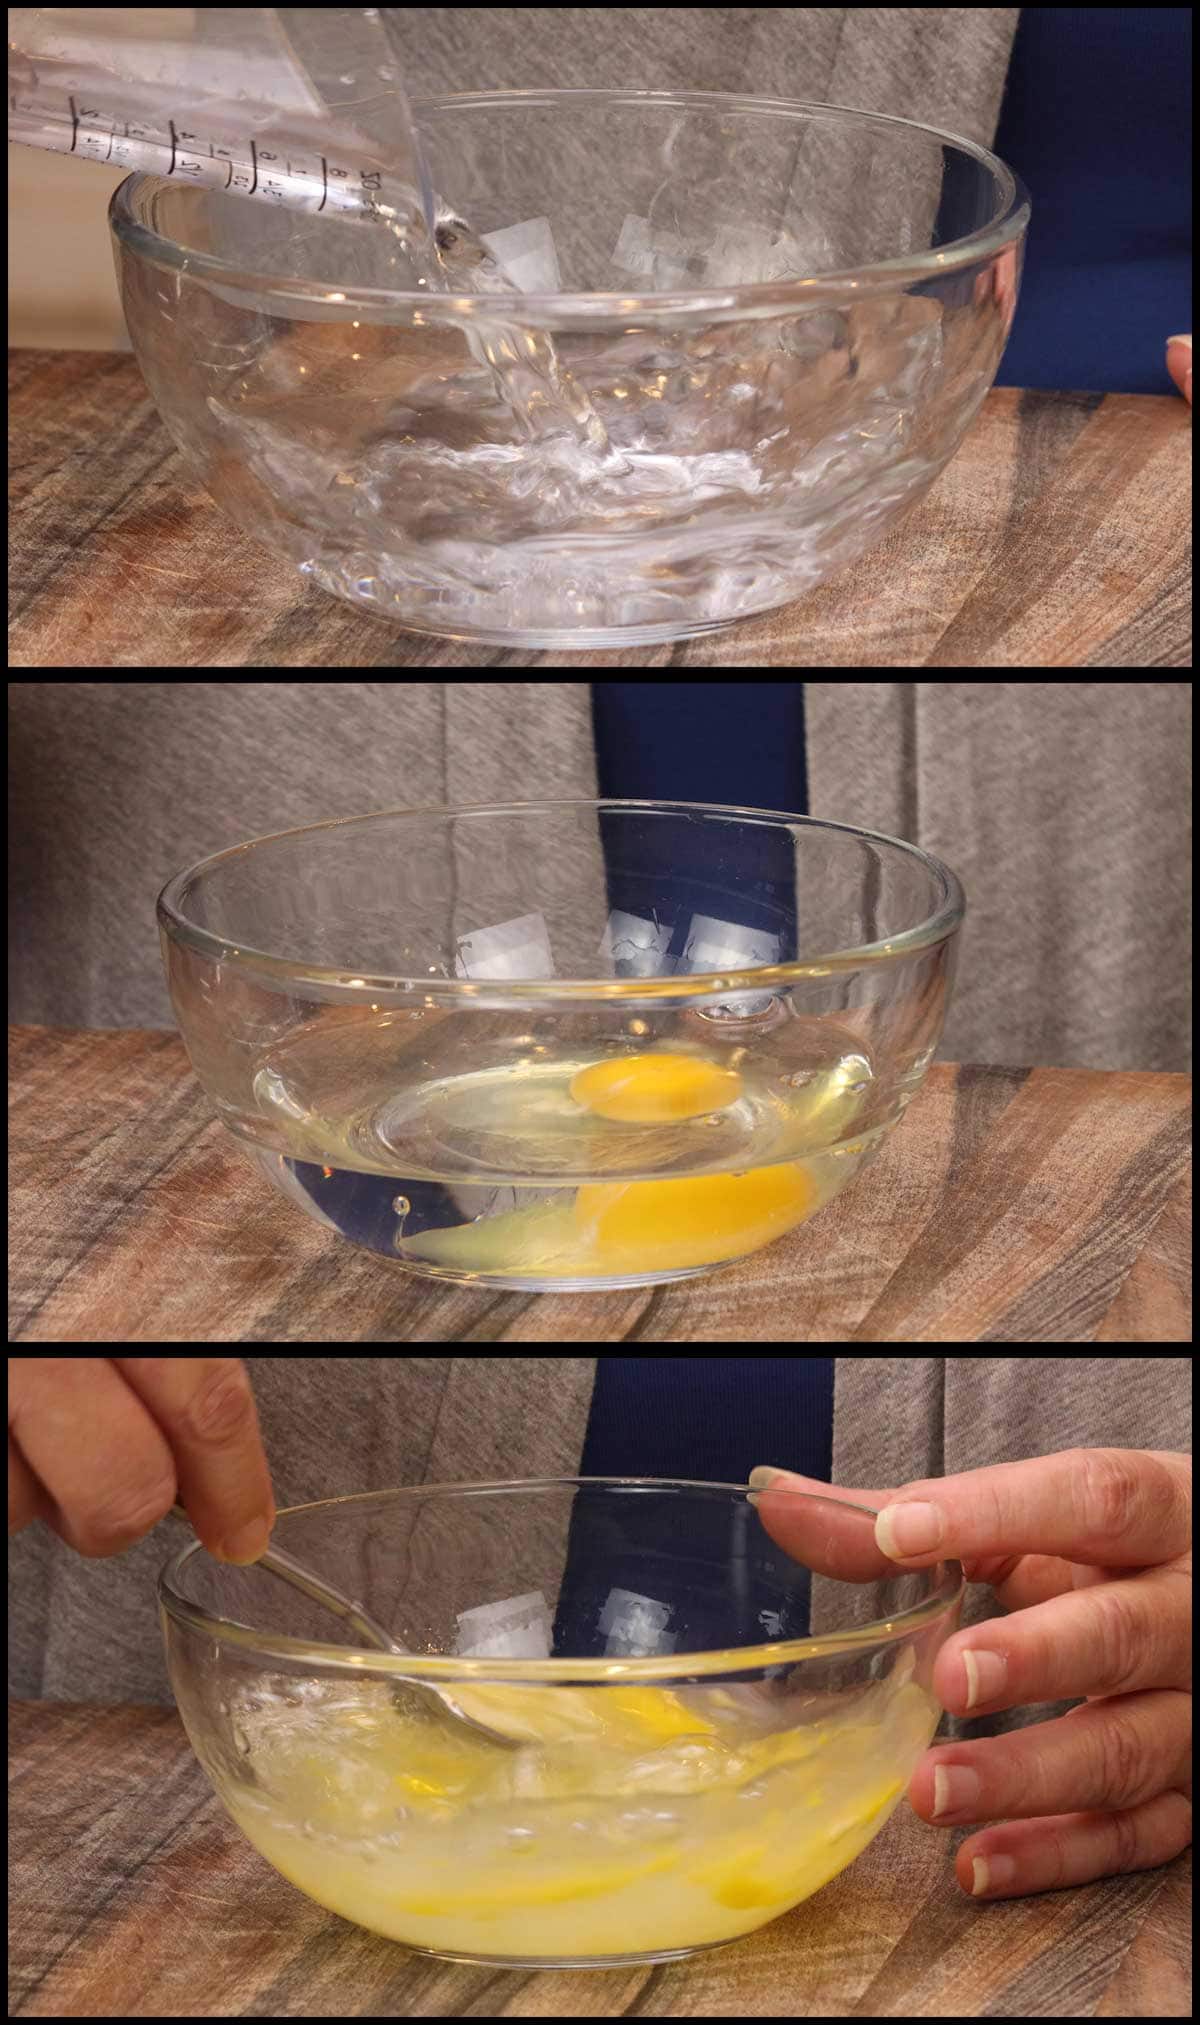
- Use COLD water and a COLD egg in the wet batter. This not only helps the flour incorporate easier, it also helps the batter stick to the mushrooms better. A warmer batter doesn't seem to adhere as well.
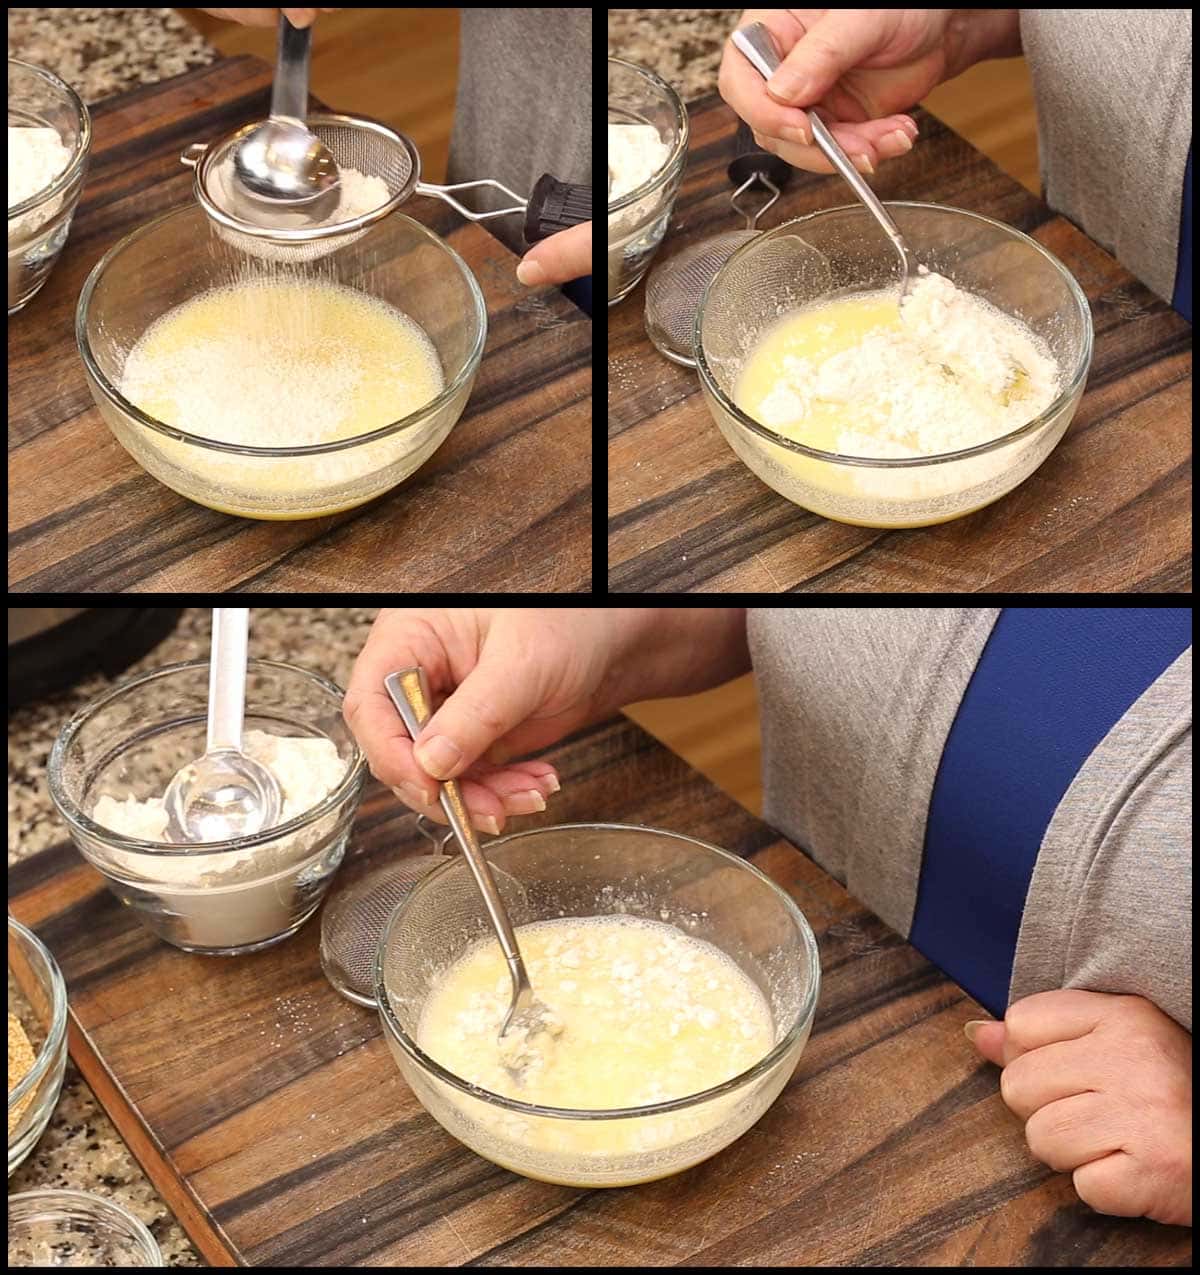
- Sift the flour as you add it to the egg and water mixture. This avoids large clumping of the flour and will make it easier for you in the long run. Trust me, it will save you time!
- Don't whisk in the flour, fold it in. Whisking or beating in the flour will activate the gluten in the flour and your batter will get gummy and not produce the thin coating on the fried mushrooms.
- Preheat. Preheat. Preheat. I can't stress this enough. You want your air fryer as HOT as it can be so the breading starts to cook immediately before the mushroom has a chance to release its juices.
- Start with DRY mushrooms. Once you wash your mushrooms (I usually only wipe them with a damp paper towel), let them dry and, before putting them in the flour to coat, pat them with a paper towel.
How to Batter & Bread the Mushrooms
The first step is what was missing for so long from my test batches and once I did this, it was a game changer. Mushrooms release juices when cooked, those juices can create a soggy crust. Soggy crust has no place on a fried mushroom, deep fried or air fried!
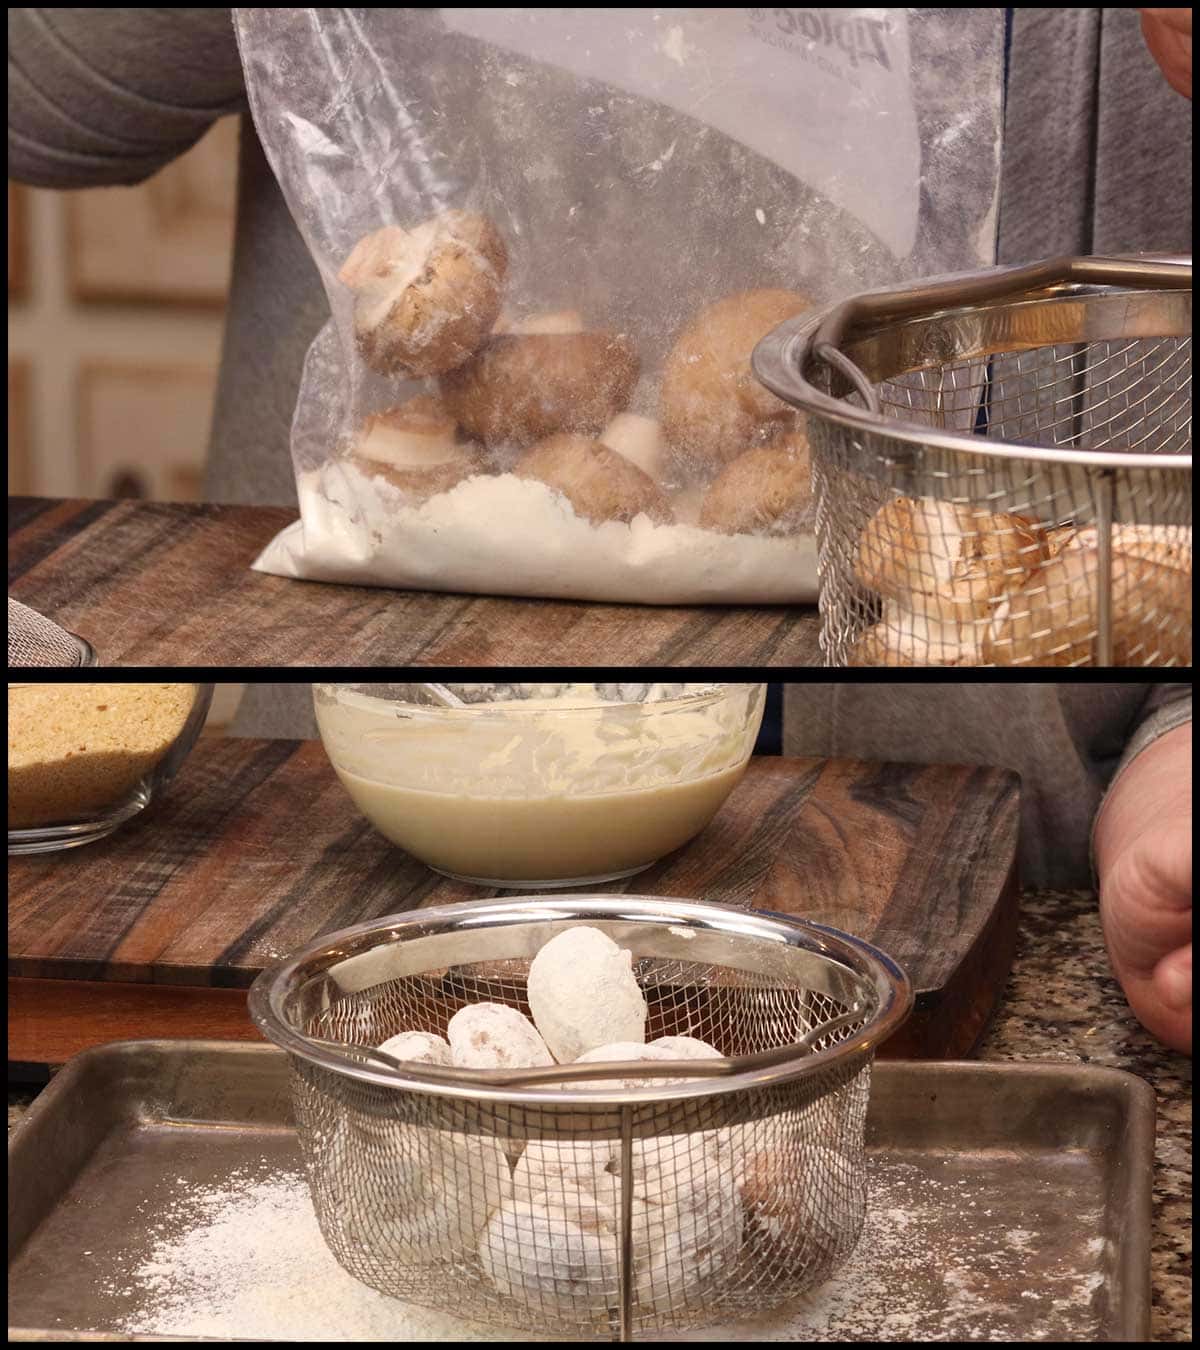
Coating the mushrooms in flour (very light coating) prevents this because the flour absorbs the juice BEFORE it gets to the breading. It works great and I don't suggest skipping this part!
Place about 2 Tablespoons of flour in a zip lock back or a container that can be sealed with a lid. I clean the mushrooms and trim the stem off just a bit and toss about 5-6 mushrooms in the flour and then put them in a colander over a tray.
Just a little note: if you don't mind removing the stem of the mushroom, they are much easier to coat and bread without the stem, in my opinion.
Repeat for all of the mushrooms. Gently shake the colander over the tray to remove any excess flour.
Mixing the Wet Batter
This is the most time consuming process in the recipe AND it's the most important. The consistency of the batter is key to getting just the right amount of coating on the mushrooms.
If it's too thick, you will have bready and gummy mushrooms. If it's too thin, you won't develop the crust.
While the recipe has flour and water amounts, these can vary. I recommend starting out using the entire ¾ cup of flour and then add small amounts of extra cold water if needed.
Put the ½ cup of water and the large egg into a round bowl that is at least a 3-4 inches deep. This will make it easier to coat the mushrooms. Whisk the egg and water until well combined.
Sift the flour onto the surface of the egg/water mixture 1 Tablespoon at a time. I know, what a pain! It matters, though. So, for the best results, add the flour gradually.
When the top of the egg/water mixture is covered with flour, take a fork or a chopstick and gently fold the flour into the liquid. You will see some clumping, don't worry. It all works out in the end.
Resist the urge to whisk or use the fork to vigorously mix the flour. This will develop the gluten and we don't want that to happen.
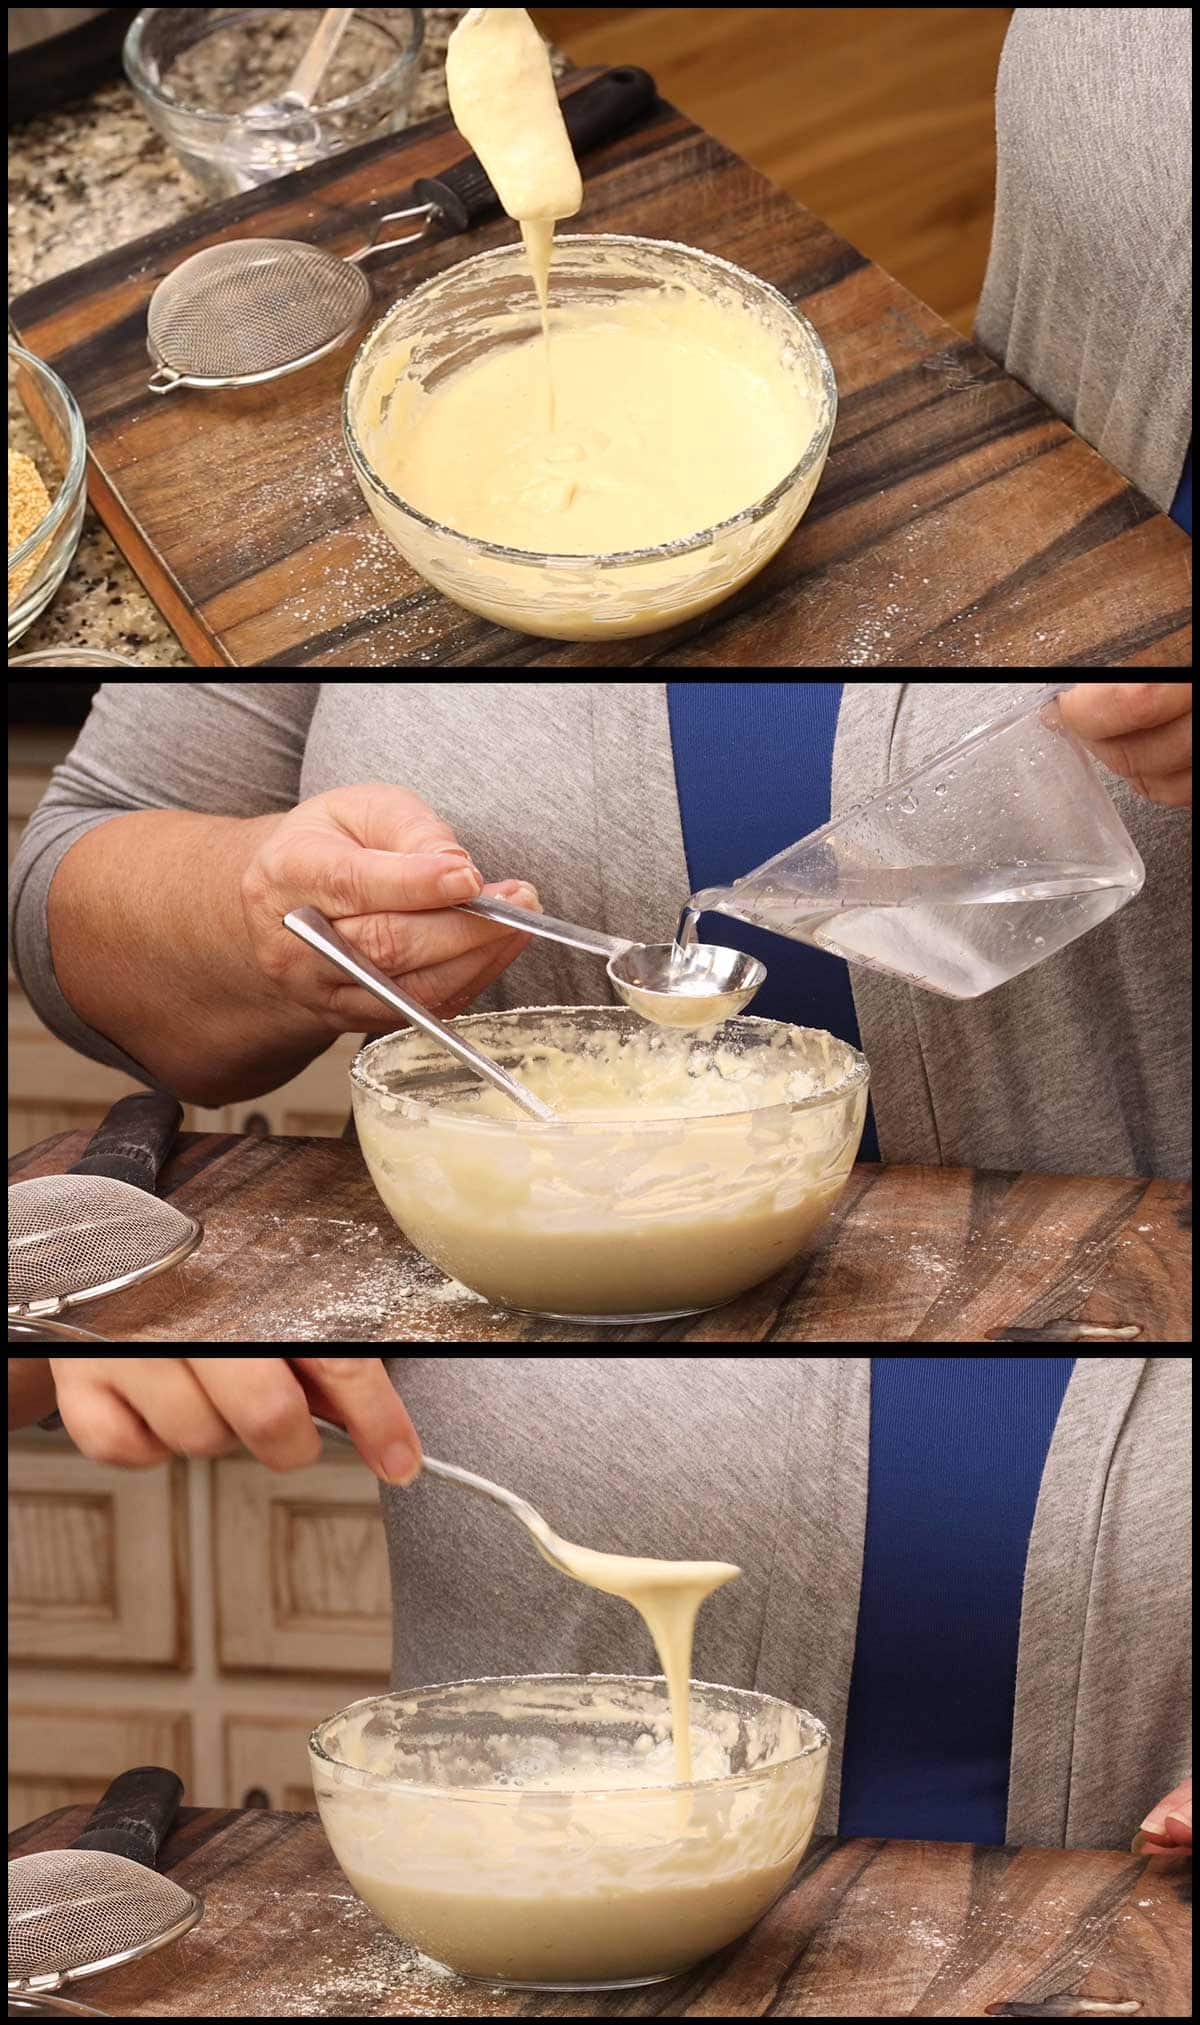
Repeat this process until all the flour is added. If you have large clumps, press them with the fork against the edge of the bowl to release the flour and continue to fold in. This doesn't have to be perfect. If you have a few clumps, don't worry about it. They will fall off the mushroom anyway.
The consistency of the batter should be like a thin pancake batter. If it's thicker, add just a small amount of cold water and fold it in. I'd start with a teaspoon of cold water if it is your first time making them. The past two times I made these, I needed 2 Tablespoons of water to get the correct consistency.
Mix up the Breading
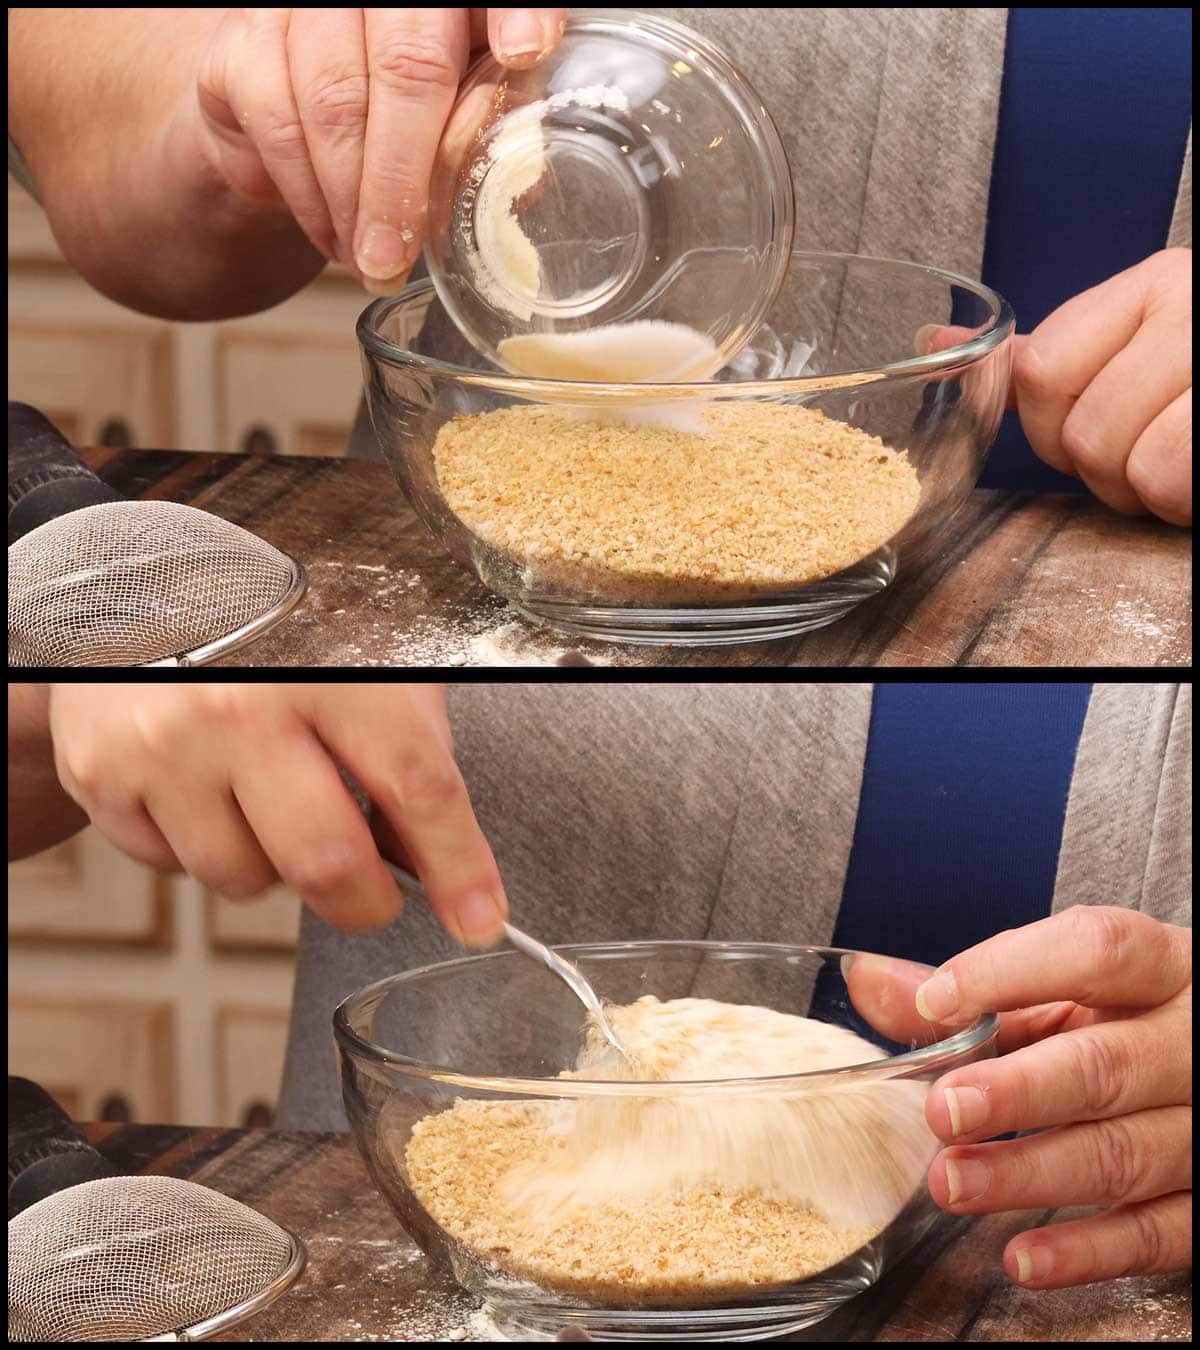
In another bowl that is 3-4 inches deep, add the breadcrumbs, salt, and onion powder and mix well.
You can certainly get creative with the spices you use. I decided to keep this very simple so the mushroom flavor really comes through. It's a blank slate so have fun creating the flavors you love the most.
Time to Dip the Mushrooms!
I'm pretty particular about how I do this because I want every inch of mushroom to have the perfect coating. Don't worry if they aren't perfect the first time, it gets easier the more you do it.
Place the mushroom cap side down into the batter and then flip it over with a fork. This should allow for a nice coating of the wet batter to cover the entire mushroom.
If you see any areas where the flour is showing through the batter, dip it back into the batter. Lift it up with the fork and let any excess batter fall off.
Using the fork, turn the mushroom over (cap side down) into the dry breading mixture and with a clean fork or a spoon, cover the mushroom (stem end) with the dry breading.
Carefully, flip the mushroom over and lift it with the fork or spoon and place it on a cooling rack or tray.
Repeat for all of the mushrooms.
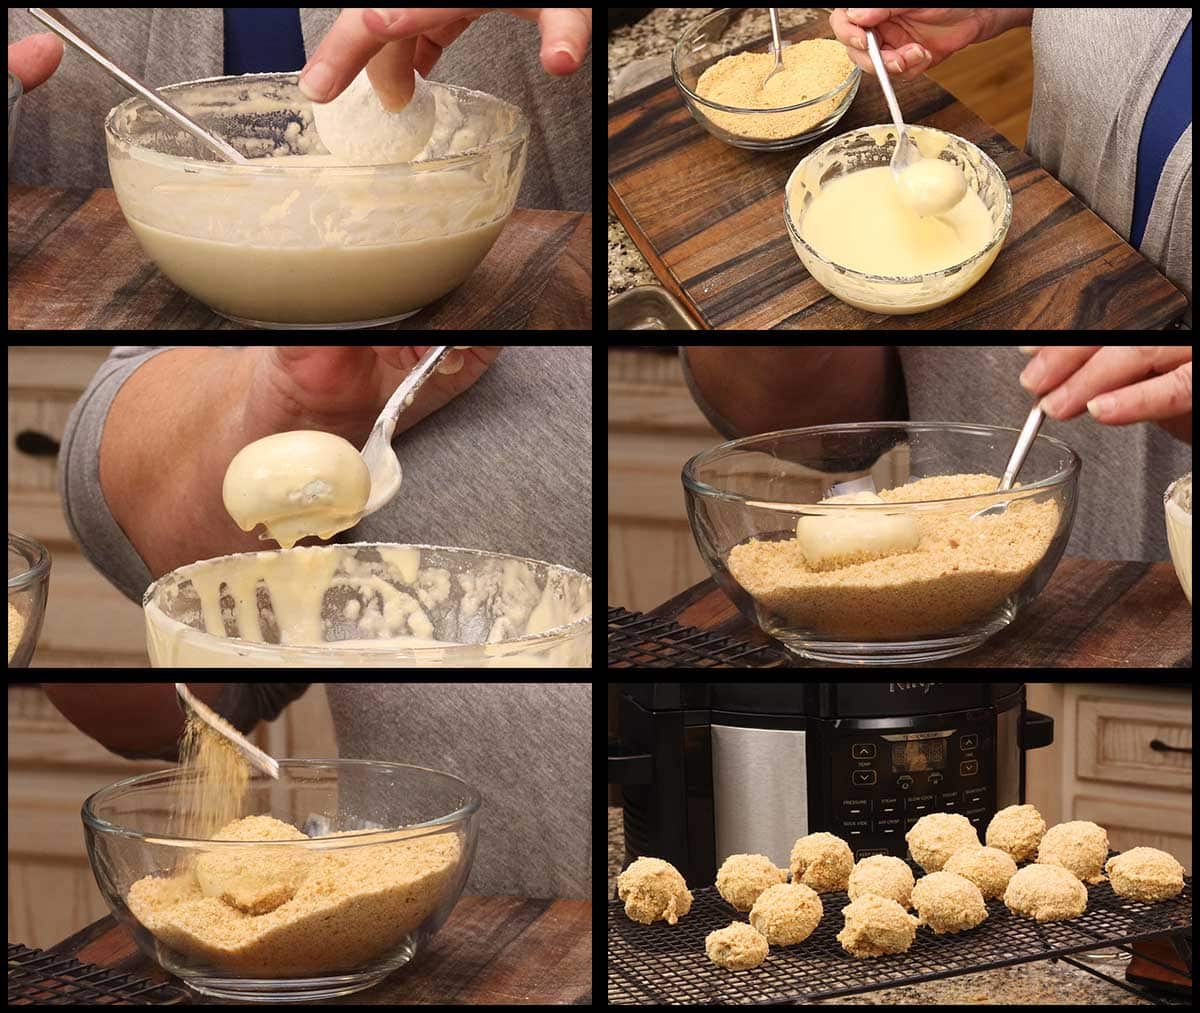
PREHEAT the air fryer. I usually do this when I start to dip the mushrooms because it takes about 10 minutes for me to do them all. No matter what air fryer you are using, preheat on the hottest setting with the tray or basket in for a full 10 minutes. On the Ninja Foodi PC & AC, I use the broil (grill in the UK) function.
Air Fry the Mushrooms
Spritz the basket or tray that you are air frying on with oil of your choice. I would use a neutral oil like avocado oil and avoid olive oil, which can impart a flavor.
Place the mushrooms stem side down onto the tray or basket. I do this with my hands because tongs can remove the breading more easily. The Ninja Foodi PC & AC can fit 8-10 mushrooms at once. This will vary based on the size of your air fryer and you don't want the mushrooms touching each other. You Spritz the top of the mushrooms with oil.
Air Fry on 325℉/160℃ for 10 minutes. This time and temperature worked fine in every air fryer except the oven style. I suggest increasing the temperature by 25° in a small oven air fryer and 50-75° in a larger one.
You do not have to flip the mushrooms, but I found that flipping halfway through cooking allowed for more even browning and the mushrooms that weren't flipped had a soggy spot on the stem area. Either way is fine!
Remove from air fryer and set on a cooling rack. This allows the air to circulate around the mushrooms and prevents steaming (like they will on a plate). Allow to cool at least 5 minutes.

Serve and enjoy! I like to serve mine with either marinara sauce, ketchup, or yum yum sauce, which was really good, too!
Troubleshooting
My wet batter is sliding right off the mushrooms.
This can happen if the batter is too thin. Sift in a little more flour and fold it into the mixture.
My Mushrooms aren't browning.
Make sure they have enough oil on the bread crumbs. The oil is important for browning and crisping.
My breading mixture is too clumpy.
Some clumping of the breading mixture is normal as you dip the wet battered mushroom into the dry mixture. If you see huge clumps, sift them out with your fork and discard them.
My mushrooms are soggy after air frying.
Usually this is caused by the juices from the mushrooms leaking out to the breading. The way to prevent this is by tossing the mushrooms in flour and making sure they are lightly coated all over.
If your batter was too thin, you may not have had enough of it to combine with the bread crumbs and form the crust.

Air Fryer Fried Mushrooms
Equipment
- Air Fryer
Ingredients
- 12 ounces mushrooms about 24 button or baby portabello
- 2 Tbsp all purpose flour
- 1-2 tablespoon oil avocado or another neutral flavored oil is best
Wet Batter
- ½ cup cold water
- 1 large egg cold
- ¾ cup all purpose flour sifted
Dry Breading
- 1 cup bread crumbs plain
- 1 teaspoon sea salt fine grind
- ½ tsp onion powder
Would you like to save this recipe?
Instructions
Mushroom Prep
- Clean and dry the mushrooms. Trim or remove the stems (it is easier to bread them with the stems removed)Toss them in the 2 tablespoon of flour about 6 at a time and place the flour coated mushrooms in a colander. Shake the excess flour off by gently moving the colander back and forth or tapping on a tray to catch the flour. The mushrooms only need to be lightly coated with the flour.
Wet Batter
- Add the cold water and the cold egg to a deep round bowl and whisk to combine.
- Sift the flour in 1 tablespoon at a time to cover the surface of the liquid. Gently fold the flour into the egg/water mixture until it is incorporated. Don't whisk or beat the flour in or the gluten will develop and become gummy. Some clumps are normal, so don't be concerned. If you have large clumps, press them against the side of the bowl to break them up. Repeat until all the flour is used.
- The consistency should be like a thin pancake batter. If it is too thick, add a small amount of water (1-2 tsp) at a time and fold the cold water into the mixture until the correct consistency is achieved. See post for more details and short video.
Dry Breading
- Combine the bread crumbs with the seasonings in a bowl that is several inches deep. I used basic seasonings, but you can add whatever spices you want.
Preheat the Air Fryer
- I usually do this right before I begin breading my mushrooms because it takes about 10 minutes to bread them all.
- No matter what air fryer you are using, preheat on the hottest setting for a full 10 minutes with the tray or basket in the air fryer.
Battering and Breading the Mushrooms
- Place one mushroom in the wet batter, cap side down and flip it over with a fork. Make sure the batter is covering the entire mushroom. Lift out of the wet batter with the fork and place in the dry mixture, cap side down. Spoon (or use a clean fork) the dry breading over the entire mushroom. Carefully, flip it over and use a spoon or fork to place the breaded mushroom on a plate or a cooling rack. Repeat for all the mushrooms.
Air Frying the Mushrooms
- When the air fryer is preheated, spritz some oil on the tray or basket. Place the mushrooms stem side down onto the tray or basket. Make sure the mushrooms are not touching each other. How many you can do at once depends on your air fryer.
- Spritz the tops of the mushrooms with oil, making sure to lightly coat the breadcrumbs.
- Air Fry on 325°F/160°C for 10 minutes. While you don't have to flip, I recommend flipping them over after 5 minutes. * see notes for air fryer oven temperature adjustments.
- Remove the mushrooms and place them on a cooling rack. This is important so they don't steam and create a soggy bottom.
- Serve with your favorite dipping sauce and Enjoy!
Notes
Nutrition
About the Recipe Author, Louise Long
Louise is a full-time recipe creator and food blogger @ The Salted Pepper. She has over 30 years of experience with cooking and recipe development. She owned a restaurant for several years and was a full-time RN until retiring to blog full-time.

She published her first cookbook in the Fall of 2018 and is very interested in writing several more.
Louise is also the creator of an online Ninja Foodi Pressure Cooking Course with over 100 instructional step-by-step videos. People absolutely rave about the course and all the value they have received from it.
Louise has several very active Facebook groups that help people with the basics of cooking and learning more about the appliances they love.
Ninja Foodi Pressure Cooker & Air Crisper 101
Ninja Woodfire Outdoor Grill & Smoker
Louise is also a YouTube creator and you can find most of her recipes in video format on The Salted Pepper YouTube channel.
She is very responsive to messages and eager to help in any way she can. Get more Information about Louise & contact information
I WOULD LOVE TO SEE WHAT YOU ARE COOKING UP IN YOUR KITCHEN! TAG ME @THESALTEDPEPPER ON YOUR FAVORITE SOCIAL MEDIA PLATFORM WHEN YOU MAKE A DISH!
BE SURE TO FOLLOW THE SALTED PEPPER RIGHT HERE ⇓⇓⇓⇓⇓
Melissa Irby says
I hope you find this to be helpful. You were talking about a keto friendly way of flowering the mushrooms. The coconut flour of course left a slightly different taste but I think if you use cassava flour you will find what you're looking for. And I believe it is keto friendly it is definitely diabetic friendly
Louise says
Cassava flour isn't keto, it's high in carbs, but okay for diabetes because it doesn't spike blood sugars. Thanks for the tips!
Connie Clifton says
These were awesome !! I did flour and cornstarch mixed and season that batter ..cooked in niji food for 10 min flip another 2 min on 375 ..excellet ! Thanks for the tip and recipe love your recipes and tips !!
Louise says
I'm so glad you enjoyed them!
Carol Michaels says
Your air fried mushrooms say it is 283 kcal which I looked up is 67.64 calories.. How many mushrooms make up the 67.64 calories.
Kathy says
This is a great recipe! I used Bob Mills GF flour and they turned out great. I had extra batter left and used it for some zucchini slices, just as good! Thank you!
Louise says
That's wonderful to hear!
Moe says
Planning on trying these this week. I will make them gluten free using Better Batter gluten free flour and gluten free bread crumbs.
Thanks for creating yummy recipes!
BTW what is that other sauce you used besides marinara?
Louise says
Please let me know how they work with the gluten free flour so I can pass that info along. The other sauce was Yum Yum sauce that I bought.
Moe says
Do you have a link to that oil sprayer that you are using in the video?
Thanks!
Louise says
The set I have been using seems to be discontinued, but this is the newer version. I did see that the prices have skyrocketed, so you might want to check around to find the best price. Here is my Amazon affiliate link: https://amzn.to/3chZ3zH