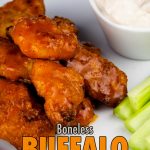
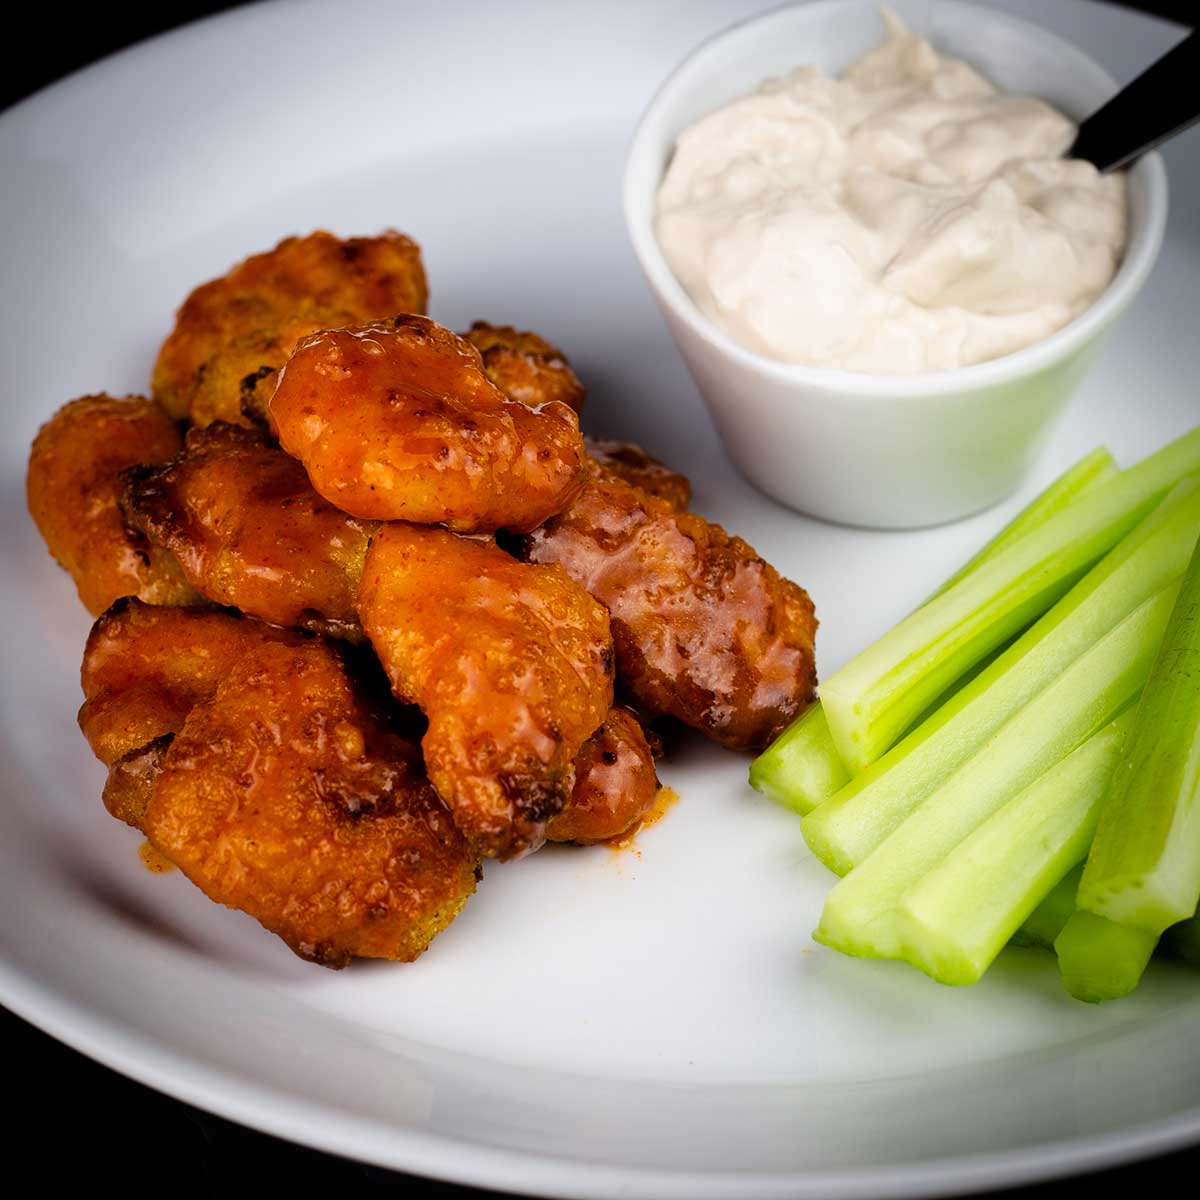
Making boneless wings in your air fryer is super easy and absolutely delicious! Honestly, I think this recipe is better than the deep fried kind!

Would you like to save this recipe?
I love wings! I love the traditional bone-in and boneless. My husband, on the other hand, doesn't like them with the bone-in. Basically what I'm saying is he likes chicken nuggets tossed in buffalo sauce or any kind of wing sauce, so that's what I make for him and they are DELICIOUS!
This post may contain affiliate links. If you make a purchase after clicking a link, I may earn a small commission. As an Amazon Associate, I earn from qualifying purchases.
If you prefer the boneless style buffalo wings AND want to make them in the air fryer, this recipe is the BEST!
Frequently Asked Questions
Absolutely! The best way I've found is to make up as many of the coated chicken nuggets as you want and don't cook them or toss them in sauce. Freeze them in a single layer on a parchment lined tray.
When they are completely frozen, toss them in a freezer bag and you can cook them from frozen following the same instructions as cooking them thawed. You just might need to add a minute or two of extra time.
Yes, it's completely safe as long as you don't let the chicken sit out for any longer than it takes to bread it. If you are making a large quantity, bread them in batches and freeze each batch immediately.
When using fresh chicken, simply bread and freeze right away.
If you are using frozen chicken, you want to make sure to thaw it in the refrigerator before breading. Thawing on the counter can allow the chicken to get into the danger zone where bacteria can grow.
I haven't been 100% successful getting the crunch I want without using the flour and the bread crumbs, BUT I do think it's possible. I just haven't had time to try it yet.
I'm hoping to get to that soon and I'll update the post with my suggestions.
Yep! Simply air fry the frozen nuggets the same as in this recipe or based on the style of air fryer you are using (see below for details) and then toss in your favorite sauce.
Temperatures & Settings for Different Air Fryers
All air fryers are not the same and it can be very frustrating when trying to follow an air fryer recipe and the same temps and times don't work as well in your air fryer.
I have several different models of air fryers and I've tested this recipe in all of them, so I can give you a pretty good ballpark of the adjustments you might need to make based on the type of air fryer you are using.
Obviously, there are tons and tons of brands of air fryers and even when they are the same basic shape, they can cook differently. So, these are only my suggestions based my experiences and testing.
Here are 4 different models of air fryers and my suggestions for making boneless chicken wings.
Round Basket Air Fryers like the Ninja Foodi PC & AC or the IPDC
This is the style of air fryer that I do most of my testing in and is my favorite to use. There is a basket inside of an inner pot. It's the most versitle kitchen appliance I've ever owned because it does EVERYTHING but wash the dishes.
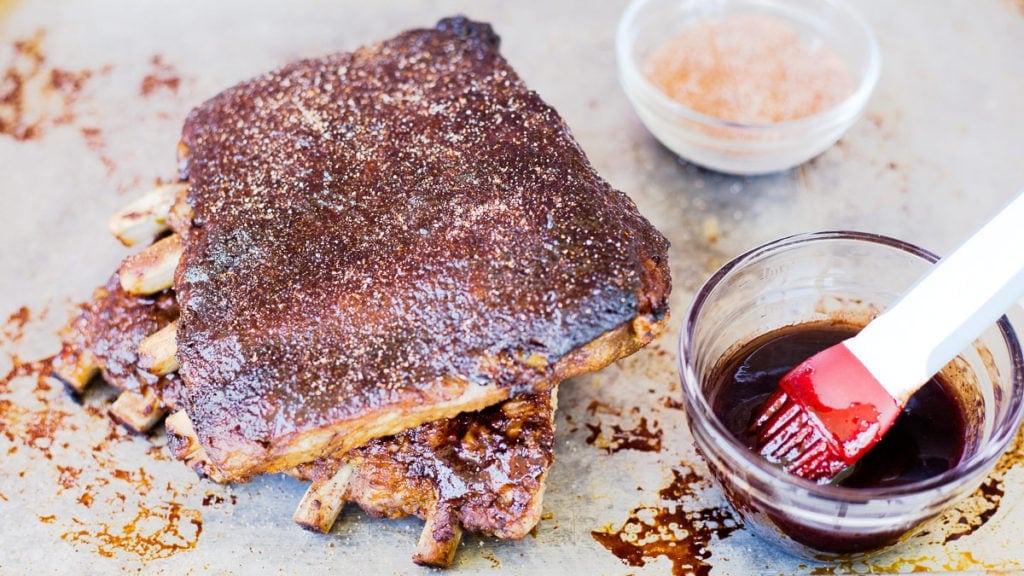
The best feature is you can pressure cook something and then air fry it without changing appliances. This worked perfectly for ribs! They are so tender, yet you can develop that crust (aka bark) on the outside.
Here is the recipe: Ninja Foodi Ribs
Since this recipe was designed for this style of air fryer, no changes are needed if you are using the Ninja Foodi Pressure Cooker & Air Crisper or the Instant Pot Duo Crisp.
There are a few more models that are combination pressure cookers and air fryers, but I'm not familiar with how they cook. If you are using a crisping lid on your Instant Pot or another similar style of combo cooker, I would start out using the same instructions, but check on the food and turn the temperature up if you aren't getting the browning and crisping you want.
Basket Style Air Fryers
This is probably the most common style of stand alone air fryers. Some have round baskets and some are rectangular.
The one I tested is the (affiliate link)Ninja Foodi Dual Basket Air Fryer, but most basket air fryers should work just about the same.
If your basket air fryer is larger in size then the individual baskets on the dual air fryer, I would increase the temperature by 25 degrees and keep the cook time the same.
Power of various air fryers also makes a difference, so you might find that you need to cook your boneless wings a little longer depending on how powerful your air fryer is.
In my testing, the chicken nuggets cooked exactly the same as in the recipe, so no changes are needed.
Oven-Style Air Fryers
While the oven-style air fryers are great because they give you so much more room, they don't seem to work as well as smaller air fryers and this is due to several factors.
The space is bigger, which is probably the biggest pro to this style of air fryer. It also comes with a big con and that is heat loss and less direct air circulation.
I have both the (affiliate link)Ninja Foodi Digital Air Fry Oven and the (affiliate link)Ninja Foodi XL Pro oven and have tested this recipe in both. I was not pleased with the outcome using the same temperature settings as I did in this recipe, so I suggest making the following changes.
PREHEAT on the highest temperature setting that your oven has for a full 10 minutes. Even if your air fry oven says it preheats in 30 seconds like the digital air fry oven I have does, PREHEAT longer. 10 minutes seems to be a good amount of time, but it doesn't hurt to preheat longer!
If you are using the tray or the basket, preheat heat with it in the oven. This is going to help with crisping up your food.
When you switch over to air fry to cook the nuggets, increase the temperature to 375-385℉/190-195℃. A temperature of 360℉ worked great in the Ninja Foodi, but wasn't hot enough for the air fry oven.
You can also air fry on the hottest temperature to get the crisping you want and then turn down the heat to finish cooking the chicken.
Keep in mind that the smaller the oven, the quicker the chicken will cook. So, in a flip style air fry oven, like the Ninja Foodi Digital oven your time will be about the same as in this recipe. In larger ovens, you may need to increase the time by a minute or two.
Indoor Grills with Air Frying Function
I'm only familiar with one brand of indoor grill with an air frying function and that's the (affiliate link)Ninja Foodi Indoor Grill.
There are two different models (the original and the (affiliate link)XL with smart technology), but they appear to cook the chicken nuggets the same or close enough that you don't have to worry which model you have for this recipe.
Personally, I liked the chicken nuggets the best air fried in the grill using the same instructions as in the recipe. However, they were really crunchy!
If you don't want quite such a crunch or if your nuggets are small in size, I would decrease the temperature to between 335-350℉/165-175℃ so the chicken doesn't dry out.
Boneless Wing Sauce Variations
There are endless varieties of wing sauces that you can use to toss your air fryer boneless wings in.
Buffalo is one of the most popular and the version in this recipe is a great balance of sweet heat! I hope you give it a try and let me know what you think!
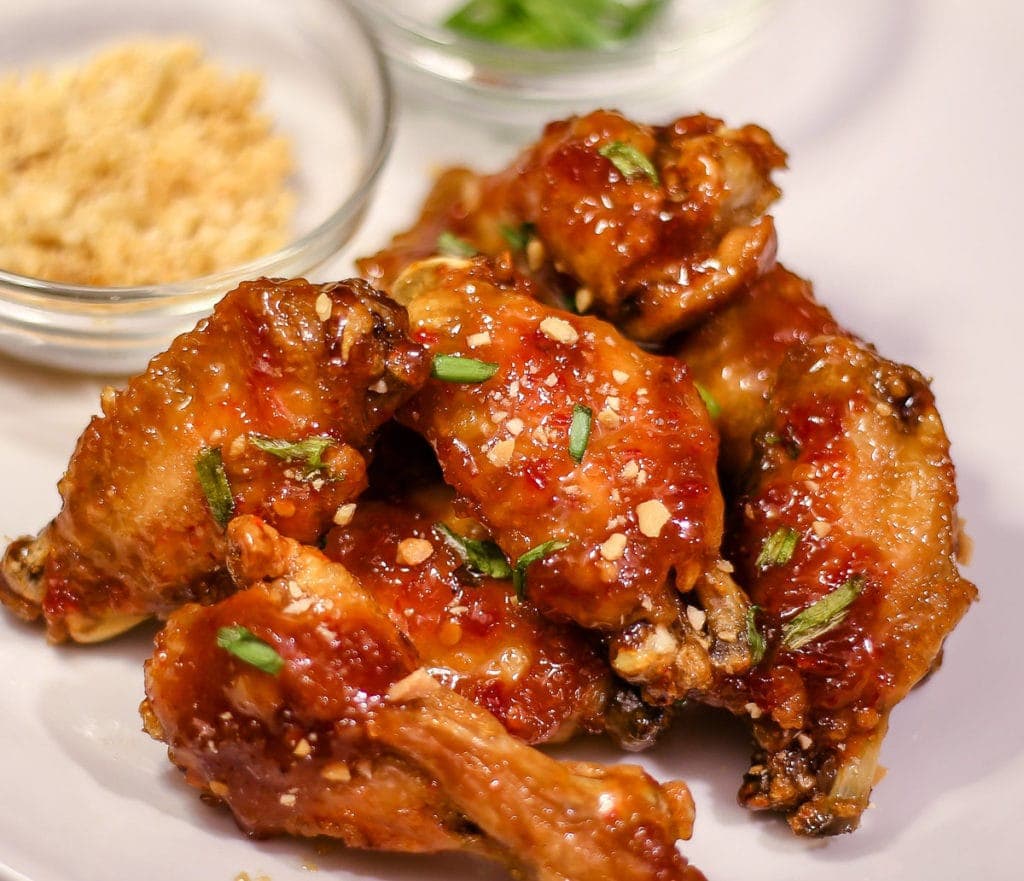
My favorite wing sauce of all time is an Asian sticky sauce that brings the perfect balance of bright flavors with a sweet heat. This sticky sauce coats the wings perfectly or can be used as a dipping sauce!
Get the RECIPE HERE➡︎➡︎➜ Asian Sticky Wings
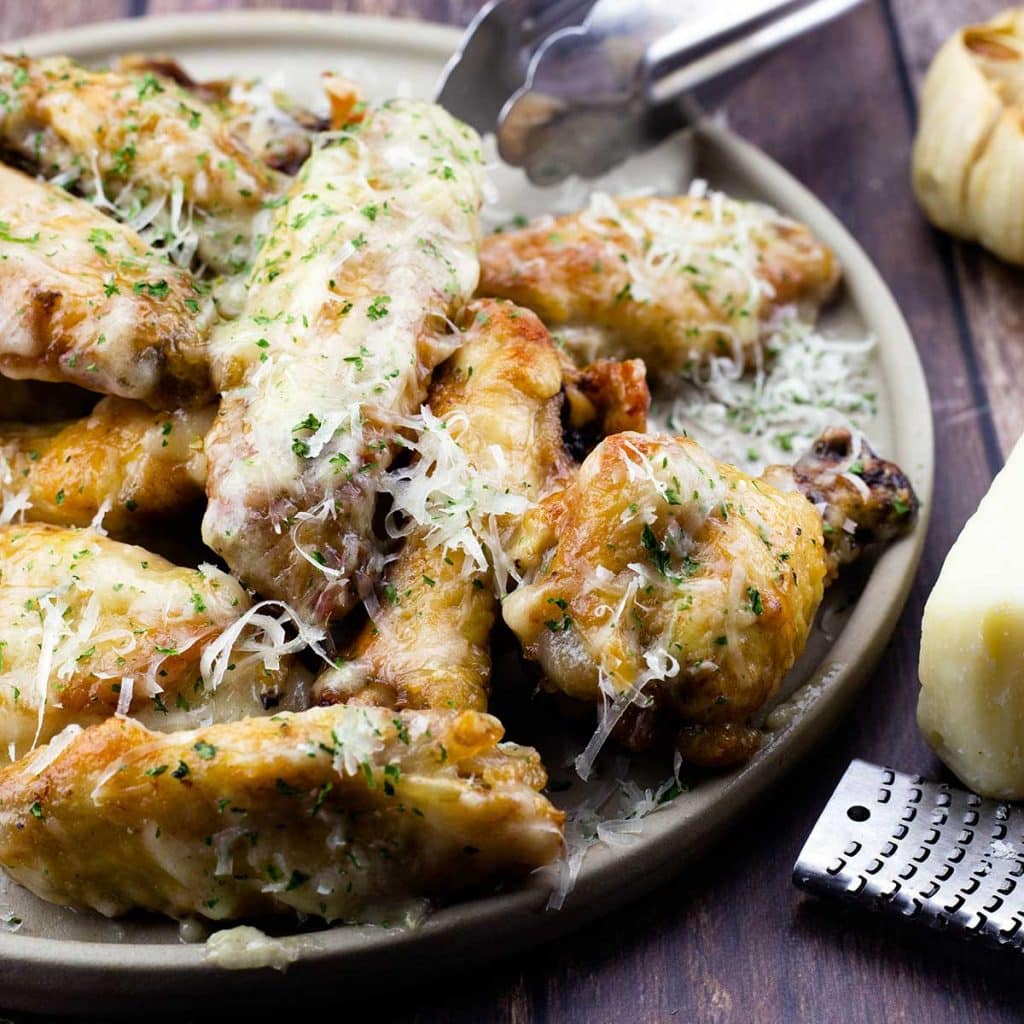
Another favorite is Garlic Parmesan! I put a little spin on my garlic parmesan wings and the end result was liquid gold! I kid you not! Give it a try!
Get the RECIPE HERE➡︎➡︎➜ Garlic Parmesan Wings
If these sauces don't float your boat, then simply toss your air fryer boneless wings in your favorite sauce and they will be great!
How do I Reheat Boneless Wings after Cooking?
Air Fryer Boneless wings are the absolute BEST when they are air fried and tossed in sauce just before eating. This will give you the best texture and crispness.
Once the wings have been tossed in a sauce, it can be difficult to reheat them without burning the sauce and they never crisp up like when they are fresh.
For those reasons, I recommend only tossing the amount of boneless wings you are going to eat in the sauce.
Unsauced boneless wings can be reheated in the air fryer and I would use the hottest setting on your air fryer for just long enough to heat them through.
Once the wings are refrigerated, it's hard to get them to the same degree of crispness when reheating, but they are still very good! Once heated through, toss them in your favorite sauce and enjoy!
Tips for Keeping Boneless Wings Crunchy
- Don't toss them in sauce until just before serving.
- Serve the sauce on the side if you have a large platter of boneless wings
- Once they are air fried, place them on a cooling rack so air can circulate under the wings. Steam is the enemy of fried food and that applies to air fried food too.
- Cook in batches and don't overcrowd the air fryer. Overcrowding prevents even browning and can create steam that makes the boneless wings soggy.
- Par cook the boneless wings in batches until the outside is brown and crunchy and then toss them all in the basket to finish cooking so they are all done at the same time. *Make sure to follow food safety guidelines and don't let the par cooked chicken sit out too long.
- Spritz with oil. This is a must for crisping the coating on the chicken.
How to Make Boneless Wings from Scratch
The secret to making really delicious boneless chicken wings is all in the coating. I tested multiple different ways and found that using this combination of a batter and bread crumbs works the best.
I can't even get over how much these taste like they were deep fried!
I go over the entire process in this recipe for Air Fryer Chicken Nuggets so I'm only going to highlight the steps here or you can watch the video below to see exactly how I bread the chicken.
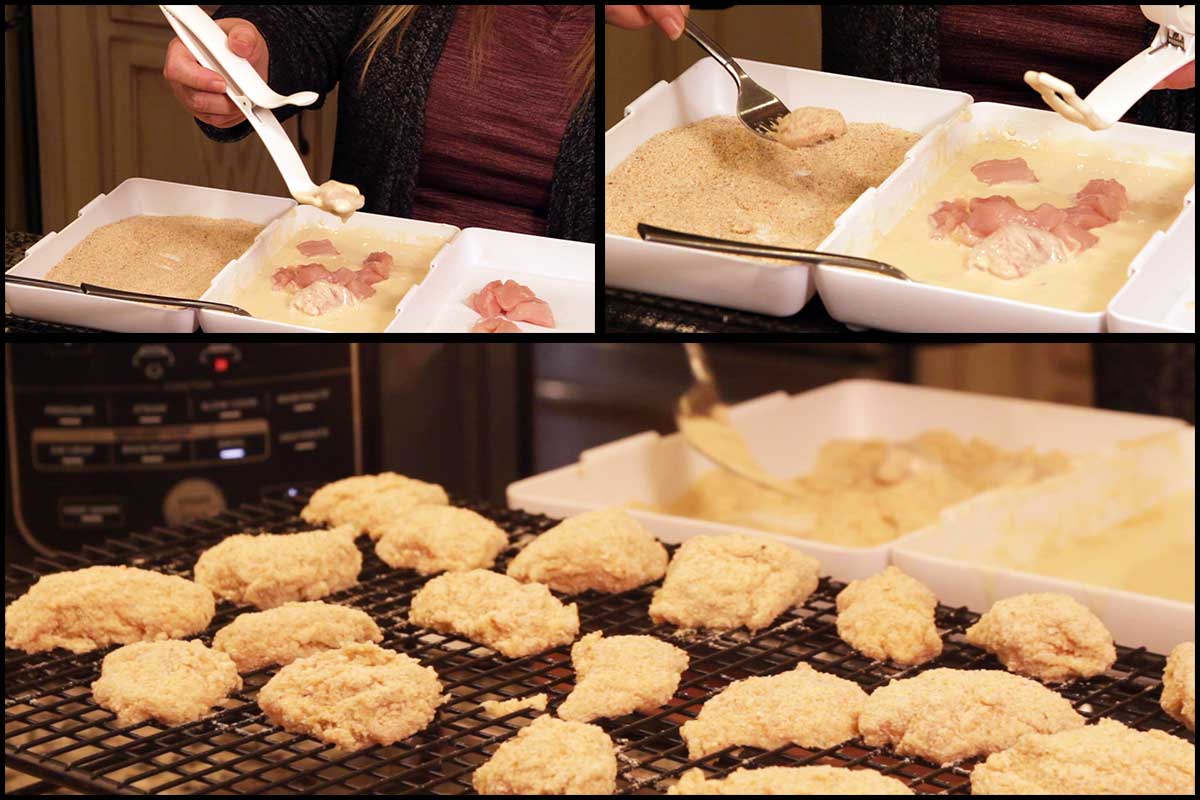
First, you want to trim and cube your chicken into bite size pieces.
Then, mix the bread crumbs with seasoning. You can get creative here or use the basic spices like I did. If you prefer a dry boneless wing that isn't tossed in sauce, you will want to add all the spices to the breading and you can even add some to the wet batter.
Always add less than you think and go ahead and coat one piece of chicken and air fry it up to taste the end result. Once you are satisfied with the flavors, bread them all up!
The wet batter is the most important part because it allows the bread crumbs to stick and when done right, gives the same result as a deep fried chicken nugget.
It's easy to make the batter, but there are a few tips for the best outcome.
USE COLD INGREDIENTS. The batter is similar to a tempura batter and using cold water and a cold egg really makes a difference in how the batter sticks to the chicken pieces.
SIFT THE FLOUR. When adding the flour to the egg/water mixture it is important to sift the flour to avoid a lot of lumps and clumps.
DON'T WHISK the FLOUR. You can whisk the cold egg and cold water, but don't whisk in the flour. When you sift the flour over the surface, gently fold it in. You can use a fork, but resist the urge to overwork the batter. Flour has gluten and when you whisk in the flour or beat it with a fork to combine with the egg/water the gluten is released and the batter becomes gummy. This will make the coating on your boneless wings way too thick and it doesn't crisp up.
CONSISTENCY IS KEY. Many things can affect how the egg/water absorbs the flour, humidity plays a big role! I've made this recipe at least 15 times and the ingredient amounts are a starting point for the wet batter. The consistency of the batter is what matters. It should be like a thin pancake batter. If it's too thick, add a tablespoon of cold water. If it's too thin and running off the chicken, sift in a little more flour.
One the wet batter is ready, you are ready to coat your chicken!
Dip each piece of chicken in the wet batter and then coat in the dry mixture. I like to place my nuggets on a cooling rack until I am ready to air fry.
Make sure to preheat your air fryer and then air fry the nuggets in batches using the temperatures suggested above in the section on different air fryers.
While they are air frying mix up your sauce. If you want to give my buffalo sauce a try, here it is!
Buffalo Sauce for Boneless Buffalo Wings
- 4 Tablespoons melted butter
- 4 Tablespoons Cholula hot sauce
- 2 Tablespoons Honey
Mix all ingredients together and toss the air fryer chicken nuggets in the sauce to coat. Serve immediately.

Air Fryer Boneless Buffalo Wings
Equipment
- Air Fryer
Ingredients
- 1 recipe Chicken Nuggets OR 32 store-bought frozen chicken nuggets
- 4 tablespoon Cholula Hot Sauce
- 4 tablespoon Butter salted
- 1-2 Tbsps Honey
Would you like to save this recipe?
Instructions
- Make 1 batch of air fryer chicken nuggets or use 32 frozen chicken nuggets. Recipe for homemade chicken nuggets HERE or in Recipe Notes below. Place the nuggets on a cooling rack until you are ready to toss them in the wing sauce.
- Mix Cholula or your favorite hot sauce with melted butter and honey. I find it easiest to melt the butter with the honey in the microwave for 15-30 seconds and then add in the hot sauce and stir until combined.
- Put the sauce in a large mixing bowl. I find wide bowls work the best so you have room to toss the nuggets around. Add the air fried chicken nuggets and toss until coated with sauce.
- Serve with celery and blue cheese or ranch dressing. Enjoy!
Notes
Ingredients for Homemade Chicken Nuggets
- 1½ pounds chicken breast
- 1 tablespoon oil for spritzing
Wet Batter
- ½ cup cold water
- 1 large egg
- ¾ cup all purpose flour- sifted
Bread Crumbs
- 1 cup plain bread crumbs
- 1 teaspoon fine grind sea salt
- ¼ teaspoon cayenne pepper
Instructions
-
Trim & cube chicken into bite-sized pieces.
-
In a shallow container, add cold water and cold egg. Sift flour into the container. Mix with a fork, but do not beat or whisk. Gently swirl the fork around in the batter until the flour is mixed in and the batter is smooth.
-
In a second shallow container, combine breadcrumbs, salt, and cayenne pepper. Mix until combined.
-
Preheat the Ninja Foodi, with the basket in, on broil for 10 minutes.
-
Coat the chicken pieces in the wet batter and then coat in breadcrumbs. Place the coated chicken onto a cooling rack until all the pieces of chicken are coated.
-
Spritz the basket with oil of your choice and place the chicken nuggets in a single layer and spritz the top of the chicken nuggets with oil.
-
Close the TenderCrisp lid and select Air Crisp on 360°F/182°C. Air Crisp for 5 minutes and flip. Spritz with oil and Air Crisp for an additional 3-5 minutes or until the chicken nuggets are golden brown and the internal temp has reached at least 165°F/74°C
-
Remove and place on cooling rack until ready to serve or toss in your favorite wing sauce!
-
Serve & Enjoy
Nutrition
About the Recipe Author, Louise Long
Louise is a full-time recipe creator and food blogger @ The Salted Pepper. She has over 30 years of experience with cooking and recipe development. She owned a restaurant for several years and was a full-time RN until retiring to blog full-time.

She published her first cookbook in the Fall of 2018 and is very interested in writing several more.
Louise is also the creator of an online Ninja Foodi Pressure Cooking Course with over 100 instructional step-by-step videos. People absolutely rave about the course and all the value they have received from it.
Louise has several very active Facebook groups that help people with the basics of cooking and learning more about the appliances they love.
Ninja Foodi Pressure Cooker & Air Crisper 101
Ninja Woodfire Outdoor Grill & Smoker
Louise is also a YouTube creator and you can find most of her recipes in video format on The Salted Pepper YouTube channel.
She is very responsive to messages and eager to help in any way she can. Get more Information about Louise & contact information
I WOULD LOVE TO SEE WHAT YOU ARE COOKING UP IN YOUR KITCHEN! TAG ME @THESALTEDPEPPER ON YOUR FAVORITE SOCIAL MEDIA PLATFORM WHEN YOU MAKE A DISH!
BE SURE TO FOLLOW THE SALTED PEPPER RIGHT HERE ⇓⇓⇓⇓⇓
Jon says
Can regular wings be substituted for the boneless? If so, what changes in preparation should be made. I have a Ninja Digital Pro.
Louise says
I think the Ninja Digital Pro is the oven if I"m not mistaken, so I would use this recipe for air frying and increase the temperture by 25 degrees. https://thesaltedpepper.com/air-fryer-garlic-parmesan-wings/
Kathy Reichard says
Can you use kosher salt instead of sea salt
Louise says
Yes, absolutley.
Jon says
Will give it a try & circle back. Thanks for your recipe site as I’ve had a lot of trial/error with interpolating other air fryer recipes for this oven.