
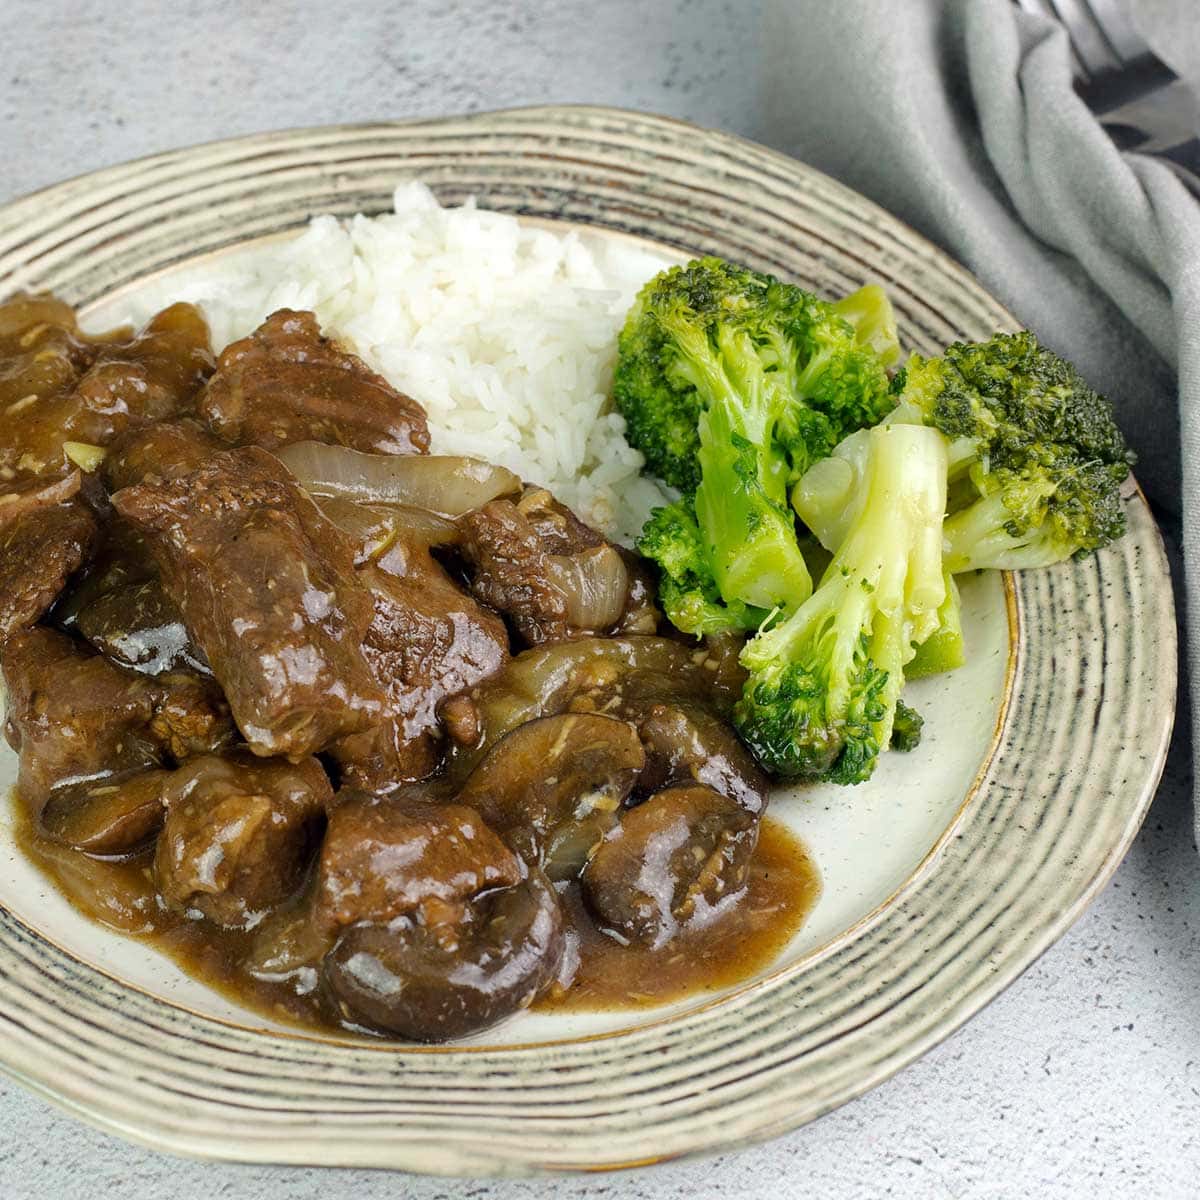
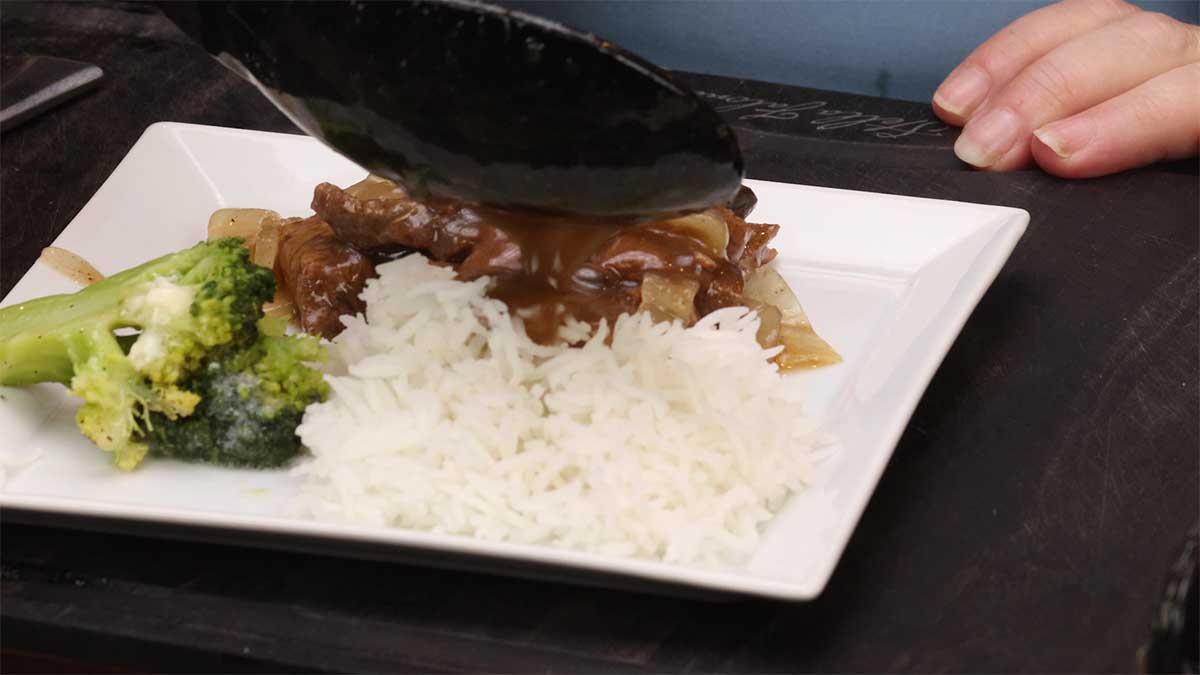
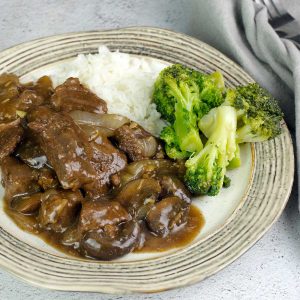
This Beef Tips & Rice with a delicious gravy and broccoli is one big plate of comfort food! Of course, you can switch the rice for mashed potatoes (yum) or make it like I did with rice AND broccoli in a one pot meal right in your pressure cooker.
Would you like to save this recipe?
No worries if you don't have a pressure cooker, though; you can make this recipe a ton of different ways and I'll go over the various methods in this article.
I used the Ninja Foodi Pressure Cooker and Air Crisper because I wanted to cook everything all at the same time. These types of meals are called 360 meals because all the components of your dish are cooked at the same time or finished at the same time, but not mixed together like one-pot meals.
You can use any pressure cooker for this recipe, as long as you have the right kind of rack and pans that fit, OR you can make the beef tips with gravy and skip the other stuff.
Frequently Asked Questions
My favorite is a sirloin roast, but many different cuts of beef can be used. In this recipe, I used a top sirloin roast, but I have also used a bottom round and it worked perfectly fine.
Flank steak is another good cut of meat for this recipe.
You can even use tougher cuts, like a chuck roast or a rump roast or stew beef that you buy already cut. If you are pressure cooking your beef tips, you will want to increase your pressure cook time to about 25-30 minutes to get the meat tender. If you are using a different method, you will need to cook it longer as well.
Yes, absolutely! If you want to double or even triple the recipe, I don't suggest trying to make the rice and broccoli at the same time. There just isn't going to be enough room.
Keep in mind, when pressure cooking, the time to pressure is cook time and when you increase the recipe ingredients, you are increasing the liquid and therefore the time to pressure increases.
If doubling the recipe, I would not make any changes to the pressure cooking time in this recipe.
If tripling the recipe, I would decrease the PC time by about 2 minutes and allow the pot to naturally release for at least 10 minutes before opening the lid. Because the pot will be full, you don't want to do an immediate release or you might have beef juices spraying all over the place.
Absolutely! Simply omit the rice and broccoli part of the recipe and you can either pressure cook the beef tips, onions, mushrooms, and seasonings for 20 minutes with a 5-to-10-minute natural release OR you can do a two-part pressure cooking time like I did if you want to add in that second onion and have it retain its texture.
Ingredients & Substitutions
Beef
You can use a top sirloin roast like I did in this recipe, or practically any other cut of beef will be just fine. Sirloin tips would also work fine.
Some people even make their beef tips with filet mignon and I bet it's delicious. If you wanted to try this, you can skip the first 15-minute pressure cooking time because the filet will be perfectly tender in the 2 minutes that it takes to cook the rice and broccoli.
While I'm tempted to try it, I just can't justify cutting a delicious steak into strips, I'll stick to eating my filet whole. 😂
Tougher cuts of meat, like beef stew meat, chuck roast, and rump roast will require a longer pressure cooking time. I would PC these tougher cuts for 25-30 minutes to get them nice and tender.
Onions & Mushrooms
You can use as much or as little of these ingredients as you want. You can completely omit them and the recipe instructions stay the same.
Seasonings & Sauces
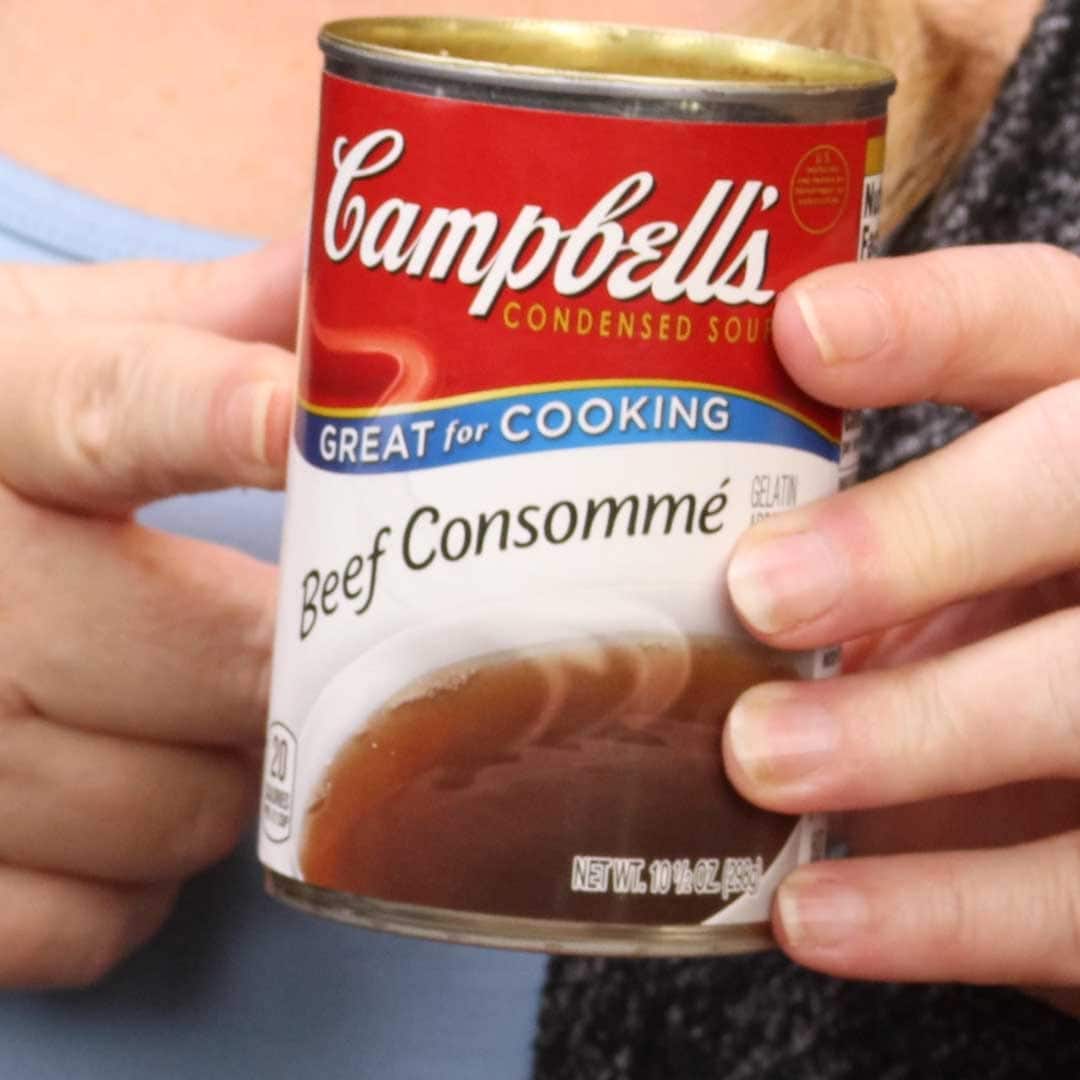
The seasonings and 2 sauces I used in this recipe were simply perfect. I specifically used the beef consommé instead of beef stock or beef broth because it's a concentrated flavor and makes a nice rich brown gravy. You can use beef broth or stock, though.
The balsamic vinegar adds a nice touch, as well, but you can skip it or use a red wine if you prefer.
I don't recommend skipping the Worcestershire sauce unless you simply don't like it or can't have it for dietary reasons. It adds a great depth of flavor to this recipe.
You can certainly adjust any of the ingredients based on what you love. Keep in mind that, if you want to add a gravy packet instead of making the cornstarch slurry, you will definitely want to decrease the salt in the recipe since the packet is already salted.
Rice
I used a long grain white rice in this recipe, but you can use jasmine or basmati, if you prefer. The liquid amounts and cook times will be the same.
If you wanted to use brown rice, I would use at least 1¾ cups of water to 1 cup of brown rice. You will also need to cook it longer and because it is in a pan, it will probably take around 20-25 minutes. The beef can be cooked this long, so simply increase the initial PC time to 20-25 minutes. Please let me know if you try it this way because I have not tested the recipe with brown rice and these are only my suggestions.
If you want to skip the rice, these beef tips & gravy would be incredible over mashed potatoes or egg noodles.
Here is my recipe for mashed potatoes that are simply incredible!
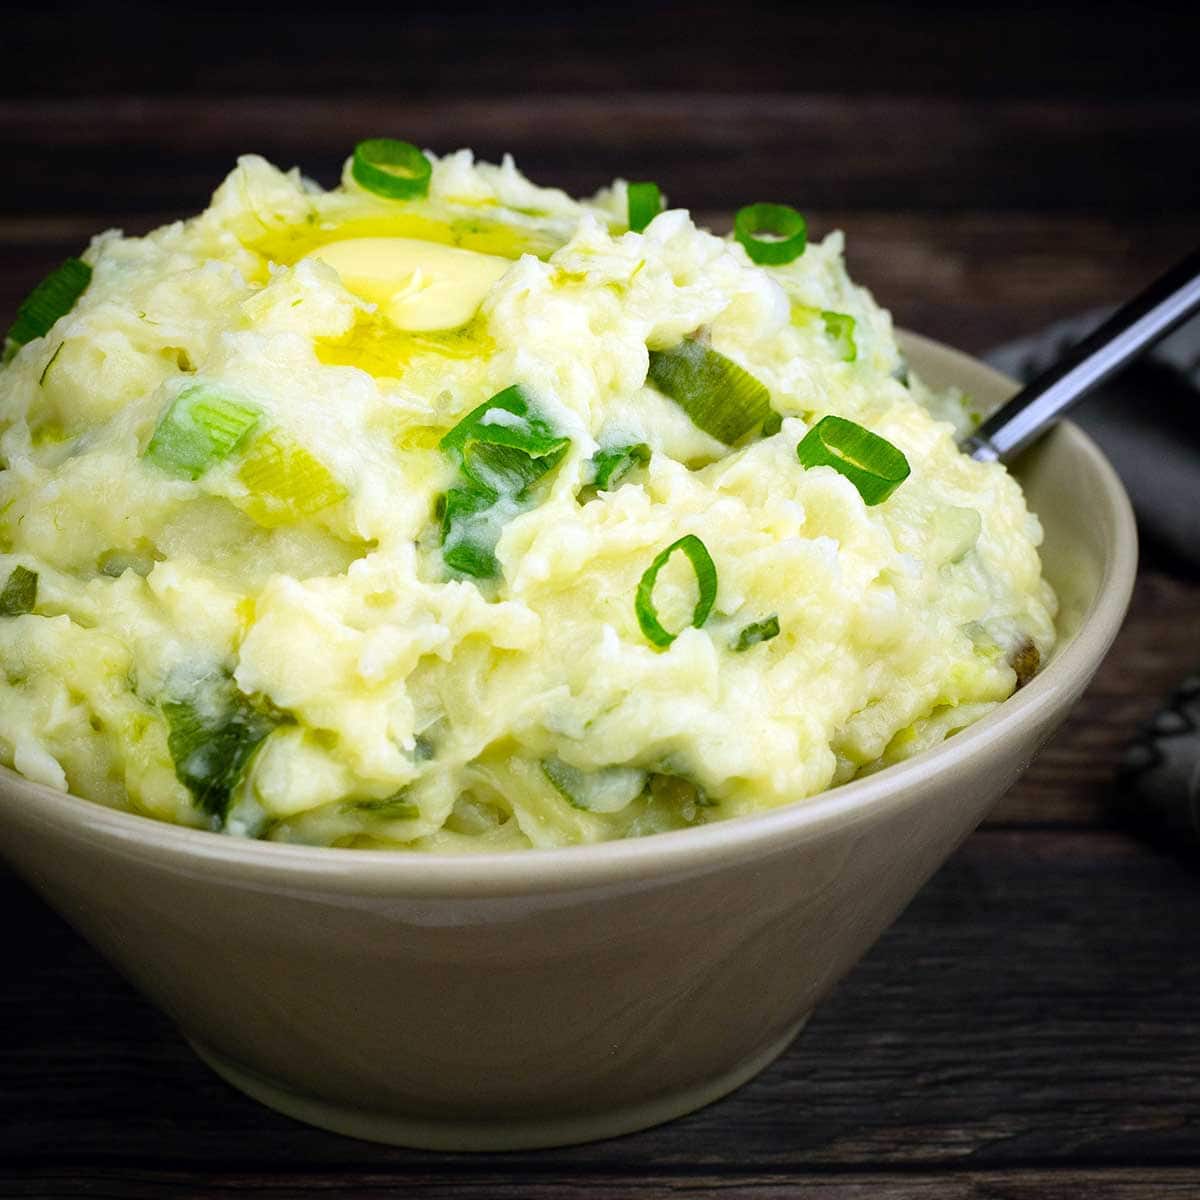
or if you want to try mashed potatoes with a little twist, you must give Colcannon a try! These are the BEST mashed potatoes I've ever eaten.

Creamy Mashed Potatoes Colcannon

Frozen Broccoli
If you don't want to use frozen broccoli, you can use any frozen vegetable medley that is made up of larger vegetables and I think it will be fine.
As far as fresh broccoli goes, it might overcook during a 2-minute PC time. If you wanted to try it, cut the broccoli florets as big as you can so they take longer to cook.
Cornstarch Slurry
I used a cornstarch slurry in this recipe because it's quick and easy, but you can also use a cooked roux made from equal parts of butter and flour, if you prefer.
A gravy packet can also be used, but you will definitely want to cut the salt down in the recipe and/or add more water to dilute the gravy.
How to Make Beef Tips & Rice Stovetop
The only major changes from making beef tips in a pressure cooker are going to be the liquid amount and the cooking time.
Follow the directions for cutting, seasoning, and browning the meat using a large pot or large dutch oven on the stove over medium-high heat. Add in the onions & mushrooms. You can put both onions in now.
Deglaze the pot with 10 ounces of beef consommé and 6 ounces of beef stock. While you can use all beef consommé, it might make the gravy too salty. Add in the Worcestershire sauce and balsamic vinegar and stir.
Reduce the heat to low and simmer the beef tips for about 30 minutes or until tender.
Make the rice according to the package directions when the beef tips are almost done.
Combine 2 Tablespoons of cornstarch with 2 Tablespoons of water and mix well to make sure there aren't any lumps. Add to the beef tips and turn the heat to medium-high. Bring to a boil and stir. This will thicken the gravy. Reduce the heat back to low and simmer until read to serve.
Serve & Enjoy!
How to Make Beef Tips in a Slow Cooker or Crock Pot
Start by cutting the beef into strips or cubes and season.
Sauté the beef in 1-2 Tablespoons of hot olive oil. If your slow cooker or crock pot doesn't have this feature, you can use the stove for this part.
Place the browned beef in the slow cooker with the onions and mushrooms. Add 10 ounces of beef consommé and 4 ounces of beef stock.
Slow cook on high for 3-4 hours or on low for 5-6 hours or until the beef is tender.
Mix 2-3 Tablespoons of cornstarch with 2 Tablespoons of water and stir into the beef tips and allow to thicken. If you cooked the beef tips on low, turn the slow cooker or crock pot up to high so the cornstarch can thicken the gravy.
Make the rice according to the package directions.
Serve & Enjoy.
How to Make Beef Tips & Rice in a Pressure Cooker
Whether you want to turn this recipe into a 360 meal or simply make the beef tips & rice, the first steps are the same.
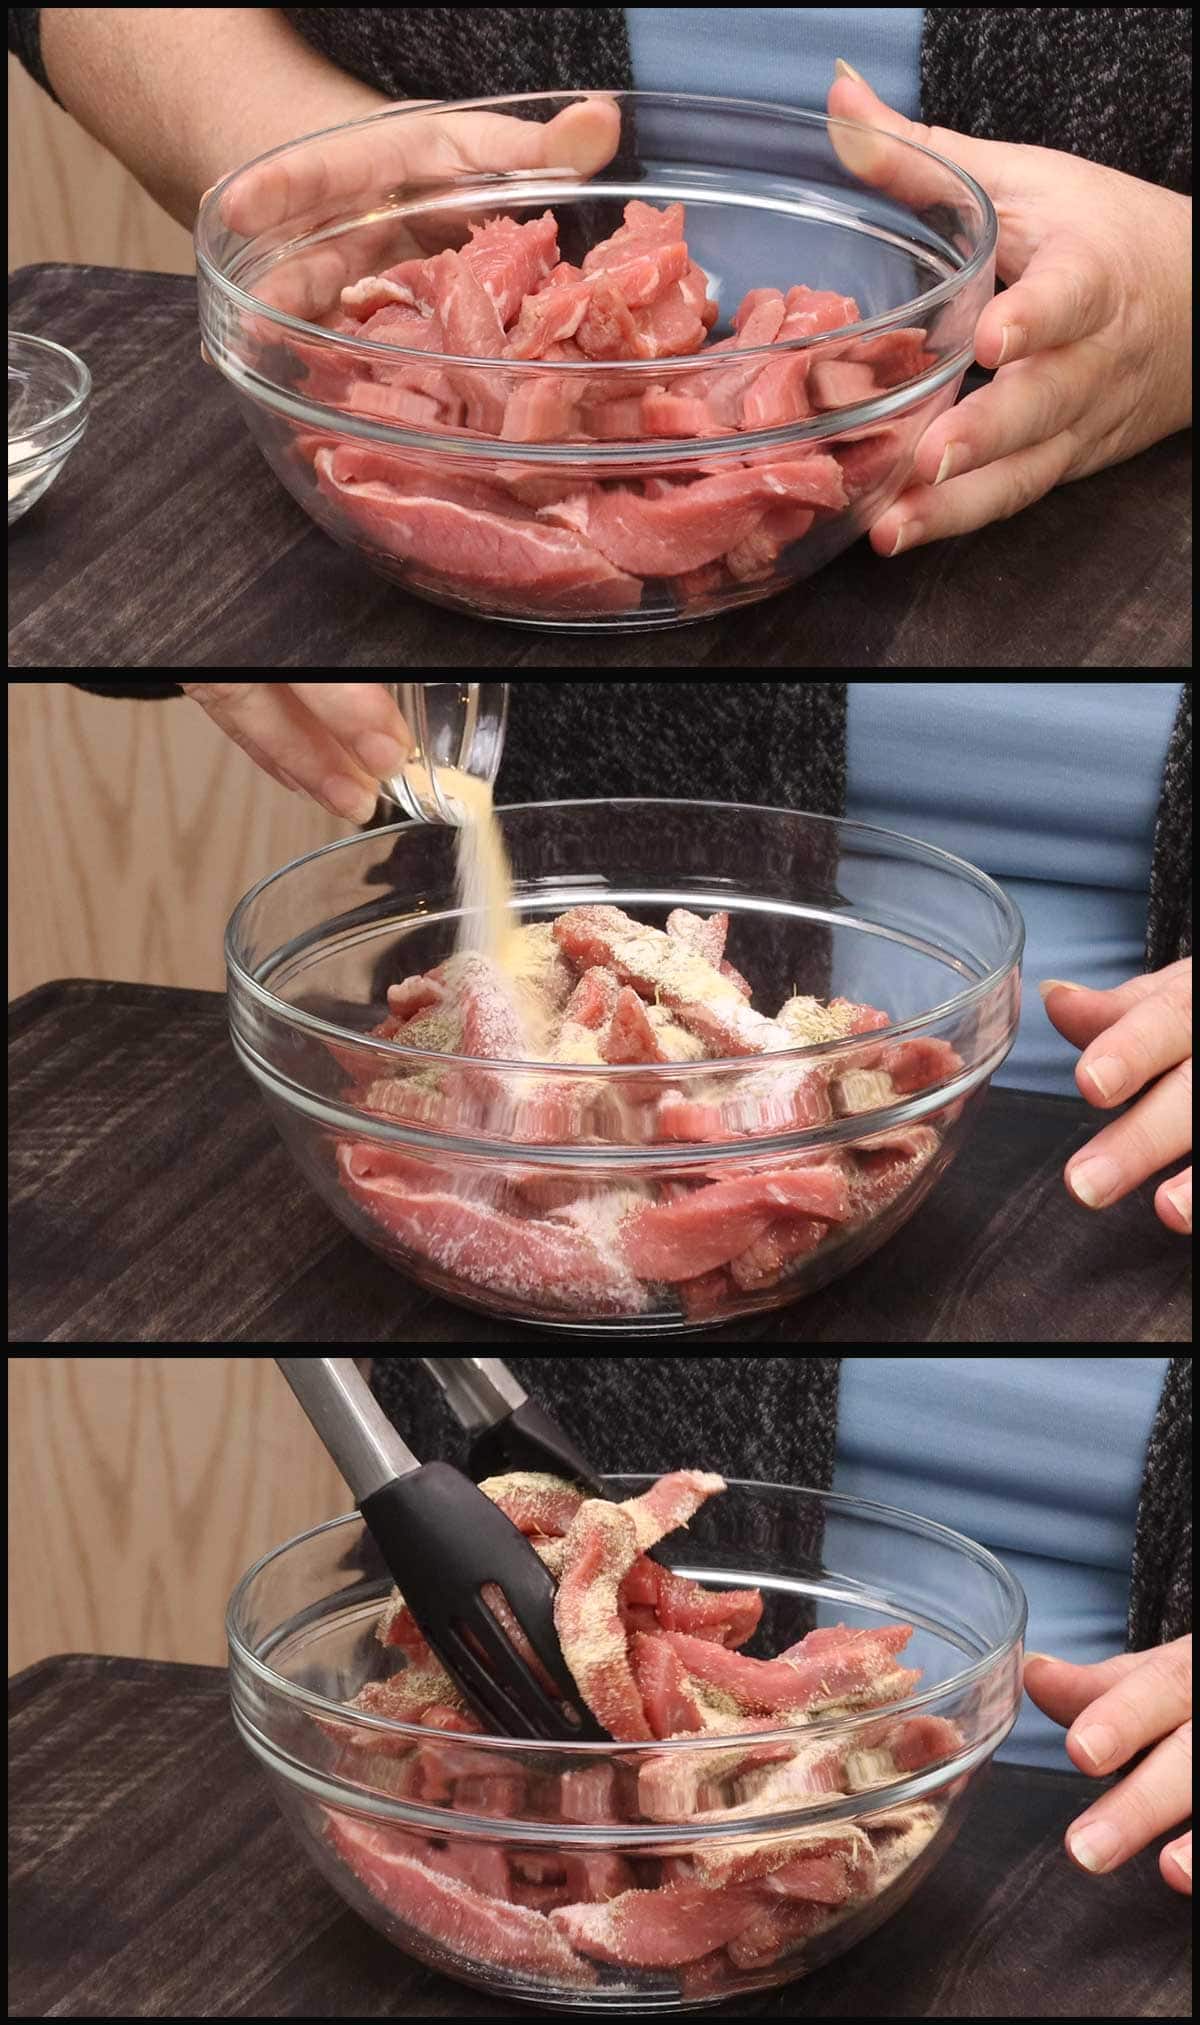
Slice or cube the beef into 3-4" strips about 1" wide or 1-2" cubes. Season with the seasoning blend or your favorite seasonings. Toss to combine.
Put about 1 Tablespoon of olive oil in the inner pot of your pressure cooker and use the sear/sauté function to heat the oil on high. Then, sauté the beef strips or cubes in olive oil for about 2-3 minutes or until the beef starts to brown on the one side. Stir the beef to brown the other side and add 1 onion sliced into about 1" strips on top.
Reserve the second onion to add later if you don't want all the onions to be very soft. If you want all the onions to be soft, you can add both onions (sliced) into the pot now.
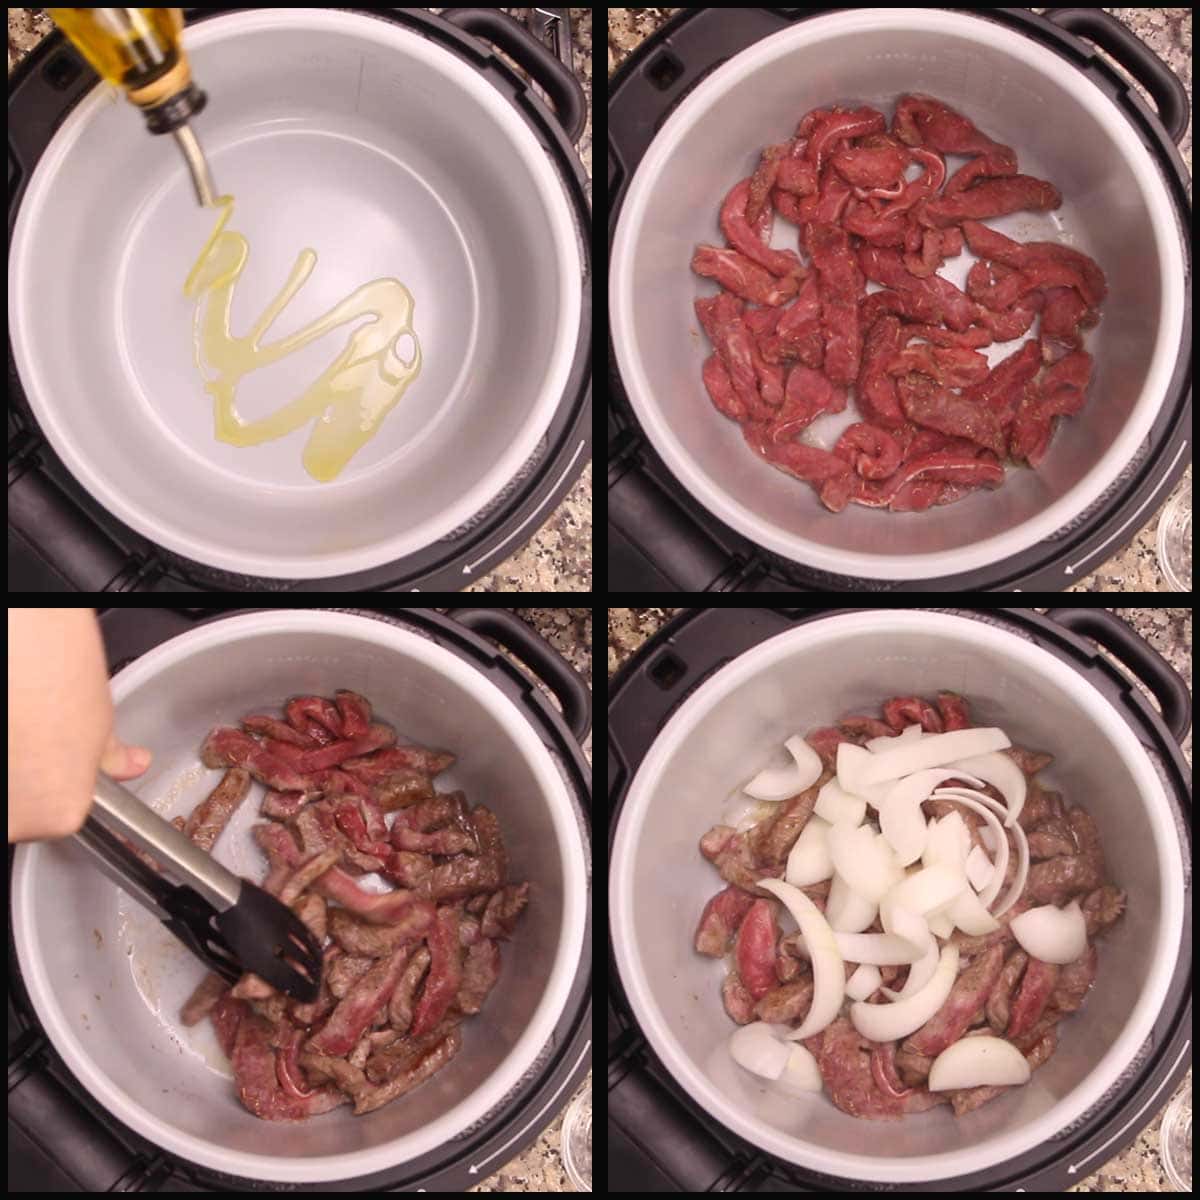
I don't even worry about browning the onions, but you can, if you like. Add the sliced mushrooms to the pot, if using.
I used beef consommé for this recipe because it's a concentrated form of beef stock and boosted the flavor of the gravy. You can certainly use beef stock or beef broth if you like and then simply adjust seasonings at the end if needed.
If you make your own beef stock or have bone broth, that will be great to use as well.
Deglaze the pot with liquid. This is important because after you sauté in the pressure cooker, there can be little bits stuck to the bottom of the pot. This is often called fond and it has tons of flavor, so by adding liquid while the pot is hot and scraping the bottom we get that fond off the bottom and into our dish. It also helps to prevent the water or burn notice, so don't skip this step.
I used 10 ounces of consommé and it was the perfect amount of liquid to make gravy, but if you want more gravy, you can use more liquid, if you like. You can also add more liquid at the end to increase the amount of gravy you make. I would simply use beef stock for this and not more consommé or your gravy may be too salty.
Add the Worcestershire sauce and the balsamic vinegar and stir.

Put the pressure lid on and turn the valve to seal. Select high pressure for 15 minutes.
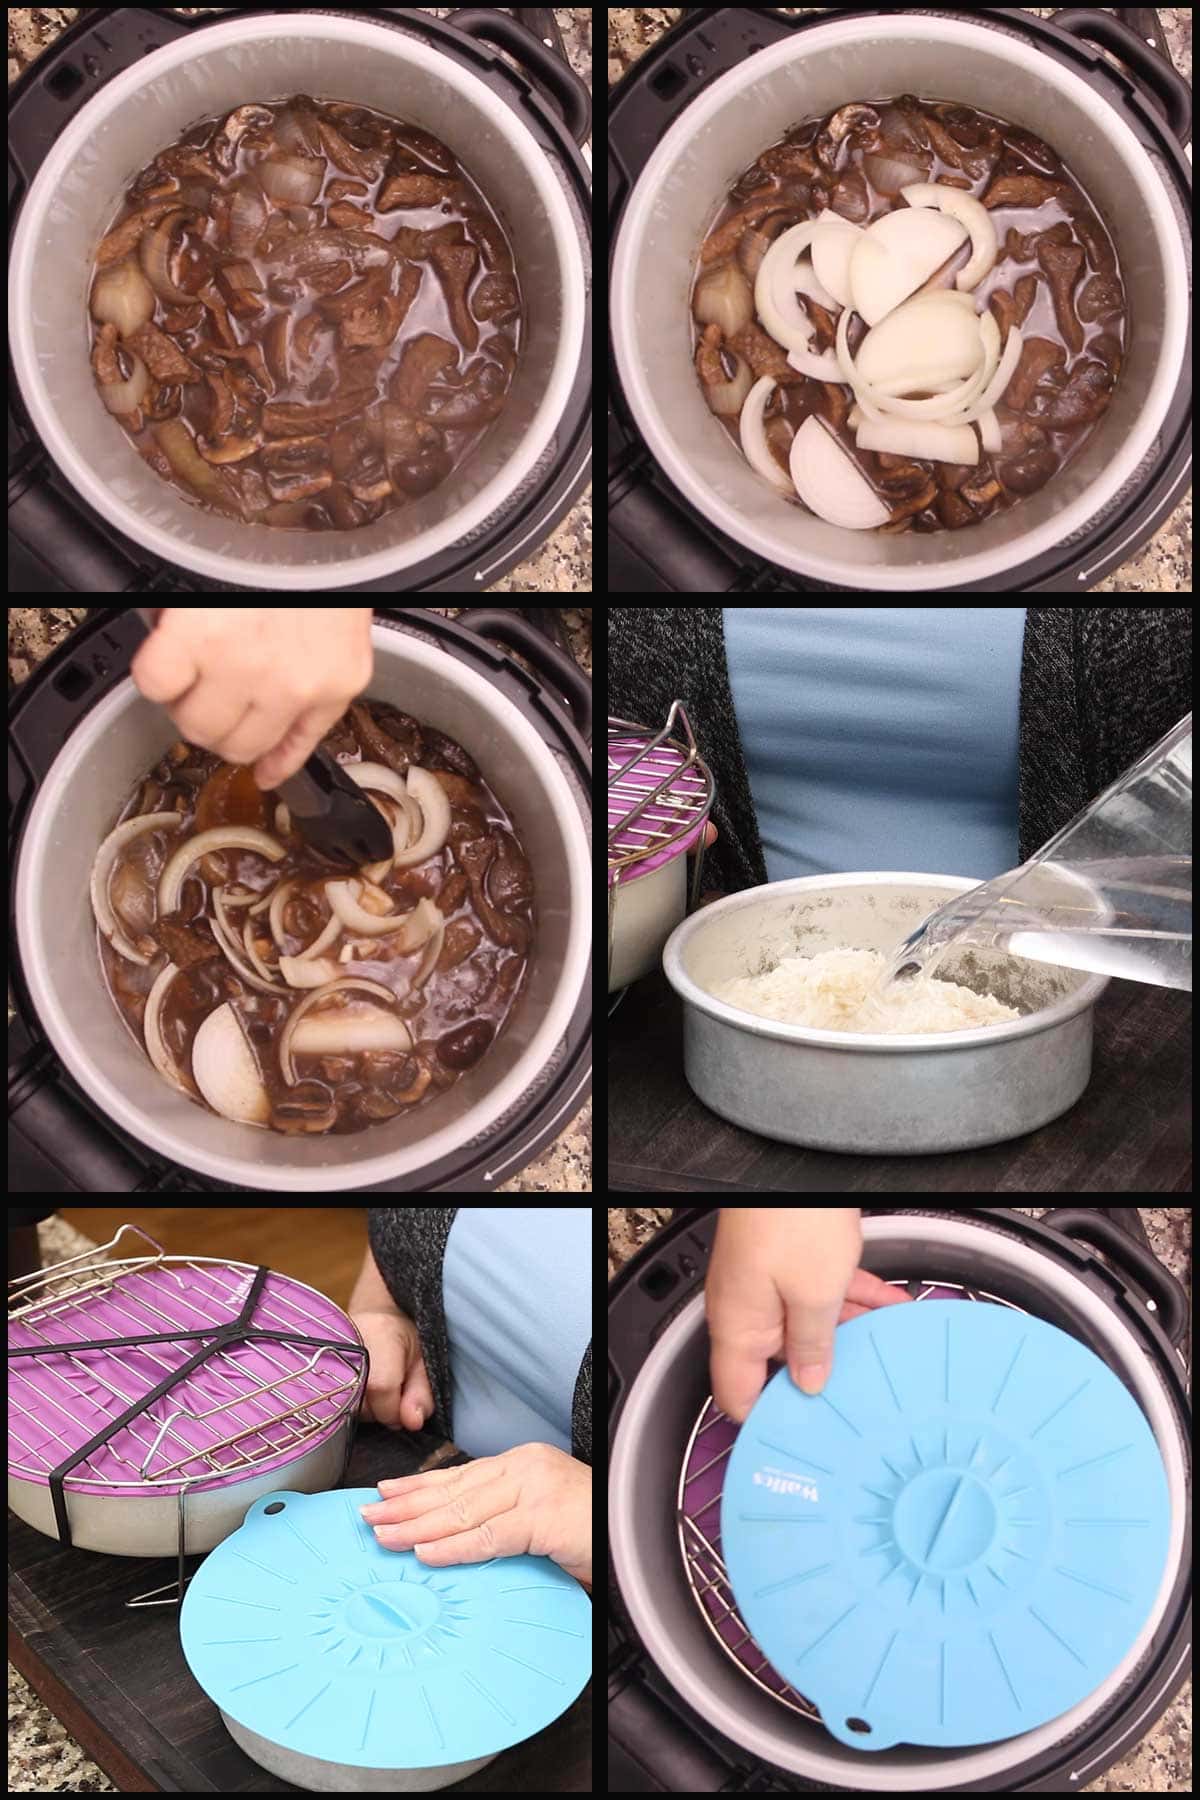
Rinse 1 cup of white rice with cold water until the water runs clear and put the rice into a metal pan. You can use any size pan that fits on your rack or trivet. *If you are doing a 360 meal, see the instructions below for getting 3 layers of food in the pressure cooker.
When the pressure cook time is up, it's fine to do an immediate release. Don't worry, you won't dry out the beef, because it's submerged in liquid at this point and we aren't removing it from the pot.
Remove the lid and add the second onion, sliced into 1" strips. Push the onion down in the liquid and nestle the rack you are using into the pot.
Add 1¼ cups of water to the rice and cover with foil or a (affiliate link)silicone cover like I use. Set the covered rice on the rack and put on the pressure lid. *The pictures below show it sitting high in the pot because I made a 360 meal and had broccoli in a pan under it.
Select high pressure for 3 minutes. When the time is up, allow the pressure to natural release for 5 minutes.
*Note, the time is increased from 2-3 minutes because you do not have the frozen broccoli in the inner pot and the time to pressure will be less. I've also added a short natural release to give your rice a little more time to cook. If you are making a 360 meal, see the instructions below because they are slightly different.
After the 5-minute natural release time, release the remaining pressure manually and remove the pressure lid. Remove the pan of rice and fluff with a fork, put the cover back on while you make the gravy.
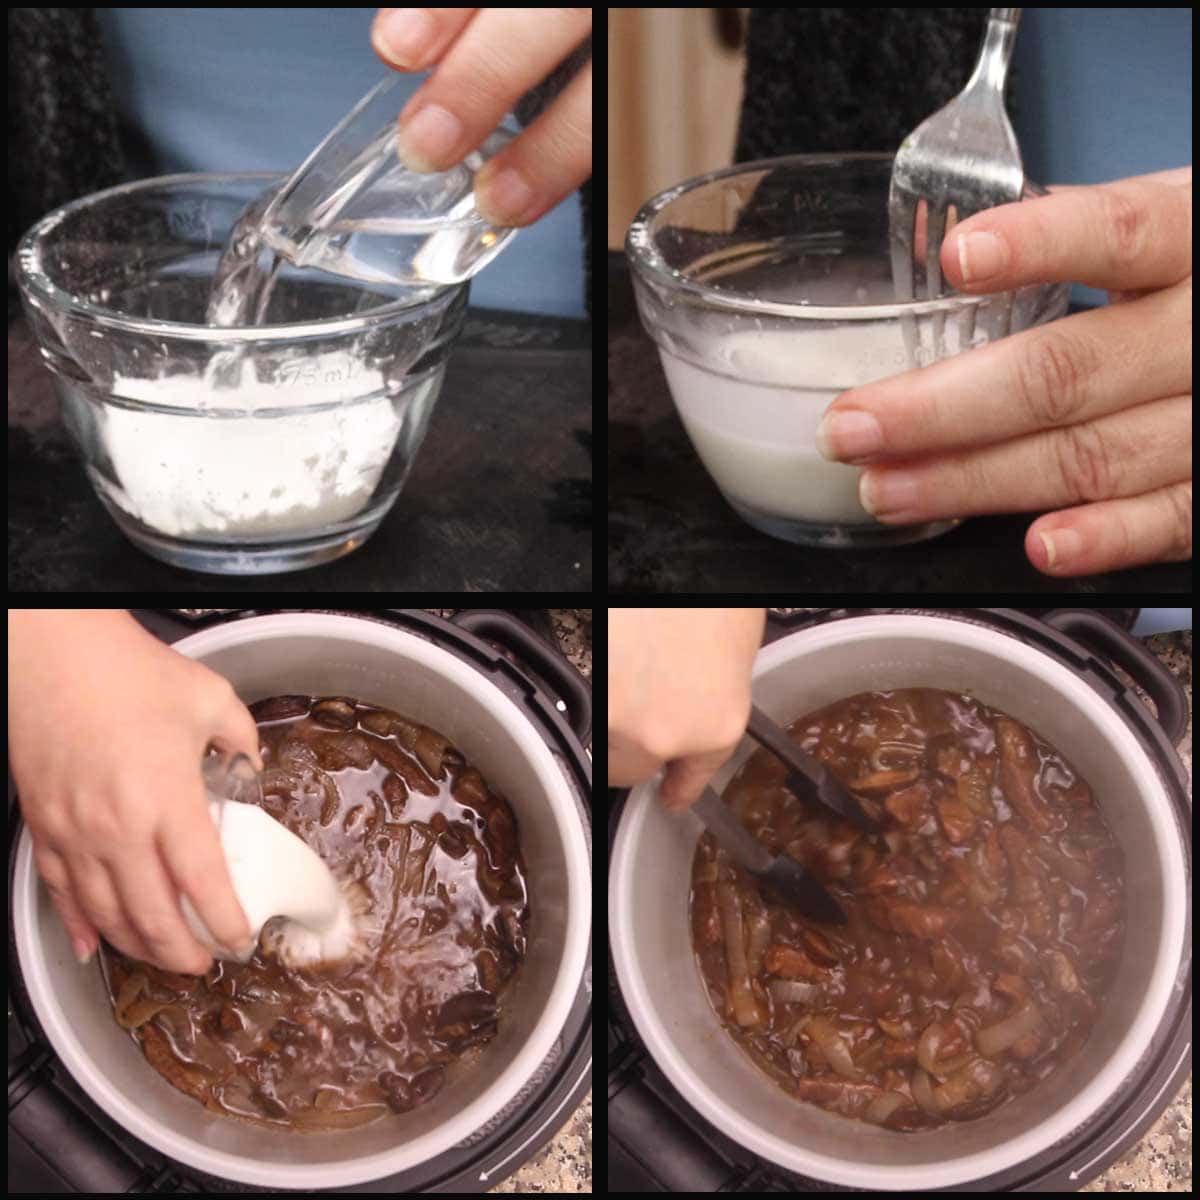
Turn the sear/sauté on high. Mix 2 Tablespoons of cornstarch with 2 Tablespoons of water. Stir to combine and make sure there aren't any lumps.
Pour the cornstarch slurry into the pot with the beef tips and stir. Once the liquid starts to boil, turn the pressure cooker off and stir. The liquid will thicken into a delicious gravy.
If you want your gravy thicker, you can certainly add more cornstarch. Just be sure to mix it in cold or room temp liquid before adding to the pot. You can also thin the gravy by adding some beef stock.
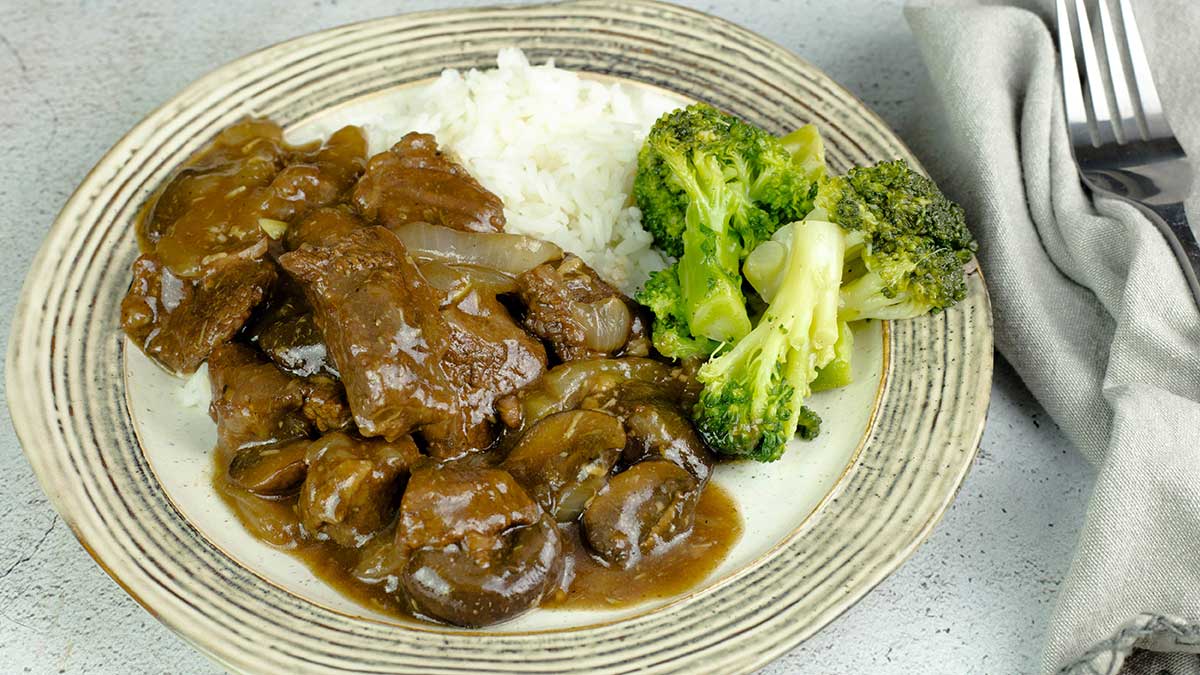
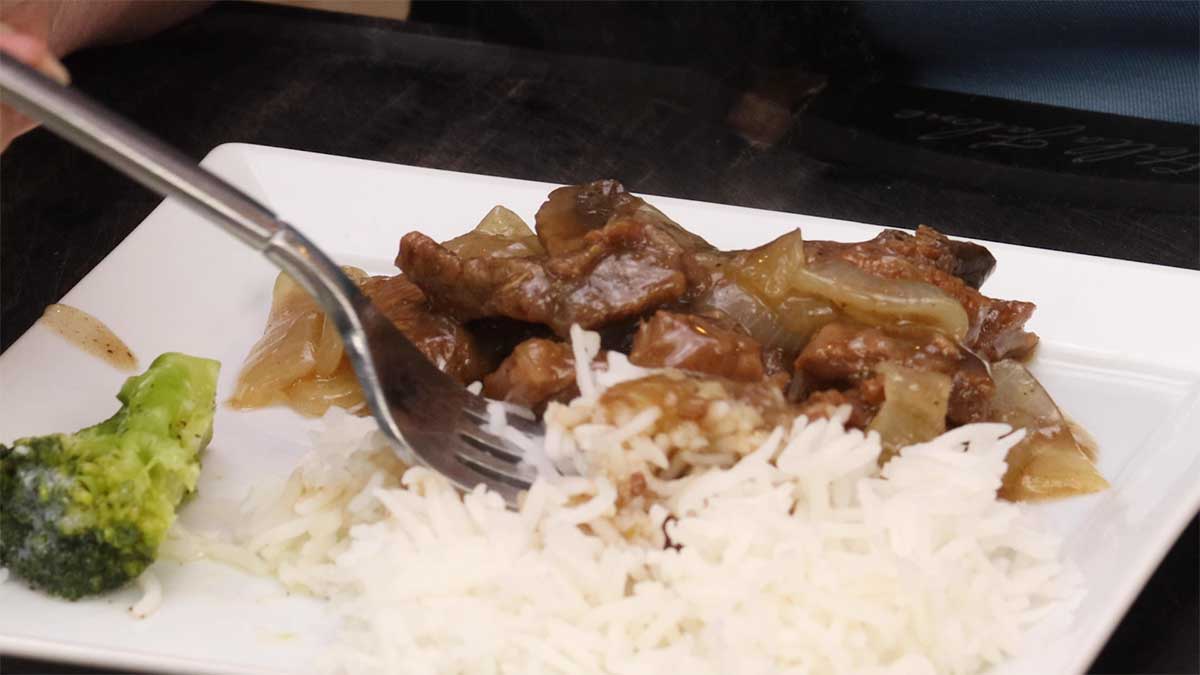
Serve the beef tips and gravy over rice. Enjoy!
Accessories Used for 360 Meal
Because this recipe can be turned into a 360 meal, I thought it might be helpful for me to list the accessories I used to create this dish.
This post may contain affiliate links. If you make a purchase after clicking a link, I may earn a small commission. As an Amazon Associate, I earn from qualifying purchases.
Unfortunately, some of the newer models of the Ninja Foodi are not coming with the reversible rack and it is really a must have if you want to do various types of layered cooking. Why they made the decision to replace the rack with a less functional one is beyond me. I hope enough people complain that they switch back to the reversible rack AND the crisping basket!
The good news is you can buy the rack (even though I don't think you should have to) on the Ninja website and here are the links.
Before you buy extra accessories, look through your cabinets for things that might work. For example, an 8" pie pan might work for the broccoli if you have one.
Reversible rack for the Ninja Foodi 6.5qt
Reversible rack for the Ninja Foodi 8qt
(affiliate link)8"X2" Fat Daddio pan
(affiliate link)6"X2" Fad Daddio pan
(affiliate link)Grifiti Bands
How to Turn this Recipe into a 360 Meal
To turn the Beef Tips & Rice into a 360 meal with frozen broccoli, you only need to change a few things.
You start the recipe the same way by cutting the meat into cubes or slices and seasoning the meat. I like to slice my beef into strips about 3-4" long and about 1" wide, but you can also cube the beef into 1-2" cubes and they will cook just fine in the pressure cook time in this recipe. If you cut the beef larger and especially if you are using a tougher cut of beef, you may want to increase the first PC time to about 20-25 minutes.
After the first pressure cook time, immediately release the pressure and remove the lid. Add in the second onion (cut into strips) and push it down into the liquid.
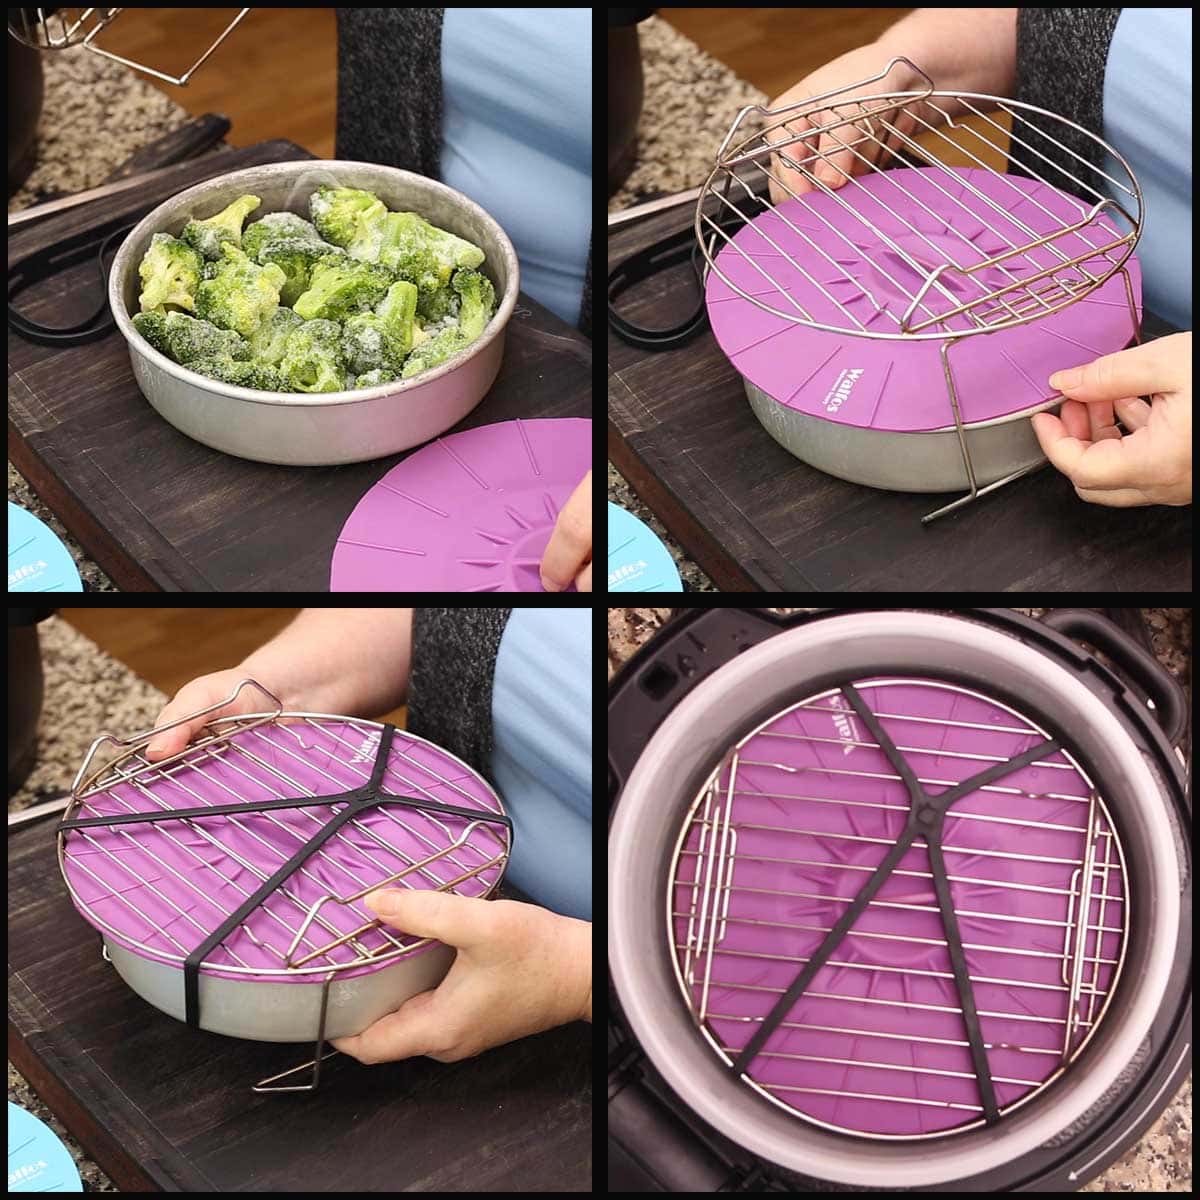
Put 10-12 ounces of frozen broccoli in an (affiliate link)8"x2" Fat Daddio pan or another metal pan of that size. Cover with foil or a (affiliate link)silicone cover. I don't add any liquid to the pan because it would create steam and possibly overcook the broccoli.
Secure the pan of broccoli with a (affiliate link)Grifiti band to the underside of the rack. Nestle the rack into the inner pot.
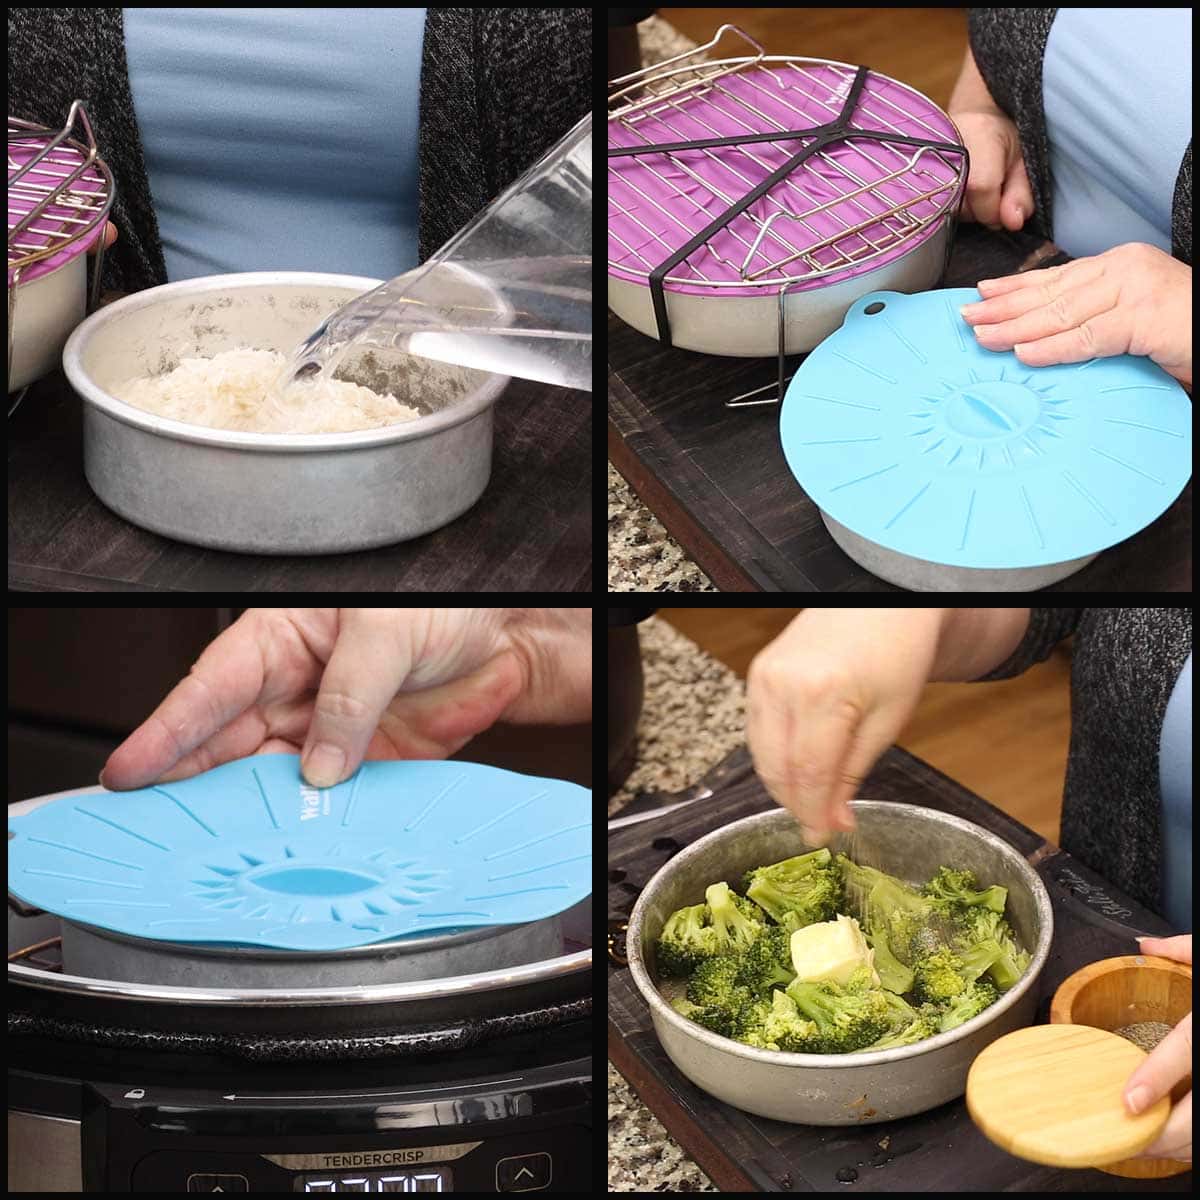
Rince the white rice under water until the water runs clear and put it into a (affiliate link)6"X2" Fat Daddio pan or another metal pan that will fit on the top of the rack.
Add 1¼ cups of water to the rice and stir. Cover with foil or a (affiliate link)silicone lid. Place the pan with the rice and water on top of the rack and make sure it is towards the front of the pressure cooker. You don't want it to be in the back where the valve and pin are.
Put the pressure lid on and select high pressure for 2 minutes. When the time is up, immediately release the pressure.
Remove the rice and keep it covered.
Remove the broccoli and add any seasonings you want. I use salt, pepper, and butter. I leave the broccoli uncovered so it doesn't overcook. The gravy will only take about 2 minutes to make, so my broccoli was still hot when serving.
Make the gravy by combining the 2 Tablespoons of cornstarch with 2 Tablespoons of water and add to the beef tips. Turn the sear/sauté on high and bring to a boil. Stir and the liquid will start to thicken. Turn the sear/sauté off.
Serve & Enjoy!
Beef Tips & Rice Recipe
Equipment
- Pressure Cooker
Ingredients
Seasoning Blend
- 1 teaspoon fine grind sea salt
- ½ teaspoon black pepper
- ½ teaspoon garlic powder
- ½ teaspoon onion powder
- ½ teaspoon thyme leaves dried or about 2 sprigs of fresh thyme
Beef Tips & Gravy
- 1 Tablespoon olive oil
- 1.5 pounds beef sirloin roast cut into 1" cubes or 4"x1" strips
- 2 medium sweet or yellow onions divided in recipe
- 8 ounces baby portobello or white button mushrooms
- 10 ounces beef consommé see recipe notes if not using a pressure cooker
- 2 Tablespoons balsamic vinegar
- 2 Tablespoons Worcestershire sauce
- 2 Tablespoons cornstarch
- 2 Tablespoons water
Rice
- 1 cup white long grain rice
- 1¼ cups water see recipe notes if not making in pressure cooker
Broccoli for 360 meal
- 12 ounces frozen broccoli
Would you like to save this recipe?
Instructions
- Cut the beef into 3-4" strips that are about 1" wide or into 1½-2" cubes. Season with the seasoning blend.
- Turn the sear/sauté on high and add 1 Tablespoon of olive oil to the inner pot. When the oil is hot, add the beef and brown for 2 minutes. Stir to brown the other side and add in 1 onion cut into 1" strips. Add in the sliced mushrooms or you can leave them whole if you prefer.
- Deglaze the pot with the consommé, making sure to scrape the bottom to remove any stuck on bits (fond). Add the Worcestershire sauce and balsamic vinegar and stir. Put the pressure lid on and turn the valve to seal. Pressure cook on high for 15 minutes.
- When the time is up, do an immediate release. This will not dry out the meat because it is submerged in liquid and we are not removing it. Removed the pressure cooker lid and add the second onion (cut into strips). Push the onion under the liquid the best you can.
- Rinse the rice under cold water until the water runs clear and place in a metal pan. I used a (affiliate link)6"x2" Fat Daddio pan, but you can use any pan that fits on your rack. Add 1¼ cups of water to the rice and cover with foil or a (affiliate link)silicone cover. Place the rack in the pressure cooker and set the rice on top. *see below if you are making a 360 meal with broccoli.
- Put the pressure lid on and turn the valve to seal. Pressure cook on high for 3 minutes with a 5 minute natural release. *the time is different for the 360 meal, so see below for instructions if using frozen broccoli.
- When the 5 minute natural release is up, manually release the remaining pressure and remove the lid when the pin drops.
- Remove the pan with the rice and set aside with the cover on. Combine the cornstarch with the water and stir to combine, making sure there aren't any lumps. Turn the sear/satué on high and add the cornstarch slurry. Stir and bring to a boil. This will thicken the gravy. Turn the pressure cooker off once the mixture starts to boil.
- Uncover and fluff the rice. Serve & Enjoy!
For 360 meal with frozen broccoli
- The only changes to the above recipe are adding the layer of frozen broccoli and decreasing the second pressure cooking time. This is done because the time to pressure is increased due to the frozen broccoli.
- Once the beef tips have finished their first pressure cooking time. Place 12 ounces of broccoli in an (affiliate link)8"X2" Fat Daddio Pan or another metal pan that fits under the reversible rack and cover with foil or a (affiliate link)silicone cover. Secure the pan UNDER the rack with a (affiliate link)grifiti band. Lower the rack into the inner pot, make sure it touches the bottom to allow enough room for the pan of rice on top.
- Add the covered pan of rice and water, as instructed above, on top of the rack. Make sure the pan is towards the front of the pressure cooker and not blocking the vent and pin. Pressure cook on high for 2 minutes and when the time is up, do an immediate release.
- Remove the pan of rice and leave covered. Remove the rack with the broccoli and uncover. Season and add butter if desired.
- Follow the instructions above for making the gravy. Serve & Enjoy!
Notes
Nutrition
About the Recipe Author, Louise Long
Louise is a full-time recipe creator and food blogger @ The Salted Pepper. She has over 30 years of experience with cooking and recipe development. She owned a restaurant for several years and was a full-time RN until retiring to blog full-time.

She published her first cookbook in the Fall of 2018 and is very interested in writing several more.
Louise is also the creator of an online Ninja Foodi Pressure Cooking Course with over 100 instructional step-by-step videos. People absolutely rave about the course and all the value they have received from it.
Louise has several very active Facebook groups that help people with the basics of cooking and learning more about the appliances they love.
Ninja Foodi Pressure Cooker & Air Crisper 101
Ninja Woodfire Outdoor Grill & Smoker
Louise is also a YouTube creator and you can find most of her recipes in video format on The Salted Pepper YouTube channel.
She is very responsive to messages and eager to help in any way she can. Get more Information about Louise & contact information
I WOULD LOVE TO SEE WHAT YOU ARE COOKING UP IN YOUR KITCHEN! TAG ME @THESALTEDPEPPER ON YOUR FAVORITE SOCIAL MEDIA PLATFORM WHEN YOU MAKE A DISH!
BE SURE TO FOLLOW THE SALTED PEPPER RIGHT HERE ⇓⇓⇓⇓⇓
Lesa Gilson says
Made this tonight instead of rice I made butter noodles. Mmmm very very tender and great gravy for the noodles too
Louise says
I'm so glad you liked it!
Robin says
So so good….I’ve made this a few times! I increase the recipe by 2 or 3 times and then I freeze in individual portions! Perfect every time! Thank you!
Louise says
I'm so glad you like it!
Silvia says
You just never disappeared, I made this today and I absolutely love it, but I only made the meat, 1 cup of rice is never enough for us, I always like extra rice for rice pudding. Thanks a bunch, you rock.
Louise says
Thanks! I'm thrilled you enjoyed it!