There is no doubt that an accurate kitchen thermometer can take the stress out of cooking, but the key word here is accurate. Thankfully, it is really easy to test your thermometer for accuracy in about 5-10 minutes!
Would you like to save this recipe?
Many thermometers can be calibrated if you find them inaccurate, but the way to do this varies, so you will need to look up the directions for your specific thermometer to find out how to do that.
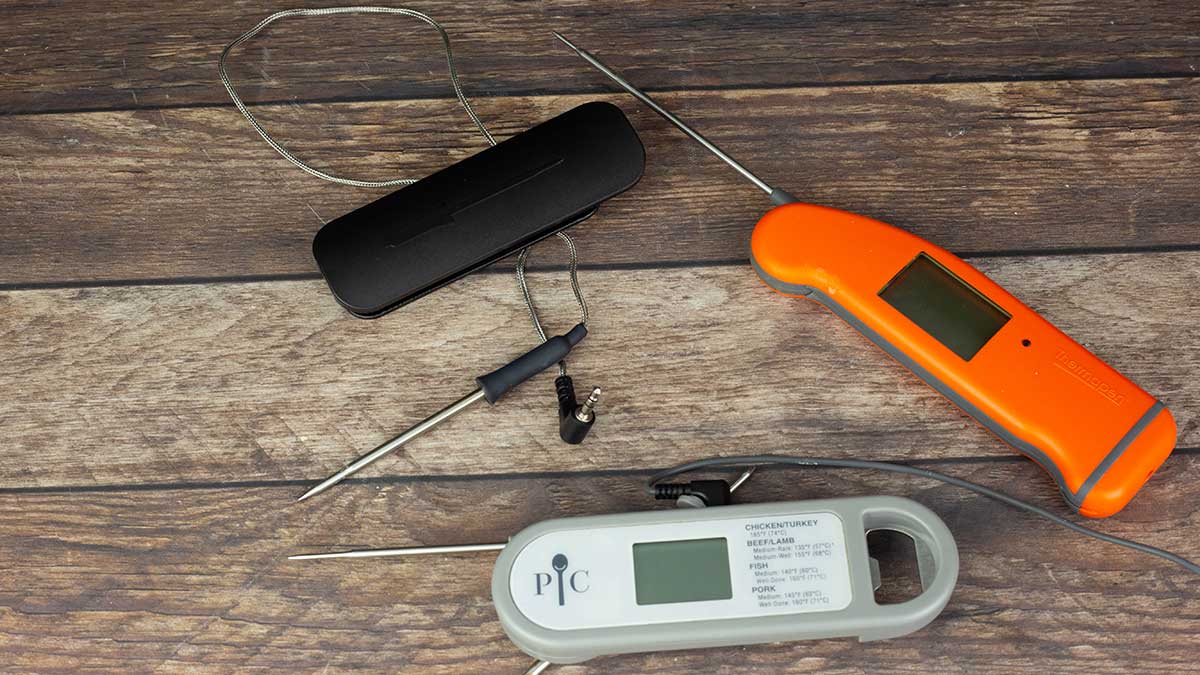
There are many different types and styles of thermometers on the market, but the most common in cooking are the instant read and the probe style thermometers. This article will be focused on those as well as the integrated probe thermometer in the Ninja Foodi Indoor Grill and the Ninja Foodi XL oven.
In fact, the main reason I'm writing this article is because I had questions about the accuracy of my Ninja Foodi XL grill integrated probe and it turns out it isn't accurate! If you find that your internal probe isn't accurate, there are a few things you can do. If it's under warranty, you can contact Ninja Kitchen and see what they say about it.
When I first received my XL grill, it appeared to be accurate and my food was turning out just fine. Then I started testing a recipe for pork loin in the grill and temperature readings weren't matching up to the ones I got from my instant read. This could simply be the position of the probe verses the instant read, but it was off enough that I thought it was worth looking into.
Don't worry too much if your integrated probe for the Ninja Foodi Indoor grill (both original and the XL) aren't accurate, you can still use them. You just have to make some adjustments to your cooking temperatures and I'm going to go over how to do that and provide some information to help make it easier!
Frequently Asked Questions
I recommend testing your kitchen thermometer when you first get it and then every 6 months on an ongoing basis. You should also do a quick test if you drop the thermometer or if it is exposed to extreme temperature fluctuations. For example, if you leave it outside in freezing weather and/or extreme heat, I'd do a quick test.
I also recommend testing it whenever you question the results you are getting or if you are going to cook a very expensive cut of meat or are cooking for a special occasion. The test takes just a few minutes and it's so much better to take that time to test your thermometer rather than ruin your meal because of an inaccurate thermometer.
Many thermometers can be calibrated if you find that it isn't accurate. Check the manufacturer's directions for the specific thermometer that you have for how to calibrate your make and model.
Some thermometers, like the integrated probe that comes with some models of the Ninja Foodi Indoor Grill and Ninja Foodi XL oven, cannot be calibrated. If your appliance has an integrated thermometer and it cannot be calibrated by you, then you can make adjustments in cooking temperatures to compensate for the inaccuracy or if it is very inaccurate, I would contact the manufacturer to see about an exchange.
Two Methods for Testing a Kitchen Thermometer for Accuracy
There are two basic methods for testing the accuracy of your kitchen thermometer; the ice water method and the boiling method.
The easiest one to do is the ice water method and that is the method I will be giving detailed instructions for, however, the boiling method can also be done by boiling water on your stove and placing the tip of the thermometer into it. Make sure the tip isn't touching the sides or the bottom of the pot of water and make sure the water is at rolling boil that does not stop when stirred.
The boiling method is a little tricker because water boils at 212℉/100℃ ONLY at sea level. In order to determine the boiling point of water at different elevations, you can use this calculator from Thermoworks: The boiling point of water calculator
Most of the time if your thermometer is accurate using the ice water test, it will be accurate using the boiling water test and that is why I opt for the easier of the two when testing my thermometers for accuracy.
What Styles of Kitchen Thermometers can be Tested for Accuracy?
Any kitchen thermometer can be tested for accuracy. There are two methods for testing accuracy, the boiling water method and the ice water method. You can use either or both, but I find the ice water method to be the easiest and that is the one I will focus on here.
While you can test any thermometer using these methods, I will be giving detailed instructions on three styles of thermometers using the ice water test. The styles I will be covering are; the instant read, the probe style, and the integrated probe that is built in to some appliances.
Infrared thermometers can also be tested, but since these types of thermometers only register the surface temperature of foods, I don't recommend them for testing the doneness of food and won't be covering this type in this article.
What Thermometers Work Best?
There isn't any right or wrong answer here. I have used very inexpensive thermometers for years and they worked just fine, but I found I had to replace them frequently.
An inexpensive (accurate) thermometer is better than not having one at all, so buy one that is in your budget.
Personally, I would choose an instant read over a probe thermometer if I could only get one or I would get one that does both.
I used a Thermopro TP18 for over a year which only runs about $20 on Amazon. It worked and it was accurate, but I had to replace the batteries every few months and it was slower to read the temperature than I would have liked. I'm hard on thermometers and have been known to drop them and even get them wet. The less expensive thermometers that I've had just don't hold up, so I found myself buying a new one every 6-12 months.
At the complete other end of the price range is my favorite thermometer, the Thermapen MK4 Instant Read. They run around $100, but if you want a fast accurate thermometer that holds up, this is it. I've had mine for about 18 months (date of purchase was 11/19) now and it works exactly the same as when I first got it. I haven't had to change any batteries and it is always 100% accurate and fast to give the read out.
If you aren't sure if you would use an instant read or a probe style, Pampered Chef has a thermometer that does both. I have found it to be quick reading and very accurate. For the price (it's around $50), this is a great option. The only thing that I don't like about it is the on/off switch can be hard to push because it is small.
Here is the link if you are interested in a dual purpose thermometer: (affiliate link)Pampered Chef Dual Thermometer
There are so many thermometers to choose from and they range in style and price, so get what you are comfortable with. Keep in mind that the longer an instant read takes to display the temperature, the longer your oven, grill, or smoker is losing heat. Personally, I would get the fastest reading thermometer you can afford.
Video Demonstration of Testing Kitchen Thermometer for Accuracy
In this video, I test my instant read, probe style thermometer as well as the integrated probe in the Ninja Foodi XL Grill.
How to Test Your Instant Read or Probe Thermometer for Accuracy using the Ice Bath Test
The process for testing your thermometer will be the same for instant read thermometers and probe style thermometers.
Here are the steps.
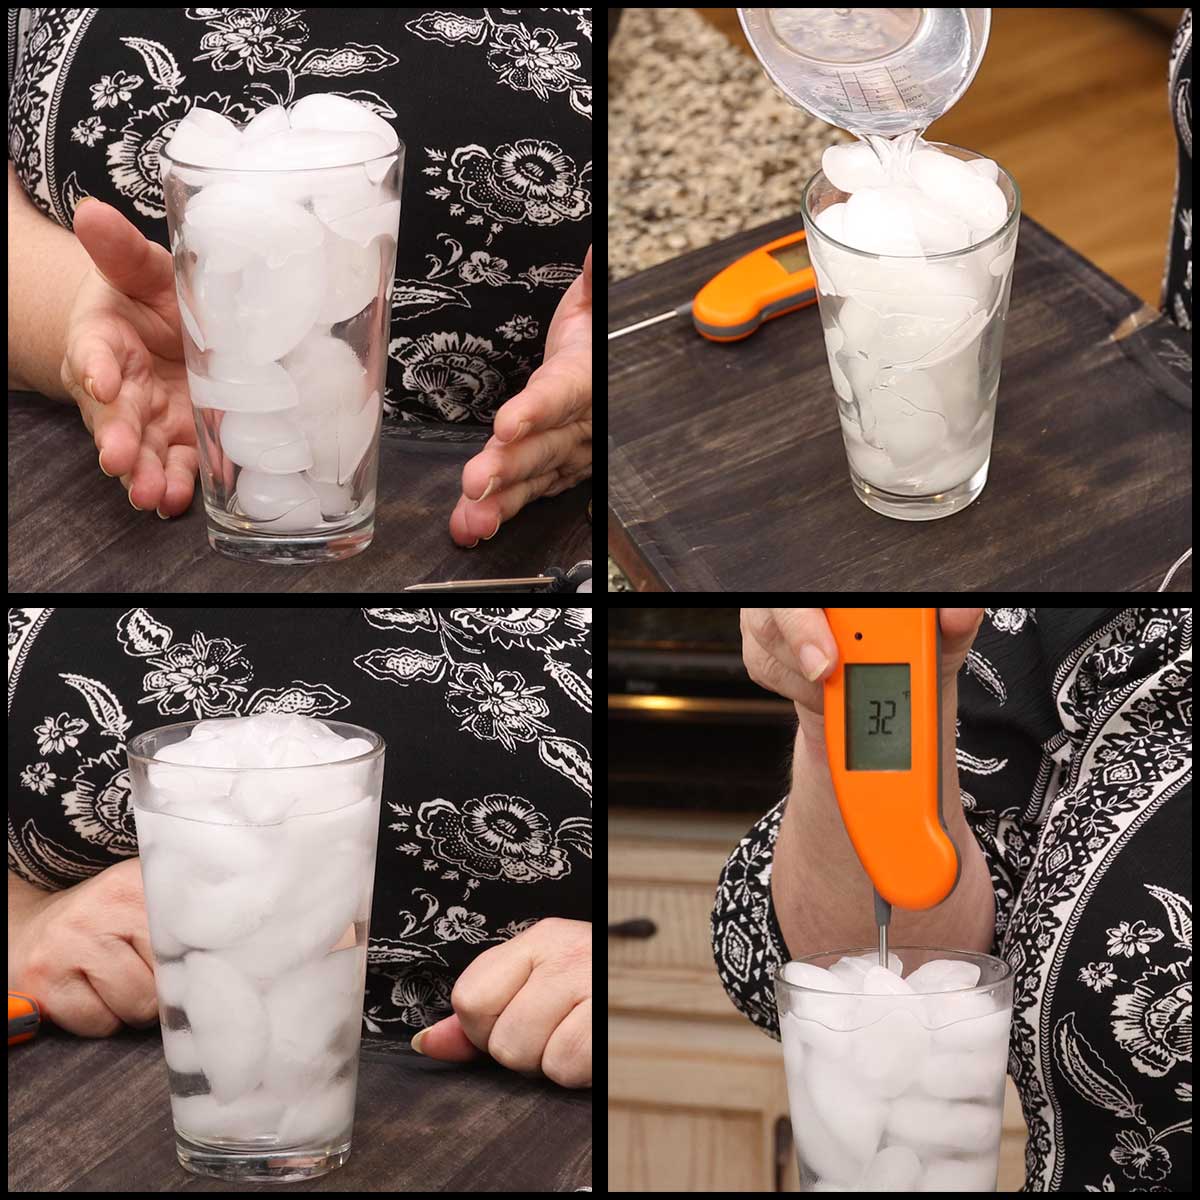
- Fill a glass with ice, making sure there are large gaps of air between the ice. The ice will settle quickly when water is added, so I usually bring the ice level to just above the top of the glass. I prefer to use a clear glass so I know that I'm not accidentally hitting the sides or bottom.
- Pour cold water into the glass until the water line is about ½" below the ice. If your ice settles too much, add some more. Let the ice water sit for about 5 minutes.
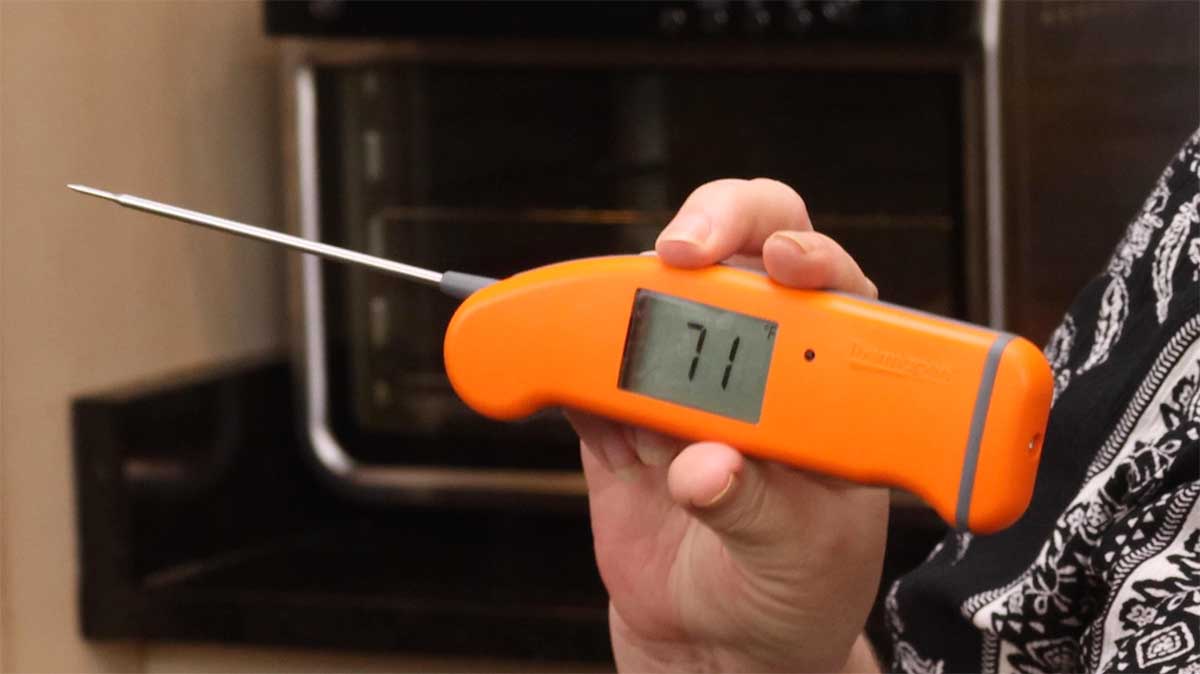
- Turn your thermometer on if it has an on/off switch. Insert the tip of your thermometer, at least 1" below the water line and swirl it around. If your thermometer is accurate, it should read 32℉/0℃.
*for most kitchen thermometers, +1° or -1° is still considered accurate. So, if your reading is 31-33℉/-1-1℃ your thermometer does not need to be calibrated in most instances.
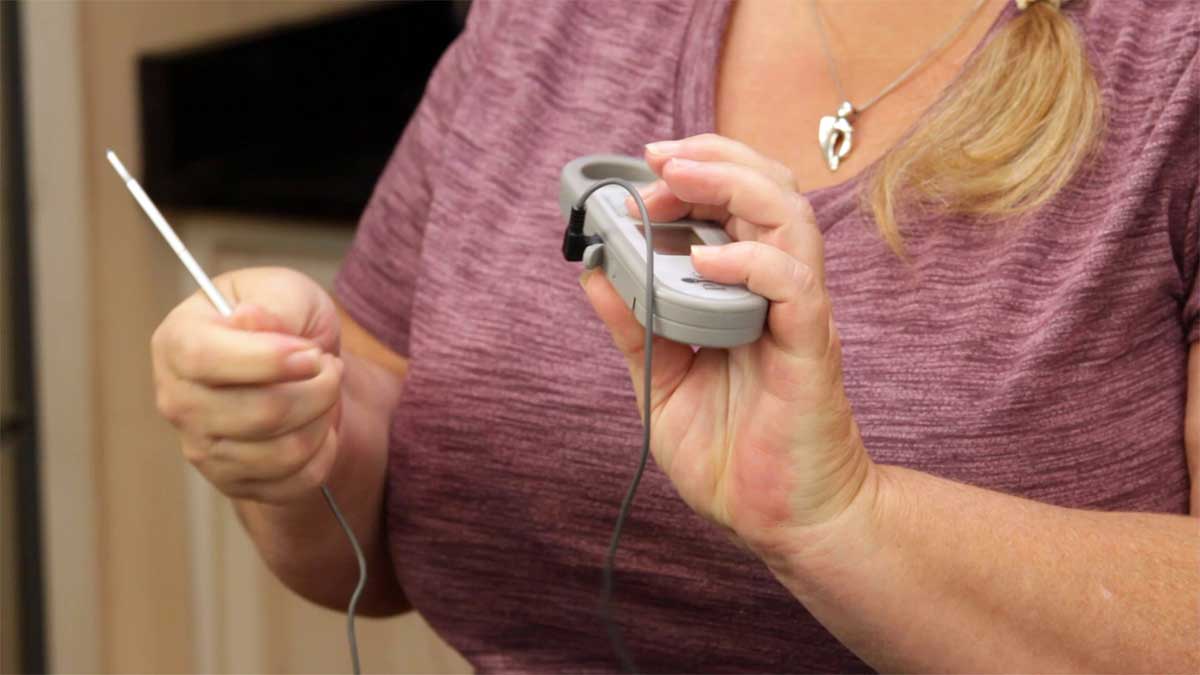
If you have a probe style thermometer, the test is done exactly the same way. Here is me testing the (affiliate link)Pampered Chef Dual Thermometer for Accuracy.
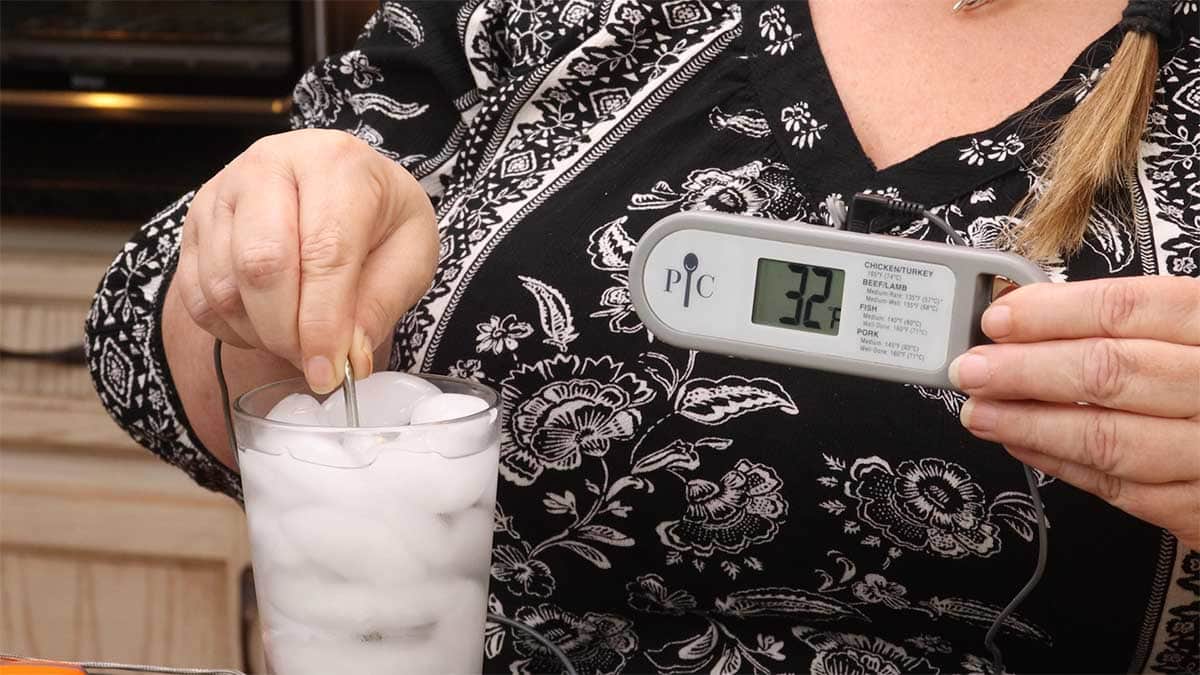
If you find that your thermometer isn't accurate, check with the manufacturer for instructions on how to calibrate it.
How to Test the Ninja Foodi Integrated Probe for Accuracy
While the basic test is the same, there are a few steps that you need to do so you can see the correct temperature readout.
- Fill a glass with ice, making sure that you don't have too many air pockets in between the ice cubes. I fill the ice a little above the glass since it settles when water is added.
- Fill the glass of ice with water until the water line is about ½" below the top of the ice.
- Turn on the Ninja Foodi Grill and plug the probe into the side.
- Select the air crisp function (any function will work, but on the original grill you can't bypass the preheat for the grill function) and select manual mode. The default temperature is fine.
- Bypass the preheat by pressing the "preheat" button on the Ninja Foodi XL grill or by pressing the "air crisp" function on the original grill. After you bypass the preheat, the display will read "add food" and you will open and close the lid.
- The display will now read the target temperature (which is the default temp) and the current probe temperature. Since your probe is NOT inside the grill, it will read the air temp in your room.
- Insert the probe end about 2" into the ice water and swirl it around. The readout on the display should start to change as it reads the temperature of the ice water. This can take a few minutes and you want to make sure the probe is not touching the sides or the bottom of the glass. If your integrated probe is accurate, it will read 32℉/0℃.

If your reading is off by a degree or two, I wouldn't worry too much about it. However, mine was off by 4-5° and that will affect the outcome of some cuts of meat, especially lean cuts that tend to dry out when overcooked.
While I don't have the Ninja Foodi XL oven with the integrated probe, the process should be very similar for testing the accuracy of the thermometer.
What to do if Your Ninja Foodi Integrated Probe Thermometer isn't Accurate?
Unfortunately, there isn't any way to calibrate the integrated probe at home according to Ninja Kitchen's customer service. I called them before writing this article and they confirmed what I suspected, the calibration is done internally at the factory and can't be modified by the owner.
If your appliance is still under warranty and your integrated probe is not accurate by more than a few degrees, contact Ninja Kitchen at 1-866-826-6941. Make sure to have your appliance registered and the model number handy when you call. It also helps to be near your appliance because sometimes they will want you to perform some tests while they are on the phone.
If your appliance is not under warranty, it can't hurt to contact Ninja Kitchen to see what they say. However, I don't want you to worry too much if they can't assist you. You can still use the integrated probe and have your food cooked to the temperature you want. You just have to make some adjustments.
As I said before, my integrated probe is off by about 5° and I decided that I wasn't going to return it, instead I will just make the necessary adjustments when cooking with the integrated thermometer.
This is easy to do, but can be a little confusing. Although I'm including easy charts for reference, the basic calculations are as follows.
Scenario #1
During the ice bath test, the probe temperature read 37℉/3℃. The known temperature of the ice bath is 32℉/0℃, meaning the probe is reading 5° higher than the ACTUAL temperature.
We have an ACTUAL temperature of the ice bath of 32°F/0℃ and an ACTUAL temperature of the probe of 37℉/3℃.
The ACTUAL temperatures are important when making your calculations because it's easy to reverse things and set your target temperature wrong.
I want to cook my steak to an internal temperature of 130℉/54℃, so I will set my target temperature using the integrated probe to 135℉ because the ACTUAL temperature of the integrated probe reads 5° hotter than the ACTUAL temperature of the meat.
Wait a minute. What? If my probe is reading 5 degrees too hot, wouldn't I want to LOWER my target temperature? Nope, just the opposite. You have to raise the target temperature by 5°. Confused yet? If so, no worries, you aren't alone. It took a little debating for me to wrap my brain around this.
As much as I hate to admit this, I argued debated with my husband for about 5 minutes over this AND we had to reshoot the video because my brain made the wrong calculations. I swore I was right, too! I wasn't. He was. I had to apologize to him and offer to kiss his feet. Thankfully, he let me off with a simple apology.
He explained it to me in ACTUAL temperatures and that really helped, that's why I'm explaining it that way here. When cooking meat to temperature the ONLY thing we care about is the ACTUAL temperature of the meat.
When the ACTUAL temperature of the meat is 135℉/57℃, a thermometer that is reading 5 degrees hotter based on a known temperature (such as the ice bath) will show an INDICATED temperature of 140℉/60℃. So, we set our target temp for 140℉/60℃ and when the integrated probe reaches that temp, the grill shuts off and the ACTUAL temperature of the meat is 135℉/57℃.
You would follow the same procedure for selecting your target temp even if your integrated probe is reading hotter than the known temperature of the ice bath by 10°, 15°, 20° or more. Simply adjust your target temperature UP by the same amount of degrees from the ACTUAL temp you want the meat cooked to.
If your integrated probe is reading colder than the known temperature of the ice bath, then you would follow this procedure in reversion.
Scenario #2
During the ice bath test, the probe temperature read 27℉/-3℃. The known temperature of the ice bath is 32℉/0℃, meaning the probe is reading 5° lower than the ACTUAL temperature of the ice bath.
Therefore, if I want to cook my steak to an internal temperature of 135℉/57℃, I will have to set my target temperature to 130℉/54℃.
When the integrated probe INDICATED temperature reads 130℉, the ACTUAL temperature of the meat is 135℉ because the probe is reading 5° lower based on the ice bath test.
Keep in mind, your thermometer could be off by 6, 7 , 8, or 12 degrees, but you can only set your target temperature in 5 degree increments on the Ninja Foodi grill.
I hope this makes sense. To make things a little easier, here is a formula to use and a chart for reference.
To determine how many degrees your thermometer is off by you can use this simple formula and plug in your numbers.
Actual probe temperature during ice bath test minus (-) Ice bath temperature equals (=) degree of inaccuracy.
The ice bath temperature, when done correctly, should always be the known temperature of 32℉.
For example, my probe read 36℉ during my test, so the formula would look like this.
36°-32°= 4°
In this instance I would raise the target temperature that I set on the grill by 5°. Even though my thermometer is only off by 4°, you can only adjust the target temperatures in increments of 5°
An easy way to remember if you need to lower or raise your target temperature is so see if you have a positive or negative number at the end of your equation. A positive number means you need to raise the target temperature on the grill and a negative number means you need to decrease the target temperature.
For example, let's say my probe read 28℉ during the ice bath test. My formula would look like this.
28°-32°= -4°
In this case, I would lower my target temperature by 5°.
Also remember that food increases in temperature by 5-15° so make sure that is taken into consideration when setting your target temp.
For example:
I want my chicken cooked to 165℉ and I know that the carryover heat is going to raise the temperature by at least 5 degrees, so I will set my target temperature using the manual setting on the grill to 160℉.
When the chicken reaches 160℉, the grill will turn off and I will remove the chicken and let it rest for 5 minutes. During that 5 minutes, the carryover heat will raise the temperature to 165℉ which is the safe internal temperature for chicken.
Most of the time, your probe is only going to be off by -5° to 15°, so here is a quick reference chart that shows you what temperature to set the grill to for the desired target temperature IF you find your integrated probe isn't accurate.
*celsius temperatures are rounded up or down and may not be completely accurate, so double check your grill settings and adjust as needed.
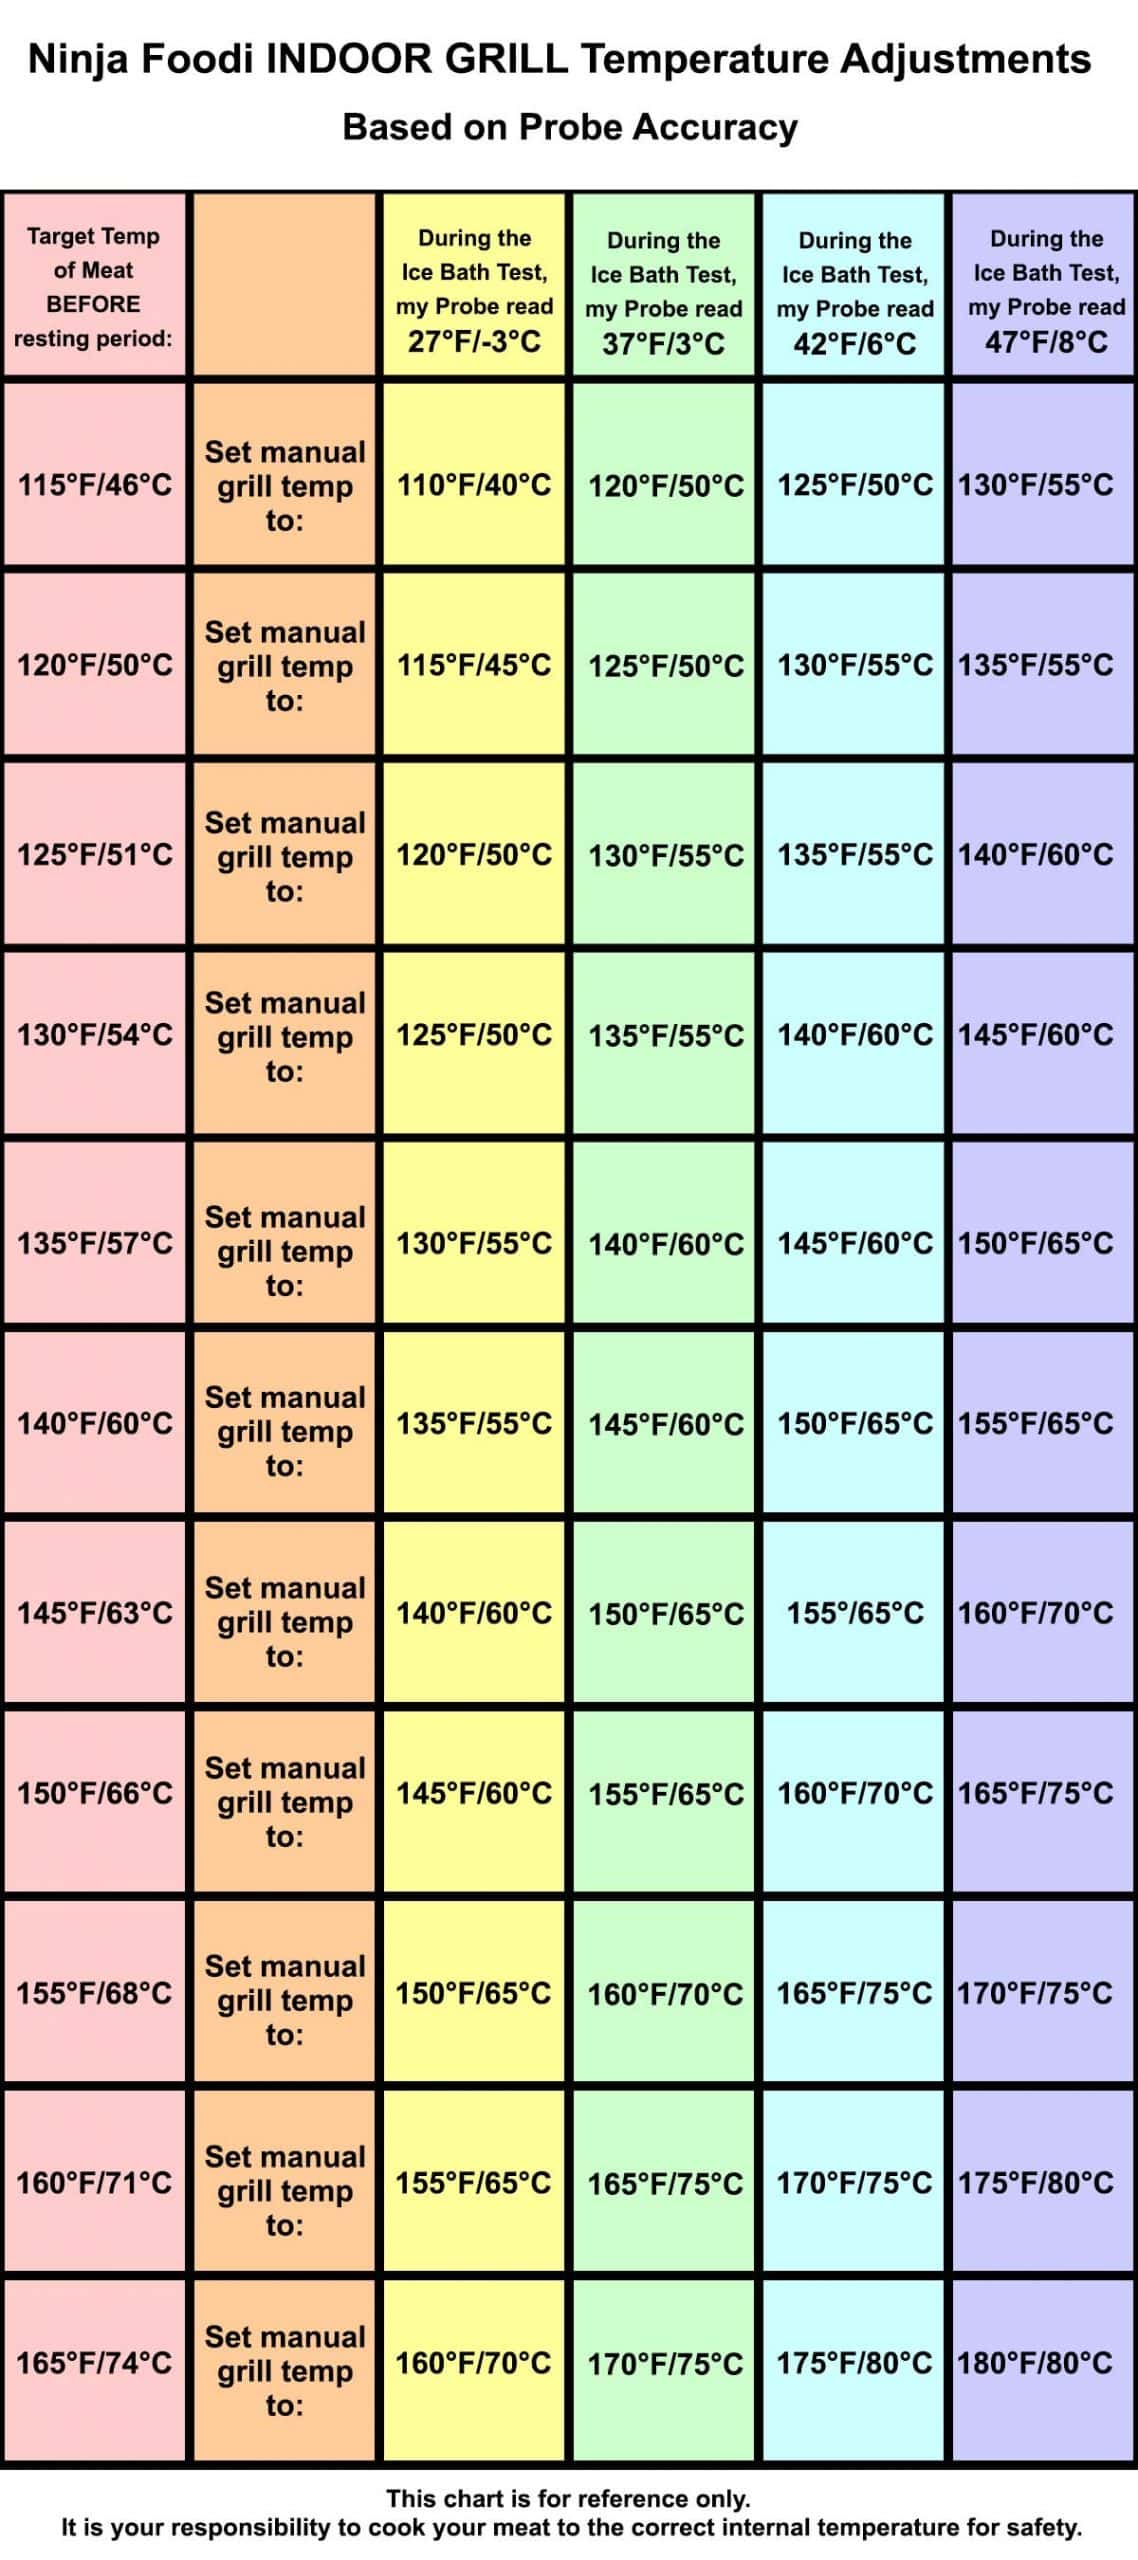
While your integrated probe might be off 4 degrees or 8 degrees, you can only adjust the manual target temperatures in 5 degree increments, so if your reading falls between 3° & 7°, I would only adjust the temperature by 5°. If your reading falls between 8°-12°, I would adjust the temperature by 10°. You can always let the meat sit in the grill while it's off for another minute or two if needed.
If you find that your integrated probe thermometer is off by more than 5°, I recommend using the manual function for target temps instead of the presets that are built in OR you can select a preset that is one step down or up depending on how your probe thermometer did during the ice bath test.
For example: My probe is reading 5 degrees on the high side, so I will want to increase my target temperatures by 5 degrees. If I was cooking a steak and I wanted it medium rare at level 3 (130℉), I would select medium rare level 4 instead. This would increase the target temp of the meat to 135℉ according to the presets.
I hope you found this helpful and if you want some delicious recipes for the Ninja Foodi Indoor Grill, here are a few you might like!

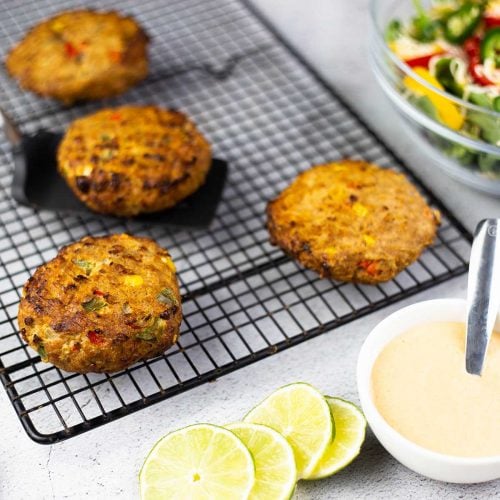
The Ninja Foodi Indoor Grill is a great air fryer and I've found that these recipes work perfectly in the Grill without any changes to temperature or cook time.
About the Recipe Author, Louise Long
Louise is a full-time recipe creator and food blogger @ The Salted Pepper. She has over 30 years of experience with cooking and recipe development. She owned a restaurant for several years and was a full-time RN until retiring to blog full-time.

She published her first cookbook in the Fall of 2018 and is very interested in writing several more.
Louise is also the creator of an online Ninja Foodi Pressure Cooking Course with over 100 instructional step-by-step videos. People absolutely rave about the course and all the value they have received from it.
Louise has several very active Facebook groups that help people with the basics of cooking and learning more about the appliances they love.
Ninja Foodi Pressure Cooker & Air Crisper 101
Ninja Woodfire Outdoor Grill & Smoker
Louise is also a YouTube creator and you can find most of her recipes in video format on The Salted Pepper YouTube channel.
She is very responsive to messages and eager to help in any way she can. Get more Information about Louise & contact information
I WOULD LOVE TO SEE WHAT YOU ARE COOKING UP IN YOUR KITCHEN! TAG ME @THESALTEDPEPPER ON YOUR FAVORITE SOCIAL MEDIA PLATFORM WHEN YOU MAKE A DISH!
BE SURE TO FOLLOW THE SALTED PEPPER RIGHT HERE ⇓⇓⇓⇓⇓
Leave a Reply