

- Ninja Foodi Pressure Cooker with TenderCrisp (or any electric pressure cooker)
Chicken Riggies is a simple yet flavorful pasta dish that can be made in one pot! You can use a large skillet, but I prefer to use my pressure cooker to speed things up even more.
This recipe takes less than 30 minutes to cook, and the prep is easy too!

Would you like to save this recipe?
Originating in Utica, New York, this pasta dish combines perfectly cooked rigatoni pasta and chicken in a creamy tomato sauce with a touch of spice from hot cherry peppers.
The beauty of making it yourself is you control the level of spiciness, or you can omit the hot peppers and still have a delicious pasta dish
It's a one-pot meal that the whole family will love!
Stovetop directions are also included just in case you don't have a pressure cooker.
Ingredients & Substitutions
Pasta
Rigatoni Pasta is where Chicken Riggies gets its name, so that is the type of pasta I use in this recipe. However, you can use penne and not have to change anything in the recipe.
You can use any kind of pasta you like and the flavors will still be delicious, but make sure to adjust pressure cooking time based on the pasta shape.
Sauce
The sauce in Chicken Riggies is similar to a vodka sauce or a parma rosa sauce combining a tomato sauce with heavy cream that turns the sauce a pinkish color. If you have never had it before, you are in for a real treat!
I did test the recipe using fire roasted tomatoes, but found that crushed tomatoes were better for both flavor and texture. You can certainly use a homemade tomato puree in place of the crushed tomatoes; just remember, if it is seasoned, you will want to cut back on the seasonings in the recipe. If you want chunks of tomatoes, you can certainly add fresh diced tomatoes and I would add those when you add the chopped bell peppers. If you want to add canned diced tomatoes, drain the juice and pour them on top of the crushed tomatoes before pressure cooking.
You can use white wine or sherry in the sauce, but I prefer sherry. The flavor was more balanced using sherry and you don't have to get fancy here. Pick up some cooking sherry! It works great. If you want to use regular sherry from the liquor store, make sure to get a dry sherry.
Parmesan is the cheese that completes the sauce, it helps to thicken it and, of course, gives the dish great flavor.
You can also use pecorino romano. I tried the recipe using both and prefer parmesan in this dish. You can use a combination of the two if you prefer.
Some people add cream cheese, but I did not find it necessary. If you want to use cream cheese, add about 4 ounces after pressure cooking.
Hot Cherry Peppers
Traditionally, this dish is made with hot cherry peppers to add a spiciness that cuts through the richness of the sauce perfectly. However, hot cherry peppers may be a little hard to find in grocery stores where you live. They were for me! I did eventually find them sliced in a jar and that worked perfectly.

Sweet cherry peppers are easier to find, so you can use those and add red pepper flakes to achieve the level of spice you want. Alternatively, you can omit the cherry peppers and just use red pepper flakes.
If you don't want any spiciness in your Chicken Riggies, omit the spicy peppers and don't use any red pepper flakes.
You can control the spice level by adding in more or less of the hot peppers and/or red pepper flakes. I found that using two hot cherry peppers was a good balance. This is about 2 Tablespoons of sliced cherry peppers in a jar.
Chicken
I tested the recipe with chicken breasts and thighs and preferred the chicken breast, but either can be used without any changes to the recipe. I recommend boneless skinless chicken thighs or breasts for this recipe.
You can also omit the chicken for a vegetarian pasta dish.
Shrimp can also be substituted for the chicken, but since it cooks so fast, I would add it after pressure cooking when you add the bell peppers and remaining onions.
How to Make Chicken Riggies in your Pressure Cooker
I used the Ninja Foodi Pressure Cooker & Air Crisper 6.5 qt two-lid model for this recipe, but any electric pressure cooker will work just fine as long as it is 6 quarts or larger.
There is plenty of liquid in the recipe, so you do not need to adjust the liquid amounts when using a larger pressure cooker.
Prep for Recipe
The prep for Chicken Riggies is pretty easy and should only take about 10 minutes.
- Cut the chicken breasts into 2" chunks
- Dice the onions and peppers. Remove half of the onions (about ½ cup) to use and set the remaining onions and peppers to the side for later.
- Mince the garlic. You want about 1 Tablespoon
- Measure out the pasta (8 ounces of weight which is about 2½ cups by volume), sherry or wine, and chicken broth or stock. You can use any thin liquid you like, you will need a total of 2½ cups.
Sauté & Deglaze
Turn the Ninja Foodi or Pressure Cooker on high sear/sauté and let the inner pot heat for 2-3 minutes. Add the oil and let that heat for 1-2 minutes.
Add the chicken chunks, onions, and salt and pepper. Stir and sauté for 3-5 minutes. The chicken does not have to be cooked all the way.

Add the hot cherry peppers and butter.

Once the butter starts to melt, add the garlic, stir, and sauté for 1 minute.

Pressure Cook
Before pressure cooking, you want to deglaze the pot with sherry, white wine, or chicken broth. This will loosen anything stuck on the bottom of the pot that could trigger the water or burn notice.
Take your scraper and go along the bottom of the pot and then add the rigatoni pasta to the pot.

Add the seasoning blend and the chicken broth.
Stir and gently press the pasta down into the liquid as much as possible. The pasta may not be 100% covered by the broth, but that is fine.
Top with the crushed tomatoes and DO NOT STIR. This is extremely important. If you stir the thicker crushed tomatoes into the thinner liquid you may get the water or burn notice and your pasta may not cook correctly.

Put the lid on the pressure cooker and make sure the valve is sealed for pressure cooking. Set the pressure to high and the time for 2 minutes. Press start.
It will take anywhere from 6-9 minutes for the pot to come to pressure. Then it will pressure cook for 2 minutes.
When the time is up, move the valve to the vent position and allow the steam to release. This is called an immediate release of pressure.
Once all the steam is released, the pin in the back (if your model has one) will drop and you can open the lid.
Quick Tip
It is expected to have a lot of liquid leftover and the pasta will look undercooked!
Don't worry when you see a lot of liquid, this is normal and it will get absorbed for an end dish that is thick and creamy.
That is why the time is set to 2 minutes which is a little less time than the pasta needs to cook. The pasta should be cooked just under al dente. We finish cooking the pasta in the next step.

Final Touches
Add the diced green bell pepper and red pepper to the pot and stir. Turn the Ninja Foodi or pressure cooker on high sear/sauté and bring the pot to a simmer.
Reduce the heat to medium and allow the vegetables to simmer for 2-3 minutes or until they are the texture you like.

Add the cream and the grated cheese. Stir to combine and turn the Ninja Foodi or pressure cooker off.
Close the crisping lid or put the pressure lid back on and let the chicken riggies sit in the pot for 5-10 minutes. This will allow the sauce to thicken.

Serve & Garnish
When the chicken riggies has thickened, dish into bowls and garnish with fresh basil and extra cheese if desired.
Enjoy!

Stove Top One Pot Chicken Riggies
Making Chicken Riggies in a large skillet or Dutch oven on the stove is a little more hands-on, but it's easy and doesn't take that much longer.
The prep is the same, but you will want to have an extra cup of chicken broth on standby in case you need to add more. There is more evaporation when cooking stovetop, so you may find the noodles need a little more broth to cook evenly.
Heat a large skillet or dutch oven on medium-high heat for a few minutes. Add the oil, chicken pieces, and onions. Sauté for about 2-3 minutes. Add the butter and garlic and sauté 1 minute.
Add the sherry and scrape the bottom of the pan to loosen any brown bits from sautéing the chicken.
Put the noodles and 2 cups of chicken broth into the pan or pot. Bring it to a boil and then reduce to a simmer and cover with a lid.
Cook the pasta for about 8 minutes or until it is slightly undercooked. Add more chicken broth, if needed. The pasta should be simmering in liquid for most of the cook time.
You should have about ½-1 cup of liquid when the pasta is done cooking. Add the crushed tomatoes and the rest of the vegetables and simmer for a few minutes. Add the cream and cheese and stir. Let simmer on low heat until the dish has thickened.
Serve & Enjoy!
Storage & Reheating Instructions
How to Store Leftover Chicken Riggies
Refrigeration
Store any leftovers in an airtight container in the refrigerator for up to 5 days. The fresher the ingredients (especially the chicken), the longer the leftovers will last.
Freezer
Before freezing it is very important that the pasta and sauce are cold, so I recommend refrigerating the leftovers overnight before freezing them.
If the food is warm when packaged for freezing, steam can be produced inside the container or freezer bag, resulting in ice crystals forming.
Quick Tip
When freezing leftover Chicken Riggies, use a vacuum-sealed bag to make reheating with sous vide easy!
Air is another issue when freezing food, so make sure you choose a container that is the proper size for the amount of leftovers. You don't want a 3-cup container for 1 cup of leftover chicken riggies or there will be too much air trapped in the container which can lead to decreased quality of the meat.
My preferred method for freezing is using a vacuum sealer which eliminates this issue.
Vacuum sealing also makes reheating super easy; you can sous vide right from frozen!
How to Reheat Chicken Riggies
Steam
One of my favorite ways to reheat pasta dishes is using steam. I use my Ninja Foodi and place 2 cups of water in the inner pot and the leftover chicken riggies in a covered container that sits on a rack inside the Foodi pot.
Select the steam function (valve vented) and steam for 5-20 minutes (timing depends on amount of leftovers and if they are frozen or not). This works for frozen and thawed pasta dishes.
Once the pasta is heated through, you can add a little cream if it is not as saucy as you like.
Sous Vide
If you have the ability to sous vide it is a great way to reheat from frozen or thawed without overcooking the pasta.
Place the chicken riggies into a ziplock bag or vacuum sealed bag. Heat the water using your appliance that has a sous vide function (or a large container of water if using an immersion sous vide circulator) to 145℉/63℃ and add the bag of chicken riggies.
The time will depend on whether the pasta is cold or frozen. Check on it in 30 minutes for thawed pasta and 45 minutes for frozen pasta.
Frequently Asked Questions
They are about the same spice level as a jalapeño pepper, but with a bit of sweetness to them.
I only recommend using 1-2 hot cherry peppers in Chicken Riggies if you like a mild spice. Add more for a spicier dish.
You can increase or decrease the ingredients to make a double batch or half a batch. The pressure cook time stays the same, but the liquid amount will change.
For half a batch, I would use a total of 1¼ cups of thin liquid and for a double batch, I would use 3½ cups of thin liquid.
More One Pot Pressure Cooker Recipes
One-pot recipes in the pressure cooker are perfect for quick weeknight meals.
Here are some easy ones!
- Shrimp Rasta Pasta (Stovetop or Pressure Cooker)
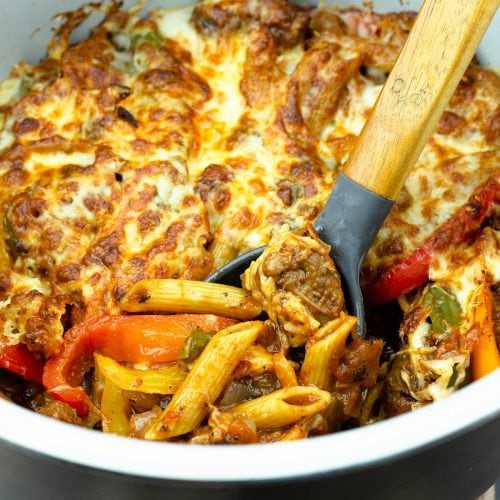
- One-Pot Sausage Peppers & Pasta ~ Pressure Cooker Recipe
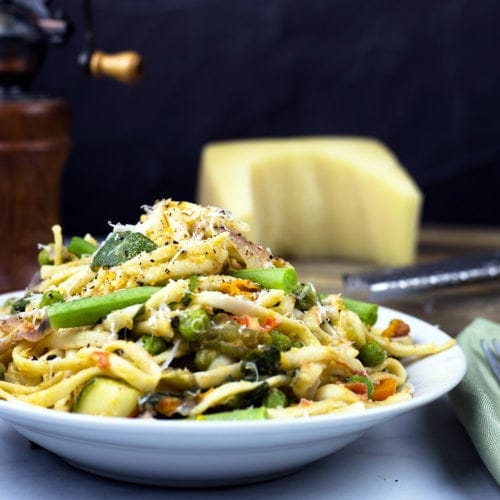
- One-Pot Pasta Primavera ~ Ninja Foodi Recipe
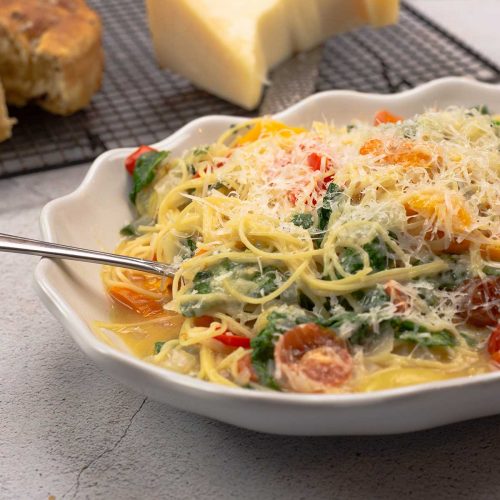
- Lemon Garlic Pasta with Vegetables ~ Ninja Foodi or Pressure Cooker Recipe
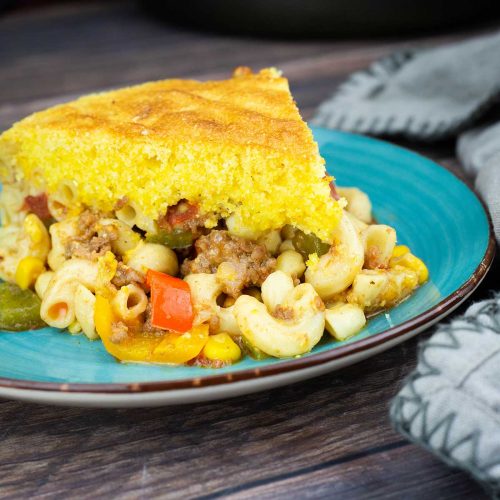
- Southwestern Goulash with a Cornbread Topping
- Walking Taco Casserole
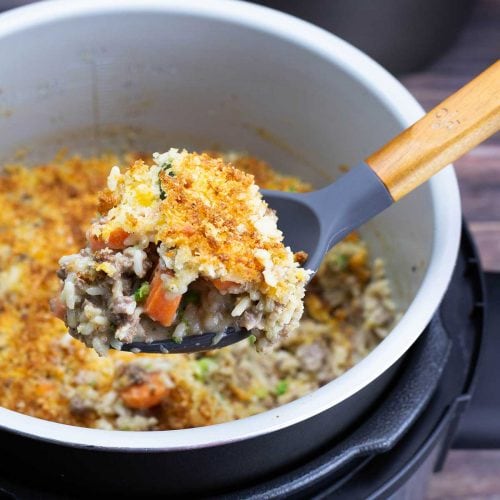
- Cheesy Ground Beef & Rice Casserole ~ Pressure Cooker Recipe
- Ninja Foodi Chicken & Wild Rice with Carrots


Chicken Riggies Recipe
Equipment
- Ninja Foodi Pressure Cooker with TenderCrisp or any electric pressure cooker
Ingredients
- 1 Tablespoon olive oil
- 1½ pounds boneless skinless chicken breasts cut into 2" pieces
- ½ teaspoon kosher or fine grind sea salt
- ¼ teaspoon black pepper
- 1 large sweet or yellow onion ½" dice (about 1 cup total) divided in recipe
- 1-2 hot cherry peppers about 3-6 slices if they come sliced
- 4 Tablespoons butter salted or unsalted
- 1 Tablespoon minced garlic
- ½ cup cooking sherry or dry white wine
- 8 ounces rigatoni pasta 2½ cups by volume
- 2 cups chicken broth
- 15 ounces crushed tomatoes
- 1 green bell pepper ½" dice
- 1 red bell pepper ½" dice
- ½ cup heavy cream
- 3-4 ounces shredded parmesan
Seasoning Blend for Chicken Riggies
- 1 Tablespoon Italian Seasoning
- 1 teaspoon kosher or fine grind sea salt
- ½ teaspoon black pepper
Would you like to save this recipe?
Instructions
Prep for recipe
- Cut the chicken into 2" pieces. Dice the onion into ½" dice and separate out ½ of it (about ½ cup).Dice the green pepper and red pepper into ½" dice.Mince 1 bulb of garlic or about 1 Tablespoon total of minced garlic.Measure out the liquid ingredients and the pasta.1 large sweet or yellow onion, 1 green bell pepper, 1 red bell pepper
Sauté
- Heat the inner pot of the NInja Foodi or Instant Pot on high sear/sauté. Add 1 Tablespoon of oil and let that heat up for 1-2 minutes. Add the chicken, ½ cup of diced onion ½ teaspoon kosher or sea salt, and ¼ teaspoon black pepper. Stir and Sauté for 2-3 minutes.1 Tablespoon olive oil, 1½ pounds boneless skinless chicken breasts, ½ teaspoon kosher or fine grind sea salt, ¼ teaspoon black pepper
- Add the hot cherry peppers and the butter. Once the butter has started to melt, add the minced garlic and stir. Sauté for 1 minute.1-2 hot cherry peppers, 4 Tablespoons butter, 1 Tablespoon minced garlic
- Deglaze the pot with sherry (or chicken broth) and scrape along the bottom of the pot to loosen any brown bits stuck on the bottom. Add the rigatoni pasta, seasoning blend, and chicken broth. Stir and press the pasta down as much as possible. All of it will not be under the broth and that is fine.½ cup cooking sherry or dry white wine, 8 ounces rigatoni pasta, 1 Tablespoon Italian Seasoning, 1 teaspoon kosher or fine grind sea salt, ½ teaspoon black pepper, 2 cups chicken broth
Pressure Cook
- Pour the crushed tomatoes on top, and DO NOT STIR. Place the lid on the pressure cooker. Turn the valve to seal. Set the pressure cooker to high for 2 minutes. When the time is up, move the valve to vent and immediately release the pressure. When all the steam has been released, open the lid. Don't worry that the pasta looks undercooked and liquidy. That all gets taken care of in the final step of the recipe.15 ounces crushed tomatoes
Finishing Touches
- Turn the pressure cooker back on sear/sauté on medium-high and add the diced red peppers, green peppers, and the remaining ½ cup of diced onions. Stir and simmer for about 3 minutes or until the vegetables are the texture you like.
- Add the cream and shredded cheese. Stir and close the lid. Turn the Foodi off. Let it sit for 5-10 minutes to thicken up. Serve and garnish with fresh basil and shredded parmesan cheese if desired.½ cup heavy cream, 3-4 ounces shredded parmesan
Notes
- Heat a large skillet or dutch oven on medium-high heat for a few minutes. Add the oil, chicken pieces, and onions. Sauté for about 2-3 minutes. Add the butter and garlic and sauté 1 minute.
- Add the sherry and scrape the bottom of the pan to loosen any brown bits from sautéing the chicken.
- Put the noodles and 2 cups of chicken broth into the pan or pot. Bring it to a boil and then reduce to a simmer and cover with a lid.
- Cook the pasta for about 8 minutes or until it is slightly undercooked. Add more chicken broth if needed, the pasta should be simmering in liquid for most of the cook time.
- You should have about ½-1 cup of liquid when the pasta is done cooking. Add the crushed tomatoes and rest of the vegetables and simmer for a few minutes. Add the cream and cheese and stir. Let simmer on low heat until the dish has thickened.
Nutrition
About the Recipe Author, Louise Long
Louise is a full-time recipe creator and food blogger @ The Salted Pepper. She has over 30 years of experience with cooking and recipe development. She owned a restaurant for several years and was a full-time RN until retiring to blog full-time.

She published her first cookbook in the Fall of 2018 and is very interested in writing several more.
Louise is also the creator of an online Ninja Foodi Pressure Cooking Course with over 100 instructional step-by-step videos. People absolutely rave about the course and all the value they have received from it.
Louise has several very active Facebook groups that help people with the basics of cooking and learning more about the appliances they love.
Ninja Foodi Pressure Cooker & Air Crisper 101
Ninja Woodfire Outdoor Grill & Smoker
Louise is also a YouTube creator and you can find most of her recipes in video format on The Salted Pepper YouTube channel.
She is very responsive to messages and eager to help in any way she can. Get more Information about Louise & contact information
I WOULD LOVE TO SEE WHAT YOU ARE COOKING UP IN YOUR KITCHEN! TAG ME @THESALTEDPEPPER ON YOUR FAVORITE SOCIAL MEDIA PLATFORM WHEN YOU MAKE A DISH!
BE SURE TO FOLLOW THE SALTED PEPPER RIGHT HERE ⇓⇓⇓⇓⇓
Elizabeth Anne Schiller says
Omg! This is delicious! I've made it once with chicken and twice with sausage. Both are awesome! Thanks for the recipe!
Louise says
I'm so glad you enjoyed it!
Devona says
This dish is one of our favorites Louise you are awesome thanks so much for all of your recipes
Louise says
Thank you so much!
Sheri Plant says
This was so GOOD!!!
Thanks Louise ❤️
Louise says
I'm so glad you enjoyed it!