

Walking Taco Casserole takes the concept of walking tacos and transforms it into a quick and easy meal for the entire family.
Would you like to save this recipe?
While there are tons of different versions of walking tacos or walking taco casserole, I decided to modify a dip recipe that my mom used to make and turn into a casserole.
You might look at this recipe and say, hey, that's Frito Pie. Yep! Pretty much the same thing that goes by different names depending on where you live.
If you have the Ninja Foodi, Instant Pot Duo Crisp, or an electric pressure cooker with a crisping lid, you can make this all in one pot and make it even easier!
I will outline those instructions in the article.
You can also turn this recipe in the more traditional walking tacos which are great if you are having a party! All of the ingredients are the same, just a slightly different process.
What are Walking Tacos?
Walking tacos are typically a fair food, common in the midwest USA, that make it super easy to simply walk around with your taco in a bag of corn chips or Doritos/tortilla chips.
It's all the fixings of a taco put right into the single serving bag of chips and eaten directly from the bag with a fork.
These are definitely NOT authentic Mexican tacos, but more of an Americanized version of what we call tacos.
The base of a walking taco is made from ground beef, seasonings and can include other things such as beans, and I like to add some cream cheese in mine.
You sauté everything up and get the mixture hot, spoon some in a bag and top with your favorite taco toppings, grab a fork and dig in.
It's a great party food because you can prep everything ahead of time and keep the meat mixture in a slow cooker, set out the bag of chips, plastic forks, and the toppings you want and let your guests assemble their own walking taco the way they like.
Then, simply throw the bag and fork away. It doesn't get much easier than that!
Frequently Asked Questions
Yes, you can double, triple, or even quadruple the recipe. You can make as much of the walking taco casserole or the meat mixture as you like. When making a very large batch, I would make up the meat/bean mixture and then put it into individual casserole dishes that are no more than 4" deep. Then spread on the the cheese and extra chips on top. This way, everyone gets a good portion of both the topping and the meat mixture.
You can certainly make as much of the meat/bean mixture as you want and freeze it, but I would warm it up and add fresh cheese, then crisp up the topping in the oven or in the Ninja Foodi. The fresh toppings (lettuce, tomato, etc.) will not freeze well.
Of course, you can use whatever type of meat you like. I suggest checking for seasonings and adjust as needed, especially if using ground turkey or chicken.
Yep! You would want to skip the beans, double the meat and seasonings. Also check for seasonings because the beans I used added a lot of flavor. Instead of the corn chips, use pork rinds to create a crunchy top. If you are really strict, omit the onion!
How to Make Walking Tacos instead of a Walking Taco Casserole
If you are planning a get together and want the individual serving size bags of walking tacos, here are the ingredients and directions.
Ingredients for Walking Tacos
- 1 pound of ground beef
- Spice Blend: 1 teaspoon fine grind sea salt, 1½ teaspoon dark or light chili powder, 1½ teaspoon cumin, 1 teaspoon smoked paprika, and ¼-½ teaspoon ground chipotle powder
- 1 large onion, diced
- 1 cup of your favorite salsa
- 5 ounce can of fire roasted chilis
- 16 ounce can of chili beans (either pinto or kidney)
- 4 ounces cream cheese
- 24 individual bags of Fritos or Doritos or a combination
- Taco toppings of your choice: shredded lettuce, diced tomatoes, diced onions, sliced jalapenos, cheese blend of choice, and cilantro are some of the ones I use.
Directions for Walking Tacos
- Sauté the ground beef, seasonings, onions and salsa until the ground beef is completely cooked.
- Add in the fire roasted chilis, chili beans with liquid and the cream cheese.
- Heat on medium low until the cream cheese is melted and the mixture is warm. You don't want it too hot or you can feel the heat through the bag of chips.
- Prepare all of your toppings and place in serving dishes.
- Set everything out with disposable forks and let everyone make up their individual walking tacos.
Here is a short video on how I assembled the walking tacos, they are so fun to make and eat!
Can I Make Vegetarian Walking Tacos?
Absolutely! Simply omit the ground beef and add in a can or two of black beans, pinto beans, or even refried beans for a creamier texture.
Make sure to drain your extra can of beans so the mixture isn't too soupy.
Saute the onions in a little olive oil to soften them and add in the remaining ingredients and simmer on low, stirring occasionally until it's heated through.
Taste the mixture and adjust your seasonings as needed. You many need a little more seasonings to flavor the extra beans.
Then, follow the oven or Ninja Foodi directions to finish up the casserole or serve with the bags of chips and cold toppings for individual walking tacos.
Turn it into a Walking Taco Dip!
I based this recipe off of a dip my Mom used to make that is absolutely delish and so easy. She would mix her regular chili with cream cheese and serve it with Tostito style chips.
You can do the same thing with this recipe simply by doubling the cream cheese. Instead of 4 ounces, use 8 ounces. Once you combine all the ingredients and let it simmer for 10-15 minutes, you can continue to let it simmer on low to reduce some of the liquid, or put it in a slow cooker on low until you are ready to serve it.
You can also transfer it to a casserole dish and bake it for 10-15 minutes, add some shredded cheese on top and let that melt. Then put out the casserole dish with a spoon and some Tostito chips and let people scoop it out as a dip.
It also makes a great topping for nachos! This recipe is so versatile and freezes beautifully. Simply make up the mixture, let it cool completely and transfer into freezer bags.
When you are ready to serve it, simply thaw and reheat.
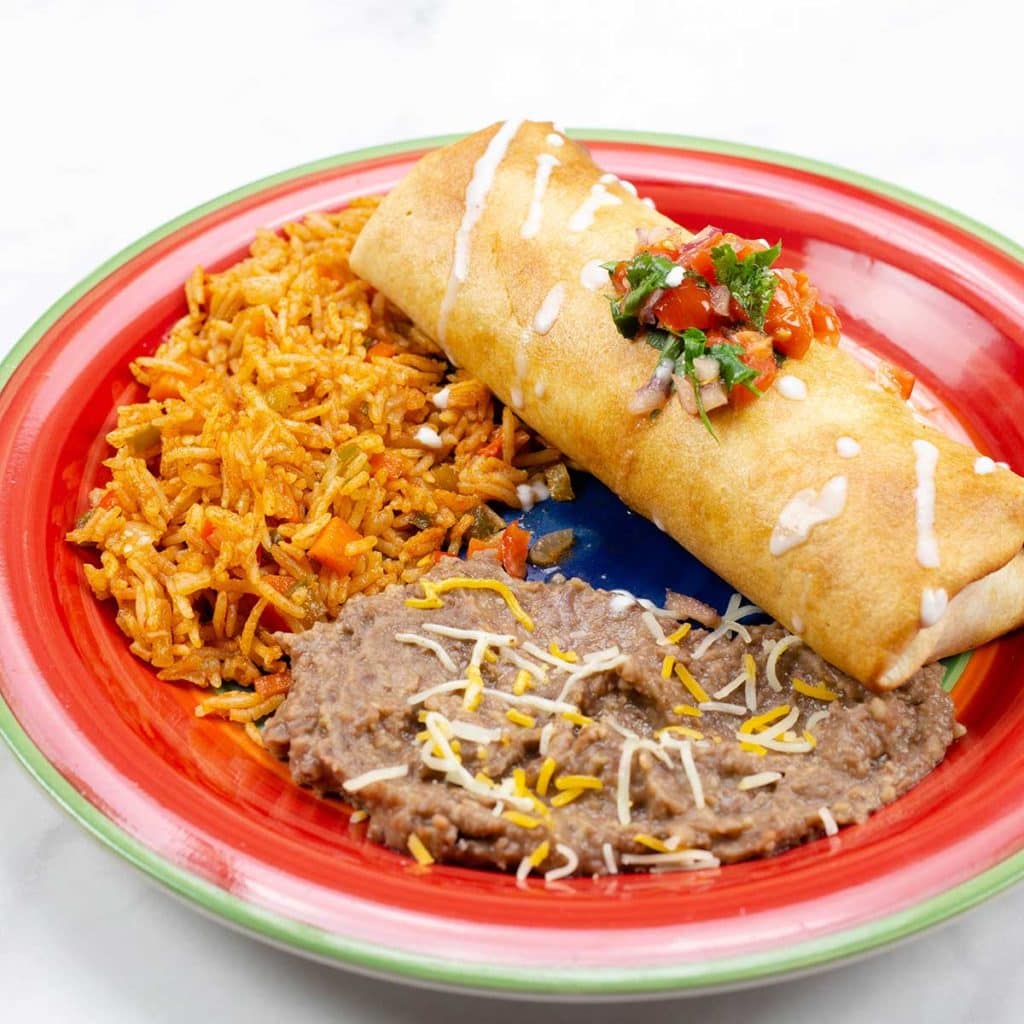
Want to throw a Mexican Fiesta? Check out these other great recipes!
My husband, Jeff, could eat Mexican food every day of the week. He absolutely loves everything from authentic Mexican food (absolutely the best) to the Tex Mex and Americanized versions.
I will never claim to have authentic Mexican recipes on my website because I have not been taught the true ways of making it, but I have managed to put together quite a few dishes that are spectacular in their own right.
Here are a few!

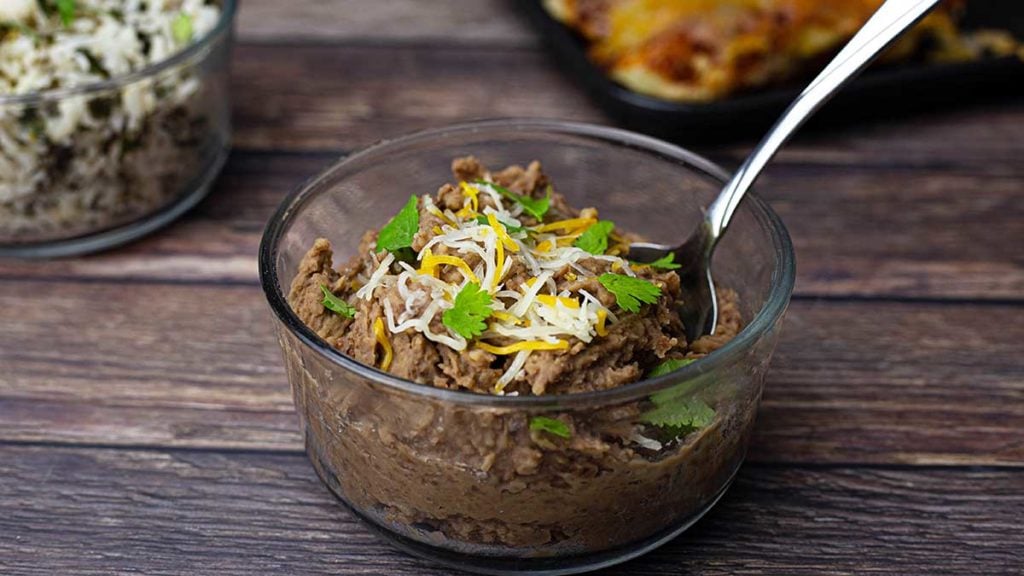
Refried Beans 
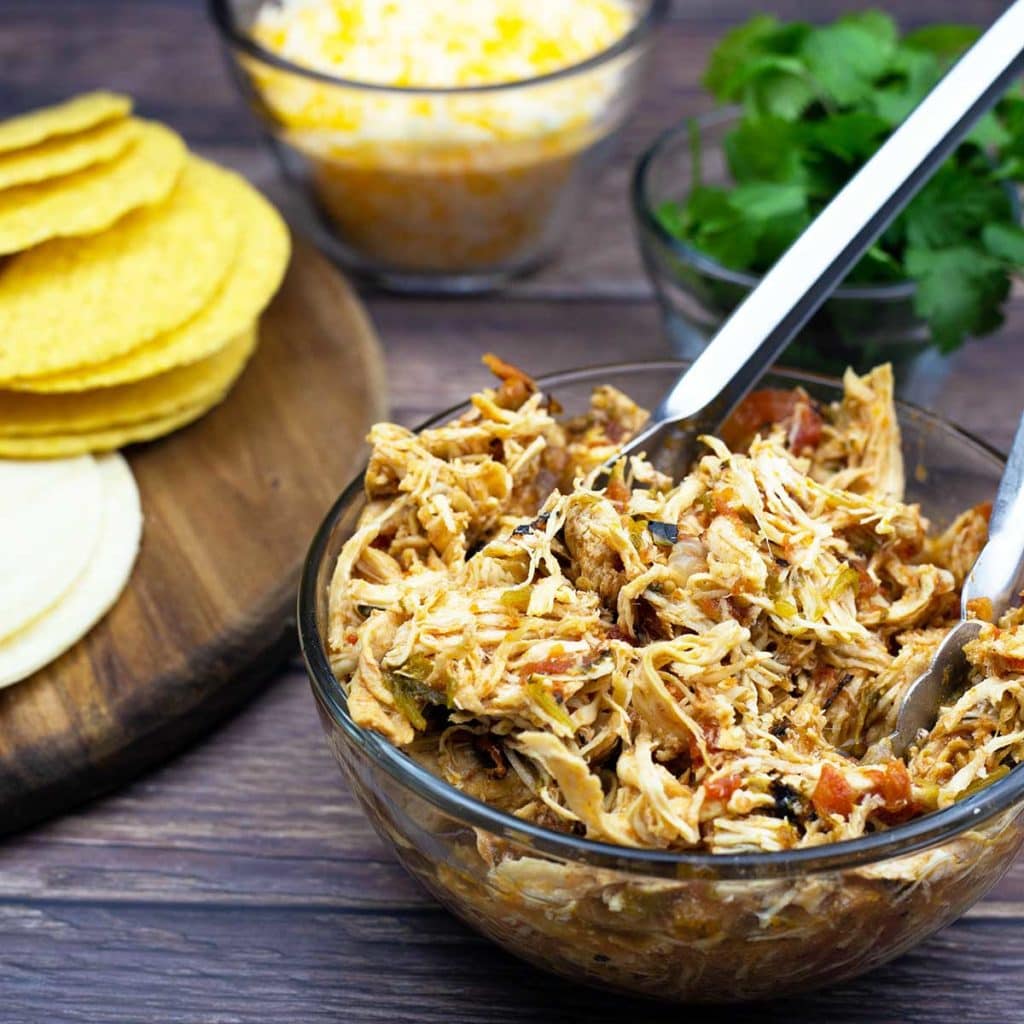
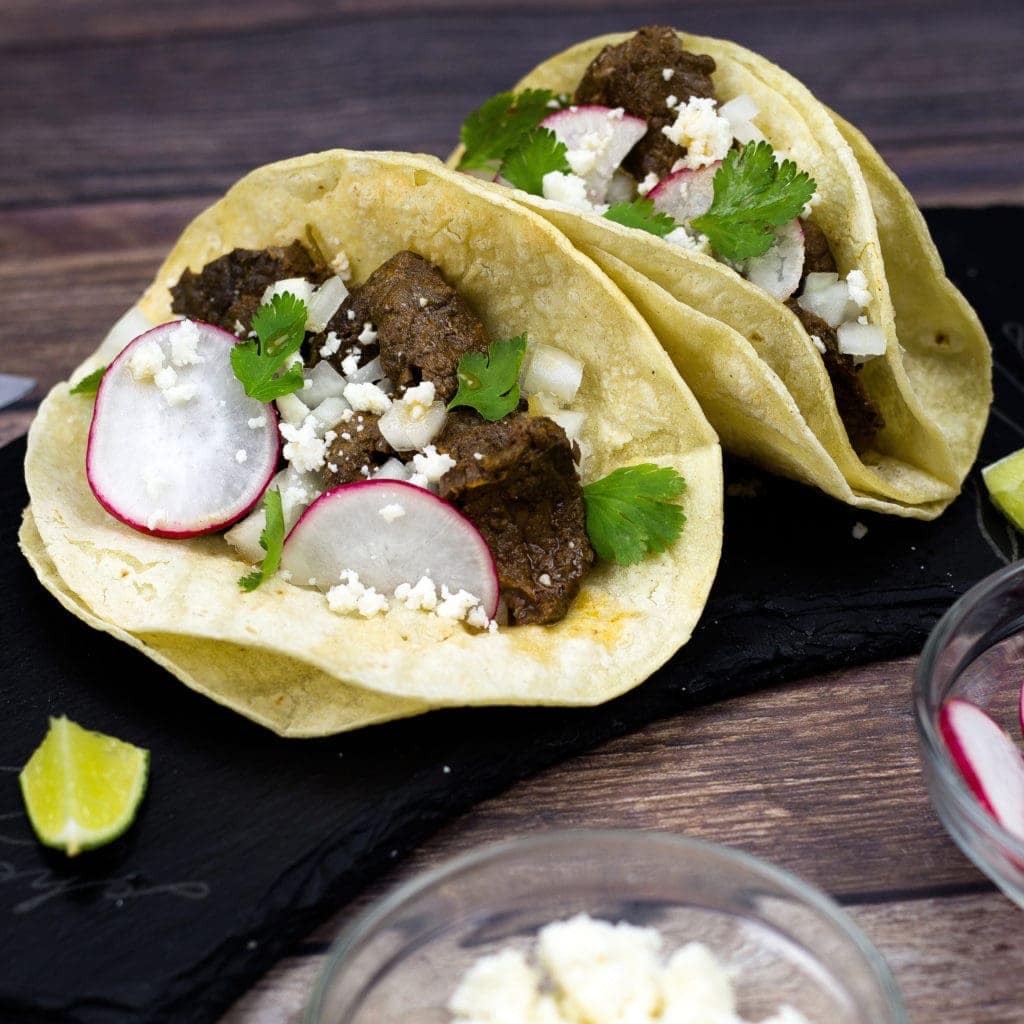
Mexican Rice Mexican Shredded Chicken Carne Asada Street Tacos Enchilada Soup Chicken Enchiladas Air Fried Chimichangas


Do I Need any Special Appliances to Make this Recipe?
Nope! In fact there are tons of different ways you can make it. I chose to make it in the (affiliate link)Ninja Foodi Pressure Cooker & Air Crisper because I love being able to sauté the meat mixture and then crisp the top all in one pot.
The Instant Pot Duo Crisp or an electric pressure cooker with a crisping lid will work just the same.
However, this recipe is easily made using the stove/oven or even in your Crock Pot or slow cooker.
How to Make Walking Taco Casserole with the Stove/Oven Method
Preheat your oven to 400℉/205℃.
In a large pot or large sauté pan, brown the ground beef and diced onions with the seasonings and salsa.
Simmer on medium heat until the ground beef is fully cooked. Add the diced fire roasted chili peppers, chili beans, and cream cheese.
Simmer on low, stirring occasionally until the cream cheese is melted and the mixture is warmed through.
Mix in 1 cup of Fritos or Doritos broken up.
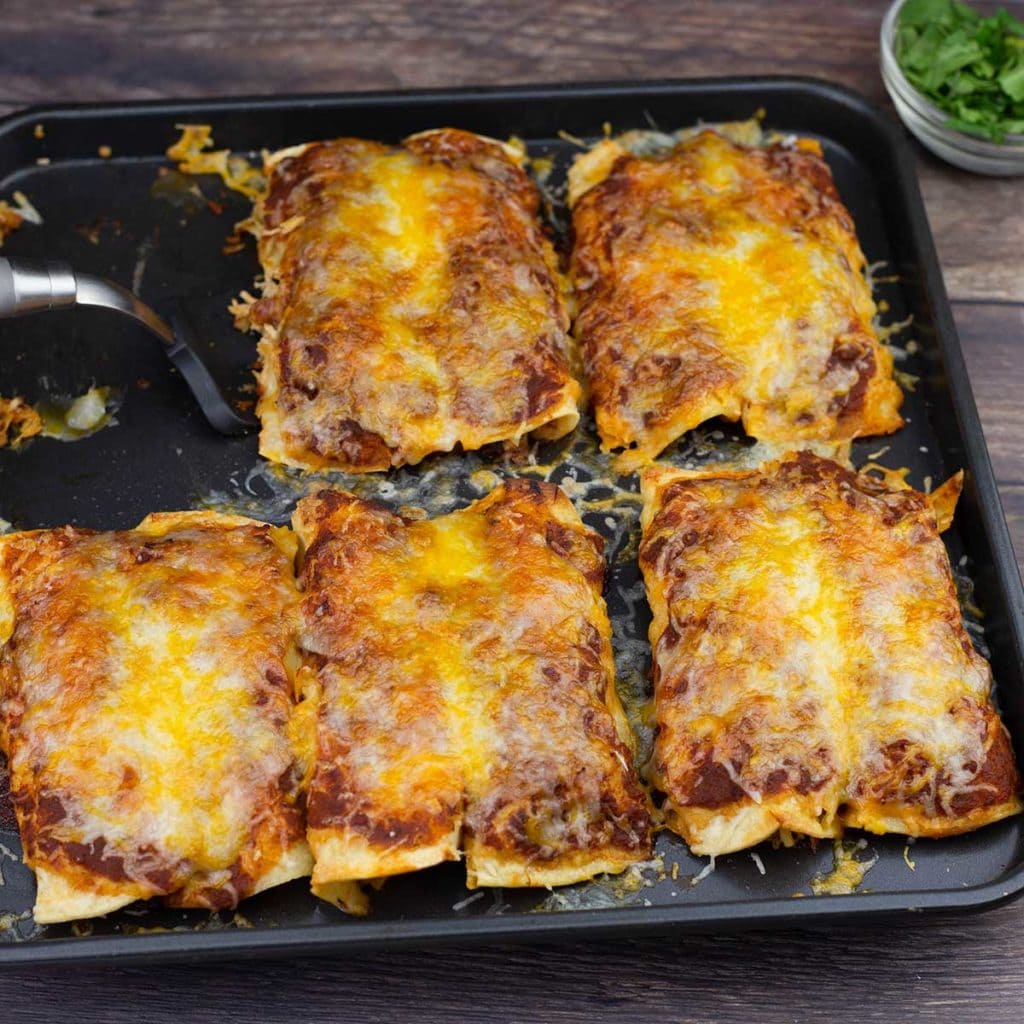
Transfer to a large casserole dish (a 9x13 with 3" sides should be fine) cover the top with Fritos or Doritos and top with shredded Mexican cheese.
Place the casserole dish in the oven and bake for 10-15 minutes or until the cheese has melted and browned to your liking.
Top with the cold toppings of your choice and serve.
How to Make Walking Taco Casserole with a Slow Cooker
First, I want to start off by saying that I have not tested this recipe using a slow cooker or crock pot, but it should be fairly simple to do.
I always prefer browning ground beef before putting it in the slow cooker, so if your slow cooker has the ability to sauté, I would definitely brown the ground beef with the onions and seasonings first.
If not, you can place the raw ground beef in the slow cooker, add the seasoning and break it up really well. Try to get it so it is an even layer on the bottom of the slow cooker.
Next add in the salsa, onions, chili beans, can of diced roasted chilis, and the cream cheese on top, but don't stir.
When cooking raw meat in a slow cooker, you need to make sure the raw meat gets up to a safe temperature within 1-2 hours and if it is mixed in with everything else, that may not happen. Cover the slow cooker with a lid.
Turn the slow cooker on high for 2-3 hours. Check on the ground beef in about an hour and see how it is coming along. If it is cooked all the way, then you can stir everything together and continue to slow cook on high for another 1-2 hours OR turn the slow cooker to low and let it go 2-4 hours.
I do recommend checking on the ground beef mixture every hour or so to make sure there is enough liquid in the slow cooker and the ground beef isn't cooking in clumps.
Once the ground beef mixture is done, stir in about 1 cup of Fritos and cover the top with cheese. Put the lid back on and keep the slow cooker on low until the cheese melts. It shouldn't take long.
Cover the top with Fritos and then add your cold toppings and serve.
How to Make Walking Taco Casserole in the Ninja Foodi Pressure Cooker & Air Crisper
If you have a Ninja Foodi or an electric pressure with a crisping lid like the Instant Pot Duo Crisp, grab it! This recipe is so easy to make right in the inner pot, and then close that crisping lid to finish it up!
Turn the Ninja Foodi or IPDC on high sear/sauté and add your thawed ground beef, seasonings, onions, and salsa. Break up the meat into small pieces with a spatula or what I like to use is this (affiliate link)Mix 'N Chop from Pampered Chef. It makes quick work of breaking up ground beef and other ground meats.
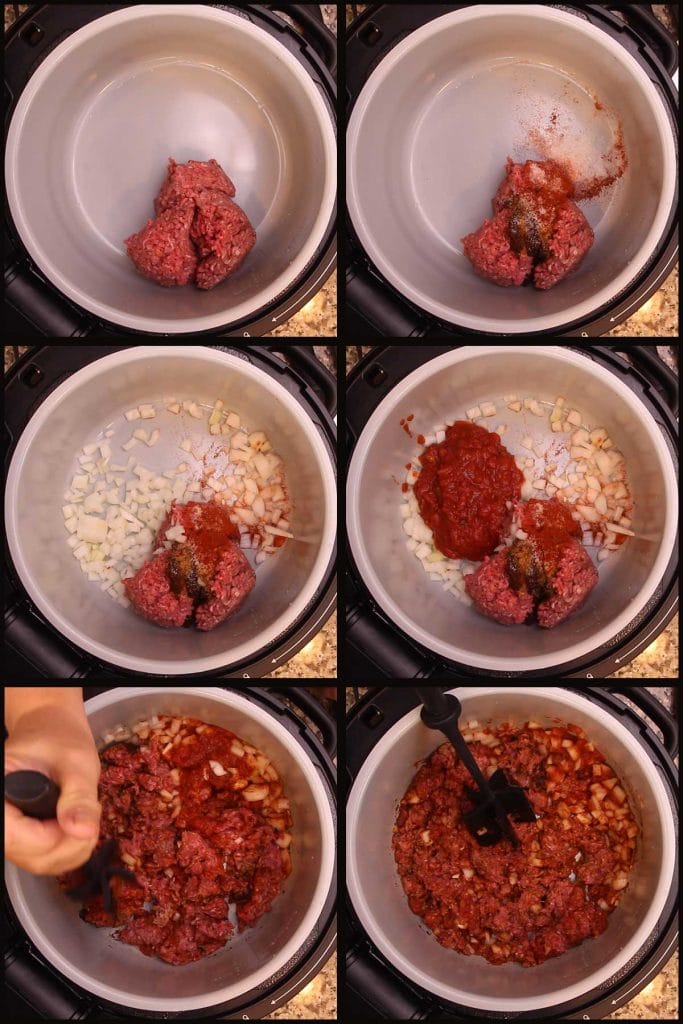
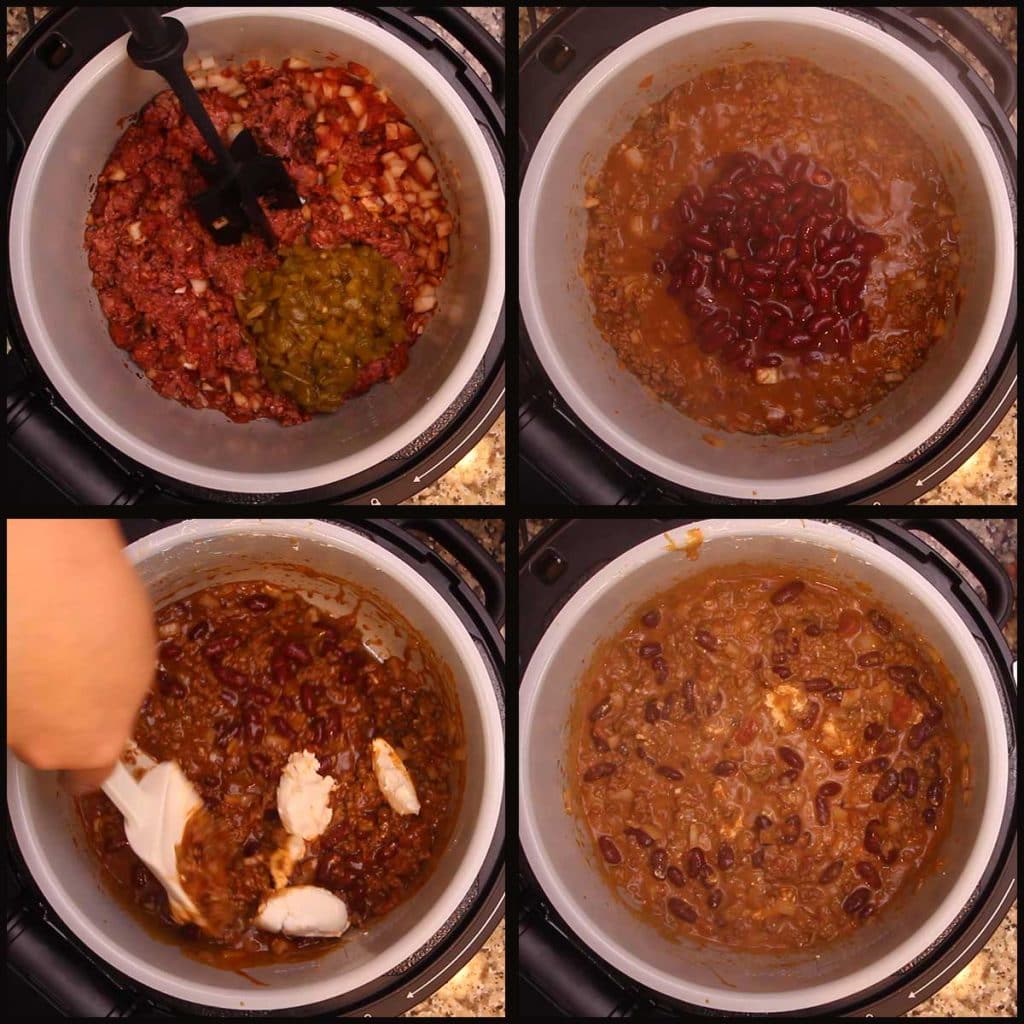
Continue to cook on high sear/sauté until the meat mixture is at least 75% cooked. Then add the fire roasted green chiles.
These are easily found in most grocery stores, the brand I used is Ortega and here is a link to it on Amazon so you can see what the can looks like in case you are not familiar with the product. Some of the prices on Amazon are way too expensive, so please don't get it there. If you can't find it in your local grocery stores, then simply omit it.
(affiliate link)Fire Roasted Green Chiles 5oz can
Next, add in the beans in chili sauce. I used a can of kidney beans in chili sauce, but they also have pinto beans in chili sauce. Either will work fine and can be found in the canned bean aisle of most grocery stores. Here is the link to it on Amazon so you can see what the can looks like.
(affiliate link)Kidney Beans in Chili Sauce
You can use a regular can of beans instead of the chili beans, but the sauce in the chili beans does bring flavor to this dish, so you might need to adjust your seasonings if using a plain can of beans.
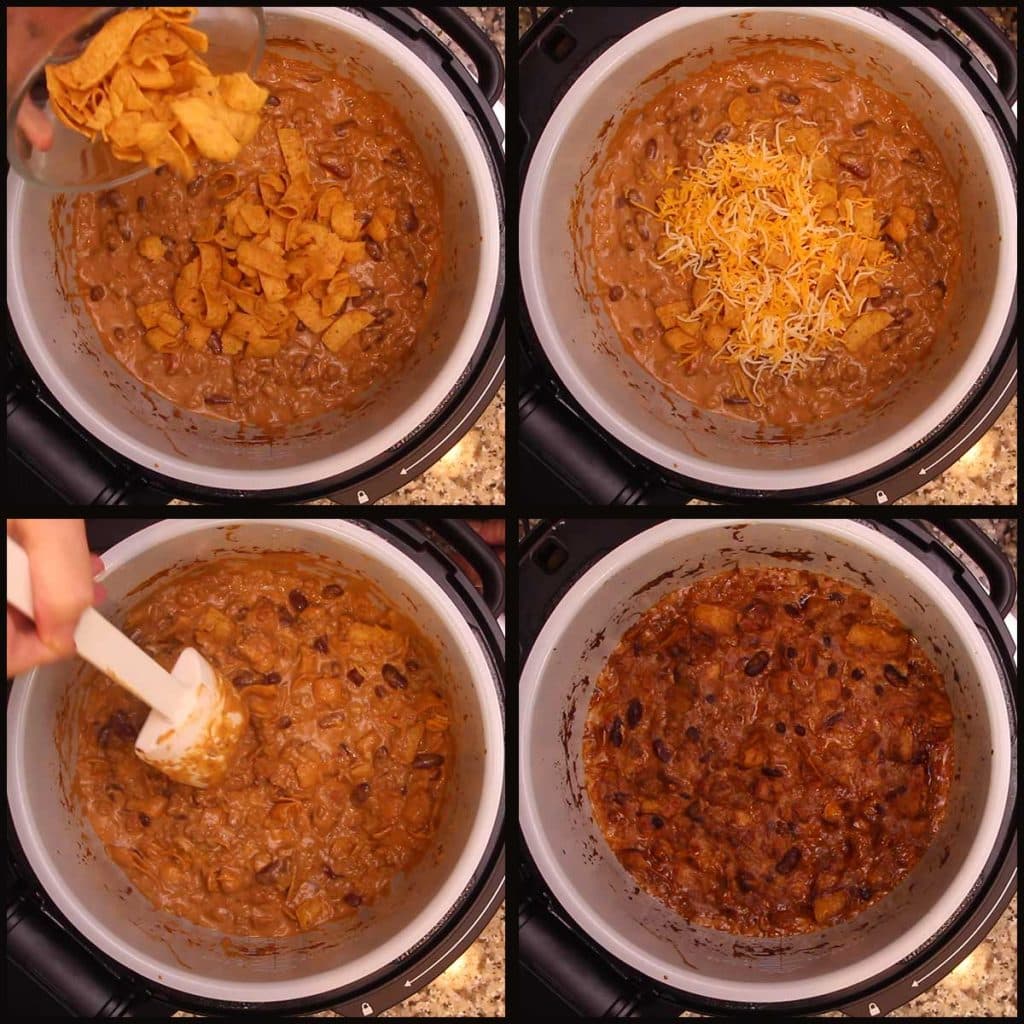
Finally, add in the cream cheese. Having it at room temperature will help it incorporate to the beef mixture better. I also break it up into chunks. Stir to combine all the ingredients and reduce the heat to lo-med. Simmer for 10-15 minutes. While it's simmering, prep the cold toppings you want to use.
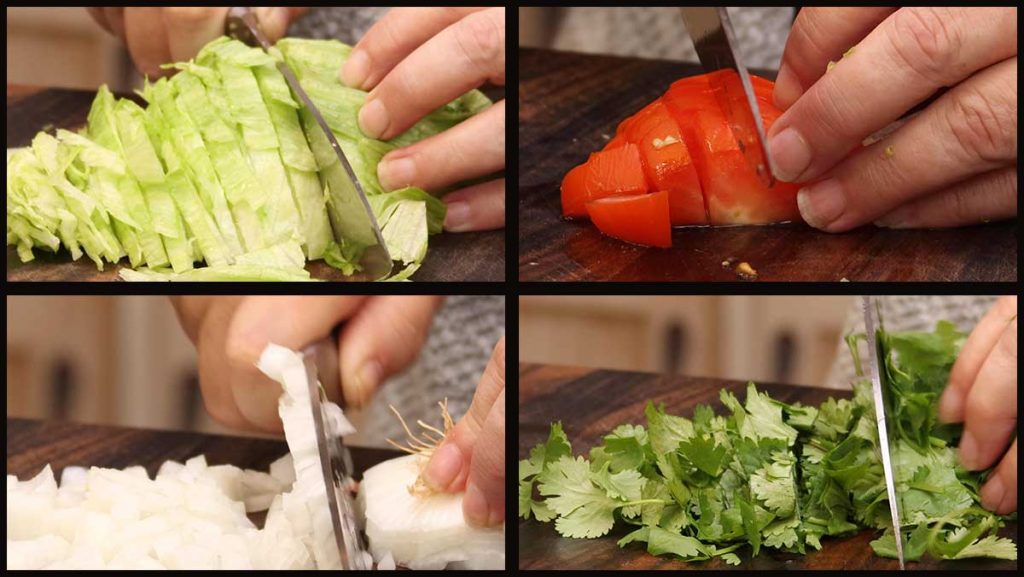
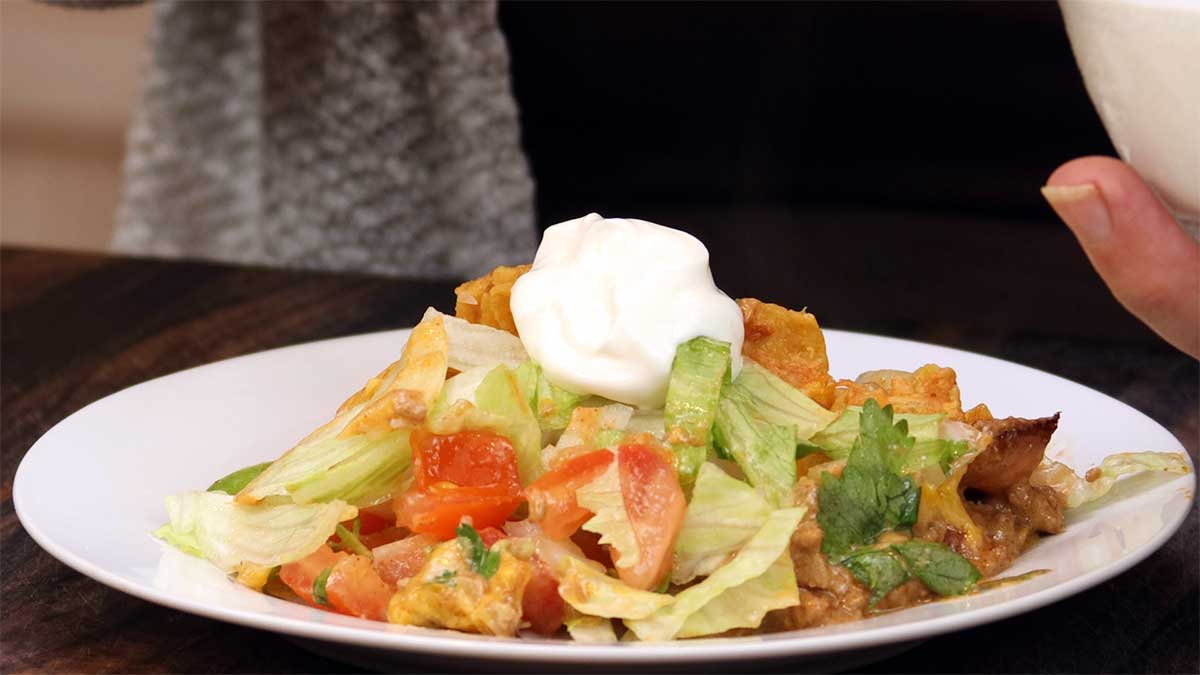
You can use any kind of toppings you want or skip them! I like to use shredded lettuce, diced tomato, diced onions, sliced jalapeños, chopped cilantro and sour cream.
Slices of avocado, more salsa, and sliced black olives are some other toppings that would be great. You can even turn it into a 7-layer bean dip instead of a casserole! I just love recipes like this that can be used for so many different things.
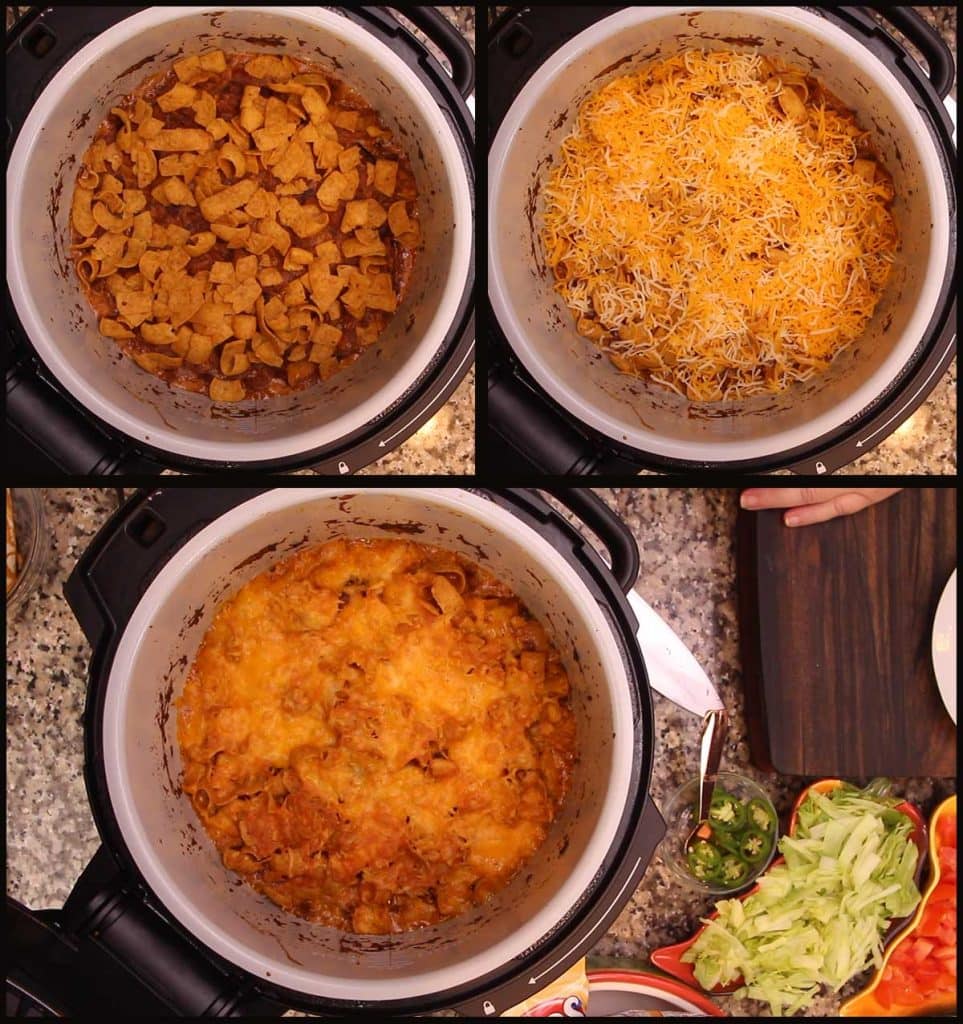
Once the ground beef/bean mixture has simmered for 10-15 minutes, add in 1 cup of Frito corn chips and ½ cup of shredded Mexican cheese. Give it a good stir and close the crisping lid. Turn the bake/roast function on 350℉/175℃ and bake for 10 minutes.
Add a layer of Frito corn chips to the top and cover with cheese. This usually is about 1 cup of Fritos and 1 cup of shredded Mexican cheese.
Close the crisping lid and bake at 350℉/175℃ for another 5 minutes or so, just until the cheese is melted on top.
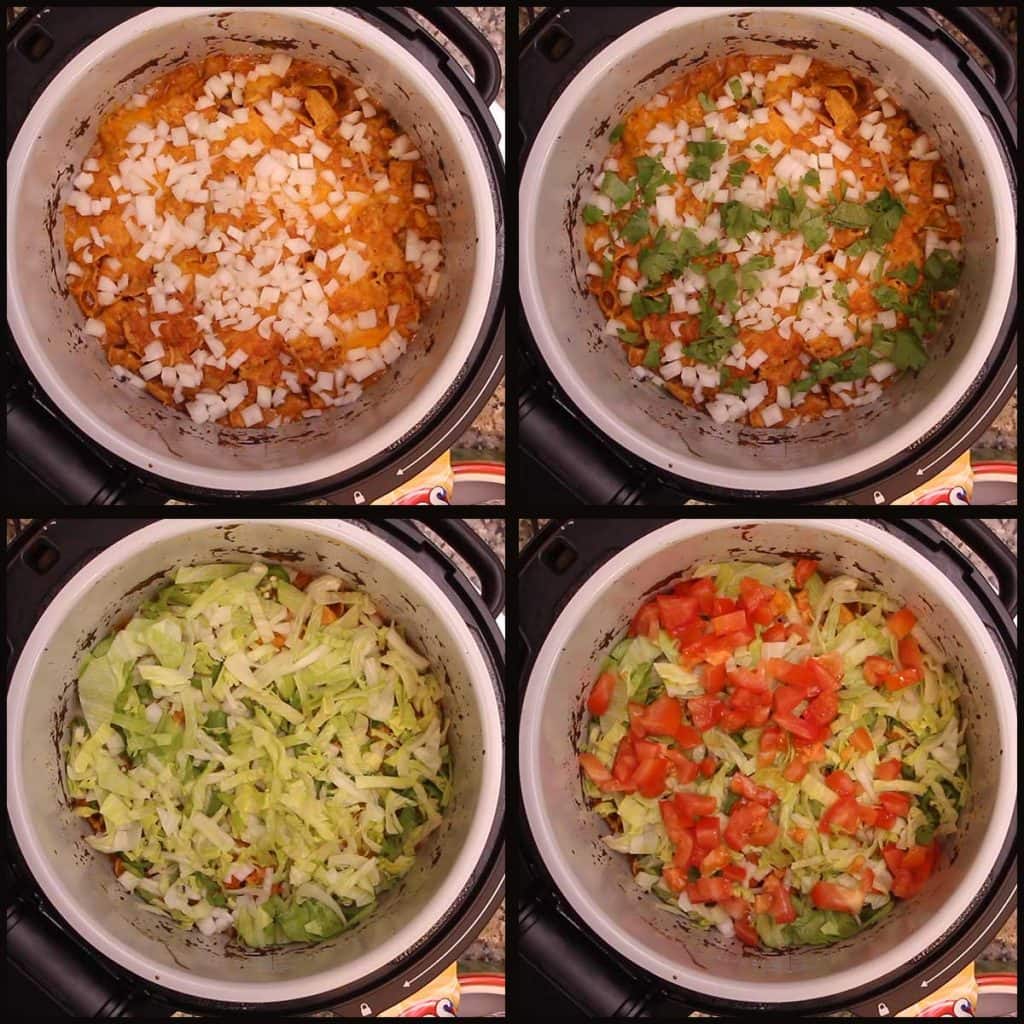
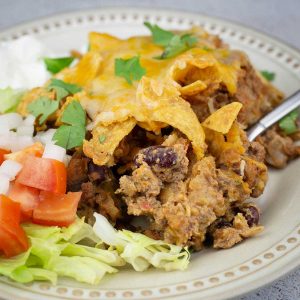
Now comes decision time! You can either add the cold toppings right on top and serve. Or, you can dish out the casserole and put the toppings on the side. I've done it both ways and it's equally delicious!
If you think there might be leftovers, I would probably put the toppings on the side because they won't store well on the casserole.
I have scooped the toppings off and incase you need to do that, I would layer the toppings in this order; onions, cilantro, lettuce, tomato. If some onions or cilantro is left behind when you refrigerate it, it won't matter when you reheat it. The lettuce and tomatoes are more of an issue. The tomatoes add liquid and lettuce isn't that great warm!
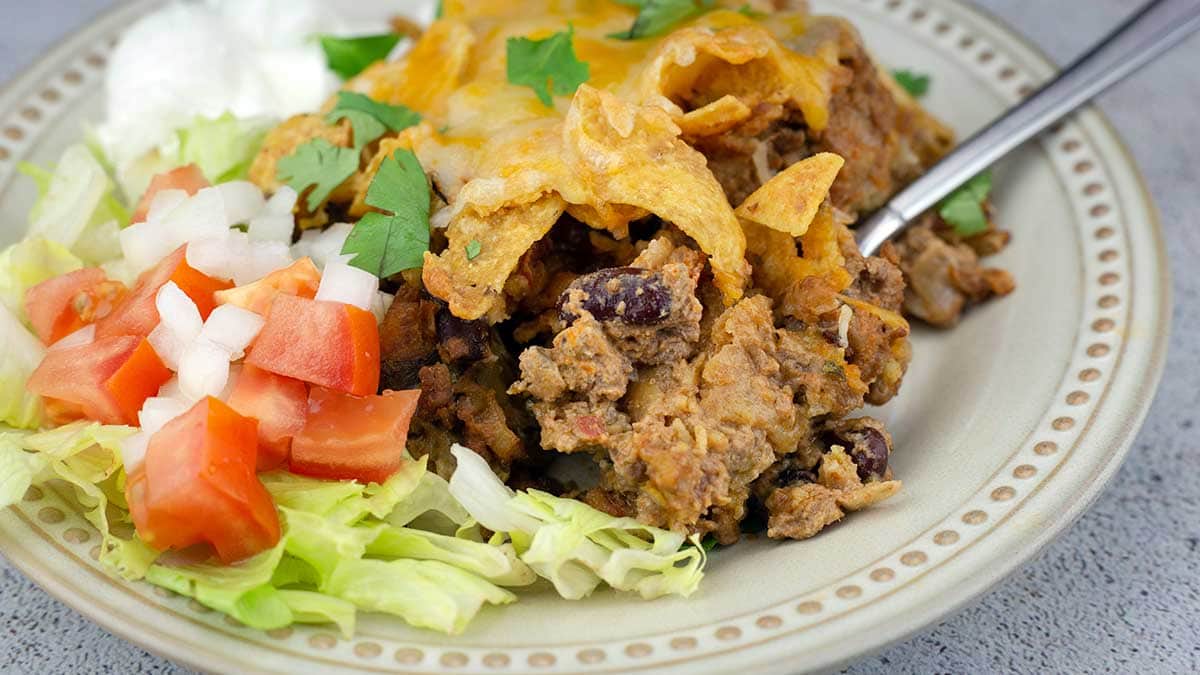
Scoop out onto a plate and top with sour cream. Enjoy!
Walking Taco Casserole
Ingredients
- 1 lb ground beef
- 1 large onion ½" dice
- 1 teaspoon fine grind sea salt
- 1½ teaspoon dark chili powder
- 1½ teaspoon cumin
- ¼-½ teaspoon ground chipotle powder
- 1 cup salsa any kind will work
- 5 ounces canned fire roasted green chilies mild or hot, I used Ortega brand
- 16 ounces chili beans in sauce either pinto or kidney is fine
- 4 ounces cream cheese room temp
- 2-3 cups Frito corn chips
- 2-3 cups Mexican cheese blend
Optional Toppings
- shredded lettuce
- diced tomatoes
- sliced jalapeños
- chopped cilantro
- diced avocado
- sour cream
- chopped chives
- black olives
Would you like to save this recipe?
Instructions
Stove/Oven Directions
- Preheat the oven on 400°F/205°C.
- In a large pot or saucepan, brown the ground beef with the seasoning, diced onions, and salsa. When the ground beef is at least 75% cooked through, add the can of roasted green chiles with the liquid, can of chili beans with the sauce, and the cream cheese. I break up my cream cheese into chunks so it blends easier.
- Turn the heat down to medium-low and simmer for 10-15 minutes, stirring occasionally. While the beef mixture is simmering, prepare the toppings you want to use.
- When the cream cheese has fully melted, add in 1 cup of Frito corn chips and ½ cup of shredded Mexican cheese. Stir and transfer the mixture to a large casserole dish. Place the casserole dish (uncovered) in the oven and let bake for 10 minutes.
- Add remaining Fritos and a layer of shredded cheese. Bake for an additional 5 minutes or until the cheese is melted and browned to your liking.
- Add cold toppings and serve. Enjoy!
Ninja Foodi or Instant Pot w/Crisping lid Directions
- Turn the Ninja Foodi or IP on high sear/sauté. When heated, add diced onions, ground beef, seasonings and the salsa. Stir and break up ground beef. Cook the ground beef for about 5 minutes or until it is at least 75% cooked.
- Add in the can of roasted green chiles with the juice, can of chili beans with the sauce, and the cream cheese. Stir to combine and turn the heat down to lo-med. Simmer for 10-15 minutes.
- Prepare you cold toppings while the mixture is simmering.
- When the cream cheese has melted, stir well to combine. Add 1 cup of Frito corn chips and ½ cup of cheese and stir to combine. Close the Crisping lid and bake at 350°F/175°C for 10 minutes.
- Add remaining corn chips and cover with cheese. Bake at 350°F/175°C for another 5 minutes. Add cold toppings of your choice and serve. Enjoy!
Notes
Nutrition
About the Recipe Author, Louise Long
Louise is a full-time recipe creator and food blogger @ The Salted Pepper. She has over 30 years of experience with cooking and recipe development. She owned a restaurant for several years and was a full-time RN until retiring to blog full-time.

She published her first cookbook in the Fall of 2018 and is very interested in writing several more.
Louise is also the creator of an online Ninja Foodi Pressure Cooking Course with over 100 instructional step-by-step videos. People absolutely rave about the course and all the value they have received from it.
Louise has several very active Facebook groups that help people with the basics of cooking and learning more about the appliances they love.
Ninja Foodi Pressure Cooker & Air Crisper 101
Ninja Woodfire Outdoor Grill & Smoker
Louise is also a YouTube creator and you can find most of her recipes in video format on The Salted Pepper YouTube channel.
She is very responsive to messages and eager to help in any way she can. Get more Information about Louise & contact information
I WOULD LOVE TO SEE WHAT YOU ARE COOKING UP IN YOUR KITCHEN! TAG ME @THESALTEDPEPPER ON YOUR FAVORITE SOCIAL MEDIA PLATFORM WHEN YOU MAKE A DISH!
BE SURE TO FOLLOW THE SALTED PEPPER RIGHT HERE ⇓⇓⇓⇓⇓
DEBI says
AHHHH, I CANT PRINT RECIPE!!!
Louise says
Refresh your browser and see if that works.
Lori L Higgins Moore says
I made this according to recipe except I did use some corn chips with a mexican style street corn seasoning to add some more spice and flavor. It was great and so easy to make.
Thanks for another great recipe!