Chocolate Covered Cherries with that liquid center aren't nearly as hard to make as they might seem. In fact, they are quite easy and quite delicious.
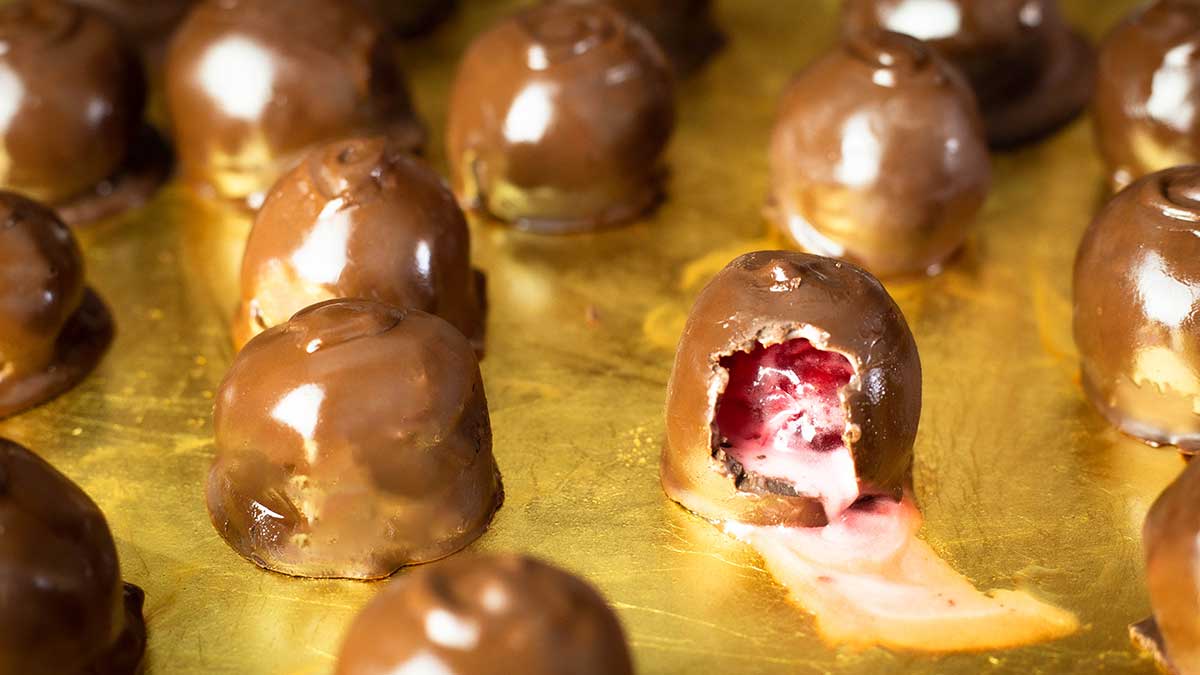
Chocolate covered cherries always remind me of my grandmother, they were her favorite candy. We used to buy her a box or three at Christmas time every year. I had never dreamed of making them homemade.
This post may contain affiliate links. If you make a purchase after clicking a link, I may earn a small commission. As an Amazon Associate, I earn from qualifying purchases.
In fact, I didn't see how it was possible. I mean, come on now, they must have some magic device that injects the liquid into the cherry after the chocolate mold is made around the cherry, right? I could never do that.
Then, I found out that the liquid center doesn't start off liquidy, it starts off as a moldable fondant of sorts. That's the day I ordered what I needed and set off to make homemade chocolate covered cherries.
I learned a few things along the way and I'm happy to be able to share them with you, so your chocolate covered cherries are perfect on the first try!
How do the Centers of Chocolate Covered Cherries Liquify?
There are a couple of ways to get this to happen, but the easiest way is to use invertase.
Invertase is an enzyme that breaks down sugar and liquifies it. It is most commonly used in candy making and is a key ingredient in chocolate covered cherries.
A little bit goes a long way, so 1 bottle will last quite a while! It's also inexpensive!
I purchased it from Amazon, here is my affiliate link:
(affiliate link)Invertase 4 ounce bottle
There is a 1 ounce bottle, but only a few dollars difference in price, so I went with the 4 ounce size.
I only used ½ teaspoon of the invertase in a batch of Chocolate Covered Cherries and the centers were quite liquidy after 2 weeks. I have thought about trying to increase that to 1 teaspoon and see if they liquify quicker or better, but didn't have time to test it out. I don't think it would hurt to add 1 teaspoon though.
I have heard that people also soak their cherries in brandy or another type of liquor for a while, then dry them and the liquor breaks down the sugar and liquifies the center. I haven't tried it that way, so I'm not so sure how well it works.
Tips for Making Chocolate Covered Cherries
- Make sure the cherries are dry before wrapping in the fondant.
- Dip the bottoms twice and inspect them to make sure there isn't any pink showing through the chocolate or they will leak.
- Refrigerate or freeze the cherries once they are wrapped in the fondant so the chocolate sets up fast.
- Make sure to allow a full 2 weeks for the centers to liquify. This happens faster when they are kept room temperature.
- Make double what you think you need. Yes, you will eat them before the two weeks and yes, they will be delicious even though the centers aren't fully liquified yet. Yes, you will need more because you will only have about 10 left after the 2 weeks.
- Use a high-quality tempered chocolate for dipping OR follow my technique for mixing melting wafers with high quality chocolate chips.
- Dry more cherries than you want to make because some might not dry as fast as others and the fondant won't stick if they are wet at all or still leaking juices.
- Make sure everything you are using to melt your chocolate in is 100% dry! Wipe out the bowl you are using to melt the chocolate in, make sure the utensils you use to stir with are dry. The slightest bit of water can cause chocolate to seize up and harden.
- Once you dip your chocolate, let it set up on your counter IF your house is not humid or warmer than 70℉/21℃. What I like to do is pop the tray in the fridge for 5 minutes (no longer) and then pull them out and let them sit on the counter.
What Type of Cherries work Best for Chocolate Covered Cherries?
Typically, Maraschino cherries are used for chocolate covered cherries, but I'm sure you could use other types as well.
Usually, I think Maraschino cherries are way too sweet, but somehow they seem to work in chocolate covered cherries, especially when you use dark chocolate instead of milk chocolate.
I thought about using sour cherries (they aren't really sour, just not sweet) or a different kind of cherry, like an Amarena cherry, but I stuck with the Maraschino.
You can use any kind of pitted, soaked cherries you want, though. I don't recommend using fresh cherries unless you want to skip the fondant that creates the liquid and just dip them in chocolate.
What is the Best Chocolate to Use?
This is completely a personal preference. You can use milk chocolate, semi sweet chocolate, dark chocolate, or even white chocolate.
I prefer the dark chocolate because it balances the sweetness of the cherries and isn't as bitter as unsweetened chocolate, which you can use as well.
Use what you like the most!
What causes Chocolate Dipped Candies to Discolor?
It's so frustrating when you spend the time to dip candy, or anything really, in chocolate and then when it sets up you see all these streaks of white and it's a dull color.
We all want shiny and smooth dipped chocolate candy, right? Trust me, I have had my fair share of discolored chocolate and I still do sometimes!
There are so many factors that can cause these streaks, but rest assured they are still fine to eat!
The two things that happen to chocolate to discolor it are: sugar bloom and fat bloom. Both are caused by temperature and humidity issues.
In my opinion, melting chocolate chips without the melting chocolate wafers results in more frequent issues, but they can still happen even with perfectly tempered chocolate.
Sugar Bloom is when chocolate is exposed to moisture and the sugar on the surface of the chocolate melts and then, as it dries, it crystallizes again on top of the chocolate. Sometimes you can feel the grittiness and sometimes it looks like the chocolate is dusty.
You can prevent this by not exposing the chocolate to high humidity and by avoiding sudden temperature changes from cold to warmer. Many people say to never put dipped chocolate in the refrigerator because of sugar bloom.
I sometimes put my dipped chocolate in the refrigerator, but ONLY for about 5 minutes. This sets the chocolate, but isn't enough time to chill it enough to cause sugar bloom. Then, I let it sit on the counter for several hours before packaging it up. I've also popped them in the freezer for a few minutes, as well, and that seems to work fine.
I do store chocolate in the fridge in the summer and haven't had too many issues as long as I let it sit in the container sealed for a while before opening it up.
You can also get sugar bloom after the chocolate is completely set if you take the dipped chocolate from a cold temperature to a warmer temperature. I like to store my candy in the freezer, so after it is completely set up on the counter, I bag it up and freeze it. Then, when I remove the entire bag, I let it sit sealed until it comes to room temp. This helps prevent sugar bloom. It isn't fool proof, though, and sometimes I still end up with some sugar specks. I will say that when I use the combination of melting wafers and dark chocolate chips, I can feel some sugar on top of the chocolate, but I can't see it.
Fat Bloom is when you see those greyish streaks on chocolate. This happens when the chocolate becomes too warm and the fat in the chocolate separates from the other ingredients and rises to the surface. Then it solidifies again and poof, you have gray streaks and swirls in your chocolate.
This happened to me when I was taking the final picture for this recipe under my lights. The chocolate got really soft under the heat and then when the lights were off and the temp was cooler, here came the swirls and spots.
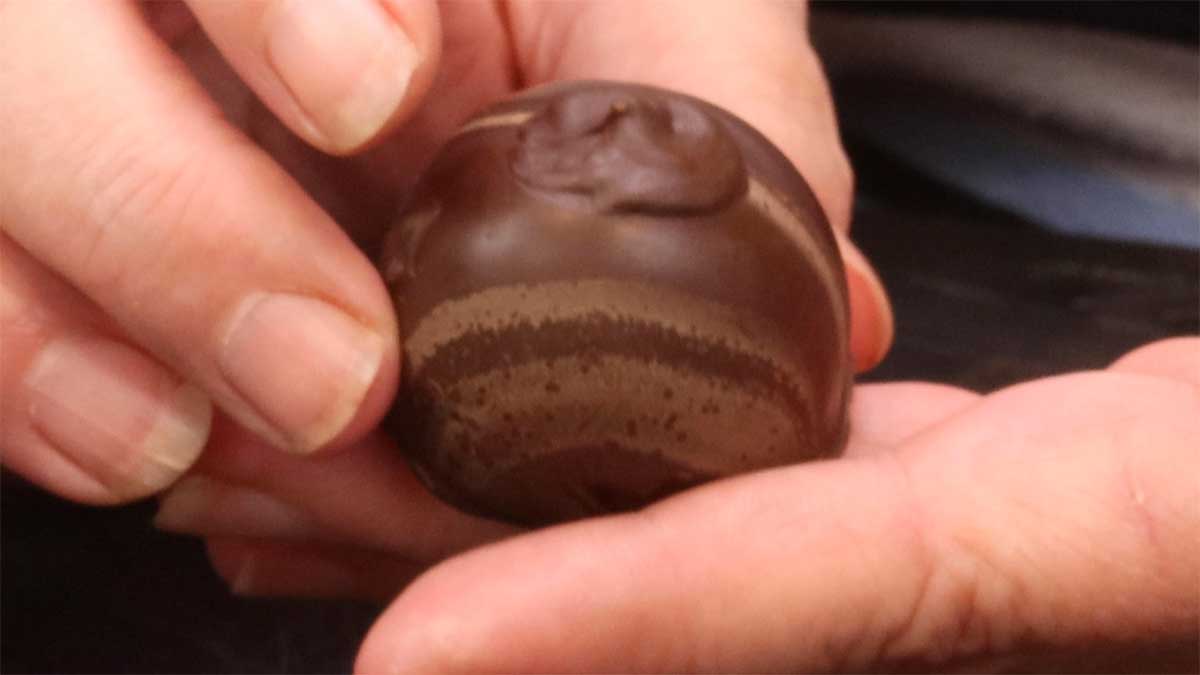
The way to prevent this is keeping the chocolate cool enough with stable temperatures.
The good news is, neither sugar bloom or fat bloom affect the edibility of the candy! So, Jeff and I will be enjoying polka dotted and swirled chocolate covered cherries!
How to use the Ninja Foodi as a Double Boiler
I don't think it comes as any surprise that I love cooking with the Ninja Foodi! It does so many things and does them well that I just love it.
It's so easy to use the Ninja Foodi as a double boiler even if you don't have any special equipment besides the Foodi.
I find it easier to use an actual double boiler, but it isn't necessary.
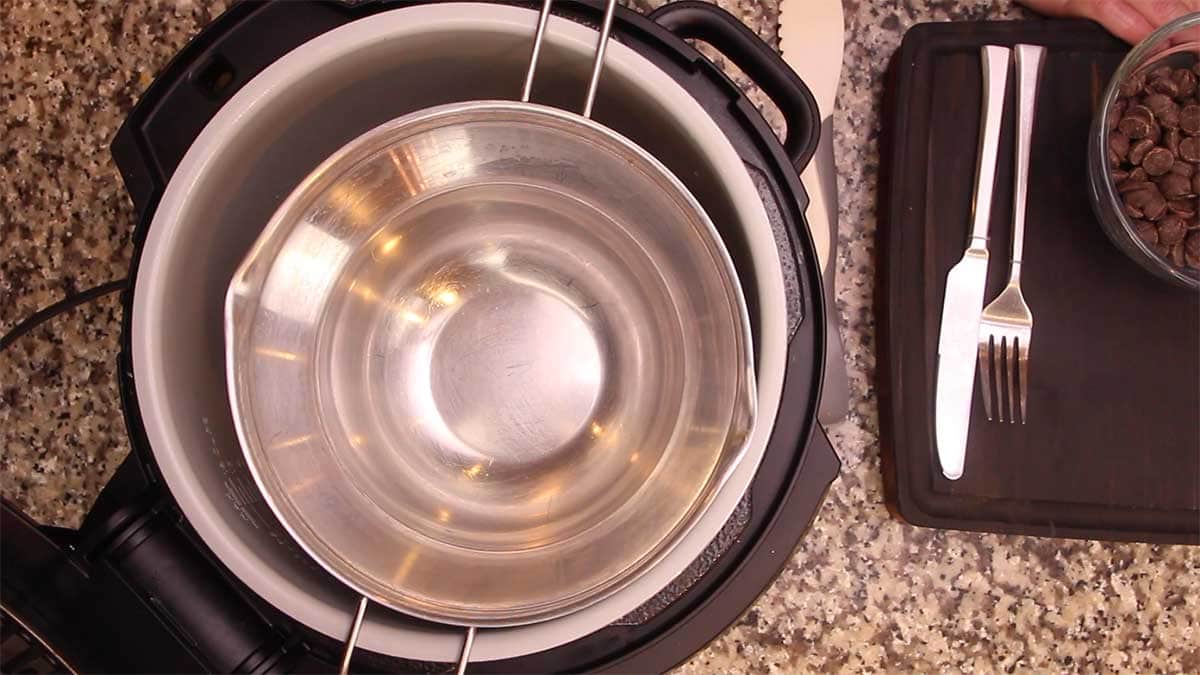
Simply place 2 cups of water in the inner pot, put the rack in the high position and place a mixing bowl (glass or metal) on the rack. You can cover the sides that are open around the pot with some foil to prevent steam loss.
Turn the Ninja Foodi on the sear/sauté mode on high until the water boils, then turn it down to medium heat. Add the chocolate and let it melt, stir occasionally.
When the chocolate is 90% melted, turn the heat down to low and stir until it is smooth.
If you are tempering your chocolate, melt the chocolate on medium until 100% melted, then turn the heat down and add the remaining chocolate. Stir until melted and your chocolate is ready for dipping.
What do I do if my Chocolate is too Thick for Dipping?
There are a few reasons why your chocolate is too thick for dipping and the most common reason is because it was heated to too high of a temperature. Sometimes you can fix this by adding in some coconut oil, but other times, you simply have to start over.
If the slightest bit of water gets into your melting chocolate it can cause it to seize up and become hard and chalky. Sometimes you can fix this by adding a little coconut oil, but most of the time you have to start over.
This is why temperature control and making sure everything is dry is so important.
When I make my melted chocolate from Ghirardelli chocolate chips and Ghirardelli melting wafers, I have added a Tablespoon or so of coconut oil to thin it out some.
Coconut oil does impart a slight coconut taste to the chocolate, but not enough to taste be off-putting. I actually liked it in the peppermint patties I made!
How to Make Homemade Chocolate Covered Cherries
I think it's easiest if I break this down into the different steps from drying the cherries through dipping the Cherries.
How to dry the Cherries for Chocolate Covered Cherries
The usual way to dry the cherries is to set them out on paper towels and let them dry for 24 hours. This certainly works, but when I want to make chocolate covered cherries, I want to make them that day!
So, I decided to try a little experiment and use the dehydration feature of both the Ninja Foodi XL oven and the Ninja Foodi Pressure Cooker & Air Crisper.
It worked! It's not instant or anything like that, but it's faster than letting them air dry.
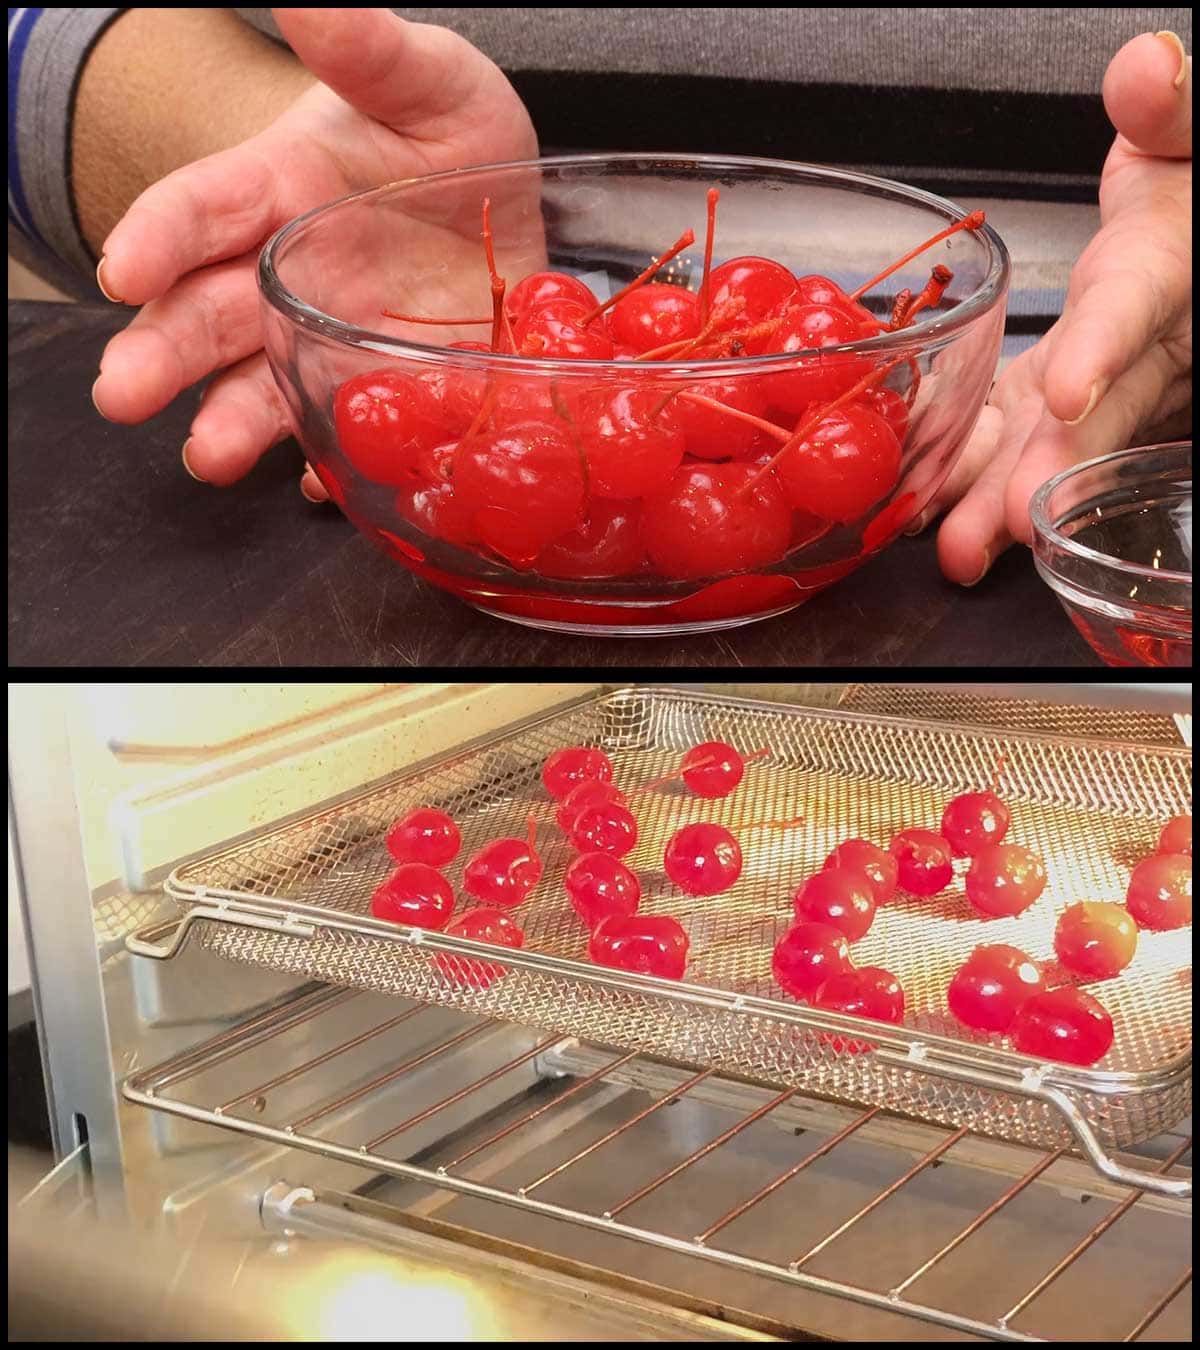
If you have a dehydrator, I highly recommend giving it a try!
I put the cherries on a dehydrating rack in a single layer (I used the basket in the XL oven) and set the temp at 105℉/40℃ for between 2 and 4 hours. Don't go longer than that or they shrivel up too much.
Then, I simply blot them off with some paper towels and proceed with covering them in the fondant.
How to Make the Fondant for Chocolate Covered Cherries
The easiest way to make the fondant is to use a stand mixer, but you can use a hand held mixer or even a wooden spoon.
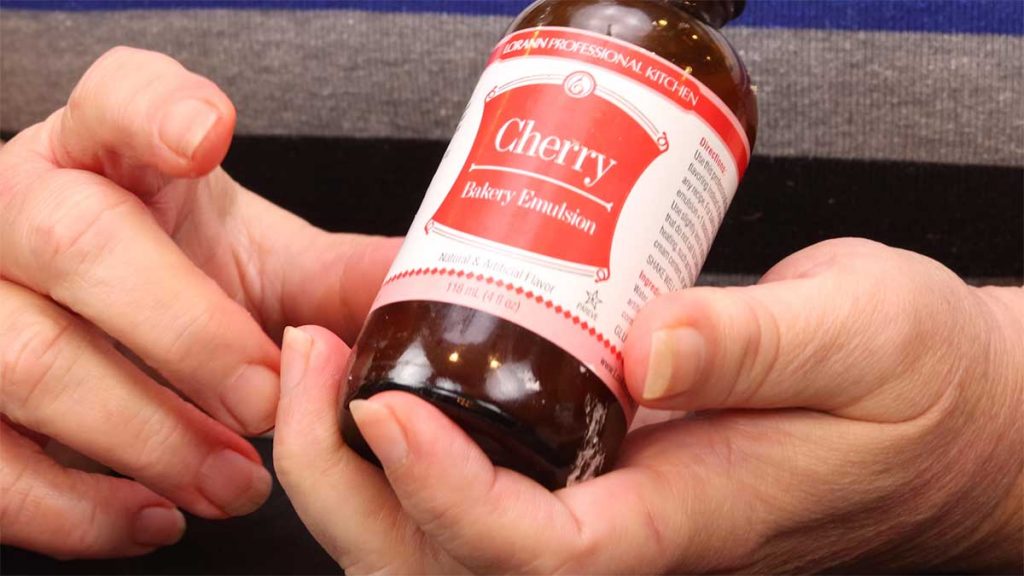
Combine the powdered sugar, butter (salted or unsalted is fine), invertase, corn syrup, 1 Tablespoon of cherry juice, cherry baking emulsion or cherry extract and turn the mixer on low speed to mix all the ingredients.
*You can find the baking emulsion that I use right here➜ (affiliate link)Cherry baking emulsion
The cherry juice will turn the fondant pink, so the liquid that comes out is a light pink color. If you want clear liquid, skip the cherry juice and use the same amount of water instead.
The fondant should be pliable (the texture of playdough), but not sticky. If it is sticky, add a Tablespoon of powdered sugar at a time until it is no longer sticky.
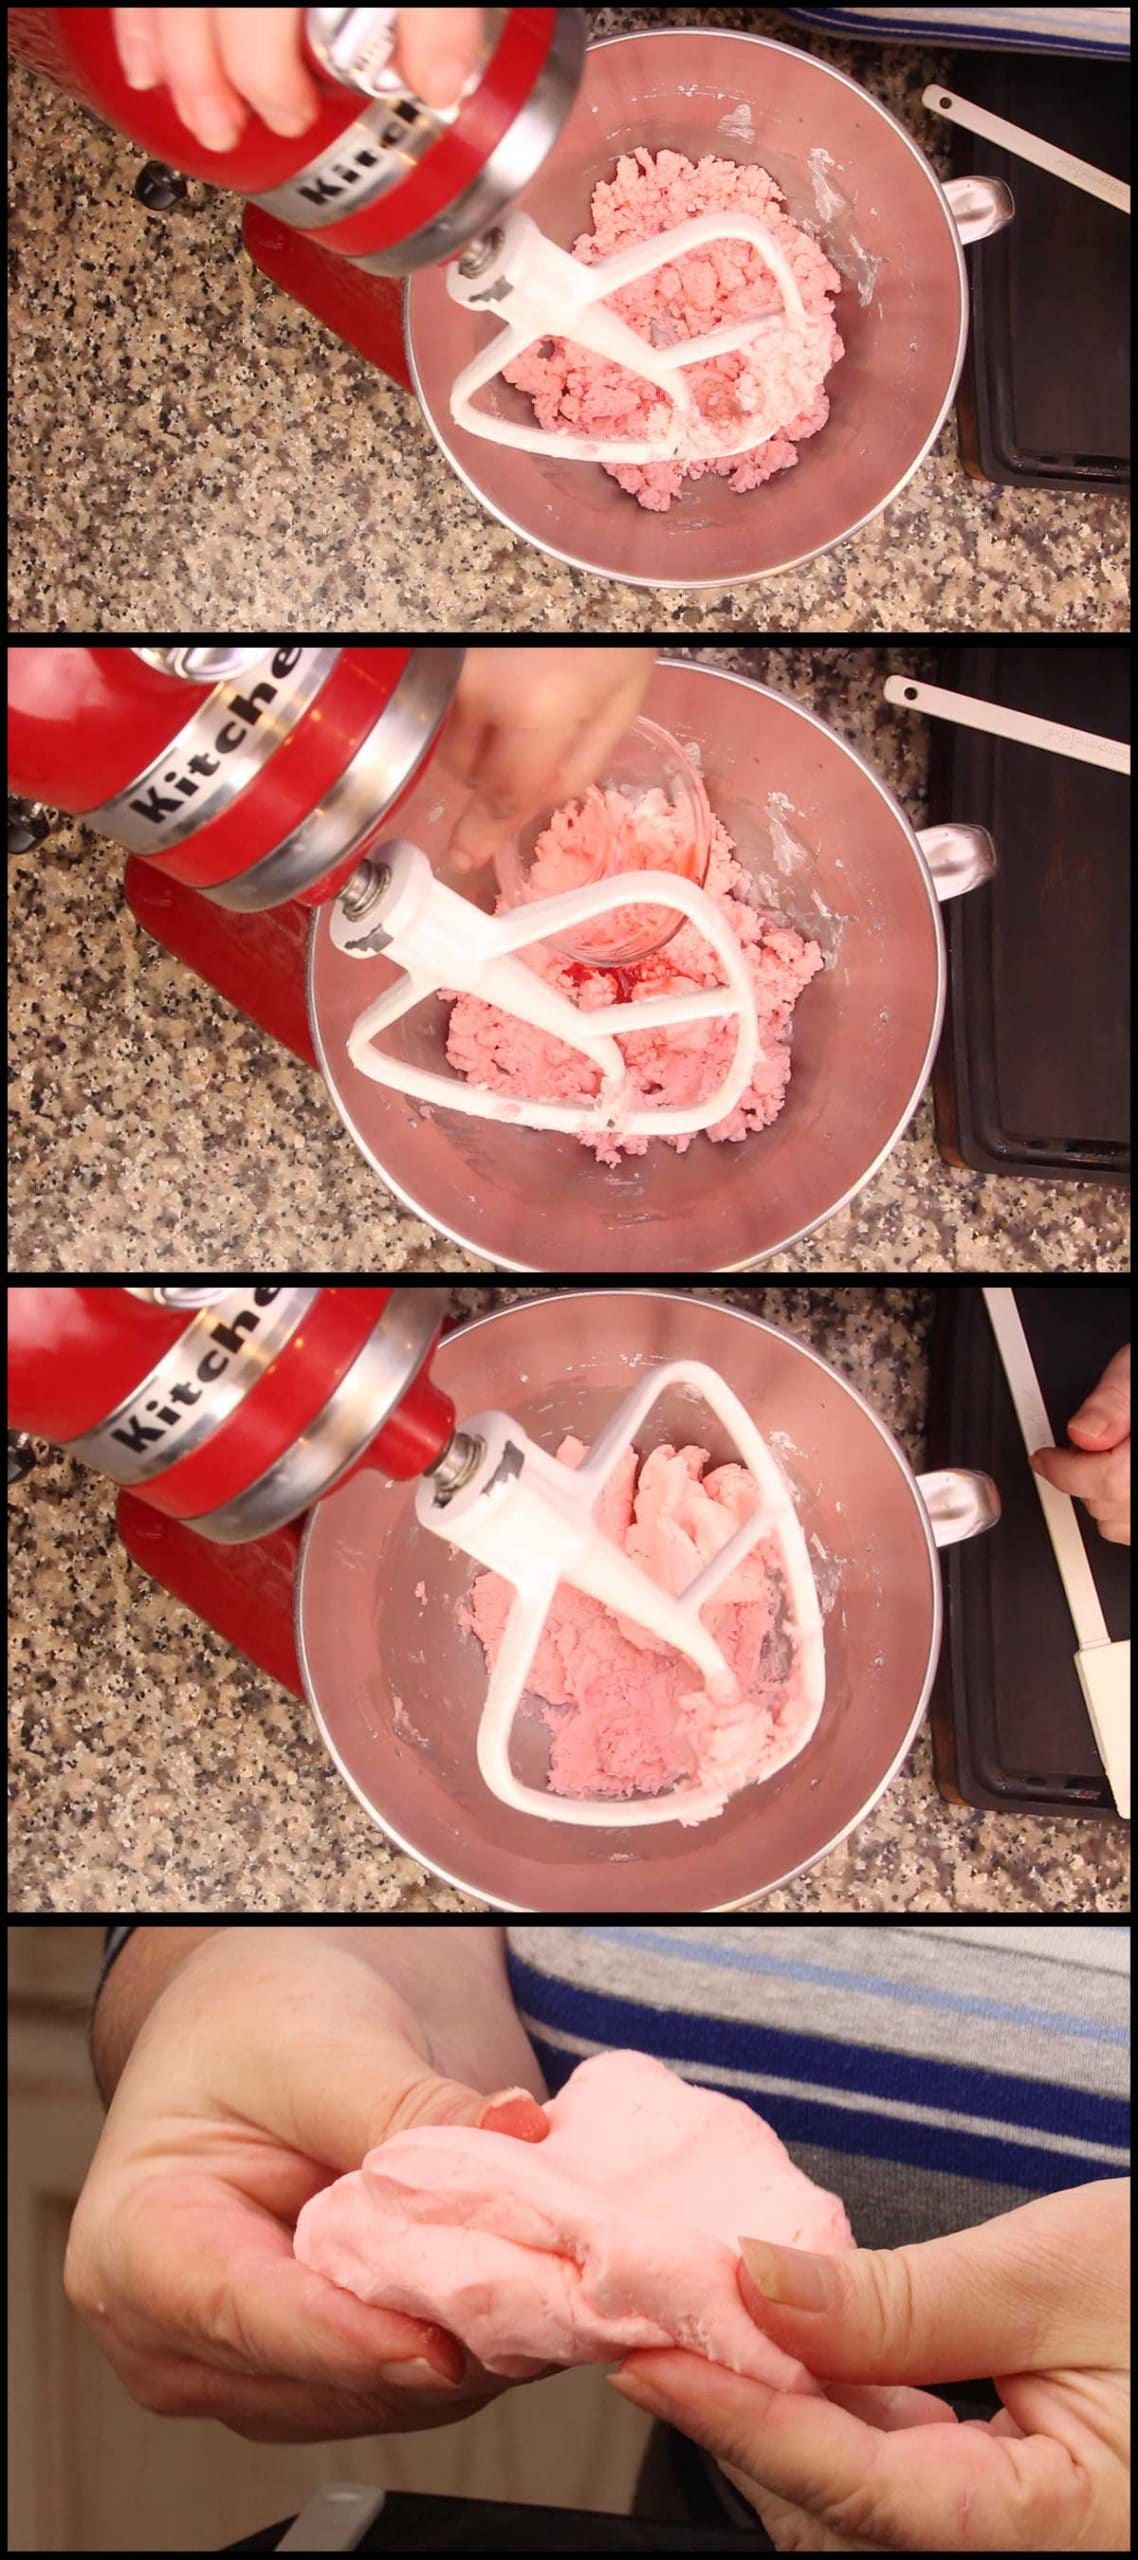
If the fondant is dry and cracking, add ½ tablespoon of extra maraschino cherry juice at a time until it is pliable and the texture of playdough.
Refrigerate the fondant for about 30 minutes before using to cover your cherries.
How to Assemble the Chocolate Covered Cherries
Before I melt the chocolate for dipping, I cover the dry cherries with the fondant and put them in the freezer. This gets the fondant nice and cold and helps the chocolate set up faster.
The easiest way I've found to cover the cherries is to use a small scoop that is about 2¼ teaspoons and roll the fondant into a ball. Place the ball on a parchment lined tray and place a small piece of parchment over top.
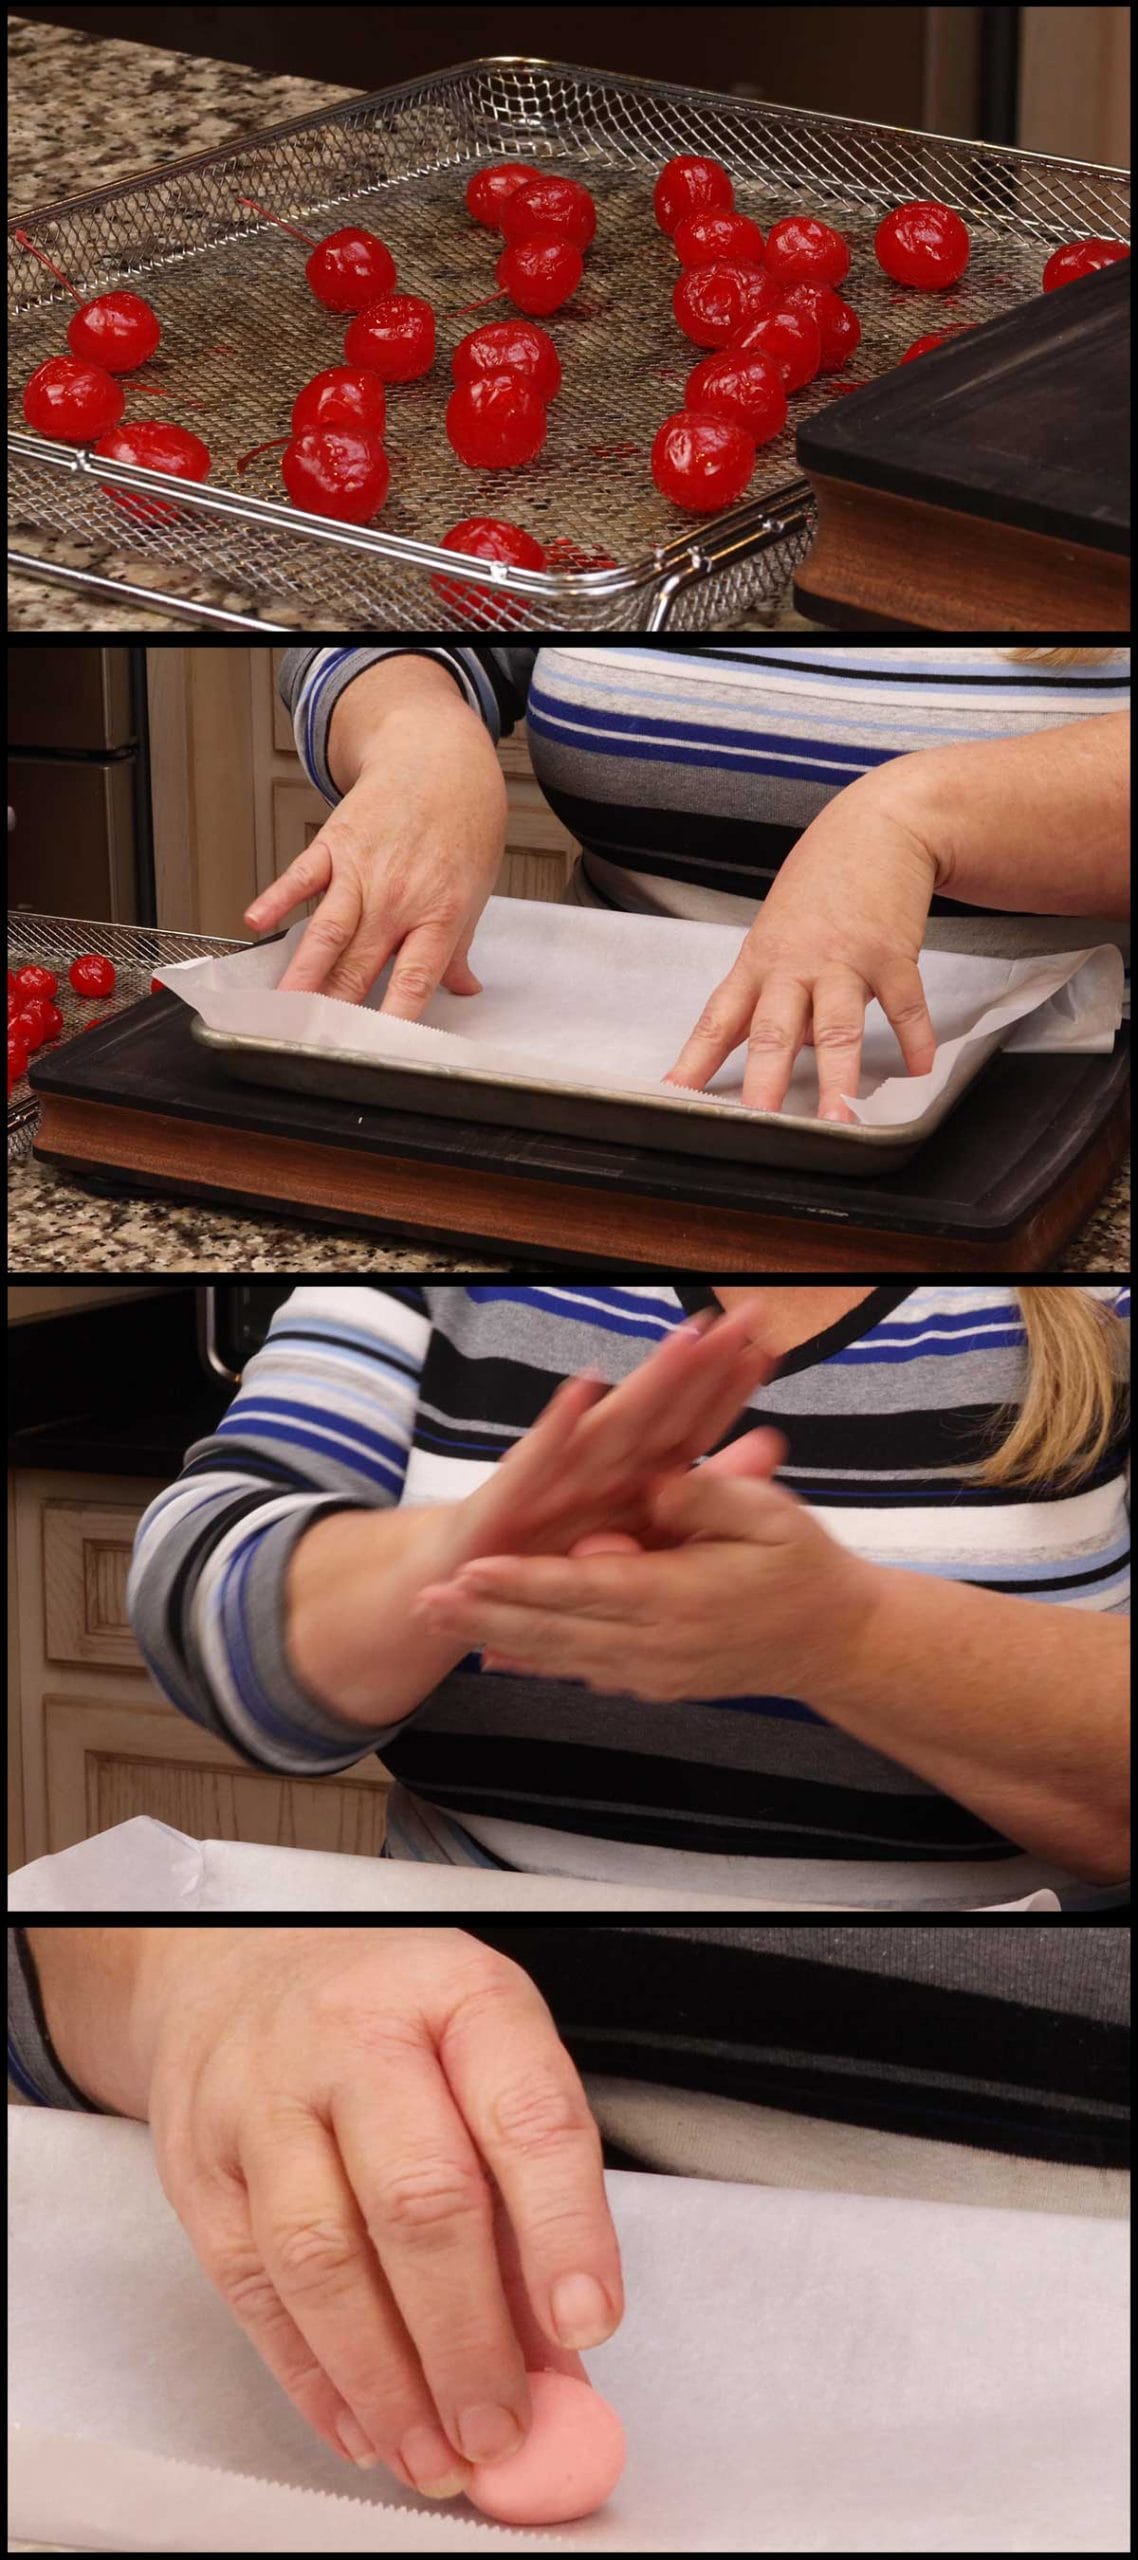
Then, use the palm of your hand or a rolling pin to flatten the circle. I use my small scoop and meat tenderizer from Pampered Chef and they work great.
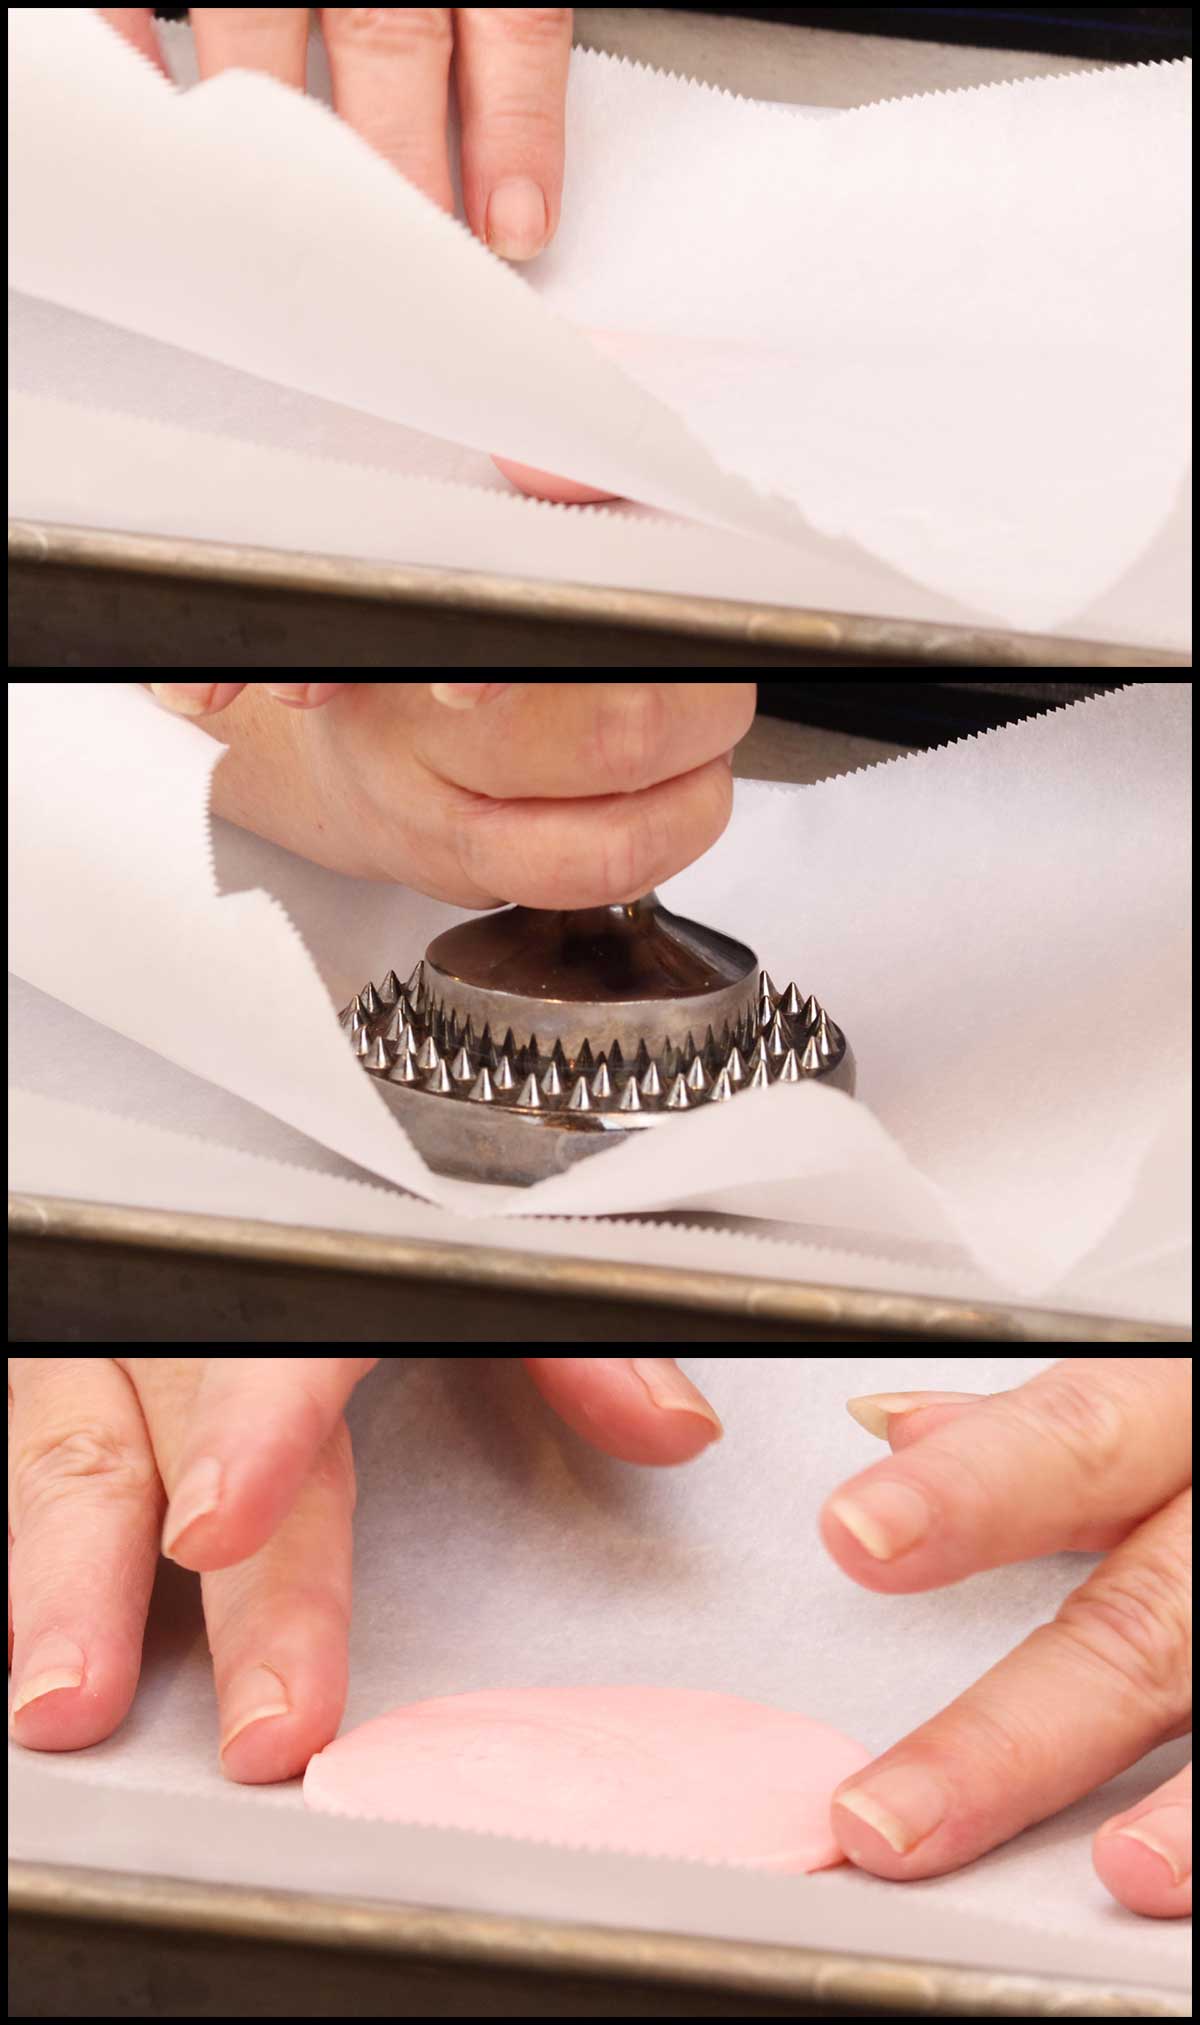
Here are the links to both of those products.
(affiliate link)Pampered Chef Small Scoop
(affiliate link)Pampered Chef Meat Tenderizer
Once the fondant round is formed, remove the top layer of parchment and carefully lift up the fondant. Wrap the fondant around the cherry and roll into a smooth ball.

If you want to keep your stems on your cherries, know that they are a little harder to roll, but do the best you can. Make sure to wrap the fondant around the base of the stem so the chocolate has a place to grab a hold of. I'll get into that in a little more detail in the dipping section.
Once all of the cherries are wrapped and rolled and on the parchment lined tray, place the tray in the freezer while you melt the chocolate.
How to Make the Chocolate for Dipping the Chocolate Covered Cherries
The best way to make dipping chocolate is to use high quality chocolate bars that you chop into small pieces, melt and then temper. I will go over this process in case you want to do it this way, but I use a little easier method because I can't easily find high end chocolate and it's pretty pricey to order the amount that I would need to test all these batches.
How to Temper Melting Chocolate
Grate or finely chop your chocolate bars and melt ⅔ of the total amount of chocolate using a double boiler over a pot of simmering water until it is completely melted. Be sure not to go over 110℉-43℃ when melting the chocolate.
Let it cool down until it reaches about 95℉/35℃ and then stir in the remaining ⅓ of the chopped chocolate. Stir until melted and your chocolate is now ready for dipping.
How to Make Melting Chocolate from Chocolate Chips and Melting Wafers
I definitely recommend buying high quality chocolate chips for melting chocolate. The brand I use is Ghiradelli and I always use dark chocolate, but that is just my personal preference.
While you can melt any type of chocolate chips and use it for dipping, you may run into a few issues because chocolate chips don't contain as much cocoa butter as chocolate bars do. They are made this way so they retain their shape while baking.
Because chocolate chips don't contain cocoa butter, you can't really temper them like you do with bar chocolate and they don't always set up that well after the chocolate is dipped.
The biggest two issues I have found when using all chocolate chips is the chocolate melts on your fingers as soon as you touch it and it often has discoloration in the form of white swirls or lines.
Ghirardelli has melting chocolates that come in milk, dark, and white chocolate flavors. However, they don't really taste like a rich delicious chocolate to me. The Ghirardelli brand is 1,000 times better than the candy melts you can buy at craft stores, but it still misses the mark for me.
The benefits of melting chocolate are that it sets up firm and glossy. This means your dipped chocolates look beautiful and they don't melt all over your hands when you pick them up.
I want the best of both worlds without the cost of chocolate bars, so I combine the two in equal amounts and have found this works great!
I'm linking to the products I use on Amazon so you can see the packaging, HOWEVER, you can find these items much cheaper at Sam's Club or Walmart.
(affiliate link)Ghirardelli Melting Chocolates
(affiliate link)Ghirardelli Dark Chocolate Chips
To create the dipping chocolate, combine equal amounts of each chocolate in a double boiler and melt over low to medium heat, stirring occasionally, until smooth.
The amount of chocolate you need will vary based on the width of the bowl you are melting it in. The very bottom of my double boiler pot is about 6" and to get the correct depth for dipping the cherries in, I used 8 ounces of each kind of chocolate.
If your bowl is wider at the bottom, you will need to melt more chocolate to get the correct depth for dipping.
Make sure the water level does not touch the bottom of your bowl that you are melting the chocolate in or the boiling water will create too much heat and over-temp your chocolate.
Turn the Ninja Foodi or Stove on high and bring the water to a boil so that steam is being produced.
Place the chocolate in the bowl and lower the heat to low-med and allow the chocolate to melt slowly. Stir occasionally.

Once the chocolate is completely melted and smooth, turn the heat on low to keep it at good dipping temperature. If it is too thick, you can add ½-1 Tablespoon of coconut oil to the chocolate.
How to Dip the Chocolate Covered Cherries
When the chocolate is fully melted, make sure to turn the heat to low and check the consistency. It should be thin and run off a spoon in a thin steady stream. If it is too thick, you can add a little coconut oil. I start with ½ Tablespoon and have gone up to 1 Tablespoon.
If you add too much, your candy will taste a little like coconut. The thing I like about adding coconut oil is it hardens when set, so it works great to thin chocolate.
Remove the cherries from the freezer just before dipping.
This is extremely important, so don't skip this step!
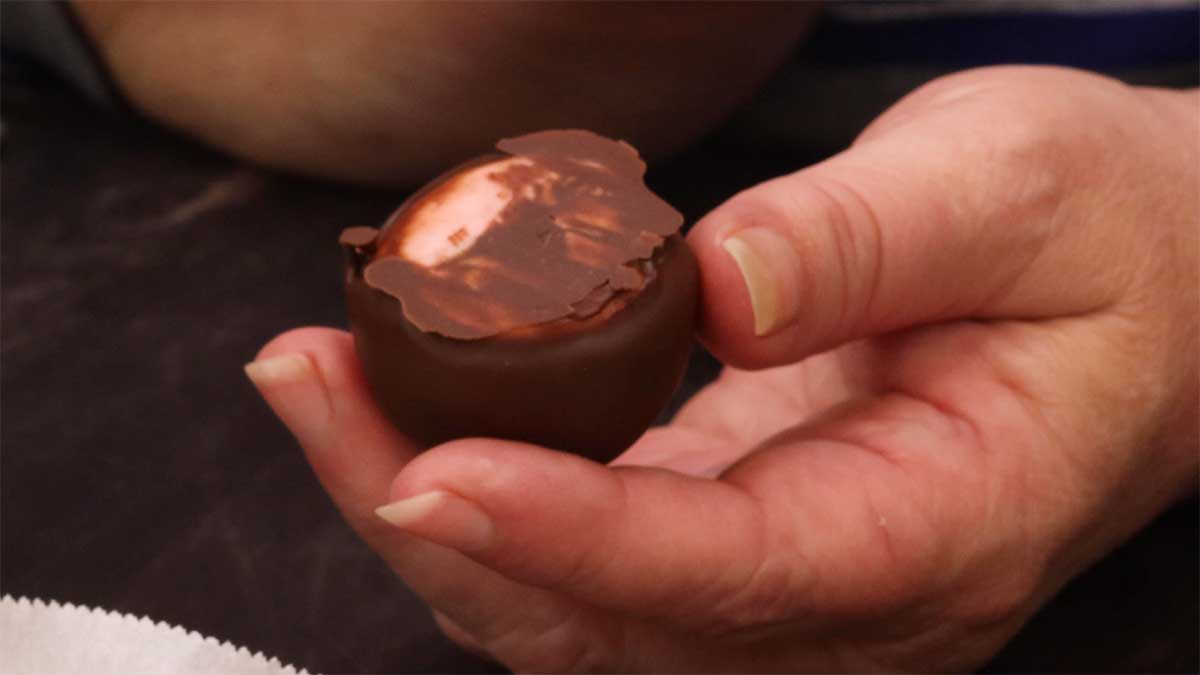
If you don't put a bottom on the cherry, your fondant could leak out. Here is one that I dipped and didn't put a bottom on. You can see the exposed fondant from when I pushed it off of the fork.
Dip each fondant covered cherry in the chocolate just enough to coat the bottom and about ¼" up the sides. This is to create a strong bottom that won't leak as the fondant liquifies. I usually use my fingers to grab the cherry from the top and just dip the bottom in the chocolate and then let the excess drip off and twirl it a bit before I put it back on the parchment lined tray.
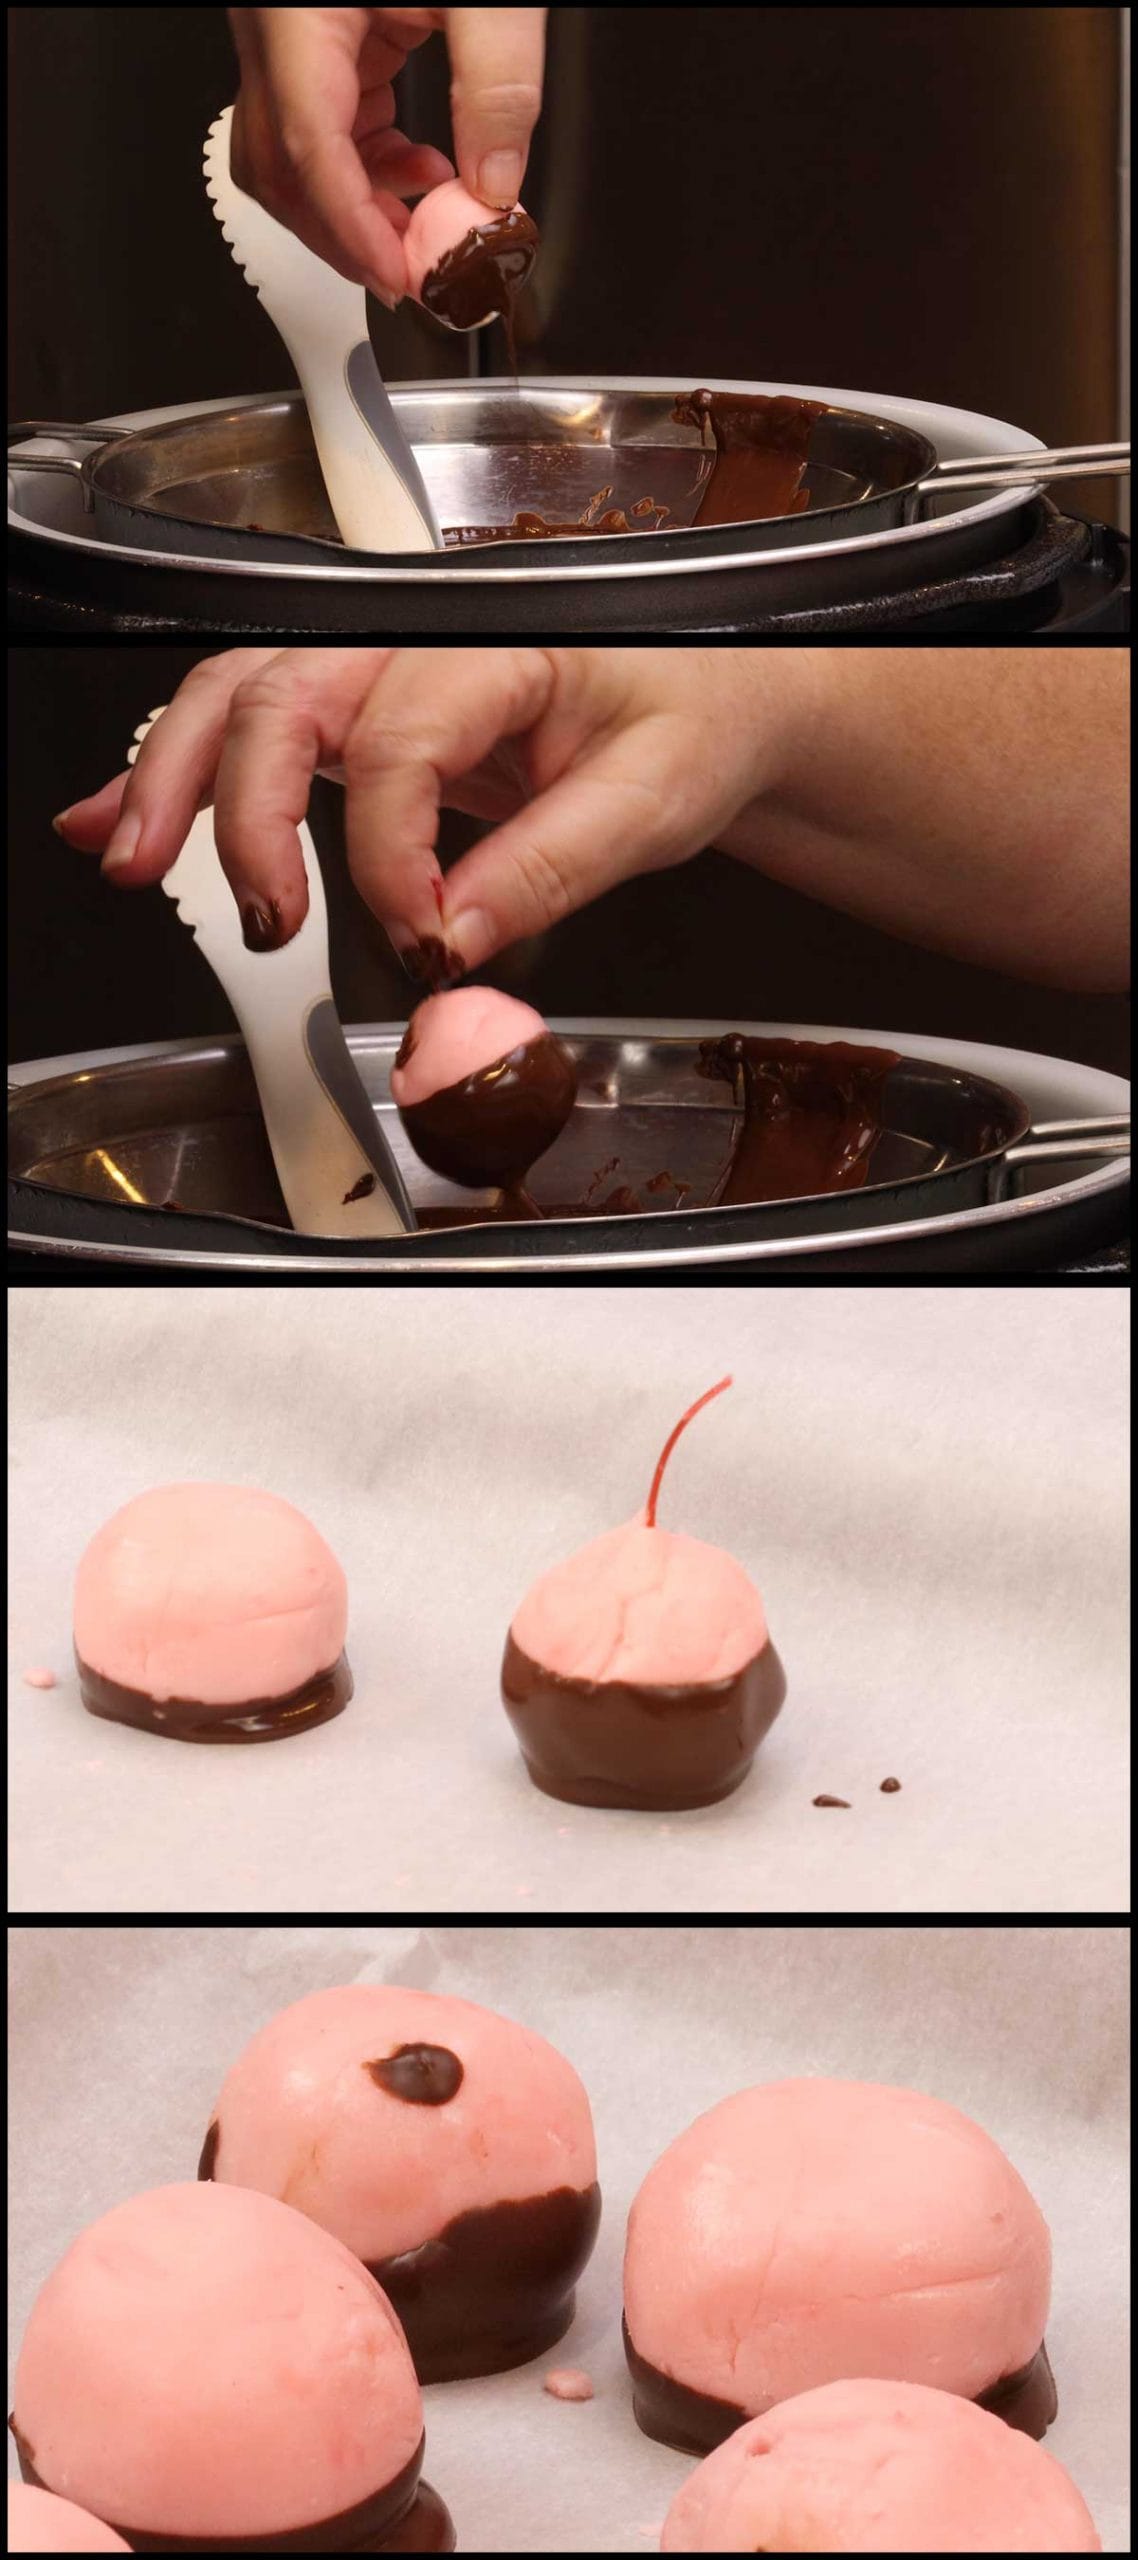
Once all the cherries have been dipped to coat the bottom, the first one should be ready to be fully dipped.
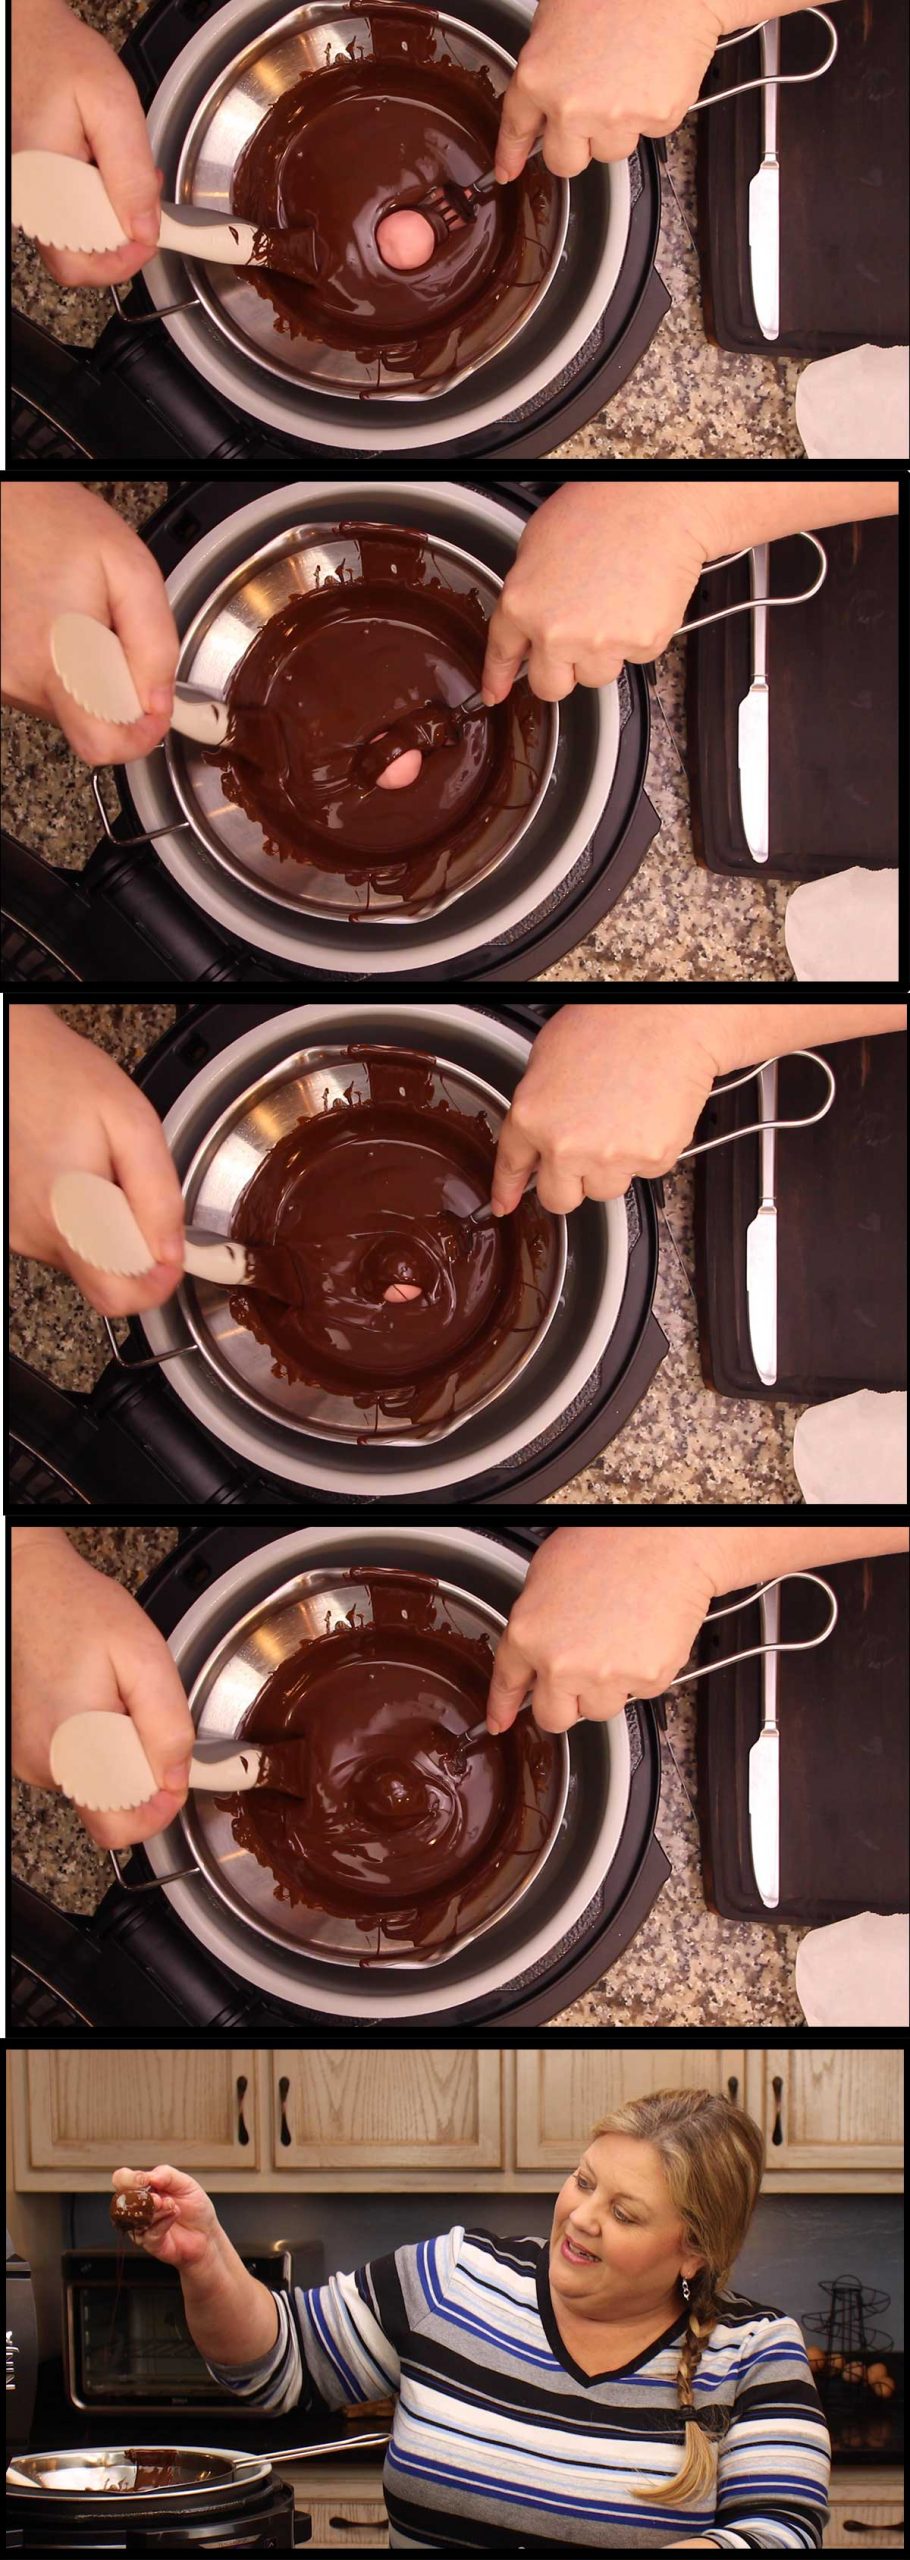
I use a fork to hold the fondant covered cherry while I dip it in chocolate and then a butter knife to slide it off. I have also found it is very helpful to have a large tray or two smaller ones because you need more room to slide the cherries off of the fork.
Place one cherry on the fork towards the tip and dip in the chocolate. I use my (affiliate link)Scoop 'N Spread to spoon the chocolate over the cherry and then lift the fork up out of the chocolate and let the excess drip off.
I usually move the fork up and down to help the chocolate drip off faster. Then, gently push the cherry off of the fork with the butter knife placed towards the bottom of the cherry and place the dipped cherry onto the parchment paper.
Repeat for all of the cherries. If they get too warm during the process, pop them back in the freezer for a few minutes.
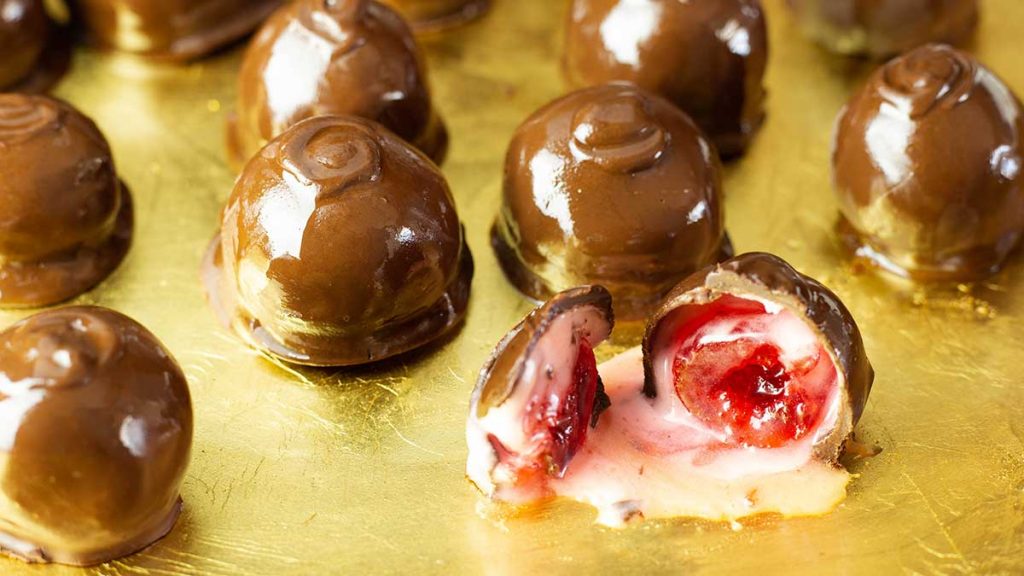
You can put a little swirl design on the top of the cherries by dipping a blunt end tool (I used my (affiliate link)cake tester from Pampered Chef) in the chocolate and swirling it on the top.
If you are leaving the stems on your cherries, make sure the chocolate extends at least ¼ of the way up the steam. The most common areas for fondant to leak out are at the stem and on the bottom.
If you want to watch a short video of me dipping the chocolate here is one:
Once all the cherries are dipped in chocolate, put the tray in the fridge or the freezer for about 5 minutes. This should set up the chocolate but not cause enough of a temperature difference that you end up with streaky cherries.
Let the cherries sit on the parchment lined tray in a cool place, but not the fridge or freezer. The temp should be no more than 70℉ and no less than 55℉ if at all possible.
Do a double check on those bottoms! Once the chocolate is set and can be touched without leaving fingerprints or melting, pick each cherry up and look for any places where the chocolate isn't covering the fondant. If you can see any pink at all, you need to get that covered with chocolate or you will end up with your liquid center leaking all over the place.
I keep any leftover chocolate for this reason. Sometimes, you need to dip the bottoms again.
If at all possible, leave the dipped cherries in a cool, but not cold place for several hours before putting them in a container. Then, line a sealable container with parchment and place your cherries in a single layer.
Leave them alone (I know you won't and that's why you need to make more than you think you need!) for 2 weeks. Room temp works best for liquefying the center. If you do store them in the refrigerator, they will take longer to liquify.
Check on the cherries every few days to make sure none are leaking. If you see one that is leaking, grab it and eat it! Then wipe up any liquid fondant from the container so it doesn't affect the remaining cherries.
Serve & Enjoy!
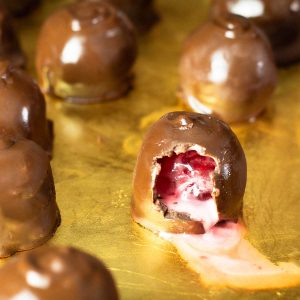
Homemade Chocolate Covered Cherries
Ingredients
- 24 maraschino cherries
- 2 cups powdered sugar
- 2 tablespoon butter room temperature
- ½ teaspoon cherry bakery emulsion or cherry extract
- ½ teaspoon invertase
- ½ tablespoon light corn syrup
- 1-2 tablespoon cherry juice from the jar of cherries
- 8 ounces Ghirardelli dark chocolate chips
- 8 ounces Ghirardelli dark chocolate melting wafers
- 1 tablespoon coconut oil optional
Instructions
Drying the Cherries
- Set the cherries out on a paper towel lined tray and let them sit on the counter overnight OR put them on the tray in your dehydrator and dehydrate them on 105°F/40°C for 3-4 hours. Blot dry to remove any liquid before covering with fondant.
Fondant
- Using a stand mixer, hand mixer, or a bowl and a wooden spoon, combine the powdered sugar, butter, cherry emulsion, invertase, light corn syrup, and 1 tablespoon of cherry juice. Mix or blend on low speed until the ingredients are combined.
- If the mixture is the texture of playdough, you are done. If it is too dry, add ½-1 tablespoon of cherry juice. If it is too wet, add 1 tablespoon of powdered sugar at a time until it is the texture of playdough.
- Cover and refrigerate the fondant for at least 30 minutes.
Melting Chocolate
- Add the melting chocolate and the chocolate chips to the bowl of a double boiler (see post for details about using the Ninja Foodi or IP as a double boiler) and melt over low-medium heat. Stir occasionally while the chocolate is melting. Once melted, turn the heat down to low.
Assemble & Dip the Cherries
- Using a (affiliate link)small scoop, scoop out a ball of fondant and roll it between your palms. The amount of fondant you will need for each cherry is about 2 teaspoons. Place the fondant ball on a parchment lined sheet pan.
- Place a small piece of parchment on top and either press down with your palm to form a circle or use a rolling pin or even this (affiliate link)meat tenderizer worked great! I used the flat side.
- Wrap the fondant around the cherry and roll between your palms to make a smooth ball. You want to get it as smooth as possible so your cherries are smooth when dipped in chocolate. Repeat for each cherry and then put the tray in the freezer for about 30 minutes.
- Dip the bottom of each cherry into the chocolate and sit it on a parchment lined tray.
- When all of the bottoms have been dipped, start back with the first one and dip the entire cherry into the chocolate. I use a fork to dip my chocolates and it works just fine. Once dipped, allow the excess to drip off and then slide the cherry onto the parchment lined tray. I use the side of a butterknife and gently push it off the fork from the bottom.
- When all the cherries have been dipped, put the tray in the fridge for about 5 minutes. Remove and let sit on the counter for about an hour or until the chocolate is hard and can be picked up without leaving fingerprints behind. Check the bottoms and make sure there is no exposed fondant. Store in a sealed container in a single layer for 2 weeks. I like to check on them every few days just to make sure none are leaking. If you see fondant leaking out of one of them, discard it and wipe out the liquid so it doesn't affect the other cherries. When I say discard it, you know I mean eat it, right?
- After the 2 weeks is up, the centers should have liquified and they are ready to be served! Enjoy!
Nutrition
ABOUT THE RECIPE AUTHOR, LOUISE LONG
Louise is a full-time recipe creator and food blogger @ The Salted Pepper. She has over 30 years of experience with cooking and recipe development. She owned a restaurant for several years and was a full-time RN until retiring to blog full-time.

She published her first cookbook in the Fall of 2018 and is very interested in writing several more.
Louise is also the creator of an online Ninja Foodi Pressure Cooking Course with over 100 instructional step-by-step videos. People absolutely rave about the course and all the value they have received from it.
Louise has several very active Facebook groups that help people with the basics of cooking and getting the most out of the Ninja Foodi.
Louise is also a YouTube creator and you can find most of her recipes in video format on The Salted Pepper YouTube channel.
She is very responsive to messages and eager to help in any way she can. Get more Information about Louise & contact information
I WOULD LOVE TO SEE WHAT YOU ARE COOKING UP IN YOUR KITCHEN! TAG ME @THESALTEDPEPPER ON YOUR FAVORITE SOCIAL MEDIA PLATFORM WHEN YOU MAKE A DISH!
BE SURE TO FOLLOW THE SALTED PEPPER RIGHT HERE ⇓⇓⇓⇓⇓


Deneene Rodriguez
Question: I have made this recipe twice! It is absolutely delicious! I have one problem I can't get my fondant to liquefy. The first time I used invertise, but I knew it was old, so I assumed the fact that they didn't liquify was because of the older invertise. So I went and purchased some new. I made them a second time. This time it did not liquefy again. What am I doing wrong? Any ideas? I really want the liquid centers because these cherries are absolutely delicious! All I need now is the liquid centers to make them perfect and I'm not sure when I'm doing wrong. Help!
Louise
How long are you letting them sit? They take a good two weeks for the centers to liquify in my test batches. You could also try using a little more invertase and see if that helps. I'm glad you like the recipe, but I totally agree that the liquid centers are super important for that traditional chocolate covered cherry!
Erica
We've been making chocolate covered cherries as a holiday family tradition for many years, and this has been our favorite recipe method yet. It didn't turn out perfect, there was a lot of cracks and leaking out of many of them. Most came out nice. They started leaking out of holes in the stem, and cracks on the bottom. Do you know what could have caused this? Or more tips to get the chocolate to cover evenly?
Louise
What did you use for the melting chocolate? I always double dip the bottoms, but haven't had issues with cracking or holes. It sounds like moisture may the culprit. Are you storing them at room temperature to liquify? Make sure the cherries are super dry before covering them in the fondant. You can always email me if you want more help troubleshooting. Louise@thesaltedpepper.com