
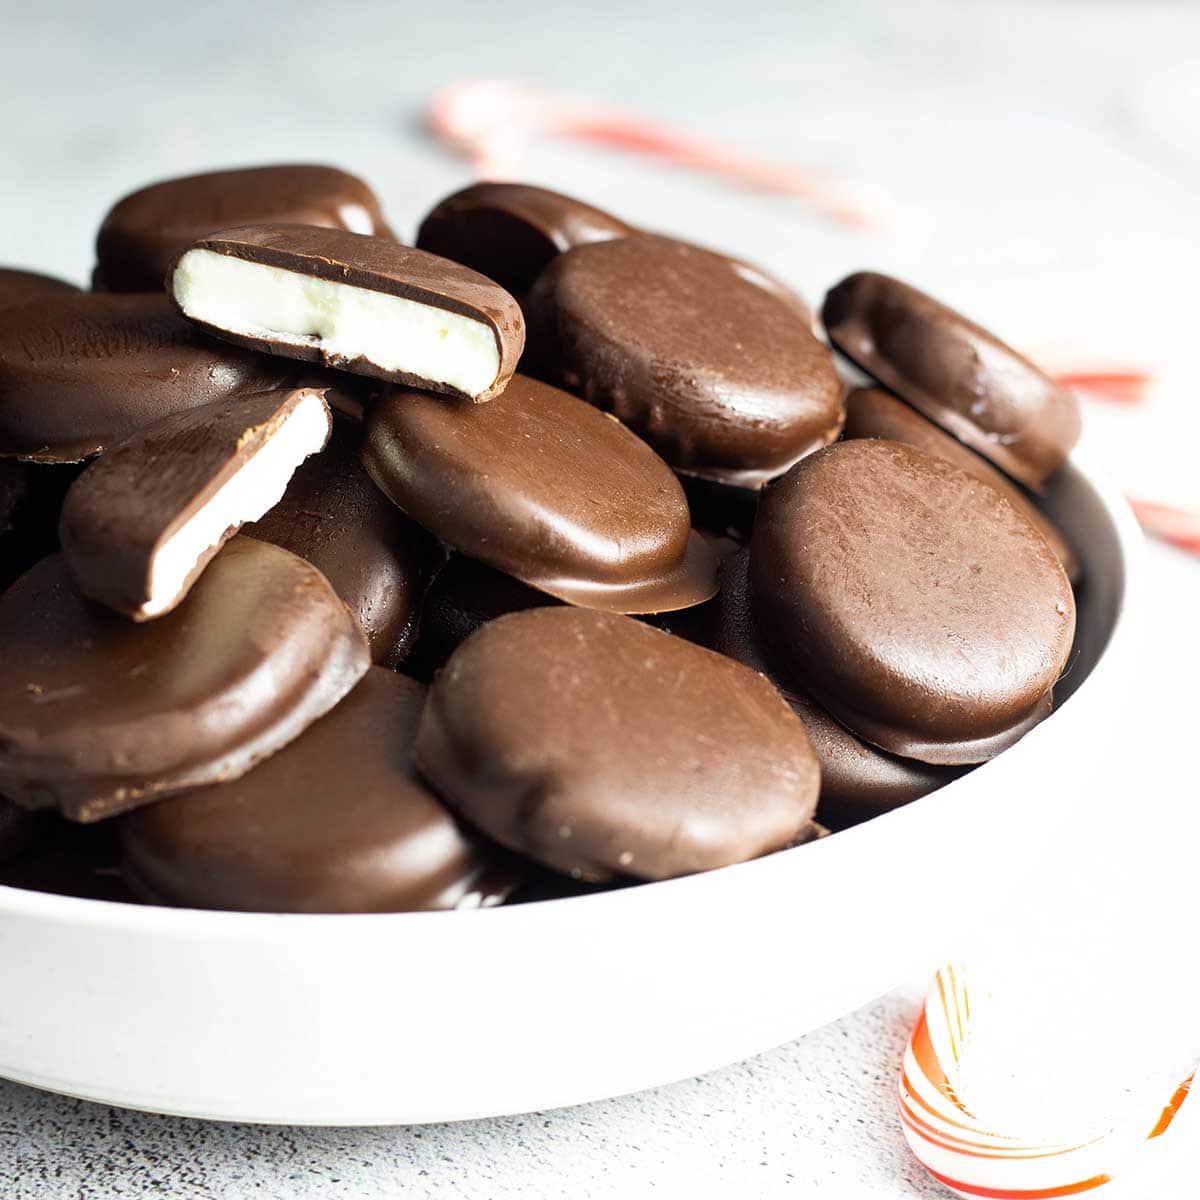
If you are a fan of York Peppermint Patties, you HAVE to make this homemade version! Of all the "copycat" candy recipes I've made, these are the easiest, and the flavor is unbelievable!
Would you like to save this recipe?
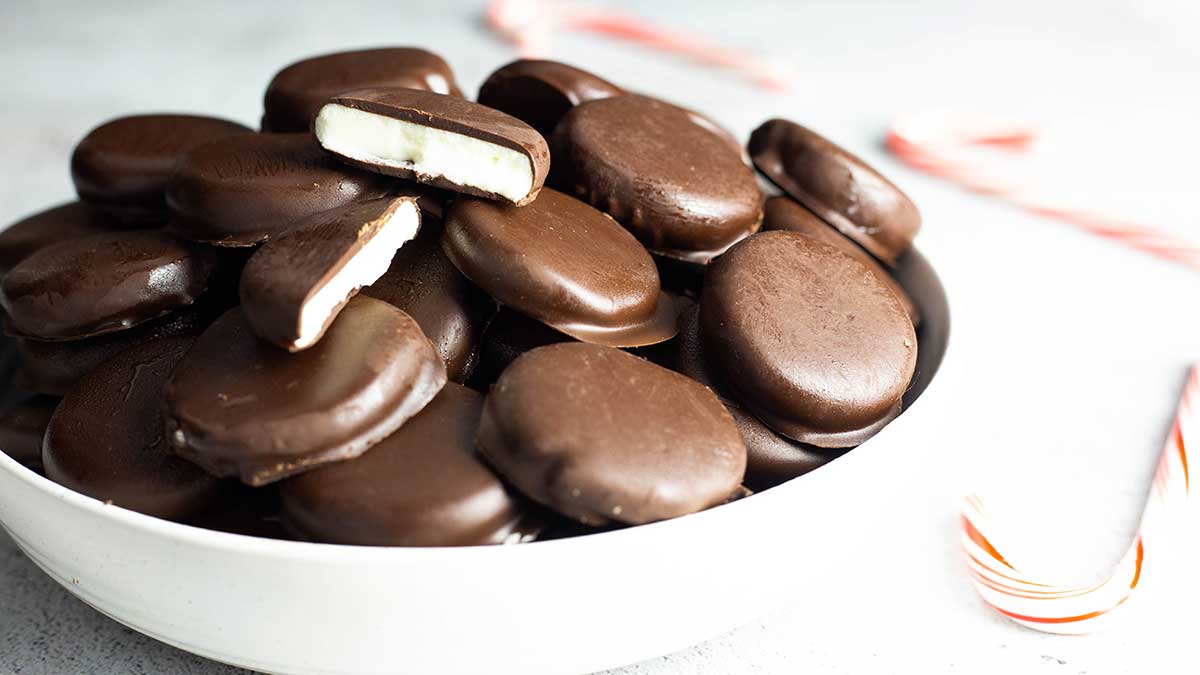
Whether you want to dip these beauties in dark, semi sweet, or milk chocolate, they are the perfect candy to make EVEN if you have never tried your hand at making candy!
This post may contain affiliate links. If you make a purchase after clicking a link, I may earn a small commission. As an Amazon Associate, I earn from qualifying purchases.
It always amazes me at how easy these are to make and how much they taste just like the store-bought kind. I've probably made them 10 or more times around the holidays and I've tried different methods, some easier than others.
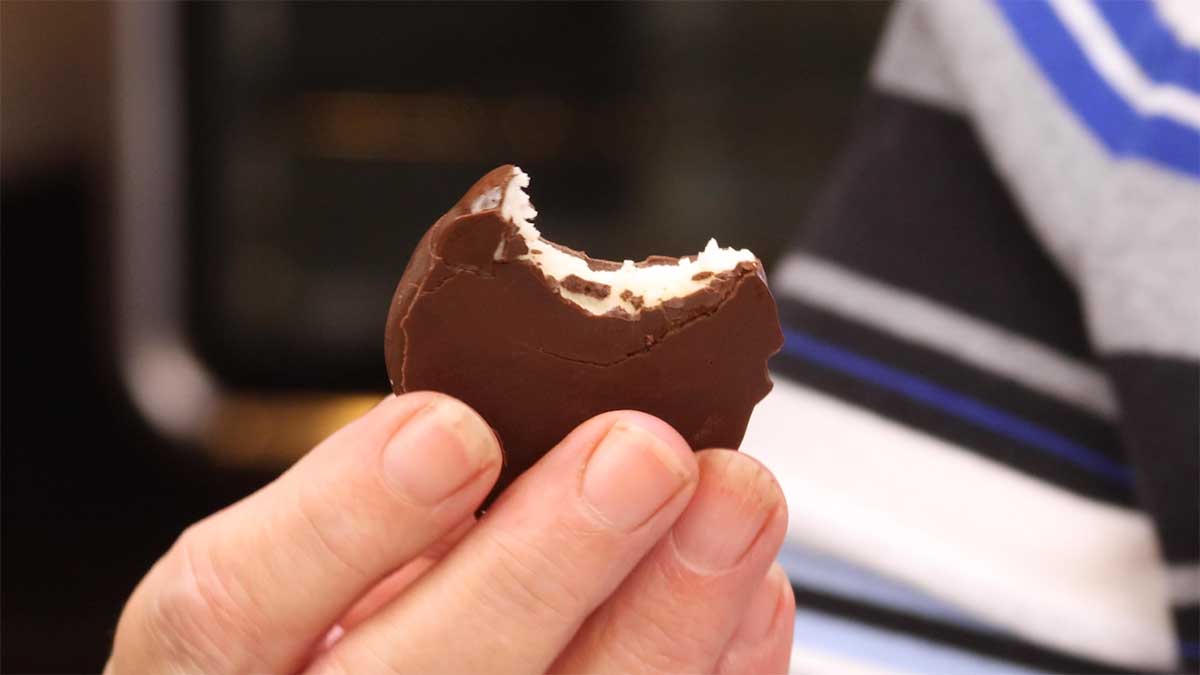
This year I made a few changes and they are even easier to make, and they taste amazing! I love to grab one out of the bag in the freezer and eat it right away! The chocolate is snappy and the center is soft. Love it!
Frequently Asked Questions
Yes, you can make as few or as many peppermint patties as you want by adjusting the ingredients. For half a batch, cut all the ingredients in half.
I like to store them in a sealed container and line each layer with parchment paper OR freeze them on a sheet tray and then put them in a freezer bag and just leave them in the freezer. When removing from the freezer, let them come to room temperature in the bag or you will end up with condensation which causes sugar bloom. More on that in the post below.
I have never had them go bad, but I usually store them in the freezer. As long as they are stored at room temperature or in the fridge or freezer, they will last a very long time.
Tips for Making Homemade Peppermint Patties
- Keep the size small in diameter and about ¼" thick for the easiest dipping
- Freeze the round discs of peppermint fondant before dipping in chocolate
- Refrigerate the peppermint fondant before forming round discs
- Line the tray with parchment paper for easy removal both before and after dipping in chocolate
- Let the chocolate dipped peppermint patties set up completely before packaging them up. The chocolate is completely set when you can touch them and the chocolate doesn't melt on your fingers.
What is the Best Chocolate to use for Dipping Peppermint Patties?
This is a personal preference, for sure. I prefer them dipped in dark chocolate, but you can use any kind of chocolate that you like.
While you can simply melt the type of chocolate chips you like, I have run into some issues with discoloration when I use all chocolate chips.
If you can find reasonably priced chocolate blocks or bars, this is the best way to go. You can temper the chocolate so you have a nice glossy candy that sets up hard so you don't have the chocolate melting on your fingers or run into streaking issues.
I go over how to temper chocolate in this post for Homemade Chocolate Covered Cherries.
You can't really temper chocolate chips because they don't contain enough cocoa butter, but I have found that using 50% quality chocolate chips and 50% quality melting chocolate works great for dipping candy.
I don't recommend using all melting wafers, although they work great, they don't have a true chocolate flavor. By combining the two kinds of chocolate (melting wafers and chocolate chips), I have been able to get a glossy candy that sets up hard and tastes amazing.
I suggest using a quality brand like Ghirardelli and they have both the chocolate chips and the melting wafers. Here are the links to the products I used, but please check the prices, because Amazon tends to be more expensive than Walmart or Sam's Club.
(affiliate link)Ghirardelli Dark Chocolate Chips
(affiliate link)Ghirardelli Dark Chocolate Melting Wafers
What is the Best way to Melt the Chocolate for Dipping?
There are several ways you can melt the chocolate for dipping, but I think using a double boiler is the most consistent way.
I know a lot of people use the microwave and that is fine, just make sure that you heat for short periods of time and stir in between heating. If I have a small amount of chocolate that I need to heat, I'll use the microwave in 15 second intervals until 75-80% of the chocolate is melted and then stir. The residual heat melts the rest of the chocolate.
A double boiler is when you have one pot with water on the the bottom and another bowl or pot on top where the chocolate goes. The steam from the water when heated will provide a gentle heat to melt the chocolate.
Chocolate can be very temperamental and heating it to too high of a temperature or exposing it to water can cause it to seize up. I have found that using the Ninja Foodi as my double boiler works great at controlling the temperature, but there are a few things you need to watch out for.
You can melt chocolate in a bowl, sitting on the rack in the high position, but make sure the water level isn't touching the bottom of the bowl. If your bowl comes in contact directly with the boiling water, it can overheat the chocolate and cause it to seize up.
I also like to put some foil around the edges of the pot to trap in the steam so there is less chance of water droplets getting into the chocolate.
I use a bowl with a handle that is specifically designed as the top part of a double boiler and I use the Ninja Foodi's inner pot as the pot that holds the water.
I have not been able to find one that is the same size as my double boiler, but as soon as I do, I'll link to it.
Which Brand of Sweetened Condensed Milk is Best for Peppermint Patties?
Ordinarily, I don't get too caught up on brands when creating recipes. I use store brands a lot and sometimes they are even better than the brand names!
However, in this recipe, I noticed a HUGE difference in the color of the peppermint fondant filling based on which brand of sweetened condensed milk I used.
For this recipe, I recommend using the Nestle Brand La Lechera Sweetened Condensed Milk. Here is a link to it on Amazon, but you can find it cheaper in grocery stores:
(affiliate link)La Lechera Sweetened Condensed Milk
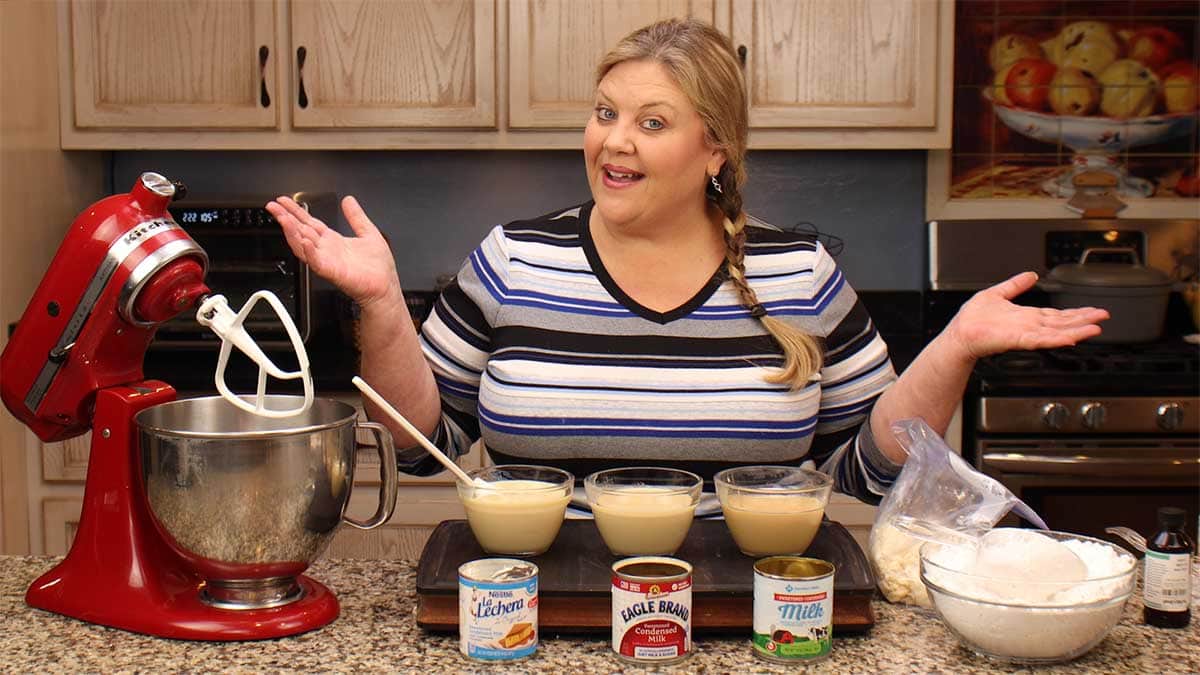
There was a noticeable difference in color with the 3 brands of sweetened condensed milk that I tried.
I had a Member's Mark store brand from Sam's Club and that one was the darkest in color. Usually, this would not make a difference and it certainly won't affect the taste or the texture, but it does affect the color of the inside of the peppermint patty.
The Member's' Mark brand created a beige fondant instead of a bright white fondant that you expect from a peppermint patty.
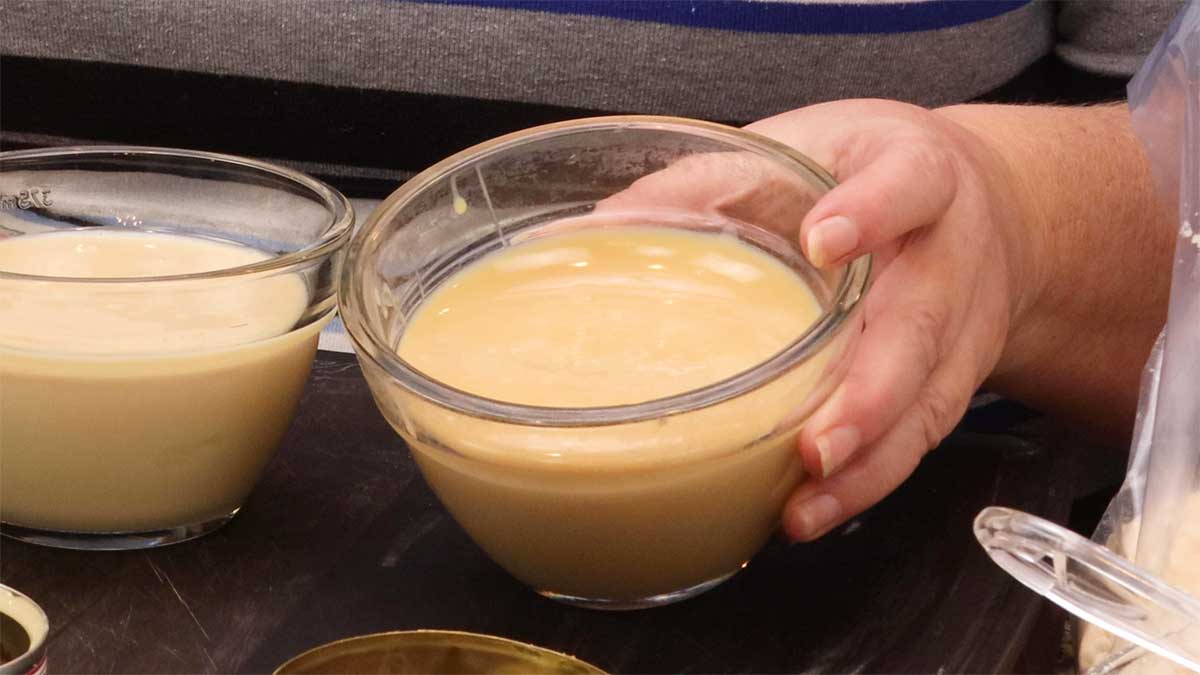
I also tried Eagle Brand Sweetened Condensed Milk and, while it was a little lighter than the Member's Mark brand, it still had a beige hue when the fondant was mixed up.
The best one that I tried was the La Lechera from Nestle. The centers of the peppermint patties were bright white!
If you can't find the Nestle brand, don't sweat it. Your homemade peppermint patties will still be delicious!
How to Make Homemade Peppermint Patties
Making Peppermint Patties consists of 3 steps. Making the peppermint fondant, forming the peppermint patties, and dipping the patties in chocolate.
Making the Peppermint Fondant Filling
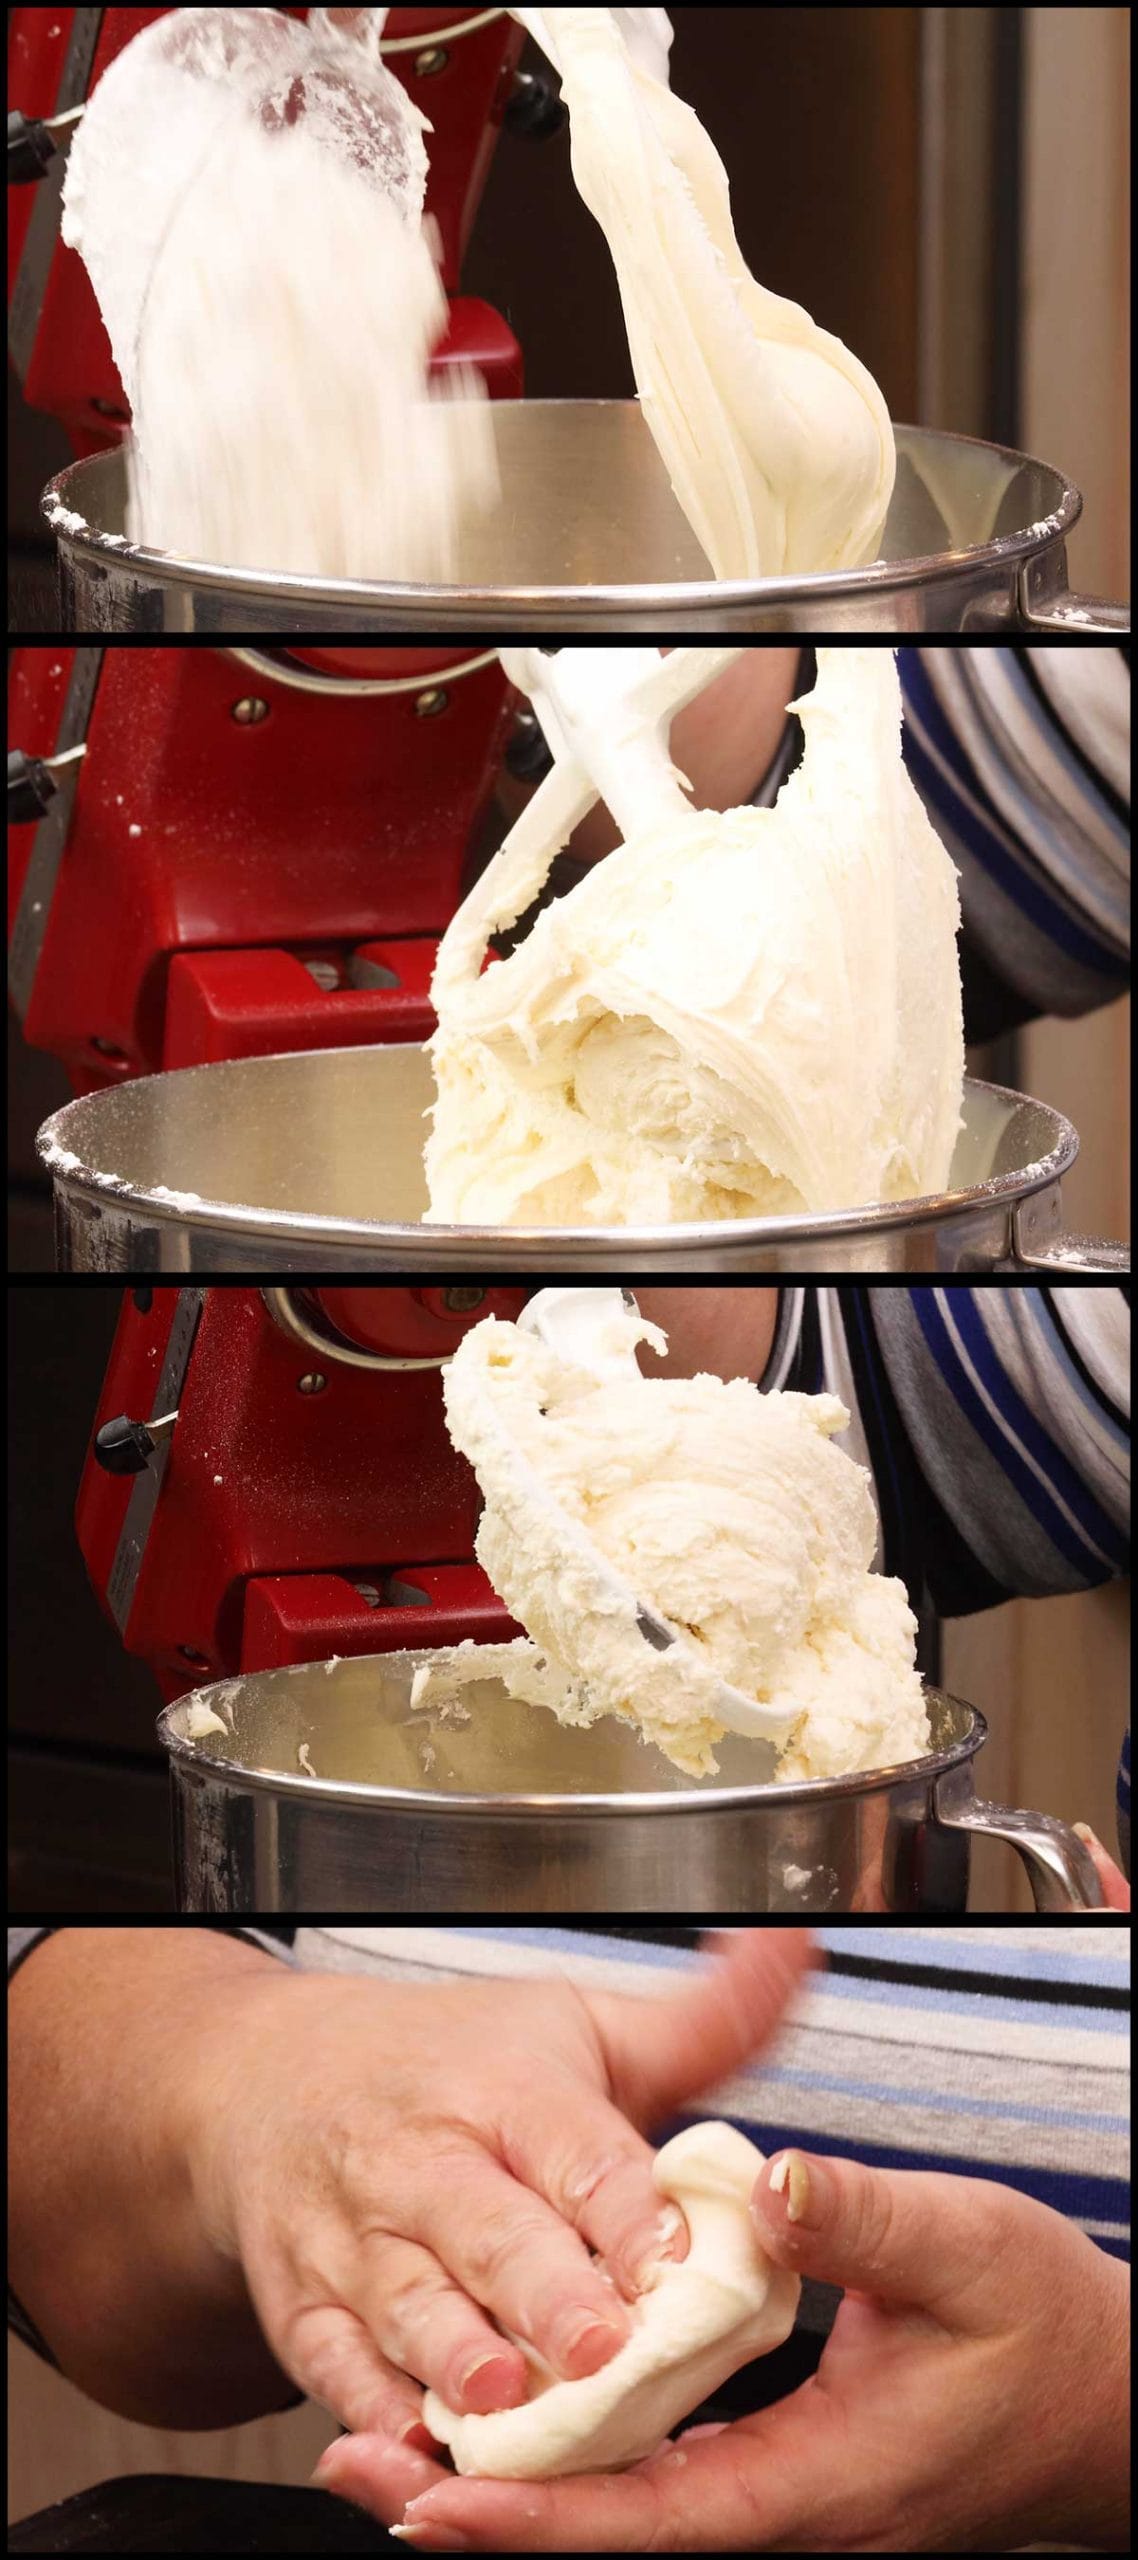
The easiest way to make the fondant filling is with a stand mixer, but you can use a hand mixer or even a wooden spoon and a large bowl.
Combine the sweetened condensed milk, room temperature butter, and the peppermint baking emulsion* with 3 cups of powdered sugar. Mix on low speed until combined or use a wooden spoon to mix well.

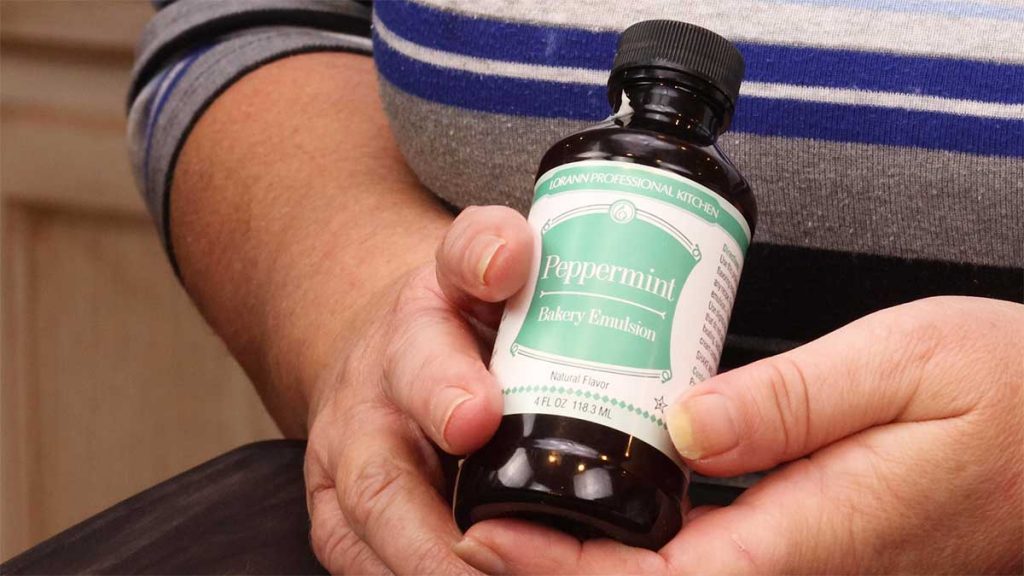
I like to use Peppermint Baking Emulsion that I get on Amazon, but you can also use peppermint extract. Start with 1-2 tsps and adjust the amount based on the flavor you want.
Here is the link to the Peppermint Baking Emulsion:
(affiliate link)Peppermint Baking Emulsion
Then add in ½-1 cup of powdered sugar at a time until the mixture becomes the texture of playdough. It should be soft, not sticky, pliable, and smooth.
Cover and refrigerate the fondant for about 30 minutes.
Forming the Peppermint Patties
I've seen recipes that call for rolling the fondant into a log and cutting, but I found this to result in uneven sized peppermint patties.
After trying several different techniques, I found this one to be the easiest of all for forming the peppermint patties.
Line a sheet tray with parchment paper. Use a small scoop (equal to about 2 teaspoons) and scoop out the fondant. Roll it between your palms to form a smooth ball.
Here is the link to the scoop I use:
(affiliate link)Pampered Chef Small Scoop
Place the ball on the tray, cover with parchment and press the ball down to form a round disc that is about 2" in diameter and ¼" thick. This will give you the perfect size mini peppermint patty.
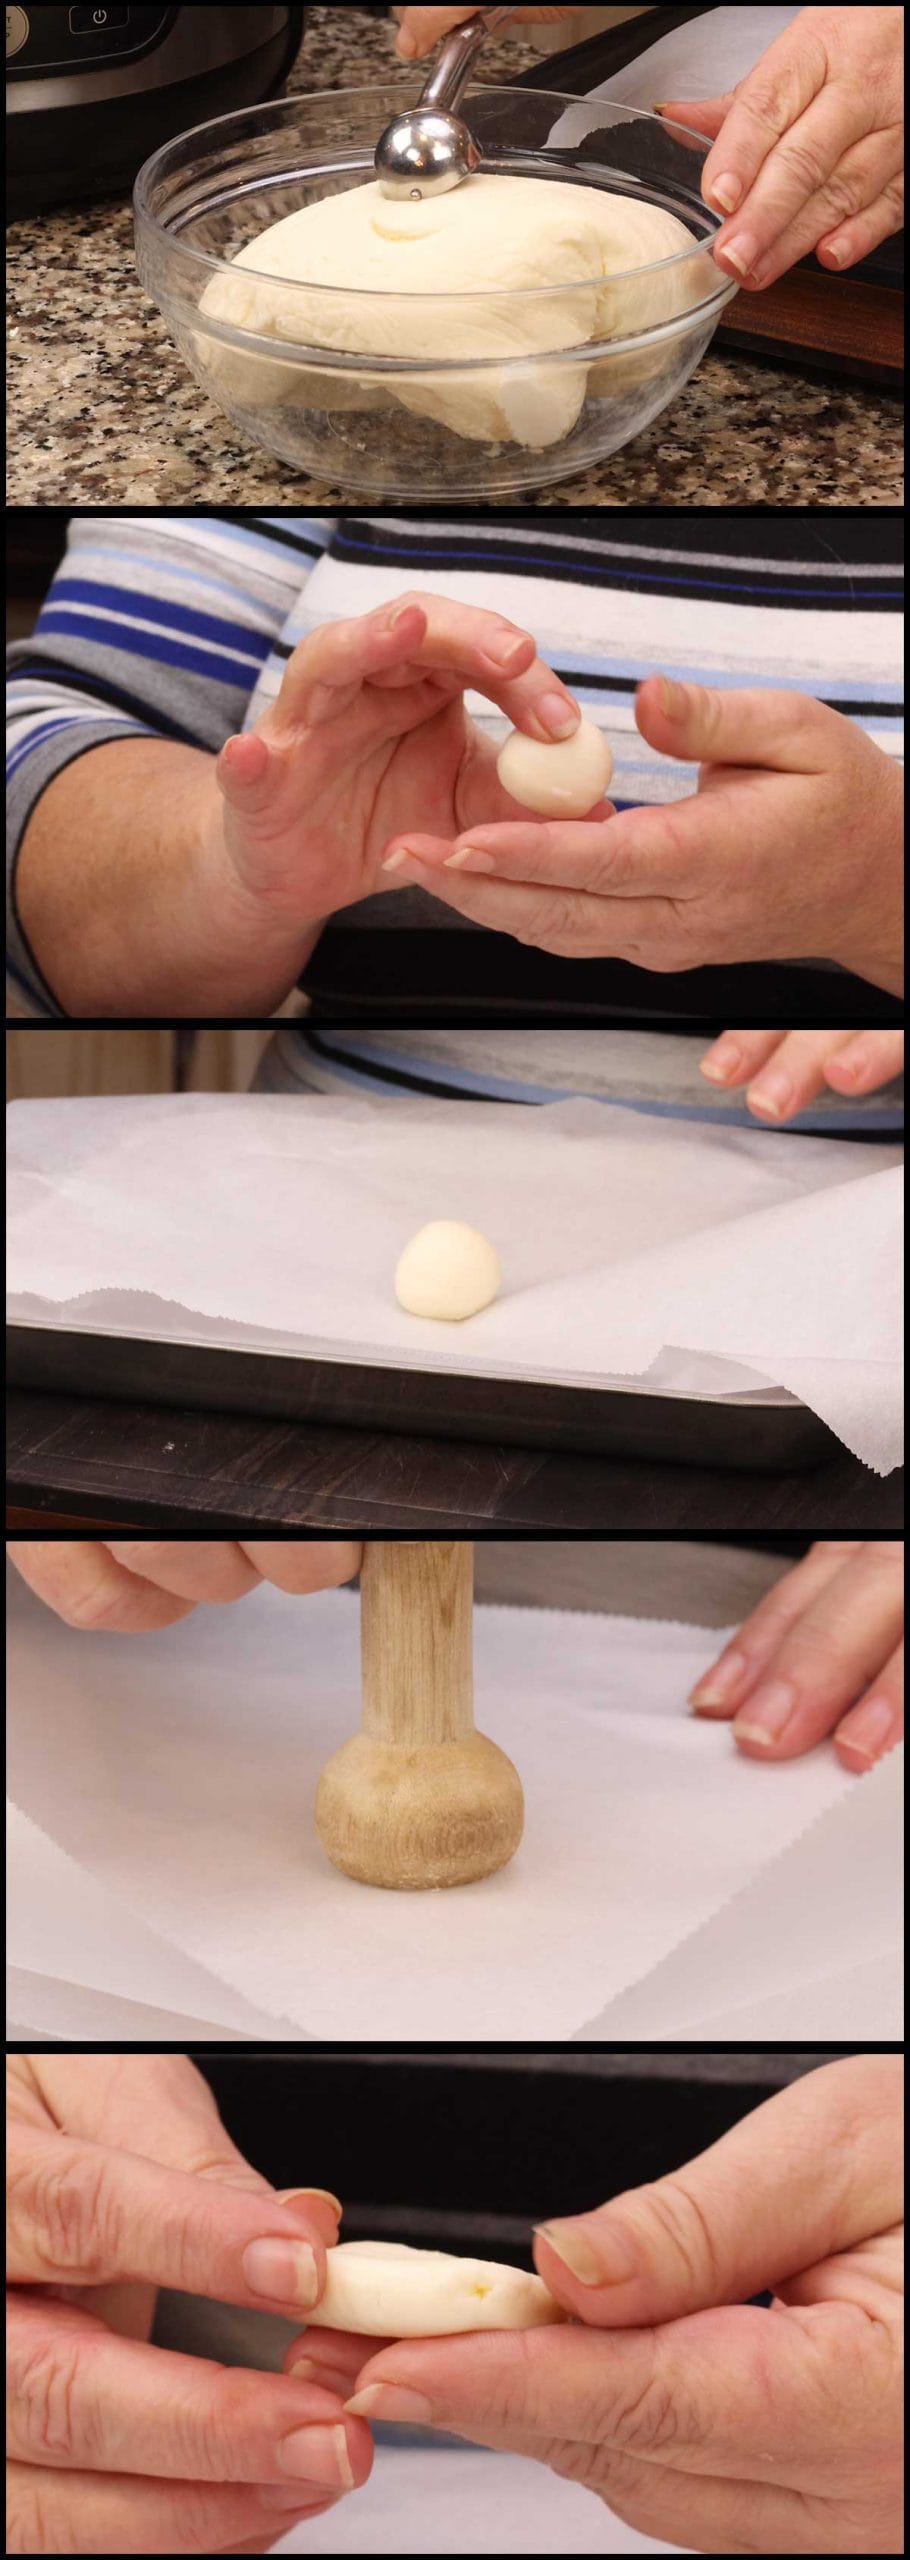
You can make them bigger if you want, but they are harder to dip in the chocolate. Make sure that they are at least ¼" thick or I found that they melted to fast when dipped in the chocolate.
I use a tart shaper to get the perfect shape, here is the link:
(affiliate link)Pampered Chef Tart Shaper
You can also use the palm of your hand or anything that has a flat area that can press the ball down to form a small disc.
Once you have formed all of the peppermint patties, place them in the freezer for about 30 minutes or so.
One batch makes about 62 small peppermint patties, so you will need several trays for the entire batch.
Melt the Dipping Chocolate
While the peppermint patties are freezing, I melt the chocolate for dipping.
I put 2 cups of water in the inner pot of the Ninja Foodi and place my double boiler pan on top. Turn the sear/sauté on high and let the water come to a boil which produces the steam needed to melt the chocolate.
You can also set a bowl on top of the rack in the high position and achieve the same result. Just make sure whatever you are using is not touching the water because the boiling water will overheat the chocolate and cause it to seize up.
Once the water is boiling and steam is being produced, turn the heat to low-medium. Add the melting chocolate and chocolate chips if using and stir occasionally until melted.
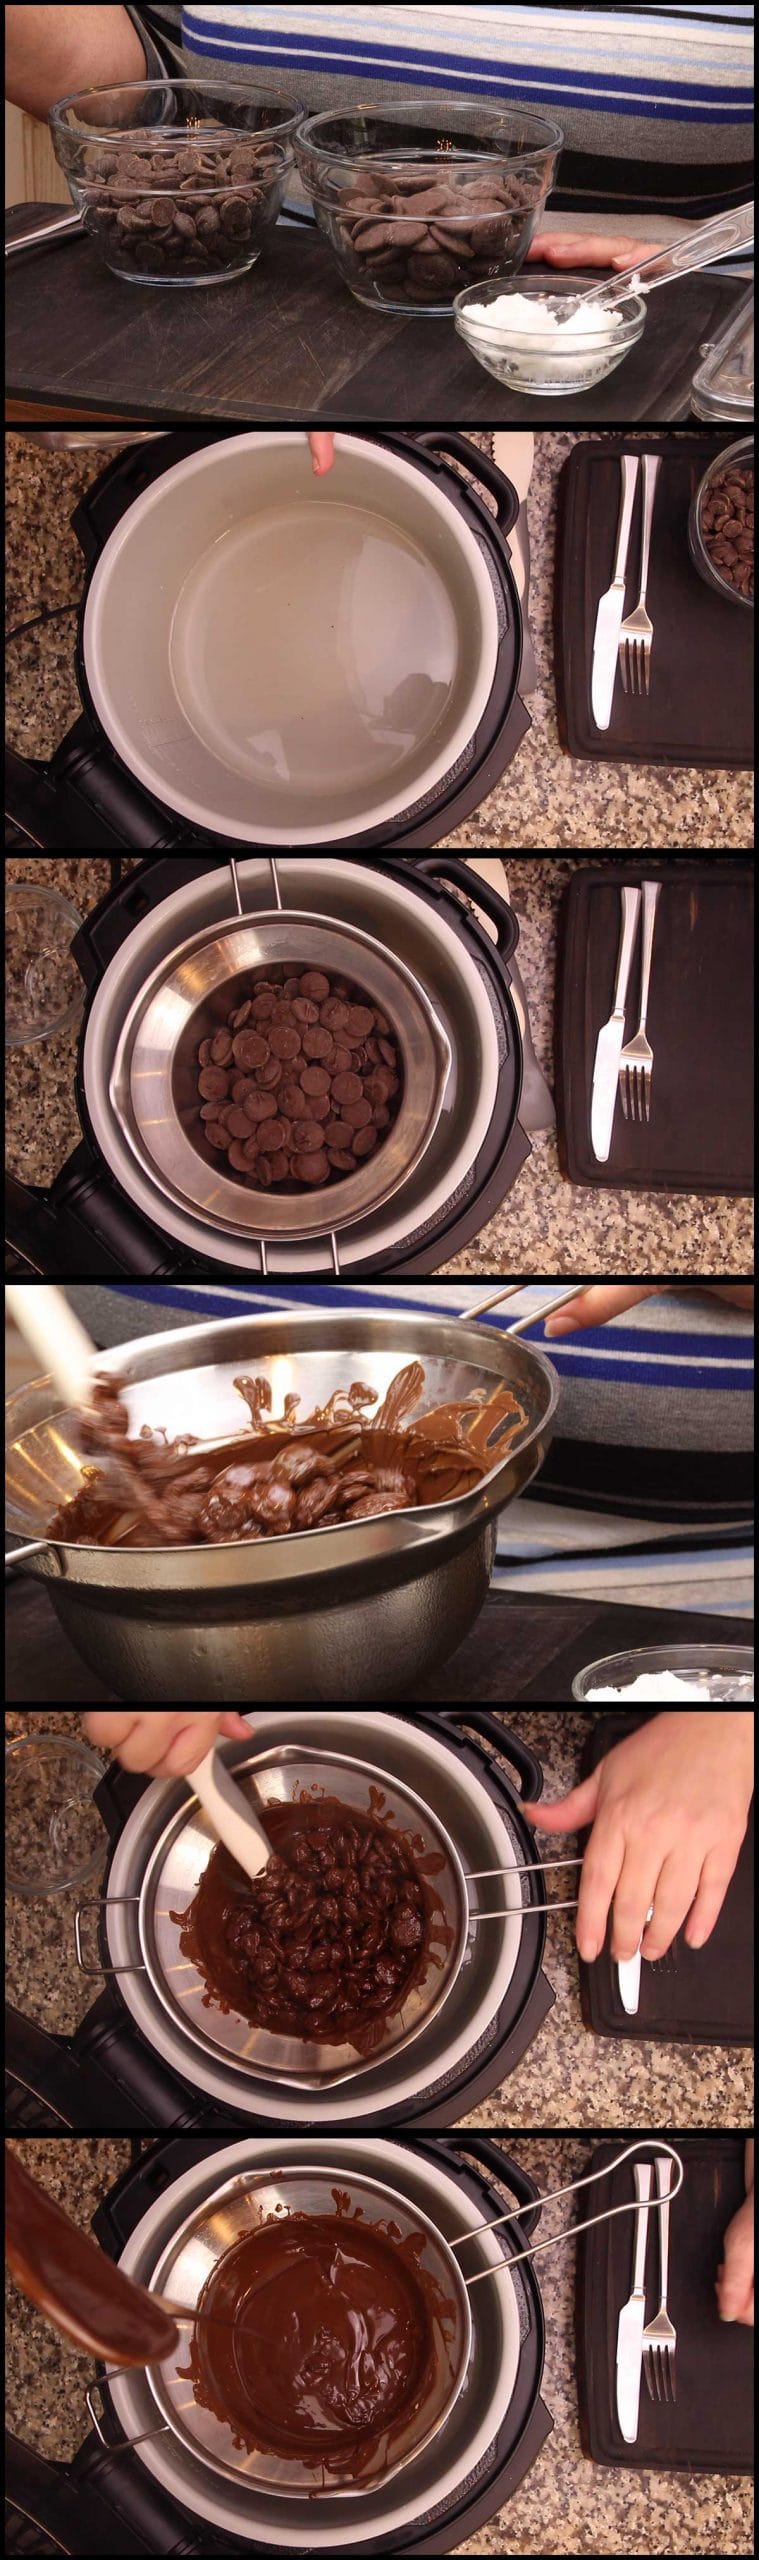
If your chocolate is too thick for easy dipping, add ½-1 Tablespoon of Coconut oil and stir until melted.
Turn the heat on low once all the chocolate has melted.
In the video, I used 8 ounces of each type of chocolate and had to had more to finish dipping all the peppermint patties, so I increased the amount to 12 ounces of each kind.
8 ounces of the chocolate was about 1¼ cups, so you don't need to weigh your chocolate if you don't have a scale. Simply add equal amounts of each type of chocolate and you will be just fine.
For a smaller batch, I wouldn't melt less chocolate because it might be hard to dip if there isn't enough chocolate.
You might want to use the extra chocolate to make these delicious Chocolate Covered Cherries!
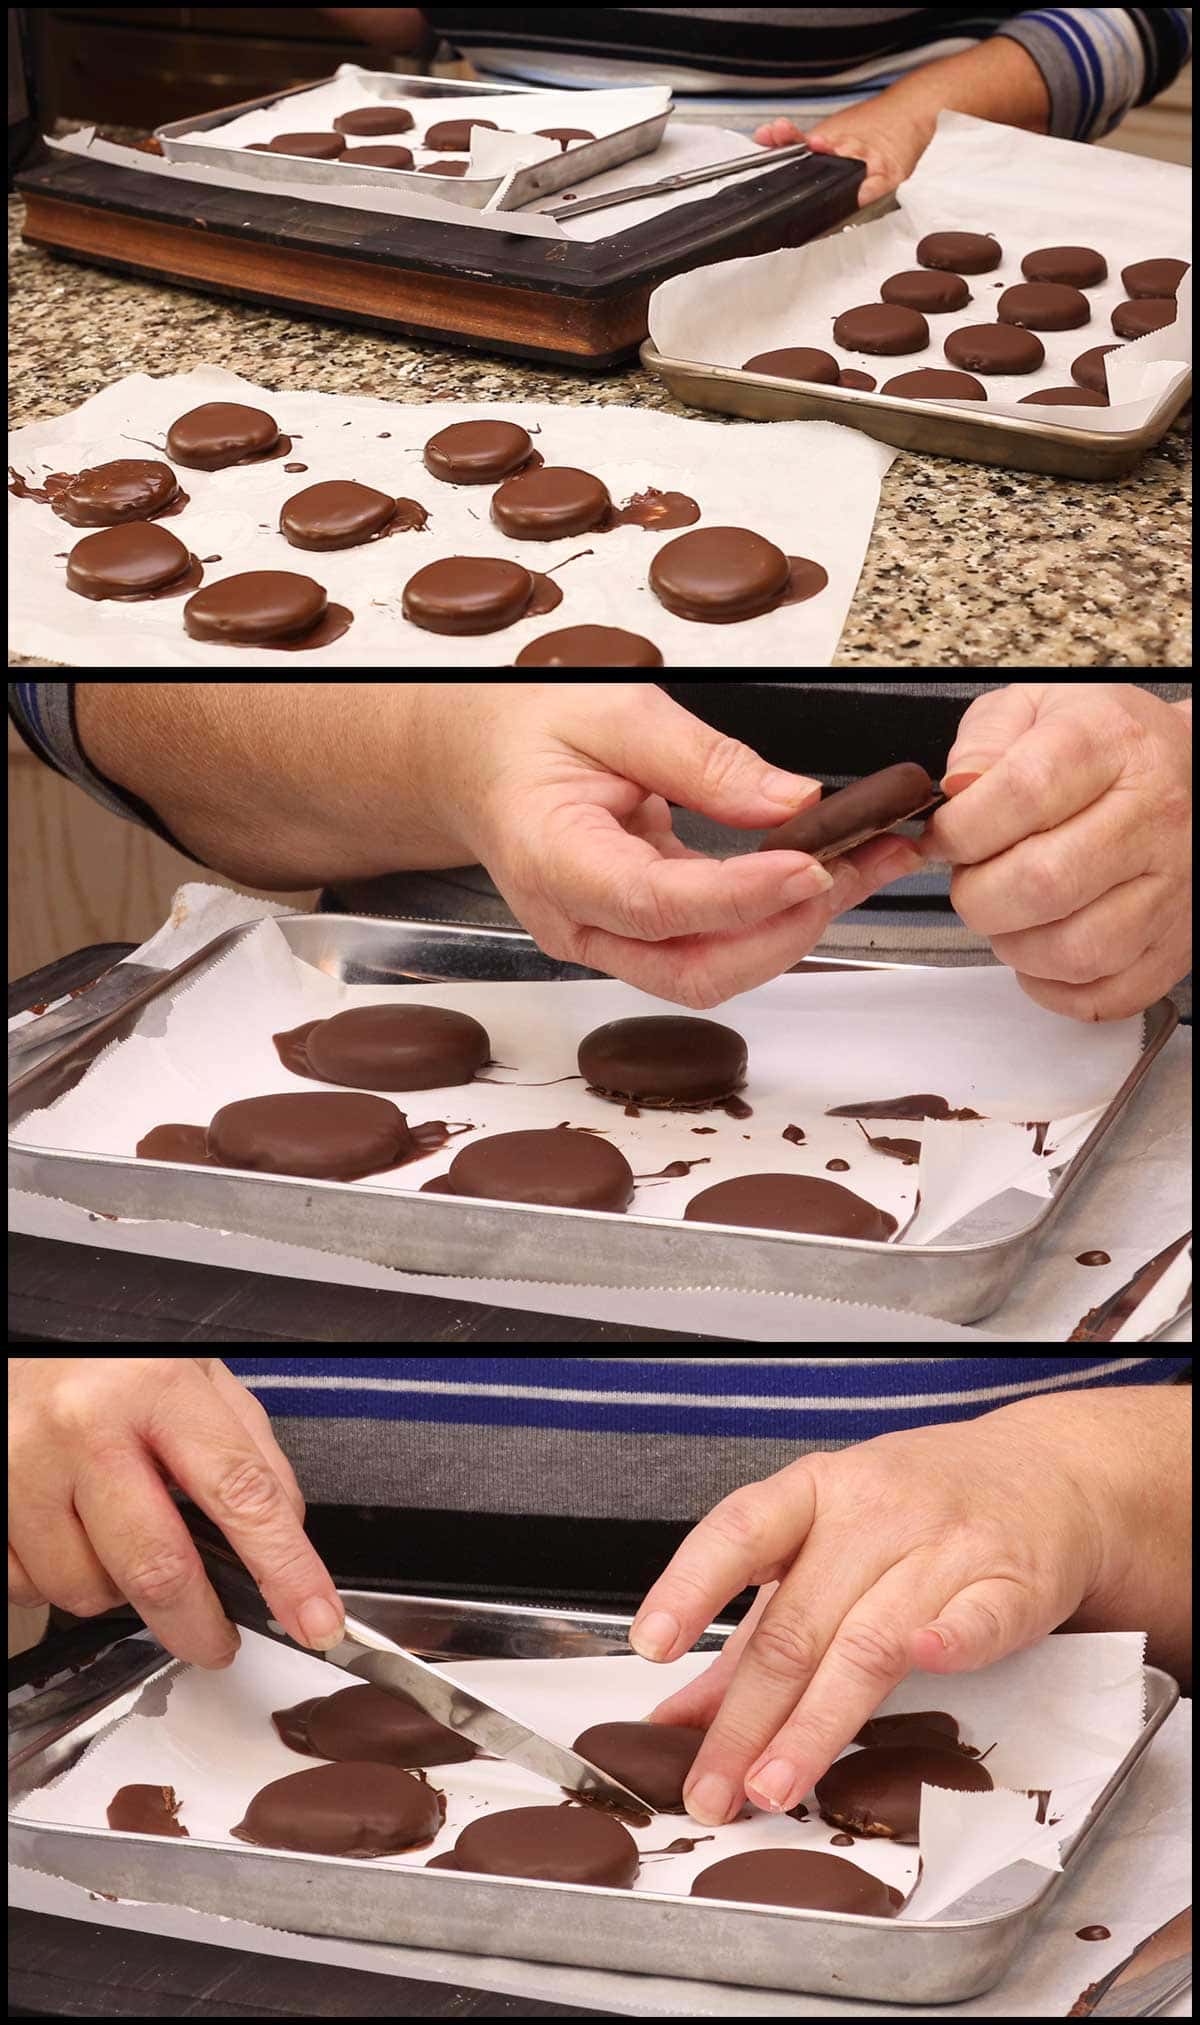
Dipping the Homemade Peppermint Patties
Remove one tray of the peppermint patties and begin to dip them in the chocolate. I have a special dipping tool that I use sometimes, but honestly, a fork and butter knife work just as well.
Place the peppermint patty on the tip of the fork and dip into the chocolate to coat. Allow the excess to drip off and then place the dipped peppermint patty on the parchment lined tray.

Repeat for all of the peppermint patties on the tray. Place the tray in the fridge for 5 minutes OR just leave it on the counter for the chocolate to harden.
Repeat for all the trays. If you are running low on dipping chocolate, simply add 50% of each kind and melt it on low-medium heat.
The peppermint patties are ready to be packages when you can touch them and not have the chocolate smear or melt in your hands.
If you have excess around the base, simply cut or break it off. It's easier to do when they are cold.
I often bag them up and store them in the freezer. If you plan on doing this, just remember when you remove the bag from the freezer, let it come to room temp before opening the bag or you will get some condensation and that can cause sugar bloom.
I go over sugar and fat bloom in my recipe for Chocolate Covered Cherries, which you can find right here ➜ Homemade Chocolate Covered Cherries.
Serve & Enjoy!
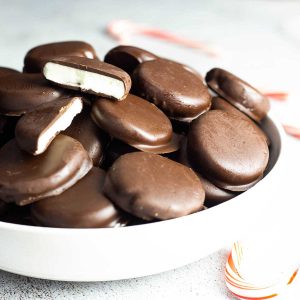
Homemade Peppermint patties
Ingredients
- 7 cups powdered sugar
- 14 ounces Nestle La Lechera sweetened condensed milk
- 4 tablespoon butter room temperature
- 2-3 teaspoon peppermint baking emulsion or peppermint extract
- 12 ounces Ghirardelli dark chocolate chips
- 12 ounces Ghirardelli dark chocolate melting wafers
Would you like to save this recipe?
Instructions
Peppermint Filling
- In the bowl of a stand mixer, combine the sweetened condensed milk, butter, 2 teaspoon peppermint baking emulsion and 3 cups of the powdered sugar. Mix on low speed until the mixture comes together.
- Add an additional ½-1 cup of powdered sugar and mix. Repeat this until the peppermint filling is soft, pliable, and not to wet. The total amount of powdered sugar you need will vary. The peppermint filling should be the texture of playdough. Refrigerate the filling for about 10-15 minutes.
Making the Peppermint Patties
- Use a small scoop or 2 teaspoon of filling and roll into a ball. Place on parchment lined sheet tray. Cover the ball with a little parchment paper and press down with a tart shaper or something that has a flat surface to create the disc. You want to make them around 2" in diameter and ¼" thick for the best results. Repeat until all the filling is used. Place the patties in the freezer and freeze for at least 30 minutes.
Melting & Dipping the Peppermint Patties
- Place 2 cups of water in the inner pot of the Ninja Foodi. Place your double boiler pot on top or use the rack with a bowl in the high position. Turn the sear/sauté on high and let the water boil. When it starts to produce steam, turn the heat down to low-medium.
- Add 12 ounces of each type of chocolate to a bowl or double boiler and let the steam gently melt the chocolate. You can add ½-1 Tablespoon of coconut oil if you think your chocolate is too thick.
- Remove 1 tray of peppermint patties from the freezer at a time. They warm up fast, so only take the tray out that you are working on. Using a fork, place the patty on the tip and dip it into the chocolate. Allow the excess to drip off and then place the dipped chocolate on the parchment lined tray. Repeat for the entire tray. Place the tray in the fridge or freezer for 5 minutes and then remove and let sit on the counter or you can skip the chilling period and just let them set up on the counter. It just takes a little longer.
- Repeat for all the trays. Let the dipped candy sit on the counter for a few hours. Then it is set and ready to serve! Enjoy!
Nutrition
About the Recipe Author, Louise Long
Louise is a full-time recipe creator and food blogger @ The Salted Pepper. She has over 30 years of experience with cooking and recipe development. She owned a restaurant for several years and was a full-time RN until retiring to blog full-time.

She published her first cookbook in the Fall of 2018 and is very interested in writing several more.
Louise is also the creator of an online Ninja Foodi Pressure Cooking Course with over 100 instructional step-by-step videos. People absolutely rave about the course and all the value they have received from it.
Louise has several very active Facebook groups that help people with the basics of cooking and learning more about the appliances they love.
Ninja Foodi Pressure Cooker & Air Crisper 101
Ninja Woodfire Outdoor Grill & Smoker
Louise is also a YouTube creator and you can find most of her recipes in video format on The Salted Pepper YouTube channel.
She is very responsive to messages and eager to help in any way she can. Get more Information about Louise & contact information
I WOULD LOVE TO SEE WHAT YOU ARE COOKING UP IN YOUR KITCHEN! TAG ME @THESALTEDPEPPER ON YOUR FAVORITE SOCIAL MEDIA PLATFORM WHEN YOU MAKE A DISH!
BE SURE TO FOLLOW THE SALTED PEPPER RIGHT HERE ⇓⇓⇓⇓⇓
Lori says
I don’t have peppermint baking emulsion. Will it ruin it if I use extract? Same measurement?
Louise says
No, you won't ruin them, but start with 1 teaspoon of extract and taste the fondant and then increase to taste.
Lori says
👍
Thanks!
Linda Lowden says
I want a thick layer of chocolate on candy how do I get it
Louise Long says
Dip them, let the chocolate set and dip them a second time. You can even refrigerate in between dipping and dip them as many times as you like until the coating is as thick as you want it to be.
Peggie says
I will definitely make the peppermint ones, but I would also like to make lemon ones. Would the 2-3 t emulsion be enough?
Louise says
That depends on how lemony you want them. I would start off with 2 teaspoons and increase based on taste.
Danielle Gulizia says
Those peppermint patties are delicious! Mine don't look very nice though because my chocolate gets thick in a hurry and clumps onto the patties when I dip them. I've added coconut oil which helps a bit, but my chocolate remains rather thick. I know that adding water is NOT the way to go as I ruined about half of it doing that. I discarded it and decided to ask for advice before resuming making more chocolate covered patties.
Louise says
What are you using for the chocolate and how are you keeping it warm through the dipping process? I have a recipe for dipping chocolate that works great if you want to look at that: https://thesaltedpepper.com/dipping-chocolate/
Charlene says
I made two batches as Christmas gifts and WOW not only are they so pretty in the box but delicious! My son was thrilled that it calls for his favorite brand of chocolate. Your demo was easy to follow and I’m surprised how well I did. Thanks for sharing.
Louise says
I am so glad you love them!