

- Large Mixing Bowl
- Box grater
- Silicone spatula
- Clean cutting board
- Plastic wrap
- Rolling Pin
There are so many uses for a homemade pie crust, both sweet and savory, and if you've never made one at home before, I promise it is so much easier than you think. This all-butter pie crust is flaky, but it's also sturdy enough to hold heavier fillings like pumpkin pie, apple pie, or a hot chicken pot pie. You don't need a food processor or a lot of tools to make it, just a bowl, a box grater, a spatula, and your hands. When you want to make the filling from scratch too, my Homemade Apple Pie Filling is delicious and comes together in the pressure cooker.
The secret is grating very cold butter right into the flour on the large holes of a box grater. It's quicker and easier than cutting the butter into pebbles, and every piece comes out the same size. Then the whole bowl takes a quick 5-minute rest in the refrigerator after the water goes in, so the flour can soak up the water while the butter stays cold. Those little slivers of butter are what give you flaky layers, because the water in the butter turns to steam as the crust bakes.
Would you like to save this recipe?
I used to make my pie crusts in a food processor, and I always found it hard to get the right consistency. This is the easiest pie crust I've ever made in my life, and there's less mess at the end of the day. The recipe makes two standard 9 to 10-inch crusts, so you can make a double crust pie or wrap one up and freeze it for later. Let me show you exactly how I do it.
Suggested Kitchen Tools for Homemade Pie Crust
- Large mixing bowl
- Box grater (use the large holes)
- Silicone spatula
- Clean cutting board
- Plastic wrap
- Rolling pin
Ingredients & Substitutions
You only need four simple ingredients for this all-butter pie crust, plus a little extra flour for rolling. Let's take a closer look at each one.
All-Purpose Flour
Used in Recipe: 2½ cups of all-purpose flour makes the dough, plus about ¼ cup more to lightly dust the countertop when you roll it out.
What it Does: Flour coats every little piece of grated butter, which protects the butter from melting too soon. It also soaks up the cold water during the 5-minute chill and gives the crust its structure, so it's sturdy enough for heavier fillings.
Substitutions: A measure-for-measure gluten-free flour blend can be used, though the dough will be more delicate and may crack more as you roll it. For the best texture, stick with all-purpose flour.
Butter
Used in Recipe: 2 sticks (1 cup) of butter, very cold but not frozen, grated on the large holes of a box grater.
What it Does: Butter is where the flavor and the flakiness come from. When those cold slivers of butter bake, the water in the butter turns to steam and creates flaky layers. That's why we keep the butter cold the whole way through, from grating to chilling the discs.
Substitutions: Salted or unsalted butter both work. If you use unsalted butter, you can add a small pinch more salt to the flour. I don't recommend margarine or butter spreads; they won't give you the same flaky layers.
Salt
Used in Recipe: ½ teaspoon of salt, mixed into the flour.
What it Does: Salt seasons the crust so it doesn't taste flat, whether you fill it with something sweet or savory. You can stir it into the flour before you grate the butter or add it after. It's perfectly fine either way.
Substitutions: Kosher salt or fine sea salt work at the same measurement. If you only have table salt, use a little less, since it's finer and saltier by the spoonful.
Very Cold Water
Used in Recipe: ½ cup of very cold tap water, poured over the butter and flour.
What it Does: Water hydrates the flour so the dough can come together, and keeping it very cold keeps the butter from softening. If the dough feels too dry and crumbly after the chill, you can add more water about 1 teaspoon at a time.
Substitutions: Any kind of water you like will work, filtered or bottled, as long as it's very cold.
How to Make Homemade Pie Crust
This pie crust takes about 25 minutes of hands-on time, plus a 5-minute chill in the bowl and a 30-minute chill for the dough discs before you roll them out. Here is everything you need to know!
Measure Everything and Grate the Cold Butter
- Keep 2 sticks (1 cup) of butter in the refrigerator until you're ready to grate it. If your butter is frozen, set it out for at least 5 minutes first.
- Measure 2½ cups of all-purpose flour into a large mixing bowl.
- Measure ½ teaspoon of salt.
- Measure ½ cup of very cold tap water.
- Set out a box grater, a silicone spatula, a clean cutting board, and plastic wrap.
- Keep about ¼ cup of extra flour nearby for rolling.
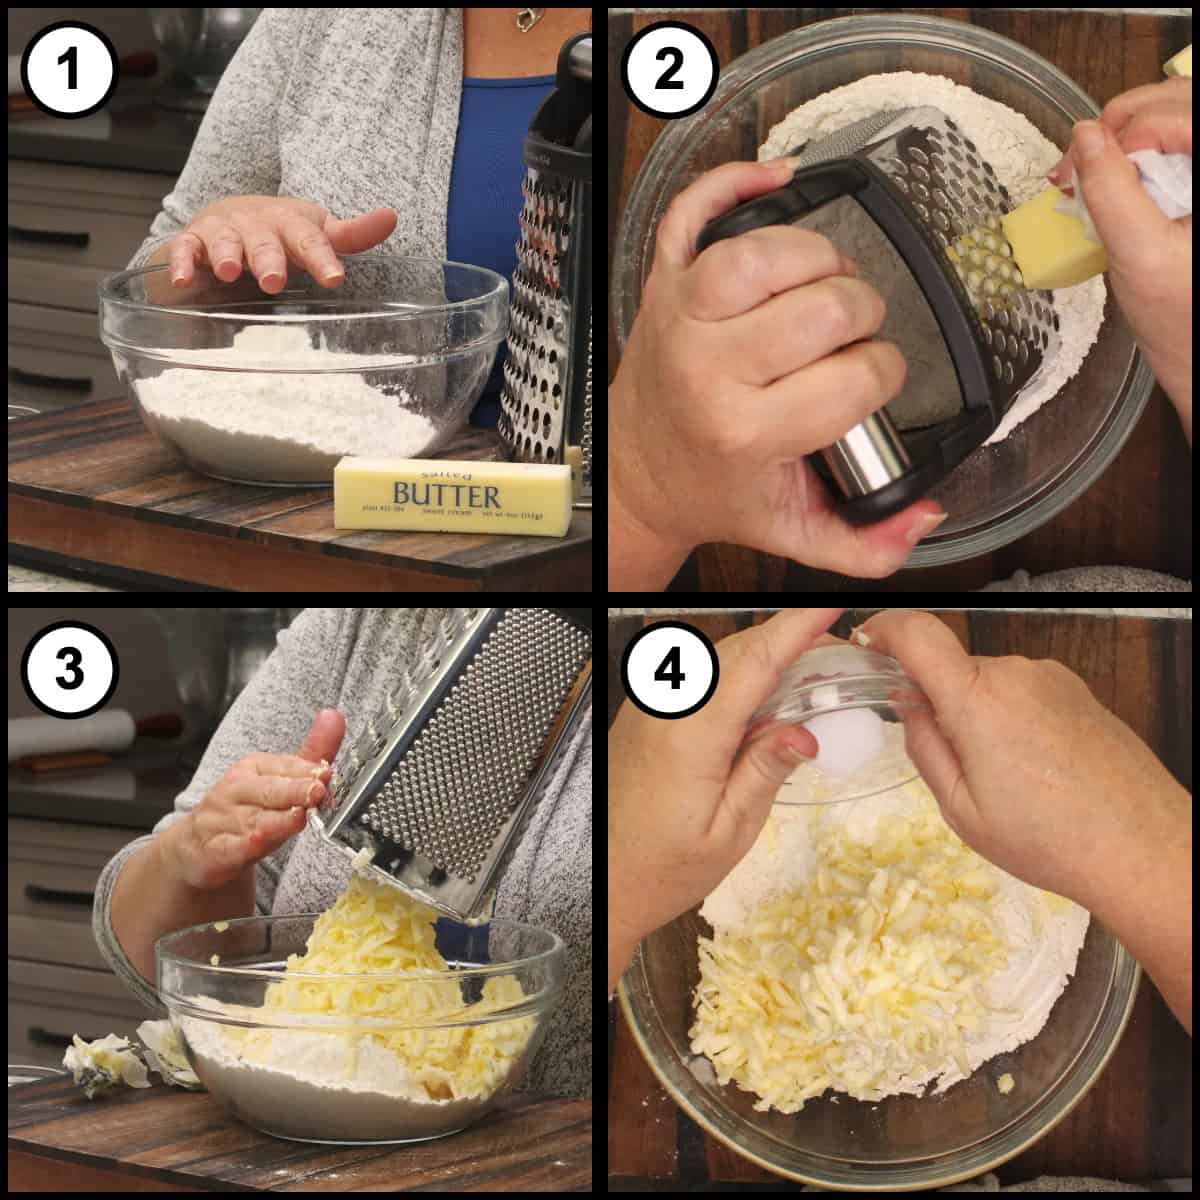
Stir the salt into the flour. Peel back part of the butter wrapper and use it as a little handle. If your grater has a rubber base, take it off, then set the grater right in the bowl and grate the butter on the large holes straight into the flour. When you get down near the end of the stick, it's perfectly fine to hold the last bit with your hands and finish grating. Repeat with the second stick.
Don't throw the wrappers away! I put mine in a container in the refrigerator, and when I'm baking something and need to butter a dish, I take one out, butter it up, and there's no waste.
Quick Tip
Use butter that is very cold but not frozen. If your butter is frozen, leave it out for at least 5 minutes before grating, because frozen butter cracks instead of grating and doesn't incorporate into the flour as well. Always use the large holes on the grater, since really small shreds melt too fast.
Toss the Butter in the Flour
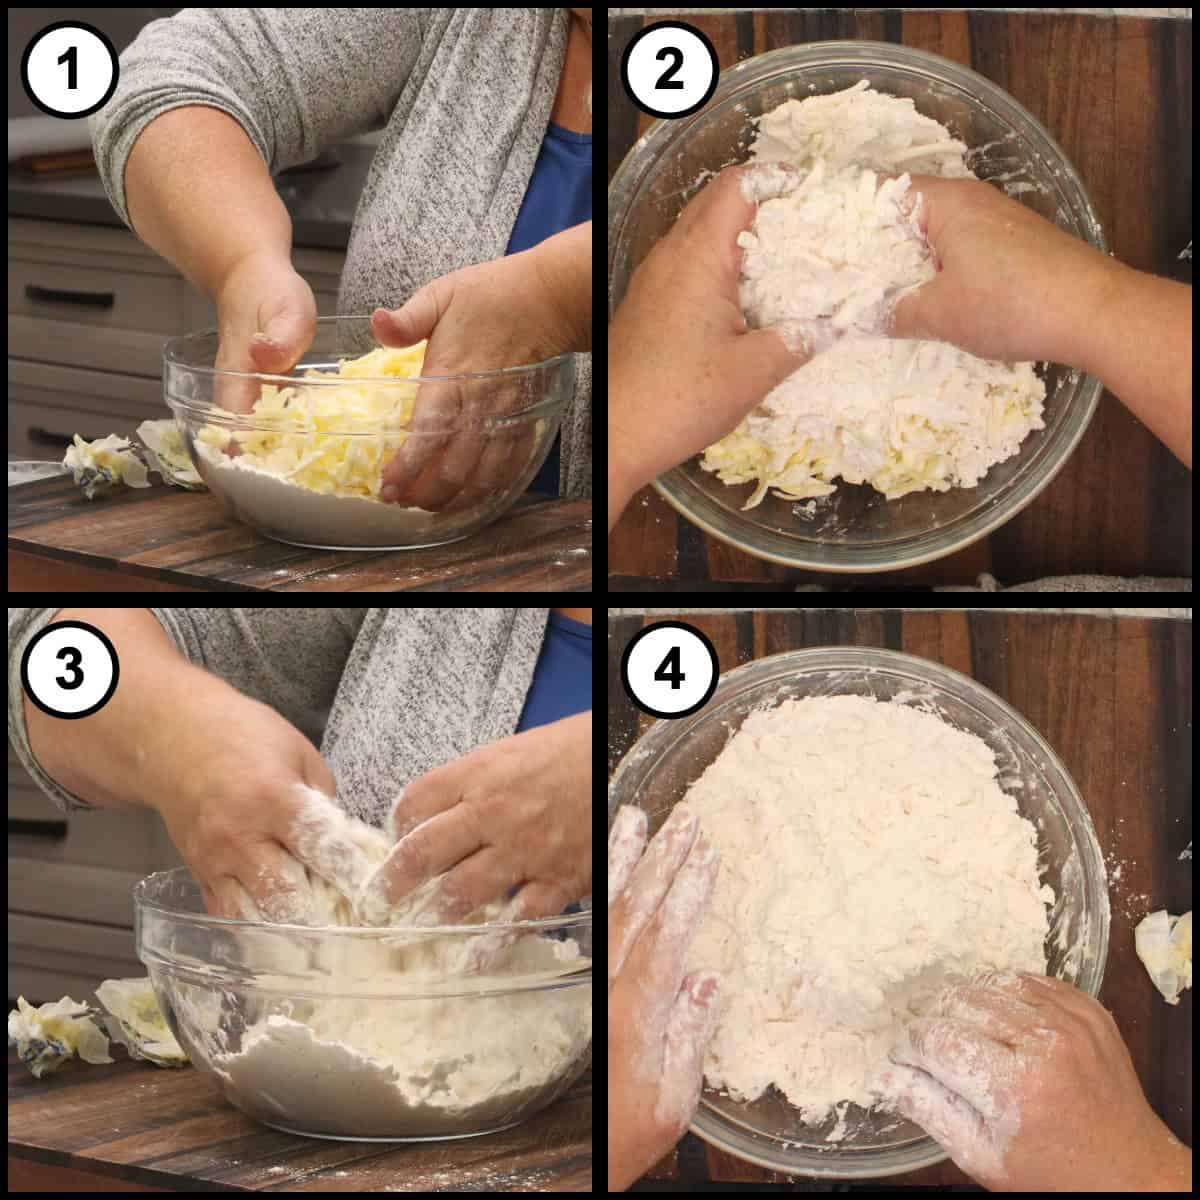
Now get your hands right in the bowl and toss the grated butter with the flour until every little piece is coated. If a few pieces clump together, just break them up. There's no need to wash your hands again before this step; they're already a little buttery, and they're going right back in.
The flour coating protects the butter from melting too soon, so when you roll out the dough, those little slivers of butter stay intact. That's what creates the flaky layers as the water in the butter turns to steam. Other recipes will tell you to break your butter into pebbles, and that works too. I just find that grating it is so much quicker and easier, and the pieces come out uniform.
Add the Cold Water and Chill the Bowl
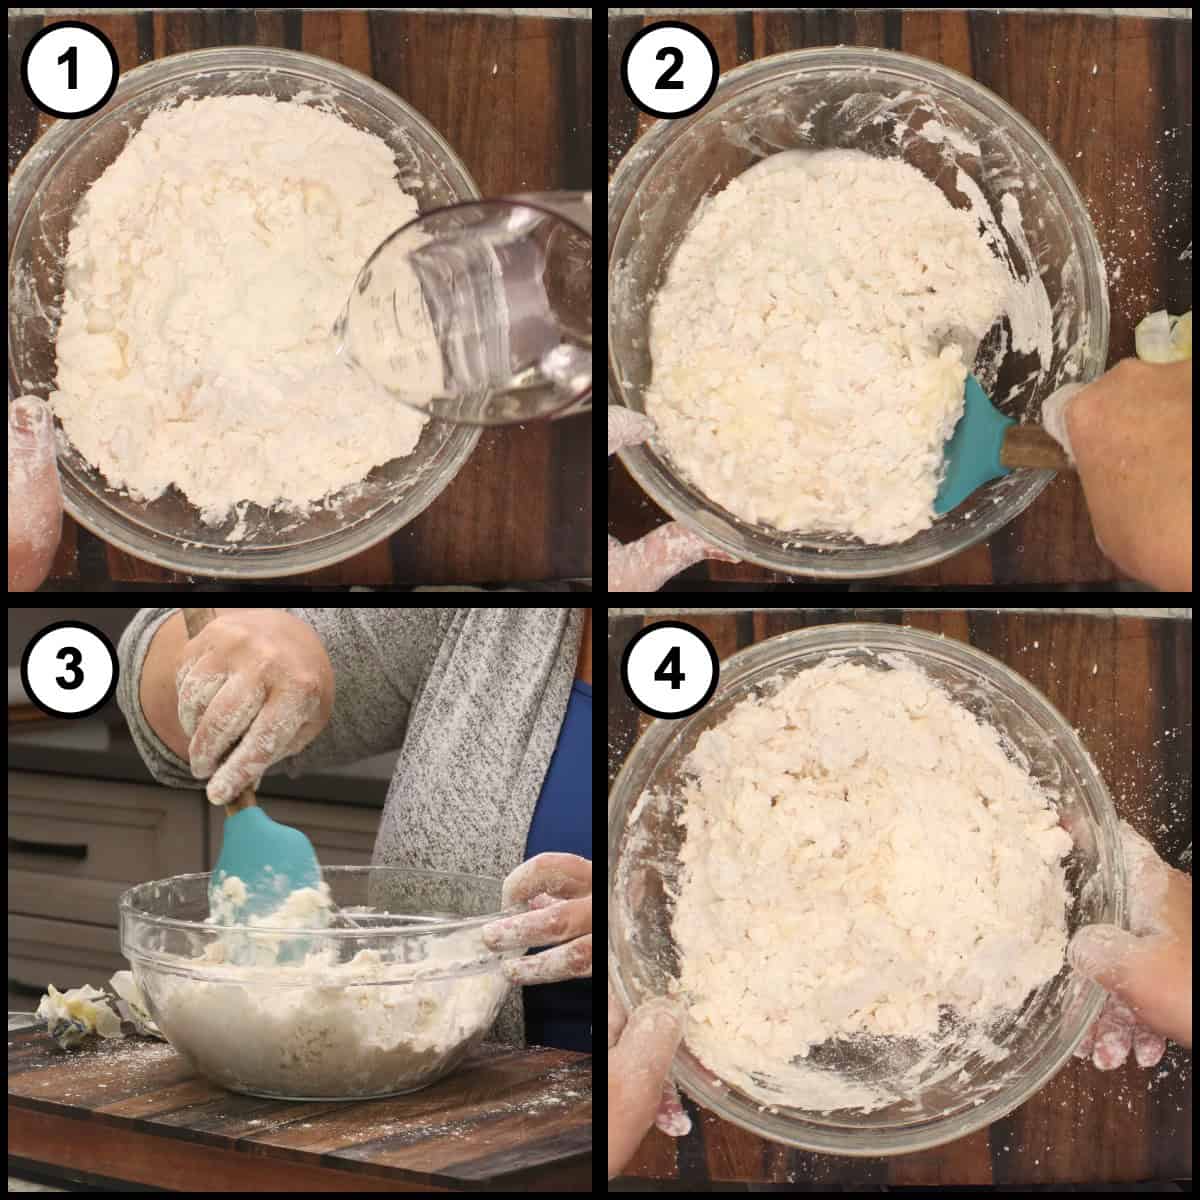
Pour ½ cup of very cold water over the top. Take a spatula and gently toss everything around. Don't mix and don't be rough; we're just moving the water around so it starts to incorporate with the flour. The dough is not going to come together at this point, and that's exactly what we want. We don't want to overwork it.
Put the entire bowl into the refrigerator for 5 minutes. This lets the flour absorb the rest of the water while giving the butter a quick chill. If the bowl sat out on the counter, the flour would still absorb the water, but the butter would soften, and that becomes a problem later when you roll out the dough.
Bring the Dough Together
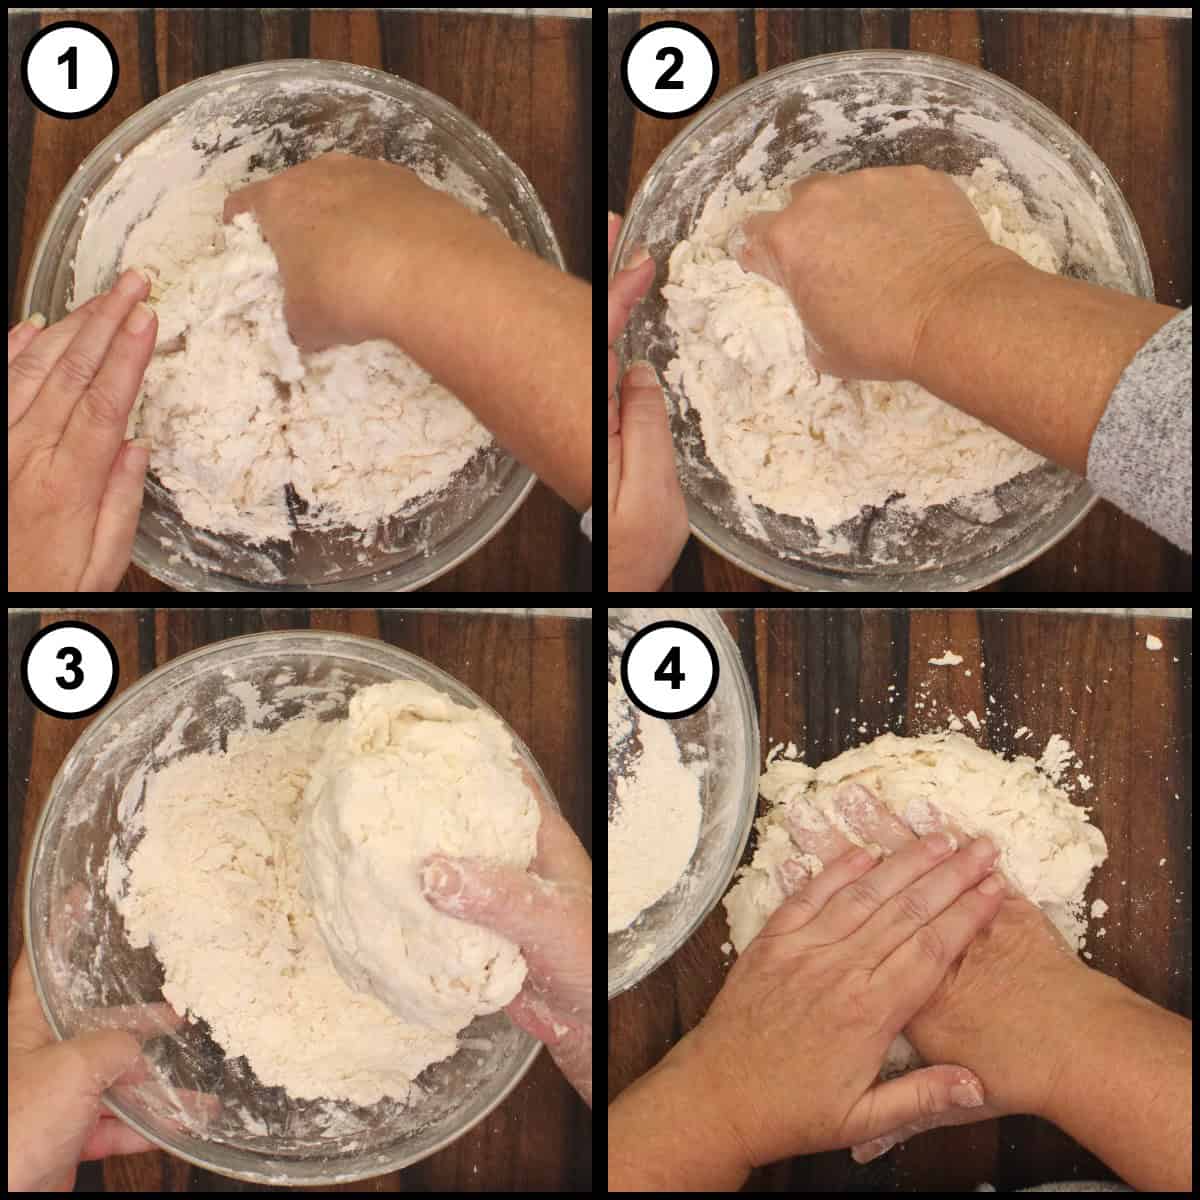
After 5 minutes, take the bowl out of the refrigerator. Work the flour and butter together into a dough ball by squeezing it in your hands, flipping it, and repeating. There will be some loose flour left in the bowl, and that's perfectly fine; we'll work it in on the cutting board.
You want the dough a little bit dry and crumbly at this stage. If it seems too dry to hold together, you can add a little more water. I haven't needed any extra water with this ratio of ingredients, but you may.
Put the dough ball on a clean cutting board. You do not need to flour the board at this point.
Quick Tip
Add extra water only 1 teaspoon at a time. The worst thing to have is a really wet pie dough, so it's much better to start a little dry and crumbly and add water slowly than to add too much at once.
Fold In the Loose Flour and Split the Dough
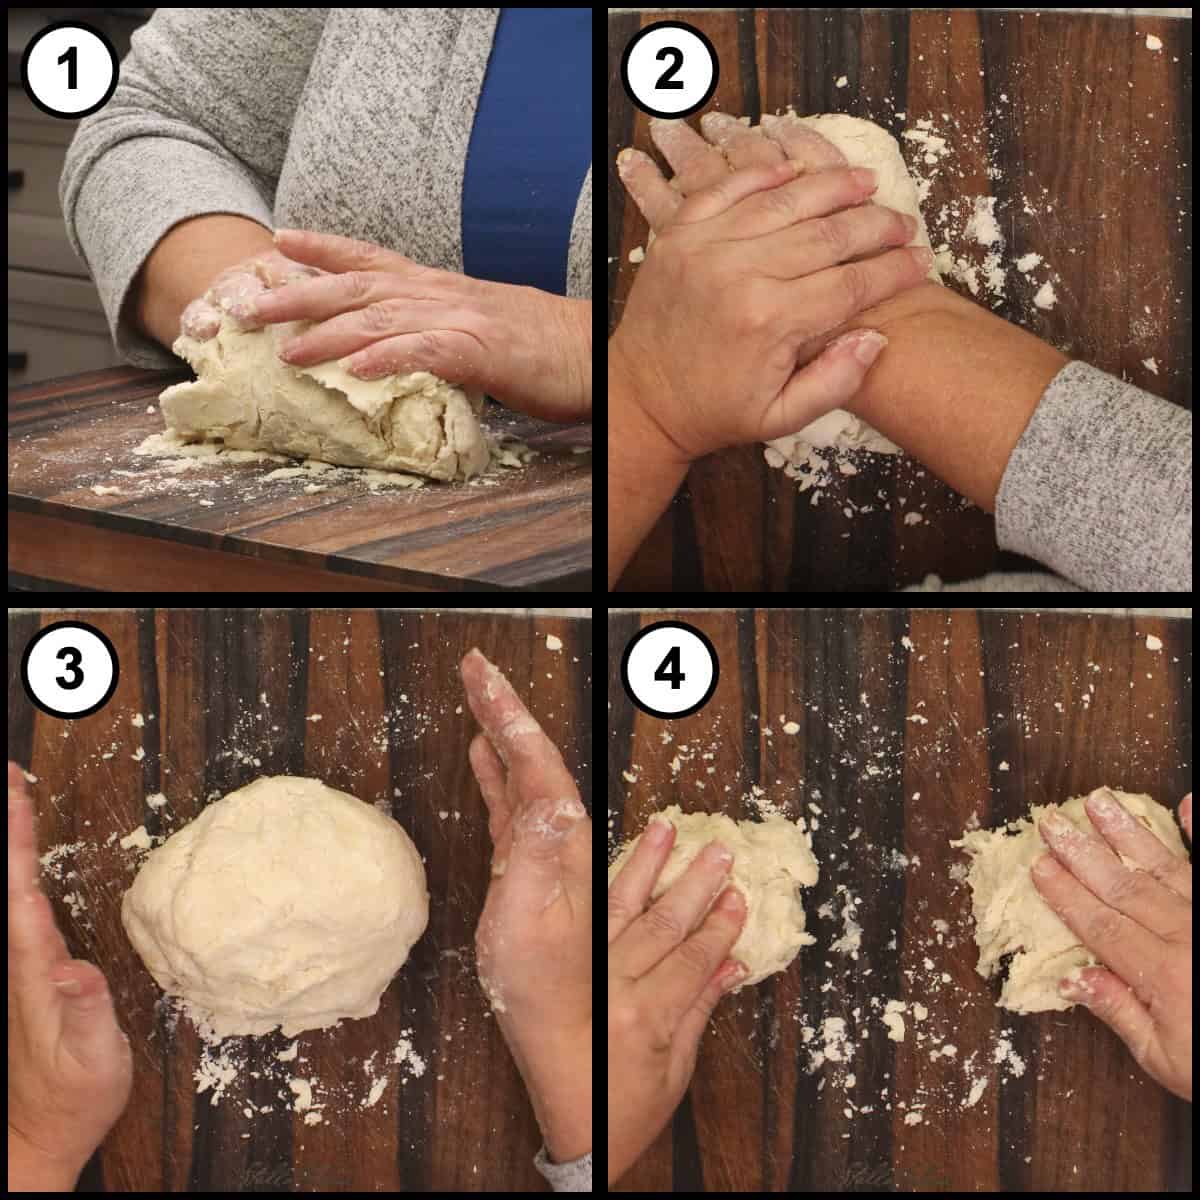
Press the loose pieces from the bowl into the dough, then fold and push it just a few times. Flatten it back out, work in the rest of the loose flour, and fold and push a few more times. Some cracks are normal. Keep this part brief; the less you work the dough, the more of those beautiful butter pieces you'll still see, and that's what you want. Split the dough in half with a knife or your fingers. If you want exact amounts, you can weigh the whole thing and divide it by 2, which is perfectly fine to do. I don't, though.
Shape, Wrap, and Chill the Discs
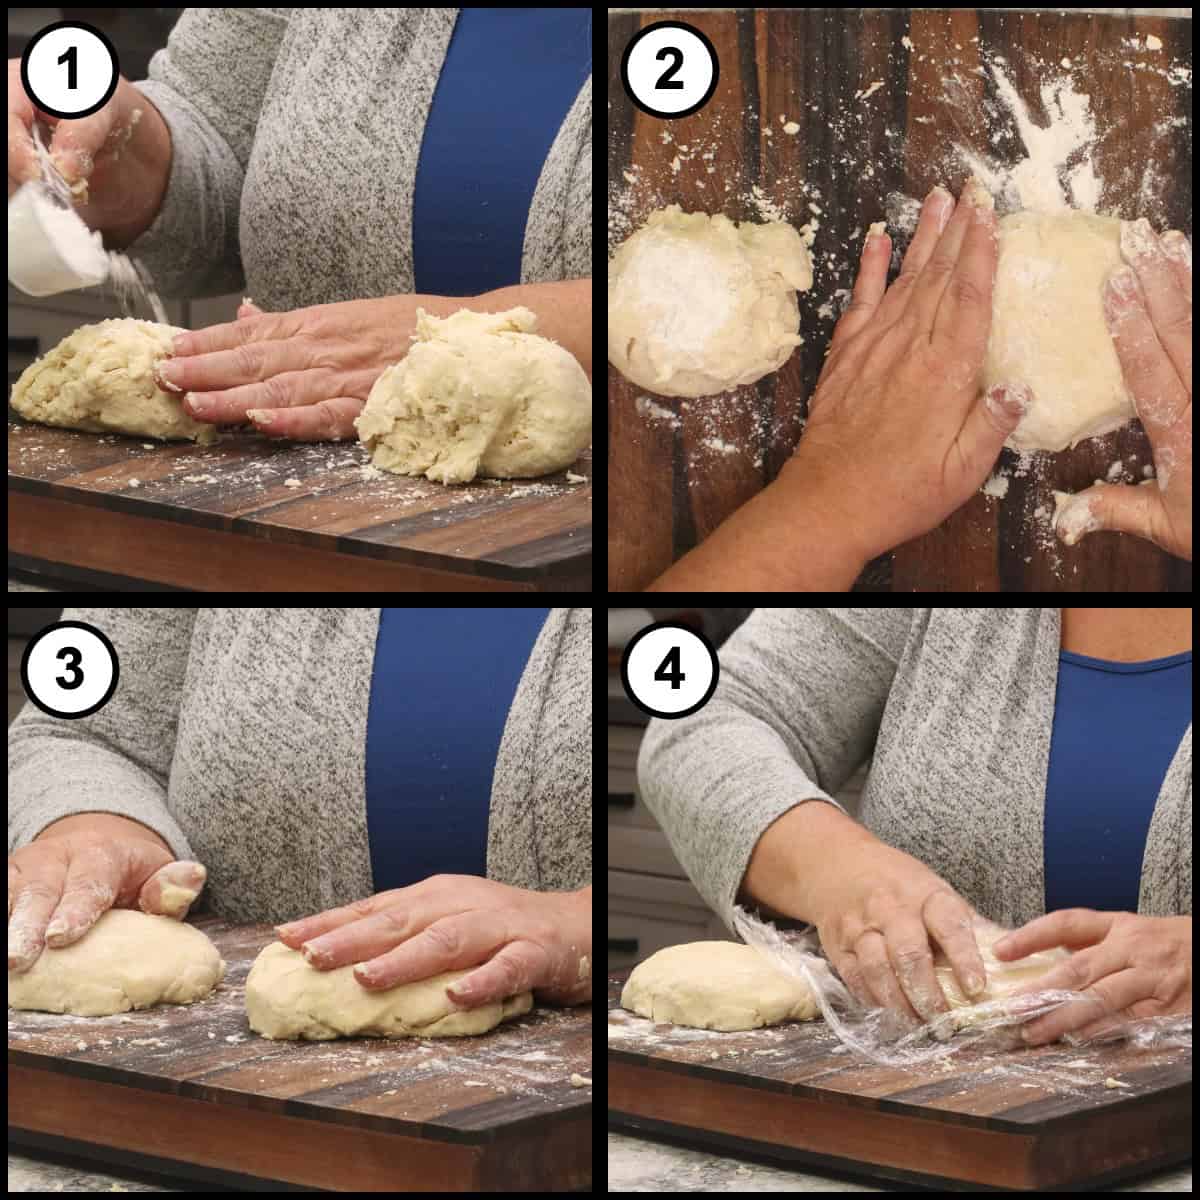
Flatten each half into a disc. If the dough sticks a little, sprinkle on a little more flour, but not too much, because we don't want it sticky right now.
Wrap each disc in plastic wrap and make sure they're sealed really well, because air will dry out the crust in the refrigerator. Refrigerate for 30 minutes. Don't skip this chill! It lets the butter set back up, and that is the secret to the flakiness.
Flour the Counter and Roll from the Center
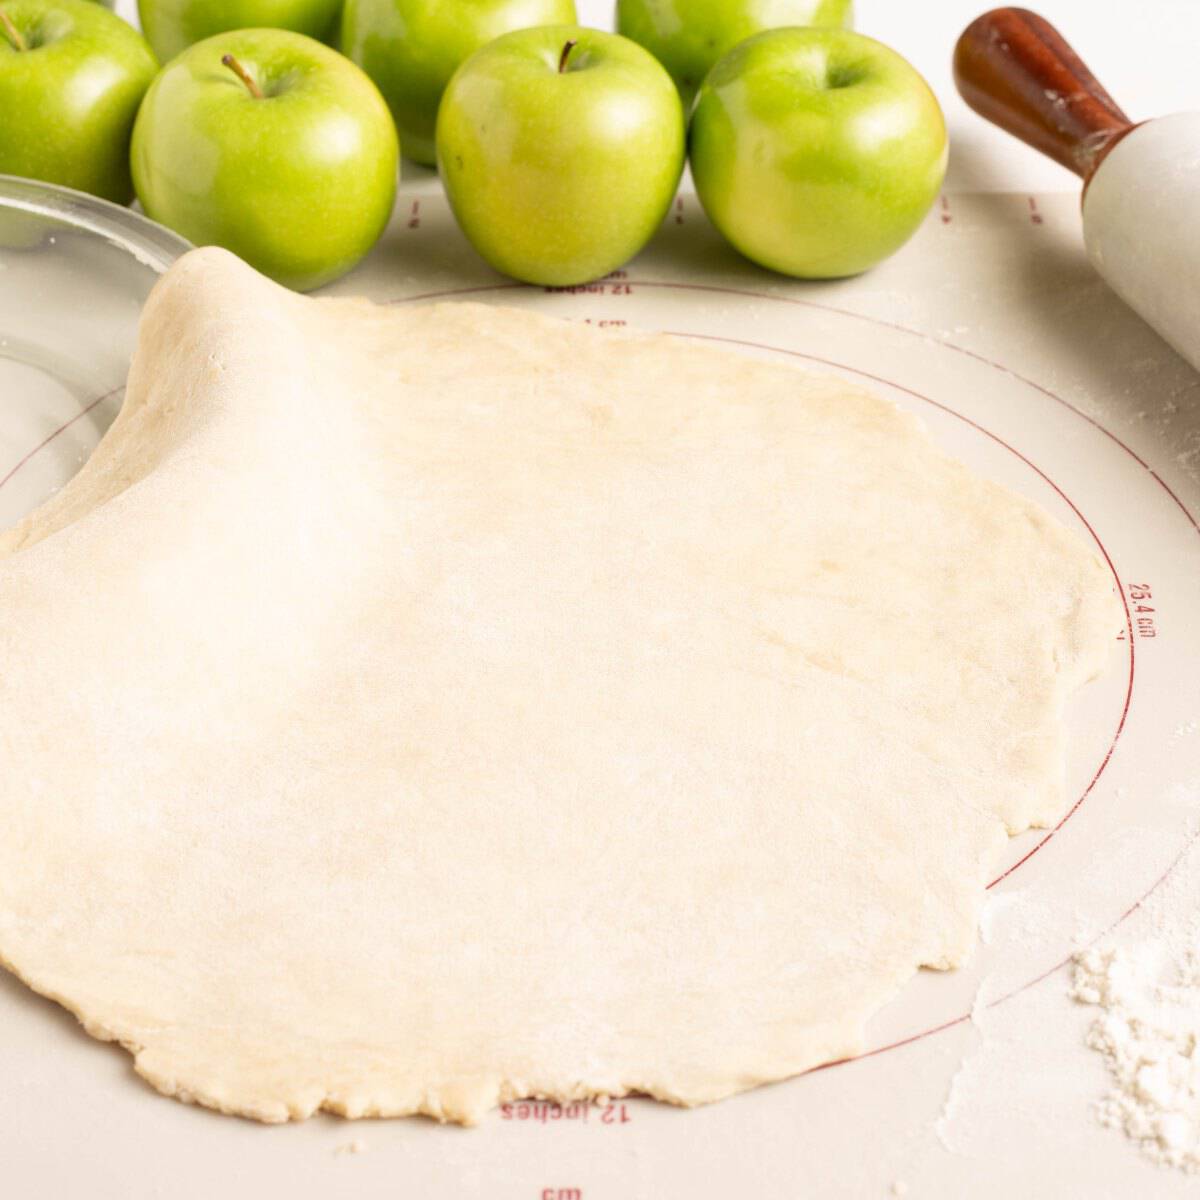
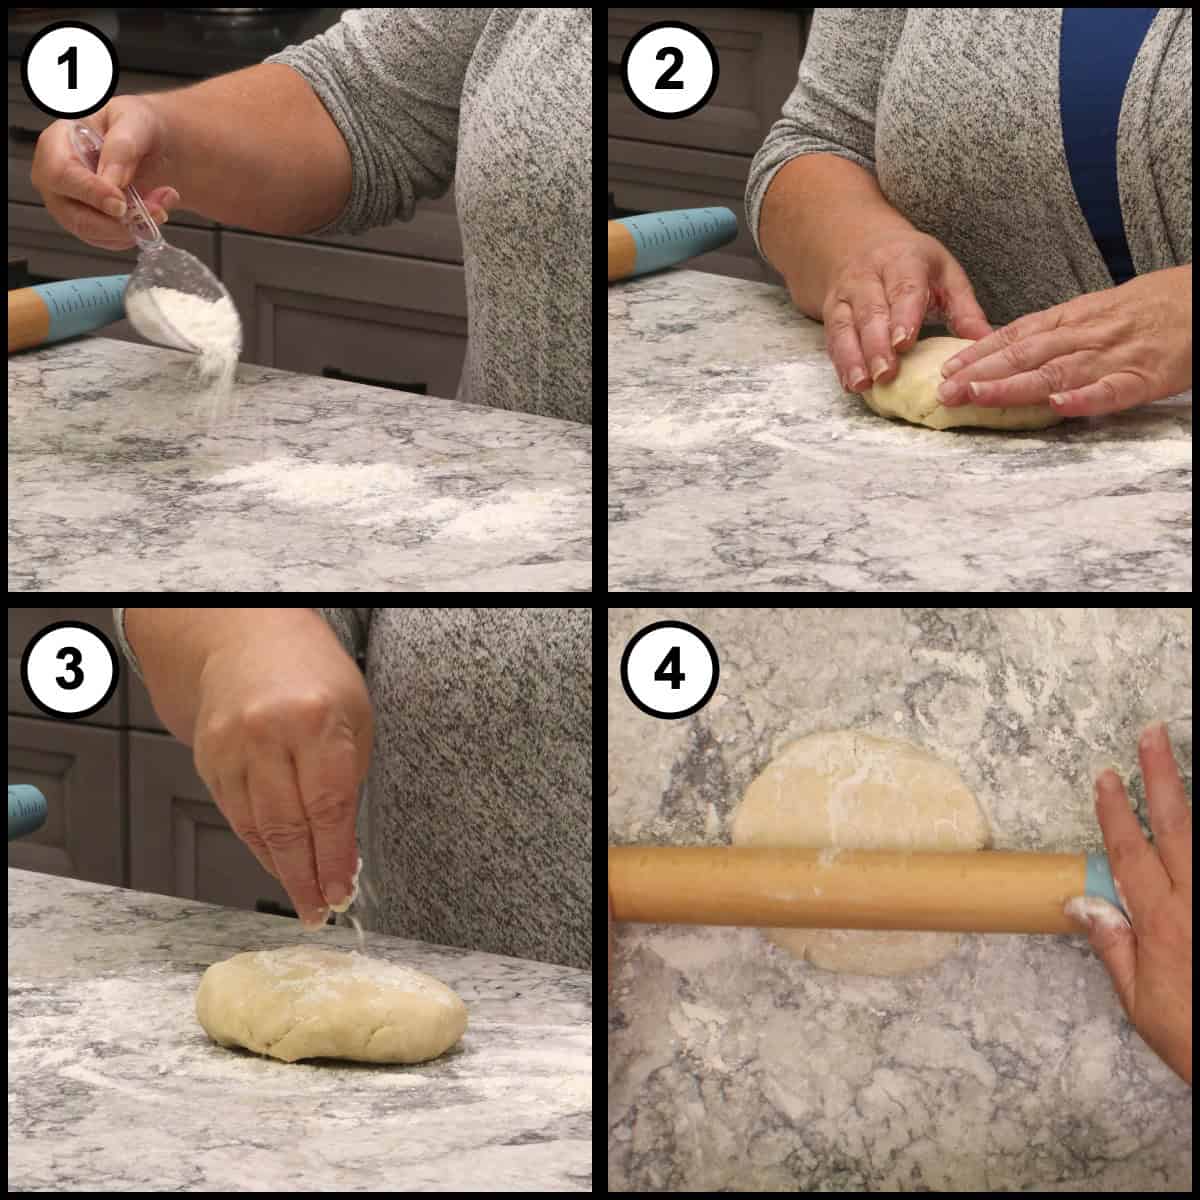
After 30 minutes, take one disc out of the refrigerator and leave the other one chilling. It's best to work with one at a time. A cutting board usually isn't big enough for rolling, and I've found that a clean countertop sprinkled with flour works better than my pastry mat. Lightly sprinkle about ¼ cup of flour over the counter. You'll flour both sides of the dough as you go, but you're only using the flour on the surface so the rolling pin doesn't stick. You're not working it into the dough.
Pat the disc down, then start in the center and roll outward with gentle pressure. The edges will start to crack. Don't worry about that; it's perfectly normal and actually the sign of a really good pie crust. Once it's about 7 or 8 inches across, lift the dough, make sure there's still flour underneath, flip it, and roll the other way, starting in the middle.
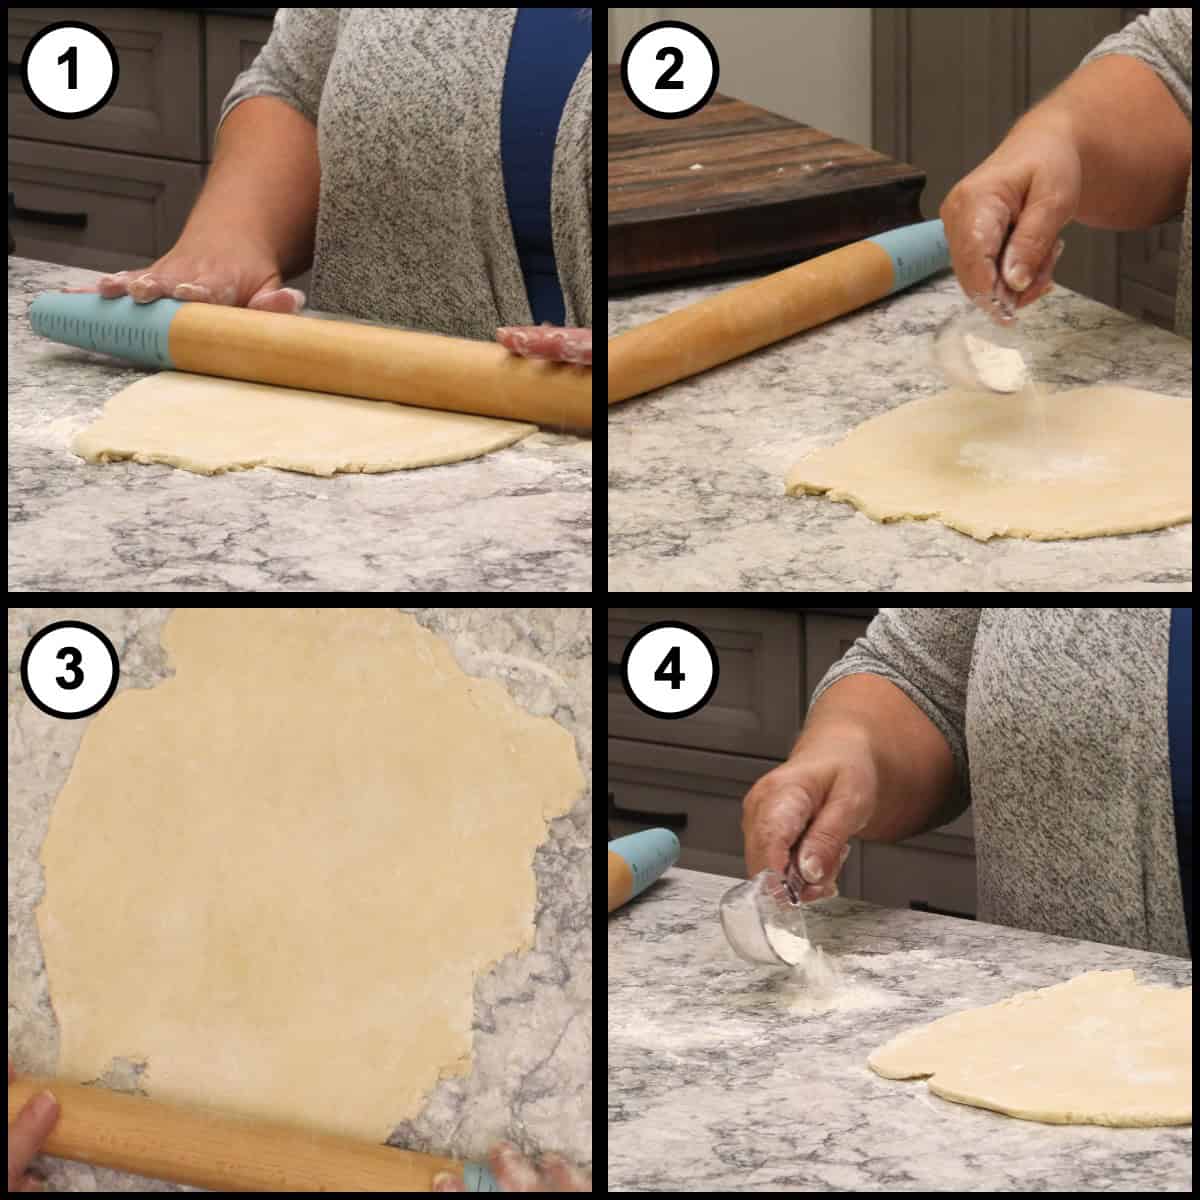
Roll the Dough into a Big Circle
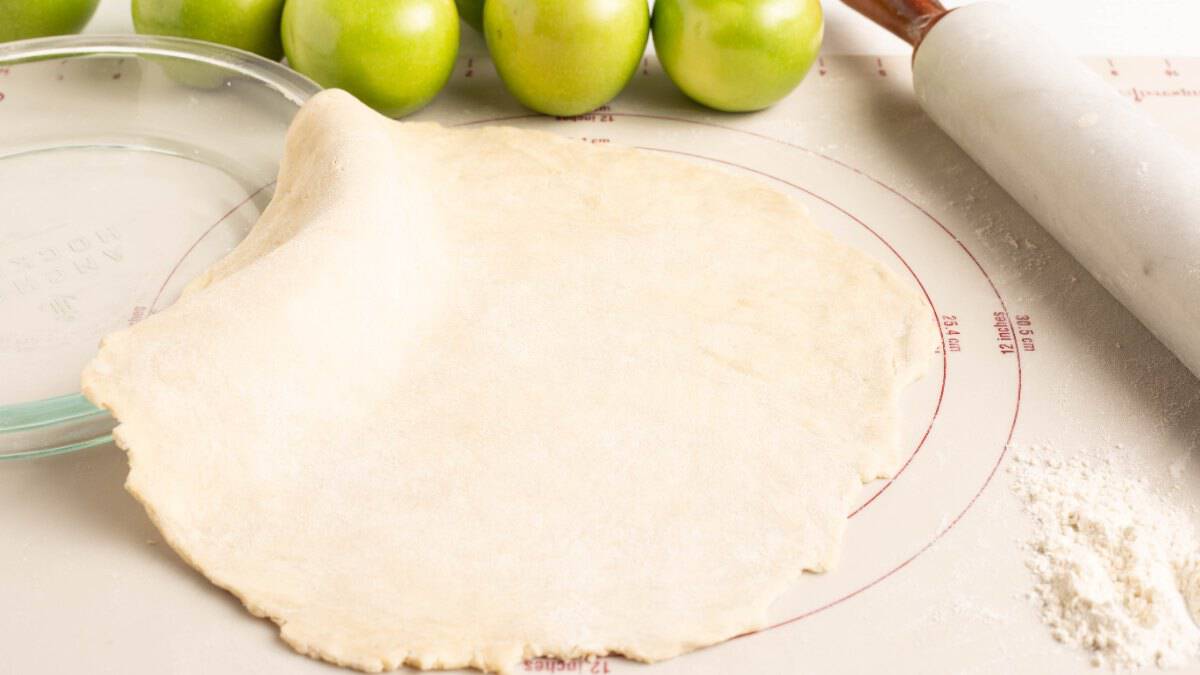
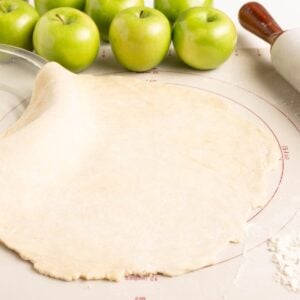
Keep rolling, sprinkling on a little more flour as needed, until you have a big circle. The dough should always be able to slide around on the counter. If it starts to stick, add more flour to your work surface, because a stuck crust is a mess to get back up.
How thick you roll it depends on how you're using it. For something savory with a hot filling, like a pot pie, or for a pumpkin pie, I roll it a little thicker. For a more delicate, lighter filling, I go thinner. It's your pie crust, so you get to decide.
This dough also works beautifully for my Savory Hand Pies, which are little individual beef pot pies.
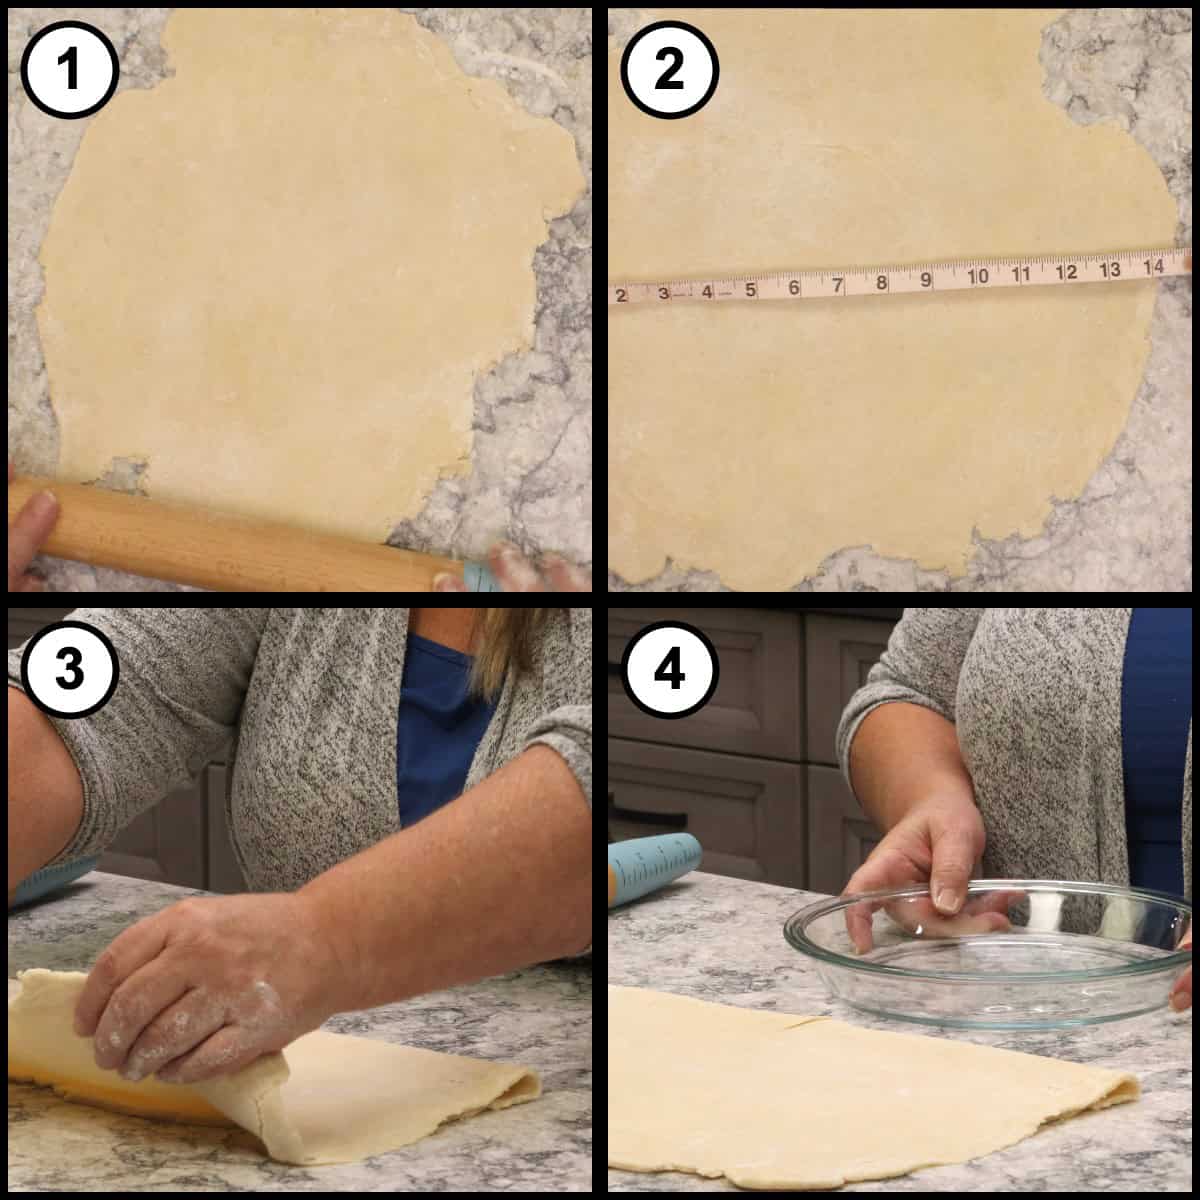
Check the Size and Fold the Dough in Half
For a 9-inch pie pan, roll the dough to about 10 to 11 inches across, since more of the crust drapes down into the pan. It doesn't have to be perfectly round. Store-bought crusts are trimmed to shape by a machine, and yours is getting trimmed too, so don't get caught up with perfect. When it is the size you want, fold the dough over in half so it is easy to lift.
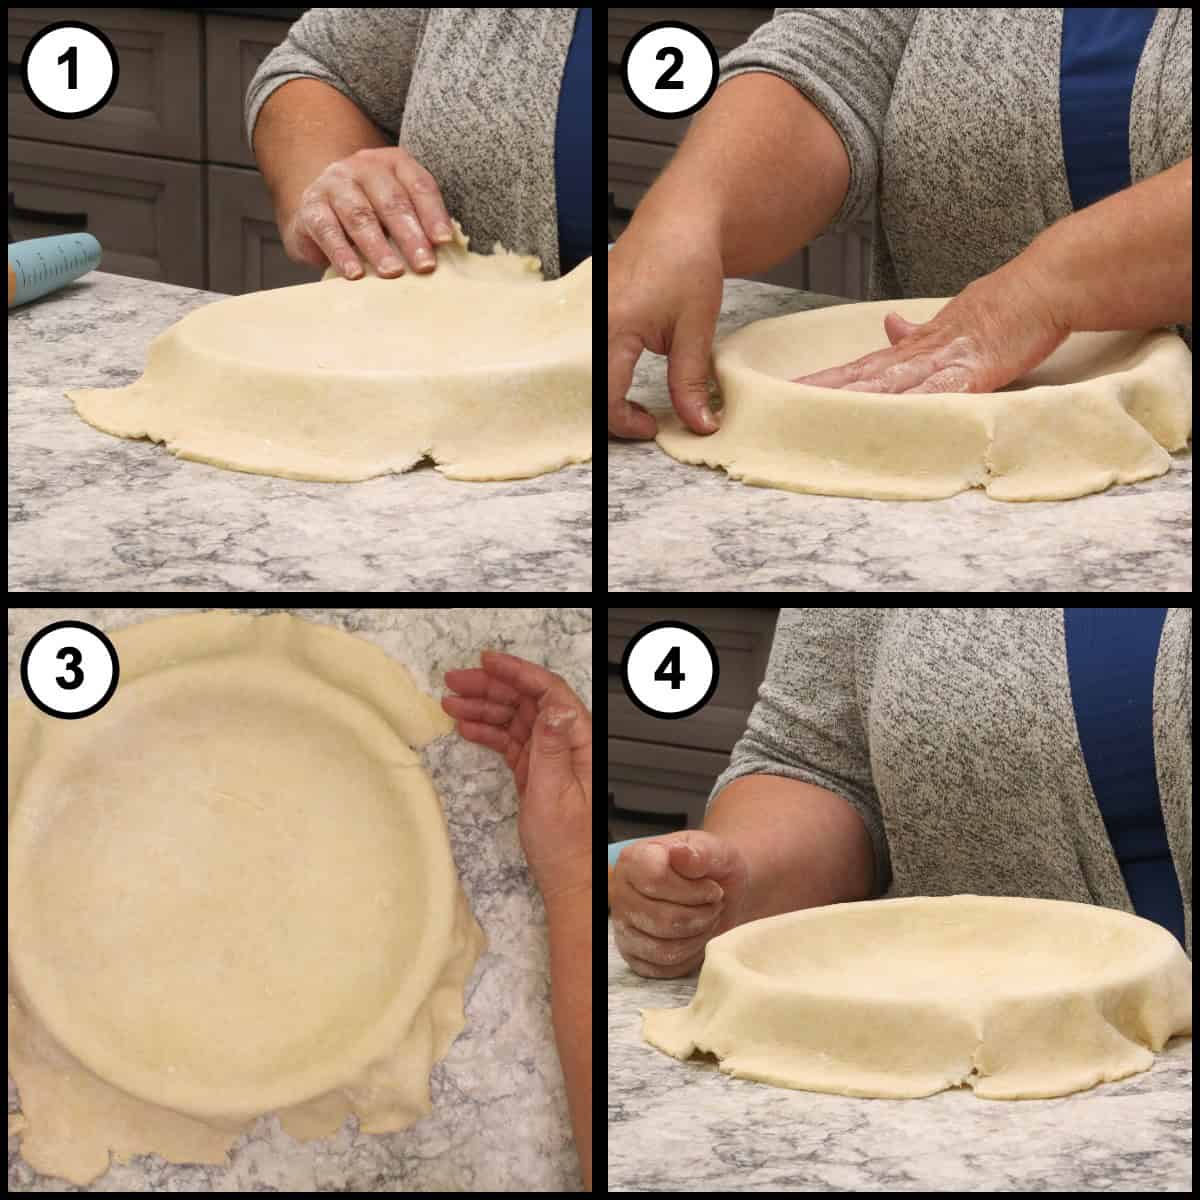
Transfer the Crust to the Pie Pan
Lift the folded dough into your pie pan and unfold it. What I love about this crust is that it does not break or crack the way store-bought crusts sometimes do. Trim off the excess, then add your pie filling, or parbake the crust if your recipe calls for it. If your pie recipe calls for a pre-baked shell, I walk you through exactly how to blind bake a pie crust in the Ninja Foodi. Repeat with the second disc if you want a top crust.
Homemade Pie Crust
Equipment
- Large Mixing Bowl
- Box grater
- Silicone spatula
- Clean cutting board
- Plastic wrap
- Rolling Pin
Ingredients
Pie Dough
- 2½ cups all-purpose flour
- 1 cup butter 2 sticks, very cold but not frozen, grated on the large holes of a box grater
- ½ teaspoon salt
- ½ cup very cold tap water plus more 1 teaspoon at a time only if the dough is too dry
For Rolling
- ¼ cup all-purpose flour for lightly dusting the countertop
Would you like to save this recipe?
Instructions
- Measure 2½ cups of all-purpose flour into a large mixing bowl and stir in ½ teaspoon of salt. You can also add the salt after grating the butter; either way works.2½ cups all-purpose flour, ½ tsp salt
- Use butter that is very cold but not frozen. If it is frozen, leave it out for at least 5 minutes first. Peel back part of the wrapper to use as a handle. Set a box grater right in the bowl and grate the first stick on the large holes straight into the flour. Repeat with the second stick. Save the wrappers in a container in the refrigerator for greasing baking dishes later.1 cup butter
- With your hands, toss the grated butter with the flour until every piece is coated. Break up any clumps.
- Pour ½ cup of very cold water over the top. Use a spatula to gently toss everything around. Do not mix or press; the dough will not come together yet, and that is what you want.½ cup very cold tap water
- Place the entire bowl in the refrigerator for 5 minutes so the flour can absorb the water while the butter stays cold.
- Take the bowl out and bring the dough together into a ball by squeezing, flipping, and repeating. Some loose flour will be left in the bowl. If the dough is too dry and crumbly to hold together, add more water 1 teaspoon at a time.
- Place the dough on a clean cutting board (no flour needed). Press in the loose pieces from the bowl, then fold and push just a few times. Flatten it, work in the rest of the loose flour, and fold and push a few more times. Some cracks are normal. Do not overwork the dough.
- Split the dough in half with a knife or your fingers, or weigh it and divide by 2 for exact amounts. Flatten each half into a disc, adding a light sprinkle of flour only if it sticks.
- Wrap each disc tightly in plastic wrap, sealing it well so air cannot dry it out. Refrigerate for 30 minutes. Do not skip this chill; it lets the butter set back up.
- Take out one disc and keep the other chilled. Lightly sprinkle about ¼ cup of flour over a clean countertop. Pat the disc down and roll from the center outward with gentle pressure. Cracked edges are normal. At about 7 or 8 inches across, lift the dough, make sure there is still flour underneath, flip it, and roll the other way, starting in the middle.¼ cup all-purpose flour
- Keep rolling, adding flour to the surface as needed so the dough always slides freely, until it is about 10 to 11 inches across for a 9-inch pie pan. Roll it a little thicker for hot savory fillings or pumpkin pie and thinner for delicate, lighter fillings.
- Fold the dough over, lift it into the pie pan, and unfold it. Trim off the excess, then fill or parbake as your recipe directs. Repeat with the second disc for a top crust, or wrap and freeze it for later.
Notes
• Keep the butter in the refrigerator until you grate it. It should be very cold but not frozen. If it is frozen, leave it out for at least 5 minutes, because frozen butter cracks when you grate it and does not incorporate into the flour as well.
• Always use the large holes on the box grater. Really small shreds melt too fast. DOUGH TIPS
• If the dough is too dry, add water only 1 teaspoon at a time. A dry, crumbly dough at this stage is fine; a wet dough is the worst thing to have. STORAGE
• Refrigerator: Wrap the dough discs tightly in plastic wrap and refrigerate for up to 2 days.
• Freezer: Chill the discs until firm, wrap them really well, and freeze on a parchment-lined tray overnight. Then vacuum seal them for longer storage, up to 3 months. Thaw overnight in the refrigerator before rolling.
• Rolled dough: Lay a sheet of parchment over the rolled dough, roll it up, wrap it well, and refrigerate or freeze. NUTRITIONAL DISCLAIMER
Nutritional information provided is an estimate based on typical ingredient values and standard portion sizes. Actual nutritional content may vary significantly depending on specific brands used, ingredient substitutions, preparation methods, portion sizes, and individual cooking techniques. For precise nutritional information tailored to your specific ingredients and preparation, please consult with a registered dietitian or use laboratory analysis. This information should not be used for medical nutrition therapy or to manage medical conditions without professional guidance.
Nutrition
Storage & Reheating Instructions
How to Store Homemade Pie Crust
Wrap the dough well so no air can get to it, since air dries out the crust.
- Refrigerator: Wrapped tightly in plastic wrap, the dough discs keep in the refrigerator for up to 2 days.
- Freezer: Chill the discs first so they're nice and firm, then wrap them really well. For long-term storage, set the chilled discs on a parchment-lined tray, freeze overnight, then vacuum seal them. Frozen pie dough keeps for up to 3 months.
- Rolled dough: Cover the rolled dough with parchment, roll it up, wrap it well, and refrigerate for up to 1 day or freeze.
Quick Tip
Freeze one disc for later so you always have a pie crust ready to thaw and use. Chill it first, freeze it overnight on a parchment-lined tray, then vacuum seal it and it will last even longer.
How to Thaw and Reheat Homemade Pie Crust
- Thawing dough: Move frozen dough discs to the refrigerator overnight, still wrapped. If a disc is too firm to roll straight from the refrigerator, let it sit on the counter for a few minutes until it's just pliable.
- Oven (baked pie): Warm leftover baked fruit or savory pie at 350℉/175℃ for 10 to 15 minutes to re-crisp the crust. Cover the edges loosely with foil if they start to brown too much.
- Air fryer (baked pie): Warm a single slice of fruit pie at 300℉/150℃ for 4 to 5 minutes for a crisp crust.
- Microwave (baked pie): A slice warms in 20 to 30 seconds, but the crust will soften, so use the oven or air fryer when you want it flaky. Reheat savory pies like chicken pot pie to 165℉/74℃.
Frequently Asked Questions
Grate very cold butter on the large holes of a box grater straight into flour and salt, then toss it with your hands until every piece is coated. Pour very cold water over the top, toss it gently with a spatula, and chill the whole bowl for 5 minutes. Squeeze the dough together, divide it into two discs, wrap them, and chill for 30 minutes before rolling. You don't need a food processor at all.
Breaking the butter into pebbles works too, but grating it is so much quicker and easier, and every piece comes out uniform. Those even slivers of butter get coated in flour, stay intact when you roll the dough, and create flaky layers as the water in the butter turns to steam.
The 5-minute chill lets the flour absorb the rest of the water and gives the butter a quick chill at the same time. If the bowl sat out on the counter, the flour would absorb the water just the same, but the butter would soften, and that becomes a problem later when you roll out the dough.
Add a little more water, but only about 1 teaspoon at a time. I haven't needed extra water with this ratio of ingredients, but you may. The dough should be a little bit dry and crumbly at this stage, and the worst thing to have is a really wet pie dough.
Yes, it's perfectly normal. Cracked edges are actually the sign of a really good pie crust. Keep rolling from the center with gentle pressure, and make sure there's always enough flour on your work surface that the dough can slide around.
Roll it to about 10 to 11 inches across. More of the crust drapes down into the pan once you lay it in, so you always want it a few inches bigger than the pan. It doesn't have to be perfectly round, because you'll trim off the excess.
Variations
- Double crust pie: The recipe makes two crusts, so roll out the second disc the same way and use it as a top crust. For a sweet pie that is a little different, try this crust in my Easy Blueberry Slab Pie.
- Rectangle for bigger pot pies: For my chicken pot pie recipe, I shape the disc into more of a log and roll it into a rectangle when I want to make bigger chicken pot pies. When you make your own crust, you get to choose the shape.
- Thicker or thinner crust: Roll it a little thicker for hot savory fillings or pumpkin pie, and thinner for delicate, lighter fillings.
- Parbaked shell: Lay the crust in the pan, trim it, and parbake it before filling if your pie recipe calls for it.
- Make one, freeze one: Use one disc now and freeze the other for later using the chill, freeze overnight, and vacuum seal method.
Savory and Sweet Ways to Use Your Crust
Once you have a couple of homemade crusts ready to go, you can use them for dinner or for dessert. I love this crust under a hearty savory filling just as much as I love it in a sweet fruit pie. Here are a few of my favorite recipes from The Salted Pepper to try it in!


About the Recipe Author, Louise Long
Louise is a full-time recipe creator and food blogger @ The Salted Pepper. She has over 30 years of experience with cooking and recipe development. She owned a restaurant for several years and was a full-time RN until retiring to blog full-time.

She published her first cookbook in the Fall of 2018 and is very interested in writing several more.
Louise is also the creator of an online Ninja Foodi Pressure Cooking Course with over 100 instructional step-by-step videos. People absolutely rave about the course and all the value they have received from it.
Louise has several very active Facebook groups that help people with the basics of cooking and learning more about the appliances they love.
Ninja Foodi Pressure Cooker & Air Crisper 101
Ninja Woodfire Outdoor Grill & Smoker
Louise is also a YouTube creator and you can find most of her recipes in video format on The Salted Pepper YouTube channel.
She is very responsive to messages and eager to help in any way she can. Get more Information about Louise & contact information
I WOULD LOVE TO SEE WHAT YOU ARE COOKING UP IN YOUR KITCHEN! TAG ME @THESALTEDPEPPER ON YOUR FAVORITE SOCIAL MEDIA PLATFORM WHEN YOU MAKE A DISH!
BE SURE TO FOLLOW THE SALTED PEPPER RIGHT HERE ⇓⇓⇓⇓⇓
Leave a Reply