I will email this recipe page to you, so you can come back to it later!
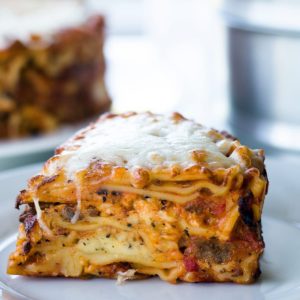
Need an easy recipe for Lasagna and don't want to spend a whole day making it? I've got you covered with this Double Decker Lasagna in the Ninja Foodi!
Lasagna is one of those meals I love to eat, yet dread making! Not only is it time consuming, I really dislike boiling those noodles prior to baking. So, when I do make it... I want to make a lot of it and freeze it for several other meals.
This post may contain affiliate links. If you make a purchase after clicking a link, I may earn a small commission.
Not only does this recipe eliminate the need to boil the noodles, it makes at least 8-10 servings! Serve it with a salad and a piece of garlic toast and you can easily get 12 servings out of this Double Decker Lasagna!
Can I make a Double Decker Lasagna an Instant Pot?
Of course! I happen to love the ease of the Ninja Foodi because you can pressure cook the lasagna and then crisp up the cheese all in one appliance, but you can certainly make this in the Instant Pot or any other electric pressure cooker.
If you want to learn more about the Ninja Foodi and its functions, here is my article on How to Use the Ninja Foodi.
Just make sure you have two pans that will stack in your pressure cooker and allow the pressure lid to close.
The only change you need to make is adding the cheese and browning in the oven. You can use the broil on low or bake on 400° F to get that cheese nice and browned.
Do I need any special pans to make a Double Decker Lasagna in the Ninja Foodi?
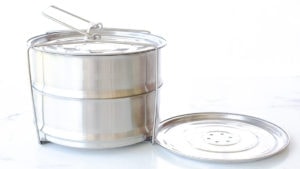
You can make this lasagna with any 7" x 3" pan as long as they can stack together and give enough clearance to close the lid. Please test that out beforehand, so there aren't any surprises when you go to pressure cook your lasagna.
The pans I used are MaxRock stackable stainless steel pots, but they are no longer available. I searched for a similar item that is stainless steel and these (affiliate link)Stackable pans from Koysas seem to fit the requirements.
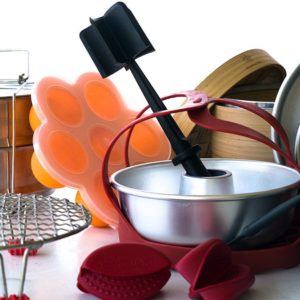
The other thing that comes in handy is this OXO sling for setting the pans on. While the MaxRock pans come with a rack, I find it very difficult to use and I worry that the metal will bounce around and scratch the inner pot.
If you don't have an OXO sling, try to find something that is heat resistant silicone that is no more than one inch in height to put on the bottom of the inner pot to protect your pot. I have this silicone waffle maker (I haven't figured out how to make a good waffle in the Foodi) and use it sometimes, but the sling is much more handy and helps get the pans out of the Foodi.
I always recommend looking around your kitchen to see what you can make work before you buy any accessories. If you want to read about the accessories I use most, here is my article on 11 Best Ninja Foodi Accessories.
Can I make this recipe without meat?
Absolutely! I would add in an extra ½ cup of broth (veggie or water) in the sauce to make sure you have enough liquid to cook the noodles.
Or you can use vegetables like zucchini that have a high water content and will provide the noodles with extra liquid to cook through.
Can I make Double Decker Lasagna with Ground Beef?
Of course, you can use whatever meat combination you want. Just use 1 ½ pound and drain the fat if you need to. I like to cook the meat at least ½ way through to ensure it finishes cooking completely during the PC time.
I also recommend increasing the seasoning because the ground meat will not have as much seasoning as the sausage. A good place to start with a seasoning blend is the one I use in this recipe for Spaghetti in the Ninja Foodi.
Can I Freeze Lasagna?
Yes! It freezes wonderfully. A few tips when freezing any leftovers.
Make sure the food has cooled completely before wrapping and freezing. Warm food sweats, creating condensation that then freezes and forms ice crystals on the food.
Wrap the cooled food in plastic wrap. This protects the food from air and air is the cause of freezer burn.
Squeeze as much air out of the bag as you possibly can. Air trapped in a container can lead to freezer burn rather quickly.
Use within 6 months. Freezer burn can happen even when you store the food correctly and is more likely to happen if food is kept too long in the freezer.
Foods that show signs of freezer burn are safe to eat, but might not taste as wonderful as they would have without it. If you want to read a little more about freezer burn, here is an article: 5 Things to Know About Freezer Burn.
How can I reheat the Lasagna in the Ninja Foodi
Reheating foods is so easy in the Ninja Foodi and they turn out great whether they are frozen or in the fridge.
Reheating Lasagna in the Ninja Foodi from the fridge
I have found that the best way to reheat any pasta is by using the steam function to heat the pasta without over cooking it. Put two cups of water or any thin liquid in the inner pot and make sure the valve is to vent.
For individual servings of lasagna:
Place the lasagna in a covered pan and place on the rack in the low position. Set the steam function for 15-20 minutes. You can use the same pan you made the lasagna in or any pan that is heat resistant.
After the lasagna is heated through, use the Air Crisp function on 325° F to get the top nice and bubbly again. You can even add a little more cheese if you want... more cheese is always welcome!
For a whole pan of lasagna:
Place the lasagna in a covered pan and place on the rack in the low position. Set the steam function for 30 minutes. After the lasagna is heated through, use the Air Crisp function on 325° F to get the top nice and bubbly again. You can even add a little more cheese if you want... more cheese is always welcome!
Reheating Lasagna in the Ninja Foodi from frozen
Pasta is notoriously difficult to heat from frozen and usually takes forever! Not in the Ninja Foodi! Put two cups of thin liquid into the inner pot and put the frozen lasagna in a covered pan on the rack in the low position.
For individual servings of lasagna:
Use the steam function and make sure the valve is set to vent. Steam the lasagna in the Ninja Foodi for about 30 minutes. When it is heated through, use the Air Crisp function on 325° F to brown the top. Feel free to add more cheese!
For a whole pan of lasagna:
Place the lasagna in a covered pan and place on the rack in the low position. Pressure cook on high for 15 minutes. After the lasagna is heated through, use the Air Crisp function on 325° F to get the top nice and bubbly again. You can even add a little more cheese if you want... more cheese is always welcome!
It's Lasagna time in the Ninja Foodi and here is how you make it!
The first thing I like to do is make my own Ricotta cheese for this recipe. It's super easy to do and quick! Here is the video on how to make Ricotta at home just using milk, heavy cream and vinegar. I haven't done a recipe post on it, but there is so much interest I will do that soon. In the meantime, you can find the written instructions in the video description.
Of course, you don't have to make your own Ricotta, you can use store-bought. It really is fun to make though!
The second thing I usually do is prep and gather all of my ingredients. This really helps to keep a recipe moving along nicely.
Dice your onions into ¼" inch dice. Shred the cheese you want to use. Measure out your spices and beef broth.
Turn the Ninja Foodi on sear/sauté on high. Add 1 tablespoon of olive oil. Remove the casings from the Italian sausage. The easiest way to do this is by twisting in the middle and push the sausage out. Add the sausage to the inner pot and break up with a non stick safe kitchen tool like the Mix N Chop.
Add in 1 cup of onion and continue to sauté until ½-way cooked through. This takes about 5 minutes or so. Make sure nothing is stuck to the bottom of the pot. I like to scrape with this scoop & spread from Pampered Chef.
Add in 1 teaspoon of sea salt, 1 teaspoon of basil, 1 tablespoon of sugar and 1 cup of beef broth. Stir to combine.
From this point on, do not stir.
Add in 1 bulb of roasted garlic, 24 oz of spaghetti sauce or 2 ½ cups of your favorite red pasta sauce. Add in 1 can 14.5 oz of fire roasted tomatoes.
How to Roast Garlic in the Ninja Foodi: Cut the top off of the garlic bulb and drizzle with oil olive, wrap in foil. Put it on the Ninja Foodi rack on the low setting and set the bake to 325° F for 35 minutes.
Put the pressure lid on the Ninja Foodi and set on high pressure for 3 minutes. Make sure the black valve is to seal. Immediate release the pressure when the 3 minutes is up.
For the Ricotta Cheese:
Lightly scramble 2 eggs in a medium to large mixing bowl. Add 2 cups of Ricotta cheese, 1 teaspoon sea salt, 1 teaspoon basil, and ½ teaspoon black pepper. Add ¼ cup of freshly grated Parmesan Cheese and 1 bulb of roasted garlic. Mix to combine all the ingredients.
How to assemble the Lasagna
Place a light layer of pasta sauce in the bottom of the pan
Break up lasagna noodles to cover the bottom. It does not matter how you do this; just break them so they fit nicely and you don't have to overlap too much
Add ½ cup of Ricotta cheese and spread around
Add in ¼ cup of shredded Italian cheese
Cover with 1-2 scoops of sauce
Add another layer of lasagna noodles
Add ½ cup of Ricotta cheese and spread around
Add ¼ cup of shredded Italian cheese
Cover with 1-2 scoops of sauce
Add a third layer of lasagna noodles and cover with sauce
Repeat the process for the second pan.
*Don't add the final layer of shredded cheese until after pressure cooking.
Cover the bottom pan with parchment and stack the two pans together. Cover the top pan with a lid that has vent holes or cover with foil.
Place stacked pans on the OXO sling. Add 2 cups of beef broth or water to the inner pot and lower the pans into the Ninja Foodi.
Pressure cook on high for 20 minutes, make sure the black valve is to seal. When the pressure cooking time is up, allow to natural release for 5 minutes. Then manually release the remaining pressure and remove the lid away from you.
Remove the pans from the Ninja Foodi and remove the lid from the pan. Dump the liquid from the inner pot.
Place one pan of the lasagna on the rack in the low position, add shredded cheese and return to the Ninja Foodi. Air Crisp on 400° F for 5-10 minutes or until the cheese is melted and bubbly. I recommend opening the lid every 2- 3 minutes to check on the cheese so it doesn't burn.
Repeat for the second pan.
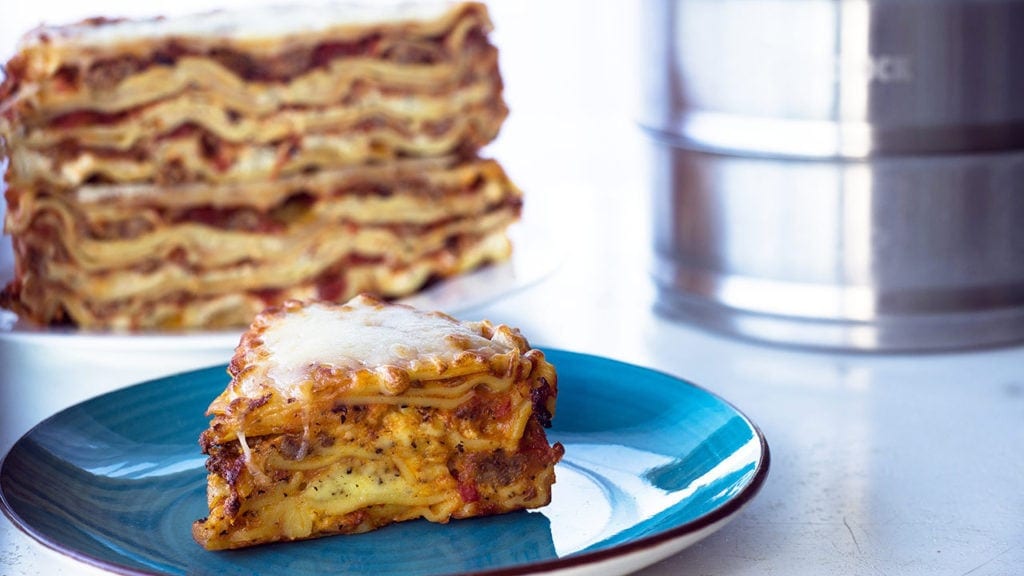
Allow the lasagna to cool for at least 10 minutes before serving. This will help it hold together when you slice it.
Serve & Enjoy!
Double Decker Lasagna in the Ninja Foodi
Recipe By: Louise
Easy Lasagna made pot in pot in the Ninja Foodi Pressure Cooker.
I will email this recipe page to you, so you can come back to it later!
Instructions
Sauce for the Lasagna
Turn the Ninja Foodi on sear/saute on high. Add 1 tablespoon of Olive oil. Remove the casings from the Italian sausage. Add the sausage to the inner pot and break up
Add in 1 cup of onion and continue to saute until ½ way cooked through. This takes about 5 minutes or so.
Add in 1 teaspoon of sea salt, 1 teaspoon of basil, 1 tablespoon of sugar and 1 cup of beef broth. Stir to combine
From this point on, do not stir.
Add in 1 bulb of roasted garlic, 24 oz of spaghetti sauce or 2 ½ cups of your favorite red pasta sauce. Add in 1 can 14.5 oz of fire roasted tomatoes.
Put the pressure lid on the Ninja Foodi and set on high pressure for 3 minutes. Make sure the black valve is to seal. Immediate release the pressure when the 3 minutes is up.
For the Ricotta Mixture
Lightly scramble 2 eggs in a medium to large mixing bowl.
Add 2 cups of Ricotta cheese, 1 teaspoon sea salt, 1 teaspoon basil, and ½ teaspoon black pepper.
Add ¼ cup of freshly grated Parmesan Cheese and 1 bulb of roasted garlic. Mix to combine all the ingredients.
Lasagna Assembly
Place a light layer of pasta sauce in the bottom of the pan. Break up lasagna noodles to cover the bottom.
Add ½ cup of Ricotta Cheese and spread around. Add in ¼ cup of shredded Italian cheese.
Cover with 1-2 scoops of sauce. Add another layer of lasagna noodles.
Add ½ cup of Ricotta Cheese and spread around. Add ¼ cup of shredded Italian cheese.
Cover with 1-2 scoops of sauce. Add a third layer of lasagna noodles and cover with sauce.
Repeat with second pan. *Do not add a final layer of shredded cheese until after pressure cooking.
Cooking Instructions
Cover the bottom pan with parchment and stack the two pans together. Cover the top pan with a lid that has vent holes or cover with foil. Place stacked pans on the OXO sling.
Add 2 cups of beef broth or water to the inner pot and lower the pans into the Ninja Foodi. Pressure cook on high for 20 minutes, make sure the black valve is to seal. When the pressure cooking time is up, allow to natural release for 5 minutes. Then manually release the remaining pressure
Remove the pans from the Ninja Foodi and remove the lid from the pan. Dump the liquid from the inner pot.
Place one pan of the lasagna on the rack in the low position, add shredded cheese and return to the Ninja Foodi.
Air Crisp on 400° F for 5-10 minutes or until the cheese is melted and bubbly. I recommend opening the lid every 2- 3 minutes to check on the cheese so it doesn't burn.
Repeat for the second pan. Allow the pans of lasagna to cool for at least 10 minutes.
I REALLY HOPE YOU LOVE THIS RECIPE AS MUCH AS I DO! PLEASE LEAVE ME A COMMENT AND LET ME KNOW!
ABOUT THE RECIPE AUTHOR, LOUISE LONG
Louise is a full-time recipe creator and food blogger @ The Salted Pepper. She has over 30 years of experience with cooking and recipe development. She owned a restaurant for several years and was a full-time RN until retiring to blog full time.
Louise has several very active Facebook groups that help people with the basics of cooking and getting the most out of the Ninja Foodi.
Seeing the need for easy, delicious, and high quality recipes, she is focusing all of her efforts creating recipes specifically for the Ninja Foodi. Her recipes are easy for the home cook to follow and provide step-by-step instructions.
Couple of questions...
(1) Can I use two 7" X 3" Fat Daddio pans to make this recipe? Meaning will they FIT in the 6.5 qt Ninja Foodi and not be too tall when you close the lid? And just cover them with foil when I stack them?
(2) I would like to make just one pan of your delish Lasagna, when there are just the two of us. How much time to need to pressure cook just the one 7 X 3 pan? And can I just cover it with foil?
I don't think 2 3" pans will fit in the 6.5 qt, but you can try with them empty to see. If you want to make just one, you still pressure cook the same time and covering it with foil is fine.
I tweaked it a bit right out of the gate. I reduced the ricotta by 1/4 cup and added one cup grated ricotta salata to firm it up a bit. (I just know how I like it) It is cooking now. It smells fantastic. One question. The recipe calls for 1 bulb =(head) roasted garlic. The instructions say to add one bulb of roasted garlic to the sauce but they also say add on bulb roasted garlic to the cheese mixture. I only added it to the sauce and added on clove to the cheese. Is that what you meant?
I hope you love it! I called for a total of 2 bulbs of roasted garlic, 1 in the sauce and 1 in the ricotta mixture. In the recipe, it's broken out by sauce/ricotta/for the lasagna. You will be just fine the way you did it though! I put the roasted garlic in the ricotta because I love the flavor, but it is not necessary. Enjoy!
Which spring form pan works well in the Ninja Foodi 6.5 qt cooker - regular or leak-proof? Didn't know a leak proof pan existed. Is there a brand that is better another? Please help. Thank you.
I didn't use a springform pan because I wasn't sure if it would leak, but a lot of people have and their lasagna has turned out just fine. I always recommended investing in a good quality pan, especially with springform pans because the cheap ones tend to bend and leak a lot. Mine is from Pampered Chef, here is the link to my PC website: https://www.pamperedchef.com/pws/thesaltedpepper/shop/Cookware/Cookware/Quick+Cooker+Springform+Pan/100048
Made it!! So good! The sauce was awesome!! And by the way...my stack pans did come with a vented lid...i saw it after the lasagna was finished. It was on the bottom of one of the pans! Lol! Thank you for your recipes!!
Hello! I only have a baking Pyrex bowl made of bicarbonate glass hence it’s oven / microwave oven / dishwasher safe. Is it safe for using this on PC for this lasagna? Also can I use this for broiling / air crsiping? Thank you!
Broiling and Air Crisping depend on the heat rating of the glass. If it can tolerate 500F, you should be fine. Pressure cooking with glass is not recommended just because there is always a chance it can break. This usually only happens when there is a hairline crack, but unfortunately you won't know that before PC'ing. I have PC'd in canning jars, but they are rated for pressure. Other people have had their canning jars crack. So, technically, you can PC in glass, but there is a risk of it breaking which would ruin dinner. Hope that helps some.


Aprile Sandefur says
Hi Louise,
Couple of questions...
(1) Can I use two 7" X 3" Fat Daddio pans to make this recipe? Meaning will they FIT in the 6.5 qt Ninja Foodi and not be too tall when you close the lid? And just cover them with foil when I stack them?
(2) I would like to make just one pan of your delish Lasagna, when there are just the two of us. How much time to need to pressure cook just the one 7 X 3 pan? And can I just cover it with foil?
Thanks!! Aprile
Louise says
I don't think 2 3" pans will fit in the 6.5 qt, but you can try with them empty to see. If you want to make just one, you still pressure cook the same time and covering it with foil is fine.
Mary says
I tweaked it a bit right out of the gate. I reduced the ricotta by 1/4 cup and added one cup grated ricotta salata to firm it up a bit. (I just know how I like it) It is cooking now. It smells fantastic. One question. The recipe calls for 1 bulb =(head) roasted garlic. The instructions say to add one bulb of roasted garlic to the sauce but they also say add on bulb roasted garlic to the cheese mixture. I only added it to the sauce and added on clove to the cheese. Is that what you meant?
Louise says
I hope you love it! I called for a total of 2 bulbs of roasted garlic, 1 in the sauce and 1 in the ricotta mixture. In the recipe, it's broken out by sauce/ricotta/for the lasagna. You will be just fine the way you did it though! I put the roasted garlic in the ricotta because I love the flavor, but it is not necessary. Enjoy!
Mary says
Thanks, I loved it. I'd never of guessed how to make it in the Foodi. What a great treat.
Sandra says
Which spring form pan works well in the Ninja Foodi 6.5 qt cooker - regular or leak-proof? Didn't know a leak proof pan existed. Is there a brand that is better another? Please help. Thank you.
Louise says
I didn't use a springform pan because I wasn't sure if it would leak, but a lot of people have and their lasagna has turned out just fine. I always recommended investing in a good quality pan, especially with springform pans because the cheap ones tend to bend and leak a lot. Mine is from Pampered Chef, here is the link to my PC website: https://www.pamperedchef.com/pws/thesaltedpepper/shop/Cookware/Cookware/Quick+Cooker+Springform+Pan/100048
Michelle says
Cant wait to make this. But my stack pot didnt come with a lid that has some vents. Should I cover with foil and poke sime holes?
Thanks!
Louise says
You can do that for sure. You probably don't need to worry about the holes either. Just cover with what came with your pans.
Michelle says
Made it!! So good! The sauce was awesome!! And by the way...my stack pans did come with a vented lid...i saw it after the lasagna was finished. It was on the bottom of one of the pans! Lol! Thank you for your recipes!!
Winnie says
Hello! I only have a baking Pyrex bowl made of bicarbonate glass hence it’s oven / microwave oven / dishwasher safe. Is it safe for using this on PC for this lasagna? Also can I use this for broiling / air crsiping? Thank you!
Louise says
Broiling and Air Crisping depend on the heat rating of the glass. If it can tolerate 500F, you should be fine. Pressure cooking with glass is not recommended just because there is always a chance it can break. This usually only happens when there is a hairline crack, but unfortunately you won't know that before PC'ing. I have PC'd in canning jars, but they are rated for pressure. Other people have had their canning jars crack. So, technically, you can PC in glass, but there is a risk of it breaking which would ruin dinner. Hope that helps some.
Winnie says
Thanks Louise! I will probably keep the Pyrex for baking / steaming then!