

Would you like to save this recipe?
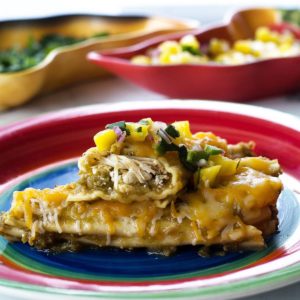
Mexican Manicotti in the Ninja Foodi is incredibly easy to make and tastes delicious!
What is Mexican Manicotti?
Is Mexican Manicotti even a thing? I don't recall ever hearing the term Mexican Manicotti before my husband suggested I make it.
I was recently challenged to make a Mexican pasta recipe by a friend and fellow YouTube creator and I had no idea what to make. That is the truth! The whole idea of pasta kind of threw me for a loop because it is not a traditional ingredient in Mexican food.
I had been talking about tamales with my husband and he said something about Mexican stuffed shells and my mind jumped right to manicotti shells. So, I did what every curious person does... I searched Google.
Turns out, it's a thing! There are tons of variations and countless ways to customize Mexican Manicotti to your taste, but simply put: Mexican Manicotti is manicotti noodles stuffed with a Mexican filling and often topped with cheese.
This is a super easy version of Mexican Manicotti made right in the Ninja Foodi!
What Variations of Mexican Manicotti can I make?
The sky is the limit with this one! You can use any type of meat or make it vegetarian and skip the meat altogether. You can use green salsa like I did or switch it to red, if you prefer.
Tip: Whatever kind of salsa you use, make sure it is thin and not chunky or the pasta might not cook correctly. The salsa verde I use is very thin. You can always add some chicken stock and blend a chunkier salsa.
Here are a few filling suggestions that I think would be great!
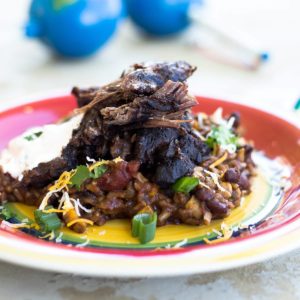
Ground beef, fire roasted tomatoes, the seasoning blend that I use in my recipe for Mexican Pot Roast and, of course, cheese.
Refried Beans, cheese, seasonings of choice would be great stuffed into the manicotti shells to keep it vegetarian.
Shredded pork with a pineapple salsa and a touch of adobo sauce would be so delicious.
Leftover Pot Roast would work too! Just add some Mexican seasonings and maybe a corn and black bean salsa with some cheese.
I really could go on and on here, but I think you get the idea. Use ANYTHING you want and leftovers is a great choice, unless those leftovers are curry-based. That's a pretty difficult flavor to turn into a Mexican dish... although, now I'm thinking about a curry pasta! YUM!
How to make Mexican Manicotti
The first thing you'll want to do is gather all of your ingredients. Dice your onion, chop the cilantro, rinse the rice and beans, mince the garlic, and get all of your seasonings together.
Make up the seasoning blend for the chicken. Remove the boneless, skinless 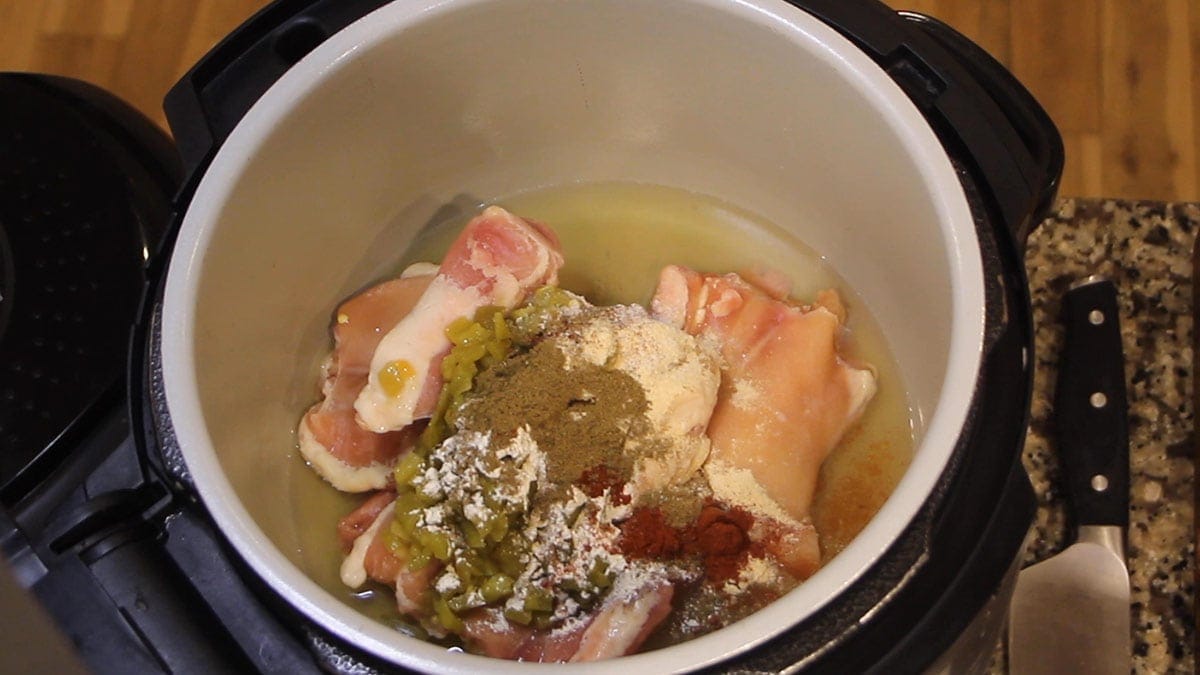 chicken thighs from the freezer and place into the inner pot with 1 cup of chicken stock or water. Add seasoning blend and pressure cook on high for 25 minutes. Make sure the black valve on your Ninja Foodi is to the seal position.
What if my chicken is fresh or thawed already? No worries, just decrease the PC time to 20 minutes. The reason why I love using chicken thighs is they are so forgiving.
When the time is up, you can immediately release the pressure. WHAT? Who's screaming at me? I know it is usual and customary to natural release pressure when cooking meats because it helps lock in the moisture.
Remember how forgiving chicken thighs are? You can immediately release the pressure and they will be fine. Plus, they are almost completely submerged in liquid and you can immediate release the pressure on any meat that is submerged in liquid. I promise... you can.
If you decide to use frozen chicken breast instead of thighs, I would cook them for about 12 minutes and do a 10-minute natural release.
While the chicken is cooking, combine mango, onion, jalapeno, cilantro, and lime 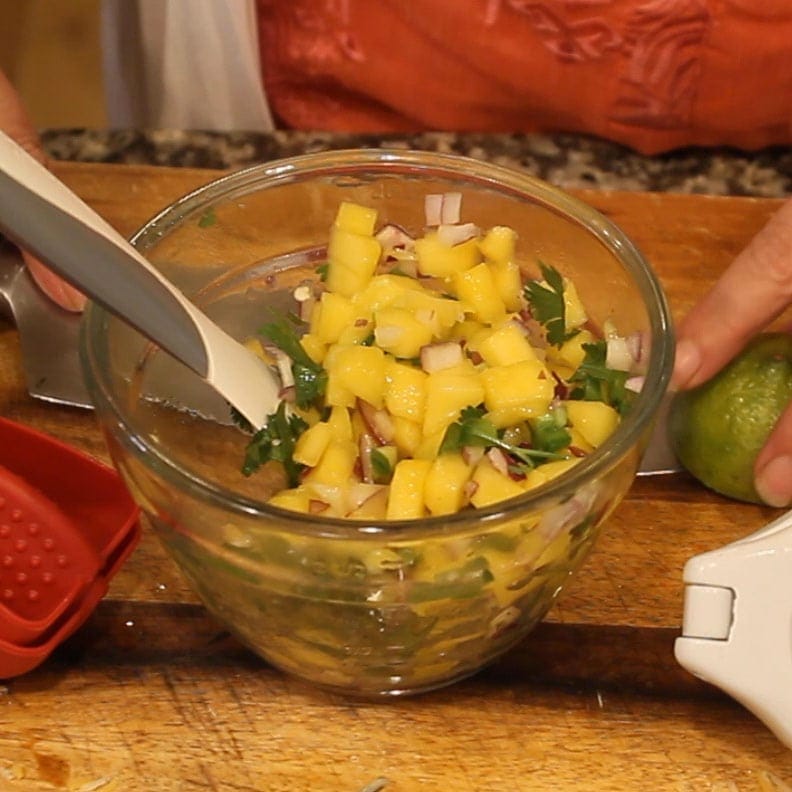 juice in a small bowl. Salt to taste and place in fridge until ready to serve.
Remove the chicken from the broth, but be sure to reserve the liquid. We are going to use that later. Shred the chicken up in a medium-size mixing bowl.
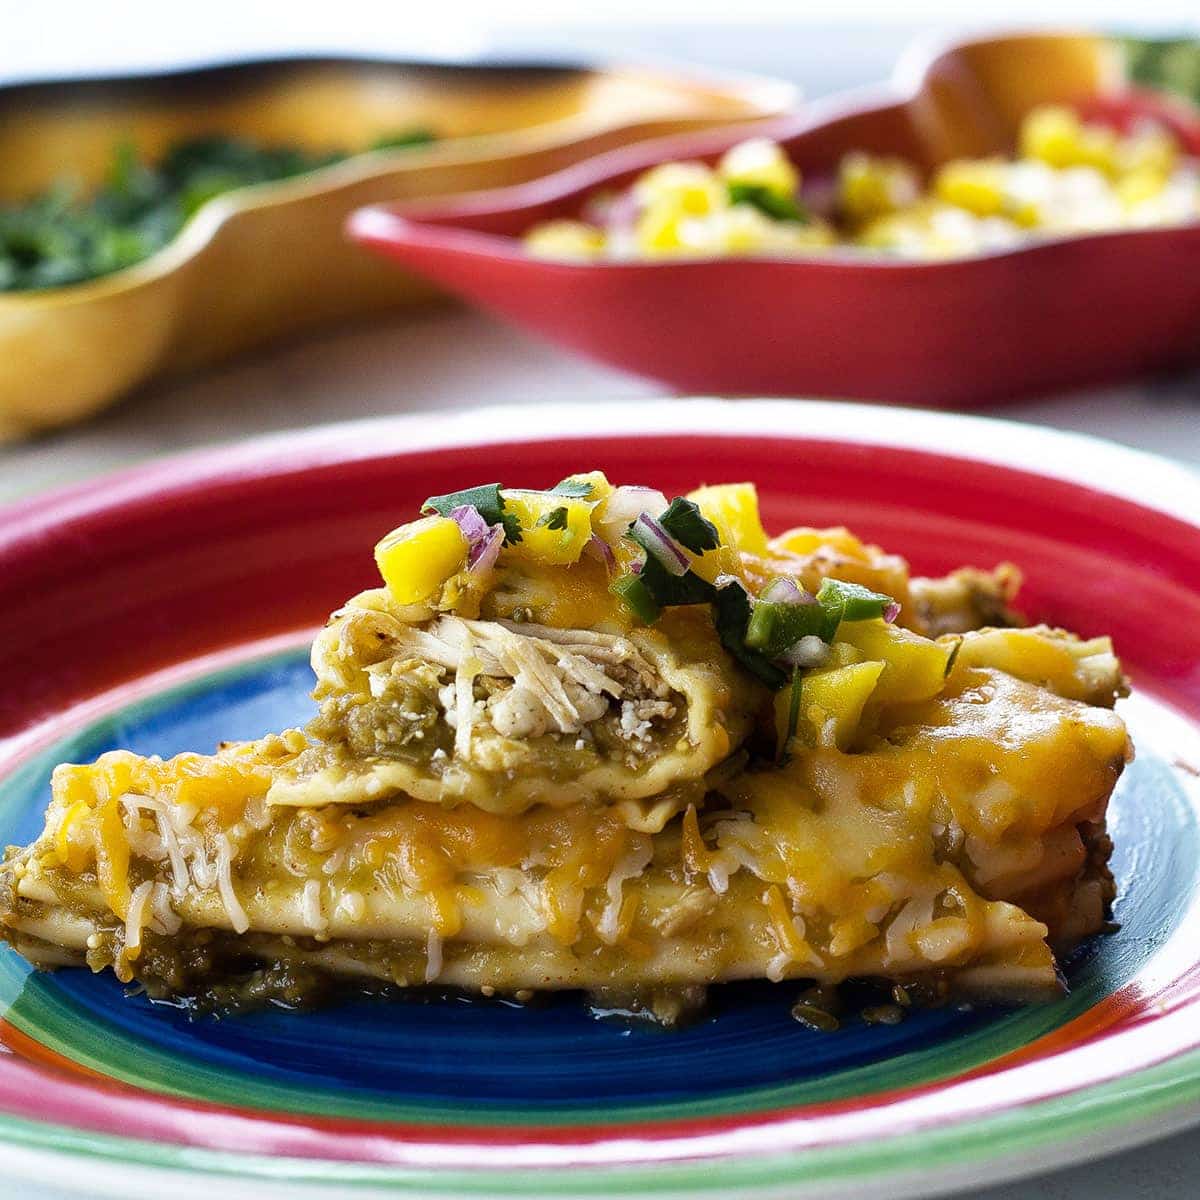
Combine shredded chicken with 6 ounces of crumbled Queso Fresco cheese and 3 ounces - or 1 cup - of shredded Mexican blend cheese.
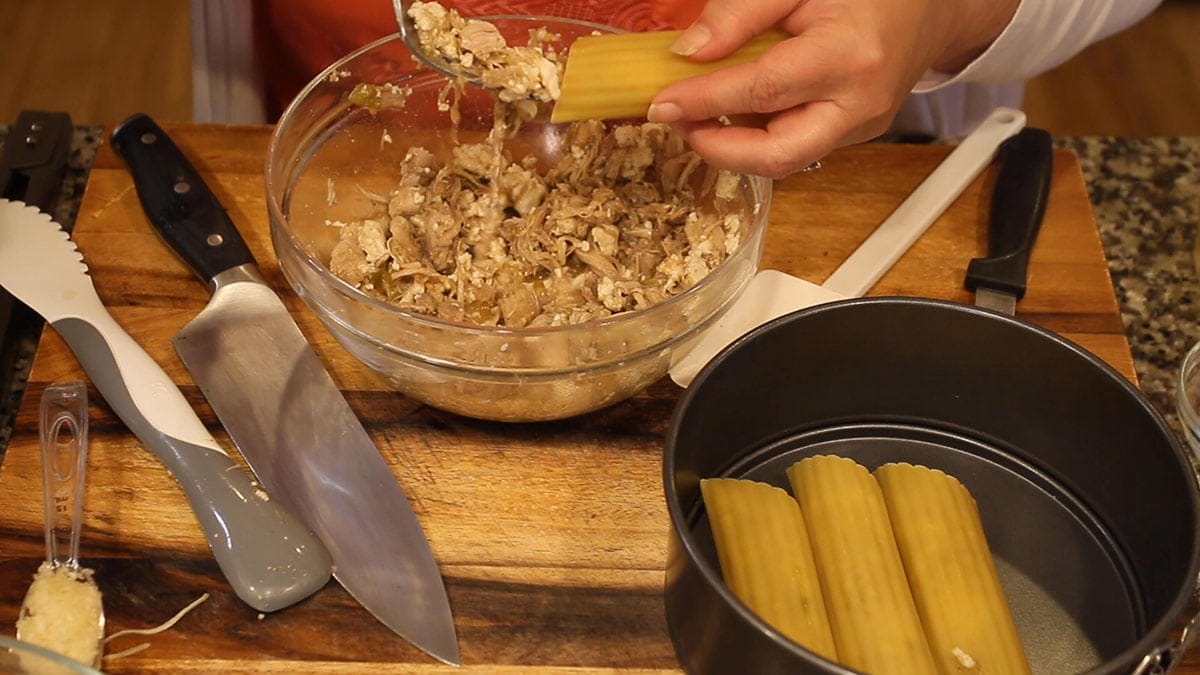 Stuff the mixture into the dry manicotti shells. You can either use a fork, like I did in the video on Mexican Manicotti, or use your fingers - it is a bit faster.
Layer the stuffed Manicotti shells into a 7" or 8" pan. I used a springform pan because I had the thought that I could remove the sides and serve it like that, but the truth is it will just spill all over the place. So, any 7" or 8" pan will work just fine, but it does need to have high sides of 3-4".
Add ¾ cup of dry black beans and ¾ cup of brown rice to the inner pot along 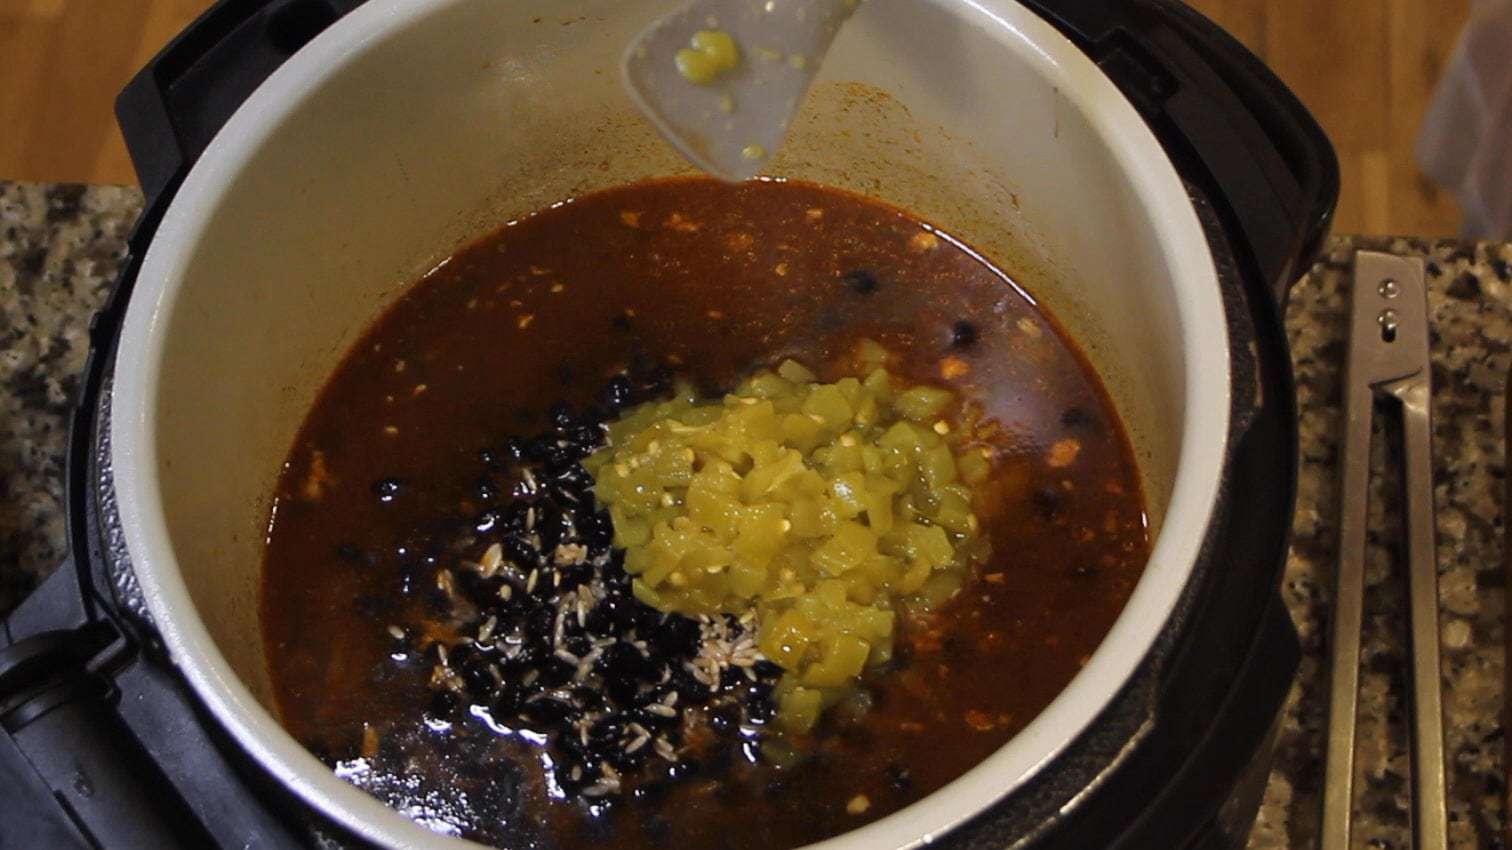 with a total of 3 cups of liquid and Add in 1 teaspoon cumin and ½ teaspoon salt and 4 ounces of fire roasted chilis. Use reserved liquid from cooking the chicken and add additional chicken stock or water to make a total of 3 cups. Stir.
Combine 32 ounces of salsa verde with 1 Tablespoon of freshly minced garlic and ½ teaspoon of chipotle powder. Pour sauce over the manicotti. If you don't need to use all of it, you can use it as a garnish. Cover with Foil.
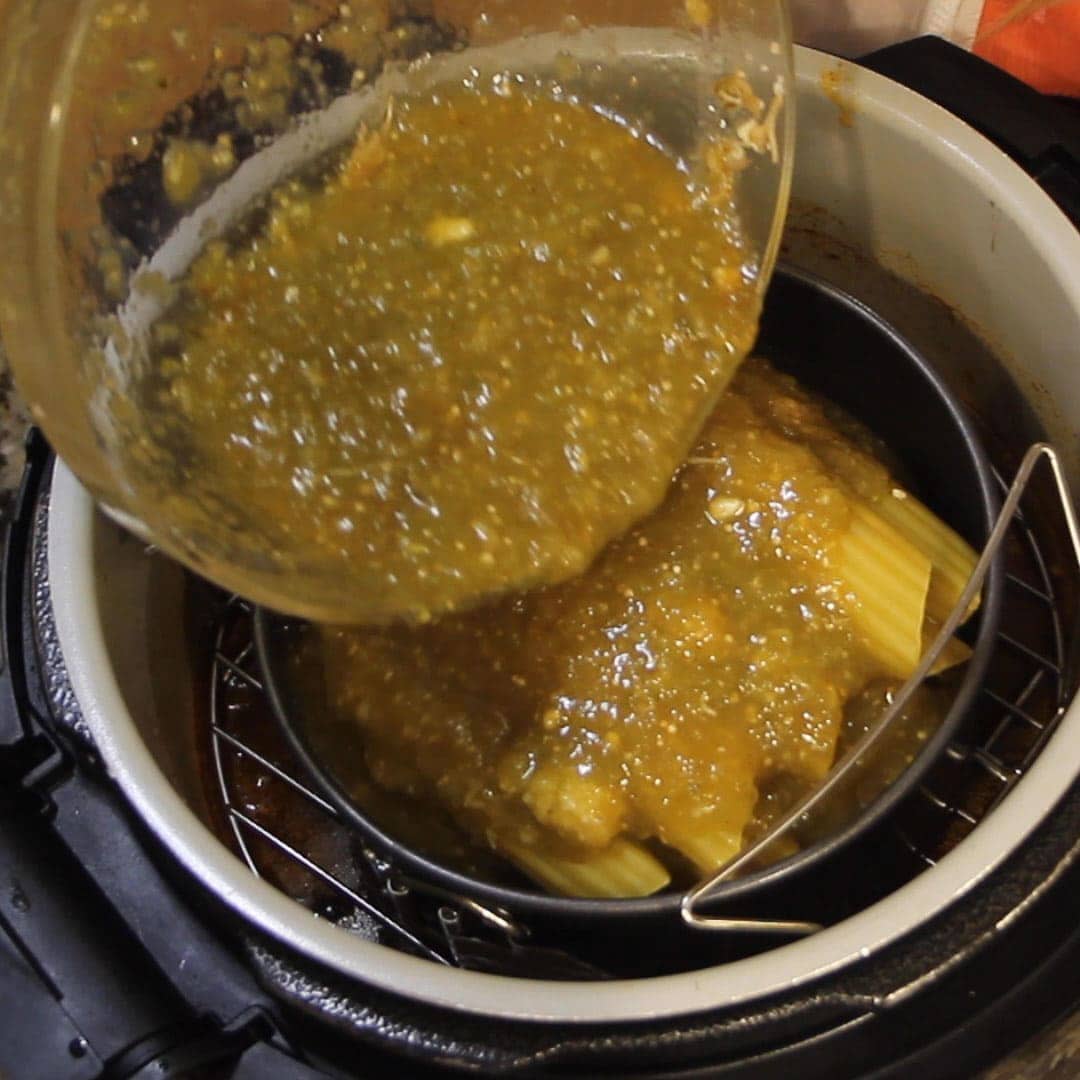 TIP: If you are using a springform pan, you might want to pour the sauce over the manicotti after you put the rack with the springform pan into the Foodi. Sometimes springform pans will leak a bit.
Place rack in low position over the beans and rice. Place covered pan on rack. Put the pressure lid on and turn the valve to seal. Set the Ninja Foodi on high pressure for 30 minutes. When the time is up, immediately release the pressure.
Remove the rack with the pan and stir in 1 cup of diced onion and ¼ cup cilantro.
Cover with remaining cheese and return the rack with the springform pan to the Ninja Foodi. Set the air crisp on 390° F for 5-10 minutes or until the cheese is brown and bubbly.
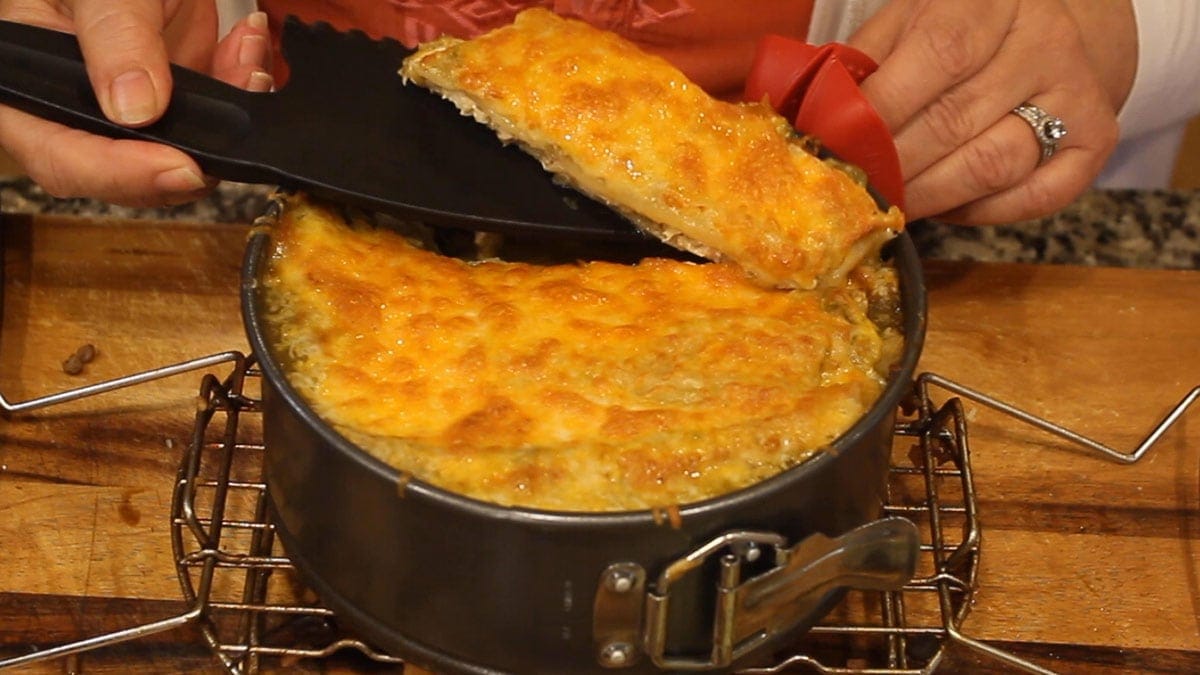
Serve the Mexican Manicotti topped with mango salsa. Enjoy!
Mexican Manicotti in the Ninja Foodi
Ingredients
Accessories used in this recipe
For the Chicken
- 1 pound chicken thighs frozen
- 1 4 ounce fire roasted green chilis mild
- 1 cup chicken stock
- 1 batch seasoning blend see recipe below
- 6 ounces Queso Fresco plus more for garnish if desired
- 2 cups cheese shredded Mexican blend, divided
- 8 ounces manicotti pasta dry
Seasoning Blend for Chicken
- 1 teaspoon sea salt
- 2 teaspoon cumin ground
- 1 teaspoon garlic powder
- 1 teaspoon onion powder
- 1 tsp smoked paprika
- ¼ tsp chipotle ground
For the Sauce
- 32 ounces salsa verde
- 1 tablespoon garlic minced
- ½ teaspoon chipotle
For the Rice & Beans
- 3 cups liquid use reserved liquid and add chicken stock or water to make a total of 3 cups
- ¾ cup brown rice rinsed
- ¾ cup black beans rinsed
- ½ teaspoon salt
- 1 teaspoon cumin
- 1 cup onion diced. red or white
- ¼ cup cilantro
Mango Salsa
- 1 mango diced into ½" pieces
- ½ jalepeno pepper diced, seeds removed
- 2 tablespoon chopped cilantro
- ½ lime juiced (about 1 Tbsp)
- salt to taste
- 4 ounce fire roasted green chili peppers mild
Would you like to save this recipe?
Instructions
- Combine the frozen chicken thighs with 1 cup of water, 4 ounces fire roasted chilis and seasoning blend. Turn the Ninja Foodi on high pressure for 25 minutes. Make sure to turn the valve to seal. When time is up, you can immediately release the pressure.
- While the chicken is cooking, combine mango, red onion, jalepeno, cilantro, and lime juicein a small bowl. Salt to taste and place in fridge until ready to serve.
- Remove the chicken from the liquid (reserve for later) and shred into a bowl. Combine with 6 ounces of Queso Fresco cheese crumbled and 3 ounces or 1 cup of shredded Mexican blend cheese.
- Stuff the dry manicotti shells with the chicken mixture and layer into 7" Springform pan.
- Add ¾ cup of dry black beans and ¾ cup of brown rice to the inner pot along with a total of 3 cups of liquid and Add in 1 teaspoon cumin and ½ teaspoon salt and 4 ounces of fire roasted green chilis. Use reserved liquid from cooking the chicken and add additional chicken stock or water to make a total of 3 cups. Stir.
- Combine 32 ounces of salsa verde with 1 Tablespoon of freshly minced garlic and ½ teaspoon of chipotle powder. Pour sauce over the manicotti. If you don't need to use all of it, you can use it as a garnish. Cover with Foil
- Place rack in low position over the beans and rice. Place covered pan on rack. Put the pressure lid on and turn the valve to seal. Set the Ninja Foodi on high pressure for 30 minutes. When the time is up, immediately release the pressure
- Remove the rack with the pan and stir in 1 cup of diced onion and ¼ cup cilantro.
- Cover with remaining cheese and return the rack with the springform pan to the Ninja Foodi. Set the air crisp on 390° F for 5-10 minutes or until the cheese is brown and bubbly.
- Serve the Mexican Manicotti topped with mango salsa. Enjoy!
Notes
Nutrition
ABOUT THE RECIPE AUTHOR, LOUISE LONG

Louise is a full-time recipe creator and food blogger @ The Salted Pepper. She has over 30 years of experience with cooking and recipe development. She owned a restaurant for several years and was a full-time RN until retiring to blog full-time.
Louise has several very active Facebook groups that help people with the basics of cooking and getting the most out of the Ninja Foodi.
Ninja Foodi Fresh & Healthy Meals
Seeing the need for easy, delicious, and high quality recipes, she is focusing all of her efforts at this time creating recipes specifically for the Ninja Foodi. Her recipes are easy for the home cook to follow and provide step-by-step instructions.
Louise is also a YouTube creator and you can find most of her recipes in video format on The Salted Pepper YouTube channel.
She is very responsive to messages and eager to help in any way she can.
Elizabeth says
Come back to this one again and again. Don’t forget to put red onion in the salsa. A nice change and so flavorful.
Louise Long says
I'm so glad you like it!
Terry Miller says
Louise, I went to the Pampered Chef to purchase the 7" Springform Pan, but only have 9". Will this be too big or be a problem cooking this meal? It looks and sounds AMAZING
Louise says
The 9" will probably be too big. I'm so upset that they aren't selling this right now. I'm hoping it's only temporary!
Pat says
Hello Louise,
I didn't read the recipe before I purchased the items to make this meal. I read black beans so I purchased them in a can not dry, will these work?
Thank you,
Pat
Jori Pedriana says
I don't have a spring form pan or a round pan that is 3-4 inches high. Could I split the recipe between two 8 X 2 inch pans and layer in the foodi? If so, would any of the cooking times change? Thanks, Louise - I truly enjoy watching all of your videos!
Louise says
I haven't tested the recipe that way, but I think it will work fine. No changes in the time.