
- Mixing bowl
- Silicone spatula
- Plastic wrap or a container with a lid
- Cutting board
- Bench scraper (optional)
- Large skillet or pan with a lid
- Small tray or sheet pan
- Instant-read thermometer
- Cooling rack
- Fork (for splitting)
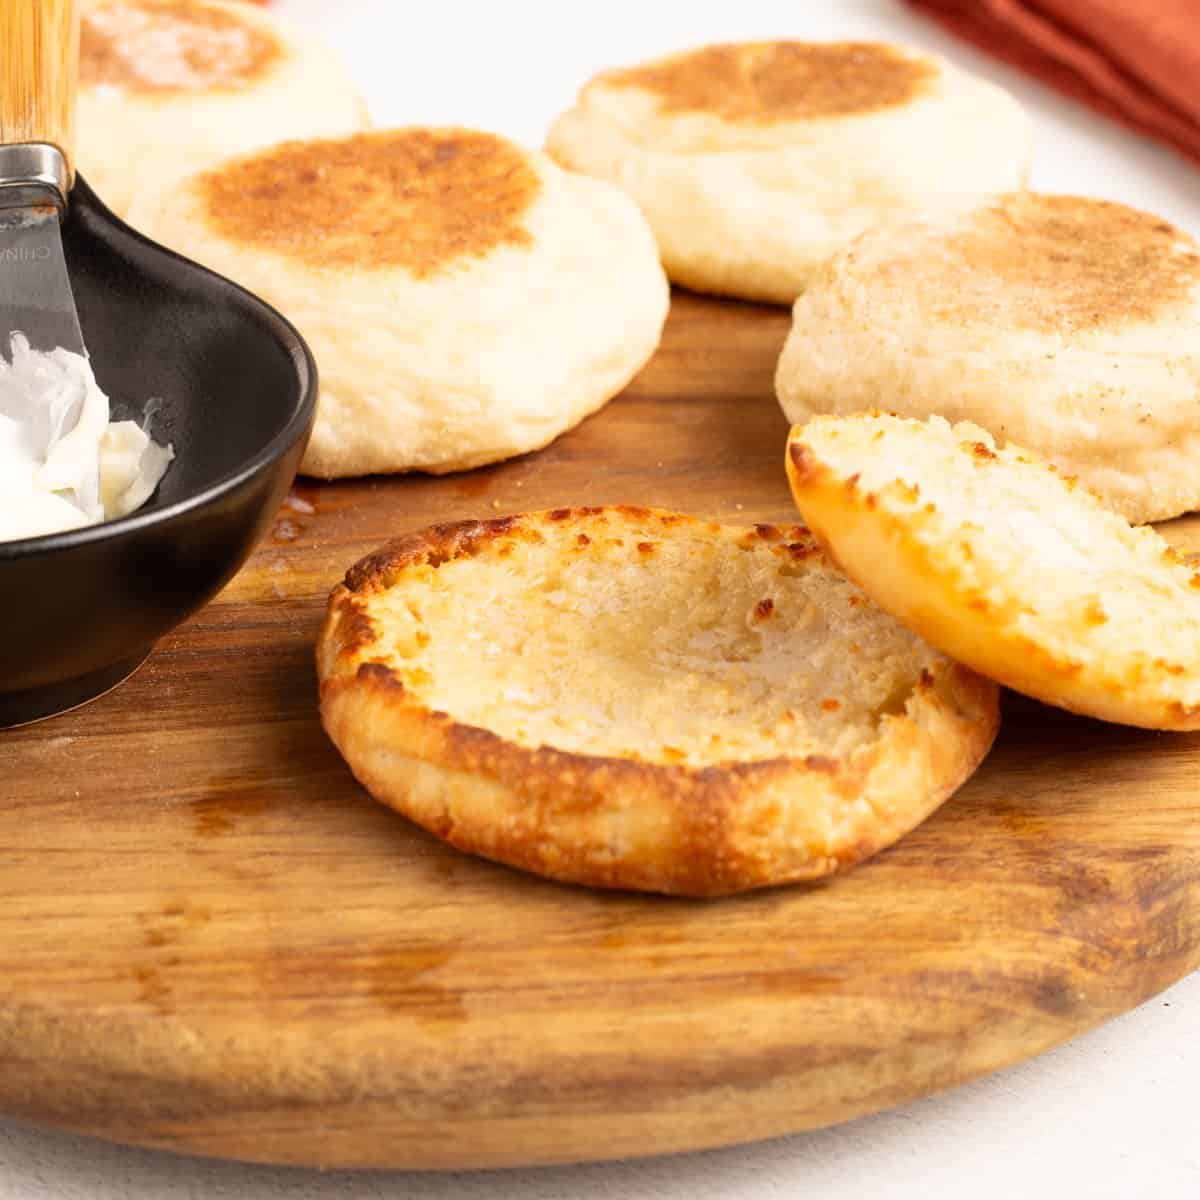
I promise you, these homemade English muffins are the easiest English muffins you will ever make. There is no kneading, no fussy shaping, and no second rise. You stir a handful of ingredients together in about 2 minutes, leave the dough on the counter overnight, and cook the muffins in a skillet on the stovetop the next morning. If you have always thought English muffins were too much work to make at home, you're going to love this one.
Would you like to save this recipe?
What makes this recipe different is that time does the work your hands or mixer normally would. Most English muffin recipes use all-purpose flour, but I use bread flour because it keeps the dough strong during the long overnight rise and, since we are not kneading, the bread flour is what helps to build the gluten.
A tiny ⅛ teaspoon of yeast and a single 12-hour rest on the counter, with no trip to the refrigerator, give you a dough full of bubbles and beautiful gluten strands.
I'll walk you through exactly how to make them with step-by step photos or a video demonstration if you prefer.
Suggested Kitchen Tools for No-Knead English Muffins
- Mixing bowl
- Silicone spatula
- Plastic wrap or a container with a lid
- Cutting board
- Bench scraper (optional, you can pull the dough apart by hand)
- Large skillet or pan with a lid
- Small tray or sheet pan for the shaped muffins
- Instant-read thermometer
- Cooling rack
- Fork (for splitting)
Ingredients & Substitutions
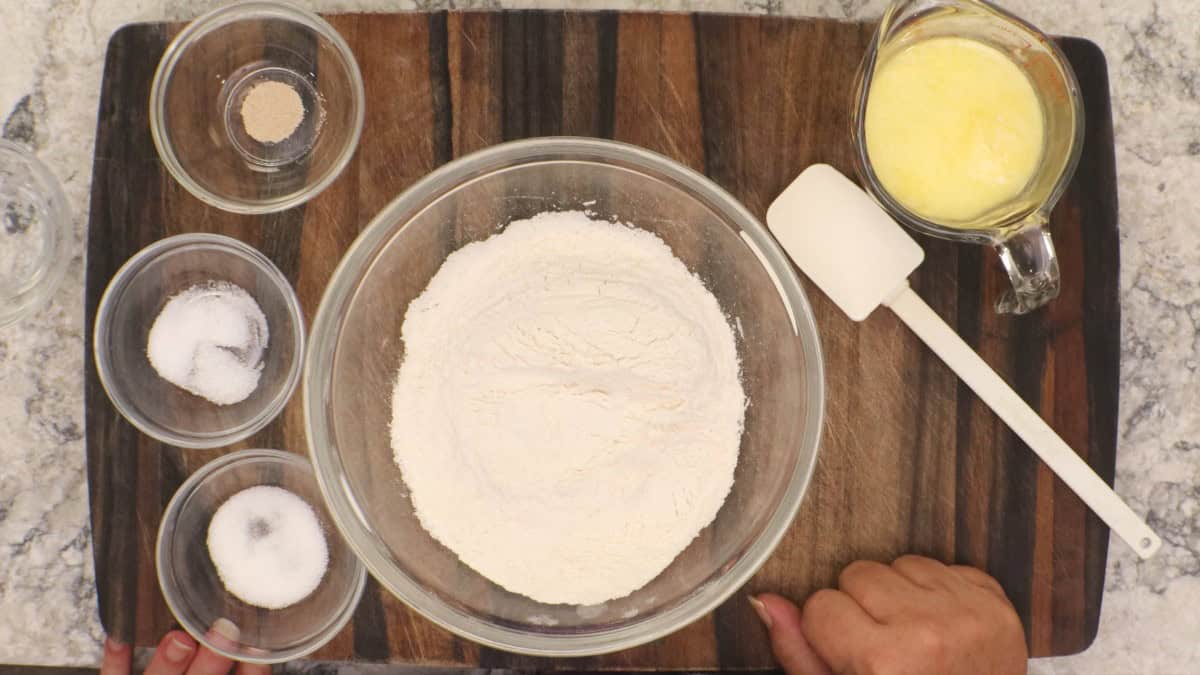
You only need a few simple ingredients for this no-knead dough, plus a little exta flour and cornmeal for shaping and cooking. Let's take a closer look at each one.
Bread Flour
Used in Recipe: 1½ cups of bread flour, which is about 205 grams.
What it Does: Bread flour is very important in this recipe because we are not doing any mechanical kneading. Its higher protein helps the dough develop gluten on its own over time, and it keeps the dough strong during the long overnight rise. That strength is what gives you a muffin that holds its shape and an inside with an open, airy crumb.
Substitutions: Stick with bread flour for this one. Most English muffin recipes call for all-purpose flour, but with no kneading and a 12-hour rise, bread flour is what makes this method work.
Instant Yeast
Used in Recipe: Just ⅛ teaspoon of instant yeast. That is not a typo.
What it Does: This dough rises slowly on the counter over about 12 hours, so it only needs the tiniest bit of yeast. The long, slow rise gives the dough time to build gluten and develop flavor, and it fits right into your schedule: mix it in the evening and cook in the morning.
Substitutions: You can use active dry yeast and mix it with the tablespoon of water and just a pinch of the sugar (not the entire tsp) and let it bloom for 5 minutes. Measure the ⅛ teaspoon carefully, since the amount is matched to the long rise.
Milk and Salted Butter
Used in Recipe: ⅔ cup of milk and 1 tablespoon of salted butter, melted into the milk while it warms.
What it Does: The warm milk and butter bring the dough together and give the muffins a soft, tender inside with a little richness. Warm the milk to about 110℉/43℃ so it is warm but not hot, and do not let it go past 120℉/49℃.
Substitutions: Unsalted butter is perfectly fine if that is what you have on hand.
Sugar, Salt, and Water
Used in Recipe: 1 teaspoon of sugar, ½ teaspoon of kosher salt or fine sea salt, and 1 tablespoon of water.
What it Does: The sugar gives the yeast a little fast food and the salt seasons the dough. The tablespoon of water goes in after everything else (unless you used it to proof the yeast). If you are using table salt, reduce the amount down to about ¼ teaspoon.
Cornmeal and Dusting Flour
Used in Recipe: A little cornmeal for the bottoms of the muffins and the tray you put your
What it Does: The dough is sticky, so a light coat of flour on the outside makes it easy to handle, and cornmeal keeps the muffins from sticking to the tray and the pan. It also gives them that classic English muffin look.
Substitutions: I usually put cornmeal on just one side, but you can put it on both sides, or use a little flour on top instead. You can skip the cornmeal.
How to Make Homemade English Muffins Without Kneading
This recipe takes about 2 minutes of mixing, about 12 hours of hands-off rising on the counter, a few minutes of shaping, and roughly 15 to 20 minutes in the skillet. Here is everything you need to know!
Measure Everything and Mix the Dry Ingredients
Start by measuring everything out: 1½ cups of bread flour, 1 teaspoon of sugar, ½ teaspoon of kosher or fine sea salt, ⅛ teaspoon of instant yeast, ⅔ cup of milk, 1 tablespoon of salted butter, and 1 tablespoon of water. Have plastic wrap or a container with a lid ready to cover the dough. For the next day, you will also want a little flour and cornmeal, a tray, a large pan with a lid, and an instant-read thermometer.
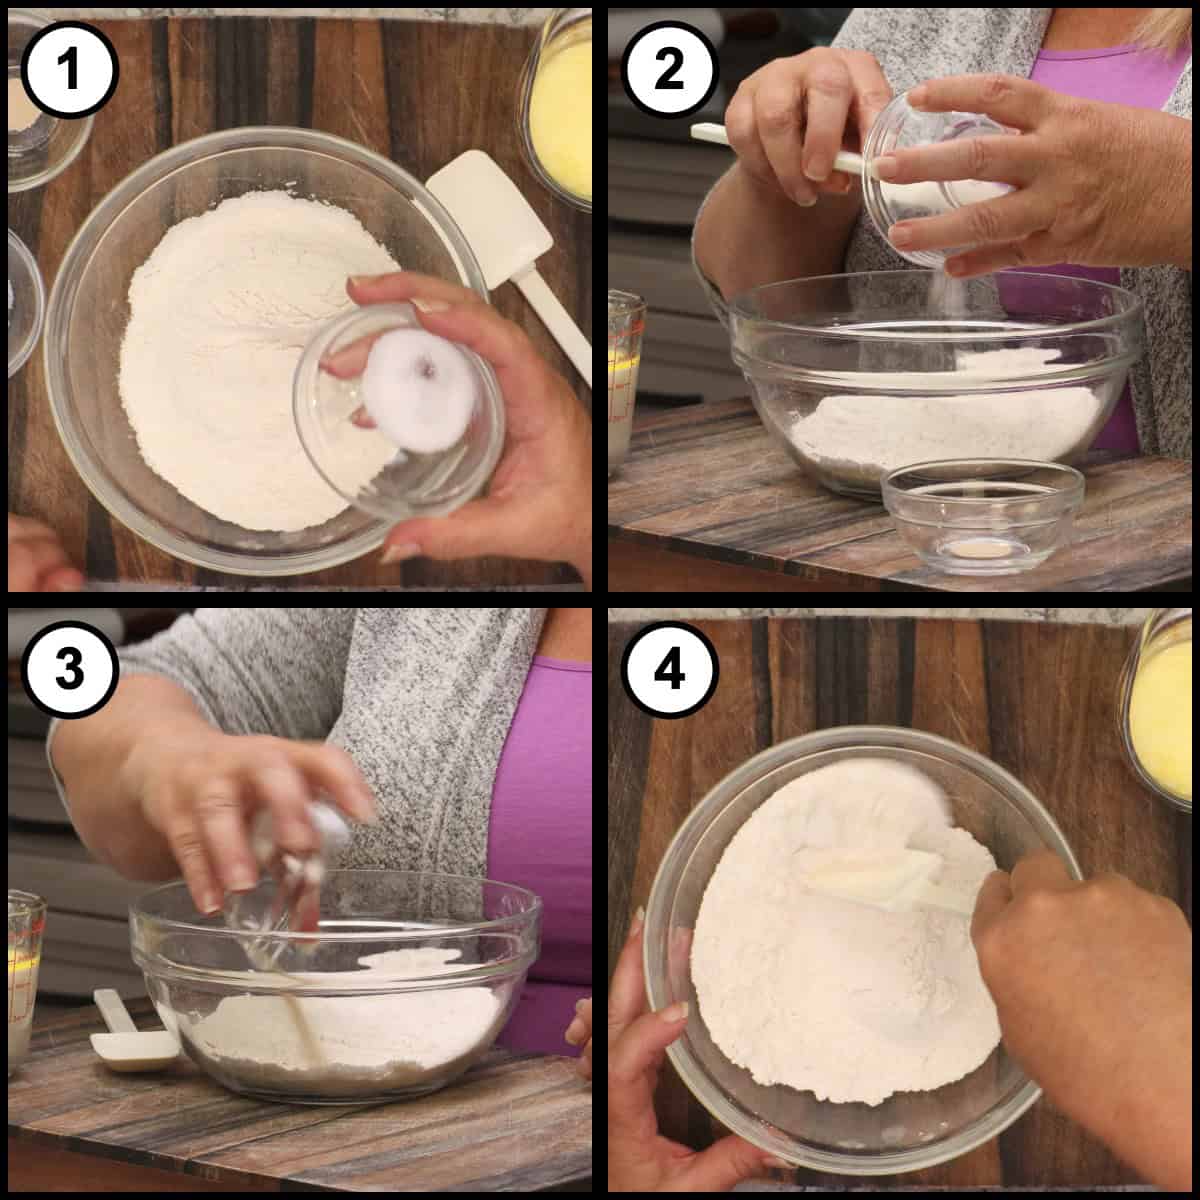
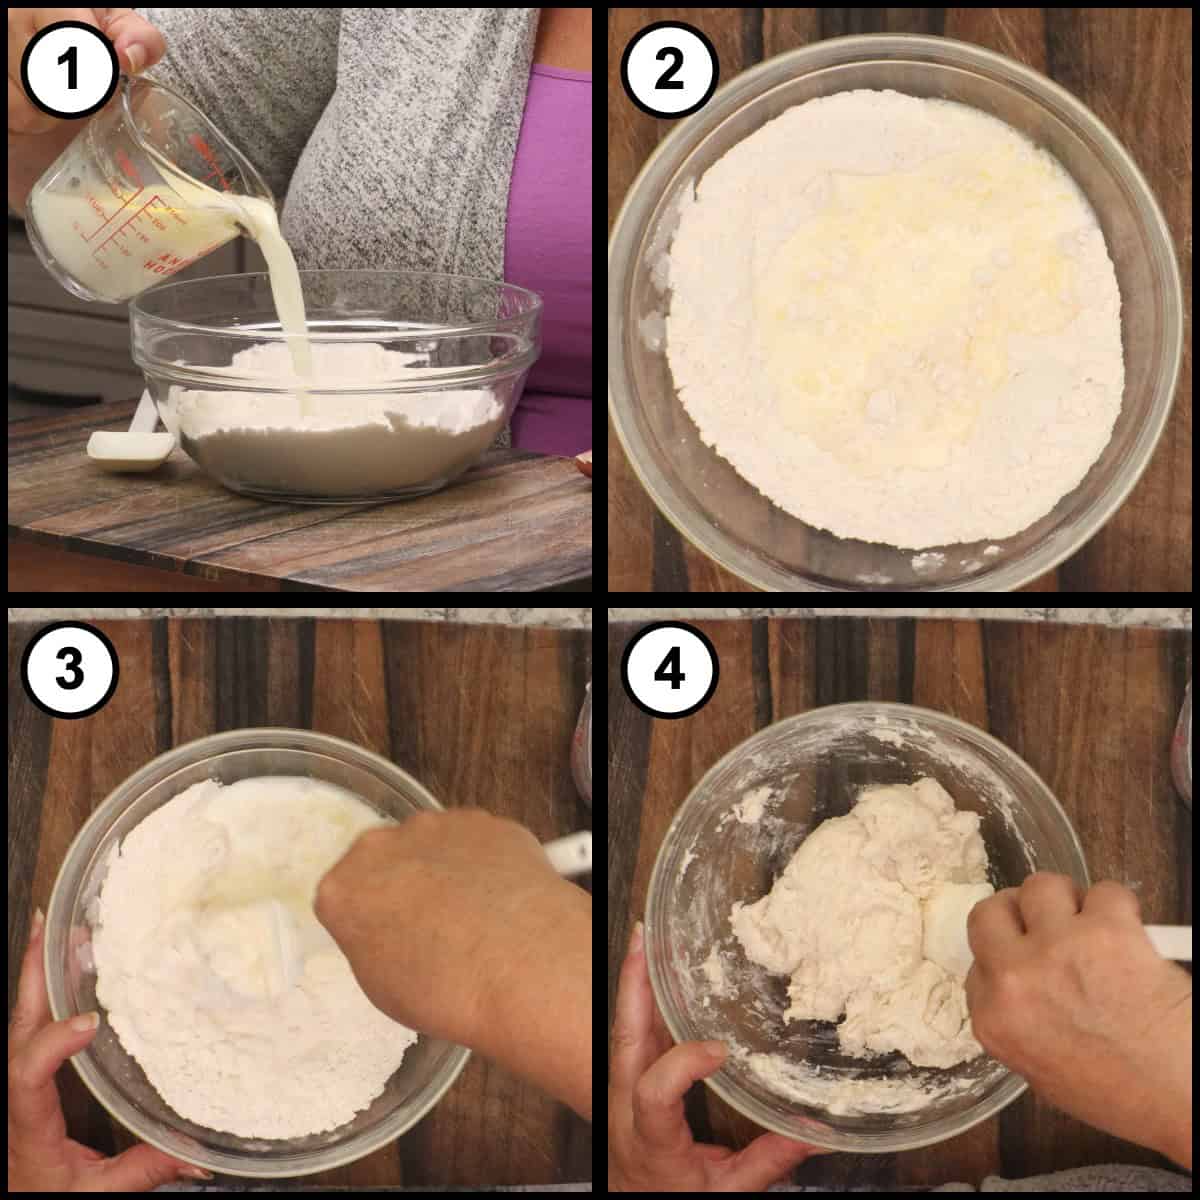
In a mixing bowl, combine the bread flour, sugar, salt, and instant yeast, and stir it all together with a spatula.
Add the Warm Milk and Butter
Warm the milk with the butter so the butter melts into the milk as it heats. You are aiming for about 110℉/43℃, warm but not hot. Do not let it go past 120℉/49℃.
Pour the warm milk and butter into the flour and fold it in. It will come together into a very shaggy-looking dough ball. Once that is mixed, add the tablespoon of water and mix it right in. That little bit of extra hydration is what helps the dough build gluten without any kneading.
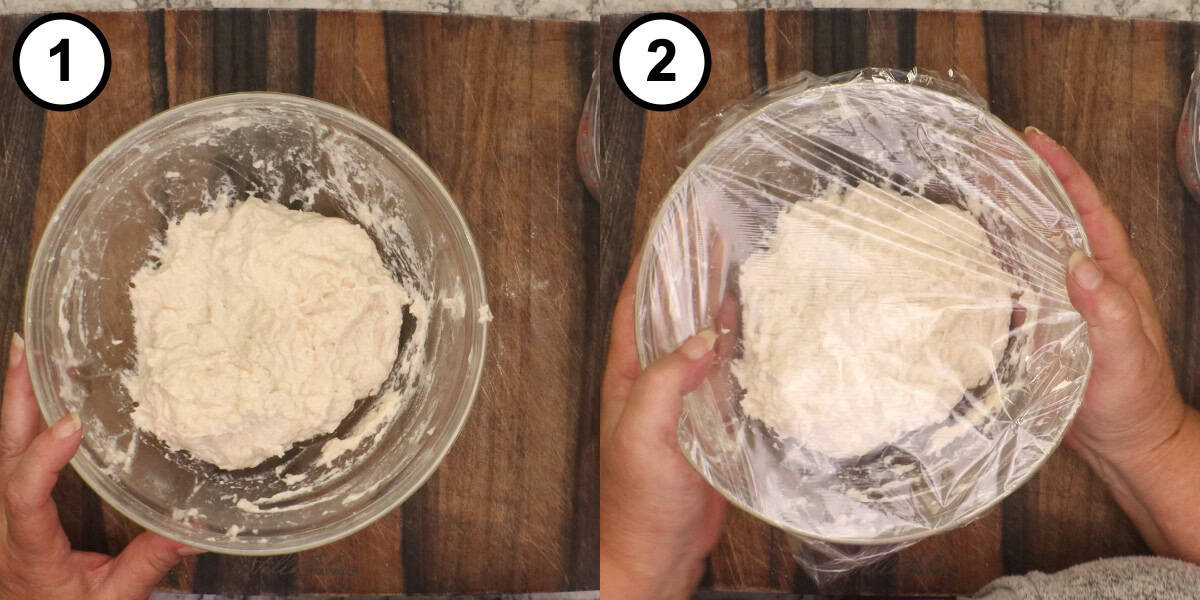
Cover the Wet, Sticky Dough
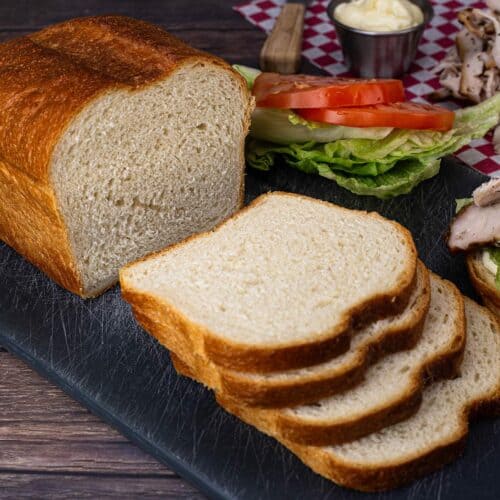
That is it, your dough is made. It will be an extremely wet, sticky dough, and you would not even want to try to knead it right now. Don't worry about that; it is exactly how it should look. This same idea works for other doughs too, because you can build gluten through time and hydration just like you can with kneading. If this has you excited about baking bread at home, try my Homemade Sandwich Bread next.
Cover the bowl with plastic wrap, or use a container with a lid, so it is ready for its long rest on the counter.
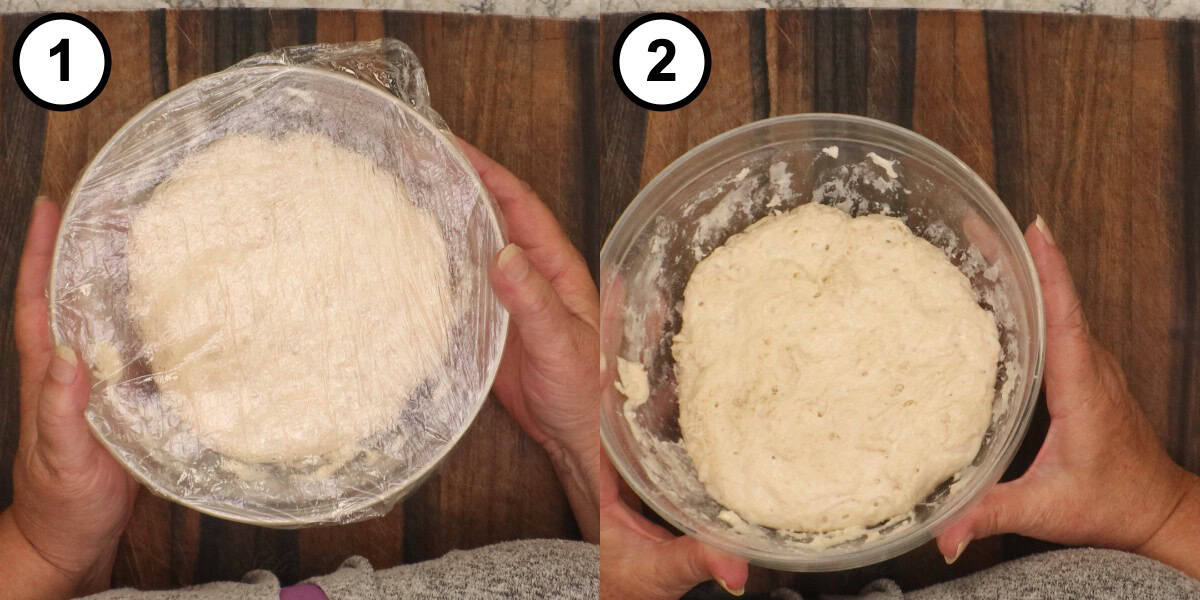
Let It Rise on the Counter for 12 Hours
Leave the covered bowl right on the counter for about 12 hours. You don't have to do anything with it. Just don't put it in the refrigerator, because that will slow everything down; this rise has to happen at room temperature.
At a normal room temperature of 68-72℉/20-22℃, 12 hours is the sweet spot. If your house is warm, around 75-80℉/24-27℃, it will take less time, so check it at 8 hours. If your house is cool, around 60℉/16℃, it will take longer. When it is ready, it will have doubled in size with lots of bubbles. The top may look a little dry, and that is perfectly fine.
Turn the Dough Out and Pat It Down
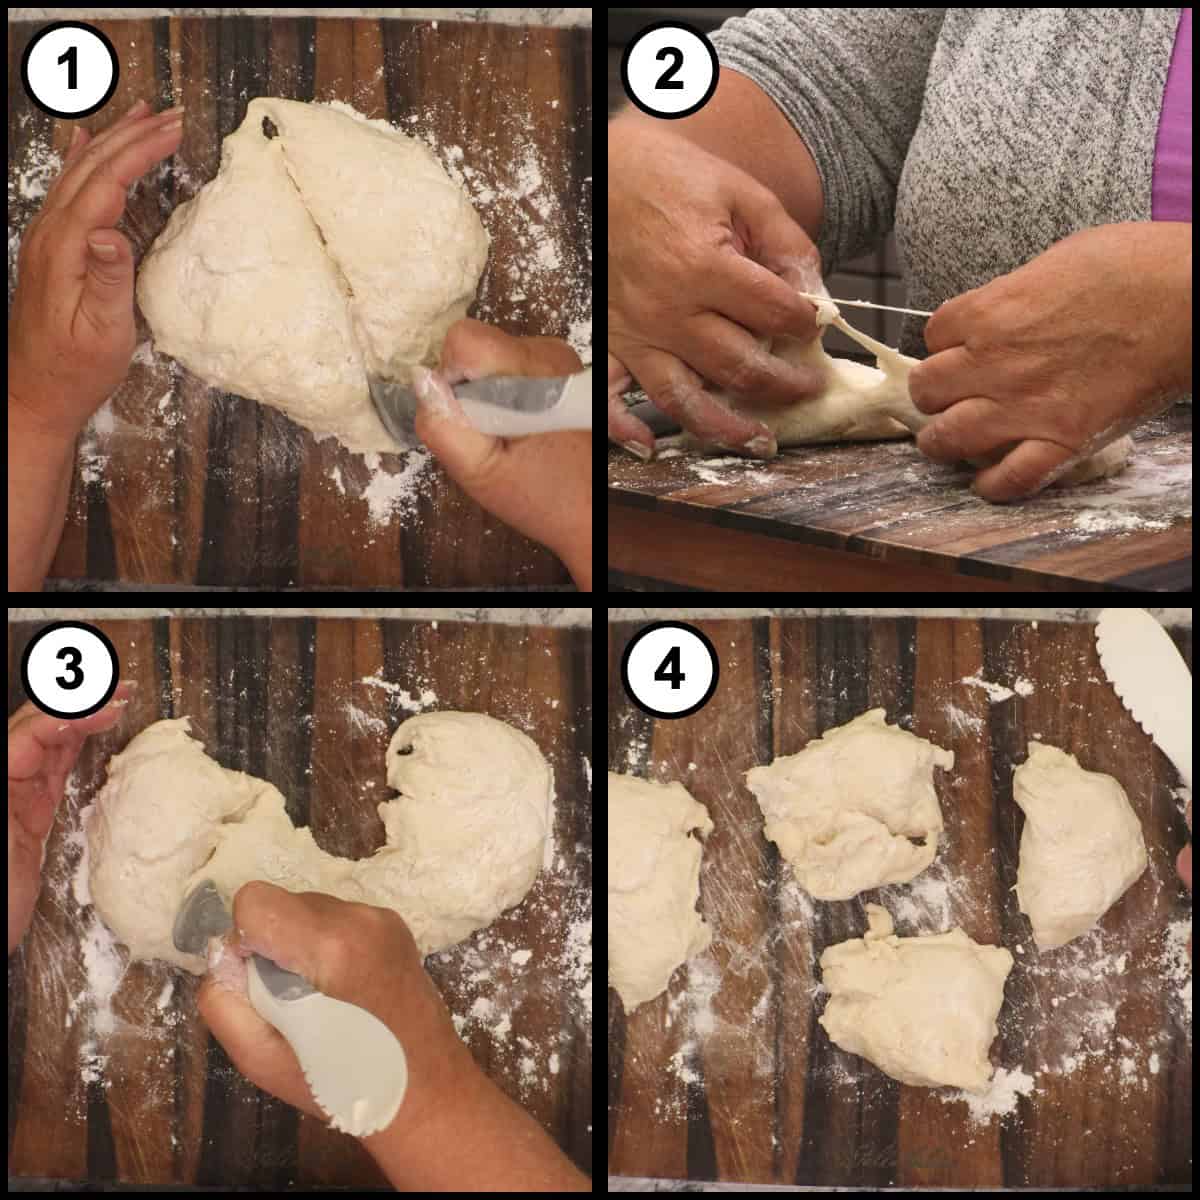
Lightly coat your cutting board or a clean countertop with flour and turn the dough out onto it. You will see beautiful gluten strands as it comes out of the bowl. One important thing here: do not knead flour into the dough. We only use flour on the outside. Sprinkle a little flour on top and gently pat it out.
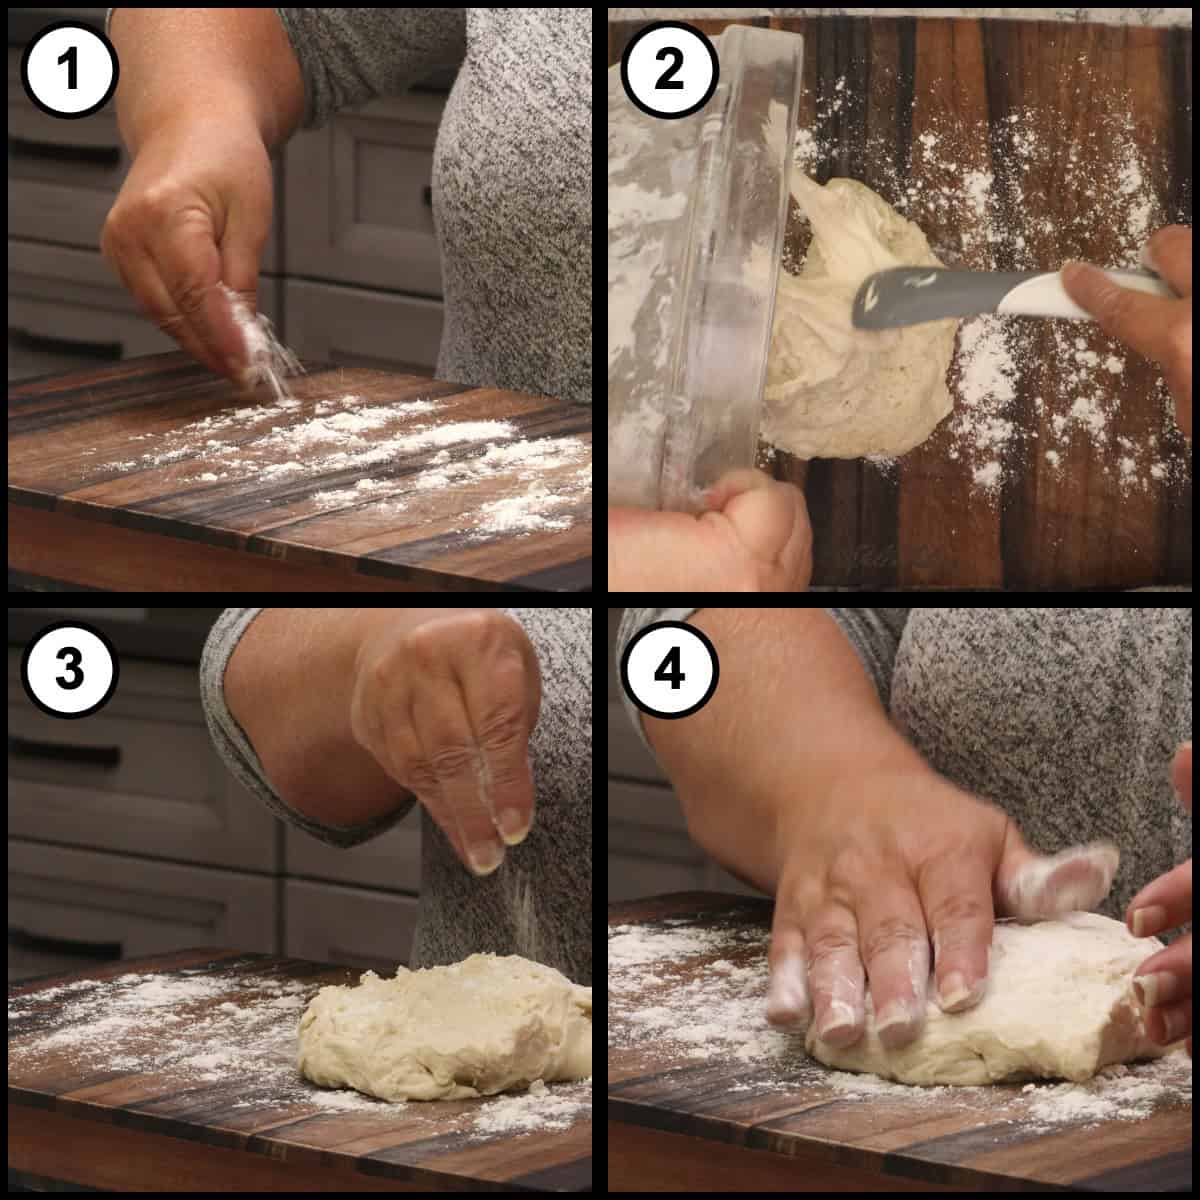
Divide the Dough Into 4 Pieces
Divide the dough into 4 roughly equal portions (sometimes I get 5). You can use a bench scraper or just pull it apart. I eyeball it, but you can weigh the dough if you want to be more precise.
Shape and Seal Each Muffin
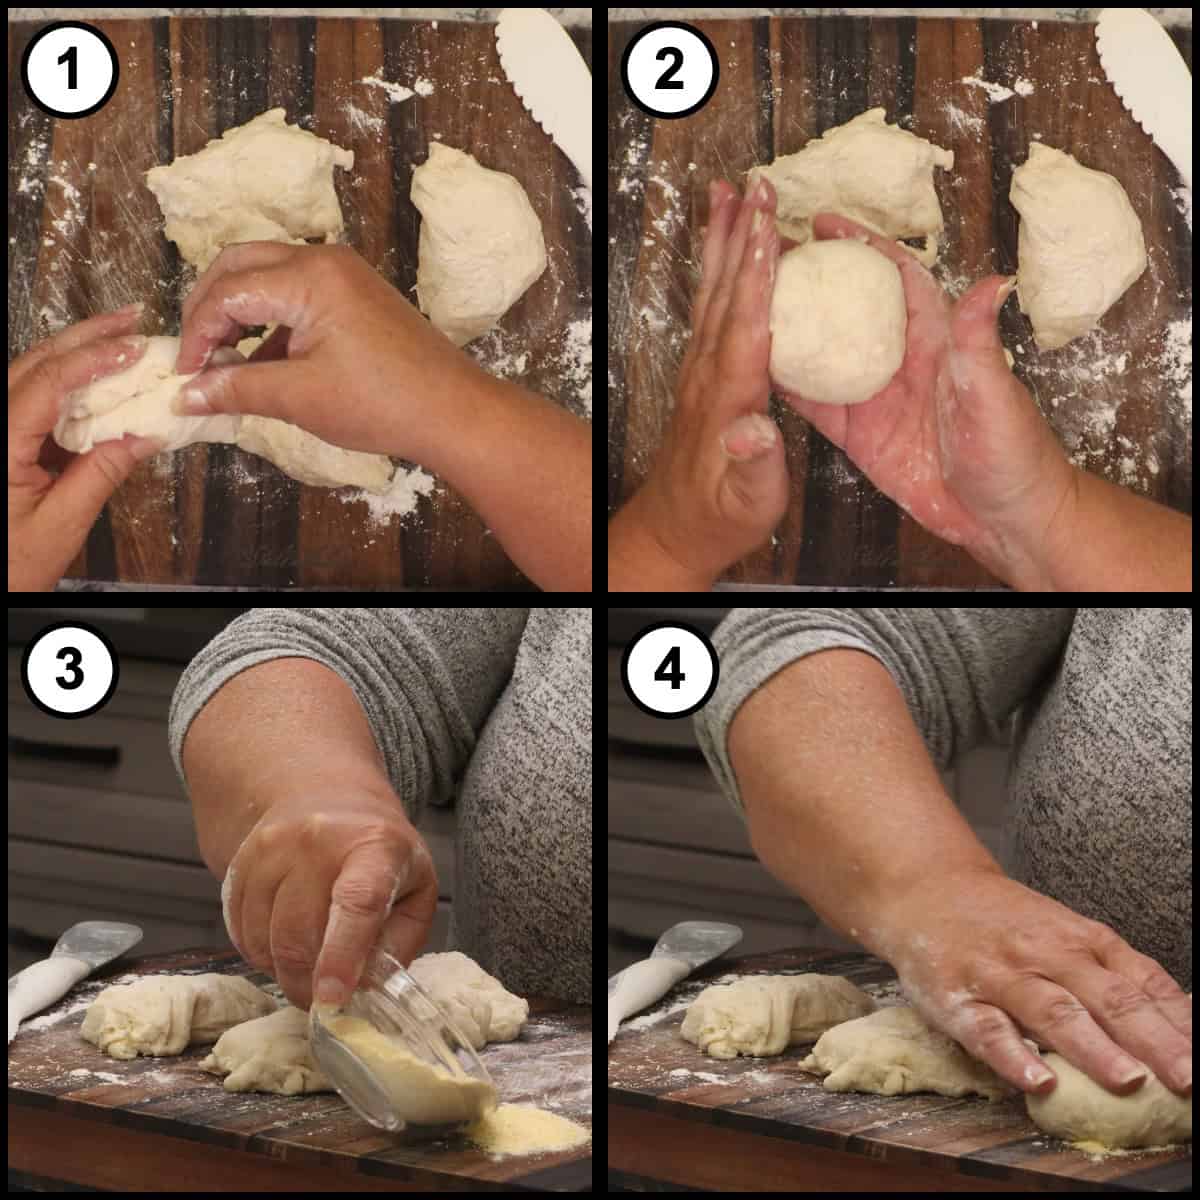
Take one piece at a time and brush off any excess flour. Fold the dough in on itself to form a ball, almost like making a roll, and make sure it is completely stuck together on the underside. Pour a little cornmeal onto the board, set that sealed bottom into it, and press the dough down to about ½ inch thick. They will rise as they steam in the pan, so they don't need to be any thicker unless you want really thick muffins.
Quick Tip
Sealing the bottom of each piece is the most important part of shaping. If the underside is not completely stuck together, the muffin will break apart on the bottom as it expands and rises in the pan.
Set the Muffins on a Cornmeal-Dusted Tray
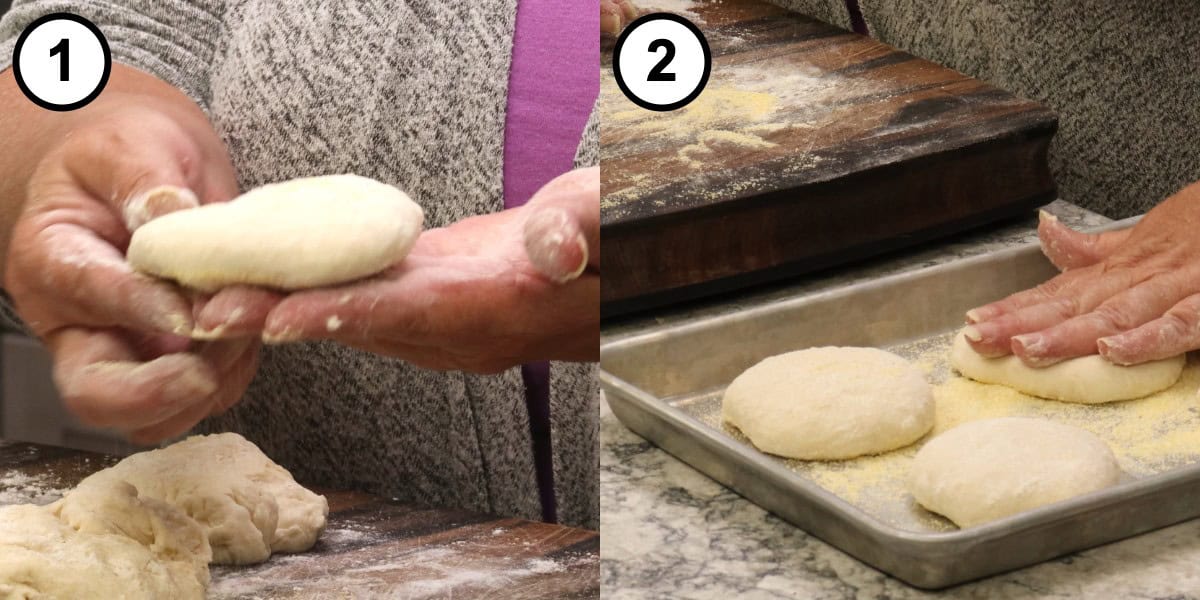
Place each shaped muffin on a tray dusted with cornmeal and repeat with the rest of the dough. Now the best part: there is no waiting. They don't need to rise again, so you can head straight to the stove.
Cook Covered on the Stovetop
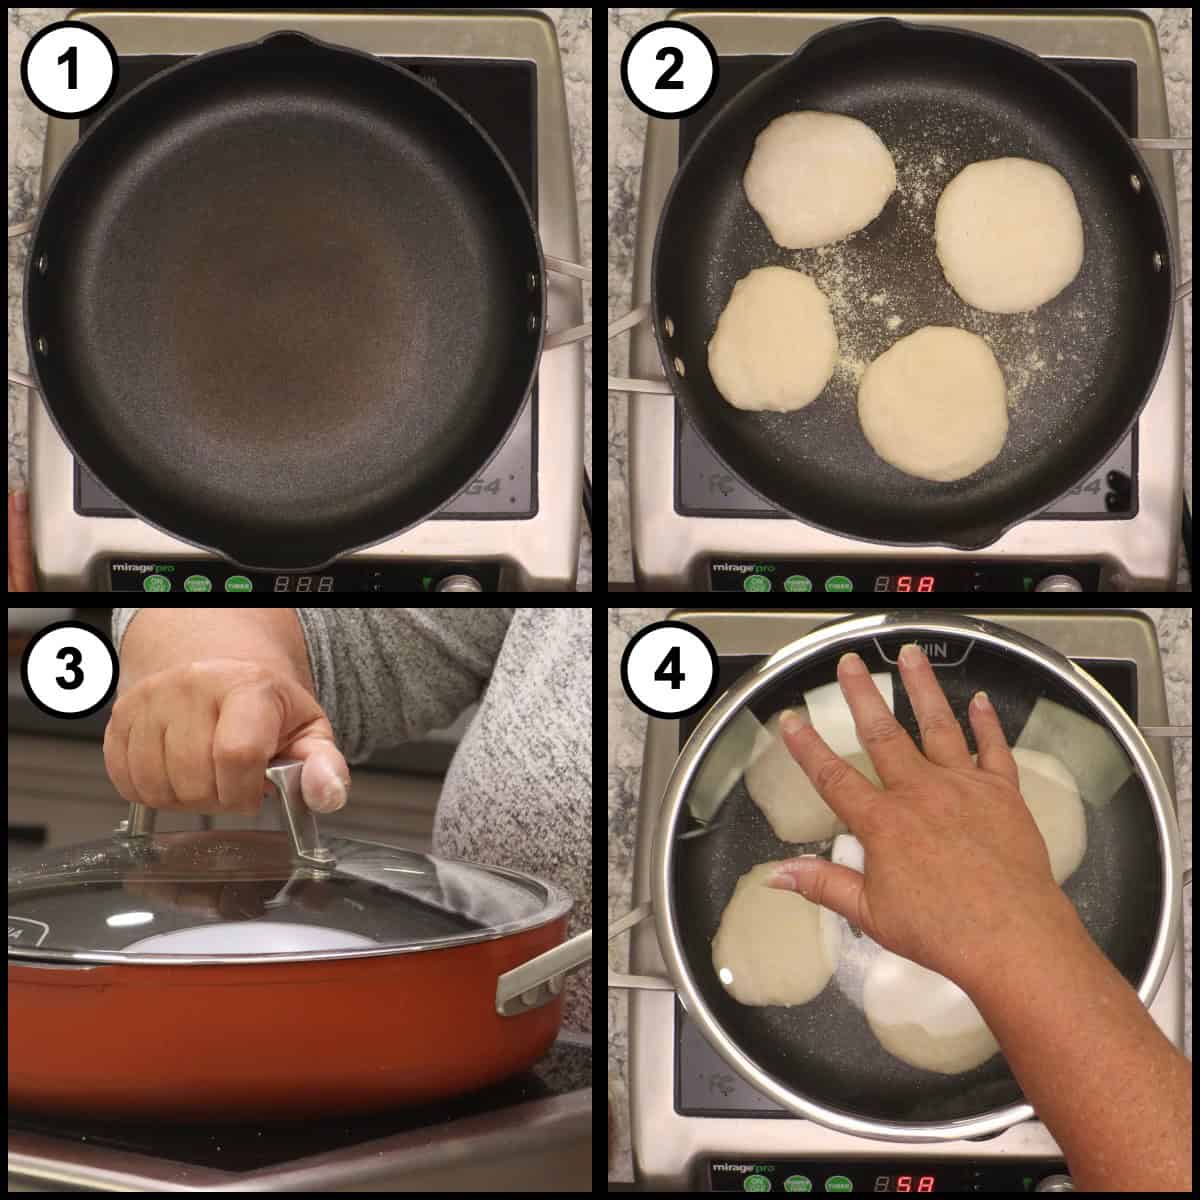
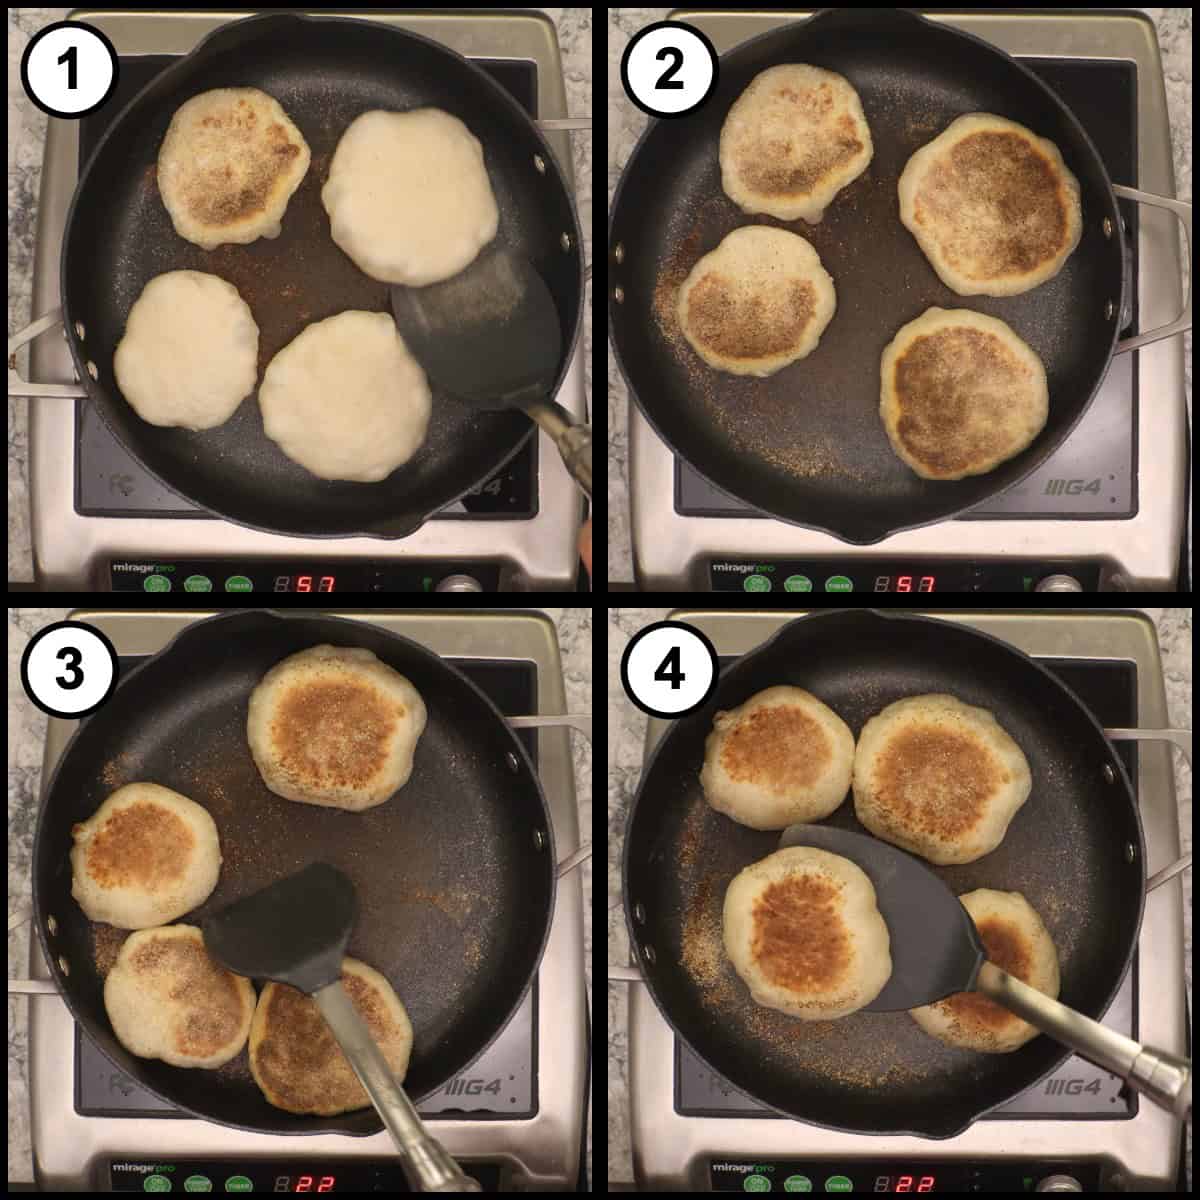
Heat a large pan with a lid on the stove over medium-high heat until the bottom of the pan is really hot. Use a pan wide enough to fit all 4 at once, or cook them in batches. Sprinkle a little cornmeal into the pan. If the cornmeal starts to burn, your pan is too hot. Add the muffins, cornmeal side down, and cover the pan with the lid. Cook for 5 to 6 minutes. The lid traps steam so the muffins rise up a little while they get a nice golden brown on the bottom.
Quick Tip
Cover the pan only for the first part of the cook time. The lid traps steam while the muffins rise and brown on the bottom, then it comes off for good after the first flip. Leaving it off for the rest of the cook is what gives English muffins their signature sides.
Flip, Uncover, and Finish Cooking
Remove the lid and flip the muffins. Flipping gently compresses them, and they will already look like English muffins. Turn the heat down to about medium and leave the lid off. Cook for about 5 minutes, at least 2 to 3 minutes on this side, so they cook from this side up into the center. You can move them around in the pan a little if you want.
Then flip them back over and cook for about 5 more minutes. I flip them back because I would rather the bottom get darker than the top. Thicker muffins will take longer, so go by temperature rather than the clock.
Check the Temperature and Cool on a Rack
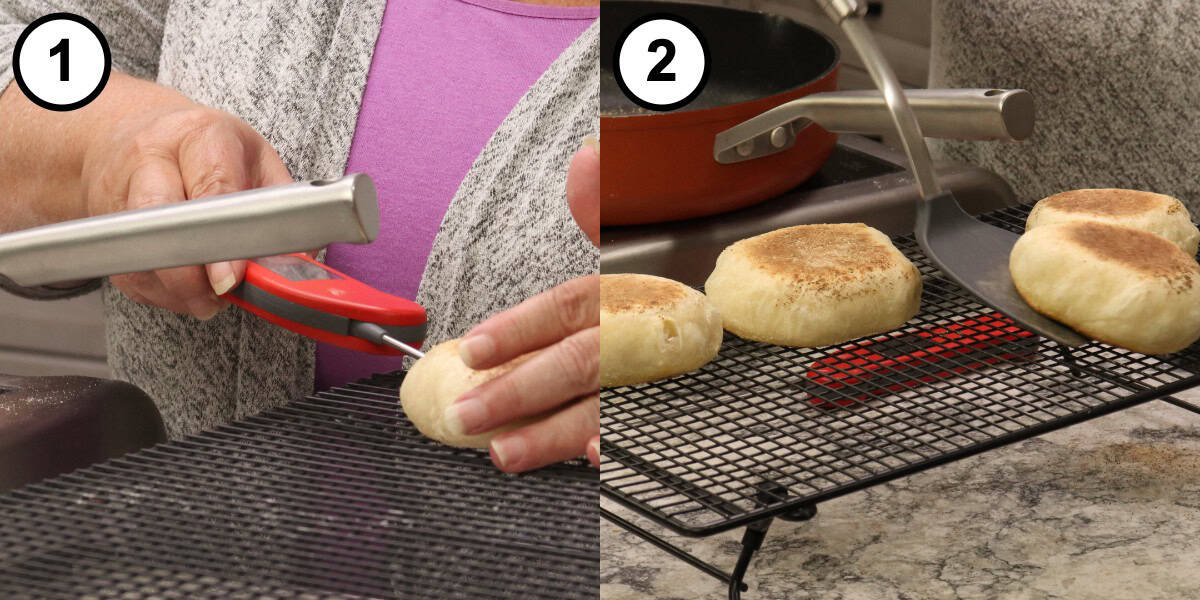
It is almost impossible to tell by looking whether English muffins are cooked all the way through, so use an instant-read thermometer. You are aiming for an internal temperature of 200-205℉/93-96℃. When I checked mine the first time they were at about 190℉/88℃, so I gave them a few more minutes and they came up to 205℉/96℃. The temperature will also climb a little as they sit.
Turn off the stove and move the muffins to a cooling rack. Let them cool completely before you split them. If you cut or fork into them while they are warm, the inside will be gummy.
Split with a Fork and Toast
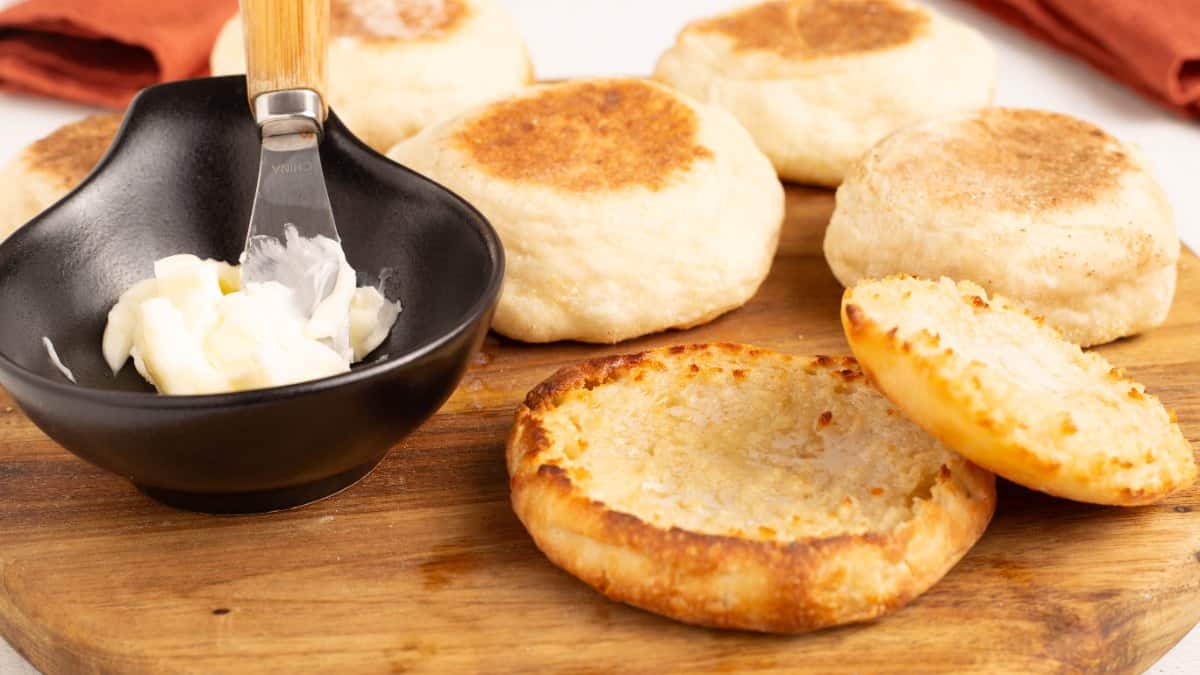
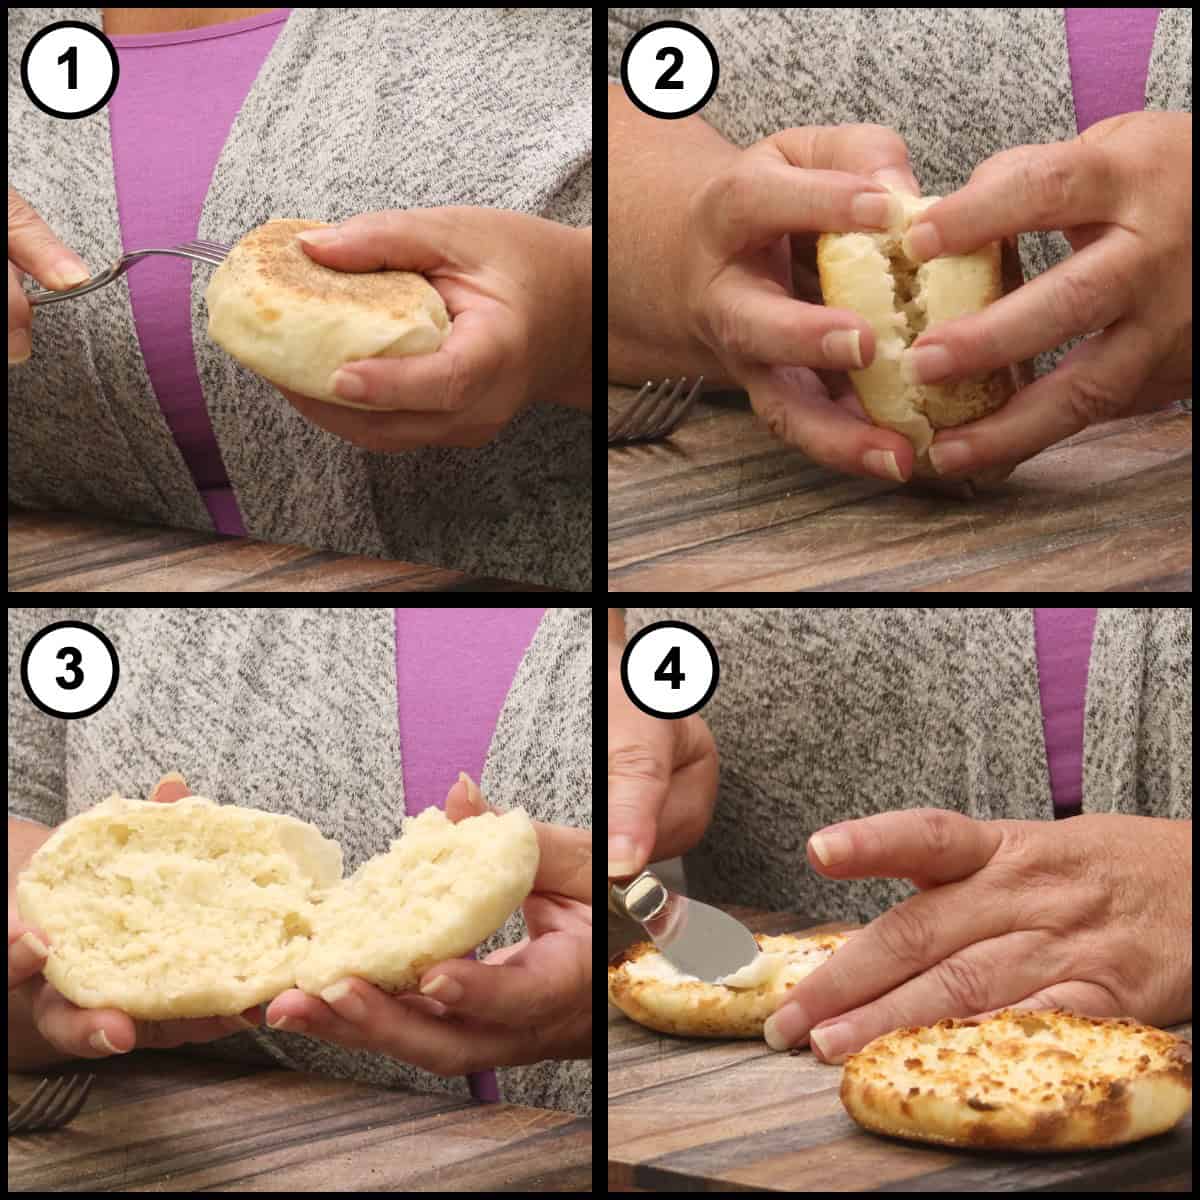
Once they are cool, do not reach for a knife. Poke a fork in all the way around the middle, then pull the halves apart. That is how you get all those delicious nooks and crannies. Toast them up, spread on a little butter, and enjoy!

No-Knead English Muffins
Equipment
- Mixing bowl
- Silicone spatula
- Plastic wrap or a container with a lid
- Cutting board
- Bench scraper (optional)
- Large skillet or pan with a lid
- Small tray or sheet pan
- Instant-read thermometer
- Cooling rack
- Fork (for splitting)
Ingredients
Dough
- 1½ cups bread flour about 205 grams; bread flour is important here, see notes
- 1 teaspoon granulated sugar
- ½ teaspoon kosher salt or fine sea salt use ¼ teaspoon if using regular table salt
- ⅛ teaspoon instant yeast yes, just ⅛ teaspoon
- ⅔ cup milk warmed to about 110℉/43℃, no hotter than 120℉/49℃
- 1 tablespoon salted butter melted into the milk while it warms
- 1 tablespoon water
For Shaping
- flour for dusting the work surface and the outside of the dough
- cornmeal for the bottoms of the muffins, the tray and the pan
Would you like to save this recipe?
Instructions
- Warm ⅔ cup of milk with 1 tablespoon of salted butter, letting the butter melt into the milk as it warms. You want it at about 110℉/43℃, warm but not hot. Do not let it go past 120℉/49℃.1 tbsp salted butter, ⅔ cup milk
- In a mixing bowl, combine 1½ cups (about 205 grams) of bread flour, 1 teaspoon of sugar, ½ teaspoon of kosher or fine sea salt, and ⅛ teaspoon of instant yeast. Stir with a spatula to mix.1½ cups bread flour, 1 tsp granulated sugar, ½ tsp kosher salt or fine sea salt, ⅛ tsp instant yeast
- Pour in the warm milk and butter and fold it in with the spatula until it comes together into a very shaggy dough ball. Add 1 tablespoon of water and mix it right in. The dough will be very wet and sticky. Do not knead it.1 tbsp water
- Cover the bowl with plastic wrap, or use a container with a lid, and leave it on the counter at room temperature for about 12 hours. Do not put it in the refrigerator. At a normal room temperature of 68-72℉/20-22℃, 12 hours is the sweet spot. In a warm house (75-80℉/24-27℃), check it at 8 hours. In a cool house (around 60℉/16℃), it will take longer. It is ready when it has doubled in size and is full of bubbles. The top may look a little dry, and that is fine.
- Lightly coat your cutting board or a clean countertop with flour and turn the dough out onto it. Use flour only on the outside of the dough; do not knead flour into it. Sprinkle a little flour on top and gently pat it out. Divide the dough into 4 roughly equal portions (or 5 smaller ones) with a bench scraper, or simply pull it apart.flour
- Working with one piece at a time, brush off any excess flour, then fold the dough in on itself to form a ball, almost like making a roll. Make sure it is completely sealed together on the underside, or it will break apart on the bottom as it rises in the pan.
- Set the sealed bottom into a little cornmeal and press the dough down to about ½ inch thick. Add a little flour or cornmeal to the top if you like. Place it on a tray dusted with cornmeal and repeat with the remaining pieces. There is no second rise; they are ready to cook right away.cornmeal
- Heat a large pan with a lid on the stove over medium-high heat until the bottom of the pan is really hot. Add the muffins, cornmeal side down, and cover the pan with the lid. If the cornmeal starts to burn, your heat is too high. Cook for 5 to 6 minutes to trap steam, brown the bottoms, and let them rise up a little.
- Remove the lid, flip the muffins, and turn the heat down to about medium. Leave the lid off from here on. Cook for about 5 minutes, at least 2 to 3 minutes on this side, so they cook from this side up into the center.
- Flip the muffins back over and cook for about 5 more minutes, until an instant-read thermometer in the center reads 200-205℉/93-96℃. Thicker muffins will take longer. If they are not there yet, give them a few more minutes and check again.
- Turn off the stove and move the muffins to a cooling rack. Let them cool completely before splitting, or the inside will be gummy. To split, poke a fork in all the way around the middle and pull the halves apart. Toast and serve.
Notes
• Plan ahead. The dough takes about 2 minutes to mix, then rests on the counter for about 12 hours. Mix it in the evening and cook the muffins in the morning. COOKING TIPS
• Turn the heat down to about medium after the first flip.
• An instant-read thermometer is the only reliable way to know they are done. Aim for 200-205℉/93-96℃ in the center. DOUGH TIPS
• Use bread flour. Since there is no kneading, bread flour is what builds the gluten and keeps the dough strong through the long overnight rise.
• The tablespoon of water adds the extra hydration the dough needs to build gluten without kneading.
• Let the dough rise at room temperature, not in the refrigerator. Cold slows it down.
• Use flour only on the outside of the dough when shaping. Do not knead flour into it.
• Seal each portion completely on the underside so it does not break apart as it rises in the pan. NUTRITIONAL DISCLAIMER
Nutritional information provided is an estimate based on typical ingredient values and standard portion sizes. Actual nutritional content may vary significantly depending on specific brands used, ingredient substitutions, preparation methods, portion sizes, and individual cooking techniques. For precise nutritional information tailored to your specific ingredients and preparation, please consult with a registered dietitian or use laboratory analysis. This information should not be used for medical nutrition therapy or to manage medical conditions without professional guidance.
Nutrition
Alternate Cooking Instructions
- Ninja Possible Cooker Pro: Use the Sear/Sauté function on High and cover with the lid for the first part of the cook, then follow the same flip, uncover, and temperature steps as the stovetop method.
- Ninja Foodi: Use the Sear/Sauté function on High with a lid for the covered start, then finish uncovered, flipping as described. Check for 200-205℉/93-96℃ in the center.
- Smaller skillet: If your pan will not hold all 4 muffins at once, cook them in batches, keeping the covered start for each batch.
Storage & Reheating Instructions
How to Store Leftover No Knead English Muffins
Let the muffins cool completely before storing them, then keep them in an airtight container.
Quick Tip
Patience pays off here. Let the muffins cool completely on a rack before you split, store, or toast them. Splitting them while warm is what makes the inside gummy.
How to Reheat No Knead English Muffins
- Toast: Split the muffin all the way around with a fork, pull the halves apart, and toast until golden. Spread with salted butter while it is warm.
Frequently Asked Questions
Because this dough is never kneaded, it has to build its gluten on its own over time, and bread flour is what helps it do that. It also keeps the dough strong during the long overnight rise, which is why I use it instead of the all-purpose flour most English muffin recipes call for.
The dough rises slowly at room temperature over about 12 hours, so ⅛ teaspoon of instant yeast is all it needs. The long rise does the work, building gluten and flavor while you sleep.
No, keep it on the counter at room temperature. The refrigerator slows the rise way down. At a normal room temperature of 68-72℉/20-22℃, 12 hours is the sweet spot. In a warm house, check it at 8 hours, and in a cool house, give it longer.
No, and that is one of the best parts of this recipe. Once the muffins are shaped and pressed to about ½ inch thick, they go straight into the pan. They rise as they steam under the lid during the first part of cooking.
Use an instant-read thermometer, because it is almost impossible to tell by looking. You are aiming for 200-205℉/93-96℃ in the center. If they read lower, give them a few more minutes and check again.
Poking a fork in all the way around the middle and pulling the halves apart is how you get the nooks and crannies. A knife slices them flat. Just make sure they have cooled completely first, or the inside will be gummy.
Variations
- Make 5 smaller muffins: Divide the dough into 5 portions instead of 4. Start checking the temperature a little sooner.
- Make them thicker: Press them a little thicker than ½ inch if you like a taller muffin. They will take longer to cook, so go by the thermometer.
- Cornmeal on both sides: I usually put cornmeal on only one side, but you can coat both sides, or add a little flour on top instead.
- Perfectly even muffins: Weigh the dough and divide it by weight instead of eyeballing it.
What to Serve With No Knead English Muffins
There is nothing like a warm, toasted English muffin with a little salted butter melting into all those nooks and crannies. I also really like a little peanut butter on top of the butter. If you want something sweet on top, my Strawberry Basil Preserves are delicious on a warm, toasted English muffin.
More Homemade Breads and Rolls
Once you see how easy it is to make bread at home, it is hard to stop. Here are a few more of my favorite homemade breads and rolls, and every one of them is delicious fresh out of the oven!


About the Recipe Author, Louise Long
Louise is a full-time recipe creator and food blogger @ The Salted Pepper. She has over 30 years of experience with cooking and recipe development. She owned a restaurant for several years and was a full-time RN until retiring to blog full-time.

She published her first cookbook in the Fall of 2018 and is very interested in writing several more.
Louise is also the creator of an online Ninja Foodi Pressure Cooking Course with over 100 instructional step-by-step videos. People absolutely rave about the course and all the value they have received from it.
Louise has several very active Facebook groups that help people with the basics of cooking and learning more about the appliances they love.
Ninja Foodi Pressure Cooker & Air Crisper 101
Ninja Woodfire Outdoor Grill & Smoker
Louise is also a YouTube creator and you can find most of her recipes in video format on The Salted Pepper YouTube channel.
She is very responsive to messages and eager to help in any way she can. Get more Information about Louise & contact information
I WOULD LOVE TO SEE WHAT YOU ARE COOKING UP IN YOUR KITCHEN! TAG ME @THESALTEDPEPPER ON YOUR FAVORITE SOCIAL MEDIA PLATFORM WHEN YOU MAKE A DISH!
BE SURE TO FOLLOW THE SALTED PEPPER RIGHT HERE ⇓⇓⇓⇓⇓
Leave a Reply