

- (affiliate link)Ninja Combi (Optional)
- 9x5 Loaf Pan, buttered
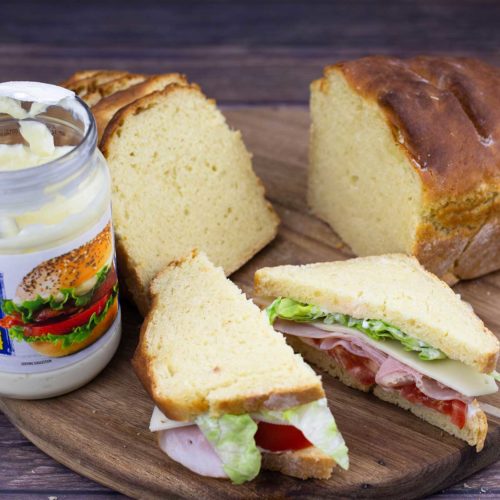
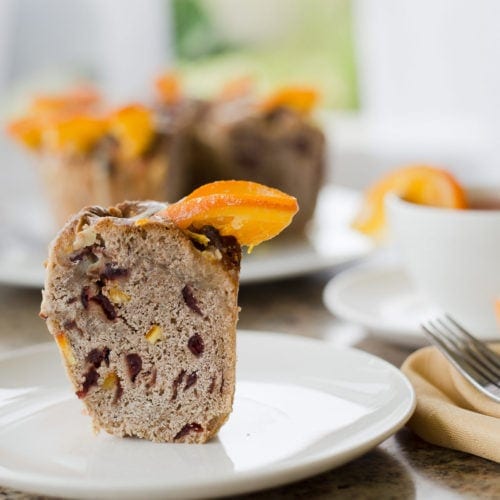
Making homemade sandwich bread doesn't have to be intimidating or difficult. My approach to making bread dough is different from many other people's and with these easy to follow steps, you will have the perfect sandwich bread in just a few hours!
A perfect loaf of bread for sandwiches is tender and fluffy inside, and the crust is golden brown while still being soft. This texture and appearance is achieved by using an enriched dough, meaning it has various ingredients like milk, butter, or eggs added to the flour and yeast.
There is nothing like a fresh loaf of bread and, with this easy recipe, you'll forget all about store-bought bread and make your own!

Would you like to save this recipe?
In this recipe I use milk and melted butter along with flour, yeast, and salt to make a soft white sandwich bread. These enrichments also make the dough VERY easy to work with so this recipe is perfect for beginner bread makers.
I love using my Ninja Combi for making homemade bread because it adds just the right amount of steam at the beginning of the cooking cycle and then moves to a dry heat environment for that beautiful golden crust. I have also tested this recipe in a regular oven and it works perfectly with just a little temperature adjustment.
If you don't have the Ninja Combi, you can still make homemade sandwich bread in the oven and I will provide detailed instructions in this article.
Suggested Kitchen Tools for Sandwich Bread
- 9x5 loaf pan
- Stand Mixer or Large Mixing Bowl
- Sharp Knife or bread lame
- Work Surface for shaping dough
A stand mixer with the dough hook attachment is recommended, but you can mix the dough in a large mixing bowl and knead it by hand.
Ingredients & Substitutions
Flour
I recommend using all purpose flour in this recipe for the best texture, but you can use bread flour if that is all you have on hand. When using bread flour, you may need a little more liquid to properly hydrate the dough. As long as you go by the look of the dough, you will be able to tell how much more you need.
You can use some whole wheat flour in place of the all purpose flour, but if you are new to making bread I only recommend substituting up to 1 cup of the AP flour with whole wheat flour until you get used to how the dough feels with different flours being used. Whole wheat flour may also need more liquids, but as long as you go by the look and feel of the dough it will be fine.
I have not tested this recipe with any type of alternative flours like gluten free or low carb. They usually require many modifications to produce a desirable result. I recommend finding a recipe specific to your needs for the best outcome
Yeast
You can use either instant yeast, rapid rise yeast, or active dry yeast in this recipe. The only difference is active dry yeast will need to be proofed/bloomed before adding it to the flour. To do this add the yeast and 1 Tablespoon of warm milk in a small bowl (you can add a teaspoon of the sugar if desired) and mix to combine. Let it sit for about 5 minutes and it will start to bubble and become frothy.
The difference between active dry yeast and instant (or rapid-rise yeast) is that the granules in instant and rapid-rise yeast are smaller and designed to dissolve easily. Therefore, they can be added straight to the flour mixture without having to proof or bloom the yeast.
Salt & Sugar
Both are optional, but I find them important to the overall taste of the sandwich bread.
I used Diamond Crystal kosher salt in this recipe, but you can use a fine grind sea salt if you prefer. If you are using table salt, don't use more than 1 teaspoon or the bread will be too salty.
The sugar does add a little flavor and sweetness to the bread, but it is optional.
Milk & Butter
I recommend using whole milk in this recipe or you can use ¾ cup half and half and ¼ cup water. If you want to substitute with heavy cream, use half heavy cream and half water.
I always use salted butter because that is what I have on hand. You can use either salted or unsalted, and the small reduction in salt when using unsalted butter will not affect the outcome so you don't need to add more salt to the recipe.
How to Make Dough for Sandwich Bread
I have been making bread dough for 30+ years, and my method may be different from what you are used to seeing. However, it is incredibly easy and teaches you to pay attention to the dough itself more than measurements.
This technique can be used to make all kinds of bread, from Artisan bread to lean French bread dough.
You do not need a scale for this recipe, but a stand mixer does come in handy. If you don't have a stand mixer, you can make the dough in a large mixing bowl and knead it by hand.
Mise En Place (Prep for Recipe)
It's important to have a prep list to refer to so when you are making something in the kitchen, you have things readily available. This will reduce stress and allow for an overall better kitchen experience.
- Gather the ingredients you will need: flour, milk, butter, salt, and yeast.
- Gather the supplies you will need: stand mixer with dough hook, 9"x5" loaf pan, bowl or pan for proofing dough, plastic wrap or large plastic bag if proofing in a bowl.
- Melt the butter and allow it to cool slightly before using.
- If you are using active dry yeast, combine it with 1 Tablespoon of warm milk to bloom it. This is not necessary if you are using instant yeast or rapid-rise yeast.
- Aerate your flour before measuring it. This is as simple as using the measuring cup to fluff the flour in the bag or canister.

Making the Dough for Sandwich Bread
In the bowl of your stand mixer, combine the flour, yeast, salt, sugar and melted (but not too hot) butter and mix using the dough hook on the lowest setting.

Pour in about half of the milk. You can warm the milk if desired, but I usually don't. If you warm the milk, make sure it is under 110℉/40℃ so you do not kill the yeast.
Turn the stand mixer on the lowest speed and begin to combine the milk with the other ingredients.

It takes some time for the flour to absorb the liquids, so try not to rush this process. Add in a little more of the milk and continue to mix on low speed.
The dough will begin to pull all the flour from the sides of the bowl and form a shaggy dough ball.

Once the shaggy dough ball has formed, if it comes clean from the base of the bowl in the stand mixer, it needs a little more hydration.
The goal is to have about half-dollar size of dough sticking to the bottom of the bowl. Add only a small amount of milk at at time to the bowl and mix on speed 2 until the dough smooths out and is sticking to the bottom.
Knead the dough on speed 2 for about 5 minutes. It will form a nice smooth dough ball, but should still stick sligthly to the bowl at the bottom.
If the dough is sticking too much, you may have added just touch too much liquid. You can fix this by adding 1 Tablespoon of flour at a time and mixing on speed 2 until you achieve the correct consistency.
The dough should feel tacky but not stick to your fingers when you touch it.

Proofing & Forming the Dough
Once the dough has reached the correct hydration and has been kneaded long enough, it will be smooth and slightly tacky to the touch.
Form it into a disk and proof in a warm place until it doubles in size.
I use the Ninja Combi's proof function and place the dough directly in the combi pan, which I lightly butter.

The first proof takes about 45 minutes on 95℉/35℃.
Quick Tip
When proofing dough, do not go by time. There are many variables that affect the rate at which the dough will rise. Give it enough time to double in size.
If you do not have the Ninja Combi or another appliance that proofs the dough, place the dough in a lightly buttered deep bowl and cover with plastic wrap. Allow it to double in size. The time it takes depends on the temperature in your house.

After the first proof of the dough, it is time to shape the dough and place it in the loaf pan for the final rise.
If you haven't done so already, lightly butter the inside of your loaf pan.

Remove the dough from the combi pan or bowl and press it flat into a rectangle just a little longer than your loaf pan.
You can lightly flour your work surface if needed, but usually the dough is soft, but not tacky at this point and flour isn't needed.
Once you have a rectangle about 10" long by 8" wide. Bring the top of the dough and fold it into the middle while pressing forward.
This creates tension on the top of the dough.
Bring the bottom of the dough up towards the middle to form a log.
Fold in the sides and pinch together.

Flip the dough over to the seam side and press the seam together.
Place the dough into the loaf pan.

Forming the loaf Video
It is probably easier to watch me form the dough than explain it and show pictures, so here is a short video.
Place the loaf pan back into the Combi pan for the second proof. I go ahead and add the ½ cup water to the Combi pan now, but that is optional. It doesn't help with proofing, but it is necessary to use the Combi Crisp Function for baking.
The second rise is also done at 95℉/35℃, but usually only takes 30 minutes to rise just above the lip of the loaf pan. In the photo below, it looks like the dough is below the lip of the pan, but when you look at it from the side, the middle is just above the lip.

If you are not using the Combi to proof the dough, loosely cover the pan with a damp towel or plastic bag for the second proofing. The dough will rise just over the lip of the pan, so make sure to allow for this by tenting the towel or bag.
Baking the Bread in the Ninja Combi
Baking bread in the NInja Combi is so easy, and every loaf of bread turns out perfectly every time I use it.
Quick Tip
Please do not use CombiBake, the steam time is too long and it will ruin your sandwich bread. You only need a short period of steaming at the beginning and CombiCrisp is the best function.
You do not need to preheat because we are using the CombiCrisp function which starts off with a little steam and then switches over to a dry cooking method.
Once the dough has risen the second time in the loaf pan, remove it from the Combi and using a sharp knife or bread lame, make a slit down the middle that goes about ½" in depth.
If you forget to score the dough, please don't worry, it will be fine!
Make sure you have ½ cup water in the Combi pan and set the loaf pan directly in the Combi pan. You don't want to use a rack for this recipe because it will cause the bread to sit too close to the heating element and burn.
Place the Combi pan into the Ninja Combi and select the CombiCrisp function. Make sure the lever at the top of the appliance is pointing up.
Set the temperature to 325℉/160℃ and the time for 30 minutes. Press Start.

The water in the bottom pan will start to heat up and produce steam. During this time you will see dashes on the display. This lasts about 5 minutes and then the Ninja Combi will switch over to the crisping function and the countdown will start.
You do not need to do anything during the baking process except leave the door closed and let the Combi do its magic.
If for some reason, you think the bread is getting too dark on top, you can lower the temperature to 300℉/150℃, but I have never had that happen with this recipe.
When the time is up, remove the Combi Pan and then wearing oven mitts, remove the loaf pan. Turn the bread over onto a cooling rack.

Liberally butter the bread all over and wrap in a tea towel or (affiliate link)flour sack to cool. This will create a nice soft crust on the bread.
If you prefer more of a crunch, skip this step and let the bread cool on the cooling rack without butter or wrapping.

Let the bread finish cooling completely. This is very important because the cooling period also finishes cooking the center and if you cut into it too soon the inside could be gummy.
Slice and serve!

Baking Sandwich Bread in the Oven
Making and forming the dough remains the same no matter which appliance you choose to bake the bread in.
Preheat the oven to 375℉/190℃.
Place the loaf pan in the middle rack of the preheated oven and bake for 35-40 minutes.
Ovens can vary in temperature and some have hot spots, so you can rotate the pan if you see one side getting more done than the other or increase or decrease the temperature as needed.
Make sure to allow the bread to cool completely before slicing and if you want a nice soft crust like sandwich bread, butter it all over and wrap it in a tea towel.
Storage Instructions
How to Store Leftover Sandwich Bread
I recommend storing the sandwich bread either wrapped in plastic wrap or a plastic bag at room temperature for up to 3 days.
Refrigeration
Once the bread has cooled completely, you can store it wrapped in plastic or in a plastic bag in the refrigerator for 5-7 days.
Freezer
If you want to freeze the bread, wrap it in a few layers of plastic wrap and then place it into a large plastic bag and freeze for up to 3 months.
Frequently Asked Questions
Yes. Simply follow the instructions on your bread machine for mixing and kneading the ingredients.
Depending on the model of your bread machine, you may be able to bake the bread right in the bread machine and have a sandwich shaped loaf.
Or, you can always use the bread machine to mix and knead the dough and then remove the dough and shape it and put it into a loaf pan for baking.
Yes, if you want to make two loaves of sandwich bread, you can make a double batch of the dough.
After the first rise, separate the dough into two equal portions and shape each one and place them into your 9x5 pans.
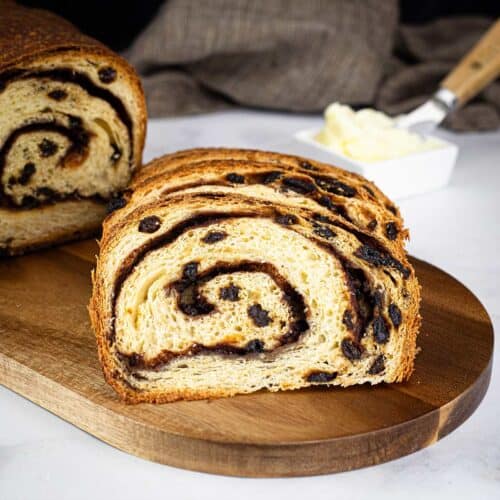
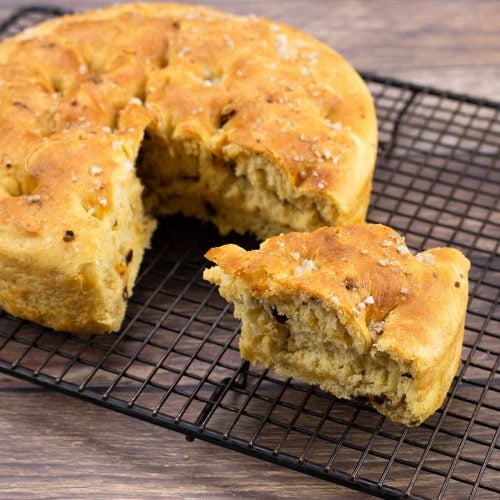
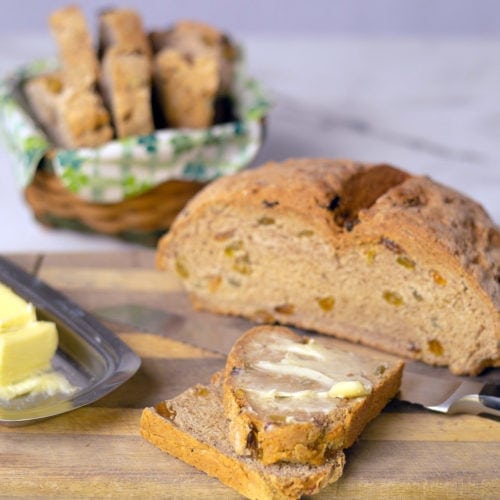
More Bread & Roll Recipes


Homemade Sandwich Bread (Ninja Combi & Oven Directions)
Equipment
- (affiliate link)Ninja Combi Optional
- 9x5 Loaf Pan, buttered
Ingredients
- 3 cups all-purpose flour
- 4 Tablespoons melted butter cooled slightly
- 1½ teaspoons instant yeast
- 1 Tablespoon granulated white sugar
- 1½ teaspoons kosher or fine grind sea salt
- 1 cup whole milk plus a little more only if needed
Buttering for Cooling
- 1-2 Tablespoons butter
Would you like to save this recipe?
Instructions
Making the Dough
- Add all of the ingredients to the bowl of an electric stand mixer except for the milk. Using the dough hook attachment, mix on lowest speed for about 1 minute.3 cups all-purpose flour, 4 Tablespoons melted butter, 1½ teaspoons instant yeast, 1 Tablespoon granulated white sugar, 1½ teaspoons kosher or fine grind sea salt
- Add in half of the milk and mix on the lowest speed until the mixture starts to come together. It will look dry and crumbly at this point. Add half of the remaining milk and mix on low until a shaggy dough ball has formed. It will start out looking dry and as it mixes the flour will absorb the milk and become more hydrated.1 cup whole milk
- When a shaggy dough ball has formed, add in the remaining milk 1 Tablespoon at a time and mix on Speed two. The dough is perfectly hydrated and ready to use when it becomes a smooth ball and about half dollar size of it is sticking to the bottom of the mixing bowl. You may not use all the milk and you may need a little more depending on the flour and humidity. Go by looks of the dough and you will have perfect bread. This kneading process on speed two will take 5-10 minutes.
First Proof of the Dough
- Once the dough is ready, form it into a ball or disc. Lightly butter the bottom of the Ninja Combi pan or a large mixing bowl and place the dough in the bottom. Ninja Combi: Proof directly in the Combi pan on 95℉/35℃ for 45 minutes or until doubled in size. Room Temperature: Proof in covered mixing bowl until doubled in size. This can take 60-90 minutes.
Shaping and Second Proof
- Once the dough has doubled in size, remove it from the bowl or pan and press it out on clean work surface into a rectangle that is about 10" wide by 8" long. I don't usually have to flour the work surface, but you can if needed. If this is the first time you have shaped dough for a loaf of bread, I recommend you watch the video in the post.
- Fold the top third of the dough towards the middle and press away from you to form tension and start to form a log shape. Tuck in the sides and then bring the bottom of the dough that is closest to you up to the middle to finish the log shape. Pinch the seams together and place the dough into the buttered loaf pan.
- Ninja Combi: Place the loaf pan directly into the Combi pan. You do not want to use a rack because it will put the bread too close to the heating element. You can add the ½ cup of water now or after the second proofing and before baking. Select the proof function and set the temperature to 95℉/35℃ and the time for 30 minutes. When the second proofing is done, score the bread down the middle with a sharp knife or bread lame about ½" deep. Room Temperature: Loosely cover the loaf pan and let it sit in a warm place for 45-60 minutes or until the dough just starts to rise over the lip of the loaf pan.When the second proofing is done, score the bread down the middle with a sharp knife or bread lame about ½" deep.
Baking in the Ninja Combi
- Make sure you have ½ cup water in the bottom pan and the loaf pan is sitting directly in the Combi pan. It's fine that it is sitting in the water. Select the CombiCrisp function and set the temperature to 325℉/160℃ and the time for 30 minutes. HIt start. It will steam for a short time and then the countdown will start. When the time is up remove the loaf pan and proceed to the cooling phase.
Baking in a traditional oven
- Preheat the oven to 375℉/190℃. Place the loaf pan on the middle rack and bake at 375℉/190℃ for 35-40 minutes or until golden brown on top and it should sound hollow when you tap on it.
Buttering & Cooling
- When the bread is done, remove the loaf pan from the oven or Ninja Combi and turn it over onto a cooling rack to remove the loaf of bread. Liberally butter the outside and wrap in a tea towel or flour sack to cool. This will soften the crust for the perfect sandwich bread. Allow to cool completely before slicing.1-2 Tablespoons butter
Nutrition
About the Recipe Author, Louise Long
Louise is a full-time recipe creator and food blogger @ The Salted Pepper. She has over 30 years of experience with cooking and recipe development. She owned a restaurant for several years and was a full-time RN until retiring to blog full-time.

She published her first cookbook in the Fall of 2018 and is very interested in writing several more.
Louise is also the creator of an online Ninja Foodi Pressure Cooking Course with over 100 instructional step-by-step videos. People absolutely rave about the course and all the value they have received from it.
Louise has several very active Facebook groups that help people with the basics of cooking and learning more about the appliances they love.
Ninja Foodi Pressure Cooker & Air Crisper 101
Ninja Woodfire Outdoor Grill & Smoker
Louise is also a YouTube creator and you can find most of her recipes in video format on The Salted Pepper YouTube channel.
She is very responsive to messages and eager to help in any way she can. Get more Information about Louise & contact information
I WOULD LOVE TO SEE WHAT YOU ARE COOKING UP IN YOUR KITCHEN! TAG ME @THESALTEDPEPPER ON YOUR FAVORITE SOCIAL MEDIA PLATFORM WHEN YOU MAKE A DISH!
BE SURE TO FOLLOW THE SALTED PEPPER RIGHT HERE ⇓⇓⇓⇓⇓
Cyndy says
Amazing! My second attempt at making bread (first was a different “simpler” recipe from another site and didn’t turn out well at all. Love the flavor of this bread and that there is a YouTube video that goes over this recipe as well helped having both the printed out recipe and a visual. Will be making this at least once a week.
Louise says
I'm so glad you enjoyed it!
Sheri Wright says
Hi Louise, was wondering if I can try your recipe using All Purpose Einkorn flour. I have been working with Einkorn for about a year now. I know it is low in gluten and the dough is very sticky and not easy to work with. Still want to try it using my Combi to proof and bake.
Your thoughts please. Thank you.
Louise says
Unfortunately, I can't answer that question because I've never worked with it. What I can say that is if you have successfully made bread with it before, then using the Combi to proof and bake shouldn't change anything.
Karen Crook says
I made this today. Delicious and so easy to make! Made it in my Combi. I’ll probably make this every week.
Louise says
I'm so glad you enjoyed it and found it easy to make!