When it comes to cooking Prime Rib in the Ninja Foodi, you will hear everything from "It works great" to "No, don't do it!" I have to be honest, I was in the "No, don't do it" camp. Then I figured, how bad could it turn out? What if I pressure cook one and use the TenderCrisp lid for the other one? How will they compare? Let's find out!
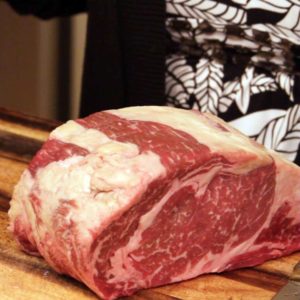
It took me forever to find a prime rib roast anywhere near where I live and, when I did find one, it was boneless. I would have preferred bone-in, but sometimes you have to take what you can get.
I must tell you, I was really nervous about this one. The 6-pound prime rib cost me over a hundred dollars and I questioned my sanity when deciding to do this comparison. I have a method that I use in the oven for perfect prime rib every single time, so why even risk this?
This post may contain affiliate links. If you make a purchase after clicking a link, I may earn a small commission. As an Amazon Associate, I earn from qualifying purchases.
Well, because the Ninja Foodi has yet to let me down and I'm a very curious person. I figured, even if the pressure cooked prime rib was overdone, I'd just make the most expensive vegetable beef soup ever!
I also know that many of you want to cook a prime rib in the Ninja Foodi and I hope to help you with choosing the best method for getting the results you want.
How large of a Prime Rib will fit in the Ninja Foodi?
I would look for a prime rib that is 6 pounds or less. This would be for the 6.5 qt and the 8 qt because you want to be able to place your prime rib on the rack in the low position and have plenty of room for using the TenderCrisp lid. Even if you pressure cook the prime rib, I think you'll want to crisp the top and render the fat that does not render during pressure cooking.
You might be able to go a little bigger, but that will really depend on the shape of the prime rib.
I know this sounds silly, but if you are really intent on cooking the prime rib in the Foodi and don't want to have to cut it to fit, I would take the inner pot with you so you can get a better visual on size. Some prime rib roasts are going to be taller and some wider.
If you just can't bring yourself to do that, no worries! IF your prime rib is too wide, just slice a 2" steak from it and freeze it until you want to cook up a delicious rib eye!
How to season a prime rib roast?
This is completely up to you! You can use simple salt and pepper and be just fine. The wonderful flavor of the prime rib comes from the marbling and this cut of beef needs very little seasoning to be delicious.
I happen to love garlic and rosemary, so I use both (along with salt and pepper) to season my prime rib roasts. You could fresh thyme in place of the rosemary or skip the fresh herbs all together.
If you choose to use garlic and plan on using the TenderCrisp lid, I don't recommend just mincing the garlic and rubbing it all over the prime rib. Garlic burns very easily and you do not want to taste burnt garlic on this beautiful and expensive prime rib.
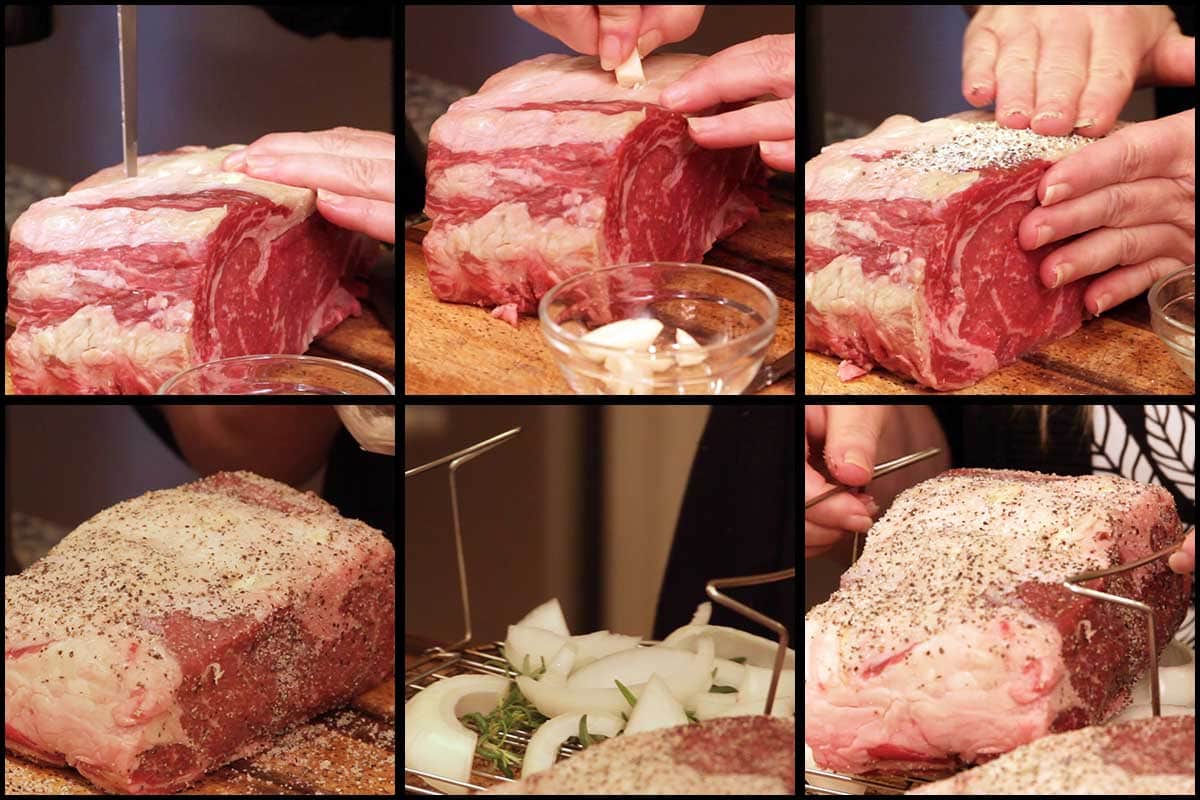
What I do is cut 6-8 slits in the fat cap on the top of the prime rib and insert whole garlic cloves into the slits. I find this gives a subtle garlic flavor to the prime rib.
Can I cook the Prime Rib in the oven?
Absolutely! I've been doing just that for years and the method I use most often is the closed-door method. This is fairly simple. Allow the prime rib to come to room temp, I usually take it out of the refrigerator 2 hours before I plan on cooking it. Preheat the oven to 500° F/260° C for 10-15 minutes. Season the prime rib how you like it. Place the prime rib on a roasting pan. I like to use one that has a rack to elevate the meat above the juices.
Place the pan with the prime rib on the middle or lower rack of the oven. I usually take the top rack and move it down to the middle or you can remove one of the oven racks if your prime rib is too tall. This will all depend on the size of your oven.
Roast on 500° F/260° C for 5 minutes per pound. This applies to bone-in or boneless, usually. When the time is up, do not open the oven door. Leave the oven off and let the prime rib continue to cook for 2 - 2½ hours. I like my prime rib medium rare to rare, so I usually temp at the 2-hour mark. If you like yours more done, go the whole 2½ hours.
If you like your prime rib more towards the medium/well done side, then I would recommend dropping the temperature of the oven after the initial roast on 500° F/260° C to 250° F/120° C and roasting another 30 minutes or until the meat reaches 5-10 degrees lower than your desired temperature.
You can also slow roast a prime rib in the oven on a low temperature of 250° F/120° C for several hours until the temperature reaches your desired doneness. Remember to allow for carryover cooking and remove the prime rib 5-10 degrees lower than your final desired temp.
For slow roasting I also recommend searing the prime rib first, so that you create what's called the Maillard Reaction. This chemical reaction usually only occurs at temperatures greater than 285° F/ 140° C, so the lower oven roasting doesn't always achieve the desired outcome. Spend the few extra minutes searing the prime rib. It's worth it.
Should I sear the prime rib before cooking it in the Ninja Foodi?
If I had it to do over again, I would sear the meat first. Especially with the pressure cooked prime rib. The prime rib I roasted on a high temperature did have the benefits of the Maillard Reaction, but I wonder, if I had seared it first, would that have made any difference?
I would say it is okay not to sear the prime rib if you are roasting at a high temp for a period of time, although next time I'm going to try searing it first.
If you are pressure cooking your prime rib, I definitely recommend searing it. As you will see in my results, the pressure cooked prime rib just didn't have the flavor development on the outside that is created by the Maillard Reaction and it was definitely missed!
What should the final temperature be for Prime Rib?
Of course, this depends on how you like it cooked. Also keep in mind that the temperature will continue to rise a few degrees. Although with the closed-door method (as described above), there is not as much carry-over cooking once you remove it from the oven as there is if you remove the prime rib from a hot oven/Ninja Foodi.
- Rare: 120-129°F/49-54°C
- Medium Rare: 130-134°F/55-57°C
- Medium: 135-144°F/58-63°C
- Medium Well: 145-154°F/63-67°C
- Well Done: 155-164°F/68-73°C
Prime rib is best cooked rare to medium rare. Anything above this will result in a chewier texture. Also keep in mind when cooking a prime rib that the ends will be more done than the middle. I don't recommend cooking to a center temp higher than 135°F/58°C. You can always pan sear the middle slices if they need to be cooked longer.
Another good rule of thumb is to consider reheating. Since it's just Jeff and me here, I always want the very center to be on the rare side, so when I reheat it, the prime rib does not overcook.
Is there a formula for cooking Prime Rib in the Ninja Foodi?
I have to answer "yes" and "no" to this question, because it depends on how you want to cook the prime rib, how big it is, and if it's room temp or not. There are so many variables to cooking, that formulas should only be used as guides. Use a thermometer to temp your meats and you will have a much better and more consistent outcome.
If you want to pressure cook your prime rib and then use the TenderCrisp lid to crisp up the top and render the fat, the timing will be different than if you strictly want to use the TenderCrisp lid to cook the roast.
There is also the question of doneness. I prefer my steaks and prime rib to be medium rare to rare and I always want to err on the side of rare. I realize that is not everyone's preference and I will give my best suggestions on how to cook your prime rib so it is perfect for you!
Size also plays a role. The larger the prime rib, the longer it is going to take to cook. I will give my best suggestions, but please use these as guidelines only and remember, you can always cook an underdone prime rib longer, but you can't uncook it.
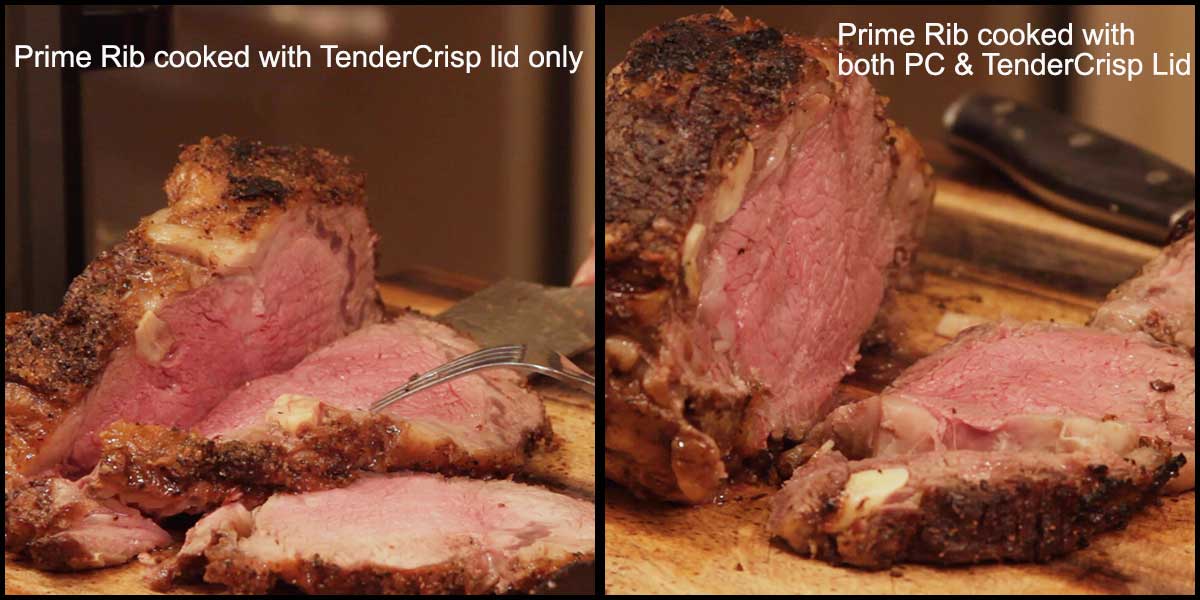
Unfortunately, due to the expense of this cut of meat and the difficulty I have in finding it, I couldn't do multiple tests to figure out exactly what will work for medium or well done prime rib. What I did instead is cut my 6-pound prime rib into two 3-pound roasts and cooked one under pressure followed by some crisping and the other one was strictly cooked using the TenderCrisp lid.
Here are my results and my recommendations for cooking your prime rib in the Ninja Foodi.
Pressure Cooking a Prime Rib in the Ninja Foodi
Let me start off by saying, I was scared -- really scared -- to pressure cook a prime rib. I have seen in many Facebook groups where people have tried it and said it worked out just fine, but I couldn't wrap my head around it.
I imagined this grey, overcooked hunk of meat that I paid a year's salary on and just shook my head and said, "no way." Then, I got to thinking about it. If I controll the pressure cook time, surely I can control the temperature of the meat, just like in the oven. The added moisture from pressure cooking can only help, right? Well, after searching high and low in my rural area for a prime rib, I finally found one.
I decided to cut the 6 pound prime rib in half and compare a pressure-cooked prime rib to one cooked using the TenderCrisp lid only. This is what I did for the pressure-cooked prime rib.
What I did:
First, I allowed the prime rib to sit out for about 2 hours to take the chill off. Then, I cut slits in the fat cap and stuck garlic cloves in them, and then seasoned all over with (affiliate link)fine grind sea salt and (affiliate link)restaurant pepper. The ratio I used is 2 parts salt to 1 part pepper and I used about 1½ Tablespoons for each 3-pound prime rib. If you don't have restaurant pepper (which is just coarser), use fresh cracked pepper. Even regular pepper would be fine. I would use a little less regular pepper, so it isn't too peppery. Unless you like peppery, and then go for it!
I placed some fresh sprigs of rosemary on the rack in the low position and also placed onion slices on the rack, put the prime rib on top of the onions and rosemary, and added 1 cup of beef broth to the inner pot and lowered in the prime rib.
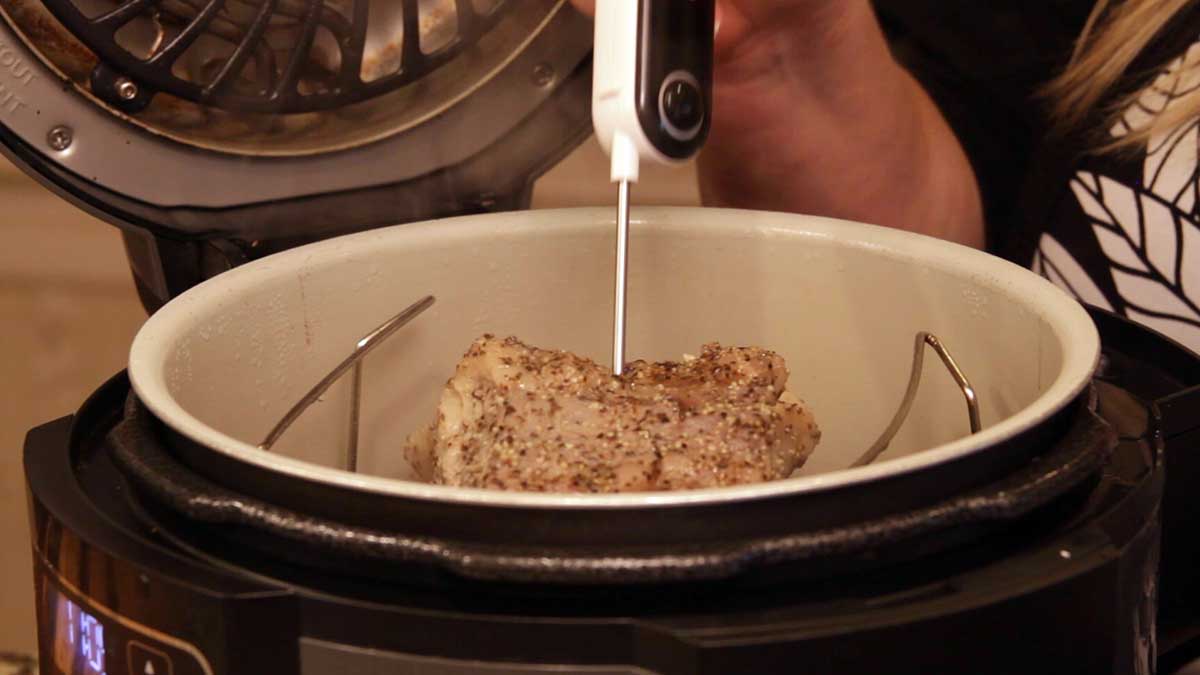
I set the pressure on high for 3 minutes and crossed my fingers. The Ninja Foodi took 9 minutes to come to pressure, cooked for 3 minutes, and then I let it naturally release. The pin dropped around the 10 minute mark. I knew this was not enough time, so I left it alone for a total of 15 minutes. When I removed the lid and took a temperature, I was shocked at how low the temp was.
The temperature in the center was only 57°F/14°C! I was expecting it to be closer to 90-100°F/32-38°C. I immediately put the lid back on and let it sit in the still hot and steamy pot for another 10 minutes. So, now it's been "naturally releasing" for 25 minutes and the temperature in the center of the prime rib was only 82°F/28°C. It's getting closer, but still not up to the temperature I was hoping for.
Instead of putting the pressure lid back on, I decided that I would finish the prime rib with the TenderCrisp lid to try to render the fat on the top and develop that great flavor. I broiled for 10 minutes and the temperature came up to 95°F/35°C, still not ready! I set the broil function for 10 more minutes and the temperature was 105°F/41°C. Still not there, so, I broiled another 10 minutes and this brought the temperature up to 122°F/50°C. Good enough for me. I took it out and let it rest for 15 minutes.
Total Cook Time (time to pressure included): 57 Minutes
What I would recommend: First of all, I strongly recommend searing the prime rib roast BEFORE pressure cooking. I think this will make a big difference in the outcome. I would also increase the pressure cook time 1½ minutes per pound, followed by a natural release of 30 minutes. Then finish up with broiling for 10-15 minutes or until your desired temperature is released.
Would I recommend this method for cooking a Prime Rib in the Ninja Foodi: Probably not. It's not because it wasn't good.
It was. I think with searing it first, the crust would develop a better flavor and then it might just be BETTER than in the oven or with using the TenderCrisp lid only.
The reasons I wouldn't recommend it are: because of all the variables of time to pressure based on temperature of the meat, amount of liquid used, along with the fact that you can't check on it. It's an expensive piece of meat and, I think, having more control over the outcome will give you more peace of mind.
Now, if you are the daring type, go for it! It was surprisingly good! I'm the daring type, so, I think the next time I run across a prime rib, I'll snatch it up and try searing, followed by pressure cooking. When I do, I'll update the post! If you try this method, please let me know your results!
Cooking a Prime Rib in the Ninja Foodi using the TenderCrisp Lid Only
I prepared the prime rib the same way I did for pressure cooking. I preheated the Ninja Foodi on broil for 10 minutes, placed the rack with the prime rib into the Ninja Foodi, and broiled for 20 minutes. How did I decided on that time? Honestly, I was thinking of 5 minutes per pound and, for some reason, I had 20 minutes in my head instead of 15 minutes. It worked perfectly to really develop that crust. Any longer than this and I think we may have run into some issues with burning the top. To play the safe card, I would go with 5 minutes per pound on broil.
I would recommend using the 5 minutes per pound rule of thumb just like in the oven. Even though the broil function doesn't get up to 500° F/260° C, this timing will work because of the small enclosed space and less heat loss. It did a great job to create the crust we want to see and I don't think searing the meat is necessary. If you do decided to sear the prime rib, then I would lower the time to about 4 minutes per pound.
DON'T OPEN THE LID
Once the broil time is done, DON'T OPEN THE LID! It's hard. Really hard. Jeff had to talk me out of peeking and temping the meat at this point and I'm so glad he did. You 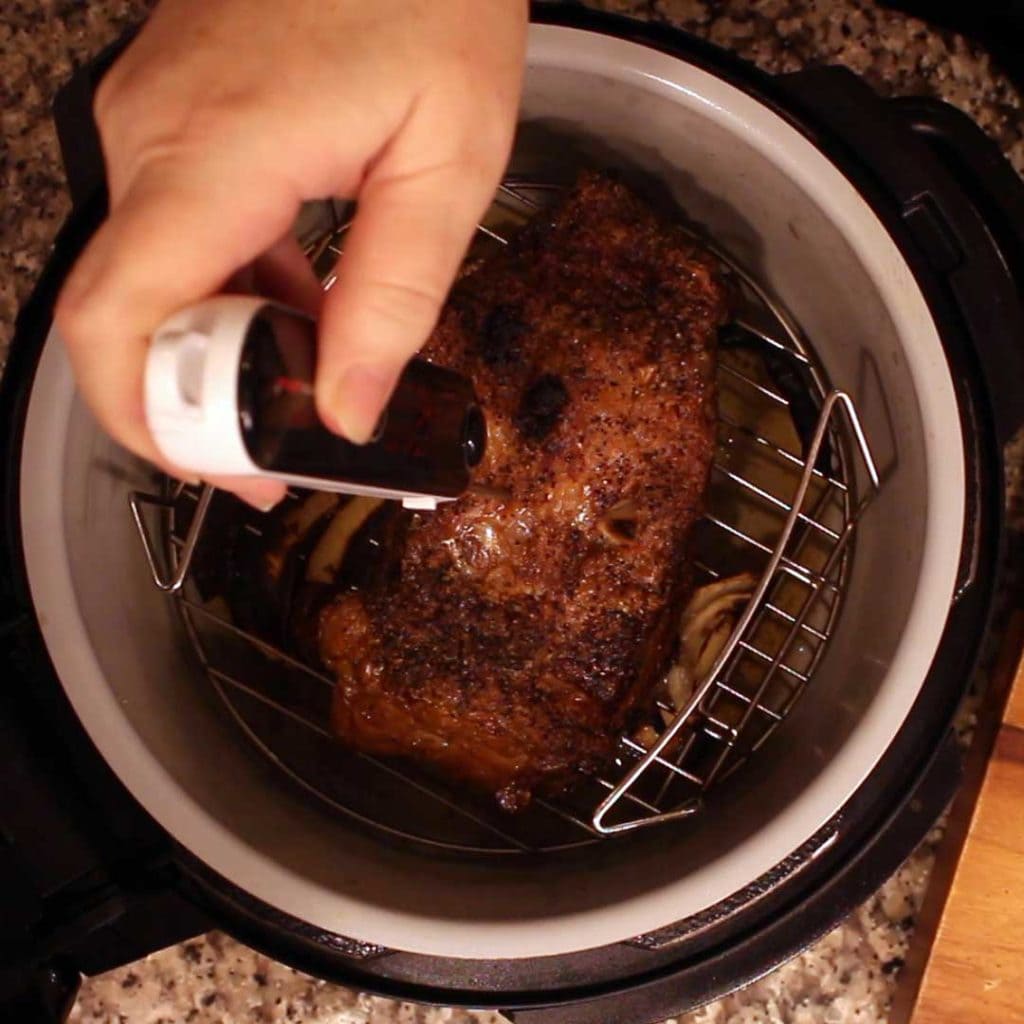
Turn on the Bake/Roast function and decrease the temperature to 250°F/121°C.
What I did: I used the Bake/Roast function on 250°F/121°C for 10 minutes and checked the temp at this point. It was only 75°F/24°C. I continued to roast the prime rib for another 10 minutes at 250°F/121°C and the temp was 110°F/43°C. After another 5 minutes on Bake/Roast at 250°F/121°C, the temp came up to 118°F/48°C. That was enough for me to pull it out and let it rest for 15-20 minutes.
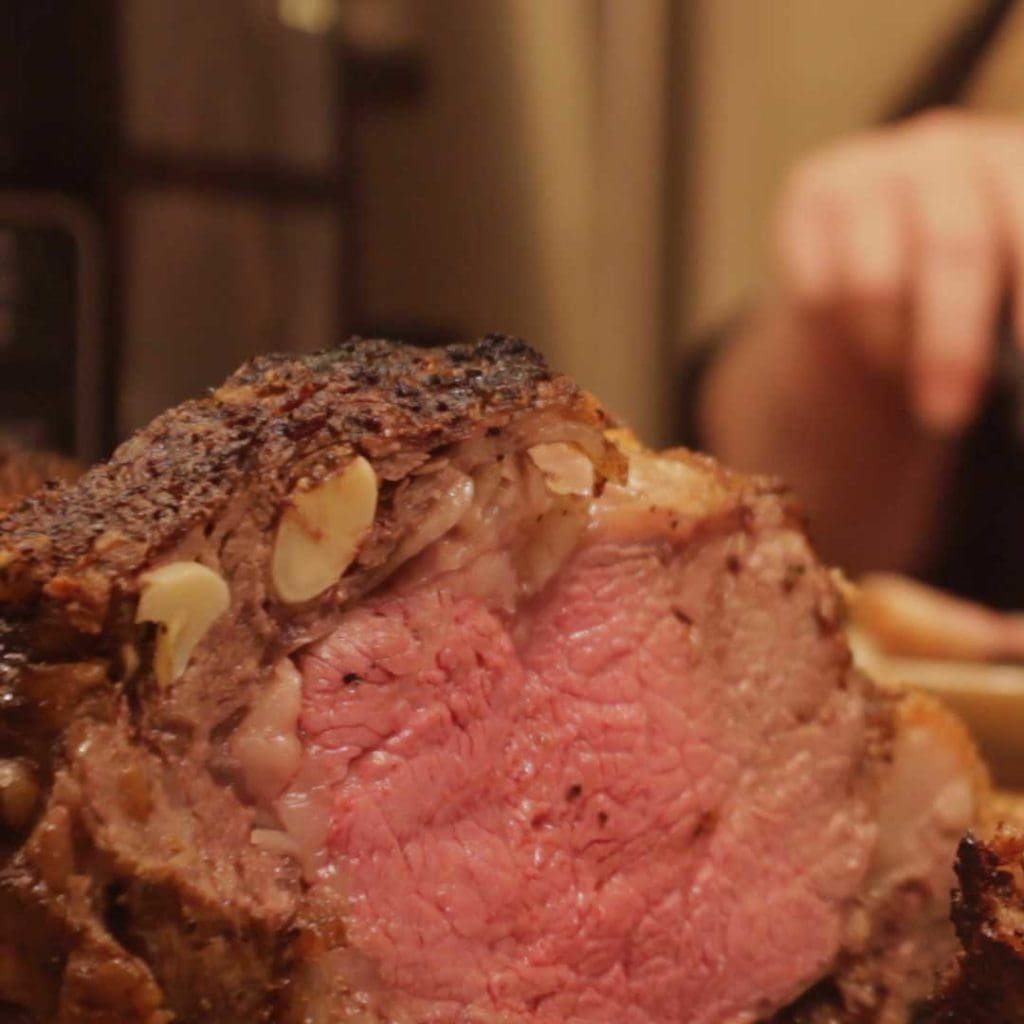
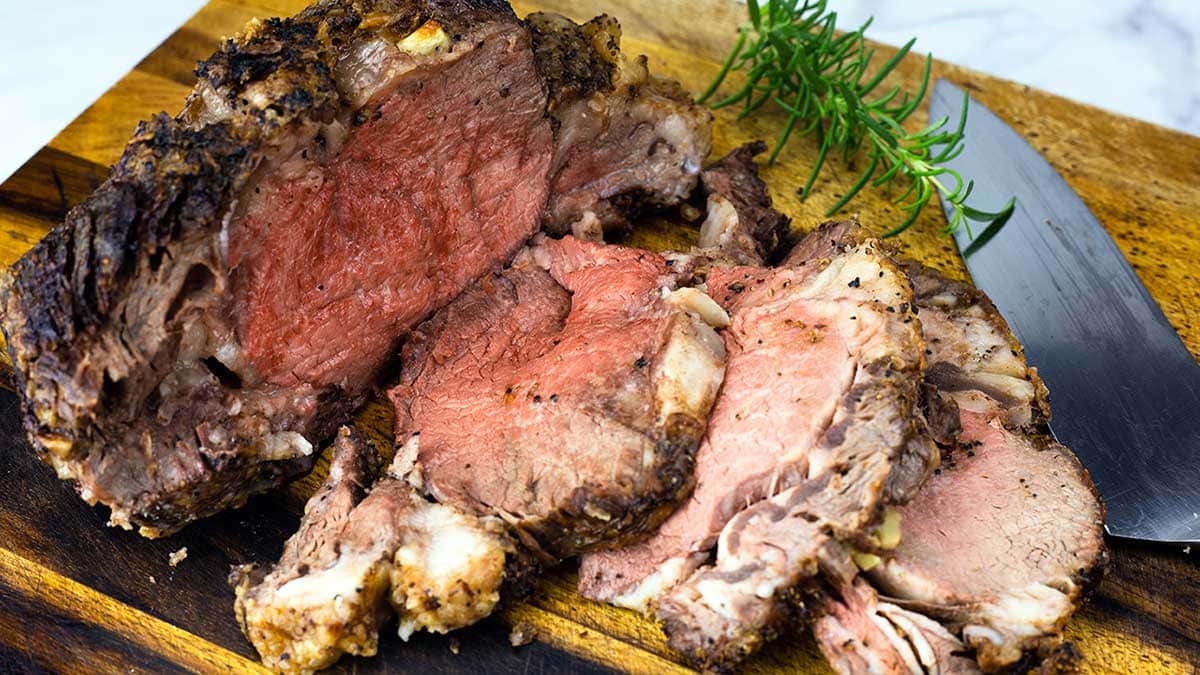
The results: The outer slice was cooked to medium, the second slice was medium-rare, and the middle slice was definitely on the rare side. This was perfect for me, but you can cook the prime rib to whatever temperature you prefer.
Total Cook Time: 45 minutes using a combination of Broil and Bake/Roast.
What I recommend: After you broil the prime rib for 4-5 minutes per pound, I suggest changing over to Bake/Roast (don't open the lid) and lower the temp to 250°F/121°C and cook an additional 9-12 minutes per pound, depending on how you like to serve your prime rib. I encourage you to take a temp midway through, just to make sure you aren't overcooking your meat. Allow for at least a 5° increase in temperature during the resting phase and remember to err on the side of undercooked rather than overcooked. You can always pan sear any slices that need to be cooked longer.
Final thoughts: I was VERY happy with the outcome of cooking a prime rib in the Ninja Foodi using the TenderCrisp lid only! VERY HAPPY!
The prime rib, cooked this way, was just as good and probably even a little better than using the oven method I usually use. The time savings alone is worth it, but it is a little more hands-on.
I think I could have cooked my prime rib a little longer and felt pretty dumb when I watched the video back and realized I had my total time all screwed up. I have no idea why I thought the prime rib had been cooking for 55 minutes, when in fact the total cook time was only 45! I hope no one judges me too harshly for that screw up, it's hard to keep everything straight when filming a video and cooking with two different methods.
Would I recommend this method for cooking a prime rib in the Ninja Foodi? YES, absolutely! In fact, this is now my preferred method for smaller prime rib roasts.
The bottom line is, both were fantastic! Yes, it was very scary. I really thought I was going to waste money on the one I pressure cooked, but it was fine. It's another lesson for me that you can use any cooking method you want as long as you manage the time and temperature for that particular food. Happy Cooking!
Prime Rib in the Ninja Foodi
Equipment
Ingredients
Instructions
- Allow the prime rib to sit at room temp for about 2 hours to take the chill off. Preheat the Ninja Foodi on broil for 10 minutes.
- Cut 6-8 slits in the fat cap on top about ½-1" deep and insert a garlic clove into each one. The garlic should not be sticking out too much.
- Place sprigs of Rosemary and onion slices on the reversible rack in the low position. Place the prime rib on top. Place the rack in the Ninja Foodi and broil for 5 minutes per pound. Don't open the lid.
- After the Ninja Foodi goes through the cool cycle and without opening the lid, select the Bake/Roast function and set the time based on weight and how you like your prime rib cooked. See Notes. Check a temperature halfway through cooking and adjust time as needed.
- Once the internal temperature is 5° less than the way you want it cooked, remove the rack with the prime rib and allow it to rest for 10-15 minutes. Serve & Enjoy!
Notes
- Rare: 120-129°F/49-54°C
- Medium Rare: 130-134°F/55-57°C
- Medium: 135-144°F/58-63°C
- Medium Well: 145-154°F/63-67°C
- Well Done: 155-164°F/68-73°C
Nutrition
ABOUT THE RECIPE AUTHOR, LOUISE LONG
Louise is a full-time recipe creator and food blogger @ The Salted Pepper. She has over 30 years of  experience with cooking and recipe development. She owned a restaurant for several years and was a full-time RN until retiring to blog full-time.
Louise has several very active Facebook groups that help people with the basics of cooking and getting the most out of the Ninja Foodi.
Ninja Foodi Fresh & Healthy Meals
Seeing the need for easy, delicious, and high quality recipes, she is focusing all of her efforts creating recipes specifically for the Ninja Foodi. Her recipes are easy for the home cook to follow and provide step-by-step instructions.
Louise is also a YouTube creator and you can find most of her recipes in video format on The Salted Pepper YouTube channel.
She is very responsive to messages and eager to help in any way she can.

Carla
Turned out fantastic. I read one reader comment who added a cup of beef broth. I would do that next time. I made packaged gravy, but next time would pour the aus jus from the beef broth over the prime rib. Or, add the aus jus to the gravy.
I started out with 2 lb. 4 oz bone in prime rib and just adjusted cooking times. I used dried rosemary instead of fresh on top of the onions; would use a little less next time because dried is more potent. I followed the time directions to a tee, and the prime rib was ready when I checked it at the half time mark on the roasting. So, definitely check at that half time mark; cooking depends so much on the size and thickness of the meat. Great directions, great video, thank you.
Louise
Thanks so much, I'm so glad you enjoyed it!
Kellie Alise
Followed the Instructions for Prime Rib in the foodi with Tender Crisp Lid ONLY(with 1 variation)!
4.77Lb Prime Rib Roast- Purchased at Stater Bros & made for Moms 73rd Birthday dinner & Celebration NYE Dinner 2023/2024.
-Pulled rosat from fridge. Allowed to set on counter 2hrs to bring to room temp. This step is important to tender, melt in your mouth meat
-Prepared a Wet Rub for Fatty top side only consisting of 2 sticks unsalted butter softened to room temp, 2 fresh sprigs of fresh Rosemary diced, 2 fresh ears of garlic peeled & diced Spike Original seasoning(amnt determined by Ind
Taste & desired saltiness) & fresh cracked Rainbow pepper corns.
-Mixed till combined.
-Made several hash marks & cross hash marks, scoring the entire top fat pad
-Applied dry rub of Spike original(red top) to all other sides of Roast
-Applied wet rub by spatula & eventually hand pushing large pieces of cut garlic & Rosemary into Cross hatched marks on top of entire fat pad
-Preheated foodi by running a 10min broil run empty
-Set ontop of Foodi wire rack insert, at lowest level using legs to lower down by hand
-Mixed 1C(8oz.) Beef broth with Better than bullion & added to bottom of pot(under roast)
-Closed Tender Crisp/Air Fry lid & Boiled for 5 Mins Per Lb.(20Mins Total),(Open windows & Ventaliate kitchen to allow for much smoke created by burning off butter & rendering fat)
-Without opening the lid
-Set Foodi to Tender Crisp function(NOT Bake/Roast), at 10mins per.Lb(47Mins total on my 4.77Lb Roast)
-Allowed Roast to remain in Foodi for 10mins with lid closed
-Pulled Roast to find top fat pad fairly well broiled(burned), brushed off burnt Rosemary & garlic cloves by hand into sink.
-Check temp w/ meat thermo. To read 150°F(Was aiming for 130° with hope to increase to 135° while Allowed Roast to rest for 20mins, un-tented
-Sliced Roast into 7, 1" Slices(Med/Well Roast achieved with excellent crust & flavor
-Poured out broth & Mixed with froather, skimming top 1" for fat & served along side as A-Jus with prepared & creamed horseradish
-Would've done different**
1-Broiled for 4, NOT 5 mins per lb.
2. Tender Crisped for 7, NOT 10Mims per Lb , to achieve a more Med/Rare sliced
Roast at finish
Special Note* have cooked Several Tritips in Foodi on Bake/Roast Vs. Tender Crisp function, with ALL TriTips resulting in better crust, better tenderness & juiciest via Tender Crisp method OVER bake/broil method
-Spike* Magic in a Bottle-I put that S#!% on Everything! Especially, Meat, Chicken, seafood & in scrambled eggs. I DONT sell it.or get commissions, just massive compliments on all my food seasoned with it! Also try the Salt FREE version & add ur own salt(I use pink Himalayan), to control ur sodium intake(trying to lower mine) & saltiness of finished food(Orig. Version can result in a salter meal than desired:) Brother uses Orig Red Top Version ritualistically, while I use the Salt Free Blue Top Version & add in my own Pink Himalayan Salt & always fresh cracked Rainbow Pepper corns
Louise
Thanks for sharing!
GIna
Hi,
I cooked my boneless prime rib using this method for Christmas and it came out fantastic !
Can I use the same method for lamb leg boneless roast ?
Louise
I'm so glad you enjoyed it! Here is my leg of lamb recipe: https://thesaltedpepper.com/air-fryer-leg-of-lamb/