
Pressure Cooker Taco Soup is one of those soup recipes where you can pretty much add whatever you have in the pantry and fridge, flavor it up with spices and it's going to be a delicious Taco Soup!
Would you like to save this recipe?
Taco soup has been a routine meal in our house and is one of Jeff's favorites. It's easy to make and can be made on the stove, in the crock pot, or in the pressure cooker. I was planning on making it one night for Jeff's dinner and couldn't believe I have never done a recipe for Pressure Cooker Taco Soup since that is the easiest and fastest way (in my opinion) to get all the flavors to meld together.
So, while making it for Jeff I wrote down everything I did and voilà... a recipe for Pressure Cooker Taco Soup was born!
One of the great things about this soup or any soup, is the flexibility of ingredients! You don't have to use what I use and I encourage you to use up leftover veggies and meat and customize this soup so it is the perfect Taco Soup for you!
What are the Basics in making a Taco Soup?
That is really going to depend on who you ask! I don't think there really are any basic ingredients you must include to be a taco soup except for some sort of taco seasoning. Other than that, it can be made any way you like.
Traditionally, taco soup is a tomato-based soup, but that doesn't mean you have to be traditional. If you don't like tomatoes, skip them! You can even swirl a little cream or even sour cream into the soup at the end if you want to make a creamy version! I think that would be delicious!
I, personally, like a beef based taco soup and use ground beef, but that is not written in stone. I like to think of taco soup being a lot of the ingredients you would put in a taco and there are TONS of different things you can put in a taco!
You can also add things in there that you wouldn't usually put in a taco... like, string beans! Yes, I've been known to add string beans to taco soup. It's your soup, add or omit anything you want!
Can I use Dry Beans in my Taco Soup?
Sure, but you will need to use more liquid and cook it longer, for sure. What I would suggest is following this recipe for Pressure Cooked Vegetable Soup for timing, liquid amount, and vegetables sizes. Then just add the taco seasonings and the vegetables you want to use and you'll have a version of Pressure Cooked Taco Soup.
If you pre-soak the beans, you can cut the timing down some.
Keep in mind, older beans tend to take longer to cook and, despite testing my dried bean recipes multiple times, some people have said the beans are still a little hard. One way to make sure you don't overcook the veggies while cooking the beans is to leave them out until after the beans are how you like them.
So, I would add all the ingredients except the vegetables (tomatoes are fine) and pressure cook for the 30 minutes. NR for about 5-10 minutes and then check the texture of the beans. If they are how you like them, add in your veggies and PC another 5 minutes. If they aren't soft enough, PC another 5-10 minutes and NR for about 5-10 minutes.
This might seem like a lot of starting and stopping, but if you plan on using dried beans and making Pressure Cooker Taco Soup regularly, you only have to do it once! Then, write it down and, every time you go to make it, you will have the perfect cook time for you.
Immediate Release versus a short Natural Release?
 There is a lot of discussion on Natural Release versus Immediate Release and while there are facts to back up why you should do one over the other (based on what you are cooking), in this instance I use the short Natural Release as a safety precaution more than anything else.
You can immediately release this Pressure Cooker Taco Soup and the worst thing that will happen is some broth spews out of the top or the soup is boiling when you remove the lid and you get splattered a bit. You aren't going to dry out the meat or ruin your soup in anyway if you immediately release the pressure, but I think it is a good practice to give the pot just a few minutes to drop in temperature before releasing the pressure; especially when you have a full pot of soup.
Allowing the soup to decrease in temp, even for a few minutes, is safer, in my opinion, than doing an immediate release and opening the lid right away. This is because the soup is boiling rapidly under pressure and I don't want to see anyone get burned by opening the lid too quickly and having hot soup splatter as the remaining steam escapes. You know how when you are boiling something on the stove and it pops and splatters out sometimes, this can happen when pressure cooking and the "splatter" is really hot.
I go into more detail in my post on Pressure Cooking 101 and I really recommend you read that article whether you have been pressure cooking for years or are just getting started. Doing the research for it was very enlightening for me and I had already been pressure cooking for many years.
One of the biggest concerns when doing an immediate release on soups is when they are thick. This doesn't pertain to this Pressure Cooker Taco Soup, but let's say you added tomato paste and you were able to come to pressure, what can happen with thicker soups is steam gets trapped beneath the surface. Then, when you put your spoon in, you release that pocket of steam that couldn't make it to the top because the soup is so thick and the soup can really fly out then. People describe it as "exploding" and while I think that word gives the wrong picture, I can see why they say that. The soup is like a volcano and it erupts, causing the soup to fly everywhere with force. This is very scary and people have been burned, so please always use caution and follow tested recipes until you really understand pressure cooking.
Frequently Asked Questions
Can I cut the recipe in half?
Yes, reduce all the ingredients by half and pressure cook the same amount of time.
Can I double the recipe?
I would not suggest doubling the recipe in any size Ninja Foodi or Pressure Cooker. You might be able to make 1½ batches in an 8 qt pressure cooker, but make sure not to exceed the max fill line.
What is the best way to freeze taco soup?
I like to freeze my soups in freezer baggies or straight-sided canning jars. The most important thing to do before freezing is to allow the soup to cool completely. The safest way to do this is to refrigerate leftovers in shallow containers overnight, then fill your containers and freeze.
If you are using canning jars, make sure to leave at least ½" head space at the top and don't use the canning jars that curve. As the soup freezes, it can crack the jars if they are curved. On many boxes of canning jars they will say what they can be used for, so look for the ones that are designed for freezing.
For plastic freezer bags, be sure to get as much air out as possible before sealing to reduce freezer burn.
How do I reheat the taco soup from frozen?
There are several ways to reheat frozen taco soup and I'll go over a few suggestions.
Pressure Cook: The easiest way to remove it from the container it is in and put it in the inner pot of the Ninja Foodi with ½ cup of water or broth. PC for 2-3 minutes and that should be enough time to thaw it and at least start to warm it up. Use the sear/sauté to finish warming. The PC time really depends on the quantity of soup you are reheating from frozen. You can do an immediate release, the soup will not be hot enough or the pot full enough to cause issues with such a short PC time from frozen.
Removing rock-solid soup from a canning jar is pretty hard to do, so, in this case, you can do a couple of things. I have set the canning jar in the basket with 1 cup of water and PC right in the canning jar for a few minutes. Please do this at your own risk, though. Some people have brought up the issue of glass cracking from sudden changes in temperature. I have not had this happen, but it is a possibility.
Steam: This is one of my favorite ways to reheat food because I don't have to babysit or worry about overcooking food. Add 2 cups of water to the inner pot. Remove the frozen soup from its container and place in a covered pan on the rack in low. Steam for 15-20 minutes or until it's thawed and hot. If I'm ready to eat and it's not warm enough, but mostly thawed, I just dump the water and finish using the sear/sauté.
Sear/Sauté: You can certainly place the frozen soup into the inner pot and use the sear/sauté on low or low medium until it is thawed and hot. You do want to stir every so often, though.
What Type of Chorizo do I use?
I used a Mexican Chorizo that comes in a tube, but some Chorizo sausage comes in individual casings and you can use those as well. Simply removed the uncooked sausage from the casing and proceed with the recipe. If you prefer chunks of sausage in your soup instead of ground, go ahead and slice it right in the casing. It will cook in the 5 minutes of pressure cooking.

You can also use the Spanish Chorizo, which is usually already cooked. Simply slice it and add it to the soup before pressure cooking. I haven't tried the Pressure Cooker Taco Soup this way, so be sure to let me know if you try it!
Can I Make Vegetarian Pressure Cooker Taco Soup?
Absolutely! Just switch the broth to a vegetarian broth and omit the meat. Add extra beans if you want or you can even add rice. If your rice is not cooked, add a the beginning of the PC time and make sure to add an equal amount of extra liquid. So, if you want to add 1 cup of rice, add 1 cup of extra veggie broth. The rice will cook in the pressure cooking time.
If the rice is already cooked, I would simply stir it in at the end.
When omitting the Chorizo, you will drastically decrease the spices so make sure to double or triple the seasonings. I would not double or triple the salt until after cooking. Then increase salt to taste. You don't want to ruin your soup with too much salt.
How to Make Pressure Cooker Taco Soup?
Brown the meat with spices, deglaze with broth, add vegetables, and PC. Yep, that is it in a nutshell!
In all seriousness, it is super easy to make. Here is the quick prep needed and then the steps.
Chop the onion into about ½" dice. Peel and slice the carrots into ½" slices. Remove the stems from the cilantro bunch and chop into ½" pieces. Reserve the remaining cilantro leaves for garnish or to add to the soup at the end. Slice the mini peppers into ¼" slices or ½" dice. Slice ½ jalapeno into ¼" slices. Reserve the other half for garnish. Drain and rinse the black beans.
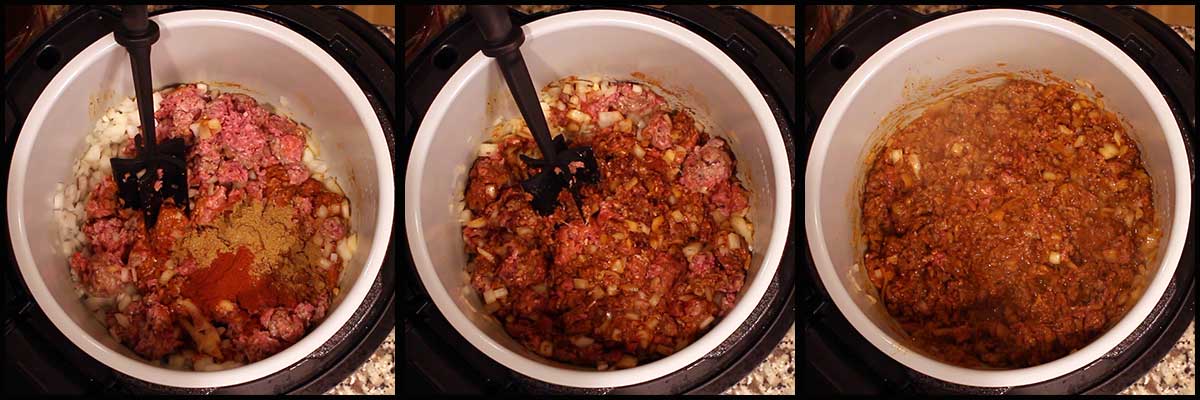
Add the onions to the inner pot. Add ground beef and chorizo. Turn the sear/sauté on high and break up the meat with a utensil that is safe for the inner pot. I like to use my (affiliate link)Mix 'N Chop from Pampered Chef, but any non stick utensil will work.
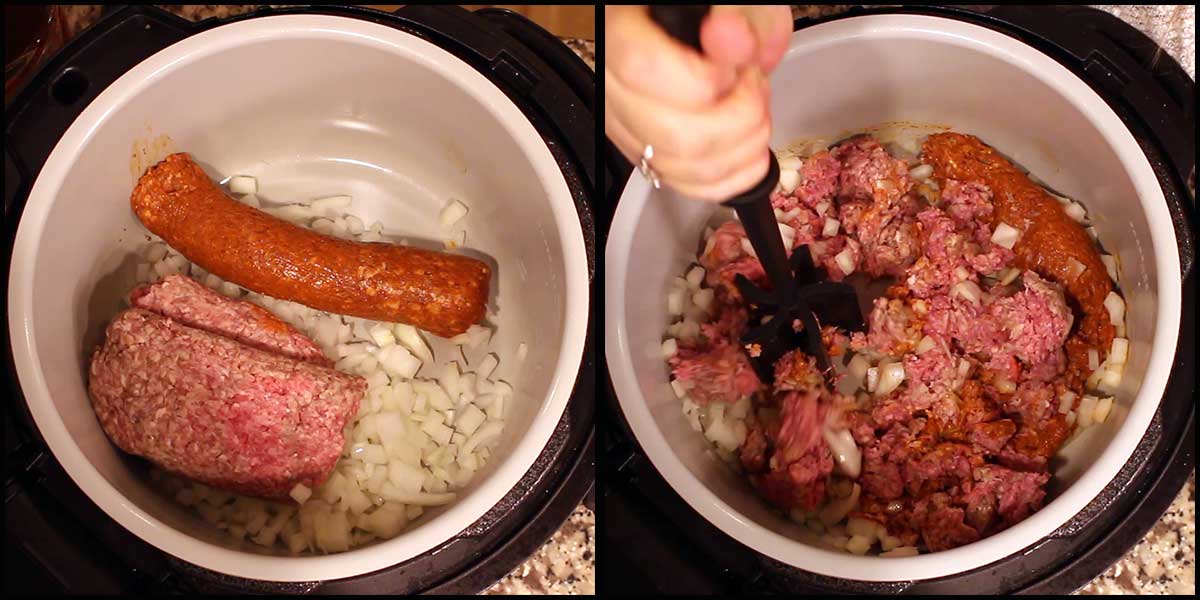
Once the meat is chopped up, add in your seasonings and mix. You can choose to add the seasonings that I did or you can use a taco seasoning packet if you prefer. If you are using the Chorizo, you may want to start with ¼ to ½ of the seasoning packet. You can always add more at the end. Sauté the meat for about 5-10 minutes, stirring occasionally.
The meat does not have to be cooked all the way. It will finish cooking during the pressure cook time. I do not recommend draining the fat from this soup because you will remove the spices and flavoring. If you want to cook the ground beef and drain the meat, that is is fine; just don't add the spices or the Chorizo until after you have sautéed and drained the ground beef.
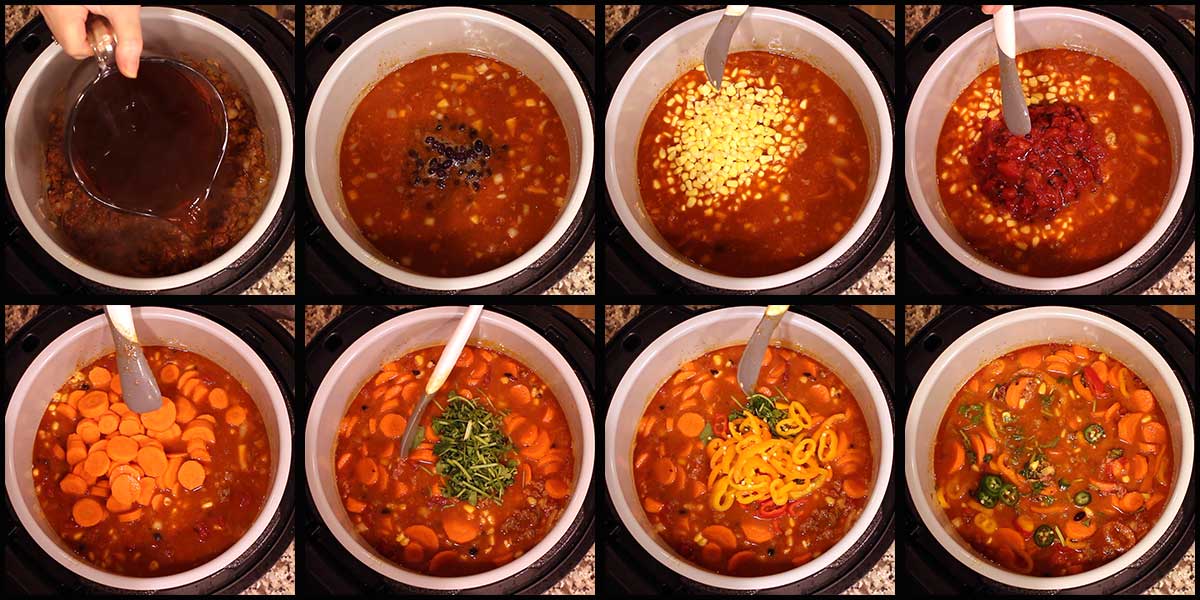
Next, you want to deglaze the pan with beef stock. This is important because you want to make sure that any pieces of meat that may have stuck to the bottom during the sautéing is released. I use my (affiliate link)Mix 'N Chop to go along the bottom of the inner pot, but a scraper works just as well. Just make sure whatever you use is safe for non stick surfaces.
You can leave the sear/sauté on during this process or turn the pot off. I usually just leave it on. Add in the black beans (drained and rinsed), frozen corn, canned tomatoes, carrots, chopped cilantro stems, mini pepper slices, and ½ of the jalapeno. I used the seeds from the jalapeno, but you can certainly remove them or omit the jalapeno pepper all together. It does not matter in which order you add the ingredients. Give a stir and put the pressure lid on. Turn the valve to seal and set the pressure on high for 5 minutes. When the time is up, allow the pressure to release naturally for 5 minutes and then manually release the remaining pressure.
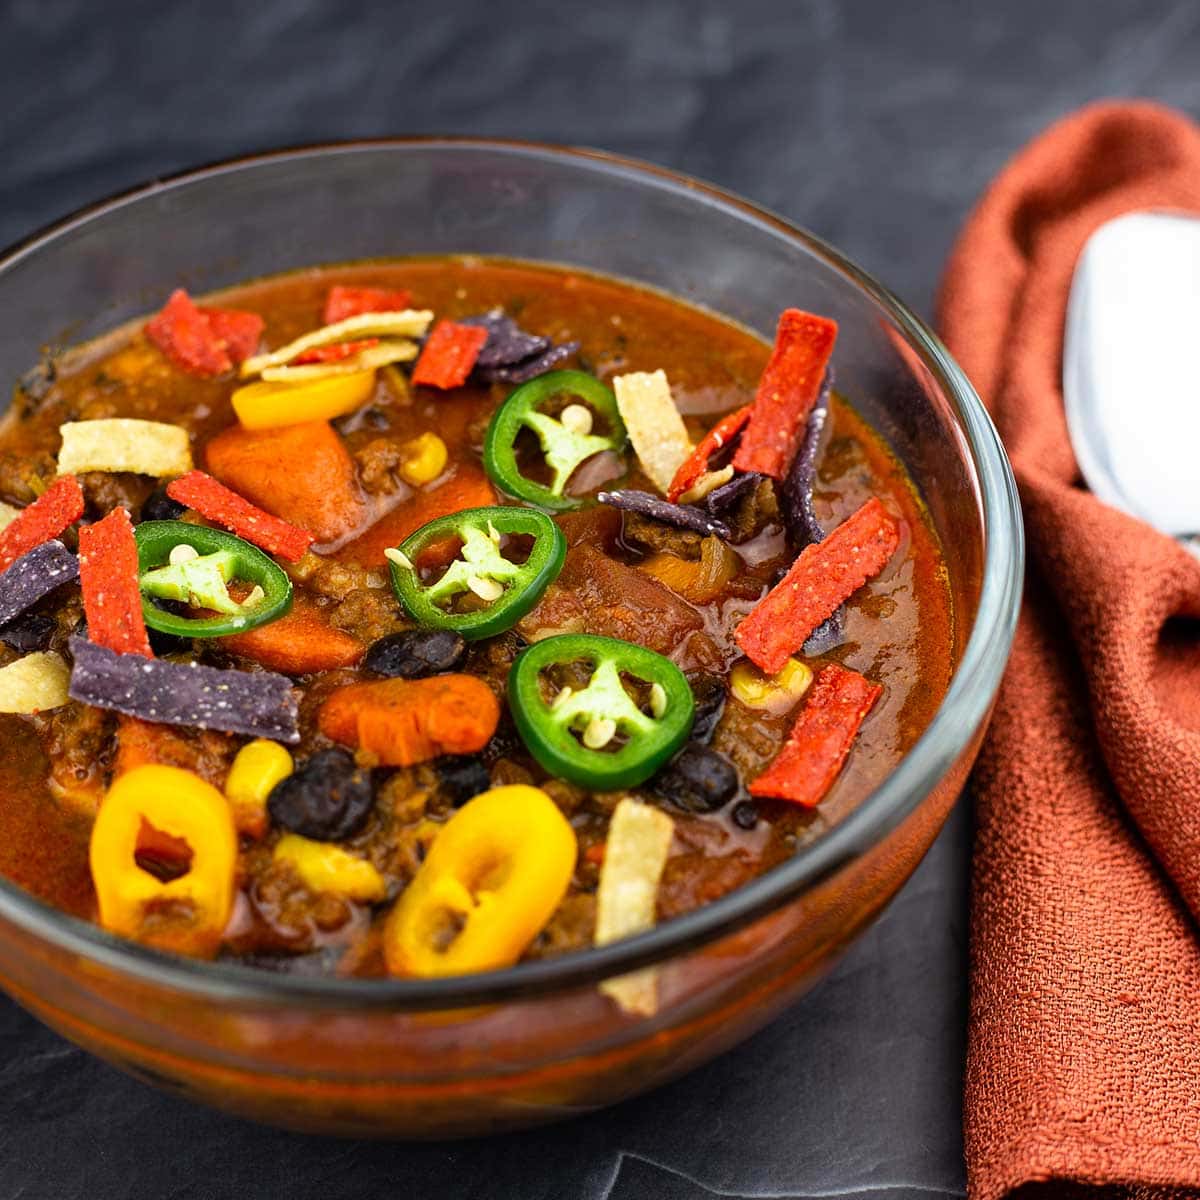
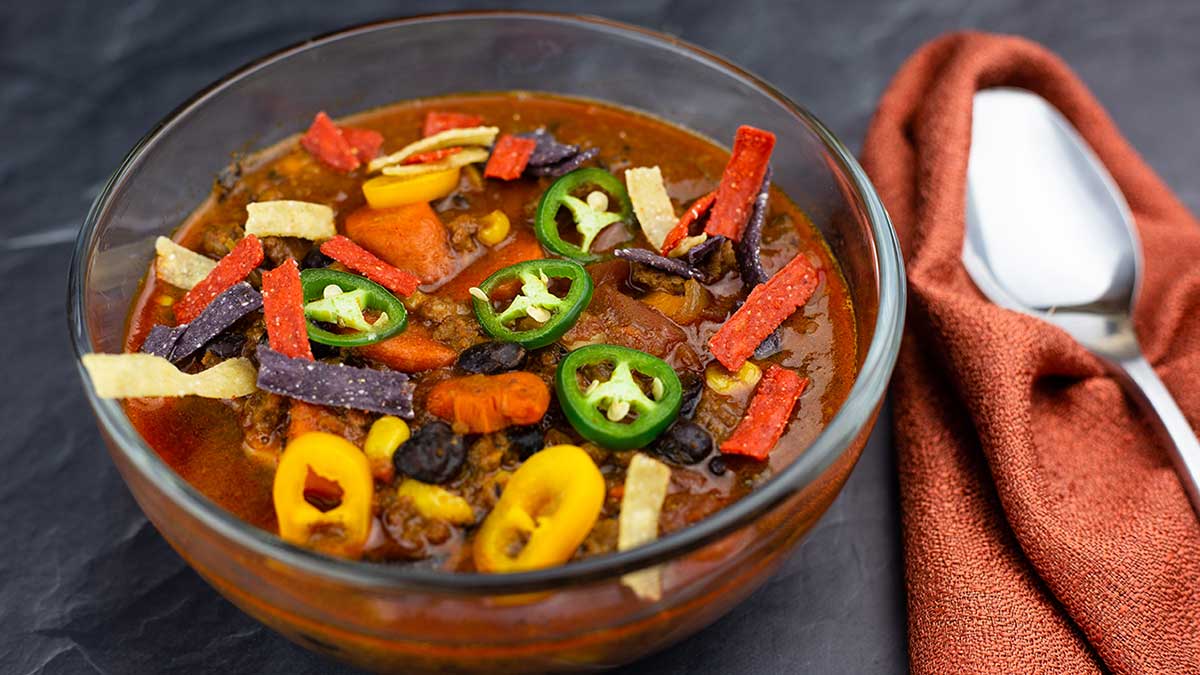
Remove the pressure lid and give the soup a nice stir. Keep it on "keep warm" until you are ready to serve. Here are the toppings I used, but of course customize those however your like. I recently created this recipe for Air Fryer Hushpuppies and they go PERFECTLY with this soup! Give them a try!

My toppings were, thinly sliced jalapeno peppers, thinly sliced mini pepper, chopped cilantro, and shredded cheese. Oh, I almost forgot, tortilla strips are also wonderful!
Ladle into bowls, top with desired toppings, Serve & Enjoy!


Pressure Cooker Taco Soup
Ingredients
Seasoning Blend
- 1 tablespoon cumin ground
- 2 teaspoon smoked paprika
- 2 teaspoon salt
- 1 tsp chipotle
Taco Soup Ingredients
- 1 onion Vidalia
- 1 pound ground beef
- 9 ounces chorizo pork
- 4 cups beef stock
- 14.5 ounces fire roasted tomatoes
- 15 ounces black beans canned, drained
- 4 carrots
- 2 cups corn frozen or canned, drained.
- 1 bunch cilantro
- 4 mini peppers or one bell pepper
- 1 jalapeno pepper
Optional Toppings
- shredded cheese
- cilantro leaves
- tortilla strips
- sliced jalapenos
- sour cream
Would you like to save this recipe?
Instructions
- Dice onion into ½" dice. Cut the carrots into ½"slices. Chop the cilantro stems into small pieces. Reserve the Cilantro leaves for garnish or to add extra to the soup at the end. Slice the mini peppers and ½ of the jalapeno. Reserve the other half of the jalapeno for garnish. Gather the rest of the ingredients.
- Add onion to inner pot along with ground beef and chorizo. Turn the Ninja Foodi on sear/sauté on high and break up the meat with a utensil that is safe for non stick surfaces.
- Add the seasoning blend and stir. Sauté for 5-10 minutes, stirring occasionally.
- Deglaze the pot with beef stock and stir around to make sure nothing is stuck to the bottom. Add the tomatoes, black beans, carrots, corn, mini peppers, stems from the bunch of cilantro, and half of the jalapeno pepper.
- Put the pressure lid on and turn the valve to seal. Set the pressure on high for 5 minutes. When the time is up, natural release for 5 minutes and then manually release the remaining pressure.
- Ladle soup into bowls and top with your choice of toppings. Serve & Enjoy!
Nutrition
ABOUT THE RECIPE AUTHOR, LOUISE LONG
Louise is a full-time recipe creator and food blogger @ The Salted Pepper. She has over 30 years of  experience with cooking and recipe development. She owned a restaurant for several years and was a full-time RN until retiring to blog full-time.
Louise has several very active Facebook groups that help people with the basics of cooking and getting the most out of the Ninja Foodi.
Ninja Foodi Fresh & Healthy Meals
Seeing the need for easy, delicious, and high quality recipes, she is focusing all of her efforts creating recipes specifically for the Ninja Foodi. Her recipes are easy for the home cook to follow and provide step-by-step instructions.
Louise is also a YouTube creator and you can find most of her recipes in video format on The Salted Pepper YouTube channel.
She is very responsive to messages and eager to help in any way she can.
Bill Mitchell says
Made it this evening. Wanted something easy and quick. It was delicious and I’m not an expert cook. Salted Pepper recipes are very good.
Louise Long says
Thank you so much!
Holly says
The family and I loved this, I also brought some to my client (I’m a personal care assistant) and he loved it also. My 14yr old will not eat veggies plan. He ate the carrots in here and loved it. So found a recipe to give him he’s veggies. My family has lived ever recipe of yours I have tried.you are out number 1 go to for recipes for my foodi, I tried finding some with the grill but can’t find any from you. I just recent bought one and also for Christmas I got the ninja ice cream maker and love it..we are a forever fan of yours. My husband was a cook in the navy for 10yrs then became a pastry chef for over 20some yrs now he’s a pastry chef and a chef at the casino he works at and he as well loves your recipes
Louise says
Thank you so much! I have a few grill recipes, but not too many. Chicken satay, pork tenderloin, and surf and turf are three grill recipes that I can think of off the top of my head. All of my air fryer recipes can be made in the grill without any changes.
Barbara Cardinal says
LOVE IT!
I will be making hush puppies to go with it tomorrow.
Bank you for another great recipe, Louise.
Louise says
I'm so glad you love it! Hushpuppies will be great with it!
Barbara Cardinal says
We ended up eating all of the soup before I got a chance to make the hush puppies. It is excellent stuff!
Louise says
I'm so glad you enjoyed it!
Marga says
I made this as part of our Mexican fiesta on super bowl Sunday. My husband LOVED it. Will make this again for sure!
Louise says
Thank you so much! My husband is HUGE fan of it, too!