Pot in Pot or PIP cooking is often mentioned in the pressure cooking world and it's a simple concept that has some great advantages.
This post may contain affiliate links. If you make a purchase after clicking a link, I may earn a small commission. As an Amazon Associate, I earn from qualifying purchases.
360 meals are mostly referred to when speaking about the Ninja Foodi and are not necessarily made using pressure or steam, but they do fall into a category of PIP cooking.
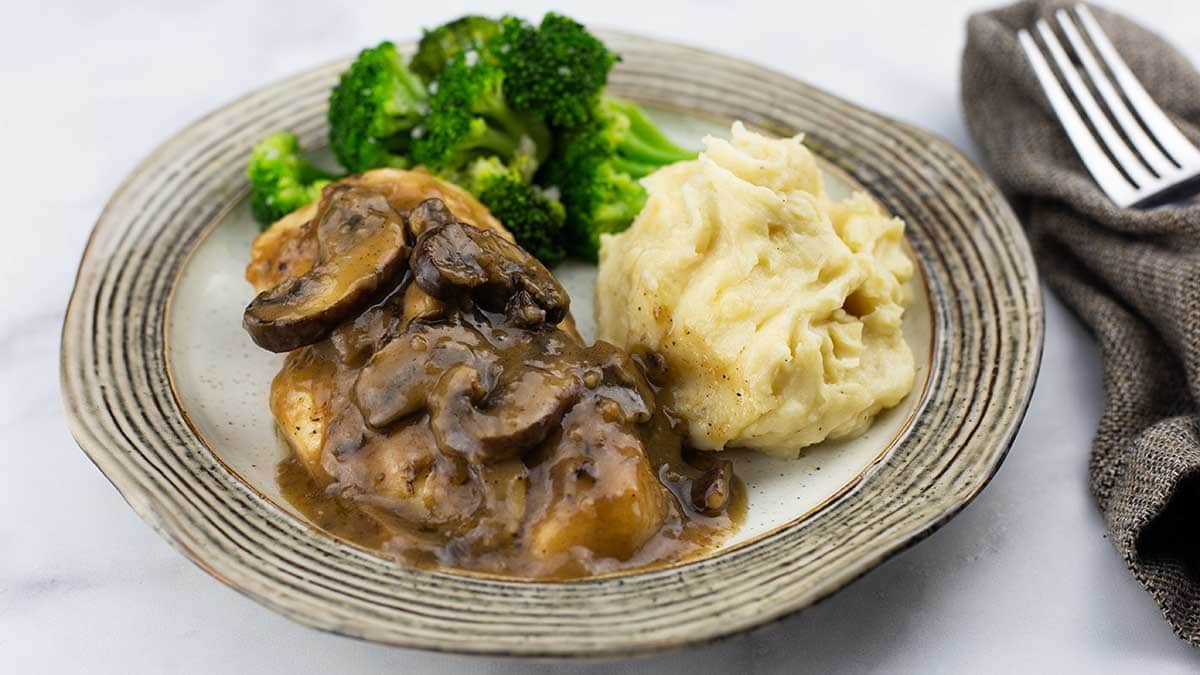
I decided to talk about both in this article because I get a lot of questions about PIP cooking and 360 meals. The concepts are very similar, so it makes sense to address them both at once.
What is Pot in Pot or PIP Cooking?
By definition, it is a style of cooking where the food is inside of one pot/container and that container is then put into the inner pot of the electric pressure cooker.
I guess technically, if you get right down to it, canning on the stove is a form of PIP cooking. We just don't put fancy acronyms on it.
A simple way to look at PIP cooking is if you aren't cooking directly in the inner pot, you are PIP cooking. Simple.
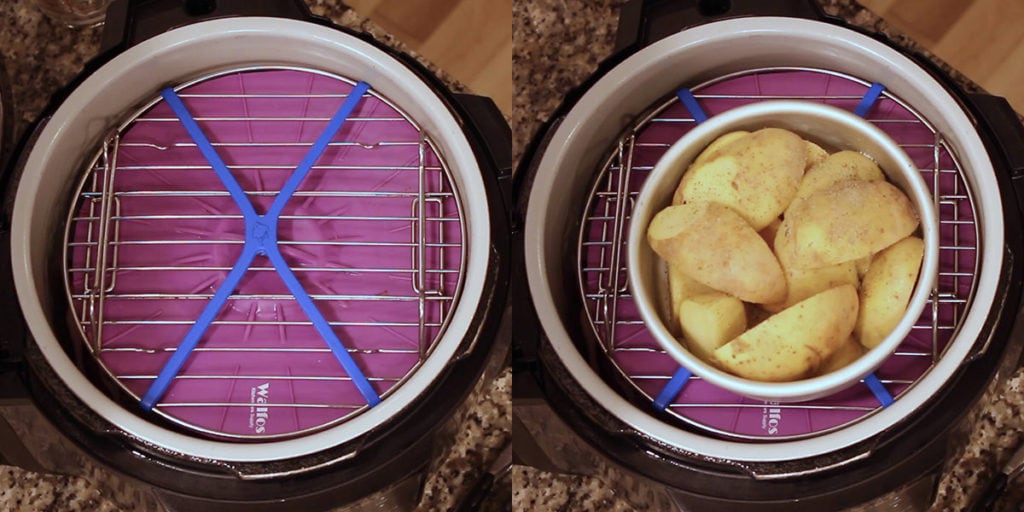
Now, that leads me to ask this question. If you put meat on the rack or in the basket with a thin liquid in the bottom, is that PIP cooking? Probably not. Does it matter if you call it PIP? Nope.
Now, I'm sure, in some Facebook group out there in internet land, you will be told that you are wrong if you call that PIP cooking. Who cares? If someone doesn't have anything better to do than be the PIP cooking police, well... I really don't think we should care what they have to say on the subject.
I'm feeling a bit salty today, can you tell? The point is, don't worry if you get the terms right, they don't matter. What matters is that you have fun while you prepare great meals for your family!
Anyway, I think we have talked enough about what PIP stands for, let's get to the important stuff... the advantages of PIP cooking!
What are the advantages of Pot in Pot cooking?
Probably the biggest advantage is not having to worry about having enough thin liquid.
When I say that, I mean that you don't need thin liquid IN the container of food you are cooking. You will still need thin liquid in the inner pot in order to produce the steam required to bring the pot under pressure.
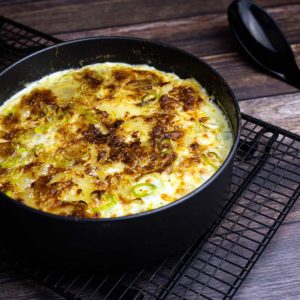
A great example of this is this recipe for Scalloped Potatoes. While you can make scalloped potatoes directly in the inner pot of the Ninja Foodi, it requires a few steps.
You have to PC the potatoes and make sure you can either drain any excess liquid or use just enough water that there isn't much left. Then you have to pour in the cream sauce and bake.
It's so much easier to just slice the potatoes, PC them in the pan and then pour over the sauce and bake. I also like the fact that you can take the pan out of the Ninja Foodi and put it on the table to serve.
As with most things in cooking, there are many ways to approach it and one isn't right or wrong, they are just different. Your preference might be to make them in the inner pot and mine is to make them in the pan using PIP cooking method.
Another advantage is you don't have to worry too much about cream sauces or cheese sauces splitting under the high heat of pressure cooking because they are insulated by the pan just enough to prevent that most of the time. At least that has been my experience.
Another big advantage of using PIP cooking technique is when you are making a small amount of food, like rice, that absorbs water. Sometimes, even making 1 cup of rice directly in the inner pot can lead to some issues.
Like the rice sticks to the bottom, or it's overcooked and gummy. Sometimes, you will see the starch adhere to the sides of the inner pot and it looks like a film of plastic.
Sometimes this can be avoided by rinsing your rice really well, but I have had it happen when cooking rinsed basmati rice.
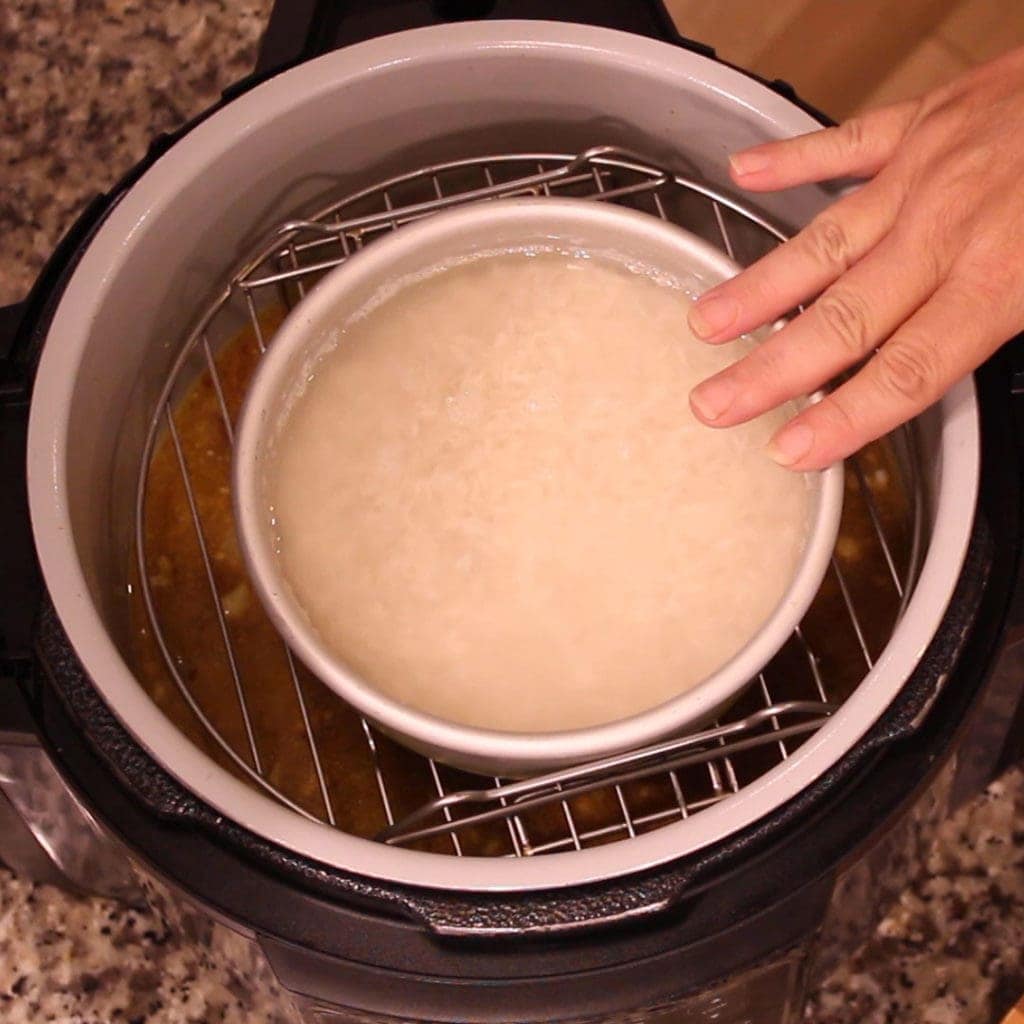
All of that can be avoided if you place your rice in a pan with the correct amount of water and add 1 cup of water to the inner pot and pressure cook that way.

When I make 360 meals, I almost always put my rice in a container/pan and PC it that way. It also extends the amount of time it takes to cook, so you have more flexibility in choosing other foods to cook at the same time.
Pot in Pot cooking also prevents meat juices from dripping on the other components of your dish.
It's a very handy way of cooking in the Ninja Foodi and I hope this article inspires you to try it.
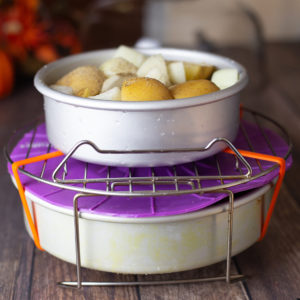
Although I'm sure there are many more advantages, the next one that comes to mind right now is PIP cooking allows you to cook different foods at the same time in different pans.
You can have rice or potatoes in one pan and vegetables in another and cook both at the same time, but they don't touch each other.
You could really make dinner and dessert at the same time in two different pans as long as they took the same amount of time to cook. I will have to experiment with that! It sounds like the perfect type of 360 meal with dessert added in!
So, that leads us right into 360 meals which are much more interesting than PIP cooking. Let's dive in!
What are 360 Meals?
If you haven't heard of them before, you aren't alone! I kept getting requests for 360 meals in the Ninja Foodi and I had not a clue what this meant.
I searched Google for 360 meals and the only thing that came up was a fitness plan or something like that.
So, I kept searching and it turns out that in the Ninja Foodi cookbook that comes with the Ninja Foodi, they refer to their complete dinners as 360 meals.
Then it hit me. OH! 360 is a circle. A plate is a circle (sometimes) and the three components that make up a typical meal are a vegetable, a starch, and a protein. Makes perfect sense, I guess. I'm not sure I would have called them that, but it stuck.
I got to work creating new 360 meals and while they are a lot of fun, they are also very challenging.
Turns out they aren't that easy to perfect! It requires some knowledge about cooking times and ingenuity at times. I've tested hundreds of 360 meals and I think I have 5 completed recipes.
I don't say that to deter you from trying to create them, I really want you to create your own 360 meals because once you get everything timed correctly, they are so easy to make the second and third time!
What I realized through my not-so-great attempts is, I was trying to pressure cook everything and some foods just don't like the pressure cooker!
So, while PIP cooking generally refers to foods that are pressure cooked, 360 meals can be made with any of the functions of the Ninja Foodi or IPDC (Instant Pot Duo Crisp).
Now, this leads me to ask the question. If I use the broil or the Air Crisp setting to make a 360 meal, is it still considered PIP cooking? My answer to the PIP cooking police, should I be interrogated by one, would be, if I have a pot or container or another cooking surface inside of another pot, it's PIP cooking. Okay? Okay.
By the way, it makes no difference what you call any cooking method as long as you are happy with the food you make.
Now, let's talk about how to create these 360 meals!
How do I make 360 Meals in the Ninja Foodi?
There are two main things to think about when planning a 360 meal.
- Do all the components cook at around the same time?
- If they don't, can I do something to alter them so they cook at around the same time?
That's really it. So, in theory, it sounds so simple. The issue is, rarely do a starch, a protein, and a vegetable cook in the same amount of time.
For example, let's say I wanted to cook broccoli, chicken, and rice.
Okay, that's a great meal. I have fresh broccoli, thawed chicken breasts, and brown rice. Now, we a few issues. Of those 3 ingredients, the brown rice is going to take the longest. Even under pressure, directly in the inner pot with the correct amount of liquid, it takes 15 minutes at the least. Broccoli would be mush after 15 minutes of pressure cooking and chicken breasts would be dry and rubbery.
So, do you trash that combination? No. You think about it. Think about the individual ingredients and make your plan around the one that takes the longest to cook. The brown rice.
Let's step backwards for a minute and ask ourselves, how do we know which one is going to take the longest? We are pretty new to this Ninja Foodi thing.
My best advice is to Google Ninja Foodi or Instant Pot recipes for each of the components of the meal you want to put together. In fact, Google several and get a feel for the times they call for.
Average three of them (for the same food item) and that is a safe bet, usually.
So, in this instance, I would Google broccoli in the Instant Pot or Ninja Foodi and see what the timing is on three recipes that are only for broccoli. Take note if they are cooking the broccoli directly in the pan or if they are using PIP method. That makes a huge difference.
Okay, I think you understand where I'm going with this. Do a little research before jumping into a 360 meal that you haven't made before and isn't a tested recipe that you are following.
Once you have the basic times for each component, then you think about how you could alter the specific ingredient to make it fit with the others.
In this instance, we have the brown rice that we know takes about 15 minutes when it is cooked directly in the pot. The fresh chicken breast that would take 5 minutes at the most and fresh broccoli that takes 1-2 minutes, if that.
So, where do we go from here? We get creative. The one thing that really can't be changed is the fact that brown rice takes 15 minutes of high pressure, at least, to cook properly.
What if we froze the chicken breast? That will extend the cook time. The problem there is, chicken breasts (even frozen) tend to get dry and little tough when pressure cooked too long. So, while it may work time-wise, it might not be the best choice.
Can we change the chicken from breasts to thighs? This is a really good option. Chicken thighs are very forgiving and they do great under pressure. You could use bone-in, skin-on or boneless and they will still be fine.
We could use frozen broccoli instead of fresh or cut the fresh in large florets, that might work if it's in a pan and covered. I was shocked that frozen peas were still frozen after 5 minutes of PC time when they were in a pan and covered.
Or, you could choose carrots because they have a longer cook time.
We could also change the rice choice. If the brown rice taking 15 minutes is throwing everything off, you can switch to a faster cooking rice, like jasmine, white, or basmati.
The other option is if you have to use the brown rice, par cook it. That would work just fine. I would definitely do PIP cooking for the rice if you want to par cook it, because you might run into trouble going back under pressure once the rice starts to absorb the liquid and release its starch into the water.
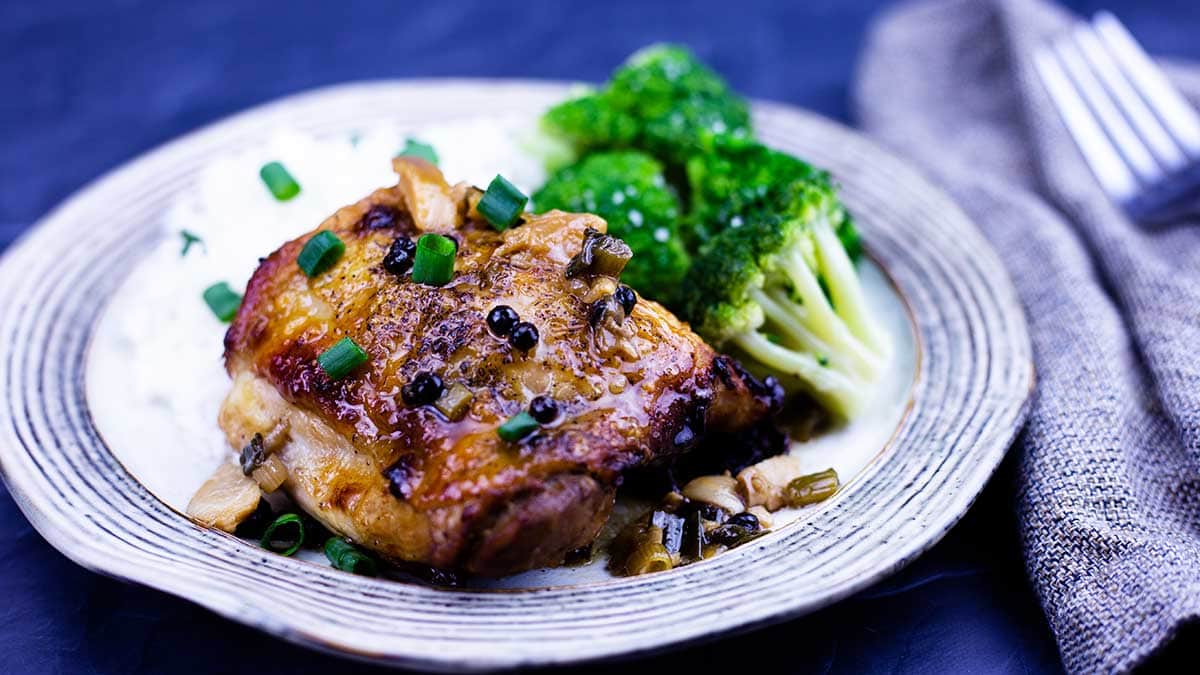
Now, let's look at a 360 meal I made using chicken, broccoli, and rice.
I used bone-in, skin-on chicken thighs, jasmine rice, and frozen broccoli. This is a Filipino dish that is so simple to make and tastes absolutely amazing!
Here is the recipe link if you want to give it a try: Chicken Adobo in the Ninja Foodi
For this 360 meal, I made the components in steps, but they are easy steps and you can do the exact same thing and switch up your seasonings to make it however you like.
The chicken was cooked in the inner pot and the rice was cooked in a pan on top of the chicken. I removed the pan with the rice and left it covered to finish cooking while I finished the meal.
Since I wanted the chicken skin crispy, I put some water in a pan with the broccoli and covered it. I placed a crisping tray on top of the covered pan and AC the chicken.
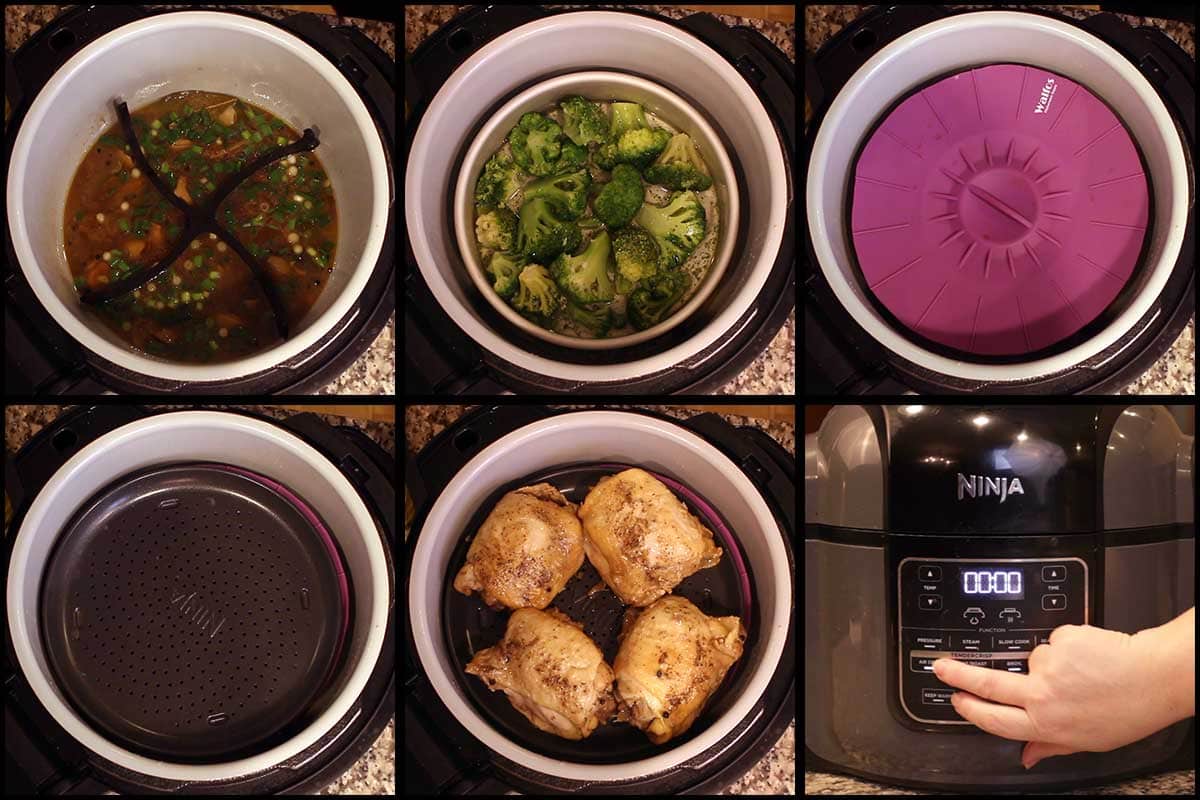
The heat from the crisping lid, heated up the water in the broccoli and cooked it while the chicken was crisping. The rice remained hot until it was all done and voila... a delicious dinner, ready at the same time.
You can do the same thing with various types of foods and seasonings.
I can go on and on about the thought process behind creating your own 360 meals, but I think you have a basic understanding now. Let's take a look at a few other 360 meals in the Ninja Foodi.
360 Meals in the Ninja Foodi
I love creating 360 meals in the Ninja Foodi. They take a little planning and sometimes trial and error, but they are so incredibly easy to make once the details are worked out.
You can make everything from a BBQ chicken dinner to an Asian Stir Fry with Veggies and Rice.
Here are some of my favorite 360 Meals in the Ninja Foodi:
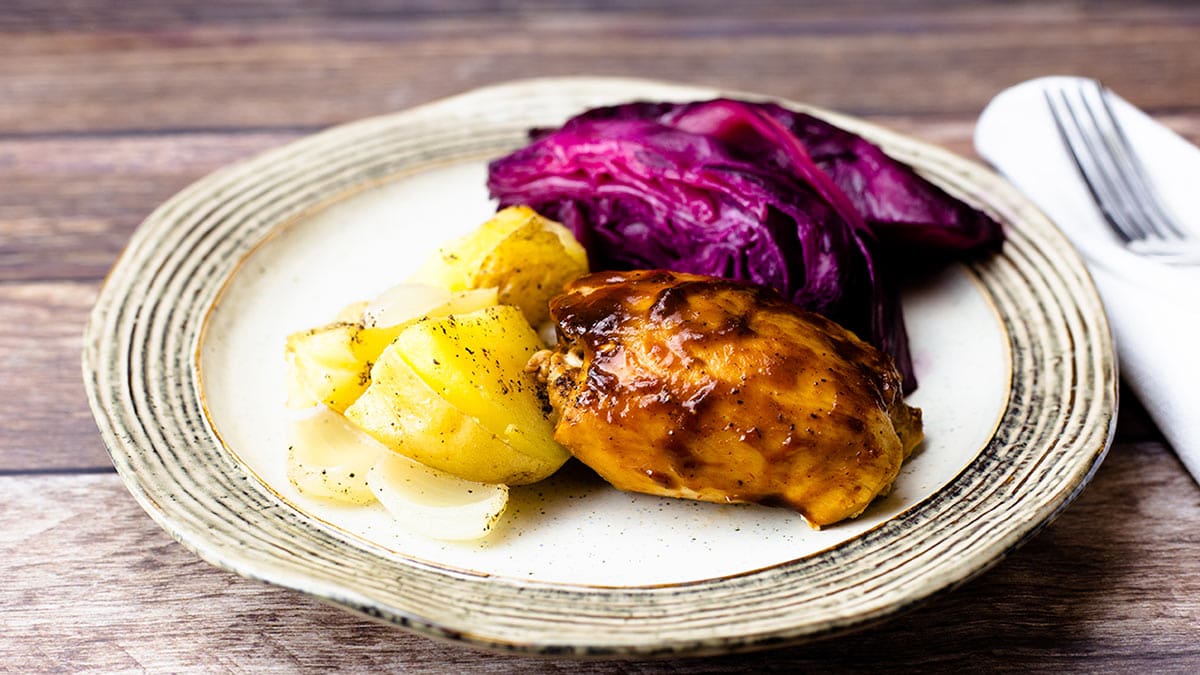
BBQ Chicken Dinner
I used chicken thighs, potatoes and purple cabbage to create a delicious meal that reminded me of a dinner you would eat while at a picnic or outdoor party.
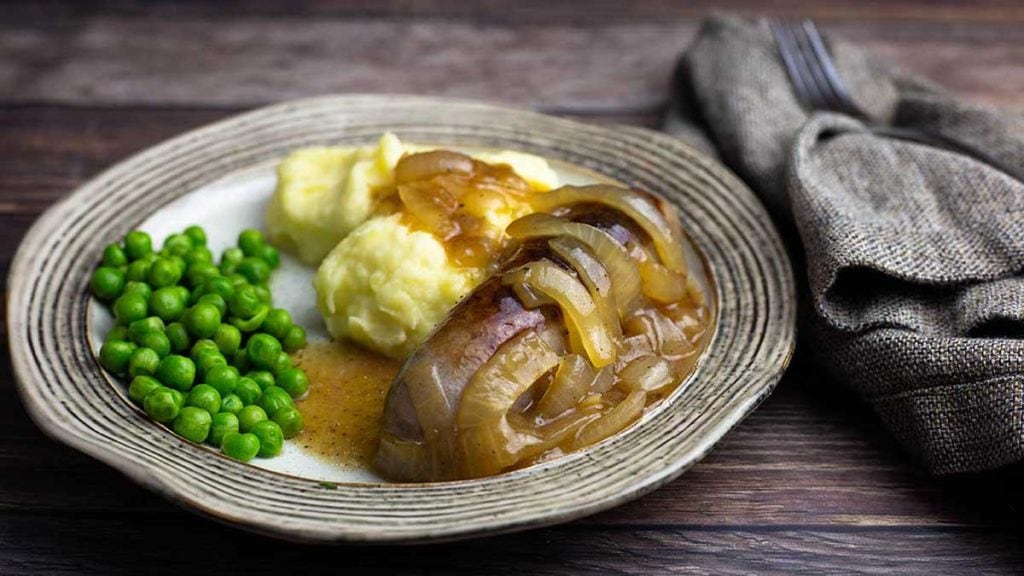
Bangers & Mash
This one really surprised me because I had never had it before and was blown away by the flavors and how easy it is to make!
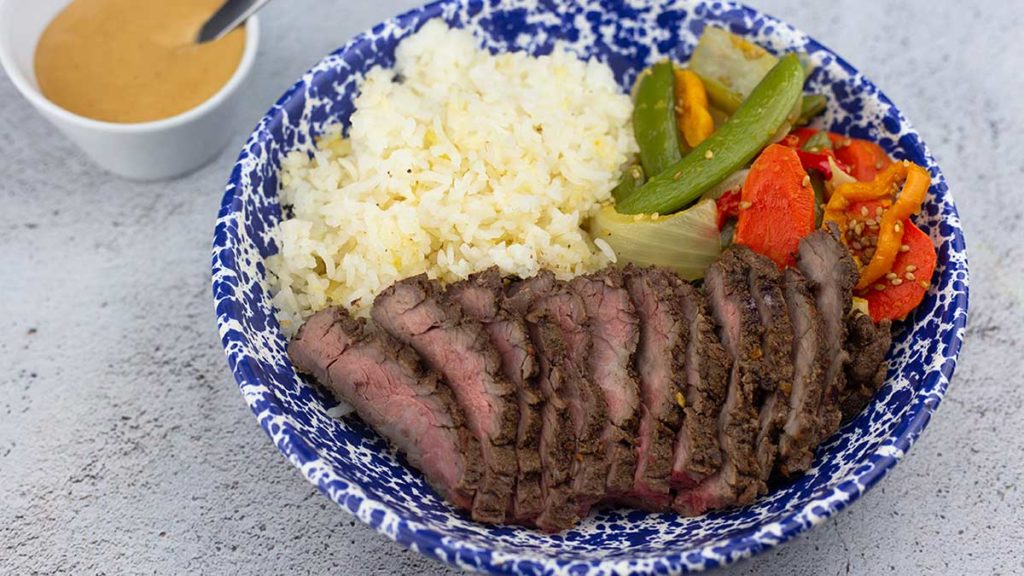
Asian Stir Fry with Vegetables & Rice
This one is probably my favorite, although it is so hard to choose because they are all so good! I used a different technique here and boiled the rice in the inner pot while the rest of the meal cooked above. It turned out amazing!
How do I Substitute Components of 360 Meals?
You can easily substitute any component of a 360 meal as long as you choose a substitute that will cook in about the same time.
You can also omit components of a 360 meal if you like. So, if you are eating low carb and don't want the starch component of the meal, simply leave it out or replace it with a low carb choice that cooks in about the same time.
There are so many ways to create your own 360 meals in the Ninja Foodi. Just get creative and do a little research and cook away!
Remember, it doesn't have to be perfect. Things will go wrong from time to time, but there is usually a way to fix it.
Do I need Accessories for PIP Cooking and 360 Meals in the Ninja Foodi?
You do need a few basic accessories for PIP cooking and especially for 360 meals. The kind of accessories that will work best for you really depend on the type of cooking you like to do.
Here is a starter list of my most frequently used accessories when making 360 meals.
*Instant Pot Duo Crisp owners: I would recommend getting the reversible rack that is made for either the 6.5 qt Ninja Foodi or the 8 qt Ninja Foodi. This rack will allow you more stacking options then the trivet that comes with the IPDC.
(affiliate link)8" x 2" Fat Daddio Pan:
I recommend the 2" depth because it allows for the maximum stacking ability in the 6.5 qt. If you have the 8 qt Ninja Foodi, you can use a 3" depth pan, but I don't think you can stack 2 (3") pans on the rack and still get the pressure lid on. I don't have 3" pans, so I can't test this for you. Sorry. If you have 2 (3") pans and they fit, please let me know!
(affiliate link)6"x 2" Fat Daddio Pan:
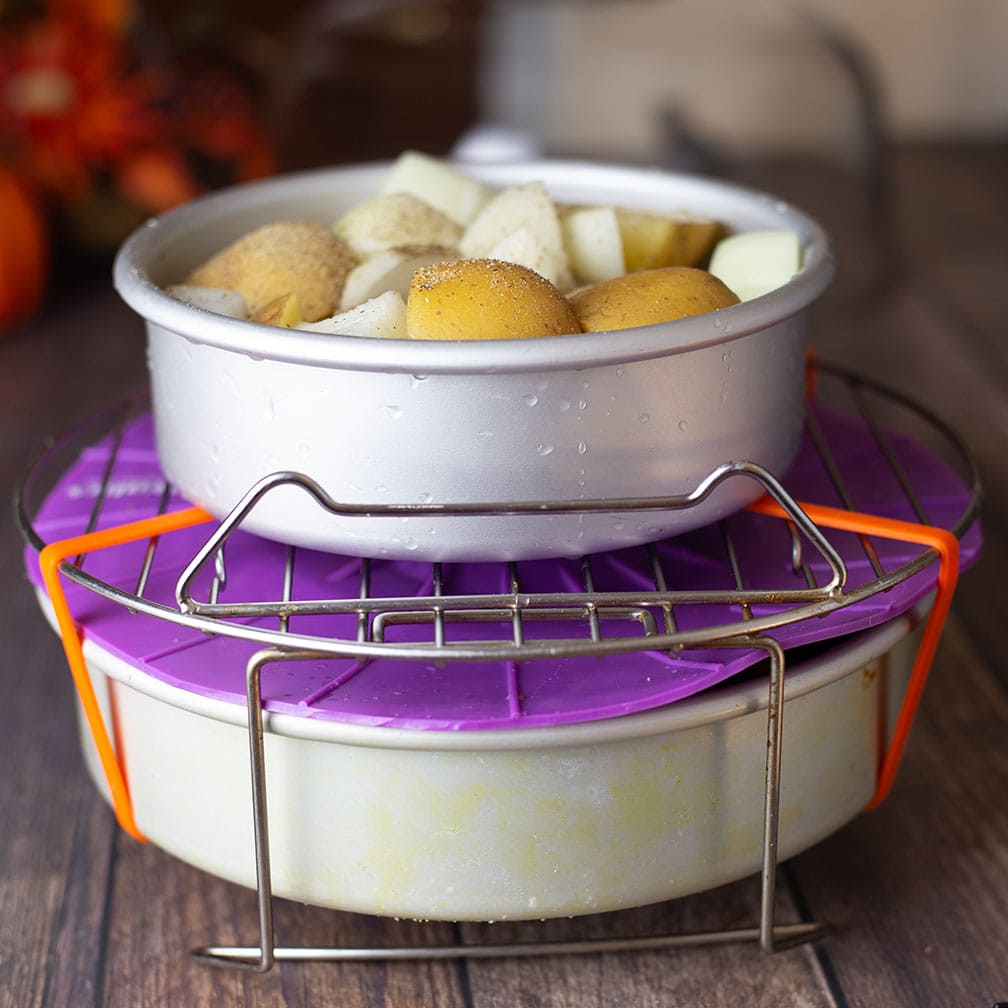
I almost always use one 8" pan and one 6" pan when stacking food because the 6" pan fits on top of the 8" pan and the pressure lid still goes on when using the rack. The 8" won't fit on the top of the rack in the high position, but the 6" does.
(affiliate link)Grifiti Bands:
I use these to secure one of the pans under the rack, while the second pan sits on top of the rack.
(affiliate link)Sear 'N Sizzle Grill Grate
Not only is the Sear 'N Sizzle Grill Grate for the Ninja Foodi one of the BEST accessories you can get, it is also extremely versatile when it comes to making 360 meals.
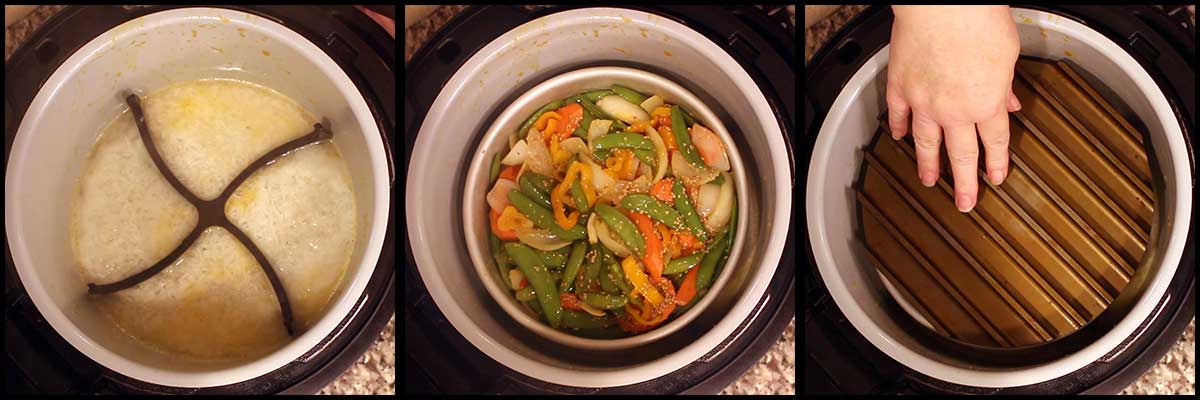
You can use the flat side or the grill side for cooking AND the heat that is conducted from the pan cooks food underneath as well.
I used the grill side to grill my steak for Asian Stir Fry while the rice cooked underneath. It's incredible and well worth the money.
Help! I'm still confused about 360 Meals in the Ninja Foodi
I completely understand that it can be confusing and a little intimidating to create your own 360 meals. I am always here to help brainstorm with you and I really urge you to join our Facebook group, Ninja Foodi 101.
Ninja Foodi 101 has over 40,000 members and a lot of them have experience with making 360 meals and are more than willing to help you.
You can also send me an email or message me on Facebook, but the quickest way to get answers to your questions is definitely in our Facebook group.
I hope you found this article useful and I appreciate any feedback, just leave me a comment below or send me an email!
My email address is: Louise@thesaltedpepper.com
ABOUT THE RECIPE AUTHOR, LOUISE LONG
Louise is a full-time recipe creator and food blogger @ The Salted Pepper. She has over 30 years of experience with cooking and recipe development. She owned a restaurant for several years and was a full-time RN until retiring to blog full-time.

She published her first cookbook in the Fall of 2018 and is very interested in writing several more.
Louise is also the creator of an online Ninja Foodi Pressure Cooking Course with over 100 instructional step-by-step videos. People absolutely rave about the course and all the value they have received from it.
Louise has several very active Facebook groups that help people with the basics of cooking and getting the most out of the Ninja Foodi.
Louise is also a YouTube creator and you can find most of her recipes in video format on The Salted Pepper YouTube channel.
She is very responsive to messages and eager to help in any way she can. Get more Information about Louise & contact information
I WOULD LOVE TO SEE WHAT YOU ARE COOKING UP IN YOUR KITCHEN! TAG ME @THESALTEDPEPPER ON YOUR FAVORITE SOCIAL MEDIA PLATFORM WHEN YOU MAKE A DISH!
BE SURE TO FOLLOW THE SALTED PEPPER RIGHT HERE ⇓⇓⇓⇓⇓

Yehuda
Awesome job! I'm not a good cook....I bought the Ninja Foodi Grill hoping it would help me learn. I hated my cooking. Now, thanks to you, I actually enjoy my cooking! 🙂 Amazing! Thanks for all you do. Keep up the good work. Although Jerusalem has lots of great food, the prices are so expensive. Now that I"m cooking my own food, life is much better!
Louise
Thank you so much! That really means the world to me!
Beth Ford
Are the Grafiti bands strong enough to lift the 8" pans of food or cake from the Ninja Foodi? My 8" pans are too big to use the sling.
Louise
I don't usually use them for lifting, but it really depends on what is in the pan. If it's really heavy, then I would say no.
Sherry Boatman
What is the purple lid you have on the larger bottom pan? Do you have a link for it?
Louise
I bought a set and here is my affiliate link through Amazon: https://amzn.to/2WNNAzz
Linda E Heffernan
can i pressure can in the foodie
Louise
The Foodi is not approved for pressure canning.
Erin
Louise, I made the 360 meal of ribs but couldn’t eat it that night. Can I reheat it in the foodi or does it have to be the oven?
Louise
You can reheat it in the Foodi. Often times, I'll use the steam function with a pan of food covered to reheat and then use the TenderCrisp lid if I want to crisp anything up.