I will email this recipe page to you, so you can come back to it later!
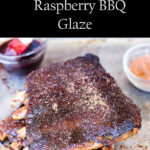
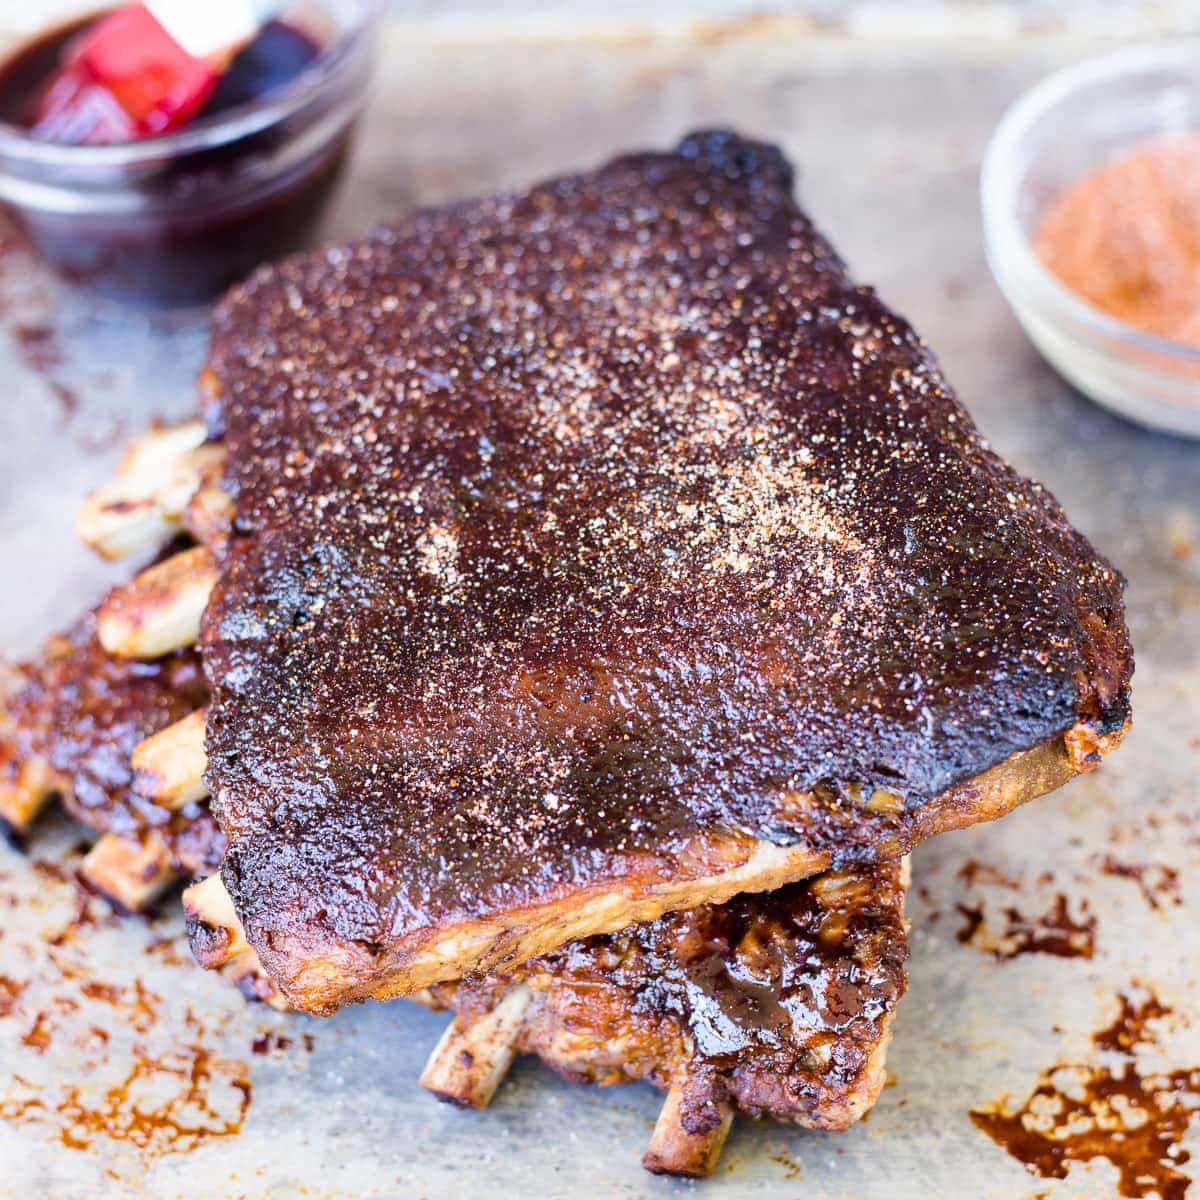
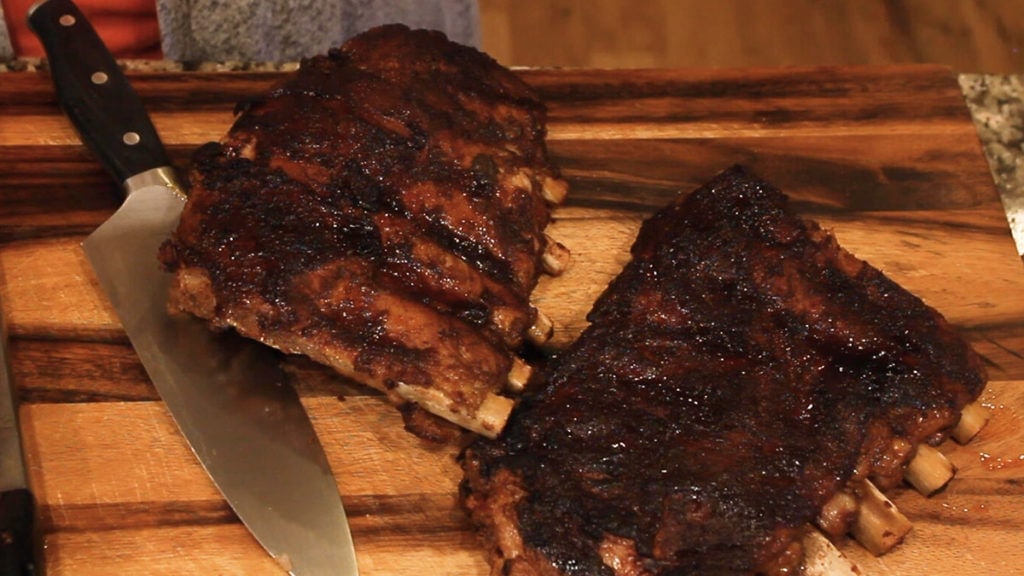
Ninja Foodi Ribs with Raspberry BBQ Glaze is going to blow your mind! I'm serious about this one... you just have to give it a try! Not only is the rub amazing, this glaze is addicting for sure!
I'm not knocking smoked ribs one bit! I love them. They just take too long. While the low and slow cooking technique for good BBQ can't be beat, these Ninja Foodi Ribs taste better than you can get in many restaurants! Did you know: a lot of times the ribs in restaurants aren't even smoked? It's true.
You might not know this about me, but I owned a BBQ restaurant (we did smoke our ribs) for several years and today I am sharing with you a version of my award-winning rub and Raspberry BBQ Glaze.
This post may contain affiliate links. If you make a purchase after clicking a link, I may earn a small commission. Thank you for your support!
When I owned the BBQ restaurant years ago, I specialized in fruit-based sauces and WOW are they delicious! The raspberry glaze was one of the most-requested sauces and it is PERFECT on these Ninja Foodi Ribs!
A few of the other fruit-based sauces we made were: Blueberry, Apple Butter Bourbon, Peach, and a Roasted Strawberry Sauce. I bet you'll see these pop up in some of my future recipes!
What's your favorite fruit-based sauce? Leave me a comment!
Do I rub the ribs before or after pressure cooking?
I wondered this same thing. Will the rub stay on when the ribs cook under pressure since they are cooking in a wet environment?
The answer is, yes. The rub stays on; so, I recommend rubbing the ribs prior to pressure cooking.
If time allows, I also recommend rubbing the ribs the day before you want to cook them. After rubbing them, cover in plastic wrap and put them in the fridge until about one hour before you want to cook them.
I always recommend letting meat (except seafood) come to room temp for about an hour before cooking.
Can I make these Ninja Foodi Ribs if I have a different pressure cooker?
Yes, of course. The beauty of the Ninja Foodi is being able to Air Crisp the ribs after pressure cooking them, but if you have a different type of electric pressure cooker, you can still make this recipe.
Follow the same instructions for pressure cooking and when the ribs are done, place them on a cookie sheet. Preheat the oven to 400° F and place the ribs on the top rack of the oven. If you have a convection oven, I recommend turning that on. Bake the ribs until the glaze caramelizes on top.
You can also turn on the broiler and finish them that way. Just keep an eye on the ribs so the sugar in the glaze doesn't burn.
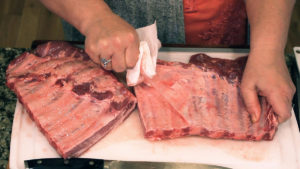
Do I have to remove the membrane from the back of the Ribs?
This is debated for sure. I decided to do a test in the video on YouTube for Ninja Foodi Ribs with Raspberry Glaze. I removed the membrane from ½ of the rack and left the membrane on in the other ½.
What I found is that the side that had the membrane removed cooked flatter, looked better, and I think the meat pulled off the bone just a bit easier.
I have always removed the membrane before cooking ribs and, after my experiment, I will continue to remove the membrane.
How long do I need to cook ribs in a pressure cooker?
Not as long as you might think! I know I will get some backlash from this, but it is okay. I can handle it. I think.
Ribs SHOULD NOT be falling off of the bone. There, I said it. I see everyone's head shaking back and forth vigorously and I can almost hear the screams.
The truth is, if the meat is falling off the bone, the rib is overcooked. You know you have a perfectly cooked rib when the meat pulls off the bone when you bite it, is tender and flavorful, but does not fall off the bone.
I know a lot of people like their rib meat to be falling off the bone and I am certainly not going to tell you how you should like your ribs. All food should be cooked the way you like it. So, here are my suggested cooking times and you will notice that the cooking time in this recipe for Ninja Foodi ribs is just a tad overcooked.
I want my rib meat to be:
Falling off the bone: Cook on high pressure for 25-30 minutes
Almost falling off the bone: Cook on high pressure for 20-25 minutes
Not quite falling off the bone, but pulling away from the bone: Cook on high pressure for 18 minutes
Still attached to the bone, but pulls away when taking a bite: This is how a perfectly cooked rib should be. I have not tried this, but my suggested cook time would be high pressure for 15 minutes. If you give this a try, please leave a comment and let me know how it worked out for you!
*all the suggested cooking times should be followed by a 10 minute natural release for best results
Can I pressure cook my ribs in the BBQ Sauce?
In order to pressure cook, you have to build steam. In order to build steam, you need a thin liquid. While some BBQ sauces may be thin enough to achieve this, a thicker sauce like the Raspberry BBQ Glaze may cause you some issues.
Before deciding to pressure cook the ribs in a BBQ sauce, I would encourage you to read this article on Pressure Cooking 101. It explains how pressure cooking works and why thicker liquids and sauces don't work as well or sometimes don't work at all.
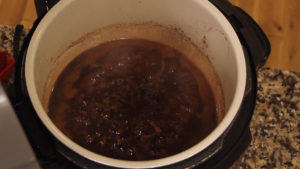
How to make the Raspberry BBQ Glaze
Place all the Raspberry BBQ Glaze ingredients into the inner pot of the Ninja Foodi and set to medium sear/sauté.
Stir frequently just until the glaze begins to boil. Turn the Ninja Foodi off and remove the sauce. Allow to cool for best results.
Please note: This recipe makes about 2 cups of Raspberry BBQ Glaze. You might use ½ cup for a rack of ribs. Store the remaining glaze in an air-tight container in the fridge until ready to use again. Give it a try on pork chops... delicious!
How to make Ninja Foodi Ribs
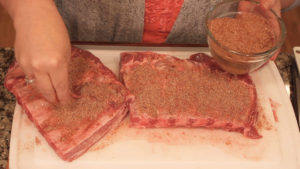
First, make up the rub by combing all of the dry spices with the sugar. Mix well. This will make enough rub for several racks of ribs. Store in an air tight container until ready to use.
Remove the membrane and the flap from the back of the ribs. You can see how I do this easily in the video: Ninja Foodi Ribs with Raspberry BBQ Glaze on YouTube or under the recipe in this post.
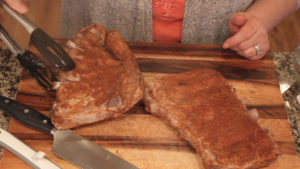
Rub the ribs very well on both sides with the rub. You can do this up to 24 hours before cooking. Wrap the rubbed ribs in plastic wrap and keep in the refrigerator until an hour before cooking.
Place the liquid smoke and cider vinegar in the inner pot of the Ninja Foodi. I personally did not notice any smoke flavor from the liquid smoke, so feel free to replace this with water or beer or any thin liquid of your choice.
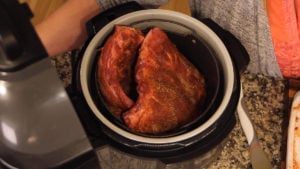
Stack the ribs on their side in the fry/steam basket that came with the Ninja Foodi.
Set the pressure to high for 18 minutes. Be sure to turn the black valve to seal. When they are done cooking, allow the ribs to natural release for 10 minutes.
After the 10 minutes, manually release the remaining pressure by turning the black valve on the back to vent.
Remove the basket from the Ninja Foodi. I like to put the ribs on the rack in the low position for Air Crisping, but you could leave them in the basket if you prefer.
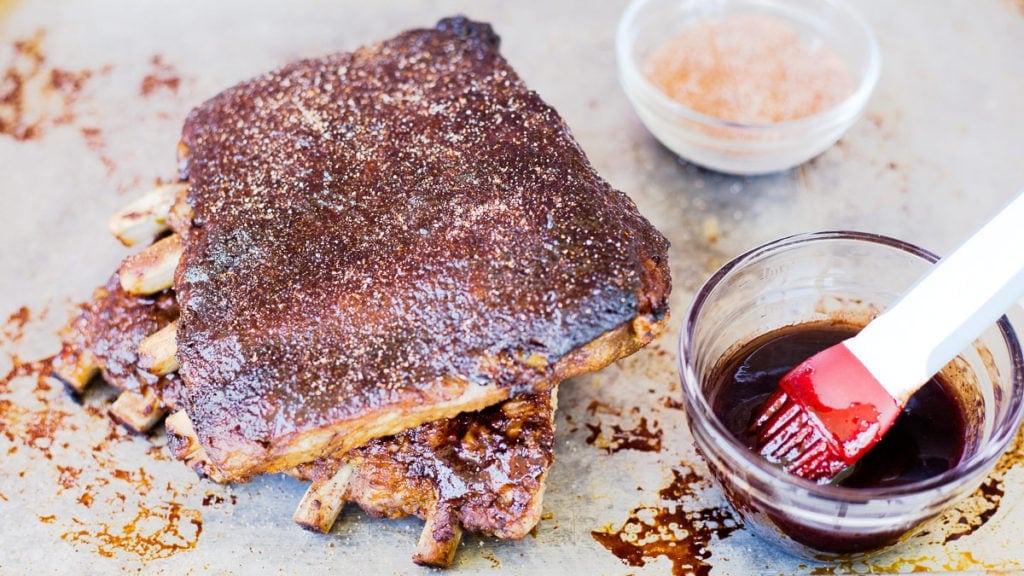
Brush on the Raspberry BBQ Glaze. I like to use my Silicone Basting Brush, but you can spoon on the glaze.
Air Crisp the ribs on 400° F for 10-20 minutes, reapplying the glaze a couple of times. I usually recommend preheating the Ninja Foodi before Air Crisping.
Serve with a bit of extra glaze and that delicious rub! Enjoy!
Ninja Food Ribs with Raspberry BBQ Glaze
Making ribs in the Ninja Foodi is so easy and they taste so delicious! Not only is the rub amazing, this glaze is addicting for sure!
I will email this recipe page to you, so you can come back to it later!
Instructions
Raspberry BBQ Glaze
Turn the Ninja Foodi on sear/saute medium heat and add the raspberry preserves, brown sugar, lemon juice, apple cider vinegar and spices. Heat and stir to combine. When the preserves and sugar have melted and the spices are incorporated, turn the Ninja Foodi off and pour into a medium size bowl. Allow to cool. You can put it in the fridge to cool.
This will make about 2 cups of Raspberry Glaze which is enough for several racks of ribs. Store in an air tight container in the fridge until you are ready to use it again.
For the Ribs
Remove the membrane from the back of the ribs. The easiest way to do this is to lift up a small piece of the membrane and grab it with a paper towel, then pull the membrane off. You can watch how I do this in the video below the recipe.
Mix up the rub ingredients and coat both sides of the ribs with a generous amount of rub. The rub recipe makes enough for 2-3 racks of ribs and can be stored in a sealed container.
Cut the rack of ribs in half and rub generously with the rub. You can do this ahead of time and wrap the rubbed ribs in plastic wrap and store in the fridge overnight.
Place ½ cup of liquid smoke and ½ cup of apple cider vinegar into the inner pot. You can also use beer, water, or a combination. As long as you have 1 cup of thin liquid you will be fine.
Place the ribs in the basket that came with the Ninja Foodi. I place them on their side. Be sure to leave enough clearance for the pressure cooker lid.
Turn the Ninja Foodi on high pressure for 18 minutes. Don't forget to turn the valve to seal. When the cooking time is up, allow to natural release for 10 minutes and then manually release the remaining pressure. Dump the liquid.
Lay the ribs onto the rack in the low position. Brush with the raspberry glaze. Turn the Ninja Foodi to the AC function on 400° F and Air Crisp for 10-20 minutes. Reapply the glaze every few minutes.
Nutritional information was calculated using all of the rub and all of the raspberry sauce. It is doubtful that you will use all of it with one rack of ribs.
There is ACV (1/2 cup) used as part of the cooking liquid and then again in the raspberry glaze. I hope that explains why it is listed twice. You don't have to use is as the cooking liquid though, you can use water or beer or anything else to make up 1 cup of total cooking liquid for pressure cooking.
It should work just fine in the Instant pot on high pressure. You can then put them in a high heat oven instead of air frying them if you want to dry the outside and set the rub and glaze. I hope you love the ribs!
I'm so glad you enjoyed them! Did you use steam/bake in the Speedi? I think you will love the Ninja Woodfire and yes, I do plan on doing ribs in it and a bunch of other recipes. It's just a little harder to plan those videos because of the weather.

ALICIA C says
My family loves these ribs! Thanks for sharing your delicious recipe!
Louise Long says
Thank you so much!
JJ Gandy says
The glaze shows ACV twice with different amounts. Is one of them supposed to be a different ingredient?
Thanks!!
Louise says
There is ACV (1/2 cup) used as part of the cooking liquid and then again in the raspberry glaze. I hope that explains why it is listed twice. You don't have to use is as the cooking liquid though, you can use water or beer or anything else to make up 1 cup of total cooking liquid for pressure cooking.
JJ Gandy says
Think this would work well for the pressure cooker part to use the Instant Pot on HI?
Otherwise, I will just take a chance, and go for it!
Thanks.
Louise says
It should work just fine in the Instant pot on high pressure. You can then put them in a high heat oven instead of air frying them if you want to dry the outside and set the rub and glaze. I hope you love the ribs!
Val says
This recipe is amazing my grandkids especially love it! Thank you so much for sharing 😊
Louise says
I'm so glad they love it!
Carol Johnson says
Awesome
Louise says
Thank you!
Kay Stratton says
I made this recipe in my Ninja Speedi -- SPECTACULAR!! THANK YOU VERY MUCH!!!
We just bought the Ninja Woodfire Grill & Smoker -- Good Friday Deal; plus 12% off ordering online via Rakuten.
Will you be making a YouTube video smoking St Louis ribs on the Ninja Woodfire Grill & Smoker?
Louise says
I'm so glad you enjoyed them! Did you use steam/bake in the Speedi? I think you will love the Ninja Woodfire and yes, I do plan on doing ribs in it and a bunch of other recipes. It's just a little harder to plan those videos because of the weather.