

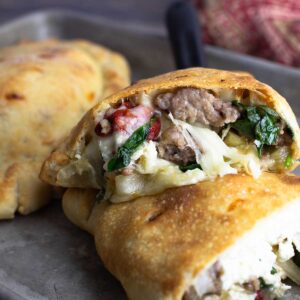
If I would have known how easy and delicious Air Fryer Calzones are to make, I would have been making them for years! They start off with a simple pizza dough, then filled with your favorite pizza toppings and air fried to perfection! Serve them with your favorite marinara sauce for dipping and a side salad, and pizza night is covered!
Would you like to save this recipe?
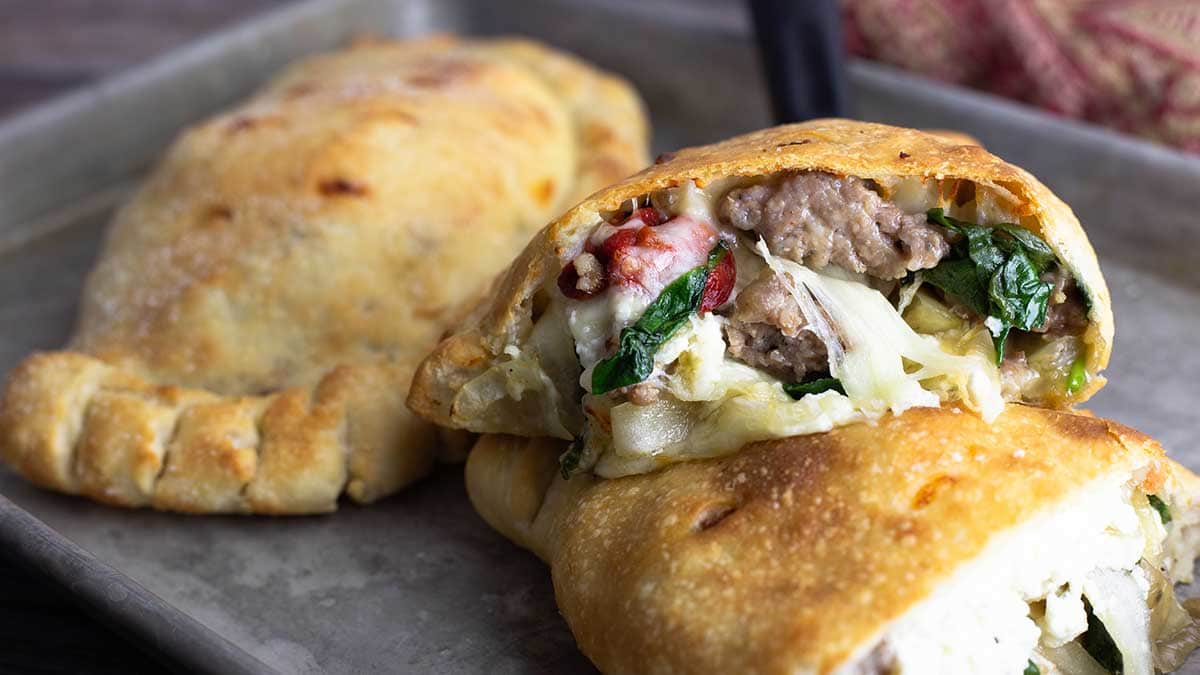
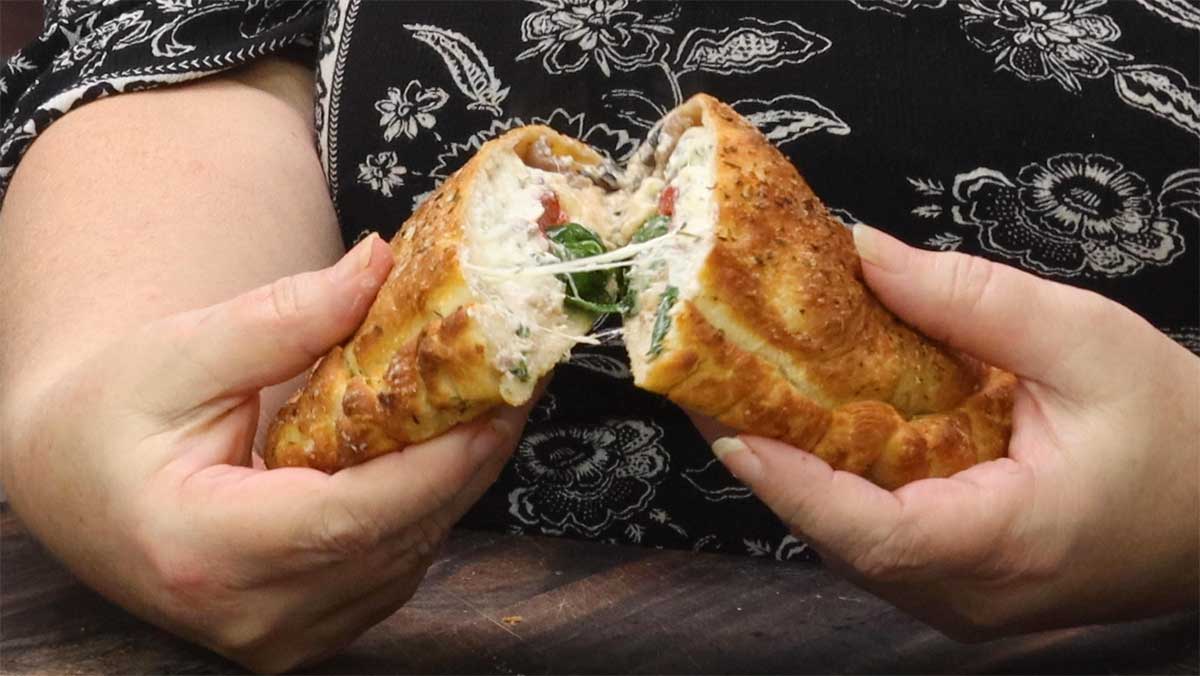
What I love the most about homemade calzones is you can make them any size you want; from mini calzones to larger ones that serve multiple people. When I've ordered calzones from an Italian restaurant, I've often been disappointed that the bread to filling ratio is not well balanced. They seem to be too bready without enough filling, but making them at home fixes all of that. These calzones are stuffed with your favorite toppings (fillings in this case) and you will have deliciousness from end to end with the perfect bread to filling ratio.
You can either make your own pizza dough like I do or purchase some from your local grocery store. Many times you can even purchase pizza dough from your local pizzeria.
Ingredients & Substitutions
Pizza Dough
Pizza dough is what is traditionally used when making calzones, but you don't have to make your own if you don't want to. I always make my own pizza dough because it's so simple to make -- much easier than making bread because you only have to let it rise once and then go right into rolling it out for the calzones.
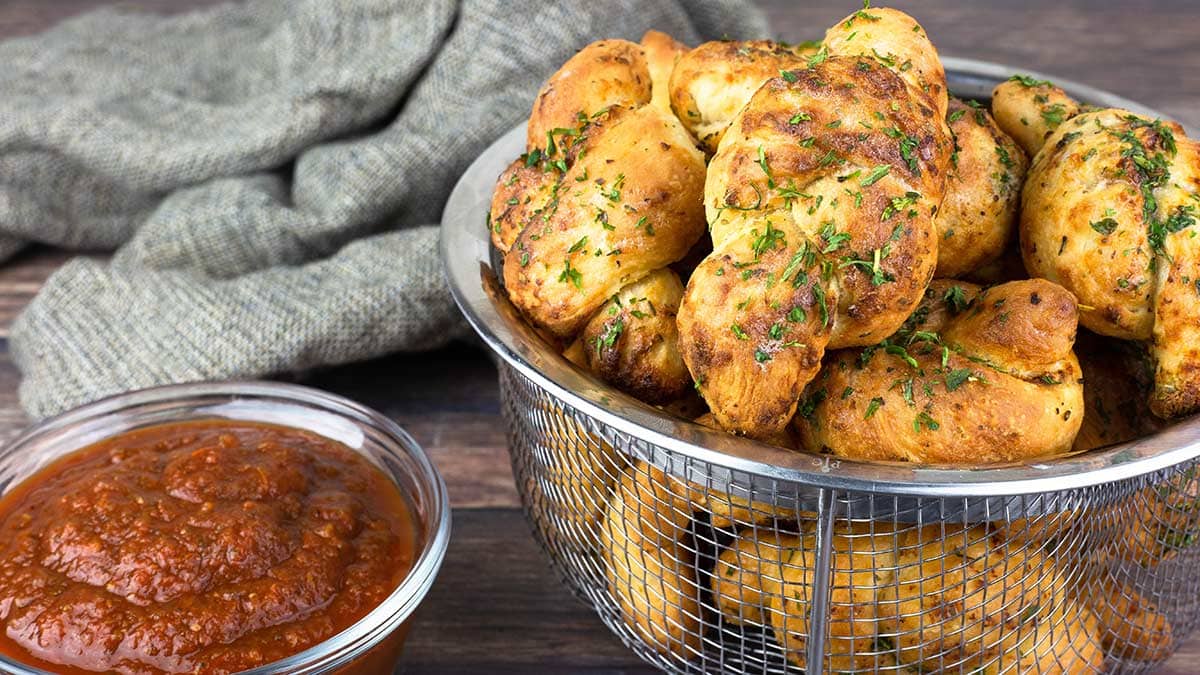
You can easily buy pizza dough already made at the grocery store or ask your local pizzeria if they will sell you some. You will need between 5-6 ounces of pizza dough per 8" calzone. I usually use the same pizza dough recipe that I use to make my air fryer garlic knots and I'll make 2 calzones and some breadsticks or garlic knots with the leftover dough.
You can also use bread dough instead of pizza dough, if you want. They are very similar and can be interchanged most of the time.
Another option is using crescent rolls and rolling them out. The problem with the store-bought crescent rolls in the tube is that they are perforated and it can be kind of hard to get them to seal all the way. However, they can be used if you don't have pizza dough or bread dough.
Cheeses
Ricotta cheese is traditionally used inside of a calzone; in fact, it is one of the ingredients that sets it apart from a Stromboli. Does that mean you have to use it? Of course not.
However, I will say that this was my first time making calzones with ricotta cheese and let me tell you, they were extra delicious! Since you don't put the sauce on the inside, the ricotta adds this level of moisture and creaminess that isn't there if you skip it. The ricotta blends in with the other cheeses and you barely know it's there, but it's role is pretty important in my opinion and I'll never make calzones without it again... unless of course I want calzones and don't have any in the fridge.
The other cheeses you use are completely up to you. I usually keep it simple and use shredded cheese blends from the grocery store, but you can also use slices of cheese, if you prefer. I like to use an Italian blend of cheeses that include parmesan cheese, mozzarella cheese, provolone cheese, and sometimes asiago.
Meats
There isn't any right or wrong when it comes to what meat you fill your calzone with. Typically cured meats like pepperoni, salami, and prosciutto are used. However, you can use any type of meat that you like. I chose Italian sausage because I love the flavor it brings to the calzone, but ham or steak, or even chicken, can certainly be used.
When using meat inside of the calzone, it is important that it is cooked FULLY before stuffing the calzone. There is not enough time for the meet to cook inside of the pizza dough and, even if there was, you would not want the juices from the meat to collect inside and make the dough soggy.
Remember to season your raw meat while cooking so that it has a good flavor when you use it in your calzone.
You can also skip the meat entirely and make a cheese and vegetable calzone.
Vegetables
Whether or not you put vegetables in your calzone is completely up to you, but I love to include them. They add some moisture to the inside of the calzone and, of course, tons of flavor. You can choose any kind of vegetables that you like. The only important thing to remember is that they need to be the texture that you want to eat them. They will not cook inside of the calzone. So, unless you want raw crunchy onions, sauté the onions first. You also want to season the vegetables as they are cooking. Your calzone filling will only be as flavorful as the ingredients you use and the seasonings you use. Be careful with salt if you are using a lot of cured meats, they will bring quite a bit of salt to the calzone filling.
You also want your vegetables in bite-sized pieces so they are easy to eat inside of the calzone. For example: if you want olives in your calzone, slice them instead of leaving them whole.
Ingredient Amounts
There is not an exact measurement when it comes to the amount of each ingredient you use in your calzone. For an 8" calzone that uses between 5-6 ounces of dough, you will use between 1½-2 cups of filling.
If you watched my video, you may be confused by this because I said several times in the video that you would use about 1 cup of filling. I realized, after the fact, that that could be confusing because I wasn't including the ricotta cheese or the shredded cheese in that amount.
So, with the ricotta cheese and shredded cheeses, the total amount of ingredients that goes inside of an 8" calzone would be 1½-2 cups.
If you are making smaller calzones or bigger ones, adjust the filling accordingly. You want a stuffed calzone that has filling from end to end and where the ratio to filling is 2 parts filling to 1 part dough. That means you get twice as much filling as dough in each bite.
What is the Difference Between Calzones and Stromboli?
I wanted to cover this because it has always confused me and I did quite a bit of research on the topic when testing both my Breakfast Stromboli recipe and this one. There are many conflicting answers when you do a Google search for this, but I think I've combed through enough articles to be able to give an accurate answer.
One of the most obvious differences is the shape. Stromboli is rolled and calzones are folded and crimped at the edges like an empanada or a pasty. Most of the time Stromboli has dough throughout the layers of fillings and calzones are encased in the dough, more like a pizza hot pocket. The Stromboli dough is rolled out into a rectangle and rolled, where the calzone dough is rolled out into a circle and then folded over to create half circles and the edges are crimped.
The differences don't stop there, though. Another big difference is the sauce. If you are making a pizza style calzone or Stromboli, usually there is marinara sauce involved. With Stromboli, the sauce is baked on the inside and with calzones the sauce is served on the side. You do want to be careful that you don't add too much sauce to the inside of the Stromboli, because it can cause the dough to get too wet and not crisp up. I like to add a thin layer between the layers of meat and cheese. I will also say that it's your dinner, so if you want to add sauce to your calzones, go right ahead, just not too much!
One of the most interesting differences and where I really think Calzones separate themselves from Stromboli, or even a folded pizza, is the use of ricotta cheese. Traditional calzones always have ricotta in their filling. While this does add some moisture, when you add the perfect amount it will not interfere with the dough crisping up. The way the ricotta coats the other fillings and blends in with the cheeses is simply magical and I highly recommend using it.
How to Make Homemade Calzones in your Air Fryer
Mise En Place (preparing to make the calzones)
Pizza Dough
First decide if you are going to make your own pizza dough or not. I really hope you decide to make it yourself, because it's very easy to make... and so satisfying. I use the basic pizza dough recipe that I use for my air fryer garlic knots.
The pizza dough can be made up to 3 days ahead of time. After the first proof, wrap the dough in plastic wrap and refrigerate until you want to make the air fryer calzones. Take the dough out of the refrigerator about 30 minutes before making the calzones.
Or, you can make the dough about an hour before you want to assemble the calzones.
If you are using store-bought dough, take it out of the fridge about 30 minutes prior to assembling your calzones.
Marinara Sauce
Making your own marinara sauce is very easy and only requires a few ingredients. If you want to try out my recipe, here is the link: Homemade Marinara Sauce
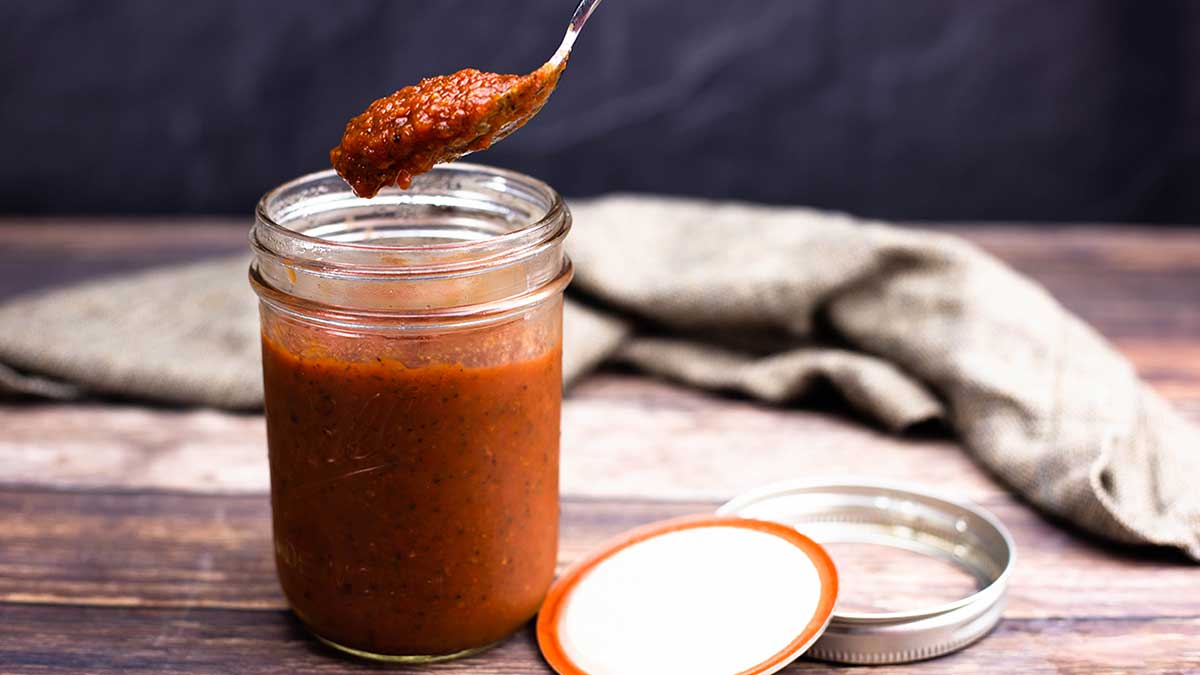
You can make the marinara sauce 3 days ahead of time, or even longer if you want to freeze it.
If you don't want to make it yourself, you can certainly purchase your favorite brand from the store. Rao's is pricey, but so good!
Fillings for the Calzone
You want to decide on and cook the fillings for the calzone at least 30 minutes before you assemble them so the fillings have a chance to cool down before using them. Hot fillings will soften the dough and you will have issues with tearing and leaking.
Most fillings can be cooked (if they need to be) and refrigerated for up to three days. If you precook the fillings ahead of time and refrigerate, bring them out to come to room temperature at least 30 minutes prior to assembling your calzones (but not more than 2 hours beforehand for safety reasons.)
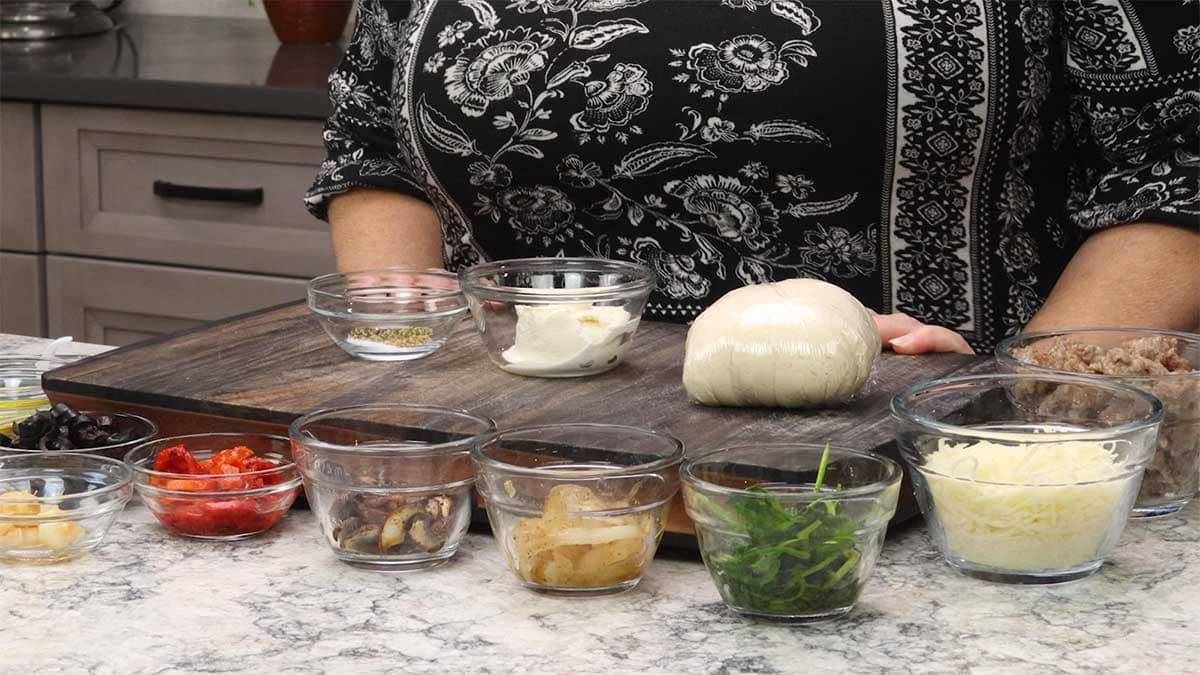
In the picture below, I cooked my fillings separately which is only necessary IF everyone doesn't want the same fillings. Otherwise, just sauté them all together in the same pan.
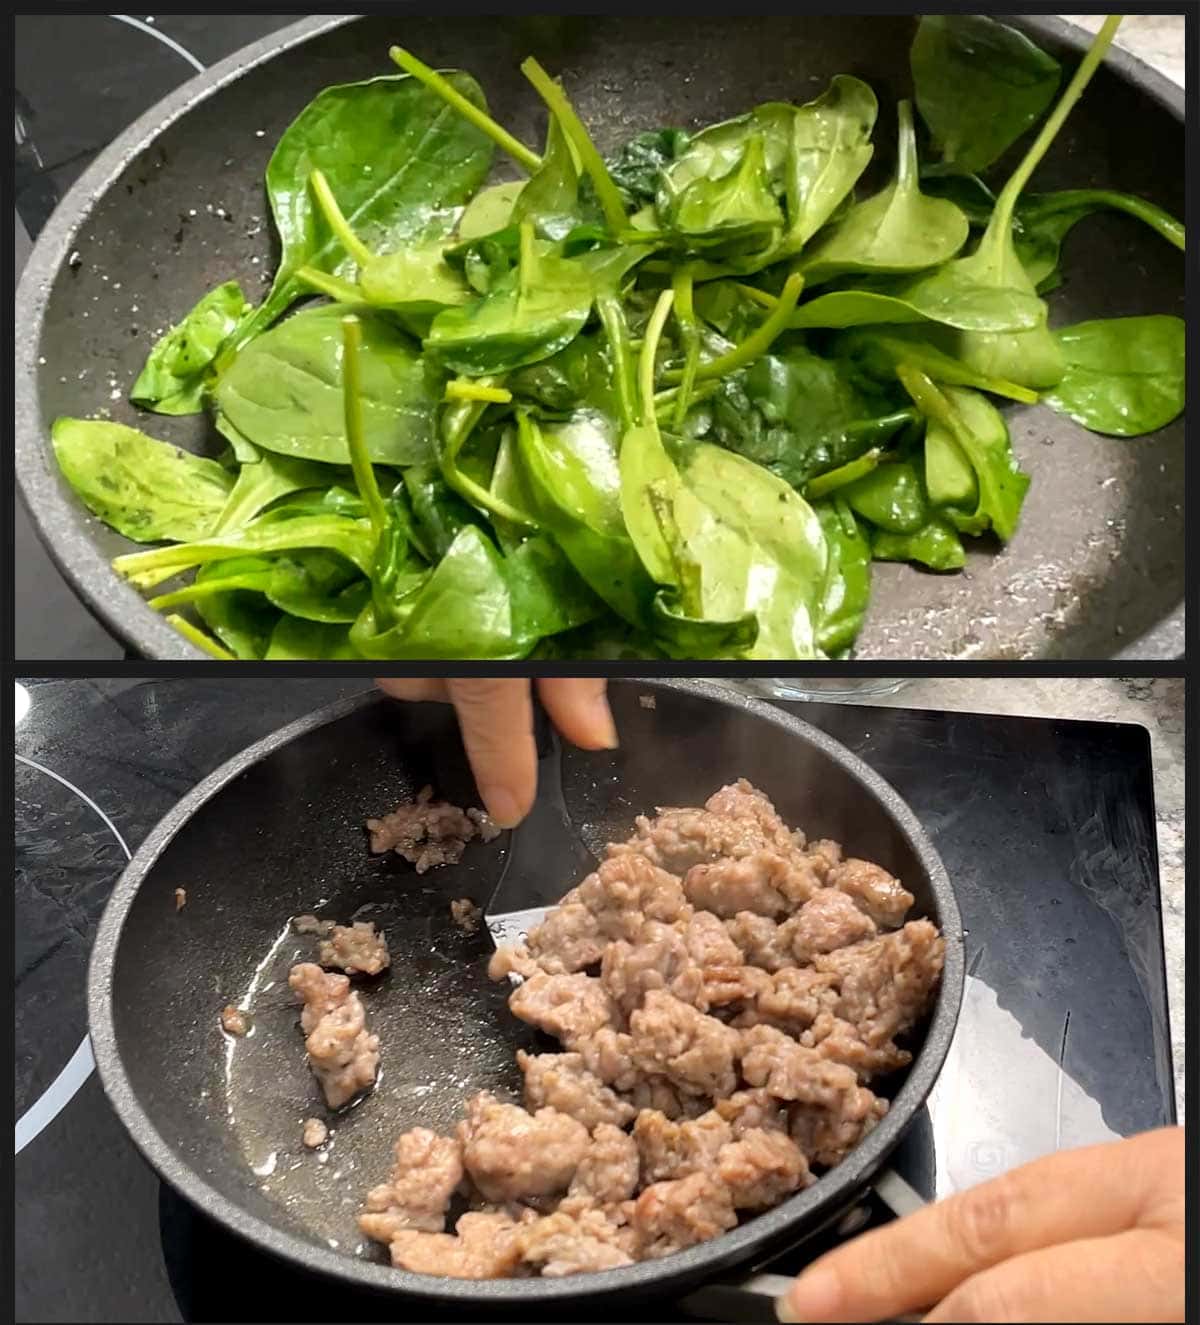
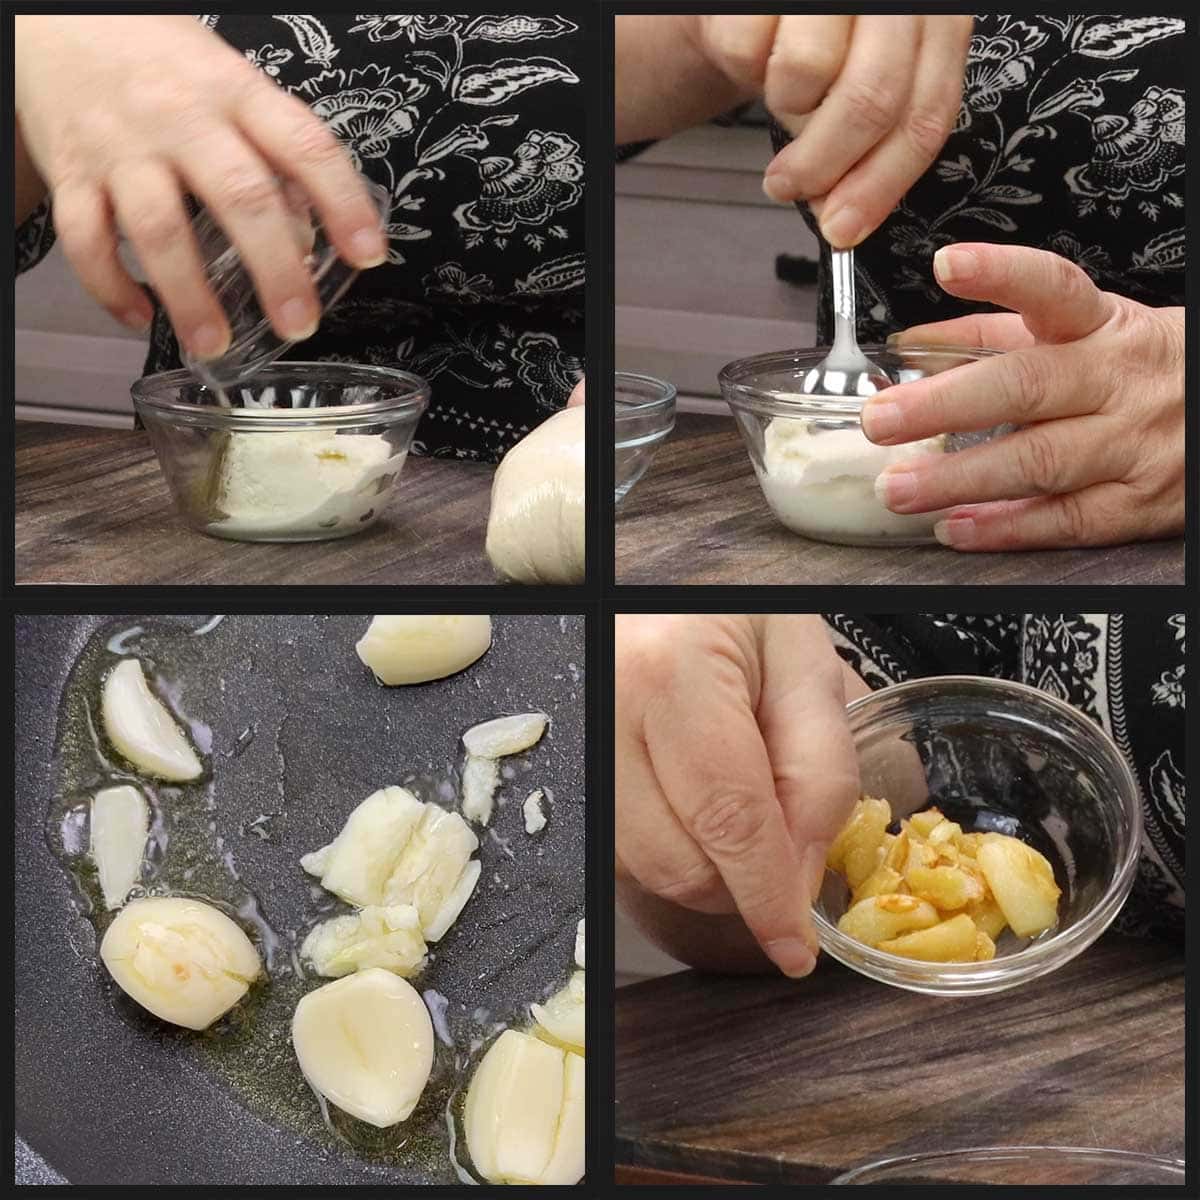
I also like to season up the ricotta cheese. This isn't absolutely necessary, but I take every opportunity to season each layer of ingredients as I can. The rule of thumb when cooking anything that has multiple ingredients is that each ingredient should taste good on its own.
Quick Tip: If you want to add roasted garlic and don't feel like or have time to make air fryer roasted garlic, put the cloves into a pan and sauté on low heat until golden brown and soft.
Forming the Dough for Calzones
Calzones are circles of pizza dough folded over to form a half circle and then sealed. So, the process is the same for rolling out calzone dough as it is for rolling out pizza dough.
You can do this by hand or with a rolling pin. Many professional pizza makers say you must do this by hand because a rolling pin removes the air pockets that make a nice pizza crust. However, with calzones, those air pockets aren't really necessary and I find it easier to use a rolling pin.
You want to roll out the dough right before assembling your calzones. First prepare a large work surface and sprinkle some flour on it. Divide the pizza dough into 5-6 ounces balls for each calzone. You can try making them smaller (4 ounces or less), but I had a hard time filling them and not ripping the dough when I made them less than 5 ounces.
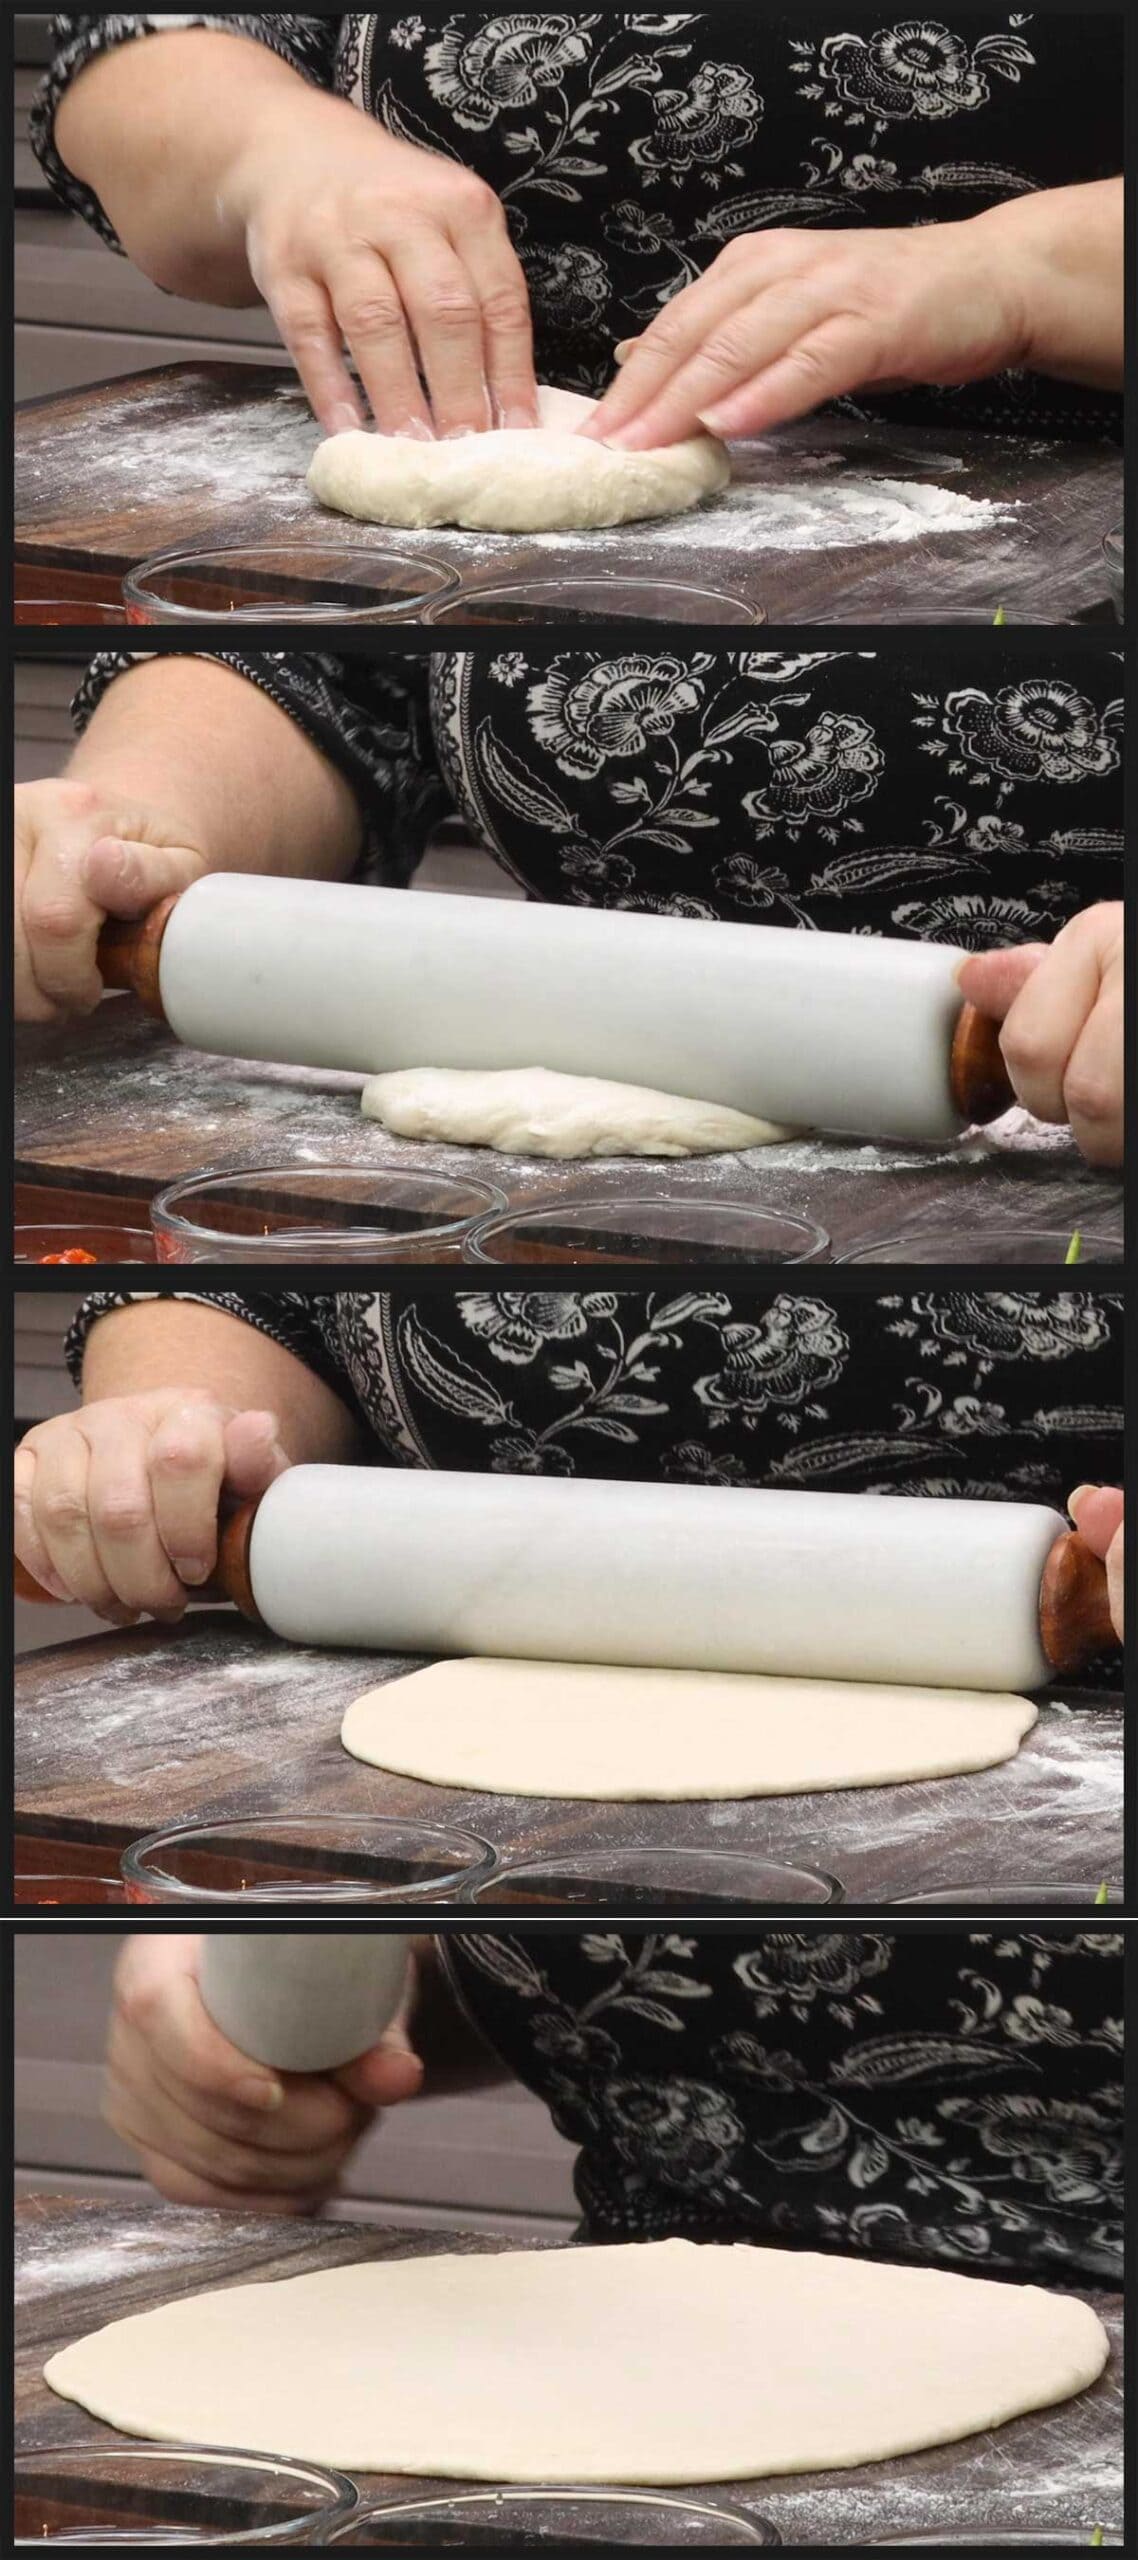
Place the dough ball onto the lightly floured surface and press down into a circular shape with your fingers. Lightly flour the top of the dough so the rolling pin won't stick.
Roll out a circle of dough that is about ⅛ inch thick. You can always trim off any excess dough so your calzone fits into your air fryer, but if the dough is too thick, it won't have the same texture as a thinner dough.
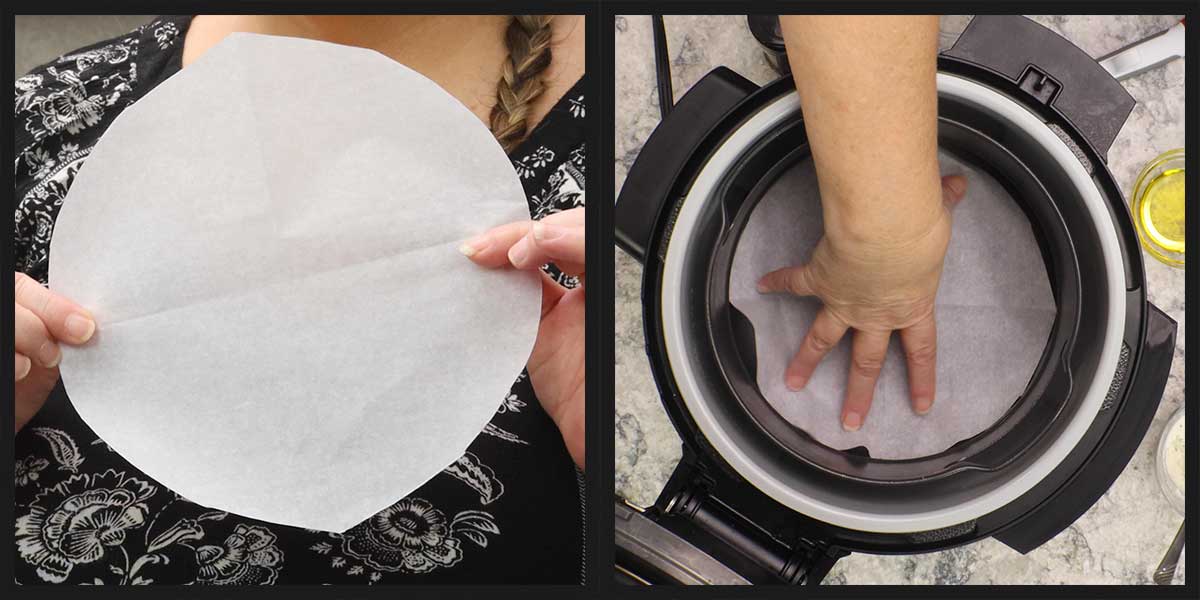
When making these using the Ninja Foodi Pressure Cooker & Air Crisper, I aim for about a 9" circle.
Quick Tip: Cut out a piece of parchment paper that is the size of the bottom of your air fryer basket and use that as a guide for how big your calzone can be and still fit in the air fryer.
Filling the Calzone Dough
Once your dough is rolled out to about ⅛", I would recommend placing it on the piece of parchment so you don't accidently make your calzone too big to fit in your air fryer. Trust me, it's easy to do!
If the dough is bigger than the parchment paper, don't worry, you can cut off the excess once the fillings are added and the dough is folded over. Just be sure to keep at least 1½-2" of dough around the edges for sealing.
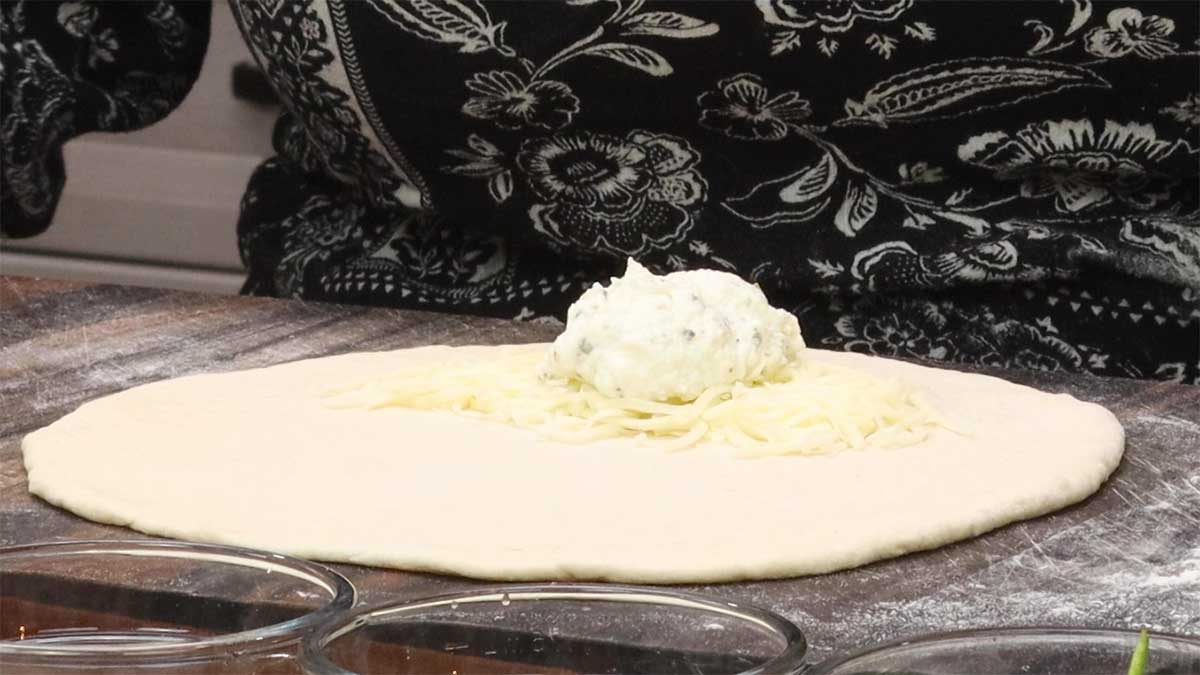
I like to start with the driest ingredient and place that down on the dough. In the calzone, this is the shredded cheese. Place about ¼ cup of cheese down on the dough about 2" from the edge of dough that is closest to you.
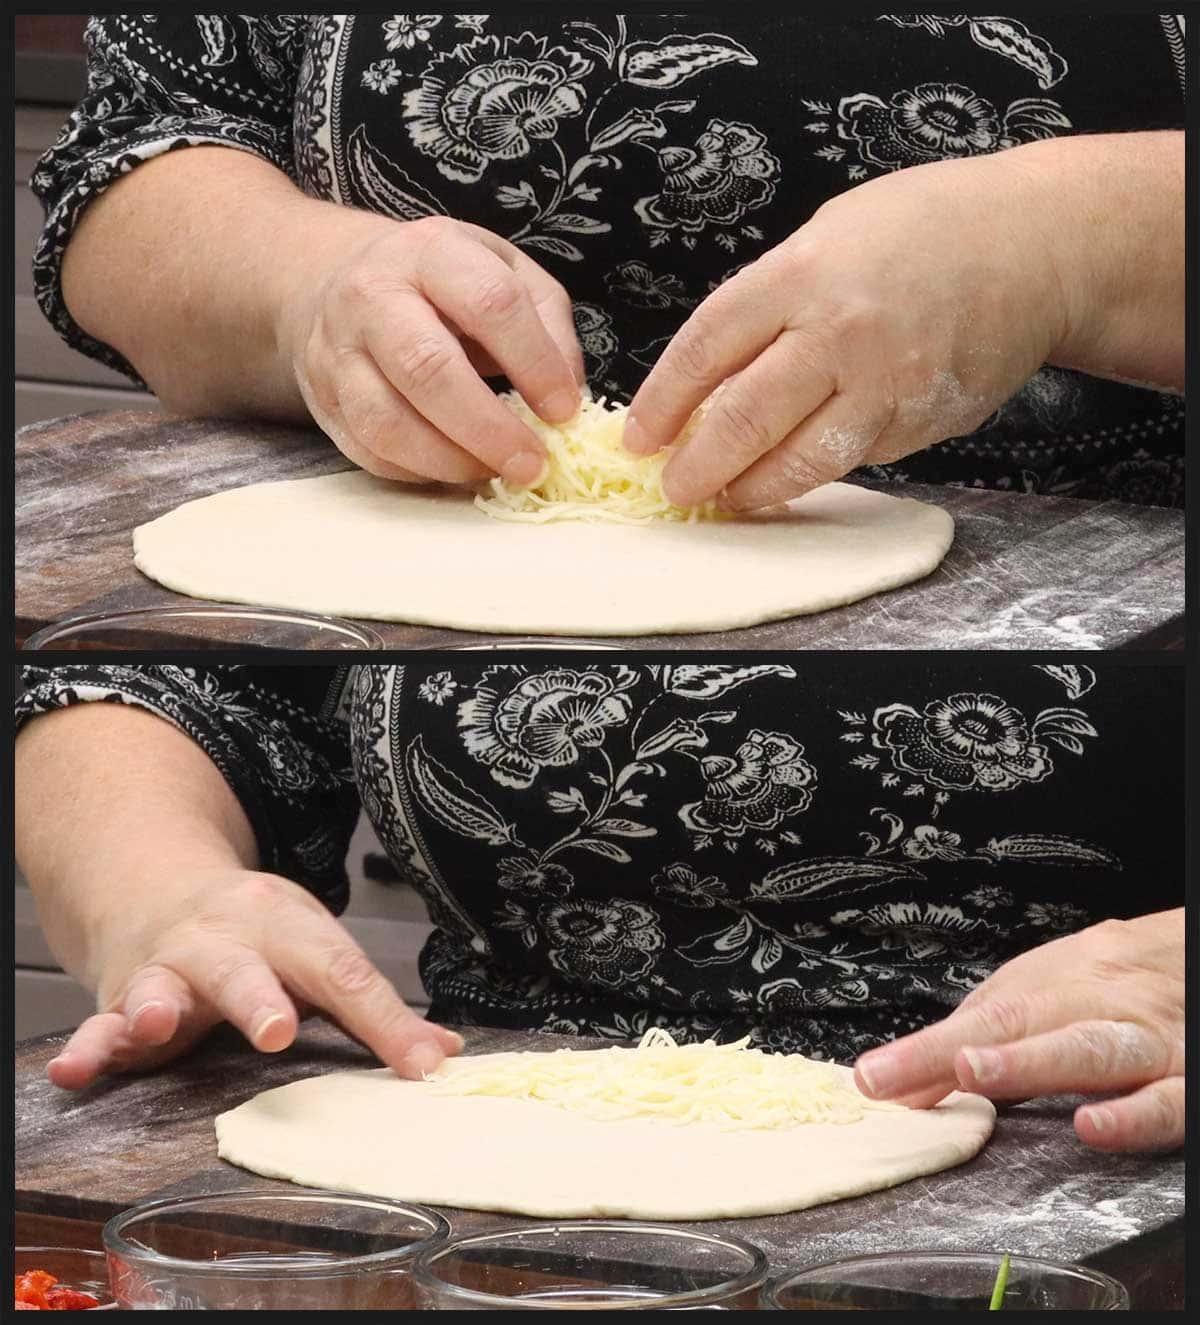
Next put about 2 Tablespoons of the seasoned ricotta cheese in one scoop on top of the cheese. I leave it all in one glob to reduce the chances of moisture leaking onto the dough. It will melt into everything once we air fry it.
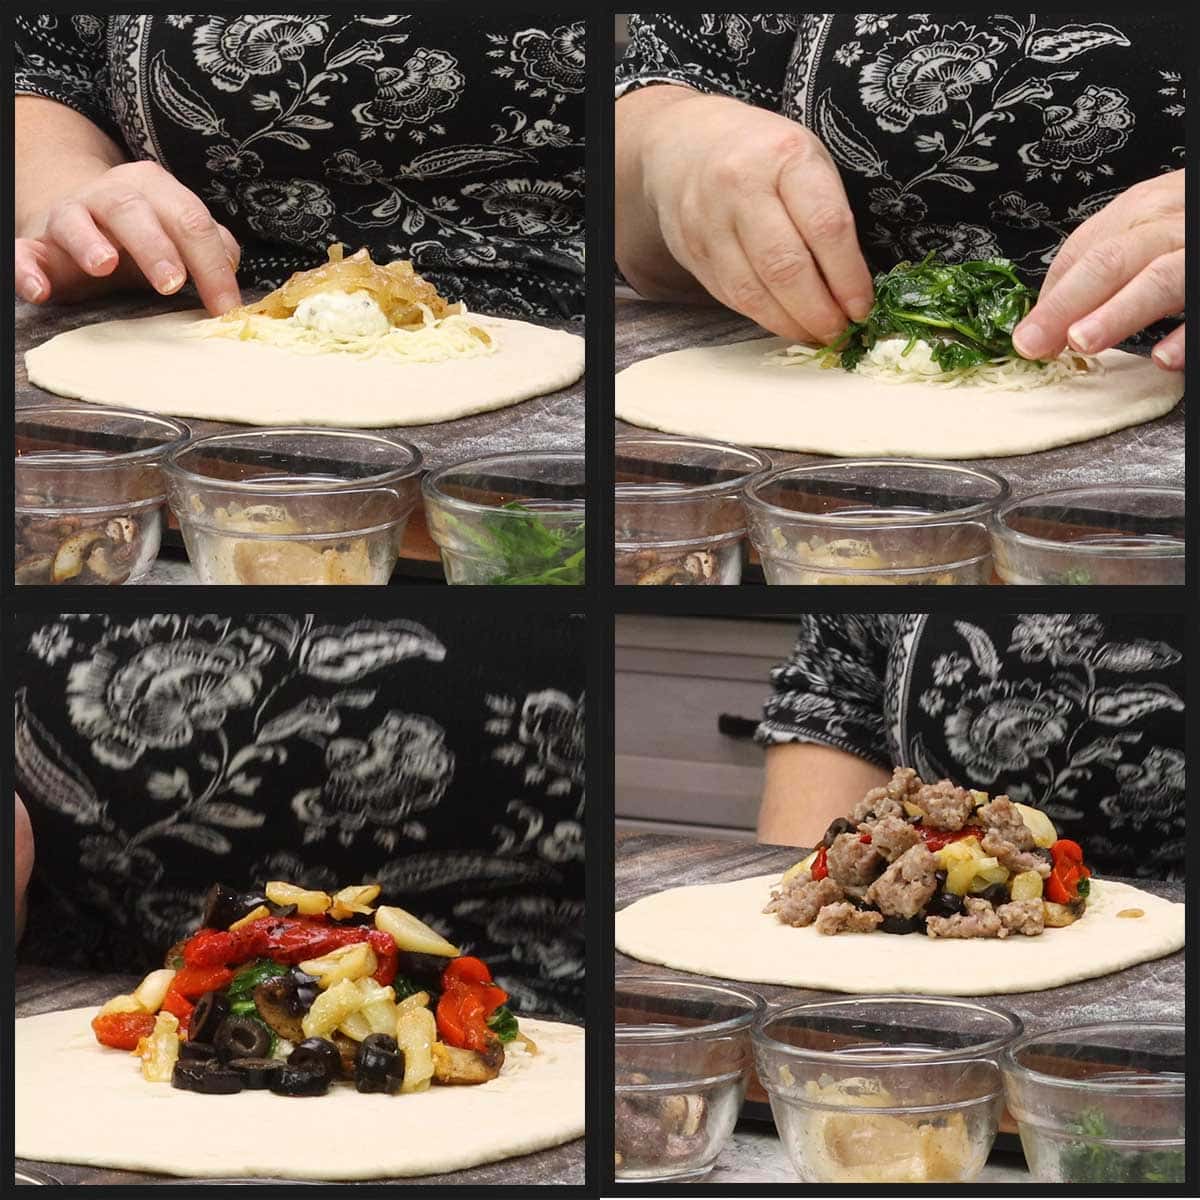
After that just add whatever fillings you want on top. You can use more of some and less of others, just so the total amount (not including the ricotta and cheese) is between 1-1½ cups IF you are using 6 ounces of pizza dough per calzone.
If you use less pizza dough for smaller calzones, decrease the fillings. If you use more pizza dough for larger calzones, increase the fillings.
What I used in 8 ounces of pizza dough for an 8" calzone
- 2 Tablespoons of sauteéd onions
- ¼ cup sauteéd spinach
- 2 Tablespoons of sauteé mushrooms
- 1 Tablespoon of roasted red peppers
- 1 Tablespoon of sliced black olives
- 4 cloves of roasted garlic
- ¼ cup of cooked Italian sausage
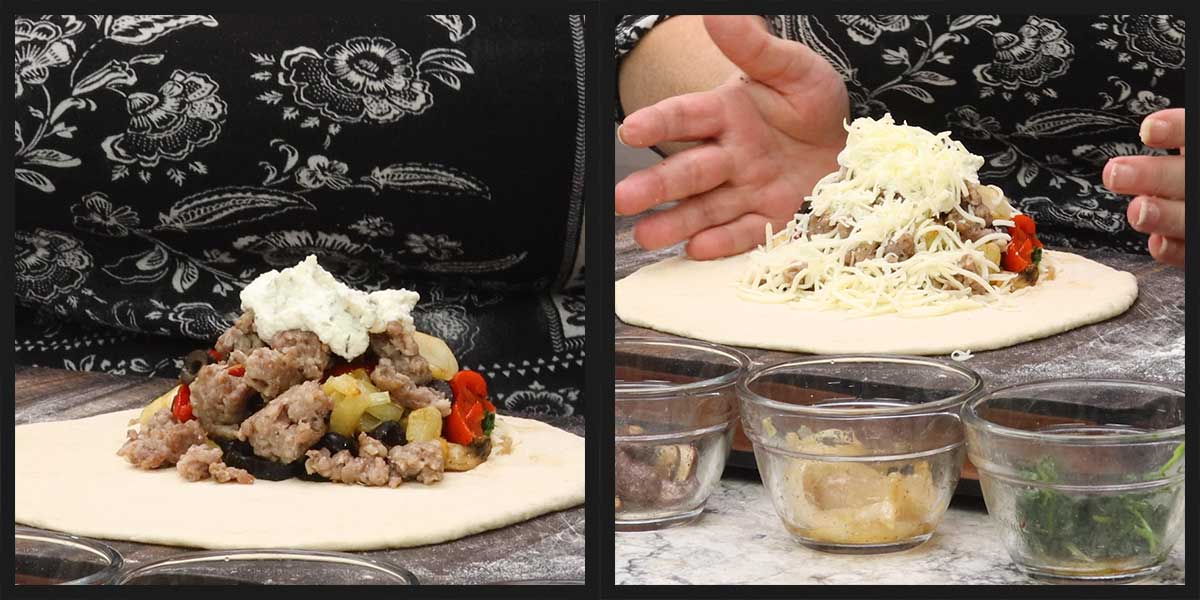
Top your fillings with the remaining ricotta cheese and then about ¼ cup of shredded cheese.
Folding the Calzone
If you haven't already started to preheat your air fryer, do that now. You want to preheat on the hottest setting for a full 10 minutes for the best results.
Folding the calzone is probably one of the most intimidating things about making this recipe and I want you to have full confidence when you go to do this step. In addition to the step-by-step written directions, I have also included a video of the process below.
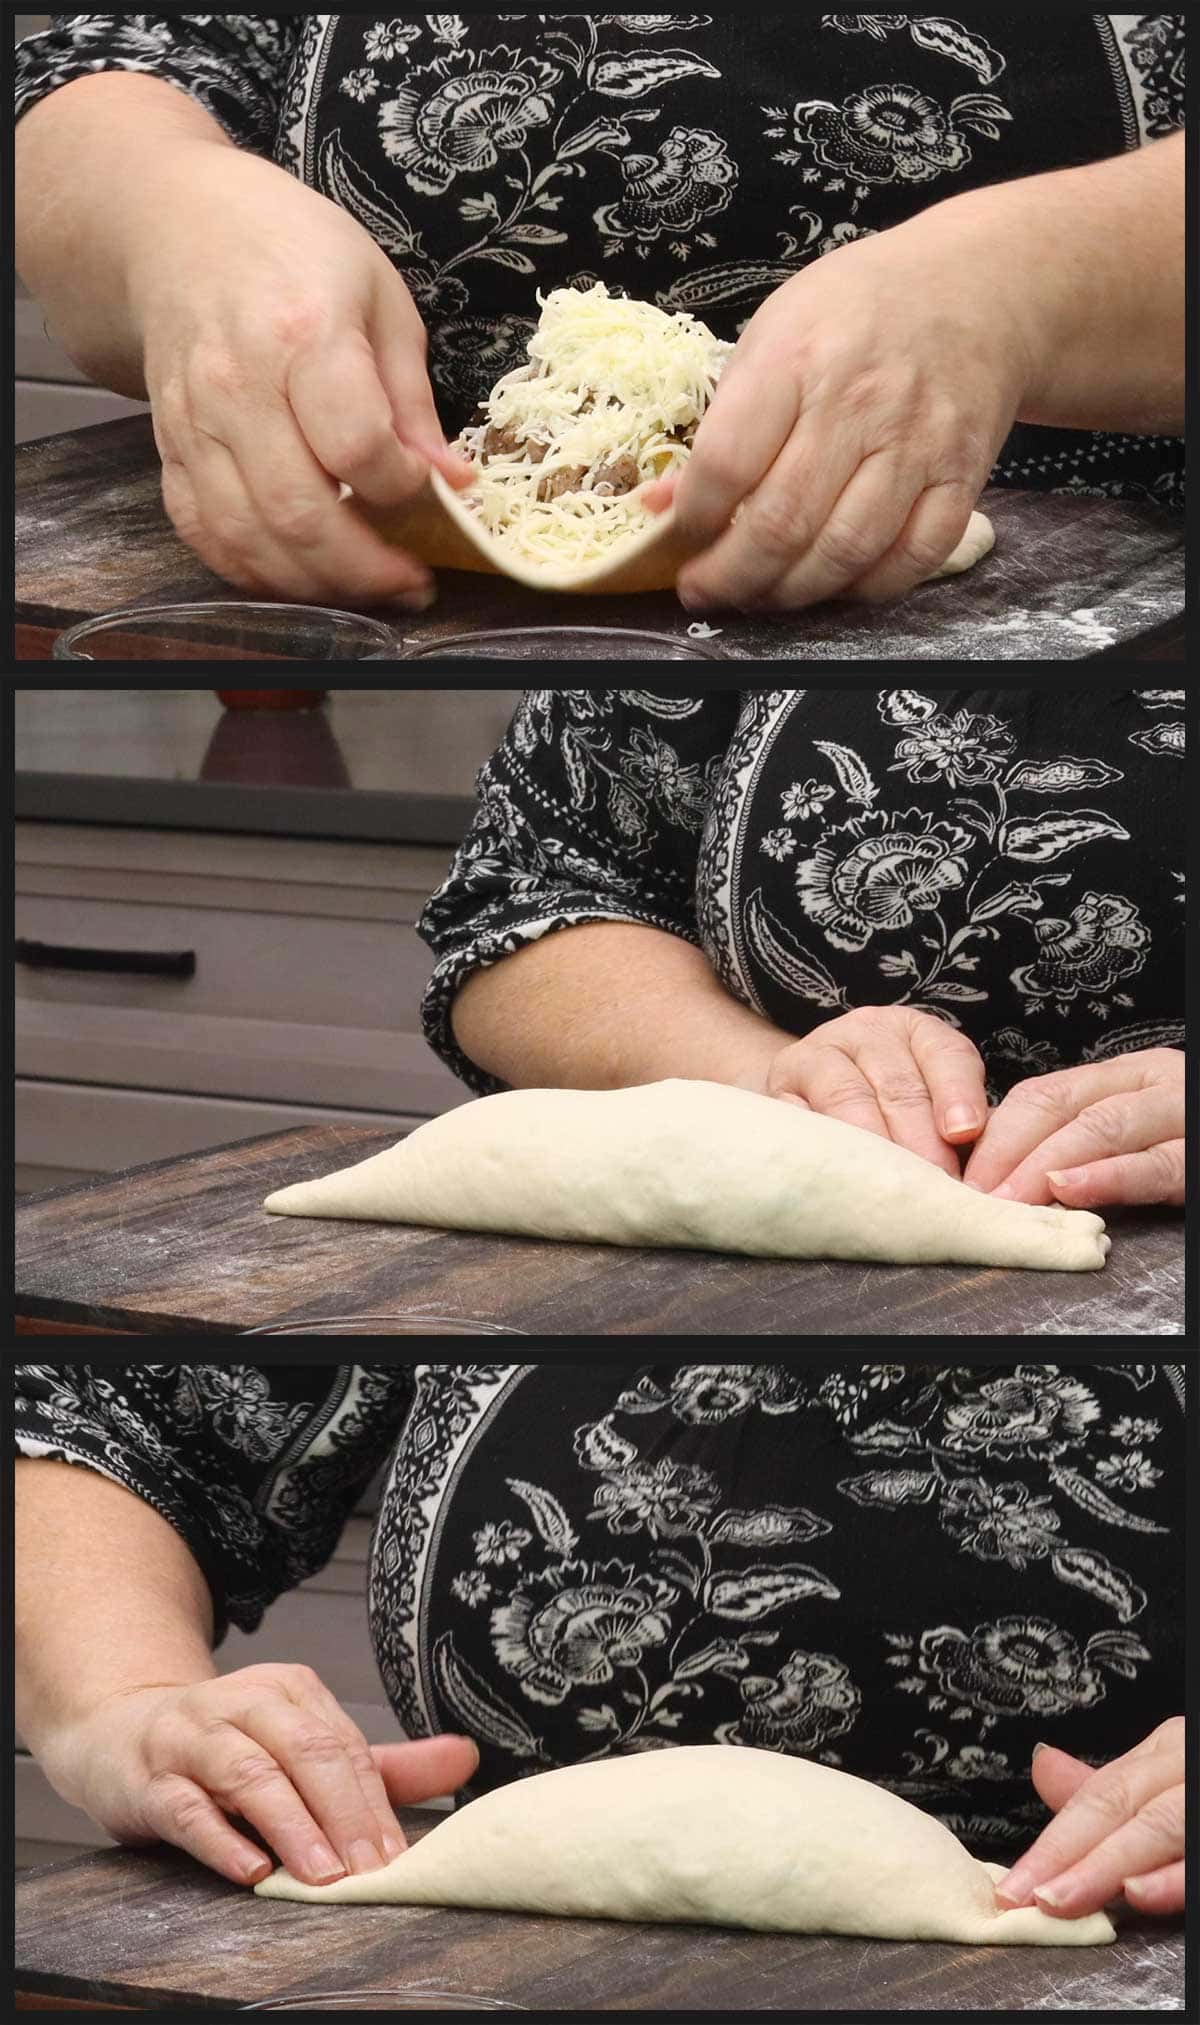
Once your fillings are piled high, take the edge of the dough furthest from you and lift it up and over the filling until the edges match up and then immediately press the edges down. You will have air in your calzone now. Don't worry about it. We will get rid of that in a second. I like to firmly seal the edges before doing anything else because if some of the filling starts to fall and moisten the edges, you will have issues with sealing it.
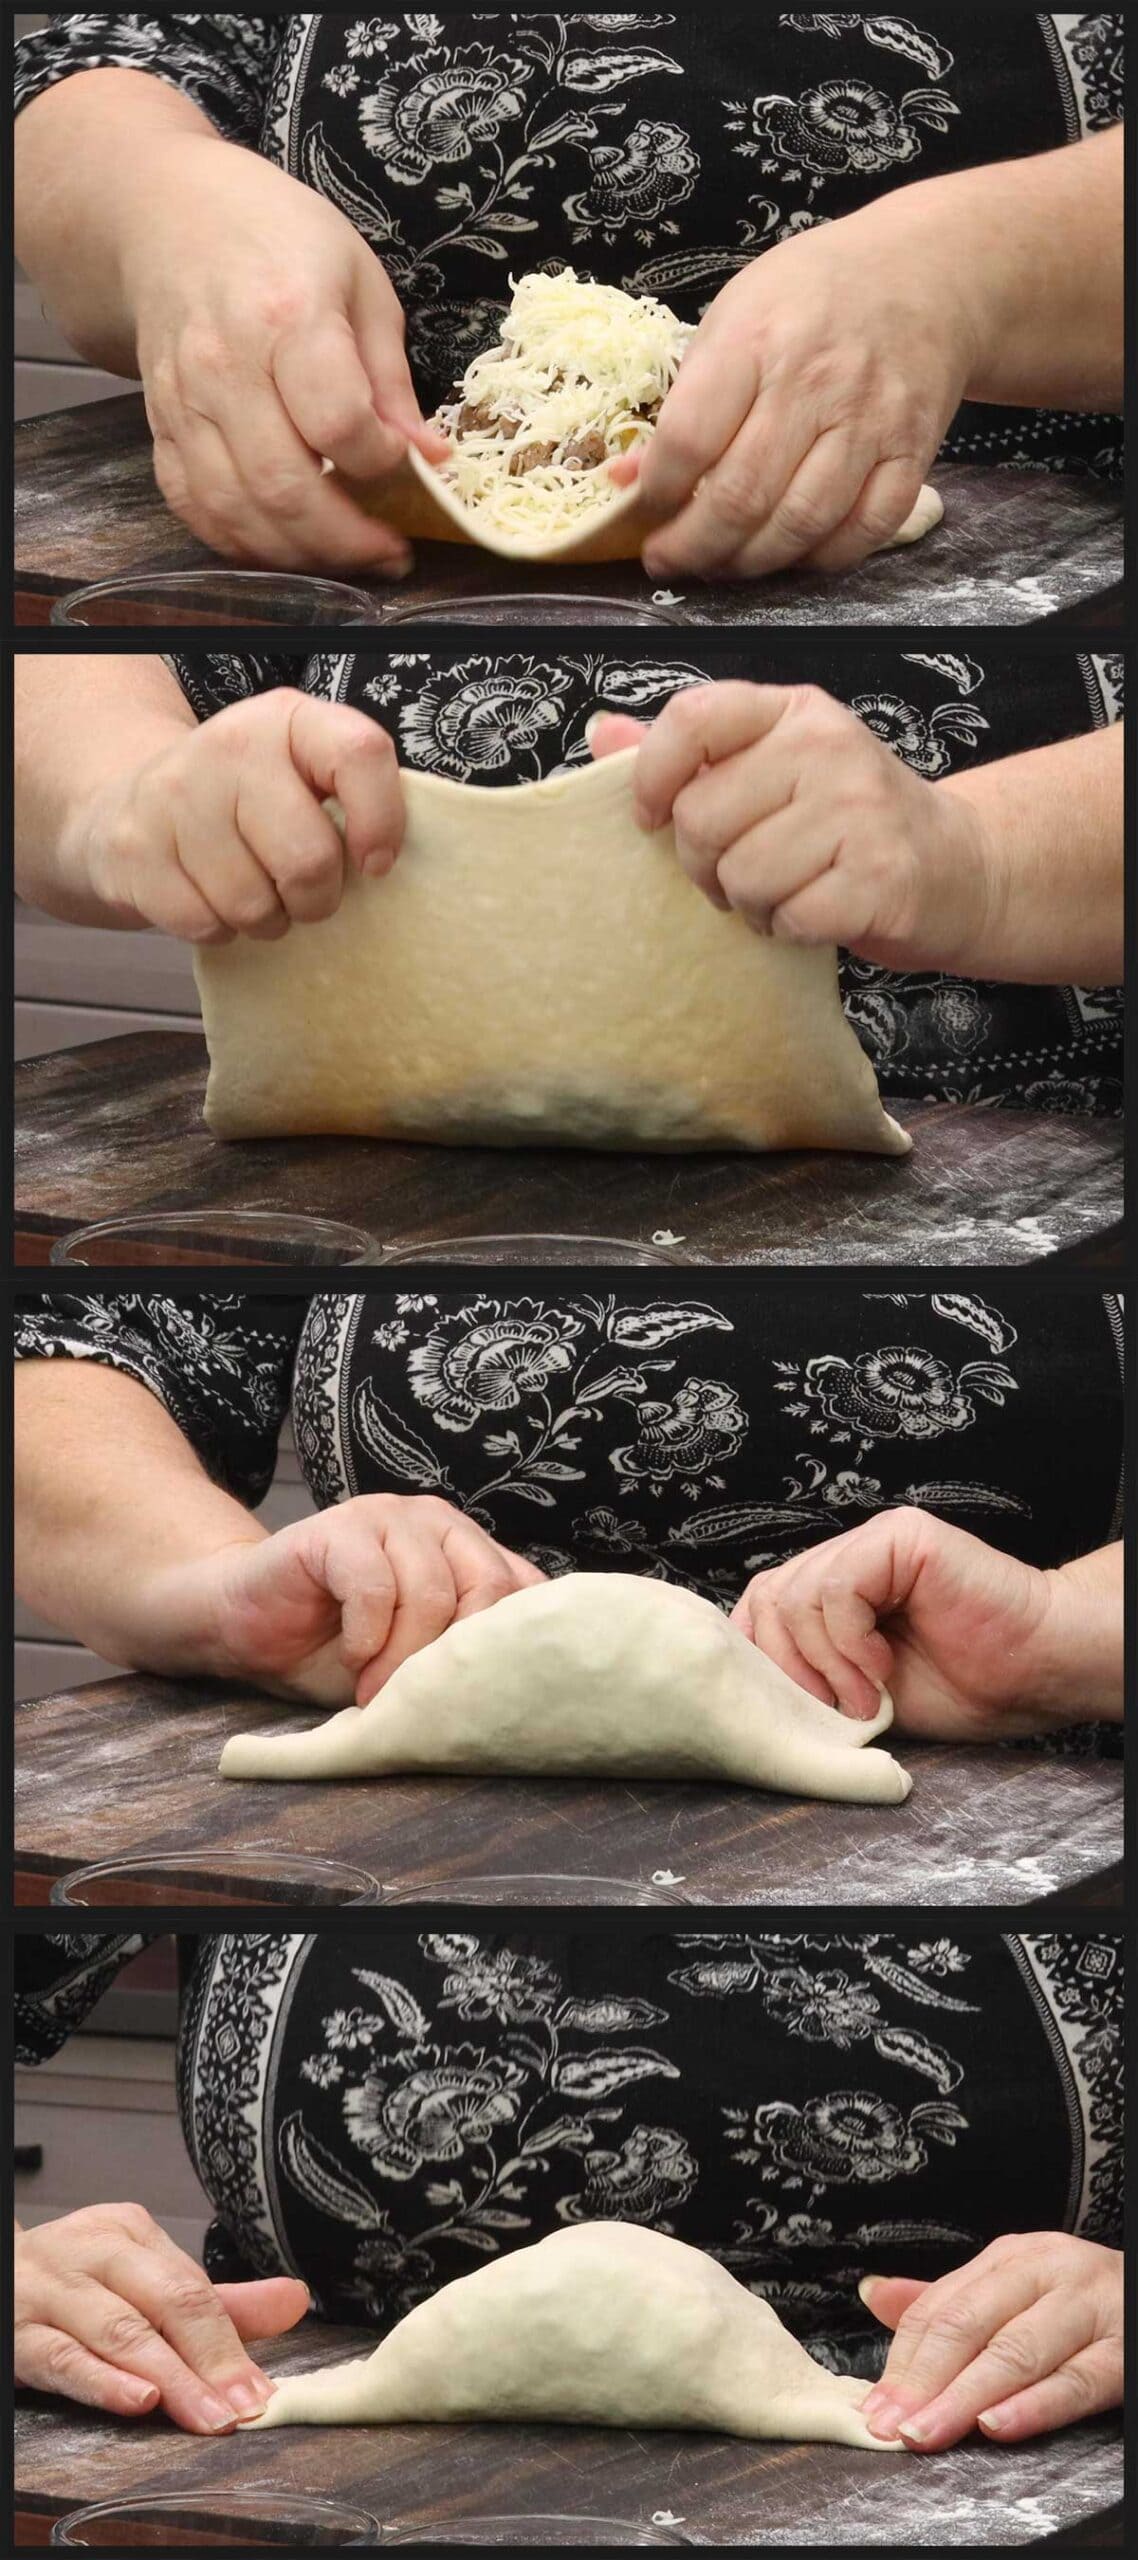
Once the edges are sealed, place your hand on top of the calzone and jiggle the fillings under the dough so they move from being all in the middle to spread out from end to end.
You can run your hand along the top down to the edge, gently pushing any air out and when the filling stops, press to seal the dough again. We will also cut slits in the top which will allow the air to escape so don't worry too much about this step.
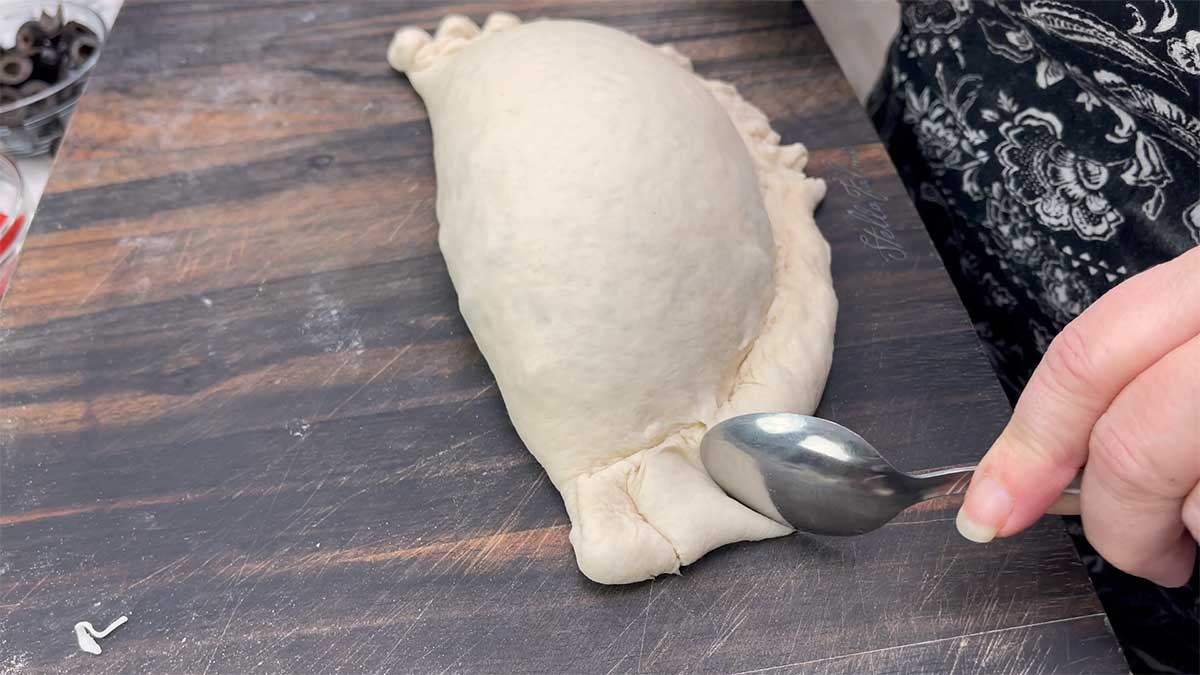
You can either trim the excess dough around the outer edges or fold it over to create a thicker piece of dough like the crust of a pizza. I showed this in the video above as well. I did a little twist on the cut dough, but that isn't necessary.
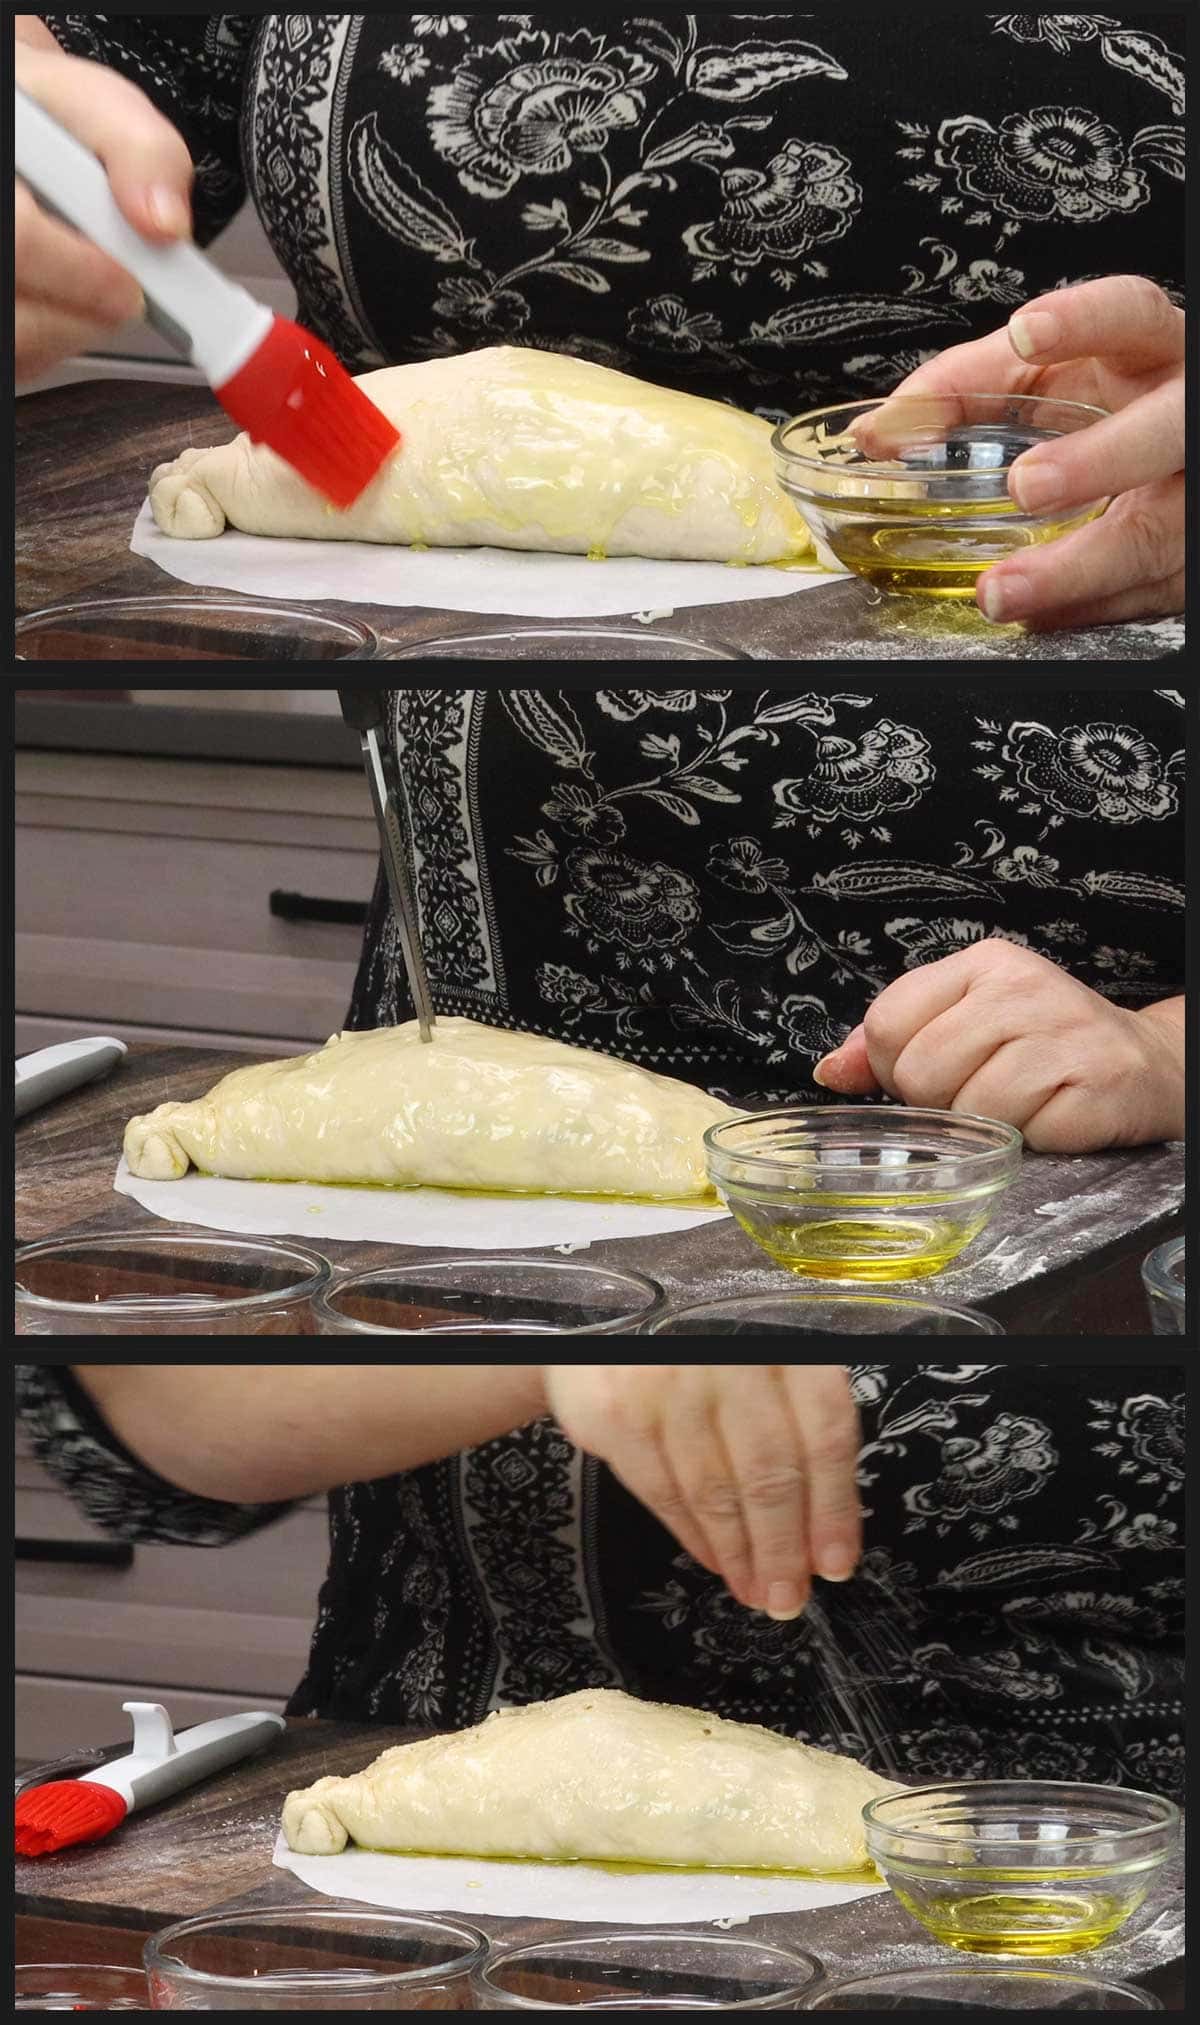
Brush the top of the calzone with olive oil and cut 3-6 small slits in the top. I do this with scissors and it's super easy, but a sharp knife will also work great.
Lightly salt the top. You can also add some italian seasoning to the top, if you like. Some people add parmesan cheese and you can do this, but I would wait until ¾ of the way through the cooking time and then brush with oil again and sprinkle on the cheese. Otherwise, the cheese will really become very brown and could burn.
Air Frying the Calzone
Once the calzone is all assembled and on the parchment paper, you are ready to air fry. This only takes a few minutes, but it is important that the air fryer is preheated with the cooking surface (air fryer basket) inside the appliance. This will allow the dough to start to set up right away and reduce the chances of leaking.
If you are using the Ninja Foodi Pressure Cooker & Air Crisper, preheat on broil/grill with the basket or crisping plate inside the inner pot for a full 10 minutes.
Place the calzone on the parchment paper into the basket of your air fryer. Air Fry (or Air Crisp) on 400℉/200℃ for between 8-12 minutes. The timing really depends on your air fryer, but in the Ninja Foodi it takes around 8-10 minutes.
Check on the Calzone about 5 minutes into air frying and pull the parchment paper so the bottom browns nicely. When the calzone is golden brown, it is done.
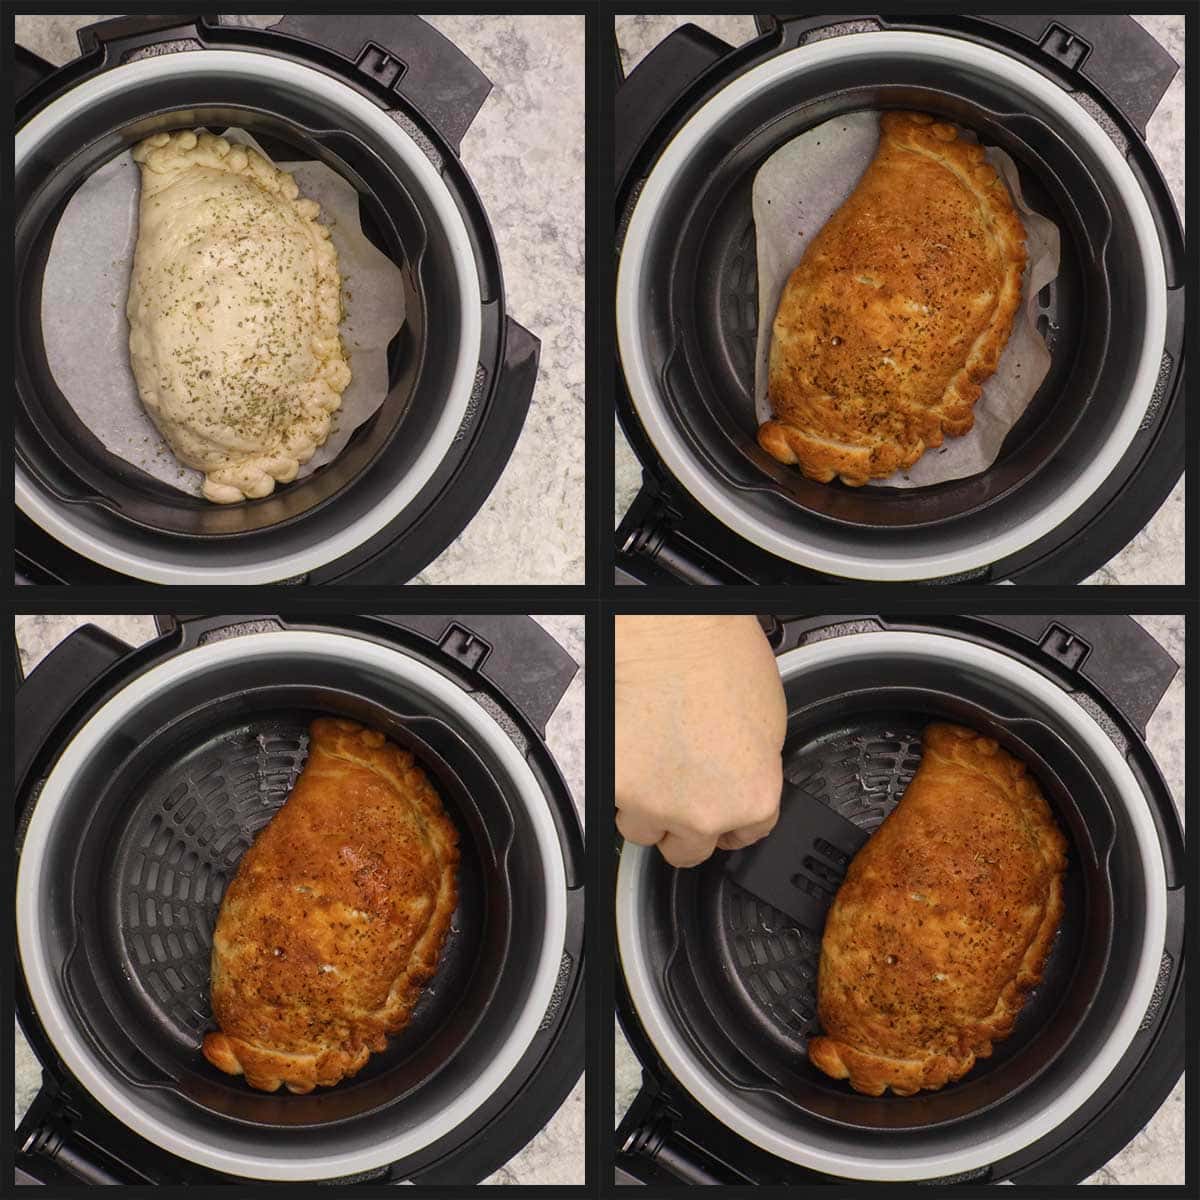
Remove and allow to cool on a cooling rack for about 5 minutes. The cooling rack will provide some circulation for the heat that comes off of the calzone and prevent the bottom from steaming. Here is the bottom after air frying in the Foodi!
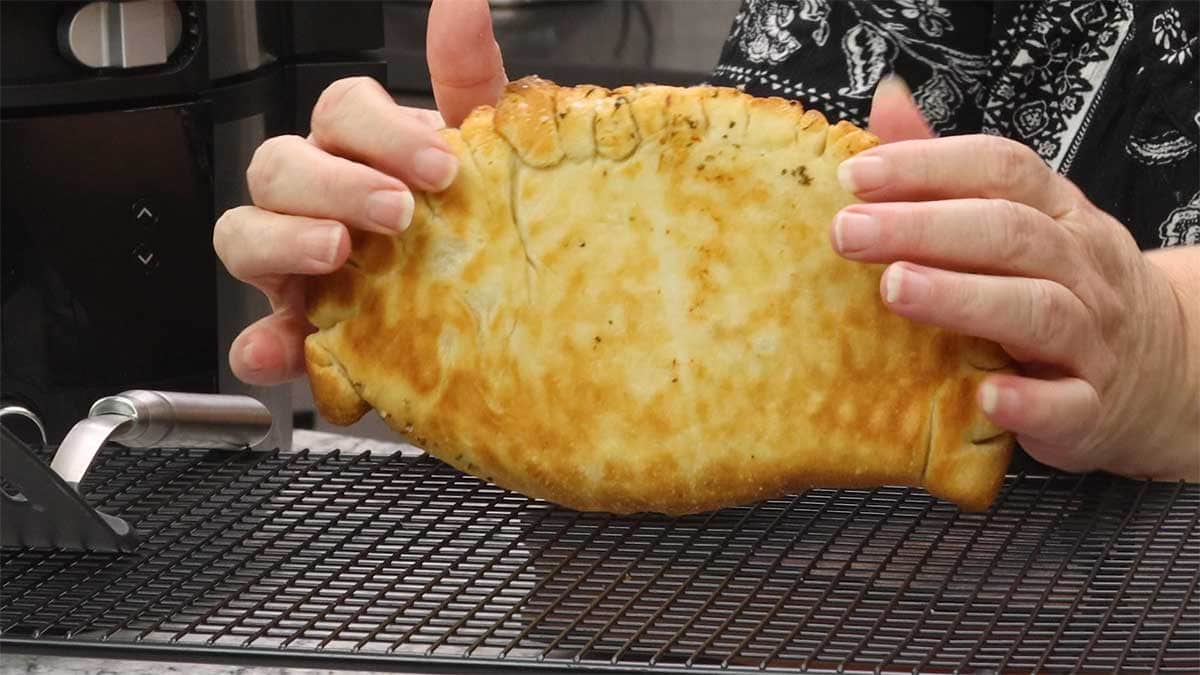
Let the calzone cool for a few minutes and then cut and serve. While you can eat an entire calzone, Jeff and I find them to be super filling and usually split one. Don't forget to serve with some marinara for dipping!
Frequently Asked Questions
Absolutely! You can either freeze them uncooked or cooked. If you freeze them before cooking, I recommend placing them on a parchment-lined tray and then freezing overnight before putting into a freezer container or air tight bag.
If you freeze them after cooking, be sure to let them cool completely before wrapping and freezing.
If the calzones are refrigerated, you will want to set your air fryer on 350℉/175℃ and heat the calzones for about 15 minutes. If the crust is getting too brown, lower your heat until the fillings are heated through.
If the Calzones are frozen after cooking, I would reheat them on 325℉/160℃ for about 25-30 minutes to ensure that the fillings are thawed and warm.
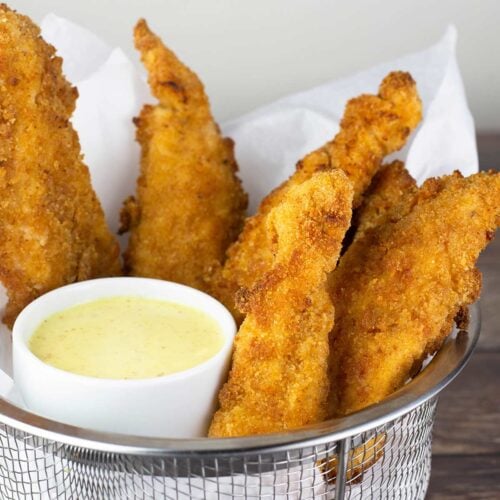
Great Air Fryer Recipes
If you want to use your air fryer more and are looking for great air fryer recipes, look no further! These are my top-rated recipes that everyone is loving.

Insert Recipe Card
Air Fryer Calzone
Equipment
- Air Fryer
Ingredients
- 6 ounces pizza dough
- ¼ cup ricotta cheese
- ½ cup shredded Italian cheeses
- 1¼ cups assorted fillings see notes for what I used
- olive oil for brushing the top of the calzone
- ¼ teaspoon fine grind sea salt or kosher salt for top of calzone
- marinara sauce for dipping
Would you like to save this recipe?
Instructions
Prepare for the recipe
- Make the pizza dough if you are making yourself and cook any fillings that need to cooked. Allow the fillings to cool about 30 minutes prior to assembling the calzone. If the pizza dough is refrigerated, bring it out 30 minutes prior to rolling it.
- Cut a piece of parchment the size of your air fryer basket.
- Preheat the air fryer on its hottest setting with the air fryer basket or crisping plate inside the appliance for a full 10 minutes before air frying the calzone.
Assembling the Calzone
- Prepare a work surface by lightly flouring it. Roll the dough out into about an 8-9" circle. It should be between ⅛"-¼" thick.
- Place the dough onto the parchment paper and use this as a guide to make sure your calzone isn't too big. Don't worry about trimming any edges now, wait until after you have filled and sealed them to trim off any excess.
- Place ¼ cup of the shredded cheese onto the dough 2" from the edge closest to you. Top with 2 Tablespoons of Ricotta Cheese.
- Place the remaining fillings on top. It is best to stick with 1-1½ cups total of all of the fillings.
- Put the remaining 2 Tablespoons of ricotta cheese on top of the fillings and sprinkle on the remaining cheese on top.
Wrapping the Calzone
- Pull the edge of the dough furthest from you up and over the fillings so the edges meet and then press to seal. Don't worry about any air inside of the calzone, we will get rid of that next.
- Once the edges are well sealed, place your hand on top of the calzone and jiggle the fillings to distribute them evenly inside the calzone. Run your hand along the top and down the sides of the calzone, and when you feel that the filling stops, press the dough to make a second seal. If your calzone is bigger than the parchment paper, trim off the excess dough. Be careful that you don't go past that seal you just made.
- Fold the edges onto themselves if you want a thicker crust or just trim off the excess if you haven't already. You can use the side of a spoon to make little cuts in the edges for decoration if you like.
- Brush the top of the calzone with olive oil and cut a few slits in the top. Sprinkle with salt.
Air Frying Calzone
- Place the parchment paper with the calzone into the air fryer and air fry on 400℉/200℃ for 8-12 minutes. The timing will depend on your air fryer. Check on the calzone after about 5-6 minutes and remove the parchment paper from underneath of it.
- When the calzone is golden brown it is done. Remove and let it cool for a few minutes on a cooling rack.
- Cut and serve. Don't forget the marinara sauce for dipping!
Notes
- 2 Tablespoons of sauteéd onions
- ¼ cup sauteéd spinach
- 2 Tablespoons of sauteé mushrooms
- 1 Tablespoon of roasted red peppers
- 1 Tablespoon of sliced black olives
- 4 cloves of roasted garlic
- ¼ cup of cooked Italian sausage
Nutrition
About the Recipe Author, Louise Long
Louise is a full-time recipe creator and food blogger @ The Salted Pepper. She has over 30 years of experience with cooking and recipe development. She owned a restaurant for several years and was a full-time RN until retiring to blog full-time.

She published her first cookbook in the Fall of 2018 and is very interested in writing several more.
Louise is also the creator of an online Ninja Foodi Pressure Cooking Course with over 100 instructional step-by-step videos. People absolutely rave about the course and all the value they have received from it.
Louise has several very active Facebook groups that help people with the basics of cooking and learning more about the appliances they love.
Ninja Foodi Pressure Cooker & Air Crisper 101
Ninja Woodfire Outdoor Grill & Smoker
Louise is also a YouTube creator and you can find most of her recipes in video format on The Salted Pepper YouTube channel.
She is very responsive to messages and eager to help in any way she can. Get more Information about Louise & contact information
I WOULD LOVE TO SEE WHAT YOU ARE COOKING UP IN YOUR KITCHEN! TAG ME @THESALTEDPEPPER ON YOUR FAVORITE SOCIAL MEDIA PLATFORM WHEN YOU MAKE A DISH!
BE SURE TO FOLLOW THE SALTED PEPPER RIGHT HERE ⇓⇓⇓⇓⇓
Grady says
Looka good asl. Im fried asf rn.
Lynda Hughes says
Hi Louise
I certainly learned a few good tricks! Thank you!
Can you freeze these before cooking and then cook from frozen?
Louise says
Yes, absolutely! It would be very similar to how I freeze and cook the meat pies from frozen. Here is that recipe post: https://thesaltedpepper.com/savory-hand-pies/
Machel says
I made these for my family last night and they were perfect! We used premade dough from our local grocery store and had no problem with it at all. So excited to try more of your recipes!
Louise says
That's awesome! Thank you and I hope you love the recipes!
Darlene says
If using pepperoni or some other cured meat, do you need to cook it first to remove some of the grease?
Thank you. These look great and I'm anxious to try them soon.
Stephanie says
As usual, turned out awesome, approved by both my husband and mother, thanks, Louise!