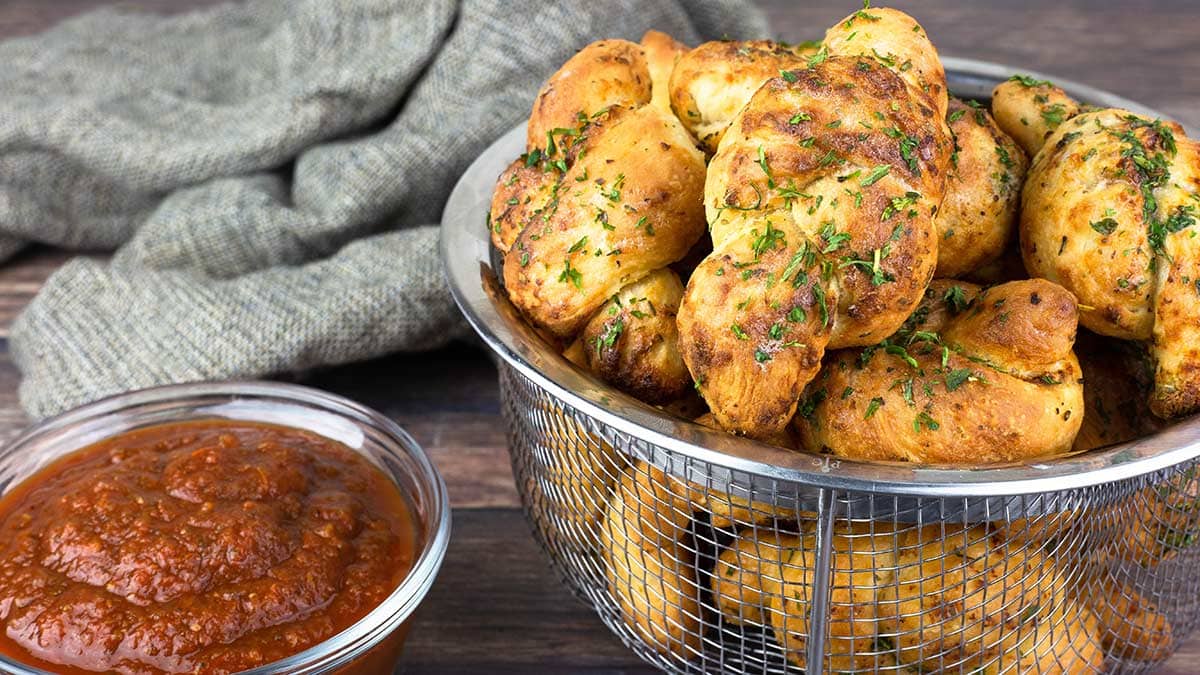
Turn a basic pizza dough into golden brown homemade garlic knots in just minutes using your air fryer! They are a great make-ahead appetizer to serve with homemade marinara sauce or as a side dish for spaghetti or lasagna. Air fryer garlic knots are even better than dinner rolls and super easy to make!
Would you like to save this recipe?
You can use a store-bought pizza dough or make your own like I do. Either way these air fryer garlic knots are so much better than your favorite pizzeria! Make your own Chicago Deep Dish Pizza and the Garlic Knots for pizza night and you can't go wrong! The delicious garlic butter along with the roasted garlic cloves in the dough creates a buttery, crisp, garlicky knot that everyone will love!
Air Fryer Appetizer Recipes
I absolutely love using my air fryer for various types of finger foods and here are just a few air fryer recipes that you can serve at your next party with confidence!
Frequently Asked Questions
They are best served within an hour of air frying, but can be refrigerated in an airtight container or baggy and popped back in the air fryer for just a few minutes to warm through. Try brushing with some warm butter after reheating and they will taste like you just made them!
You can also store them in an airtight container on the counter for 1-2 days, but if they are exposed to air, they will start to harden.
Garlic knots are traditionally served with a marinara sauce, but that is not the only type of sauce that is absolutely delicious with them. A simple garlic butter sauce is perfect or if you really want to impress, make some of this garlic parmesan wing sauce for dipping, you will not regret it!
Another few simple dipping sauce ideas are ranch dressing or a parsley butter. Honestly, they are so good and so buttery right out of the air fryer, you can skip the dipping sauce!
Absolutely! This recipe is perfect for making ahead of time and freezing. There are two ways you can do this and I go over both in detail in the section below.
How to Make & Freeze Air Fryer Garlic Knots
Follow the recipe as directed to make the dough, let it double in size and then separate into 16 equal pieces of dough. Form each piece into a knot and dip in the garlic butter sauce.
Freezing Garlic Knots
If you want to freeze the garlic knots to cook later, you will want to prepare a baking sheet that will fit in your freezer by lining it with parchment paper or wax paper.
Once the garlic knots are dipped in the garlic butter sauce, place them on the prepared baking sheet. You can place them close together, but you don't want them touching. I leave about 1" between each knot.
Freeze for about 4 hours and then transfer the frozen dough knots to an airtight container or larger freezer bag. You can use a vacuum sealed bag as well. Freeze until about an hour or so before you want to air fry them.
Cooking Garlic Knots from Frozen
Remove as many garlic knots as you want to make and place them on a lightly floured surface or on a sheet pan lined with parchment. Allow them to thaw at room temperature, which takes about an hour or so.
Once they have thawed completely, you will notice them start to puff up some. This is the yeast activating again and letting you know it's time to preheat the air fryer.
The frozen version of the Air Fryer Garlic Knots are exactly the same as if you made them fresh, so follow the same instructions for air frying. You don't have to dip them in garlic butter again, but you certainly can!
*If you skipped dipping them in garlic butter before you froze them, then you will want to cover them with seran wrap while thawing so they don't develop a crust on the outside.
Reheating Frozen Garlic Knots
You can also freeze garlic knots that have already been cooked and reheat them at a later time. I recommend taking what you need out of the freezer and then letting them thaw at room temperature, but you can also reheat straight from frozen, if you prefer.
Reheating COOKED Frozen Garlic Knots: If the garlic knots are cooked and still frozen, you will want to air fry on a lower temperature to reheat so the outside doesn't burn before the inside fully thaws and warms through. I would use the lowest heat setting on your air fryer and check on them frequently. They are done when the inside is warm throughout.
Reheating COOKED Thawed Garlic Knots: This is my prefered method because you can quickly air fry them and restore the crunch of the outside with the soft tender bread on the inside.
Remove the frozen cooked garlic knots from the freezer and allow to thaw for about 1 hour at room temperature before reheating. Throw the Garlic knots into the air fryer basket and you don't have to worry about them being in a single layer this time. Pile them up as high as you like! Set the air fryer on 400F and air fry them for about 3-5 minutes. Toss them around if needed. Don't forget to brush with butter and top with parsley!
You can also reheat them in your toaster oven or conventional oven.
Ingredients & Substitutions
Pizza Dough
I am all about making homemade pizza dough for these garlic knots and I think you will be blown away by how easy it is if you make it yourself. You can also do so much with a basic pizza dough, like make garlic breadsticks instead of knots, stuff the pizza dough to make stromboli or calzones and, of course, it makes great homemade pizzas!
To make the homemade pizza dough, you only need a few ingredients, all purpose flour, yeast, sugar, water, and salt. I really hope you give it a try. Once you make your own dough, you will be amazed by how gratifying it is.
However, you can absolutely use premade pizza dough which can usually be found in the refrigerator section of your local grocery store. You will want 1 pound of dough for this recipe and let it come to room temperature and double in size and then skip to the step where you add in the roasted garlic.
You can also use packaged crescent rolls, the ones in tube as a shortcut. Simply tie each triangle in a knot and dip in the garlic butter and air fry. I have not tested the recipe using the packaged rolls before, but I would start off air frying at the same temperature and just keep an eye on them. When they are golden brown, they are done. Don't forget to brush with butter!
Seasonings
Garlic
Let me start off with the garlic because you simply can't have a garlic knot recipe without garlic! I use two different types of garlic in this recipe and I think both are important, but if you are going to skip one, skip the roasted garlic. I've made the recipe with and without the roasted garlic and while it's absolutely perfect with the roasted garlic, they are still delicious without it.
Hopefully you won't skip the roasted garlic and here is my air fryer recipe so you can roast the garlic right in your air fryer: Air Fryer Roasted Garlic Recipe.
I also use garlic powder mixed in the butter mixture. If you have garlic salt instead of garlic butter, skip the salt in the garlic butter sauce and use about 1½ teaspoons.
Italian Seasoning
I love the flavor of Italian seasoning on these garlic knots, but this is completely optional. You can skip it all together or switch it up for a little dried basil or any combination of spices you like.
Dried Parsley
I add the dried parsley at the end because it adds such a nice pop of green color to the golden brown garlic knots. If you have some, sprinkle it on, but don't buy it just for this recipe because it will not affect the final outcome or taste.
Salt
Using salt in the dough and in the garlic butter will really boost all the other flavors and I recommend using it as directed in the recipe. I use a fine grind sea salt usually, but kosher salt will work just fine.
If you are using table salt, which is finer, decrease the amount by at least 25%.
Other Options
There are other options when it comes to adding some different flavors to your garlic knots, here are just a few suggestions.
Adding a little shredded parmesan cheese on top right after they come out of the air fryer is absolutely delicious. You can also add shredded cheese to the dough, but I don't recommend using more than about ¼ cup.
Spice them up by sprinkling some red pepper flakes on top after baking or mixing a teaspoon or two into the dough.
Make dessert knots by dipping them in sugar butter sauce instead of the garlic butter and tossing them in sugar after baking and brushing with melted butter. Try dipping them in chocolate sauce! Or, make a cinnamon sugar flavor with an icing drizzle!
Butter
I used salted butter for this recipe, but unsalted will work just fine. You can also skip the butter if you are dairy free and use your favorite oil. Olive oil or avocado oil would be my first picks.
How to Make Homemade Garlic Knots
How to make Homemade Pizza Dough
Making dough is easier than you may think and you don't need any special equipment to do it. I use my kitchenaid mixer to make and knead the dough, but don't worry if you don't have one. Just use a bowl and a flour surface to knead the dough for a few minutes.
The most important thing I can share with you about making dough is go by looks and feel and not just the flour/water measurements in a recipe. Unless you weigh all of your ingredients, the amounts of flour/water you need will fluctuate slightly depending on accuracy of measurements and also environmental factors such as humidity levels where you store your flour.
Differences in Yeast
Knowing what type of yeast you have is important because they require slightly different techniques in making the dough. There is fresh yeast which is used mostly by professional bakers and I won't be covering that type here. Most of the time you will have dry yeast that is either instant yeast or active dry yeast.
This recipe uses instant yeast which does not need to be activated before adding to the flour. You simply measure it out and add it directly to the dry ingredients. Instant yeast can also be called Rapid Rise yeast or quick rise.
Another type of dry yeast that you may have is called Active Dry Yeast. This type of yeast requires an extra step of activating it by adding it to warm water. If you have active dry yeast, you can still use it in this recipe, you will just want to proof it before adding it to the dry ingredients. This only takes about 5 minutes.
To activate the dry yeast, add the amount of yeast called for in the recipe (1½ teaspoons for this recipe) to a small bowl. Measure out the water that the recipe calls for (¾ cup in this recipe) and make sure it is warm. The water temp should be between 105-110℉/40-43℃. Add in 1 teaspoon of the sugar (only if the recipe has sugar in the dough) and stir. Let sit for about 5 minutes and you will see the yeast bloom into a frothy mixture and then it is ready to add to the dry ingredients.
Making the Dough
In a large mixing bowl or in the bowl of your stand mixer (a bread machine or food processor will work as well) add in the 2 cups of all purpose flour and salt. Mix together and add the yeast, sugar, and oil. Mix on low until combined and scrape down the sides of the bowl.
Add in about ½ cup of the warm water (between 105-110℉/40-43℃) to the flour mixture and mix on low speed until the dry and liquid ingredients begin to come together. It will still be dry and crumbly looking at this stage. Scrape down the sides of the bowl.
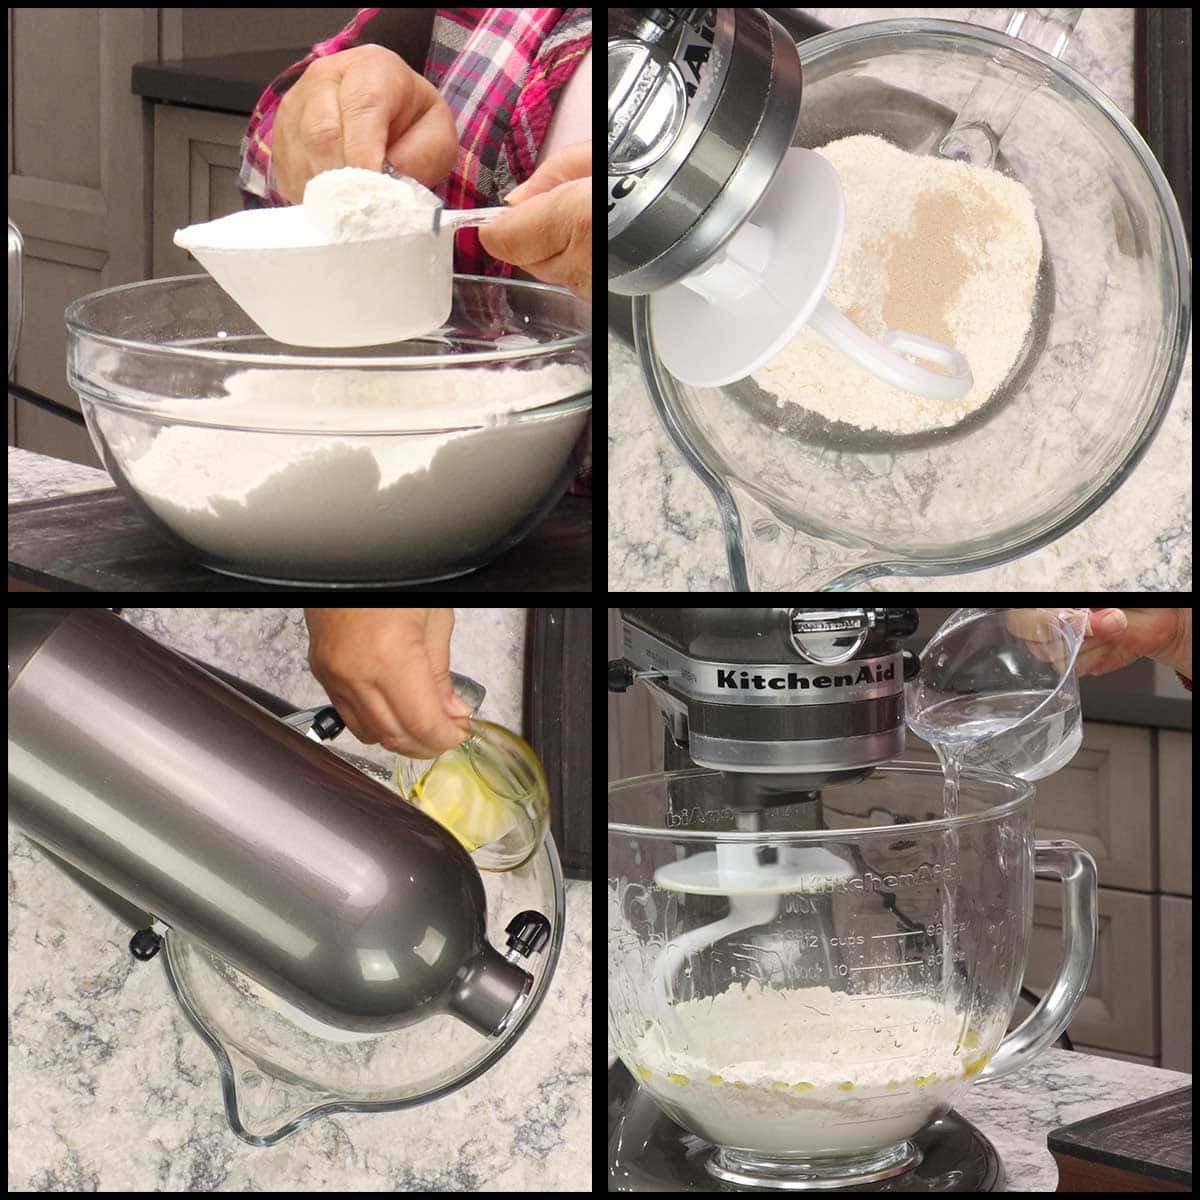
Begin adding only 1 Tablespoon of warm water at a time and mix on low speed until a dough ball begins to form and you no longer see dry flour. The dough should be tacky, but not stickly. If it is too wet and sticks to your hands, add a small amount of flour (½ Tablespoon or so) and mix on low until the dough is no longer sticky. If the dough is dry and crumbly, add a teaspoon more of water at a time and mix on low until the dough ball is nice and smooth.
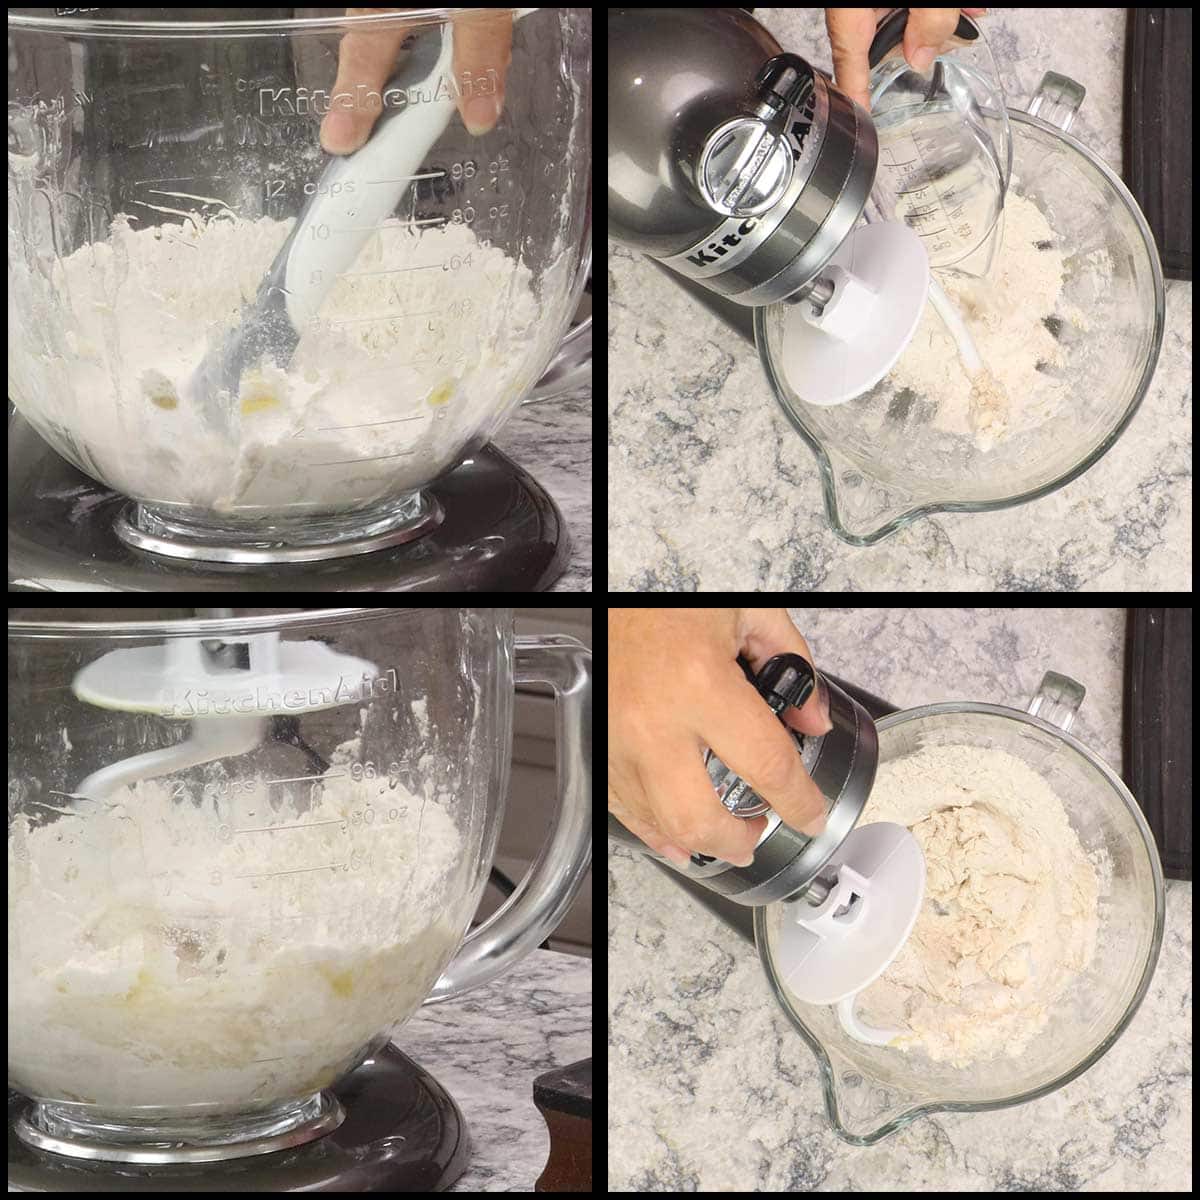
Using medium speed on the stand mixer, knead the dough for about 2-3 minutes. If you are doing this by hand, knead for about 5 minutes.
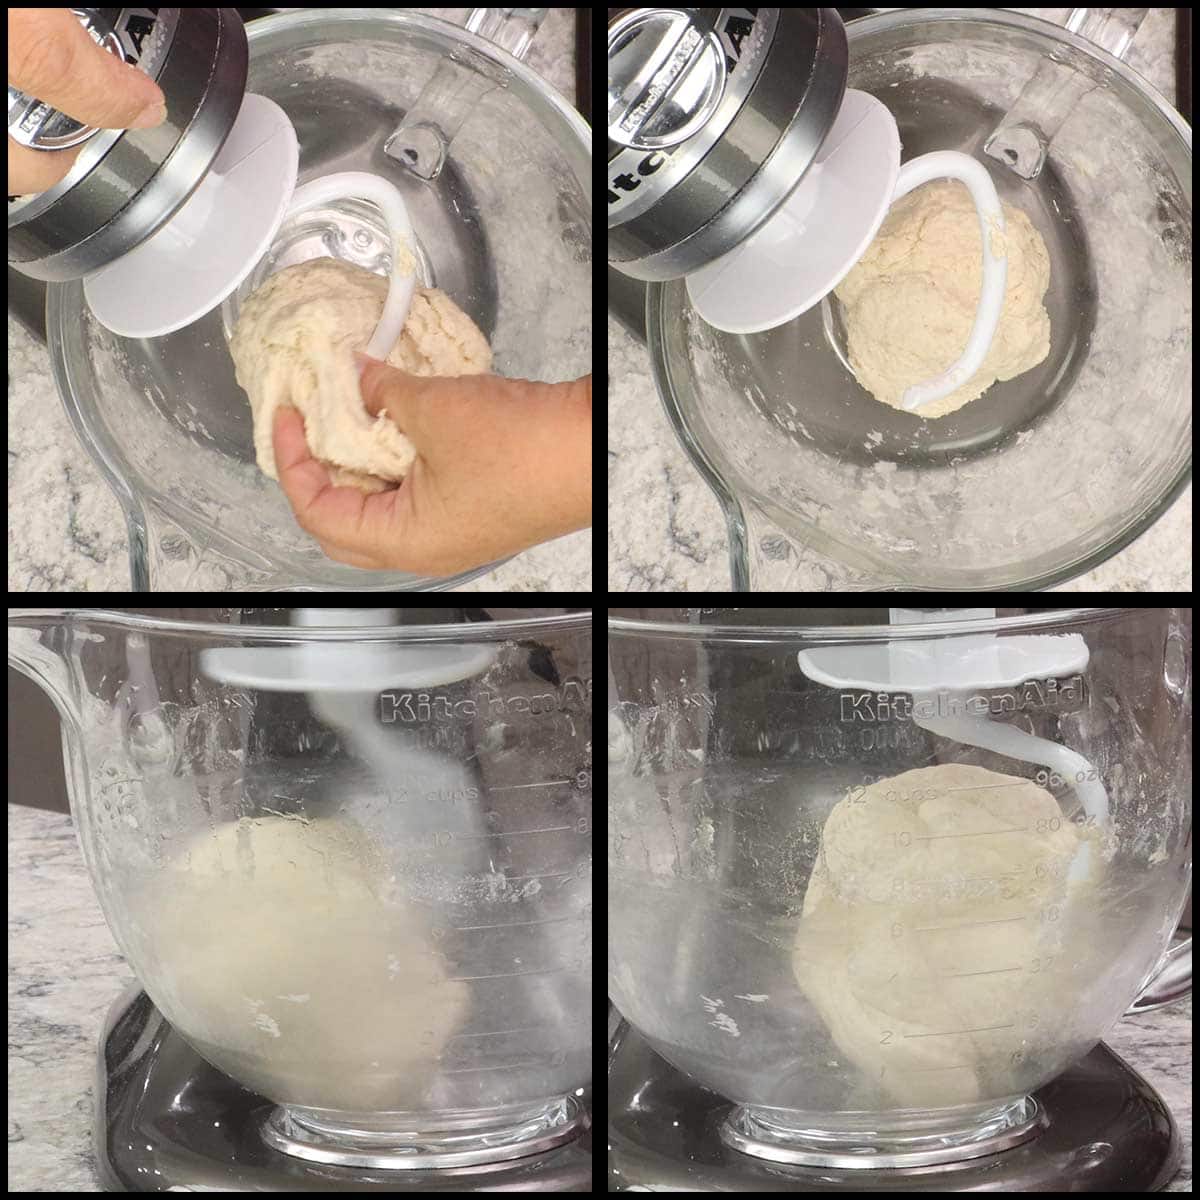
Once the dough is nice and smooth, place about 1-2 teaspoons of olive oil in a bowl (or the inner pot of the Foodi) and lightly coat the dough ball with oil. Cover with plastic wrap or a damp towel and choose which method you want to use for proofing.
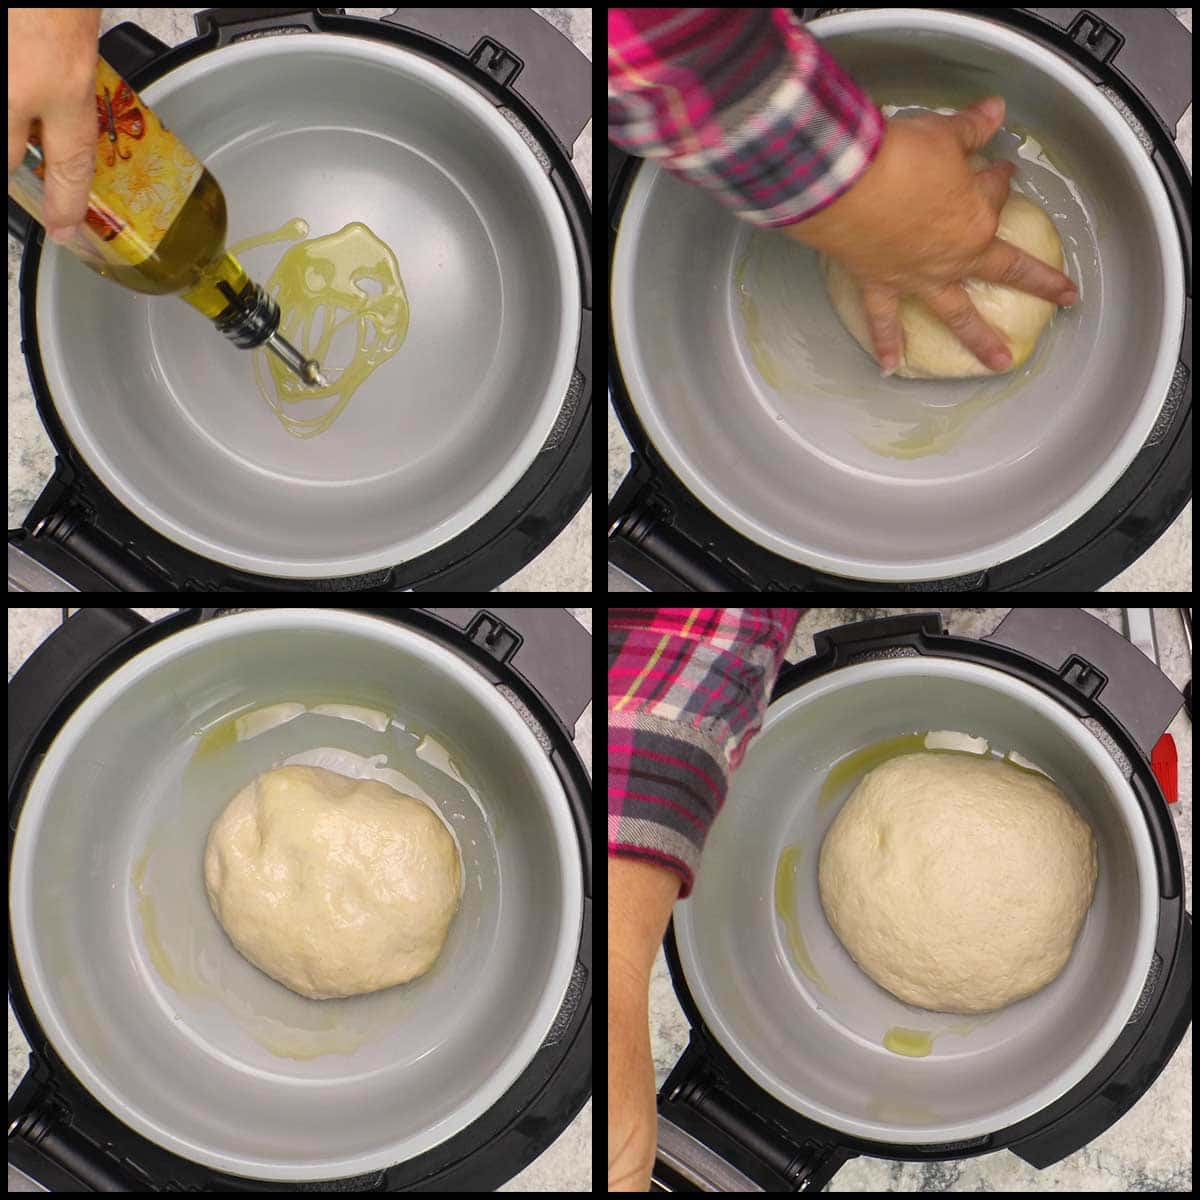
Proofing the Dough
There are many ways you can proof the dough. Since I'm not worried about developing flavor through a slow rise, I usually use my Ninja Foodi. If you don't have that function or don't have a Ninja Foodi, you can proof the bread several different ways which I will go over below.
Ninja Foodi or Ninja Speedi with proof setting: Select the proof function and set the temp at 95℉/35℃ and the time for 30 minutes.
Ninja Foodi with Dehydrate: Place the oiled dough ball into a container and cover with plastic wrap. Set the container on the rack in the low position and close the crisping lid. Set the dehydration function on 105℉/40℃ and the time for 30 minutes.
Oven: There are two methods for proofing dough in the oven. Preheat on the lowest setting on your oven for just 3-5 minutes and turn the oven off. Place the dough ball in a mixing bowl coated with a tiny bit of oil and covered with plastic wrap. Let sit in the warm oven for 30-45 minutes or until the dough is double in size.
You can also just use the oven light in the oven to create a warm environment for the dough to rise.
Countertop: You can also allow the dough to rise on your countertop or a warm place in your kitchen. Place the covered bowl with the dough on the counter and let it rise for about an hour or until it has doubled in size.
Forming and Dipping the Garlic Knots
Once the dough has risen and doubled in size, knead in the two bulbs of roasted garlic. You can do this by hand or in a stand mixer.
To do it by hand, lightly flour a clean surface and press the dough ball down into a rectangle. Place the garlic cloves on top and then begin to fold.
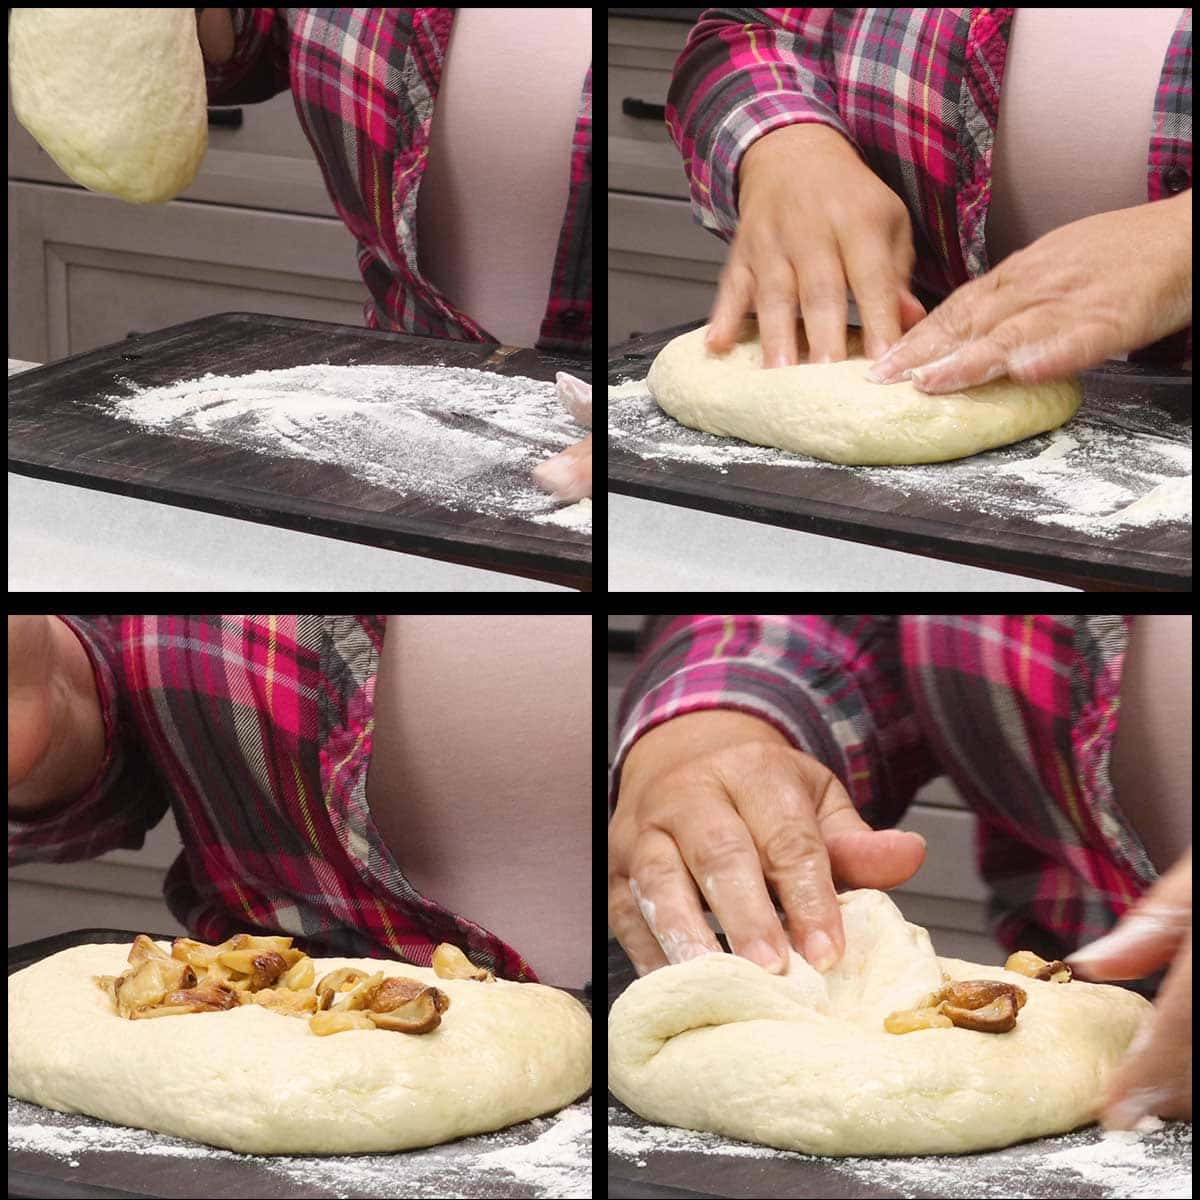
Continue to fold by bringing the sides to meet in the middle and then the top down to the bottom as shown below in the pictures.
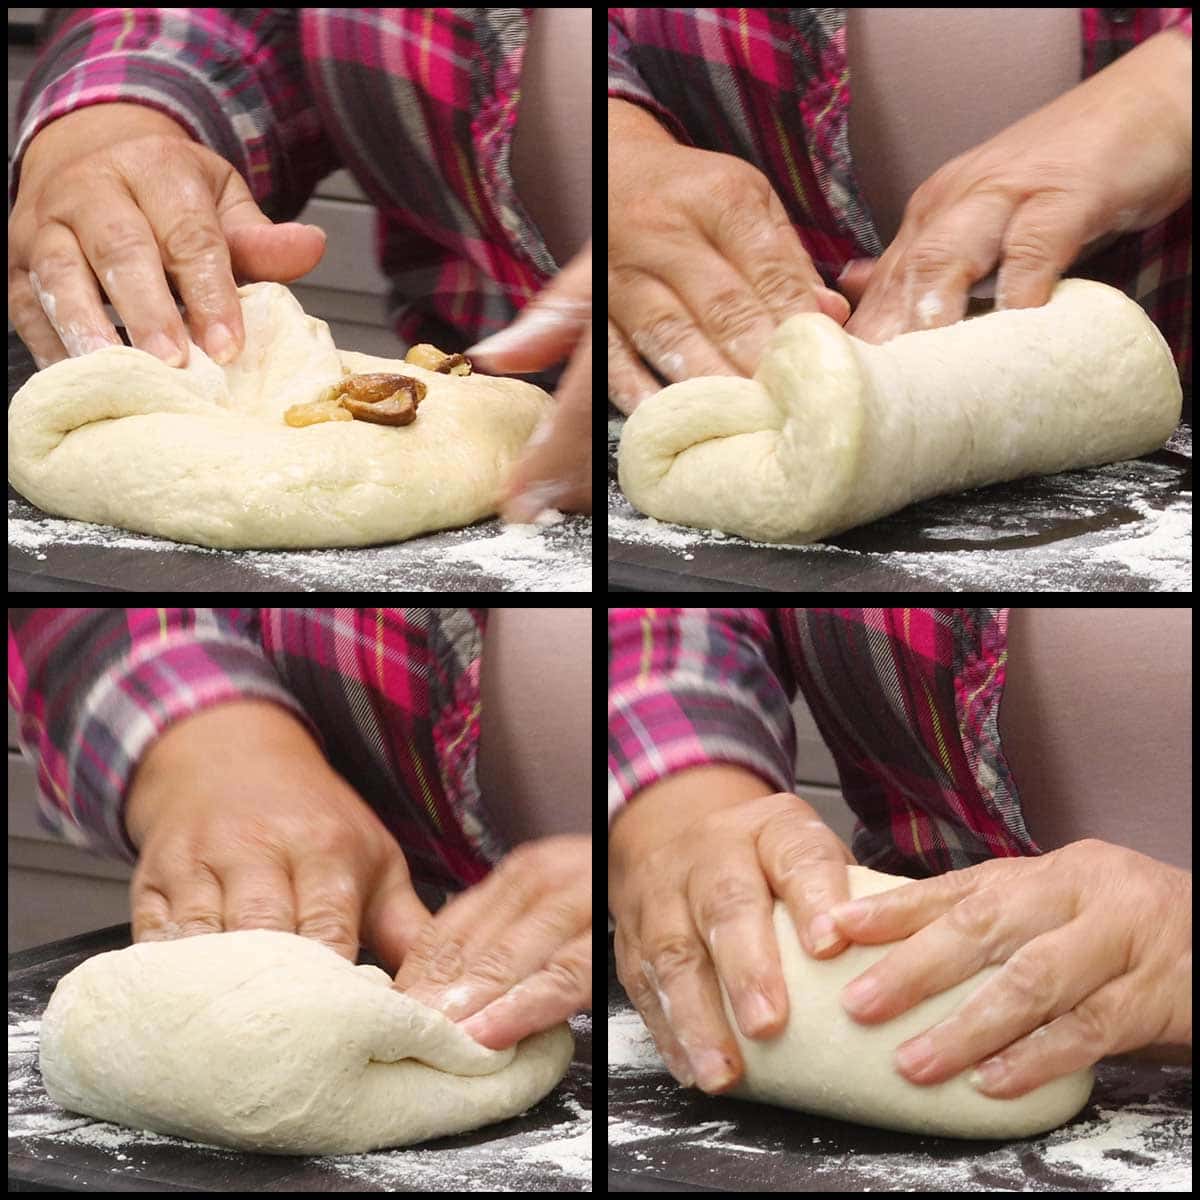
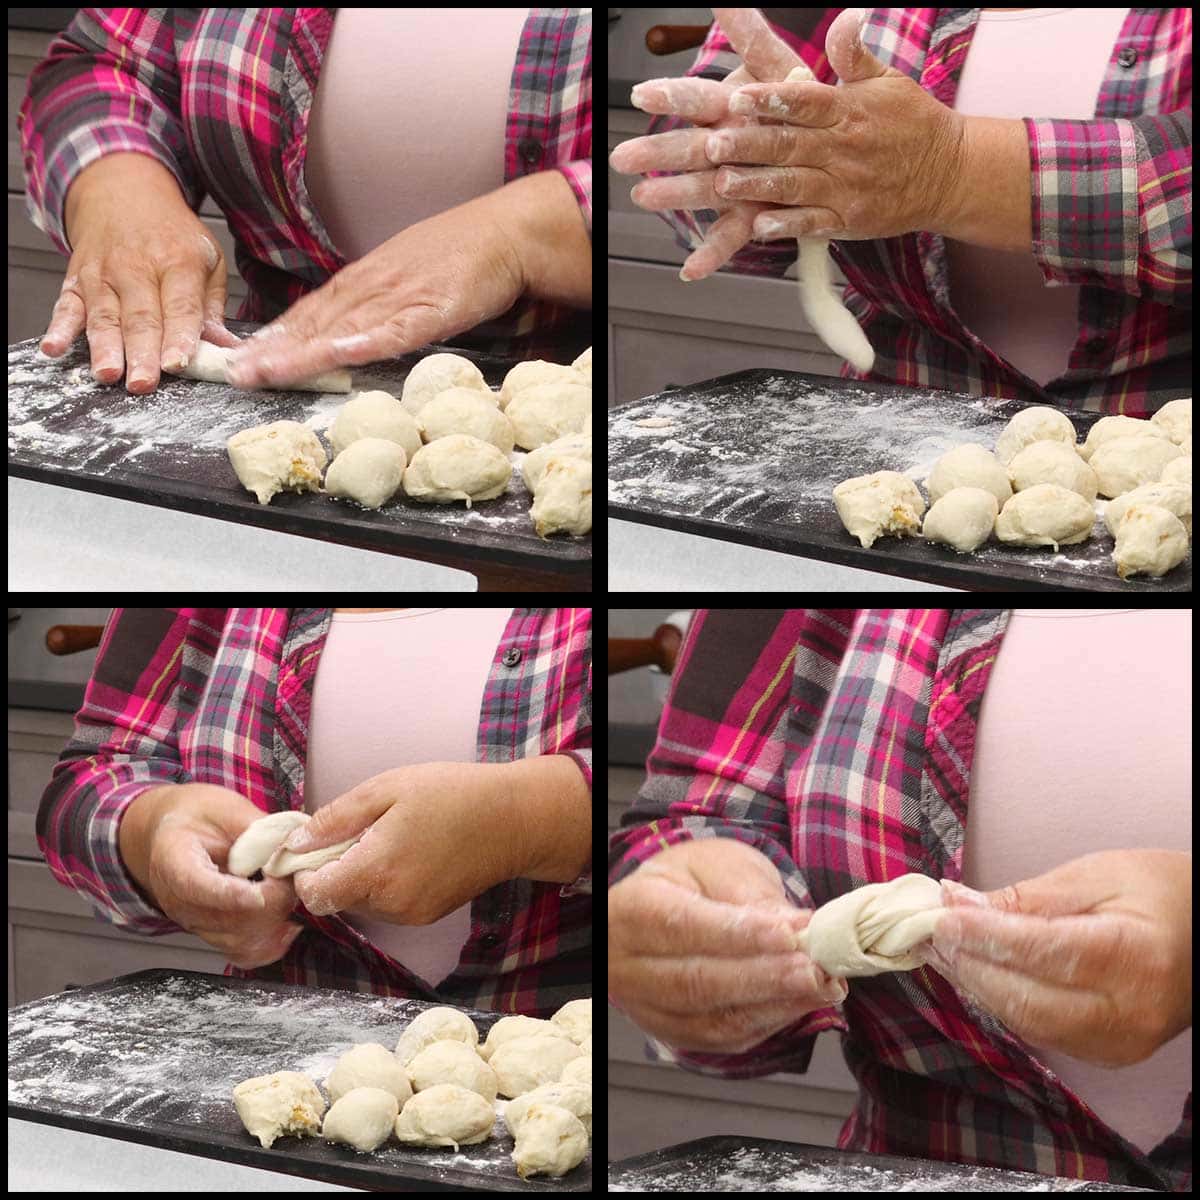
Divide the dough into 16 equal pieces. I do this by splitting the dough ball in half and then each half into half again and each one of those balls into 4 equal pieces.
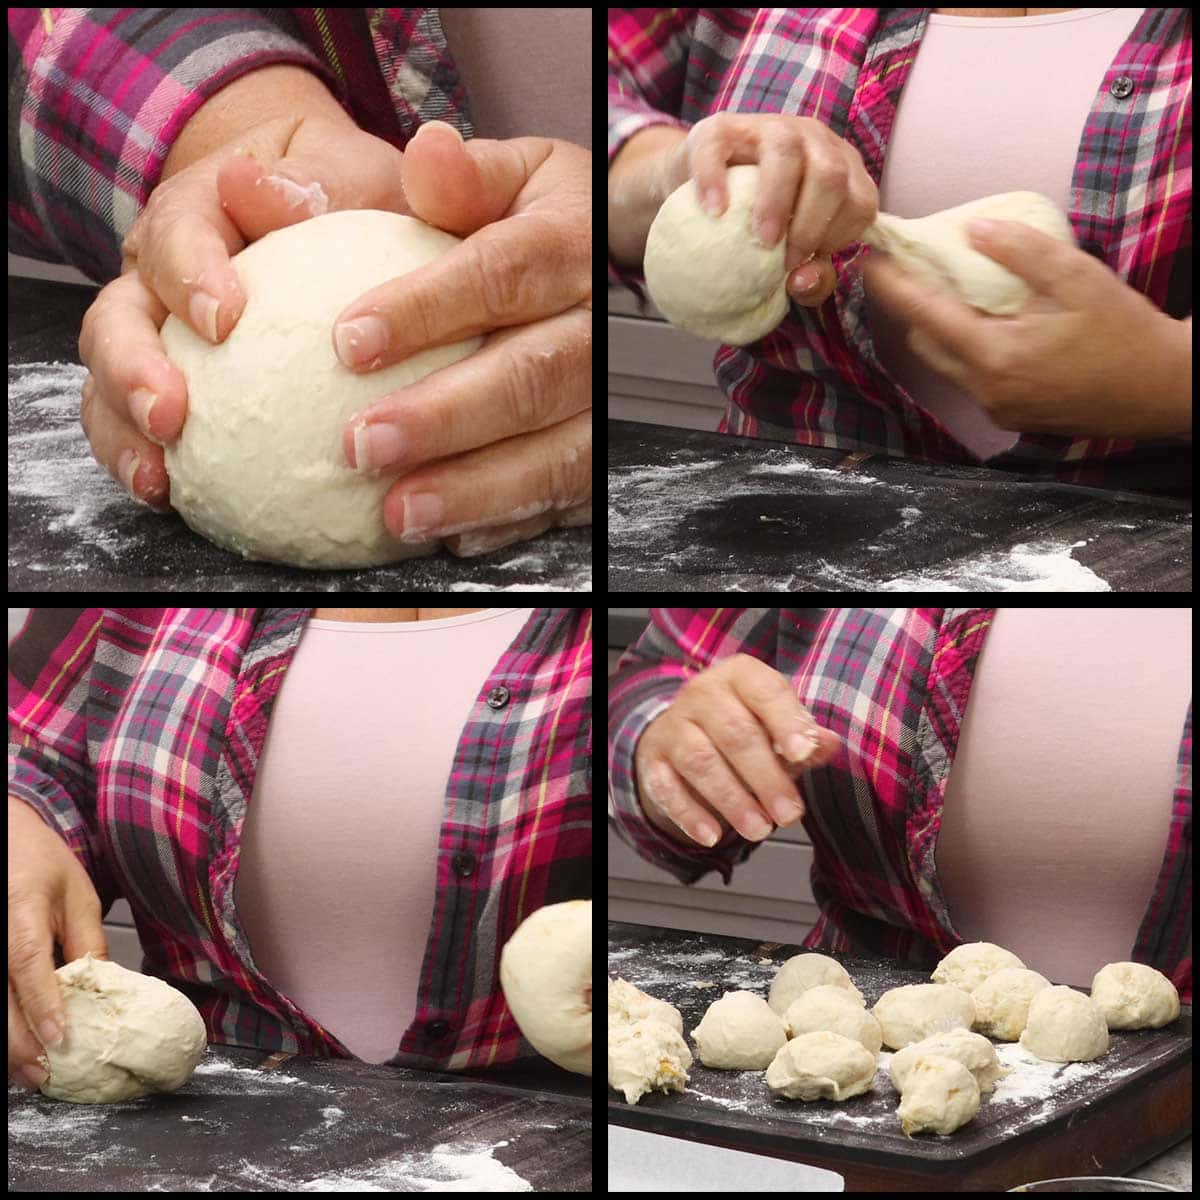
Form each piece into a ball and then roll between your hands or on a lightly floured clean surface into a rope that is about 6 inches long. Tie the rope into a knot.
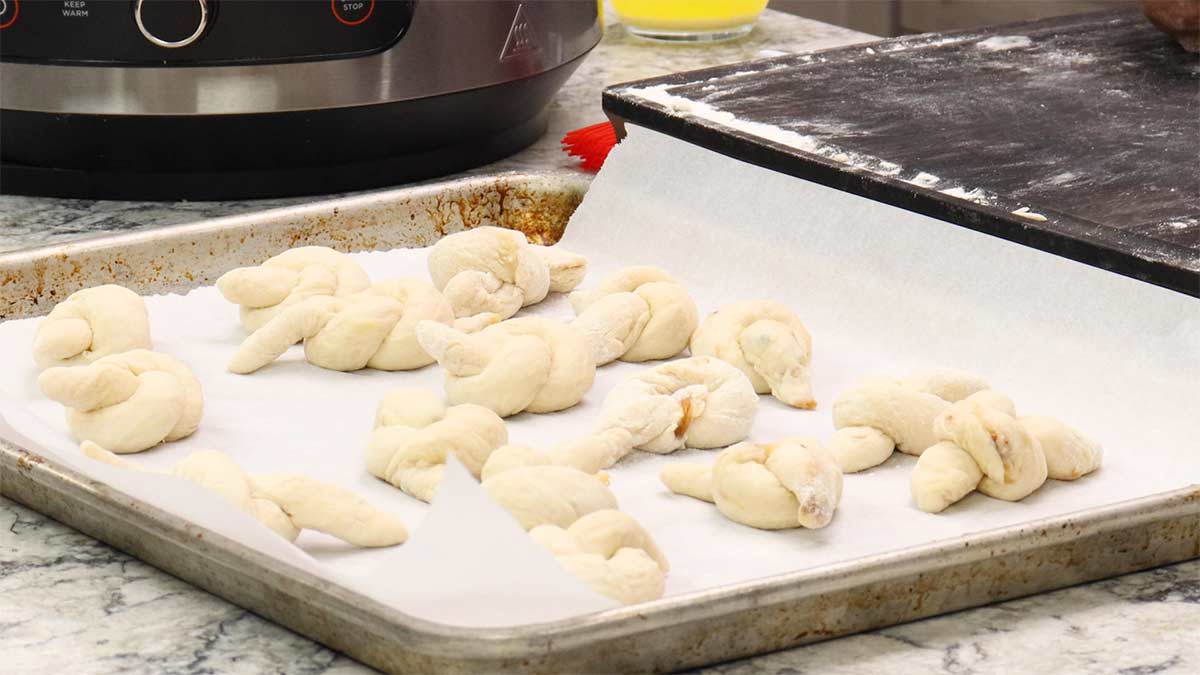
Pro Tip: Don't worry too much how they look once you tie them, I've found that it really doesn't matter because they will rise and then bake and they are all absolutely perfect!
Place each of the knots on a parchment lined tray and prepare the garlic butter mixture.
Place 4 Tablespoons of butter into a small bowl. Melt butter in the microwave oven in 30-second bursts just until melted. You don't want the butter too hot. I usually do this right before I make the dough knots so it has time to cool. Add in the Italian seasoning, garlic powder, and salt. Stir to combine.
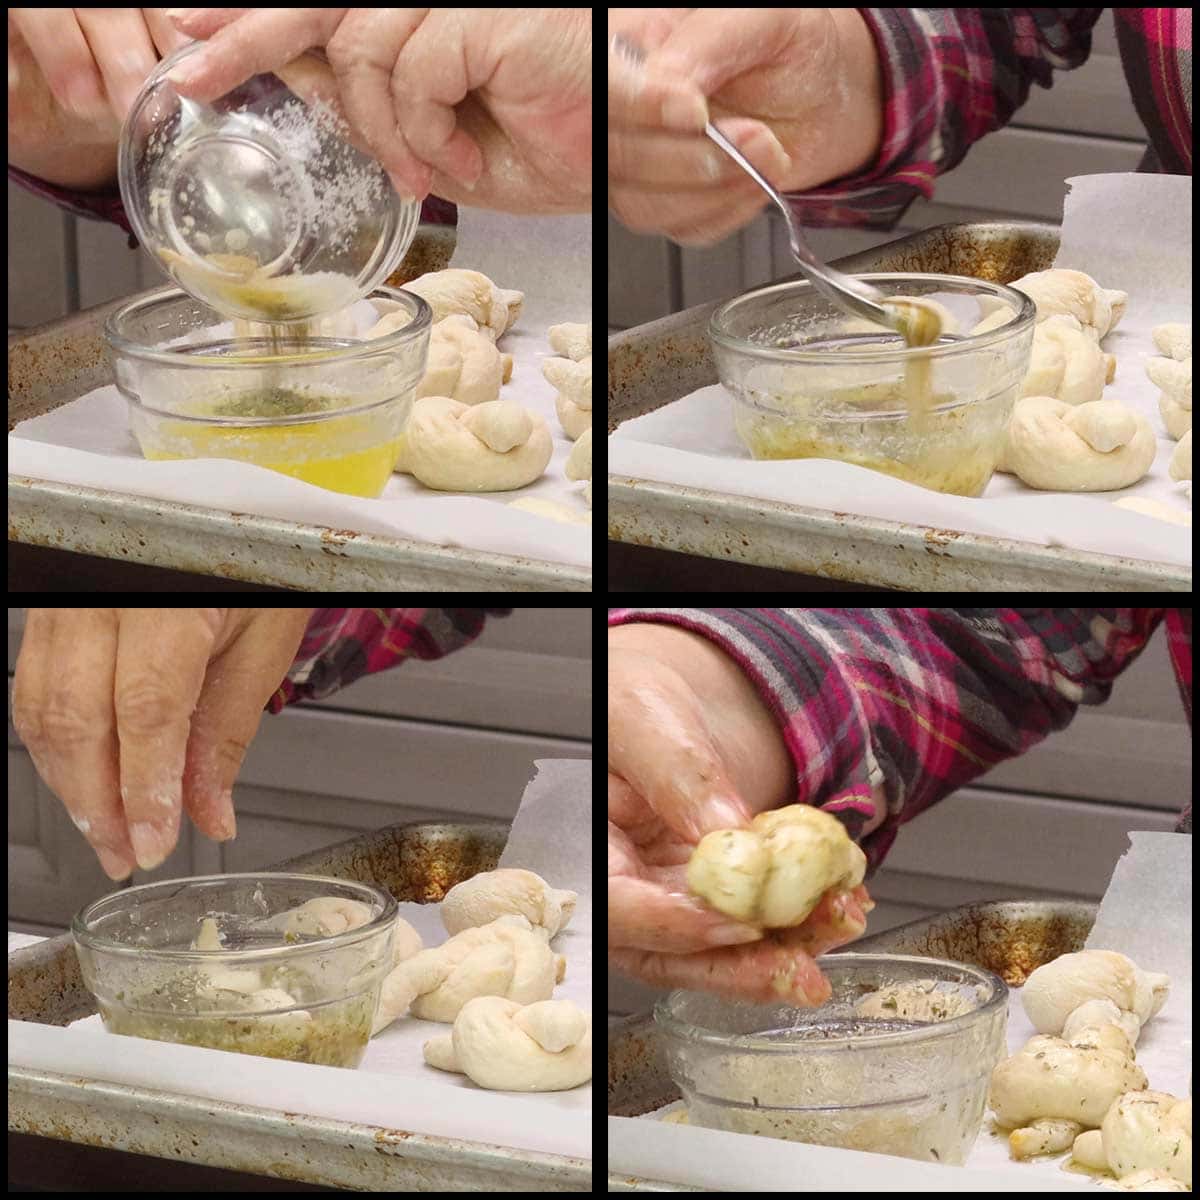
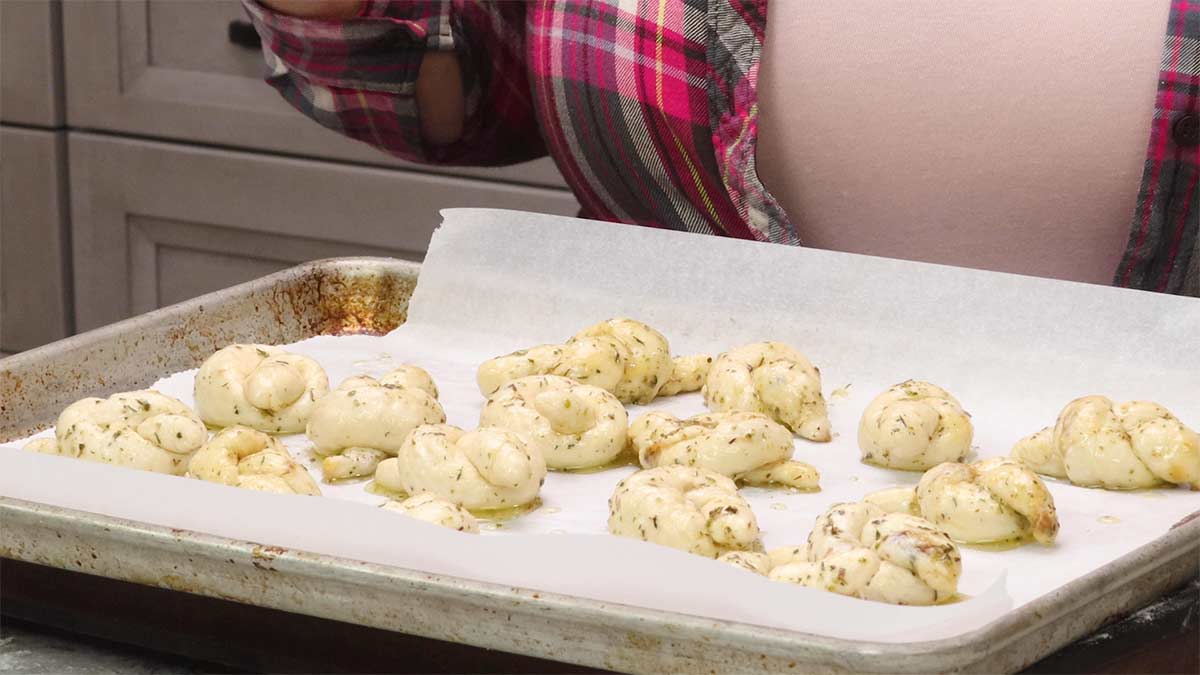
Dip each of the dough knots into the mixture and place them back on the large baking sheet.
Air Frying Garlic Knots
Once all the knots have been dipped in the garlic butter, preheat the air fryer on the hottest setting for about 10 minutes.
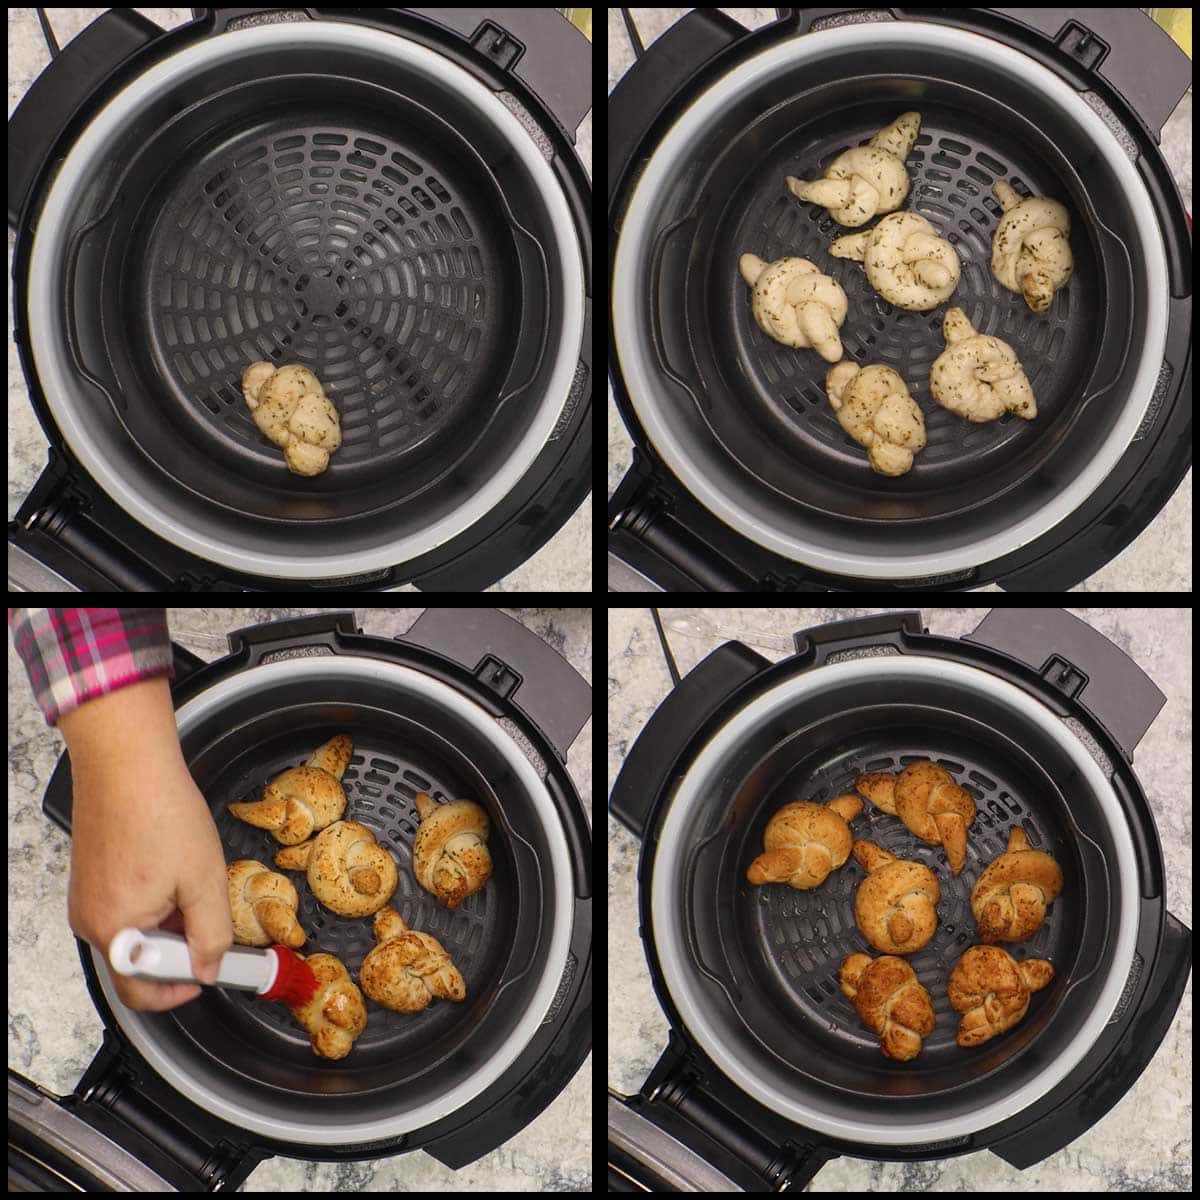
Place the knots into the air fryer basket or other cooking surface in a single layer. Select the air fry function and the temperature of 375℉/190℃ and the time for 10 minutes.
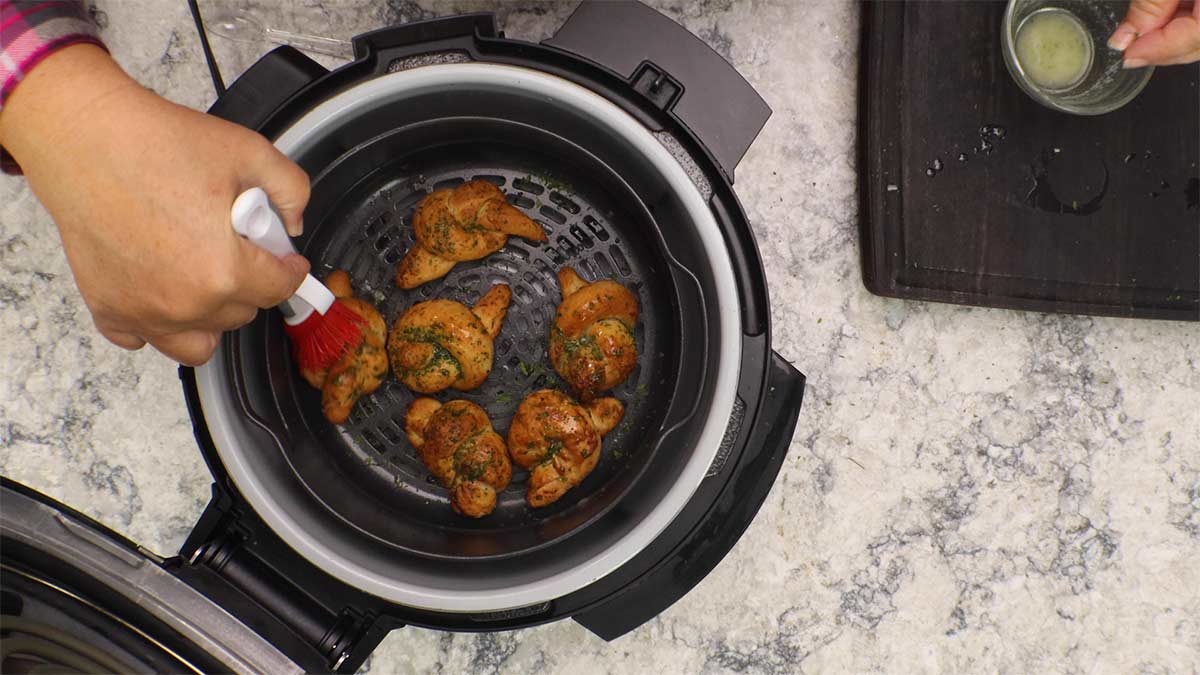
The garlic knots usually take between 7-10 minutes to become golden brown and I like to baste them with more butter using my pastry brush about 5 minutes into the cook time. This helps with browning and also creates a wonderful texture to the garlic knots.
When they are done, remove from the air fryer and brush with more butter and sprinkle with dried parsley. Or, you can do this while they are still in the air fryer, if you like.
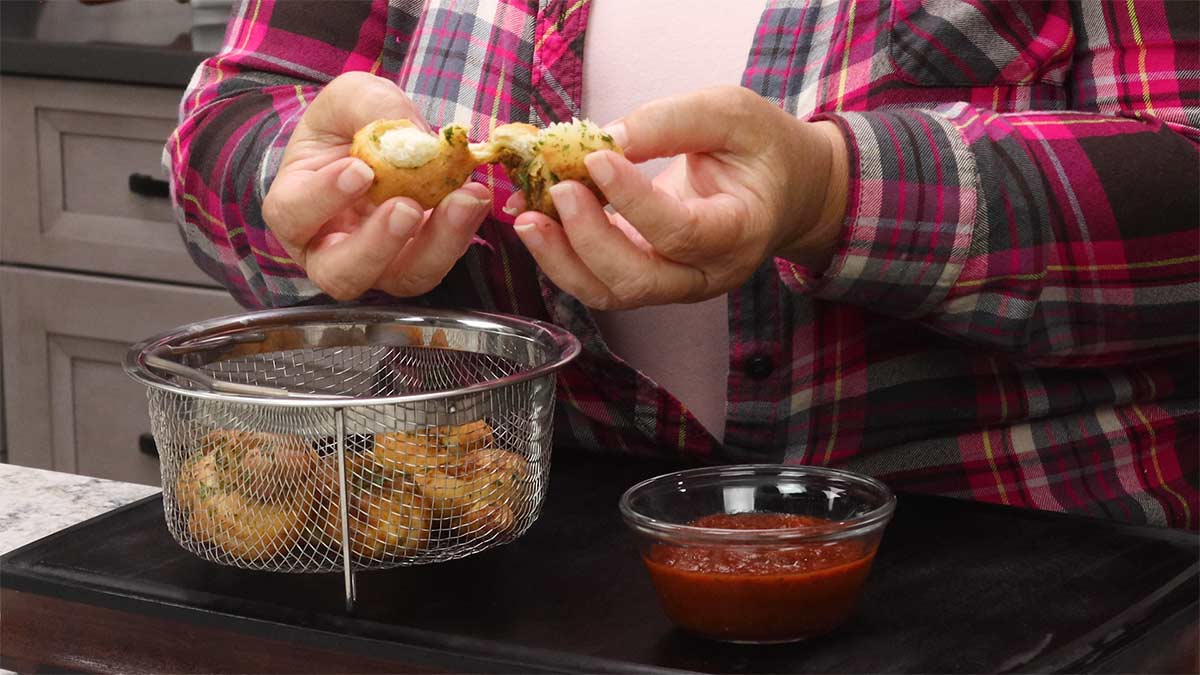
Serve with your favorite dipping sauce or enjoy them plain!

Air Fryer Garlic Knots
Equipment
- Air Fryer
Ingredients
Homemade Pizza Dough
- 2 cups all purpose flour
- 1½ teaspoons instant yeast
- ½ Tablespoon sugar
- 1 teaspoons fine grind sea salt
- 1 Tablespoon olive oil divided in recipe
- ¾ cup warm water between 105-110℉/40-43°C
Garlic Knot Ingredients
- 1 pound pizza dough if not making homemade pizza dough
- 2 bulbs roasted garlic
- 6 Tablespoons salted butter melted, divided in recipe
- 1 teaspoon Italian seasoning
- 1 teaspoon garlic powder
- ½ teaspoon fine grind sea salt
- 1 teaspoon dried parsley optional for garnish
Would you like to save this recipe?
Instructions
Homemade Pizza Dough
- Combine flour, instant yeast, sugar in a large bowl or the bowl of a stand mixer and mix to combine. Add the salt and mix. Add 1 teaspoon olive oil and ½ cup warm water and mix on low speed or with a wooden spoon until the dough starts to come together. It will be dry and crumbly at this stage. Scrape down the sides of the bowl.
- Add in 1 Tablespoon of the warm water at a time, mixing the dough on low speed between additions. Add just enough water so the dough is no longer crumbly and all of the dry flour is hydrated with the liquid. Scrape down the sides of the bowl as needed. The dough ball should be tacky, but not stick to your fingers. If it is too dry, add some more water and if it is sticky and wet, add a little flour at a time until it is just slightly tacky.
- Knead on medium speed for 3-5 minutes or by hand on a lightly floured surface for about 5-7 minutes. The dough ball should be smooth and pliable.
- Place the remaining 2 teaspoons of oil into a clean mixing bowl and coat the dough ball on both sides. Cover the bowl with plastic wrap and let sit on the counter until it doubles in sizes. If you are using a proofing oven/Ninja Foodi, then set the proofing temp between 95-105°F/35-40°C and proof for 30 minutes or until it doubles in size.
Garlic Knots
- Once the dough has doubled in size (whether homemade or store-bought) add in the roasted garlic cloves and either knead on low using a stand mixer until the garlic mixes with the dough or add the garlic cloves to the dough and fold, turn, fold until it is incorporated into the dough.
- Melt 4 Tablespoons of butter in a small bowl and add the garlic, salt, Italian seasoning. Set aside. Prepare a large sheet tray by lining it with parchment or wax paper.
- Separate the dough into 16 equal pieces and roll into a smooth ball. Roll the ball into a rope about 6" long and tie the rope into a knot. Dip each knot into the garlic butter mixture and set on the tray.
- Once all of the knots are formed and dipped, preheat the air fryer on the hottest setting for a full 10 minutes.
- Place the air fryer knots in a single layer into the air fryer basket or cooking tray. I place them about 1" apart. How many you can make at once will depend on your air fryer. If you are going to cook several batches, place the tray with the uncooked knots into the refrigerator so they don't rise too much before air frying.
- Air Fry on 375°F/190°C for 7-10 minutes. Melt the remaining 2 Tablespoon of butter and use a pastry brush to brush the top of the knots about 5 minutes into the air frying time. You don't need much butter, just a little dab. Once the garlic knots are golden brown, remove them from the air fryer and place them on a cooling rack.
- Brush a little butter on top and garnish with dried parsley. Serve with your favorite dipping sauce or plain!
Nutrition
About the Recipe Author, Louise Long
Louise is a full-time recipe creator and food blogger @ The Salted Pepper. She has over 30 years of experience with cooking and recipe development. She owned a restaurant for several years and was a full-time RN until retiring to blog full-time.

She published her first cookbook in the Fall of 2018 and is very interested in writing several more.
Louise is also the creator of an online Ninja Foodi Pressure Cooking Course with over 100 instructional step-by-step videos. People absolutely rave about the course and all the value they have received from it.
Louise has several very active Facebook groups that help people with the basics of cooking and learning more about the appliances they love.
Ninja Foodi Pressure Cooker & Air Crisper 101
Ninja Woodfire Outdoor Grill & Smoker
Louise is also a YouTube creator and you can find most of her recipes in video format on The Salted Pepper YouTube channel.
She is very responsive to messages and eager to help in any way she can. Get more Information about Louise & contact information
I WOULD LOVE TO SEE WHAT YOU ARE COOKING UP IN YOUR KITCHEN! TAG ME @THESALTEDPEPPER ON YOUR FAVORITE SOCIAL MEDIA PLATFORM WHEN YOU MAKE A DISH!
BE SURE TO FOLLOW THE SALTED PEPPER RIGHT HERE ⇓⇓⇓⇓⇓









Antonio
Hi, I have a question, why air fry instead of baking? What is the difference between these two methods when baking bread?
I made some garlic knots in the oven with the dough just like yours and I want to make them in the ninja foodie, but that’s my question, why air fry instead of baking? Thank you so much.
Louise
The fan speed is faster on air fry and that circulates the air around the garlic knots, but you can use the bake function if you want them a little softer on the outside. I like them crunchier.
Antonio
That’s it!!!!! Thanks.
Antonio
Sorry, one more question: I read a comment you made about having to lower the temperature when baking in the ninja foodie instead of an oven, and 25 to 50°F.
If my recipe calls for 390°F for 15 minutes in the oven, what would be the suggested equivalent in a ninja foodie?
Thank you so much.
PS by the way, all the family really loves your linguine shrimp scampi, it is absolutely the best!!
Joanna R.
I just got my first Ninja Foodi, and this is my very first recipe that I’ve made in it. Actually, first I roasted the garlic, your recipe as well (the BOMB), then I’ve made your yummy roasted garlic knots (from scratch). I served them with your recipe of Mexican Pot Roast (I need to review as well). Not bad for the first day, and it all was amazing thanks to you my friend!!! Very tasty dinner.
Thank you, thank you, thank you!!
Louise
I'm so happy you enjoyed them!
Dixie
As you know, the freezer in my RV is super small. I’d like to make these for dinner, but I’d like to freeze the dough in 4pc portions, but I don’t have room to separate the knots and freeze on a baking sheet.
I’m thinking of portioning into 4 balls (keeping 1 ball for continued cooking) then freezing those 4 balls that have been flattened and put in a freezer bag to save space, then thaw at a later date and continue to separate them to form into 4 knots.
Is there anything special I’d need to do after thawing, other than form the knots and cook them per directions in your recipe?
Dixie
I’ve decided to cook half the knots, then put the rest of the dough and make a small pizza later in the week. (2-3 days, tops). It smells amazing in here!
Louise
Not really. Just thaw the flat dough and then form your knots and dip them. Just make sure they rise enough after forming the knots before air frying.