

Making homemade scones in your air fryer is super easy and the texture of the scones is perfect. It's definitely my favorite way to cook a freshly made batch of British Scones.
The benefits of using your air fryer are how fast the scones are ready to eat and you don't heat up the entire kitchen! This air fryer scone recipe can be made from start to finish in less than 30 minutes and it's super easy even if you have never made American biscuits or scones before.
Would you like to save this recipe?
I specifically kept these scones very basic, but you can add in all kinds of things to the scone dough to customize them. Often times British Scones will have raisins in them. You could also add other types of dried fruit, or even some fruit like fresh blueberries would be delicious. If you want to take things to the sweeter side, add in some chocolate chips! Or take it to the savory side and add in some cheddar cheese. I'll get into more detail on these variations later in the article.
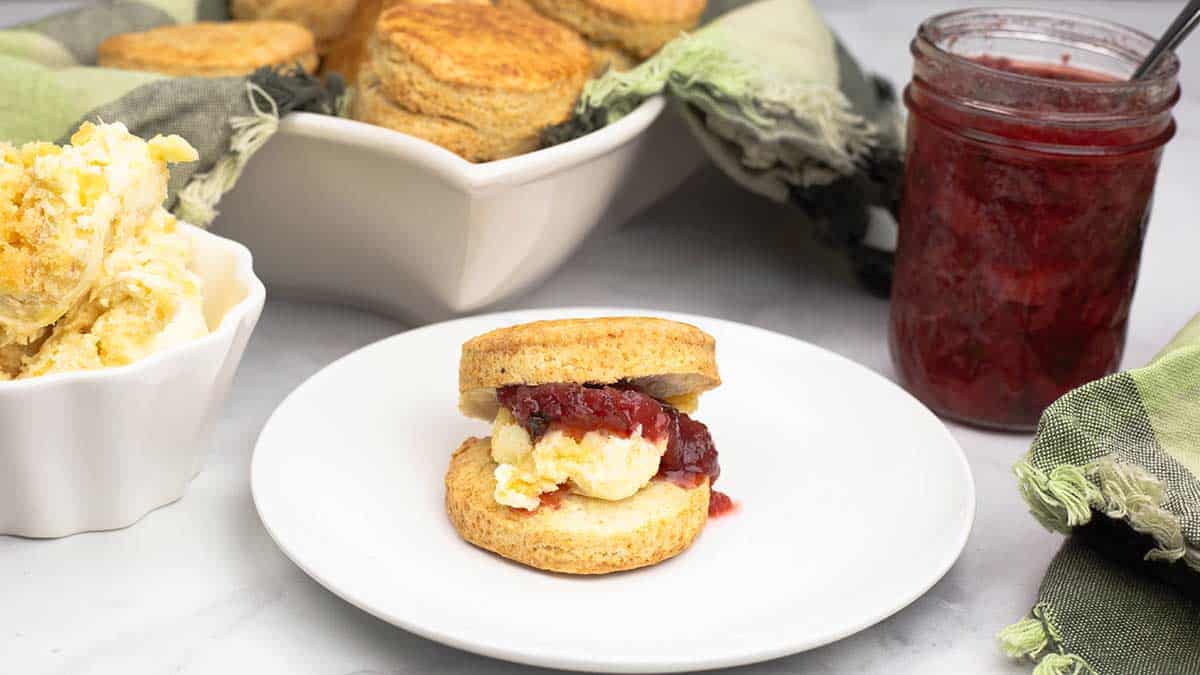
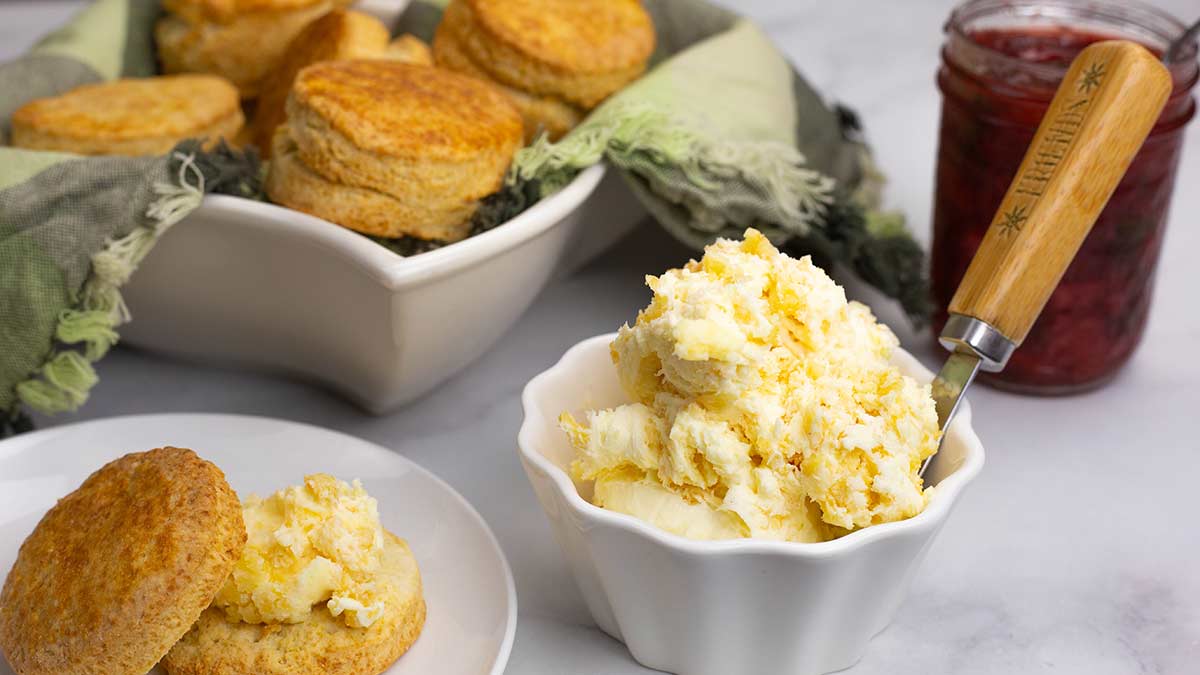
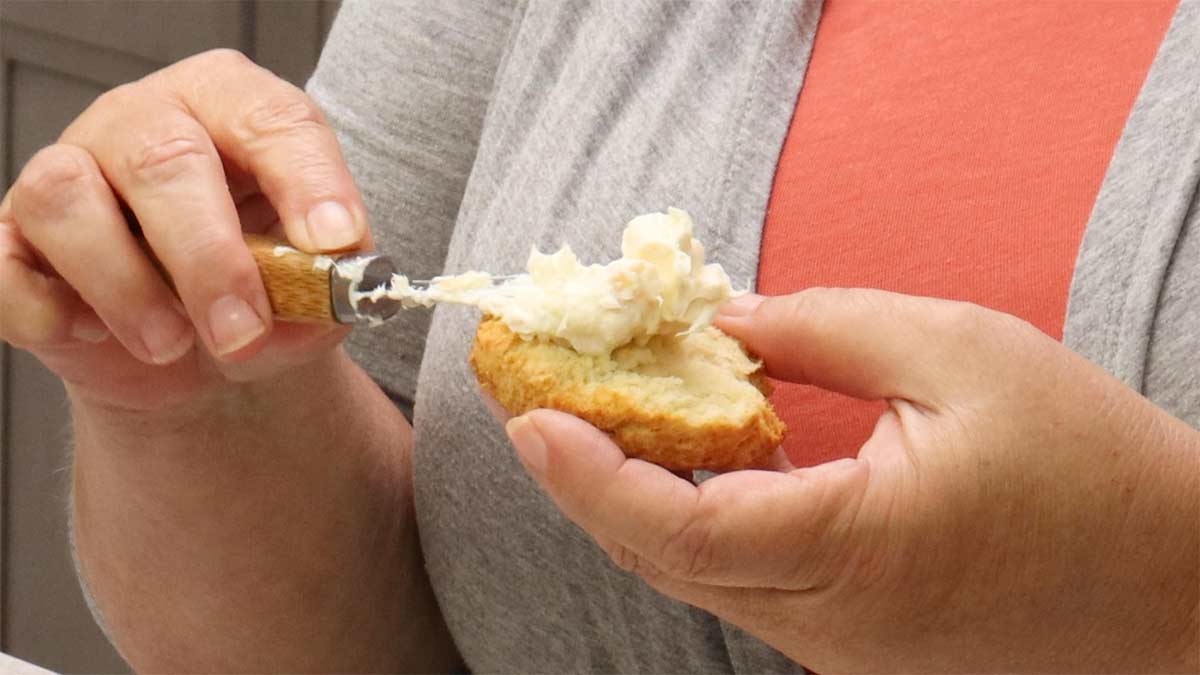
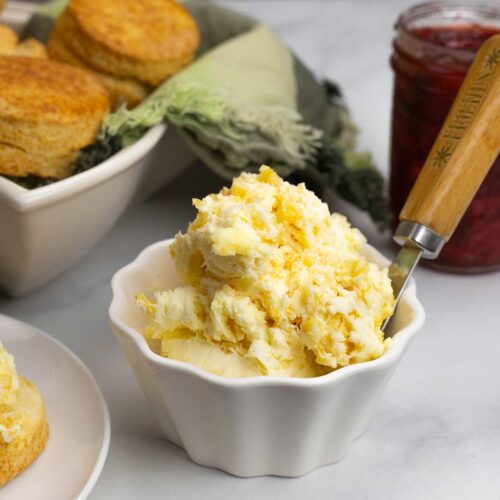
One thing that you absolutely want to do is try clotted cream with your scones! if you have never tried freshly baked scones slathered with clotted cream and topped with strawberry jam, you must experience this culinary treat at least once.
In the United States, it isn't easy to find clotted cream, but you can make it and it's very easy! Plan ahead, though; it will take 10-12 hours to cook and another 8-12 hours in the refrigerator. Here is my recipe: Homemade Clotted Cream Recipe
Ingredients & Substitutions
The ingredients used in scones are very simple; flour, salt, baking powder, sugar (optional), butter, egg, and cream or milk.
Flour
I used all-purpose flour in this recipe, but you can use self-rising flour as well. The difference is there is salt and baking powder in self-rising flour, so you will need to adjust those two ingredients in the recipe. While it could vary by brand, typically the ratio is 1½ teaspoons of baking powder and ½ teaspoon of sea salt or kosher salt per 1 cup of flour.
To substitute self-rising flour in this recipe you would use 2 cups of the self-rising flour with an additional 1 teaspoon of baking powder. Skip the salt and use unsalted butter in the recipe to avoid oversalting.
I don't recommend using bread flour due to the higher protein content and it may lead to a tough scone. You could use cake flour, but I haven't tried the recipe that way.
Sugar
I used regular granulated sugar in this recipe, but if you are in the UK you would use caster sugar. From what I understand, the UK granulated sugar is coarser than the US granulated sugar so caster sugar is a better option.
You can also omit the sugar entirely. I really enjoy the touch of sweetness to the scone, but that is completely up to you. Don't be concerned that the scones are sweet, because they are not.
Butter
You can use salted or unsalted butter in the recipe. I keep salted butter on hand and use it almost exclusively in my recipes, but unsalted butter will be just fine. You may want to add an extra pinch of sea salt or kosher salt if using unsalted butter.
The butter should be as cold as possible. This will make it easier to grate into the flour and cold butter releases water which turns to steam during the air frying process and helps the scones to have more lift.
Egg
This recipe calls for an egg, but you don't have to use eggs when making scones. You will find recipes with and without them. I have a lemon basil scone recipe that does not use eggs and it's wonderful.
The reason I decided to use an egg in this recipe is because I am trying to get as close to a true British Scone as I can and, during my research, I ran across the Buckingham Palace Scone Recipe and it called for eggs! If eggs are in the recipe served to royalty for afternoon tea, then I'm putting them in my recipe, too!
If you want to skip the egg, I would add an extra 2 Tablespoons of heavy cream to make up for the moisture content.
Heavy Cream
I used heavy cream in this recipe because that is what I tested the recipe with and the scones turned out delicious. You can substitute half and half or whole milk if you prefer.
You can also use plain yogurt, but that will give the scones a slightly different flavor.
How to Make Air Fryer Scones
Making the Scone Dough
Preheat the air fryer on 400℉/200℃ for a full 10 minutes. I usually do this while I'm making the scone dough because it does not take long to make the dough and cut the scones. It will not hurt to preheat longer, so if it is your first time making scones, set the time for 20 minutes so you don't feel rushed.
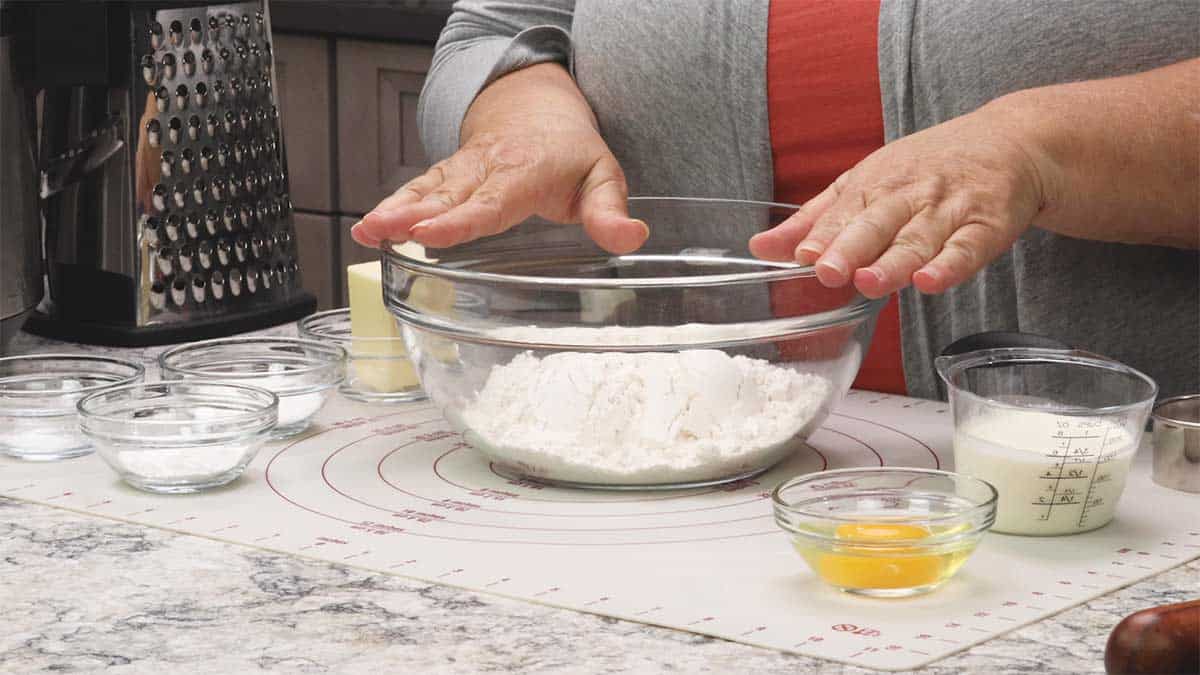
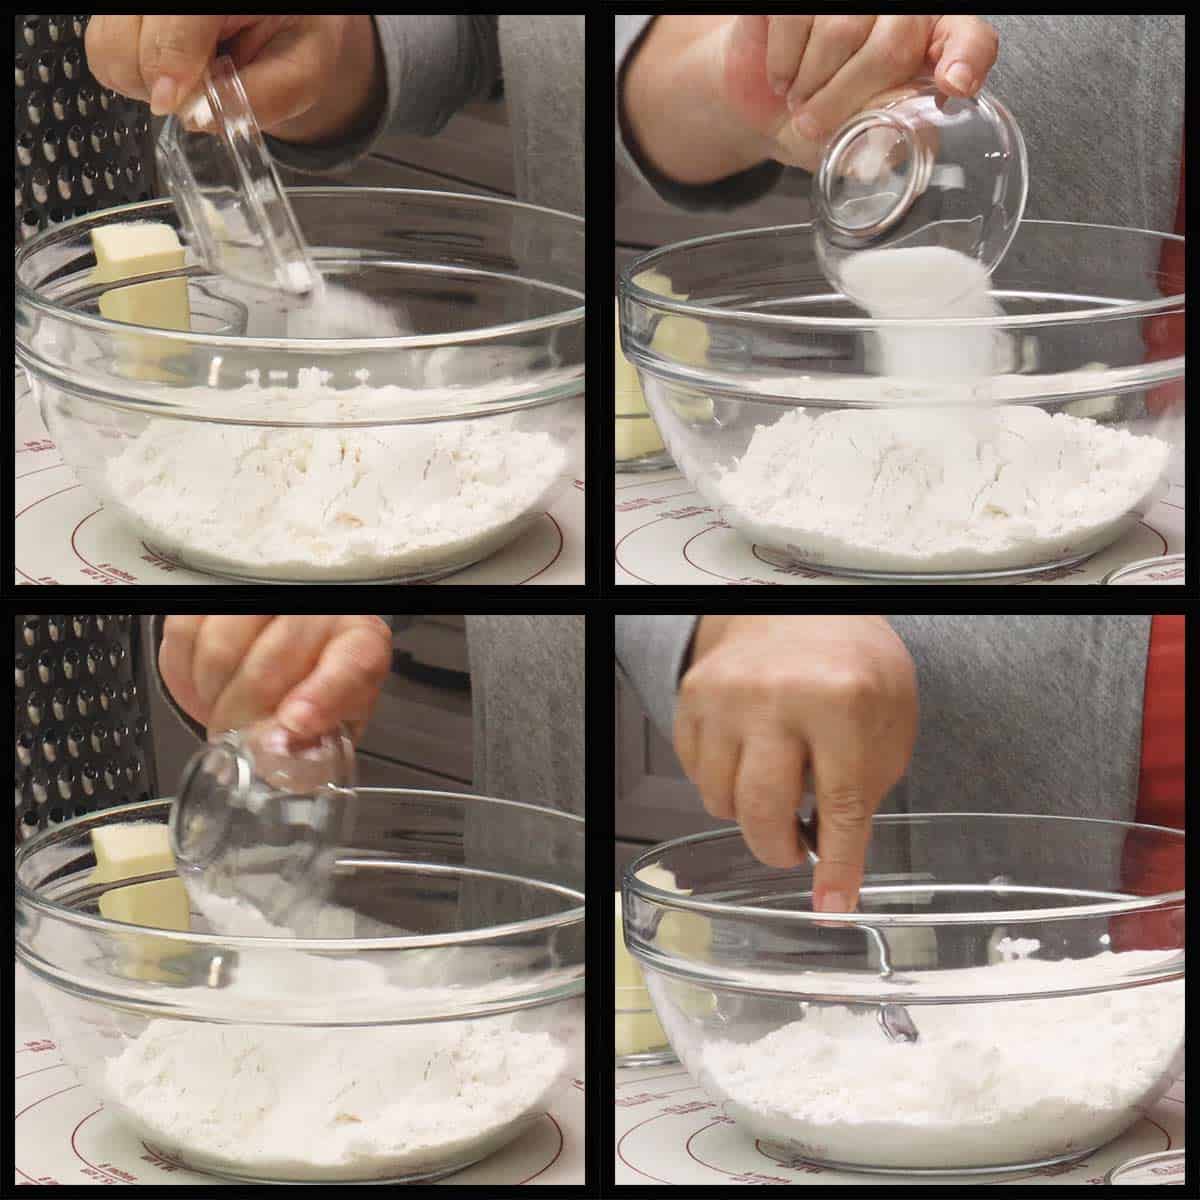
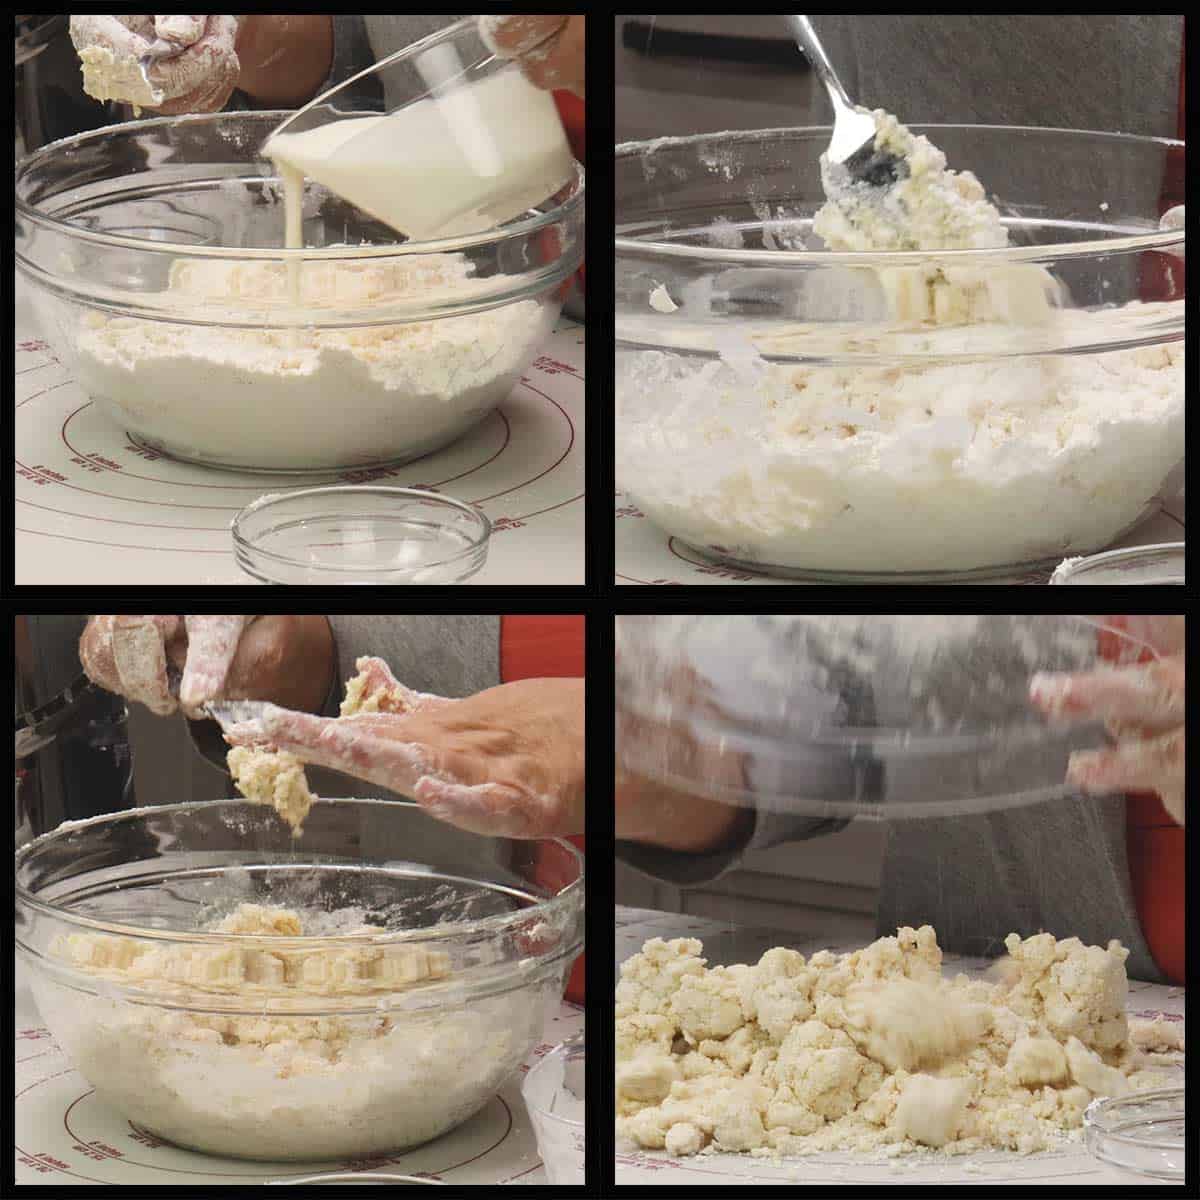
In a large mixing bowl combine the flour, baking powder, and salt. Mix with a fork.
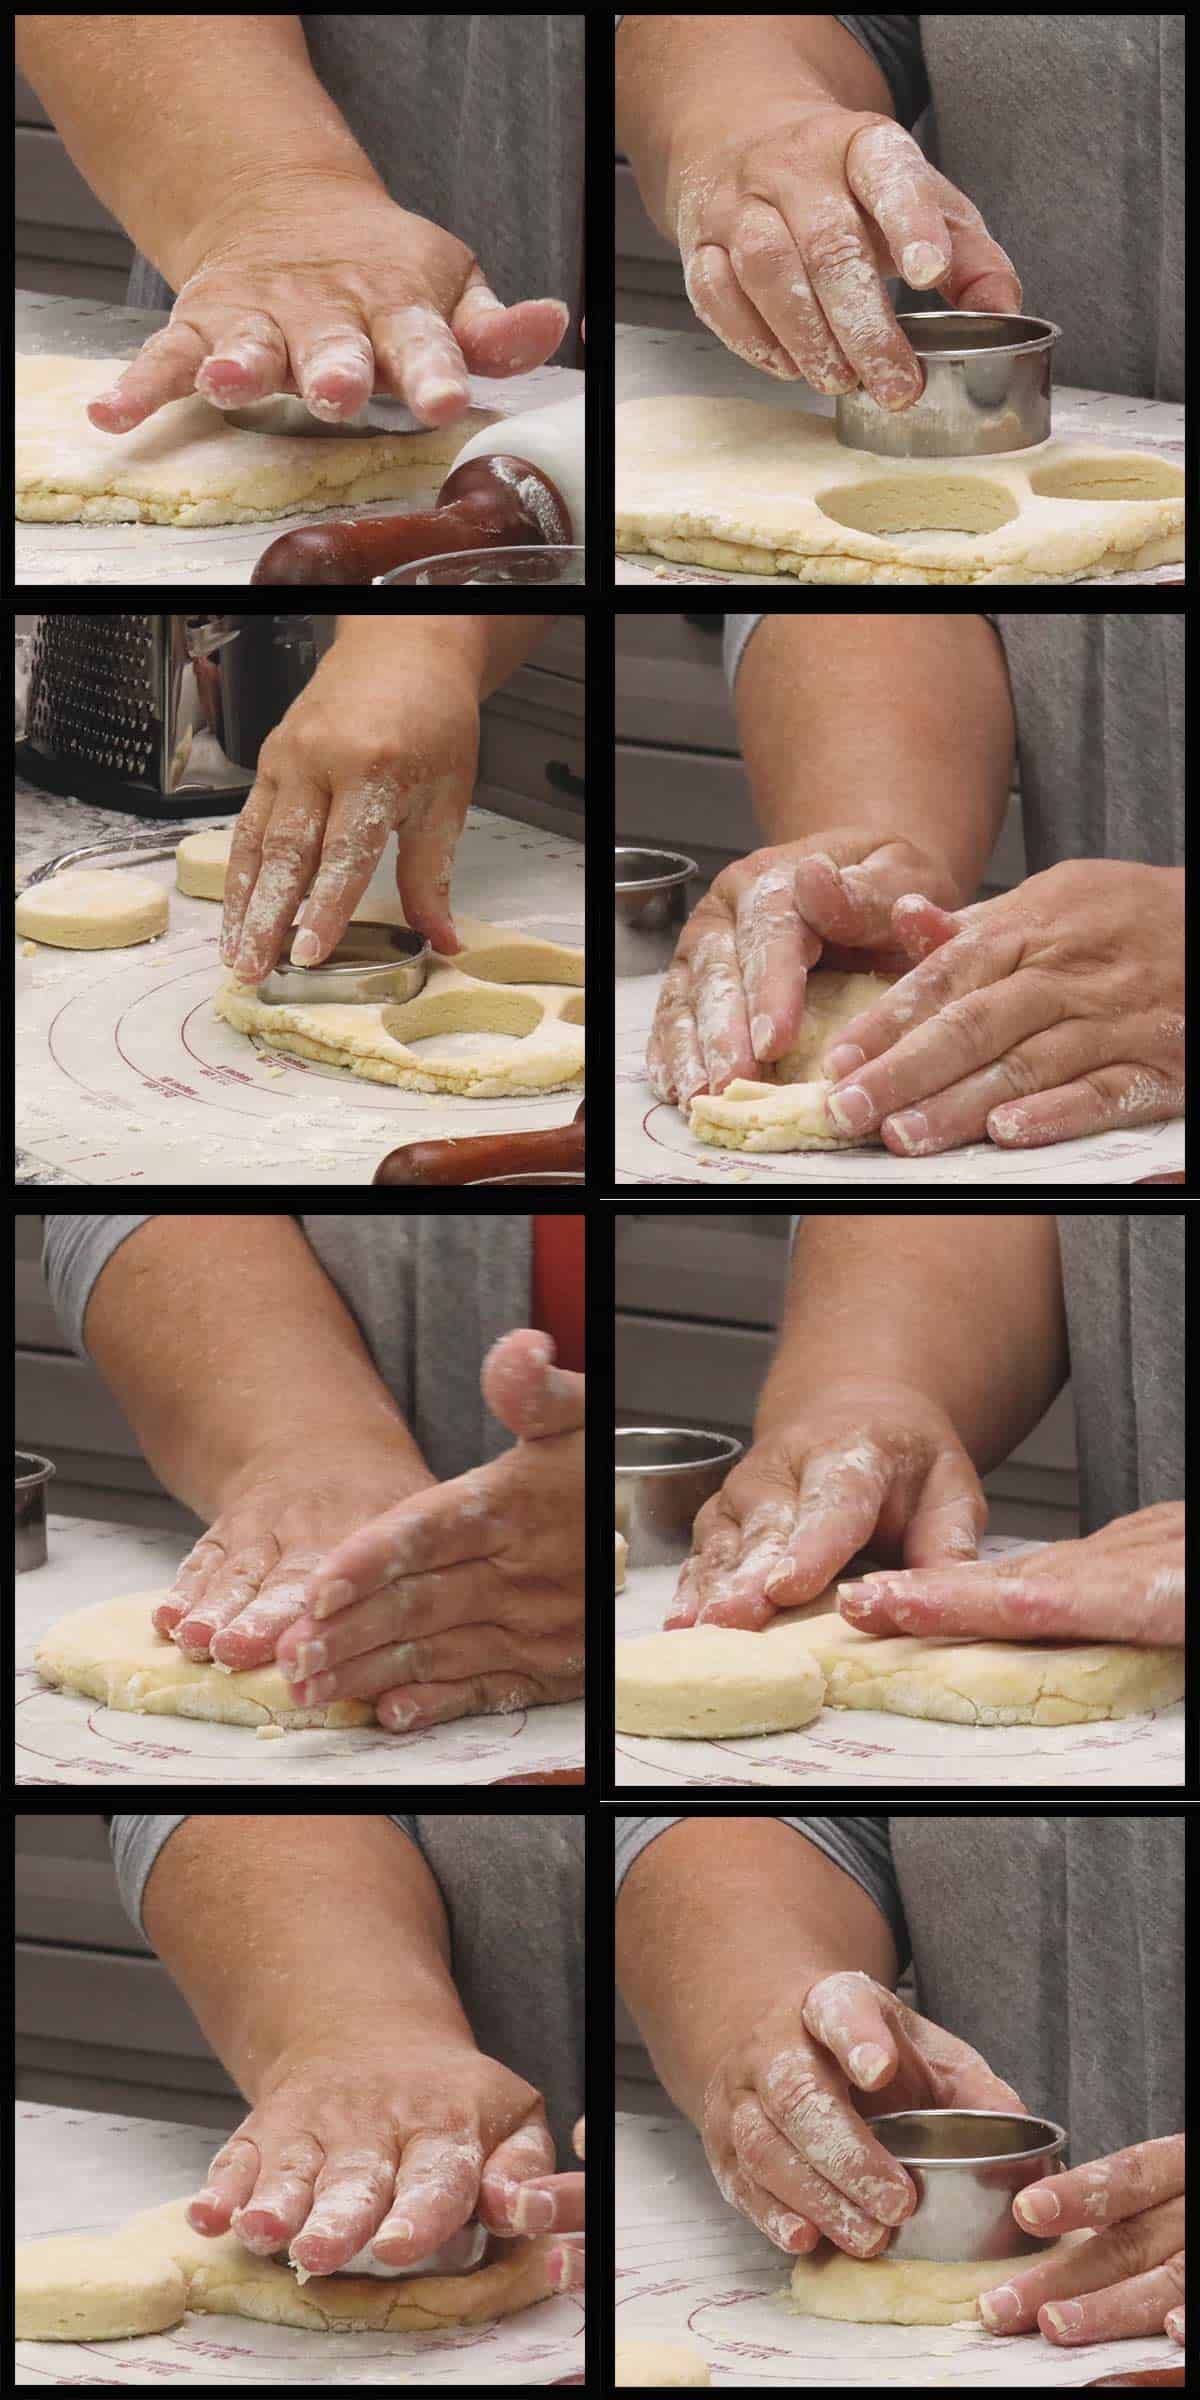
Grate the butter into the bowl of dry ingredients. If you don't have a grater, you can use cubed butter, just make sure it is in small pieces. Using your hands, toss the butter with the flour and once all the butter is coated with flour begin to break the butter up even more.
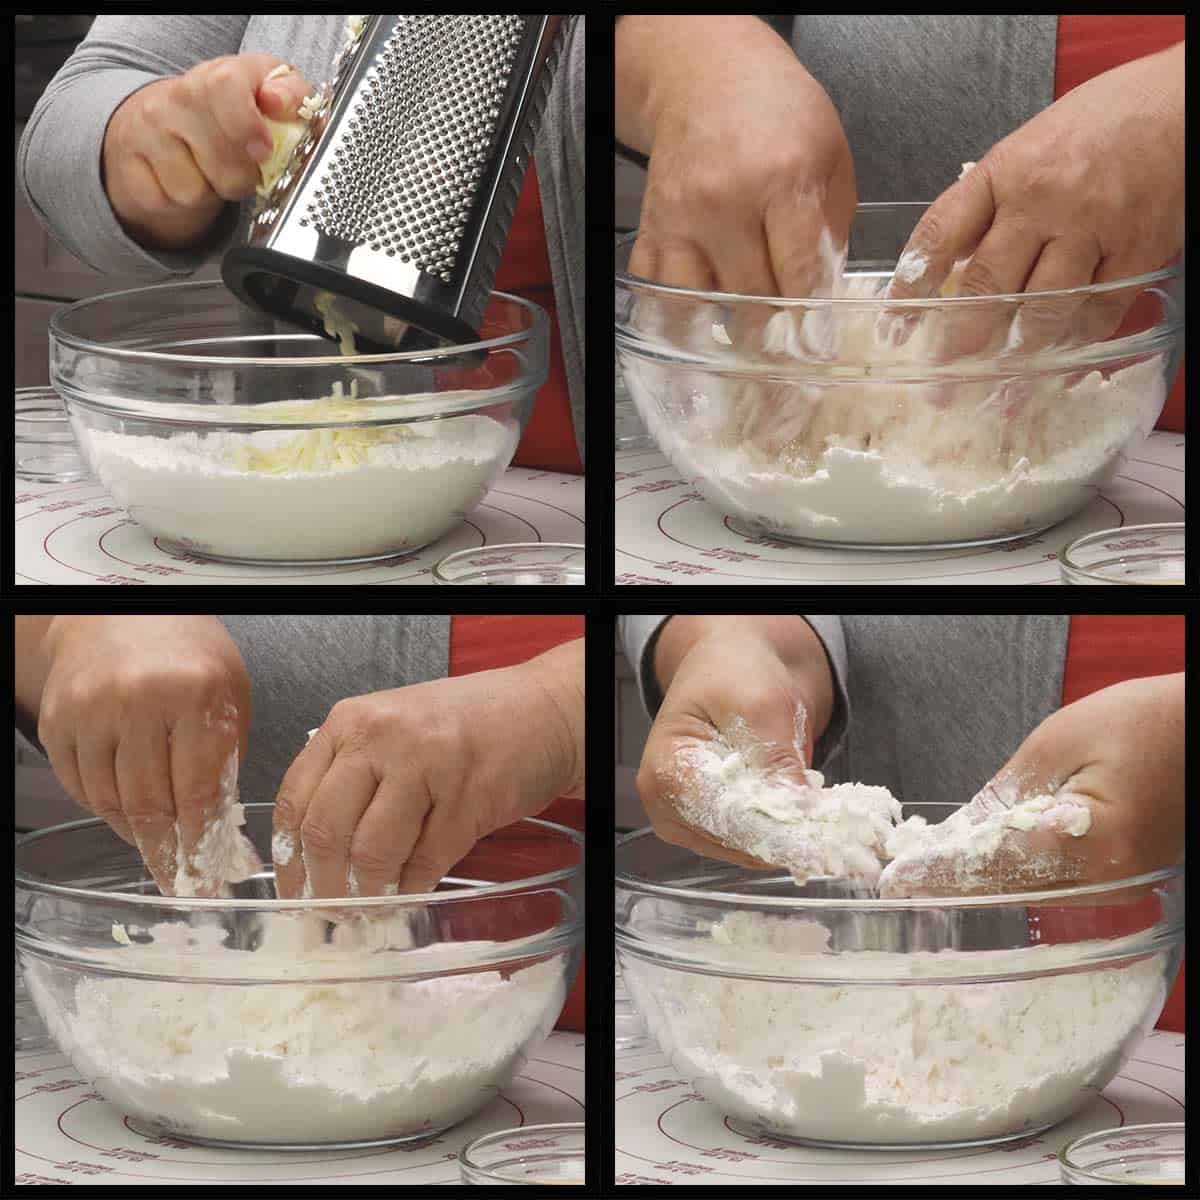
You want the mixture to feel like coarse sand with little bits of butter coated with flour. I do not recommend using a pastry cutter when making scones because it will not get the butter small enough. It's best to use clean hands.
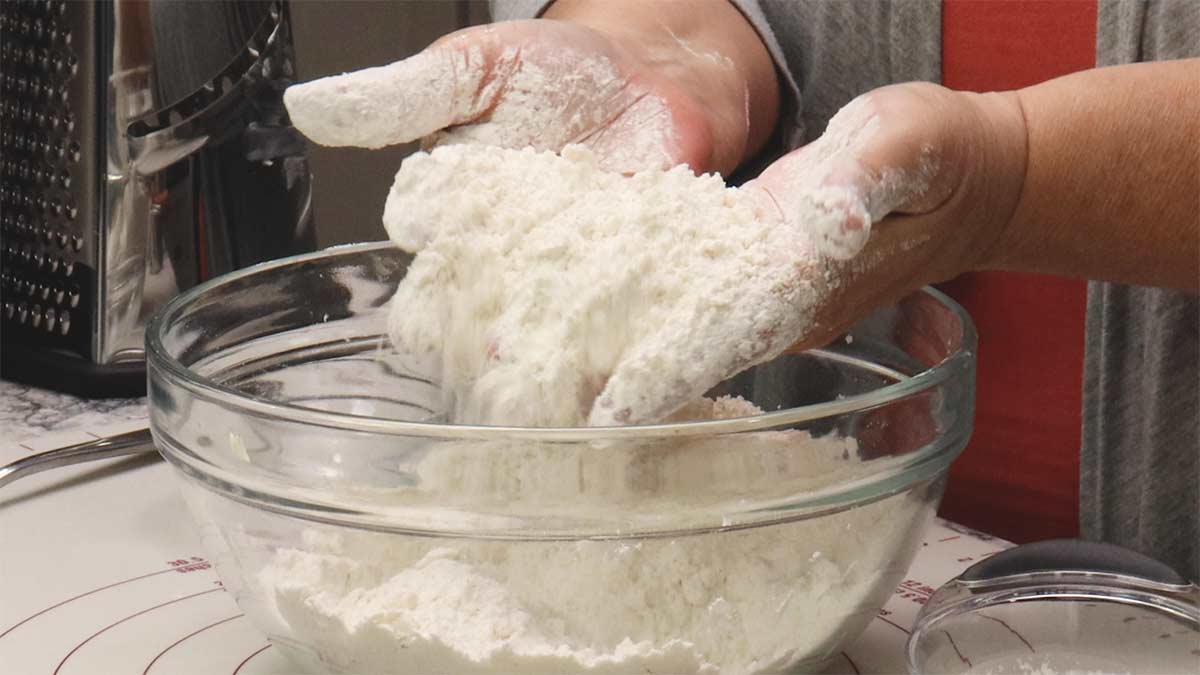
Make a well in the center of the flour and add in the large egg. Whisk the egg with the fork and then incorporate it into the flour. The flour mixture will be very dry.
After the egg is incorporated, the flour will still be very crumbly.
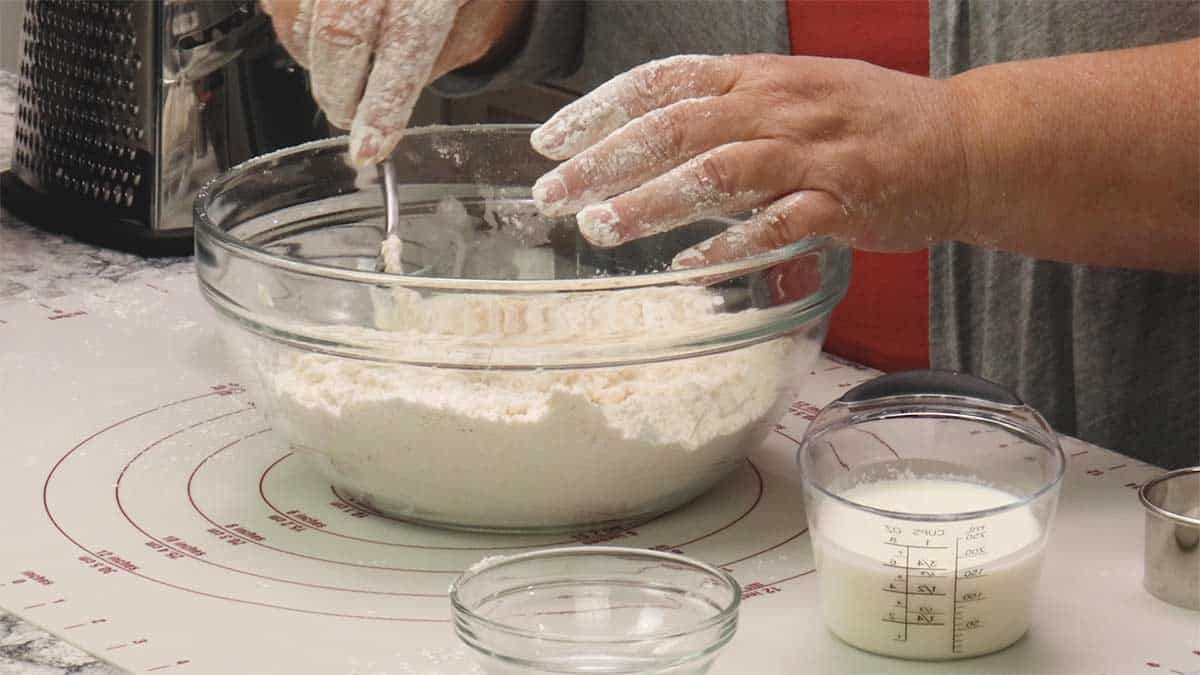
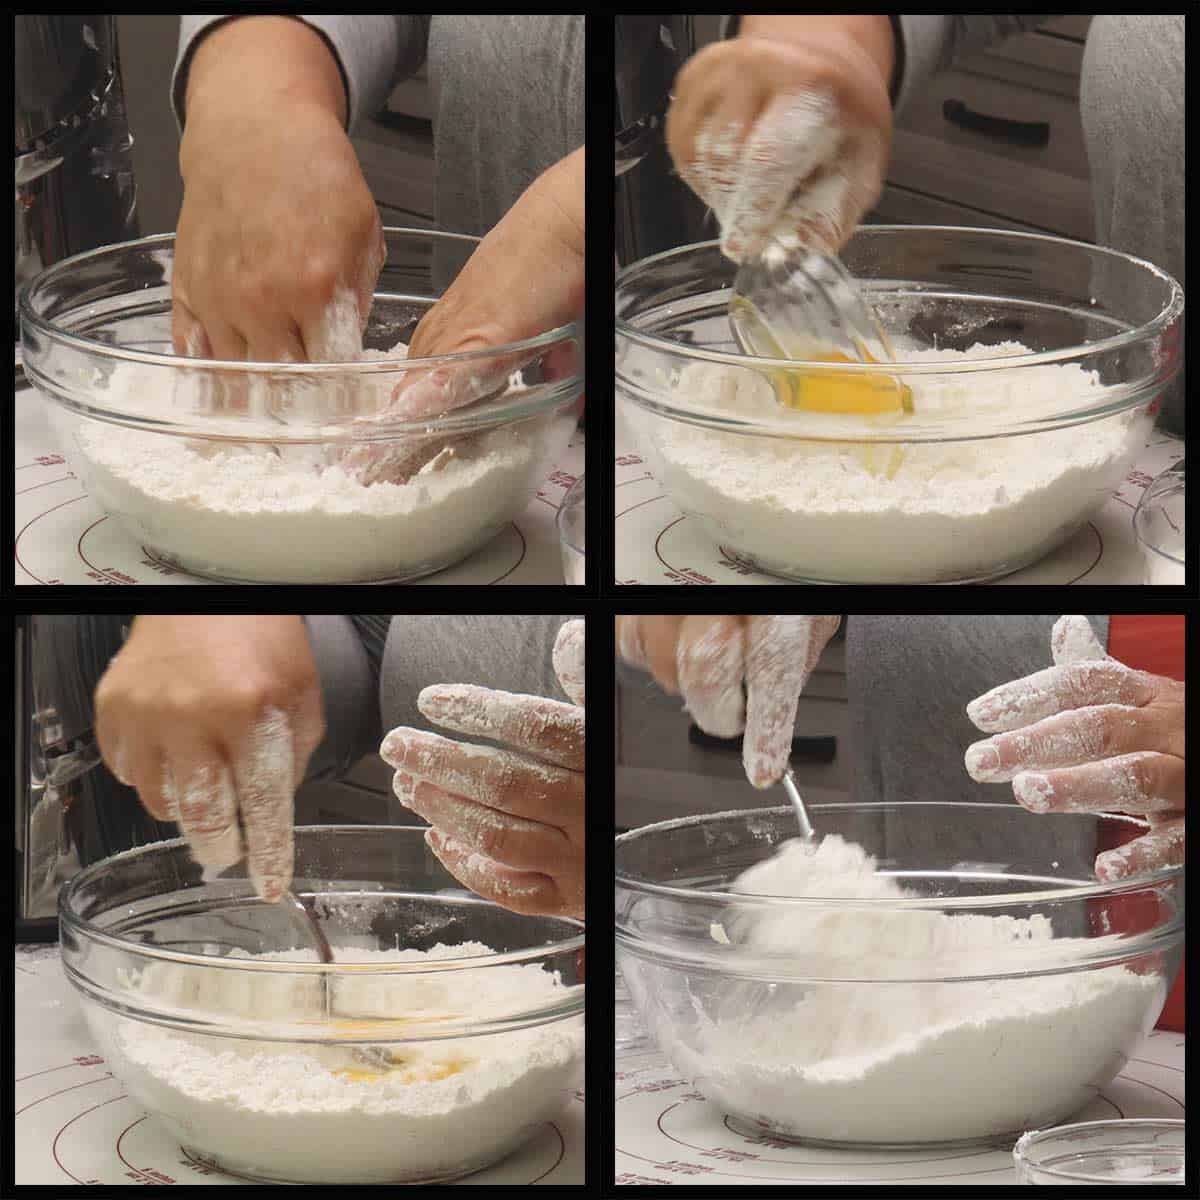
Add in the heavy cream (½ cup or about 5 ounces) and combine the flour with the cream using a fork or your hands until you have a crumbly mess of dough. Once most of the loose flour is incorporated into the large balls of crumbly dough, dump it out onto a pastry mat or large, clean work surface.
Forming & Cutting the Scones
Knead the crumbly dough by pressing it down and then pulling it back over itself and pressing again. This will get all of the large balls of crumbly dough to come together into a dough ball. This only takes about 45-60 seconds and you don't want to overwork the dough or it can become tough and won't rise as well.
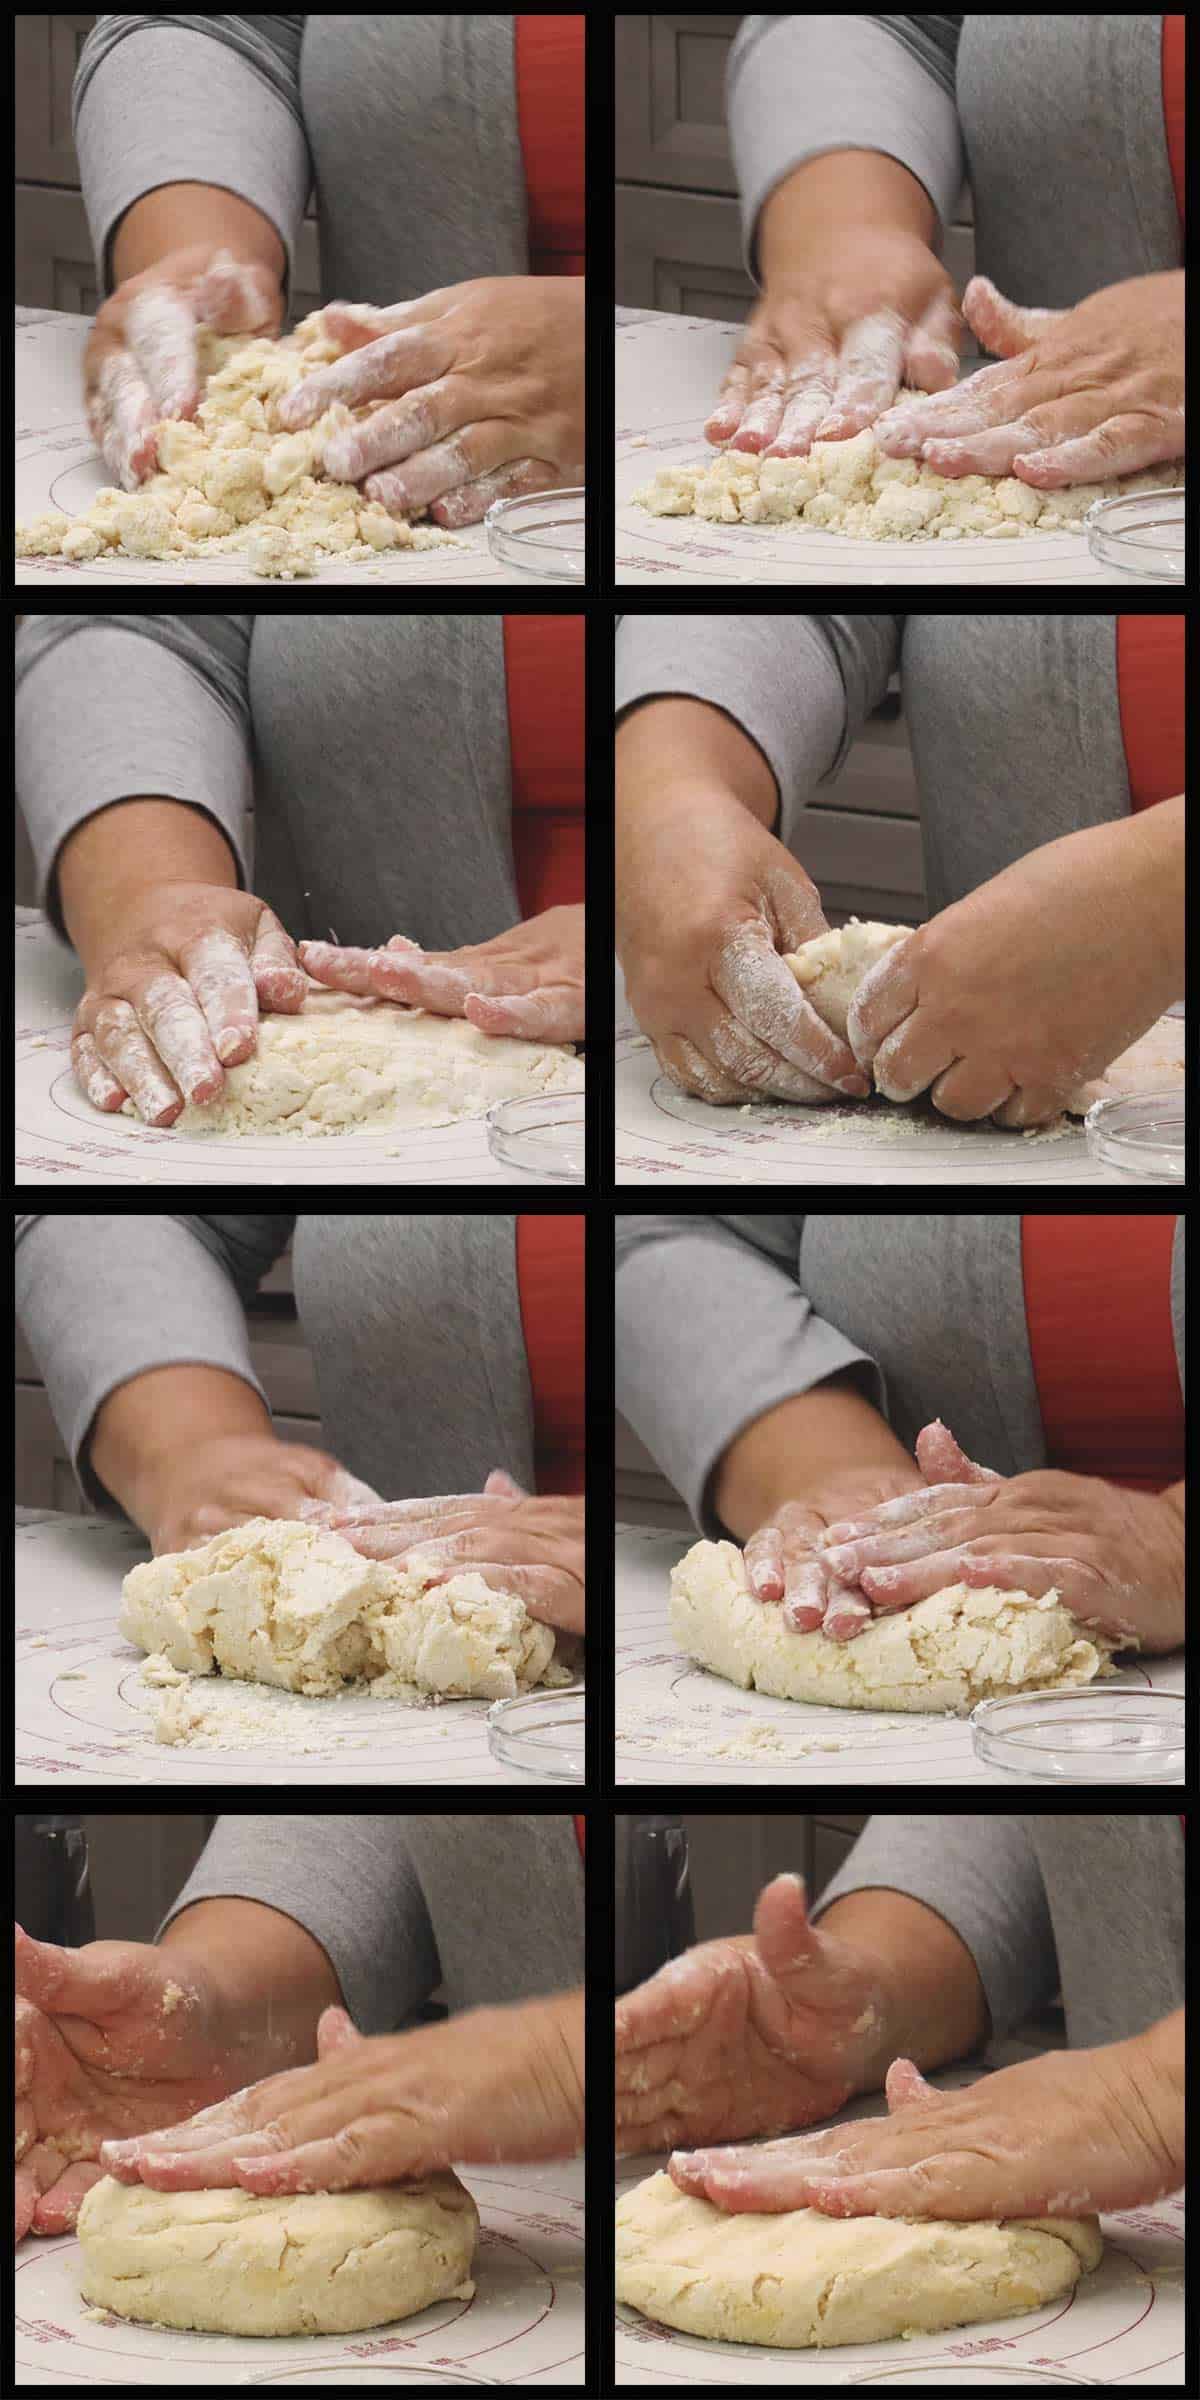
Lift the dough and put down a little flour so you have a lightly floured surface for rolling out the scone dough. Sprinkle a little flour on top of the dough as well and roll the dough into a rectangle shape that is about ½" thick.
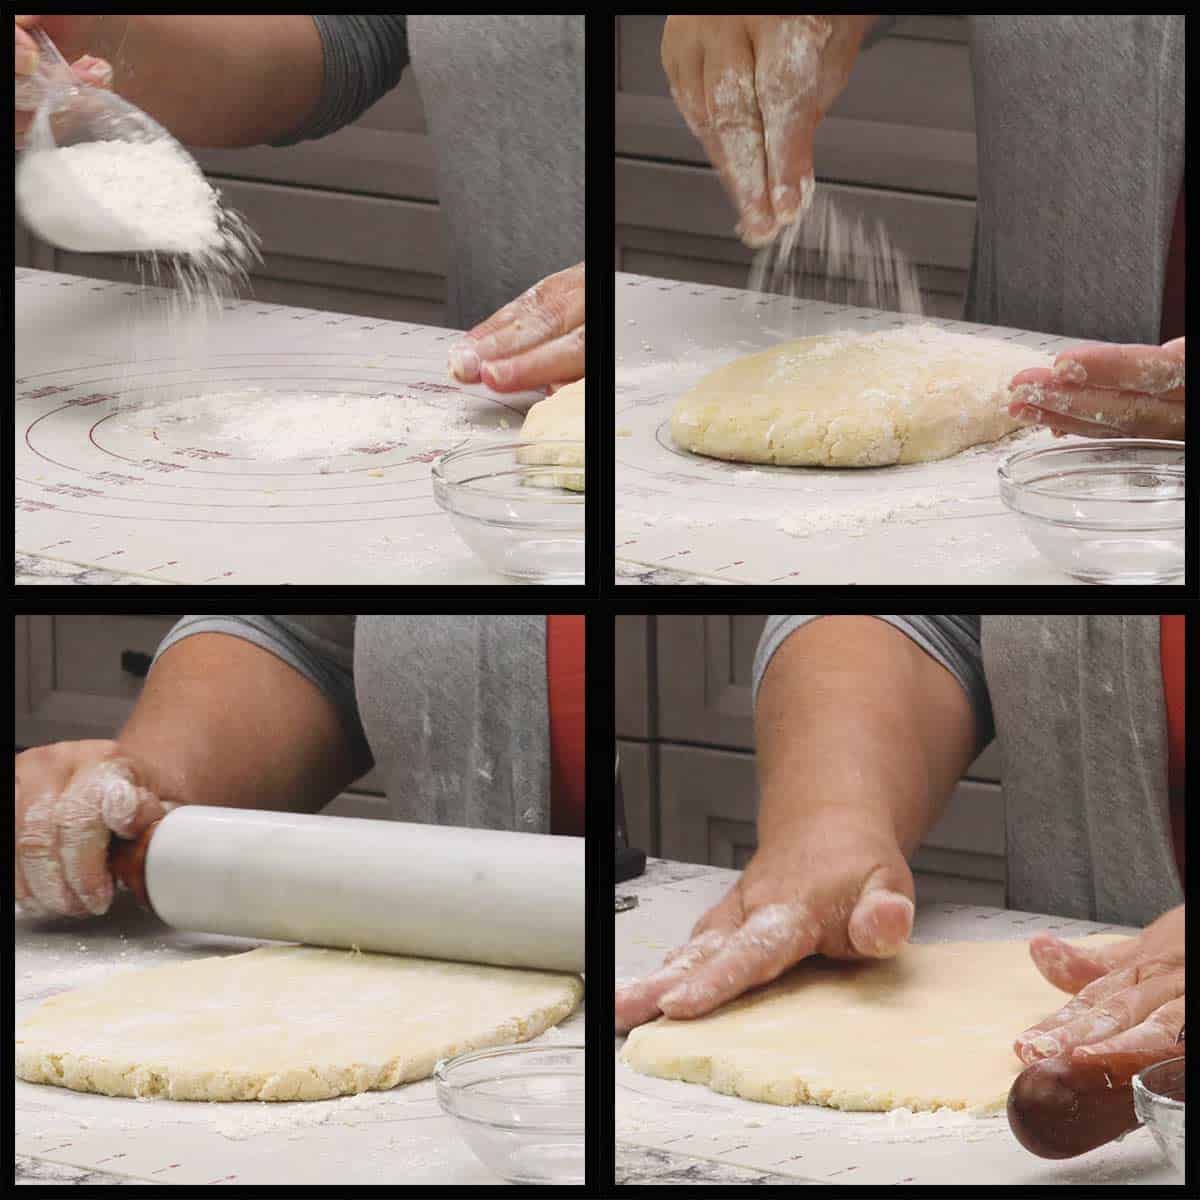
Fold the dough in half so you have a 1" thick piece of dough. The reason I do this is to have a natural break in the scones as they rise.
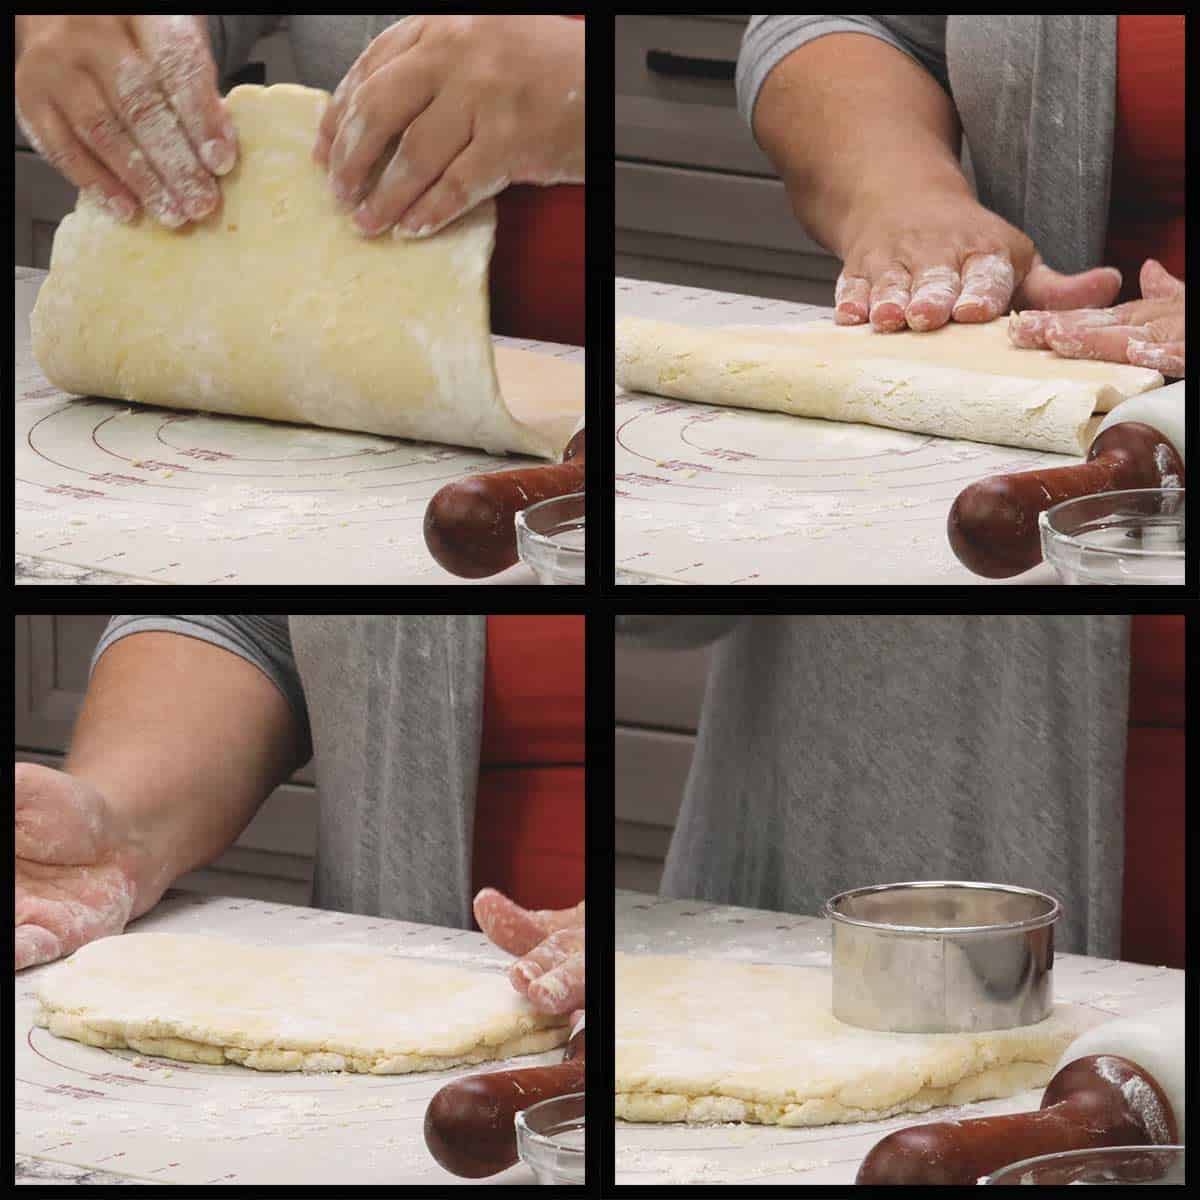
Using a round cookie cutter or biscuit cutter that is about 2½" in diameter, press straight down into the dough and lift the cutter directly up. Sometimes the scone will stay on the work surface and sometimes it will be in the center of the cookie or biscuit cutter.
Once you cut as many scones from the dough as you can, push the remaining dough together and flatten it out to be 1" in thickness. You can use an already cut scone as a guide for how thick the dough should be.
Cut out as many scones as you can and repeat the process until you don't have any dough left or at least not enough for another scone. The yield will vary based on the size of your biscuit cutter and the thickness of your dough. I usually get between 8-10 scones from one batch of dough.
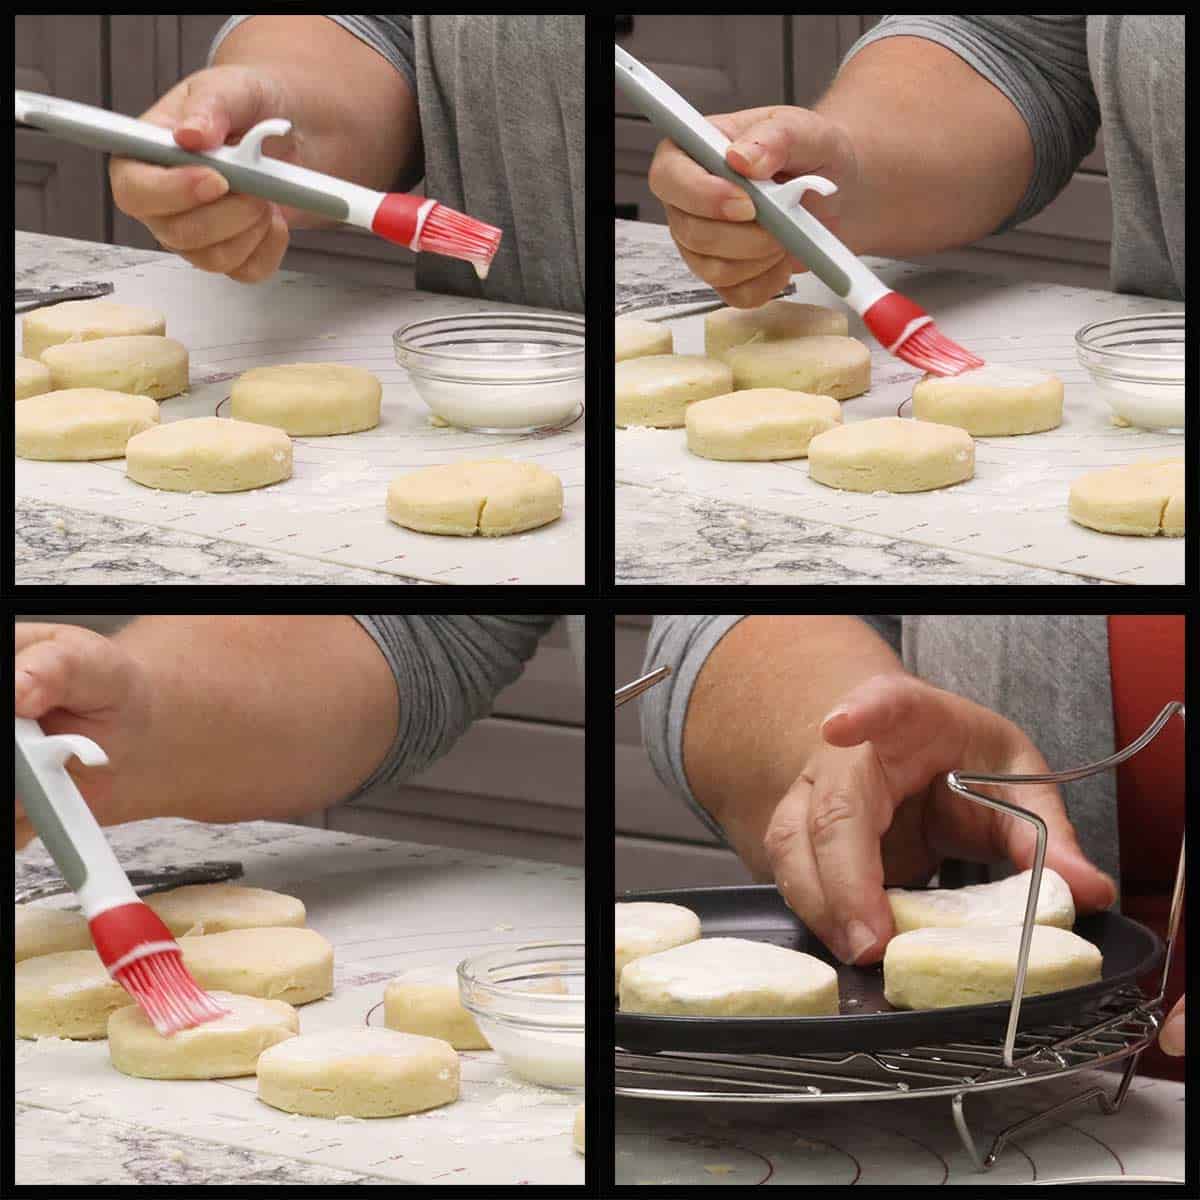
Once all the scones are cut, pour 1-2 Tablespoons of heavy cream into a small bowl. Brush the top of the scones, using a (affiliate link)pastry brush (or you can use your fingers or a small spoon), with cream. This promotes browning and gives a nice shine to the scones, but is optional.
When brushing on the cream try not to let the cream go over the edges which can interfere with the rising of the scones.
Air Frying the Scones
Make sure your air fryer has been preheated on 400℉/200℃ for a full 10 minutes. This provides the heat that the scones need to start rising immediately before the butter melts into the dough.
Place the scones in a single layer about 1" apart on a pizza plate, crisping tray, or in the air fryer basket. You want the scones to be off of the bottom of the air fryer if possible.
Air Fry at 400℉/200℃ for 8 minutes and then leave the scones in the air fryer for 2 minutes with it turned off. This finishes cooking the insides.
*All air fryers are slightly different and come in different sizes. The smaller your air fryer, the quicker it is going to cook. The closer the scones are to the heating element, the browner they are going to become. Make adjustments to the temperature and the cooking time based on your air fryer. Check on the scones after 6 minutes and if they are getting too brown, lower the temperature. If they aren't brown enough, increase the temperature or cook a few minutes longer.
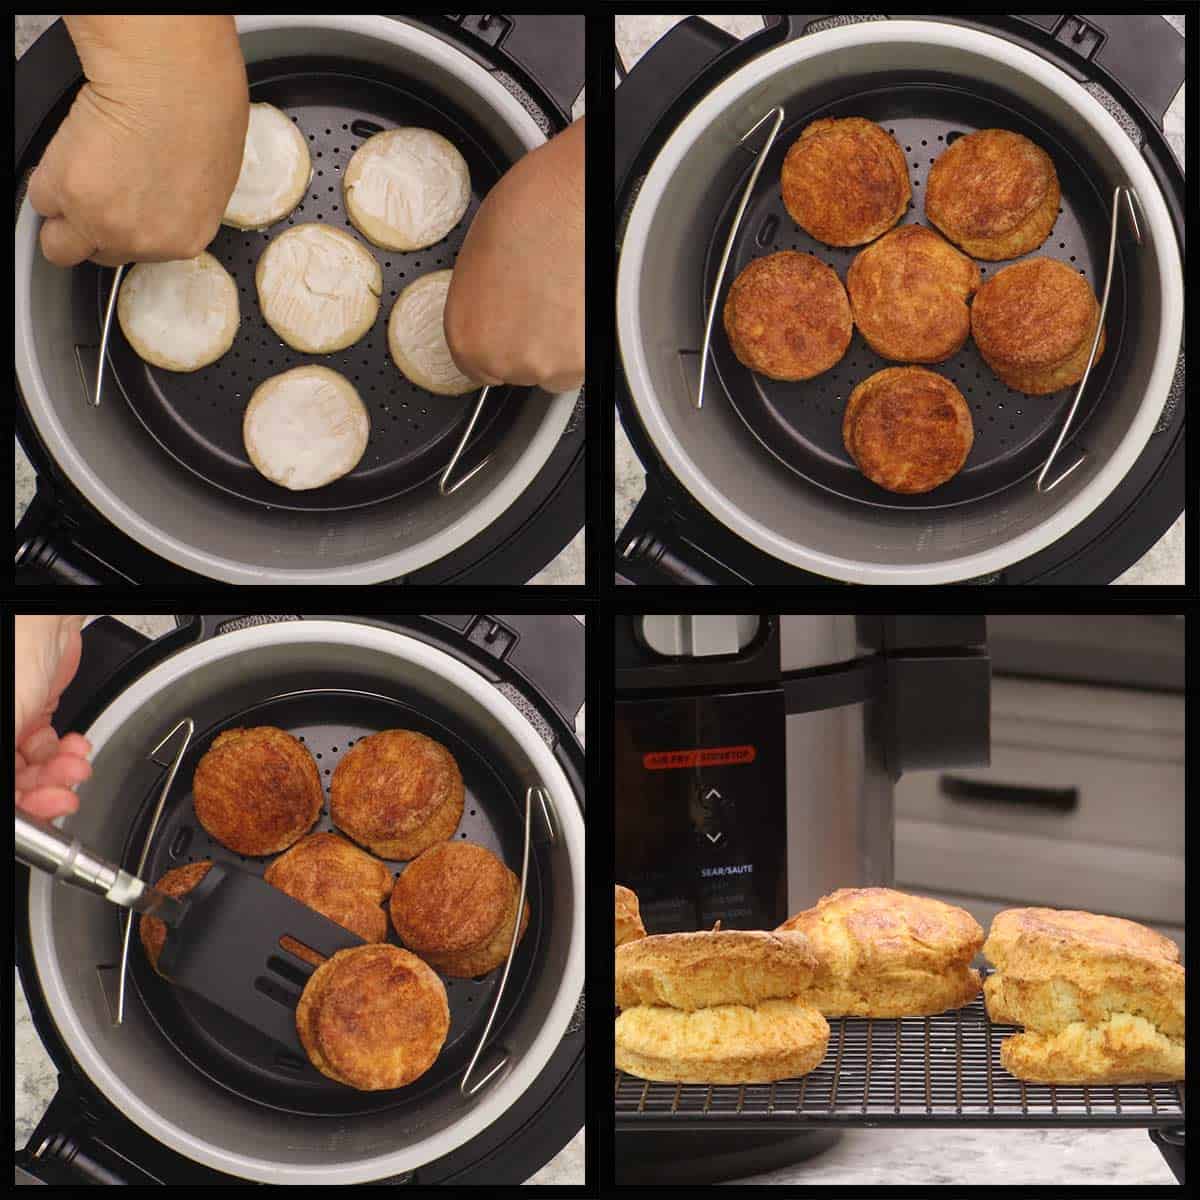
Once the scones have finished air frying and are golden brown, remove them from the air fryer and let them cool on a wire rack or (affiliate link)cooling rack.
I like to eat my scones when they are still warm.
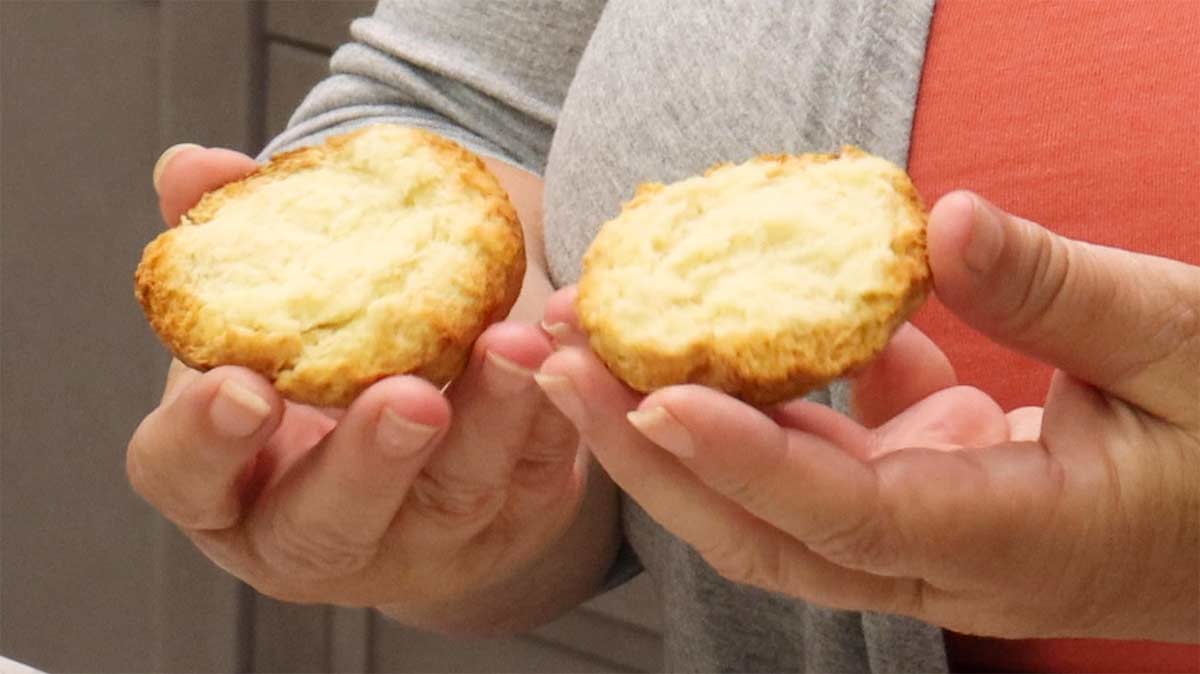
Don't forget to slather with clotted cream and strawberry jam! The order you choose is up to you! 😉
Consider the debate started, leave a comment!
Serve & Enjoy!
Variations of Air Fryer Scones
This recipe is for a plain British-style scone, but many people in the UK like to add sultanas or what is comparable to golden raisins in the US. The beauty of a basic scone recipe is you can get creative and make them how you want them.
Tips for Adding Extras to Scone Dough
- Add spices directly to the flour mixture before the butter is added so it gets incorporated evenly.
- Add extracts or liquid flavorings when the cream or milk is added to the dough and, if the liquid is more than 1 teaspoon, reduce the cream/milk by that amount.
- Toss fresh fruit in flour before adding and adjust for extra moisture by reducing the cream by about 1 Tablespoon.
- The drier the ingredient, the better. If you want to add things like chopped fresh strawberries, make sure they aren't too wet and toss them in flour before adding to the scone dough.
- Use about 1 cup of ingredients like dried fruit, fresh fruit, chocolate chips, etc. Any more than that and it might affect how the scones bake.
Different Types of Scones from the Basic Scone Recipe
- Raisin Scones: Add ½ cup of dried raisins -- they can be golden or black raisins depending on your preference. For softer raisins, soak them in the cream for 30 minutes. If you soak them, add them when the cream is added. If you don't soak them, add them in after the butter is crumbled into the mixture.
- Cinnamon Raisin Scones: Follow the instructions above, but add 1 teaspoon of ground cinnamon to the flour.
- Cinnamon Sugar Scones: Add 1 teaspoon of ground cinnamon and 2 extra Tablespoons of sugar to the flour. Add 1 teaspoon of vanilla extract to the cream. Mix up 1 Tablespoon of demerara sugar and ½ teaspoon of cinnamon in a small bowl and sprinkle on top of scones after they are brushed with cream. Lower air fryer temp to 375℉/190℃
- Cheese Scones: Add about 1 cup of grated cheddar cheese after the butter is mixed into the flour. If you want them a bit spicy, add some cayenne or chipotle powder. You can omit the sugar or leave it in.
- Lemon Basil Scones: Follow this recipe: Lemon Basil Scones
- Air Fryer Blueberry Scones: Toss 1 cup of washed and dried blueberries in about 2 Tablespoons of flour and add to the scone dough after you add the egg. Be gentle when adding blueberries, you want them to stay whole in the dough. Once you add the cream, add 1 teaspoon of vanilla extract and toss the mixture with your hands to combine together.
- Cranberry Almond Scones: Use about 1 cup of dried cranberries and ¼-½ cup of chopped almonds to the flour mixture after adding in the butter.
Frequently Asked Questions
While there are similarities in the ingredients and the technique for making them, the British scone is not as fluffy and flakey as a Southern biscuit. The texture is a little denser, but not dry by any means. If you love biscuits, you will love a British Scone.
You can make as much or as little scone dough as you want by simply increasing or decreasing the ingredients. I don't recommend making more than a double batch at a time or the butter may become too soft before you can roll and cut all the scones which will result in denser scones that don't rise as much.
When stored in an airtight container after they are completely cool, they will last 2-3 days at room temperature and 5-7 days if refrigerated.
You can also freeze scones and they will last up to 3 months, after that they tend to dry out in the freezer and the texture isn't as good.
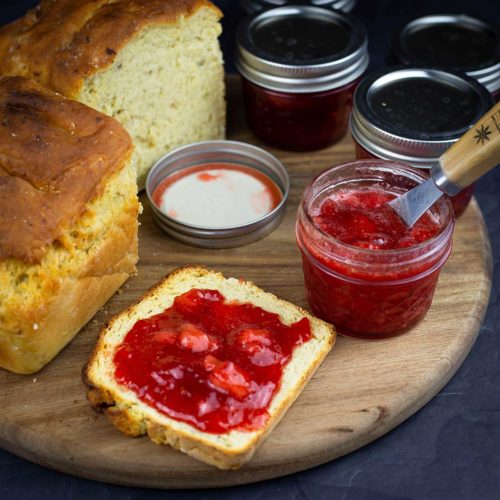
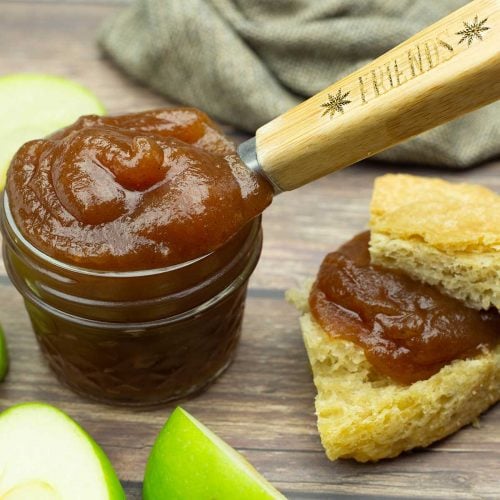
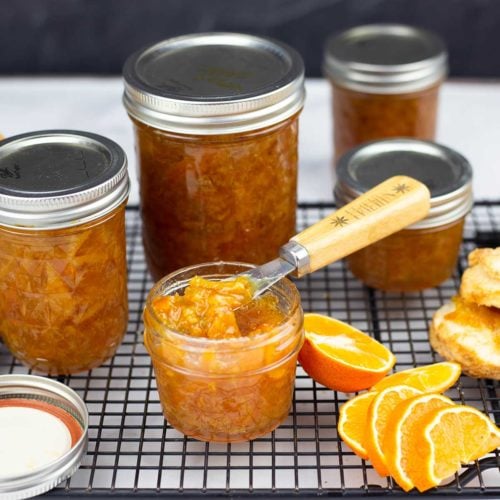
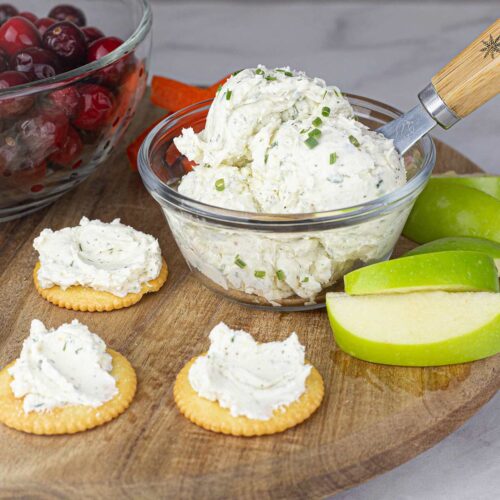
Toppings for Homemade Scones
Before you make your air fryer scones, take a look at these recipes and decide which topping you want to try on your scones!
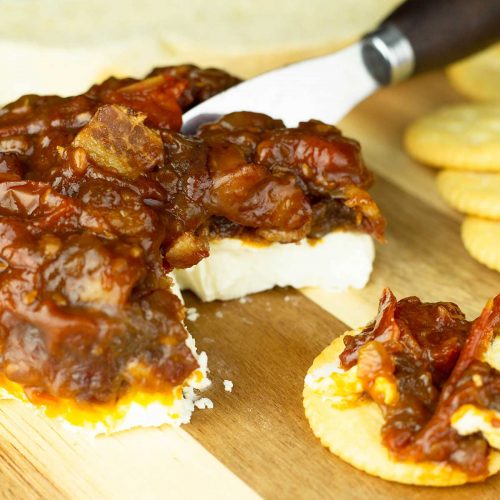
Definitely try the jalapeno jelly or the bacon jam if you make cheese scones!


Air Fryer Scones Recipe
Ingredients
- 2 cups all purpose flour
- ¼ teaspoon fine grind sea salt or kosher salt
- 4 teaspoons baking powder
- 2 Tablespoons granulated sugar optional
- 4 Tablespoons salted butter cold
- 1 large egg lightly beaten
- ⅔ cup heavy cream Plus extra for brushing tops of scones
Would you like to save this recipe?
Instructions
- In a medium size mixing bowl combine the flour, salt, baking powder and sugar.2 cups all purpose flour, ¼ teaspoon fine grind sea salt or kosher salt, 4 teaspoons baking powder, 2 Tablespoons granulated sugar
- Grate the cold butter into the bowl and using clean hands gently mix together until the butter combines with the dry mixture and becomes the texture of coarse sand.4 Tablespoons salted butter
- Make a well in the center and add in the lightly beaten egg. Using a fork, gently begin to mix the egg with the flour and butter mixture. Slowly add in the cream and contine to mix with a fork until it starts to form a crumbly dough.1 large egg, ⅔ cup heavy cream
- Turn the crumbly dough out onto a pastry mat or a clean, lightly floured work surface. There will be loose dough at this point. Gently fold the dough and press it together, gathering the loose dough at the same time. Repeat this a few times until the dough is holding together. It will still be a cracking a little.
- Press the dough into a rectangle shape. Lightly flour the surface and using a rolling pin, roll the dough until it is about ½" thick. Fold the dough in half so it is 1" thick.
- Using a 2-2½" biscuit cutter, press straight down into the dough to form the scones. Don't twist the biscuit cutter, press straight down and lift straight up. Repeat this until you run out of area on the dough. You should get 4-5 scones at this point.
- Push together the leftover dough to form another 1" thick square and cut more scones. Continue to do this until all the dough is used up. With a 2½" biscuit cutter, you should get about 8 scones that are each 1" in height.
- Preheat the air fryer on 400℉/200℃ for 10 minutes. Lightly brush the tops with cream, making sure not to spill it over the edges which can prevent them from rising as high. Place the scones on the cooking surface, which can be the air fry basket, air fry plate, or a pizza plate. Place the scones about 1" apart. Air fry the scones 400℉ for 8-10 minutes or until they are golden brown on top. I found that 8 minutes of cook time and then leaving the scones in the air fryer turned off for 2 minutes cooked them perfectly.
- Depending on the size of your air fryer, you may need to cook in batches.
- Slather with clotted cream and jam and enjoy!
Notes
Nutrition
About the Recipe Author, Louise Long
Louise is a full-time recipe creator and food blogger @ The Salted Pepper. She has over 30 years of experience with cooking and recipe development. She owned a restaurant for several years and was a full-time RN until retiring to blog full-time.

She published her first cookbook in the Fall of 2018 and is very interested in writing several more.
Louise is also the creator of an online Ninja Foodi Pressure Cooking Course with over 100 instructional step-by-step videos. People absolutely rave about the course and all the value they have received from it.
Louise has several very active Facebook groups that help people with the basics of cooking and learning more about the appliances they love.
Ninja Foodi Pressure Cooker & Air Crisper 101
Ninja Woodfire Outdoor Grill & Smoker
Louise is also a YouTube creator and you can find most of her recipes in video format on The Salted Pepper YouTube channel.
She is very responsive to messages and eager to help in any way she can. Get more Information about Louise & contact information
I WOULD LOVE TO SEE WHAT YOU ARE COOKING UP IN YOUR KITCHEN! TAG ME @THESALTEDPEPPER ON YOUR FAVORITE SOCIAL MEDIA PLATFORM WHEN YOU MAKE A DISH!
BE SURE TO FOLLOW THE SALTED PEPPER RIGHT HERE ⇓⇓⇓⇓⇓
Anne says
Overbaked, sorry Louise
Louise says
No need to apologize, but I'm not sure why yours overbaked. Did you check on them after 6 minutes like suggested? I'm also curious as to which airfryer you used and the size. That could make the difference. Cooking times and even temperatures to a certain degree are only guidelines because there are many variables that can affect the outcome. It's always a good idea to keep an eye on things, especially the first time you make them and adjust as necessary. If they are getting too brown too quickly, lower the heat and maybe even the time. I sure hope they weren't ruined!
Anne says
Scone dough should be very moist and ragged looking until being gathered in a round prior to baking
Louise says
You are absolutely correct and if you look at the pictures in the post you will see that mine was exactly like that. Enjoy!
Anne says
Louise, Sorry Luv but your scones look dry and over baked, English scones should be light beige colour with gold brown top, when pulled apart should feel slight cushion feel not dark brown and crispy on out side. Have you tried steam baking scones in ninja15-1 .
Best of luck from 85 year old British lady xx
Louise says
I appreciate your feedback, but they weren't dry or over baked. They were delicious with the slightest crisp on the outside and soft inside. I have had feedback from others who made the recipe and they turned out perfect them. Have you made the recipe? If so, then we can try to troubleshoot what went wrong for you.