
 Asian Steamed Buns are one of those foods that if you have tried them once, you want them again and again and again. They are simple, but oh so delicious and EASY to make in the Ninja Foodi!
The more I use the Ninja Foodi, the more amazed I am! This small cooking appliance can do pretty much everything! I was working on a recipe for Asian Pulled Pork and told my husband, this pork would be so good in those little Asian Steamed Buns that we had at that restaurant. He said, "Can you make them?" HUH? Make them? How? It seemed like it would be impossible and then I remembered that the Ninja Foodi is a magic machine and I made them!
This post may contain affiliate links. If you make a purchase after clicking a link, I may earn a small commission. As an Amazon Affiliate, I earn from qualifying purchases.
Talk about shocked! I could hardly believe that they turned out exactly as I remembered; little pillows of heaven. I did my happy dance and I'm so excited to share this easy recipe with you!
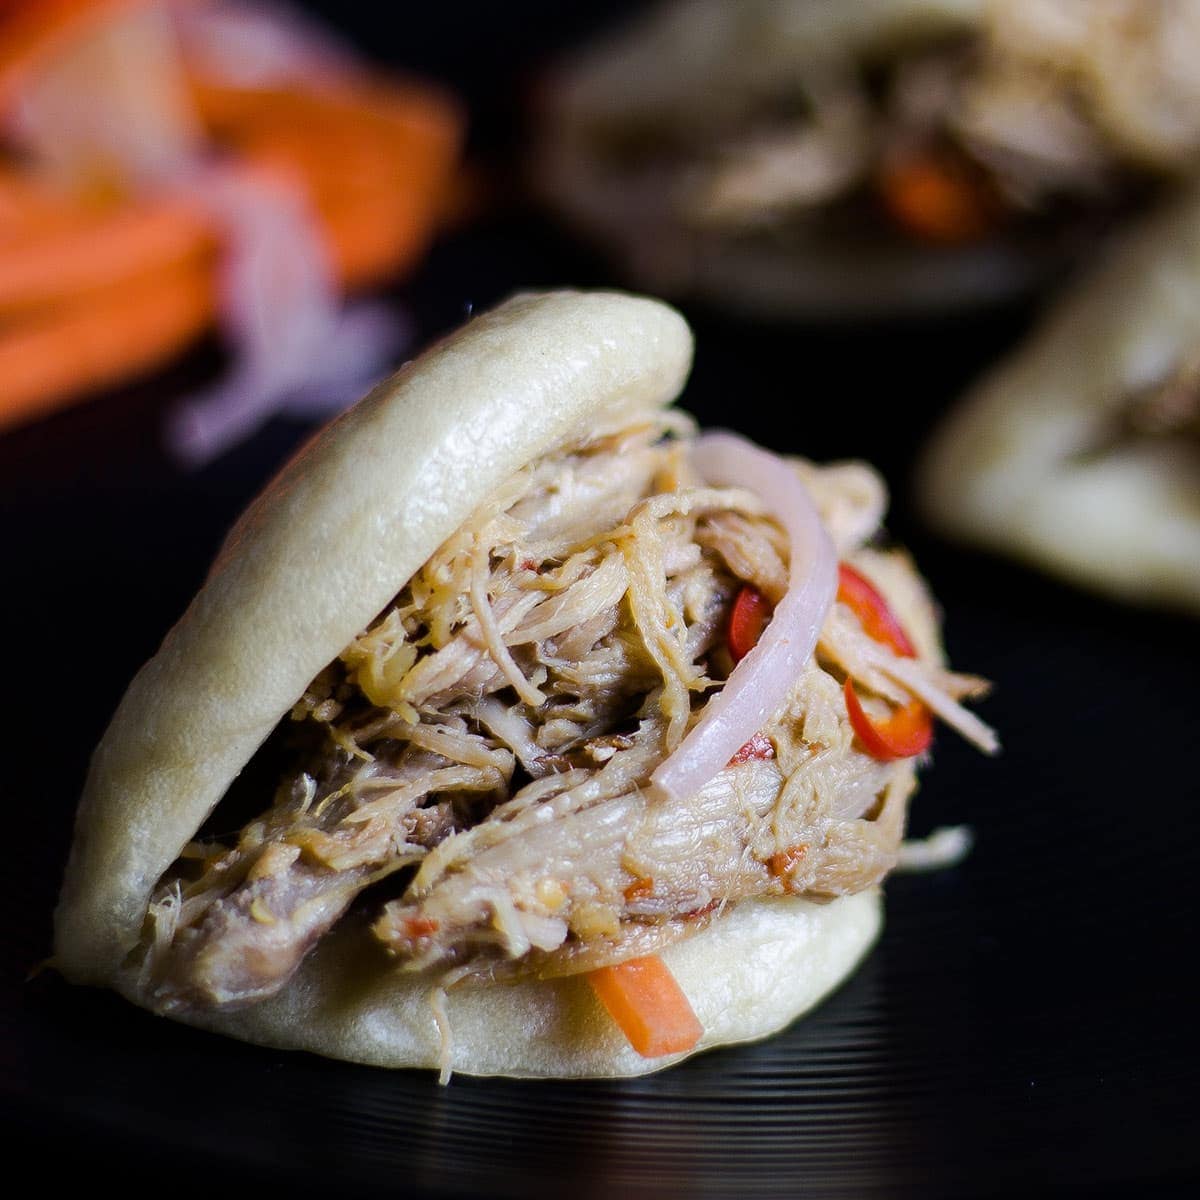
What are Asian Steamed Buns?
Honestly, I had never experienced a steamed bun until I ordered Asian tacos at a restaurant. When ordering them, I had no idea how they would be presented, so when I saw these little taco shaped buns I was more than intrigued. What are these? I didn't have time to look it up right then, I had to dive right in and taste one.
WOW! I could not believe how soft and fresh these little pillows of fluff were! I devoured them and over the next year looked for them every time we went out to eat. Sadly, I never found them again. I did look them up and found out a few things about Asian Steamed Buns or Bao as they are also called.
Steamed Buns are a yeast bread and can be made a variety of ways. I decided to use a bit of milk and some powered sugar to make a softer dough and it worked beautifully!
Instead of baking, these buns are formed into various shapes and sizes and steamed. This wet cooking method results in a tender and soft bun that does not form a crust. It is the same texture throughout the bun. Delicious!
What can I fill the Steamed Buns with?
Pretty much anything you'd like! I like them with an Asian-inspired filling, but you could fill them with just about anything. My favorite filling so far is this recipe for Asian Pulled Pork. It is a perfect filling and don't skip the pickled vegetables!
Another filling that is wonderful is this recipe for Curry Chicken. Delicious!
You can also stuff them with chicken salad, ham and cheese, bacon and eggs, or even make a BLT!
What would you fill your Asian Steamed buns with? Let me know in the comments!
Are Asian Steamed Buns Hard to Make?
Nope! In fact, they are one of the easiest types of buns to make in my opinion. The dough comes together very quickly and you don't have to knead them for very long and when you use the Ninja Foodi to steam them, they are pretty much hands off.
You can use a stand mixer with a dough hook and make them even easier.
Give them a try and I'll bet you'll be pretty surprised how easy they are to make in the Ninja Foodi! If you want to watch me make these Asian Steamed Buns, check out this video on YouTube.
Do I need special equipment to make Steamed Buns?
I use a bamboo steamer basket to steam my Asian Steamed Buns and I absolutely LOVE it! I also use it in this recipe for Orange Beef & Broccoli. I find 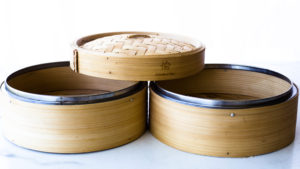 it works perfectly to steam the buns, but if you don't have one try this method (I have not tested this):
Make the steamed buns as directed and place on parchment. Line the buns in the bottom of the steam/ac basket and then cover with a piece of parchment to keep excess water off. Or you could cover with a glass lid that fits the top of the basket. The goal is to allow the steam in to cook the buns but not have a ton of condensation on them.
I'm pretty sure this will work, please let me know if you try it!
Can I freeze Asian Steamed Buns?
Yep! You can do this a couple of ways, but I recommend freezing the buns BEFORE they are cooked. I have frozen already-cooked steamed buns and the texture just isn't as soft and fresh.
Once you form the steamed buns and have the parchment between the folds, you can pop them into a freezer bag and try to get as much of the air out as possible and freeze until you are ready to use them.
When you take them out of the freezer, allow them to come to room temperature in the steam basket, during this time they will also do their second rise. You don't want to have to move them after the second rise or they might deflate a little bit. Proceed with steaming.
How to Make Asian Steamed Buns in the Ninja Foodi
I know a lot of people are intimidated by making dough and this recipe is a great way to get your feet wet with bread making because it is so easy!
Proof the Yeast:
The first thing you want to do is proof the yeast. The most important part of proofing yeast is getting the water temperature correct. If the water is too cold, the yeast will have a hard time multiplying and blooming. If the water is too hot (greater than 115° F) it will kill the yeast.
There are different types of yeast and the two most common are; Instant Dry Yeast and Active Dry Yeast. Either will work in this recipe.
Instant dry yeast (the kind I use) does not have to be proofed before using because the granules are smaller and it has been manufactured to not require proofing. So, why do I proof it? Just to make sure it's working! Some even say not to do this because your bread might not rise as well, but I have never had an issue and I always proof my yeast, no matter what kind I have.
Active dry yeast does require proofing, although I have read some articles that say it doesn't. I always recommend proofing Active Dry Yeast. Who wants to go through the whole process of bread making and end up with a dough that didn't rise? Not me.
To proof the yeast, you will need a few tablespoons of warm water, I aim for between 104° F and 110° F, the yeast and sometimes a little sugar. In this recipe, I didn't add in the powdered sugar and just let the warm water do the trick. If you notice your yeast is not bubbling and foaming after a few minutes and you are sure your water temp was accurate, add in a teaspoon of the powdered sugar and see if that gets it going.
TIP
If you don't have any way to measure the temp of your water, you can use this tip as a guide. Use very hot tap water or even put the water in the microwave for about 10 seconds. Then put your finger in the water, if you feel like you have to pull it back out quickly, your water is too hot. The water should feel like very hot bath water, but you should be able to leave your finger in the water without feeling like the water is burning you.
While the yeast is proofing, gather the rest of your ingredients.
Sift the Flour
I know, what a pain! I really don't recommend skipping this step for this recipe because you want a very light and soft bun. By sifting the flour, you aerate it, remove any clumps and the end result is a softer crumb on your bread/bun. 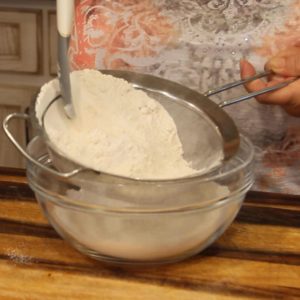
There are many ways you can sift flour, but the easiest way I find is to use a fine sieve strainer. You can also use an actual flour sifter, but I find them difficult to clean and dry.
Whatever you use, make sure it is very dry or the moisture will combine with the flour and clump.
Mix the dough
Add the proofed yeast, milk, powdered sugar, and water to the flour and stir to combine. The mixture will be dry and don't expect it to form a dough ball at this stage.
Once the the mixture is combined into a very loose, crumbly dough, turn it onto a lightly floured work surface. My favorite thing to use for kneading dough is this pastry mat from Pampered Chef. I didn't use it in the video for Asian Steamed Buns because it was still drying from a previous use.
Knead the dough
You can mix and knead the dough in a stand mixer with the dough hook if you prefer, but I enjoy kneading it by hand. I always recommend kneading by hand to new bread makers because you get the feel of how the dough should be and can better judge when it is ready in the stand mixer.
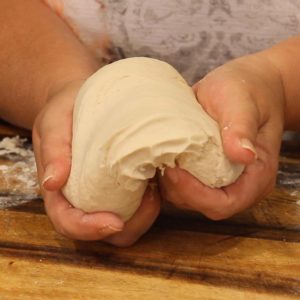 Once the dough is on a floured surface, you will want to press down and away from you with the palm of your hand. Then, turn the dough 90° and fold the dough back towards you, gathering the loose dough around the edges. Repeat this processes for 5-10 minutes until all the loose dough is incorporated and the dough turns from a dimply or craggy ball into a smooth ball.
Form the dough ball into a flat disc.
Proof the dough
The next step is to proof the dough in a warm environment to allow it to rise. The easiest and fastest way to do this is in the Ninja Foodi using the dehydration function. If you don't have that function, please see proofing tip below this.
Drizzle about 1 tablespoon in the bottom of the inner pot and then rub the top of the dough disc in the olive oil. Flip the disc over and cover with a damp kitchen towel. Don't use a paper towel because it will dry out too fast. I really recommend using these flour sacks. Not only are they great to use for covering bread, they are wonderful for straining yogurt like I demonstrate in this recipe for Homemade Yogurt in the Ninja Foodi and they are perfect for drying dishes and other cleaning tasks. I absolutely love them and get comments all the time from readers about how much they love them too!
TIP: If you don't have the dehydration setting on your Ninja Foodi, turn the bake/roast function on 250° F for 5 minutes. Do this before you start kneading the dough, so it has time to cool down. Place the dough in a cake pan and place on the rack in the low position. Cover the dough with a damp cloth and close the lid of the Ninja Foodi. The residual heat will proof the dough. If the Ninja Foodi still seams too hot, open the lid for 5 minutes before placing the rack with the dough into the Foodi.
Form the dough balls
Once batch of dough will make about 12 steamed buns. Separate the dough into 12 golf-ball-size balls. If you want your steamed buns a little bigger, go 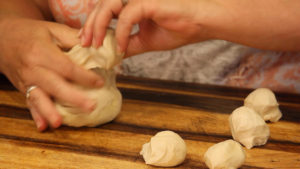 ahead and make them bigger, but you may have to increase the cook time.
Roll each dough ball into a round and smooth ball.
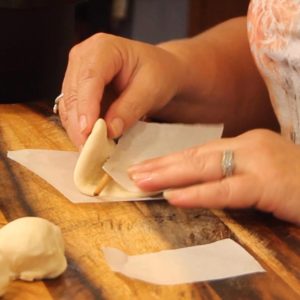
Press down with the palm of your hand to form a flat oval, you want them to be about ¼" high. Place each oval onto a small piece of parchment paper.
Line up the edge of a second small piece of parchment paper to the center of the oval. Place a chopstick in the center and fold the oval in half. Remove the chopstick.
Place each formed bun into a steamer basket in a single layer and cover. This recipe makes two layers and I recommend only cooking one at a time. I use a Bamboo Steamer Basket for this recipe and it turns out wonderful, but you can also use the steamer basket that came with the Ninja Foodi.
Steam the Asian Steamed Buns
Place 3 cups of water into the inner pot of the Ninja Foodi and set the steam basket in the Ninja Foodi. You do not want the water line to touch the buns, so raise it up some if it is touching. I used this trivet from OXO and it did the trick.
Set the Ninja Foodi to the steam function and make sure the black valve is to the vent position. Set the time for 12 minutes and press start.
Repeat for the second batch or you can freeze them for later! See Freezing instructions above.
TIP: When the black valve is properly to the vent position, you will hear and feel a click and it will raise up some.
Fill up your Asian Steamed Buns!
This is the best part! Once the buns have steamed, they are ready to fill. My filling of choice is this recipe for Asian Pulled Pork, but you can fill them with whatever you want! Serve and enjoy!

Asian Steamed Buns in the Ninja Foodi
Ingredients
- ½ teaspoon yeast
- 2 tablespoon warm water around 110° F
- 2 cups Flour all purpose, plus extra for kneading surface
- 1 tablespoon powdered sugar
- 1 Tbsp milk whole
- ½ cup water
- 1 tablespoon olive oil
Would you like to save this recipe?
Instructions
- Combine the ½ teaspoon yeast and 2 tablespoon of warm water in a small bowl. Stir and allow to proof for about 5 to 10 minutes.
- Sift 2 cups of all purpose flour into a medium or large bowl. Add the powdered sugar, bloomed yeast mixture, milk, and water. Mix until combined. The flour mixture will be loose and will not form a dough ball until the kneading process.
- Add a Tablespoon of flour onto your kneading surface and dump the flour mixture onto the surface.
- Begin kneading the dough by pushing down and away from you. Turn 90° and repeat. Pull in the loose flour each turn. If your dough is too dry, add 1 tablespoon of water. If it is too wet, add 1 tablespoon of flour. Dough should not be sticky.
- Continue to knead for 5-10 minutes or until dough becomes smooth and more pliable. Form a disc when the dough is soft and pliable.
- Drizzle about 1 tablespoon of olive oil into the inner pot of the NInja Foodi. Swirl the top of the dough in the olive oil and flip it over. Cover the dough in the inner pot of the Ninja Foodi with a damp towel. Set the dehydration mode to 105° F and let the dough proof for 30 minutes. If you don't have the dehydration setting see post on how to proof the dough using the bake/roast setting.
- Once the dough has doubled in size and feels spongy and soft, split the dough into golf ball size balls. You can get about 12 buns out of this recipe.
- Roll into a smooth ball and then flatten with the palm of your hand so they are oval and flat. Place each flat oval onto a small piece of parchment paper. Place a smaller piece of parchment and lay the edge to the middle of the oval. Lay a chopstick over the edge and fold the bun over, remove the chopstick. See video for details.
- Place the buns in the steamer basket, cover and allow to rise for 20 minutes.
- Place 3 cups of water into the inner pot. Put in the steamer basket, make sure water is not touching the buns. See post for more details. Cover and set the Ninja Food to steam for 12 minutes. Make sure the black valve is set to vent. *I recommend only steaming one layer of buns at a time.
- Remove buns, fill them with your favorite filling. Serve & Enjoy!
Nutrition
ABOUT THE RECIPE AUTHOR, LOUISE LONG

Louise is a full-time recipe creator and food blogger @ The Salted Pepper. She has over 30 years of experience with cooking and recipe development. She owned a restaurant for several years and was a full-time RN until retiring to blog full-time.
Louise has several very active Facebook groups that help people with the basics of cooking and getting the most out of the Ninja Foodi.
Ninja Foodi Fresh & Healthy Meals
Seeing the need for easy, delicious, and high quality recipes, she is focusing all of her efforts at this time creating recipes specifically for the Ninja Foodi. Her recipes are easy for the home cook to follow and provide step-by-step instructions.
Louise is also a YouTube creator and you can find most of her recipes in video format on The Salted Pepper YouTube channel.
She is very responsive to messages and eager to help in any way she can.
Tyler says
Easy to do. My timing was off as I made two batches (not double recipe). Didn't matter! Was perfect
Louise says
I'm so glad you liked them!
Linda Krause says
I have the new ninja Steam/crisp do I use the proofing option ?
I don’t have the bamboo basket. What could I use instead?
Thank you. Absolutely love all your recipes and videos.
Linda from Texas
Linda Krause says
If you don’t have the bamboo basket can you use the steamer basket with the sling?? Or how do you keep it off the water?
Oliver says
Hi Thanks for the Receipe. Have you already tried it with the Ninja Foodi Max? 🙂
Is there any difference to your instructions here?
Greetings from Germany 🙂
Olli
Louise says
I haven't tried it with the 8qt, but you shouldn't need to make any changes.
Linda Stephens says
Just made the bread. It was awesome, better than any I have made previously, thank you
Louise says
I'm so glad you liked them!