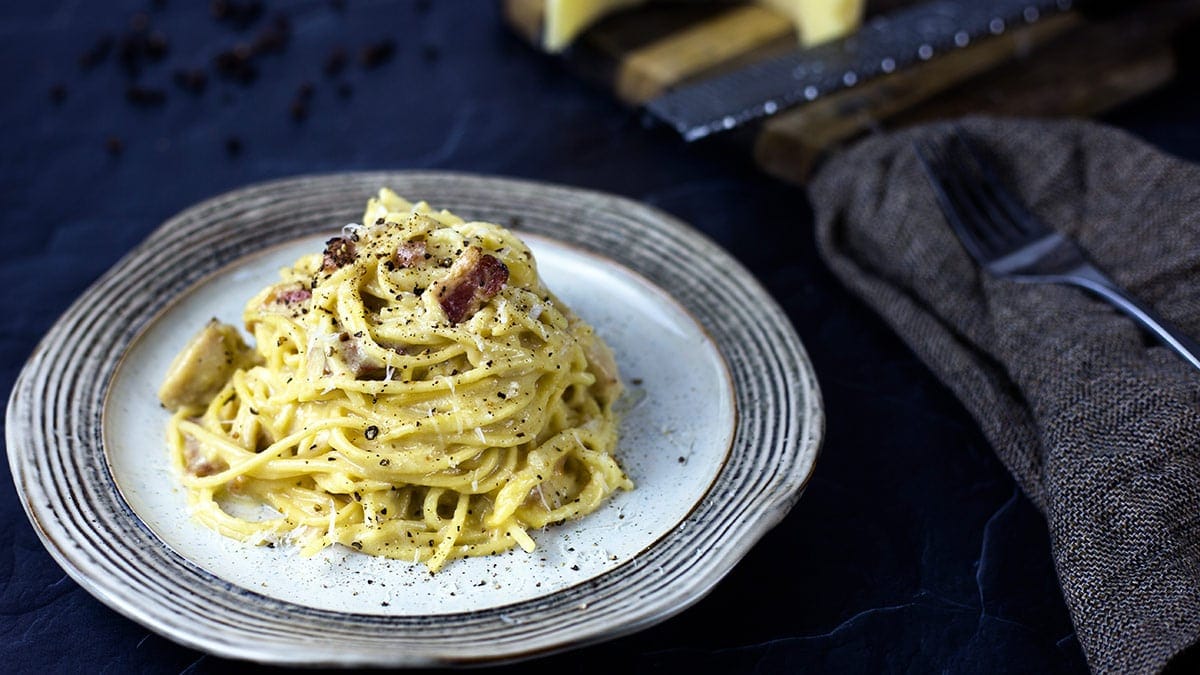
 Quick & Easy Chicken Carbonara is going to blow your mind! Are you ready for one of the best tasting meals ever?
I don't take these things lightly either! Flavor is key in all of my recipes and I was blown away by the flavor in this recipe and so few ingredients. This Chicken Carbonara is so rich and creamy, perfection!
The best part is it's quick too! Seriously quick... like lightening quick. Okay, not like lightening... but it is quick! Oh and easy! Super easy! Super duper easy!
I know you want to make Chicken Carbonara in the Ninja Foodi right now, you can always jump straight to the recipe if you are in a hurry. If you aren't, enjoy the tips and tricks that I go over in the post. If you have a question that I don't answer, please leave a comment and I will get back to you.
This post may contain affiliate links. If you make a purchase after clicking a link, I may earn a small commission. As an Amazon Affiliate, I earn from qualifying purchases.
What is Chicken Carbonara?
To best explain chicken carbonara, I need to start by talking about Pasta alla carbonara or just plain carbonara. It is a pasta dish that originated in Rome and is traditionally made with spaghetti noodles, guanciale, a hard cheese, and eggs. Sounds weird, doesn't it? Trust me, it's delicious! Don't get scared off by guanciale or pig jowl, we won't be using that today.
Now, you can use guanciale if you have some on hand, but you can also use pancetta or, like I did, thick-cut bacon. While it is traditionally made with an unsmoked cured cut of pork, I really enjoyed the slight smokiness that the thick-cut bacon gave the dish.
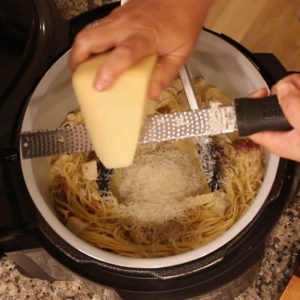
The eggs are super important in this dish because they create the sauce. The velvety delicious sauce. I know that's a tough one to wrap your head around, isn't it? Think of it this way, egg yolks are what makes a Hollandaise sauce so delicious so this isn't any different. In fact, you use the same principles to make the chicken carbonara sauce as you do when making Hollandaise sauce.
If you love Poached Eggs with Hollandaise Sauce, check out this video!
The eggs are whisked until they are completely yellow and no signs of streaky egg whites are to be seen. Then they are added to the hot noodles slowly over no heat. No heat at all. The Ninja Foodi pot can get hot really fast, so make sure it is turned off. We don't want to cook the eggs to the point that they take shape, we want to gently heat the eggs so they thicken and create that sauce. Don't worry, it's easy to do!
I even messed up a little bit in the YouTube video and I was able to heat it up a bit more and have the perfect sauce for my chicken carbonara!
What Type of Pasta Can I Use?
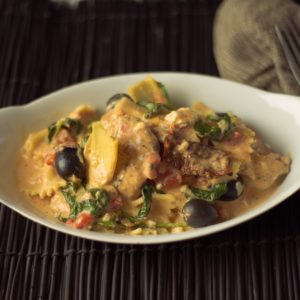
Sun Dried Tomato and Chicken Pasta
Typically, chicken carbonara is made with spaghetti noodles, but you can also use linguine noodles. If you decide to use linguine noodles, increase the time from 6 minutes to 8 minutes if you are using the rack to keep them whole. If you break them in half and they are mostly submerged in the liquid, 6 minutes is fine.
You can use any type of pasta you'd like and it will be just as delicious! Just make sure to adjust the cooking time accordingly. I use Penne pasta in my recipe for Creamy Mac & Cheese and a 3 minute High pressure cook time with a 2 minute natural release worked great!
I also love Farfale pasta too! You know those cute bow ties. They would be good in this recipe for chicken carbonara too! I used them in my recipe for Sun Dried Tomato & Chicken Pasta and the correct cook time I found for al dente pasta is 4 minutes with a 2 minute natural release.
Can I make this without meat?
Yes, you can. It won't be a true carbonara without the pork being used, but who cares! It will still taste delicious!
Instead of sauteing in the bacon grease, use olive oil or your favorite type of cooking oil or butter. Butter would be great!
Everything else would stay the same - and think about adding in some spinach at the very end for a flavorful and colorful dish. Enjoy!
Tips for Making Chicken Carbonara
This recipe is super easy to make, but there are a few tips that can help if you run into issues like I did while filming the video.
The Eggs:
You want to use fresh eggs for this recipe; the fresher the better. As always, when there are just a few ingredients you want them to be quality ingredients.
Make sure the Ninja Foodi is turned off when adding the eggs. The idea is to heat the eggs, but not cook them like you would for scrambled eggs. That would give a weird texture and look to the pasta.
The Bacon:
Use thick cut bacon or pancetta for the best results. If you only have thin bacon, use 8 strips instead of 4 to get the amount of grease you need for flavor and sautéing the onions and chicken.
The Cheese:
I really recommend using freshly grated cheese in this dish. The packaged grated Parmesan or Romano just doesn't melt as well and might leave your sauce lumpy.
The Sauce:
I ran into a little issue that turned out not to be an issue at all, but it concerned me so I wanted to share it with you.
Because we have to use a thin liquid to cook the noodles in the chicken carbonara, the sauce seemed thin and didn't appear to be thickening when I added the eggs.
This may have happened because I let the pot cool down too much or maybe the noodles just hadn't absorbed enough of the liquid yet. I ended up using the sear/sauté on low and then up to medium to thicken the sauce a little.
Be careful if you do this that you don't over heat the eggs and cook them to a solid state, make sure to stir continuously when heating.
I usually add an extra ½ cup of Parmesan cheese to help thicken the sauce too.
What I also found is the sauce does thicken quite a bit as it cools, so don't reduce it too much or your pasta will be dry.
The BIGGEST Tip of All!
NO MORE BREAKING THE SPAGHETTI NOODLES!
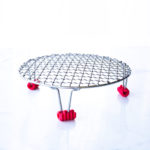
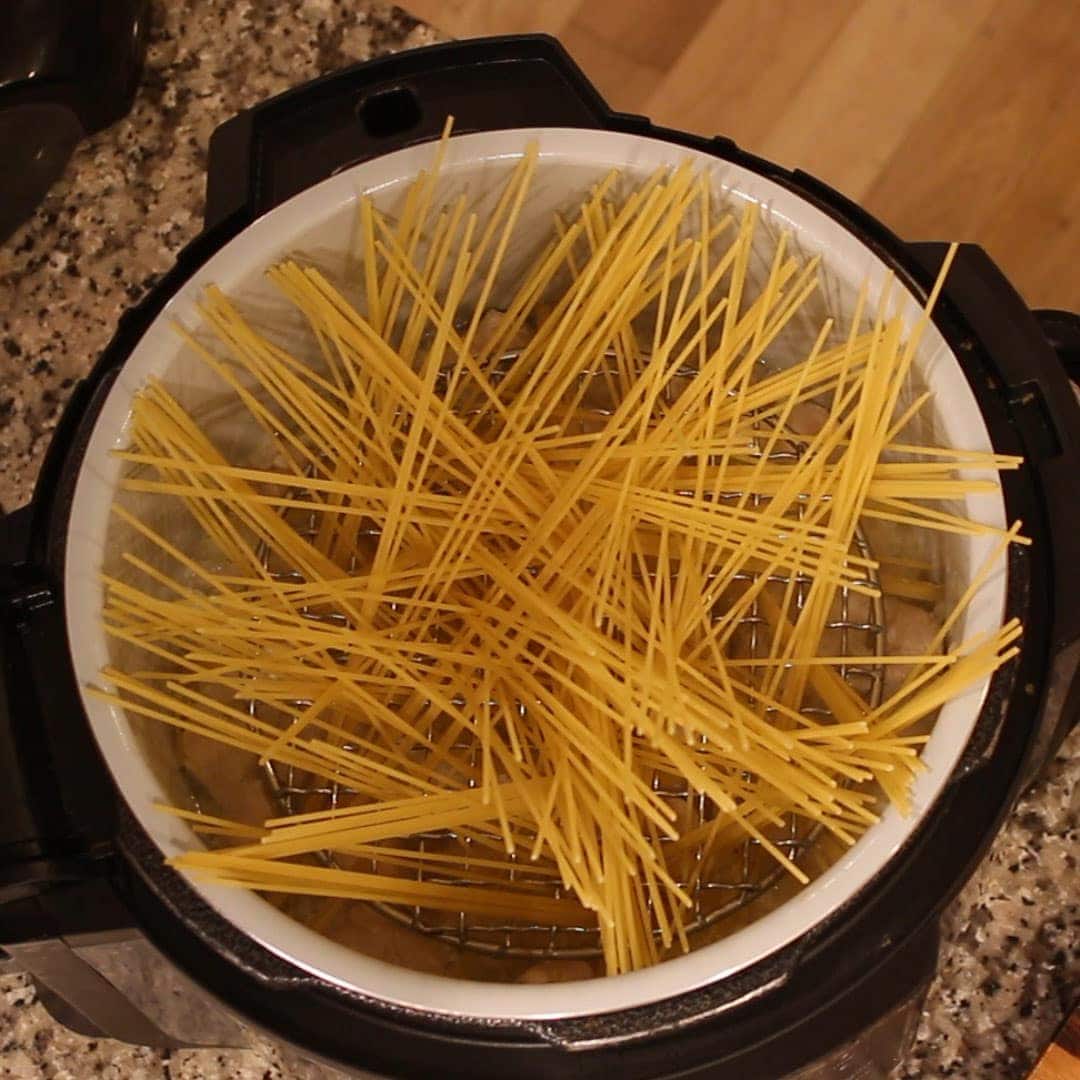
Using a rack with holes like the one I use which is a Turbokey Canning Rack 7.9" diameter with 2" legs.
You can place the rack on top of the liquid and chicken in the inner pot and fan the noodles by placing them 5-6 at a time in the holes and letting them fall a little sideways. The easiest way for me to explain this is by showing you and I do that in the video for Chicken Carbonara, so be sure to check it out! Here is a picture of what the noodles look like.
The noodles do begin to cook out of the liquid and they finish cooking and absorbing the liquid as you stir them in.
Don't worry when they look a little dry when you open the pressure lid, I promise they soften up to the perfect Al Dente!
If you like your noodles cooked more than Al Dente, increase the pressure cooking time to 8 minutes, or use the sear/saute after pressure cooking to finish cooking the noodles to your desired texture.
How to Roast Garlic in the Ninja Foodi
This recipe calls for 2 bulbs of roasted garlic and this adds a wonderful flavor to the dish, so I hope you don't skip it!
Cut the tops off the 2 bulbs of garlic, drizzle with olive oil. Wrap both bulbs in a foil packet and place on the lower rack of the Ninja Foodi.
Set the bake/roast to 325° F for 35 minutes.
That's all there is to it! Perfectly roasted garlic.
How to Make Chicken Carbonara in the Ninja Foodi
You can make this recipe in any pressure cooker, but I love using the Ninja Foodi because I can cook the bacon and move on to pressure cooking all in the same pot! If you don't have a Ninja Foodi or just want to read more about it, I recommend this article: How to Use the Ninja Foodi
The first thing you want to do is cook the thick cut bacon. Cut 4 strips of 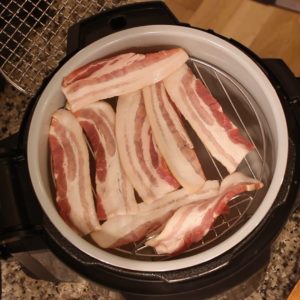
You may need to cook the bacon a few minutes less or more, so keep an eye on it. Drain the bacon slices on paper towels, but leave the bacon grease in the pot.
Dice up 1 cup of white onions, I use sweet onions or Vidalia, but any kind will work fine.
Cube up 1 ½ pounds of boneless, skinless chicken breast into about 1-1 ½ inches.
Grate Parmesan cheese until you have 2- 2 ½ cups.
Turn the sear/saute on high and allow the bacon grease to heat up. Add the onion and chicken cubes and ½ teaspoon of sea salt. Saute for about 2 minutes.
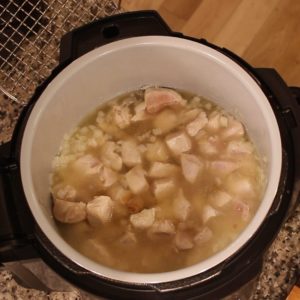
Place the canning rack or other rack with holes into the inner pot (if using) and place spaghetti noodles 5-6 at a time in the holes, keeping the noodles inside the pot as much as possible.
*** If you want to break your noodles in half, use the alternating layering technique in my recipe for Ninja Foodi Spaghetti.
Place the pressure lid on and make sure the valve is to seal. Set the pressure on high for 6 minutes. When the time is up, allow to natural release for 3 minutes, then manually release the remaining pressure.
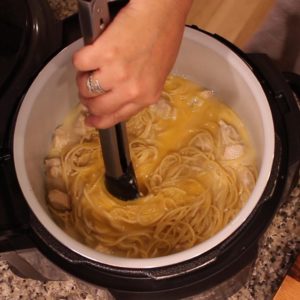
Open the lid and gently scrape the noodles off of the rack and into the liquid. 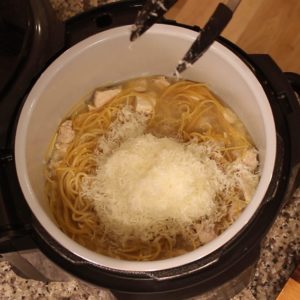
Whisk 3 eggs until they are a consistent yellow color. You don't want streaks of the egg whites.
Make sure the Ninja Foodi is off and add the whisked eggs, stirring constantly so they don't cook into a solid state. We want to gently heat them so they thicken and create a creamy sauce, but we don't want them to turn into scrambled eggs. Please see sauce tips above for more information and troubleshooting.
Crumble the bacon and stir.
Serve with extra grated Parmesan and freshly cracked black pepper. Enjoy!
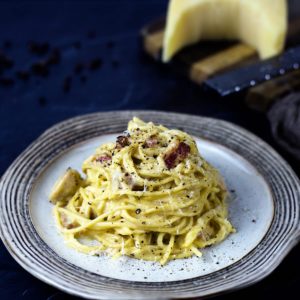
Quick & Easy Chicken Carbonara ~ Ninja Foodi or Instant Pot Recipe
Ingredients
- 4 slices bacon thick cut
- 1 cup onions ¼" dice
- 1 ½ lbs chicken breast cut into ½-1" cubes
- ½ teaspoon sea salt
- 2 bulbs garlic roasted, see post for recipe
- 8 ounces spaghetti noodles
- 2 cups chicken broth
- 3.25 ounces Parmesan Cheese grated (about 2 ½ cups) plus more for garnish
- 3 eggs large
Instructions
- Cut the bacon in ½ and lay on the rack in the high position. AC on 360° F for about 14 minutes (less if your pot is preheated). Flip at 7 minutes. Adjust the time if needed for the bacon to be crispy and have a lot of the fat rendered out. Remove and drain on paper towels. Reserve the fat that is in the inner pot.
- Cut the onion in ¼" size dice. Cut the chicken into 1 -1 ½ inch cubes.
- Turn on the Sear/Saute on high and allow the bacon grease to heat up. Add diced onions and cubed chicken and the salt. Saute for 2-3 minutes.
- Add 2 cups of chicken stock and 2 bulbs of roasted garlic. Add spaghetti noodles either by breaking them in half and alternating layers or by using a canning rack and leaving them whole. See post for details!
- Put the pressure lid on and turn the valve to seal, Set the Ninja Foodi to high pressure for 6 minutes. Adjust time up for softer pasta. Allow to natural release for 3 minutes and then release the remaining pressure.
- Scrape the noodles out of the rack if using and into the inner pot and stir so the noodles are submerged in the liquid. This will finish cooking and absorb the liquid. Turn the Ninja Foodi off.
- Add 2 cups of freshly grated Parmesan cheese and stir to combine. Close lid and wait about 5 minutes to allow the cheese to melt. If you think there is too much liquid, it does thicken as it cools, but you can also sear/saute to reduce some liquid if you want. You can also add in the extra ½ cup of grated Parmesan cheese. Make sure to let the pot cool down a little before adding in the eggs.
- Whisk together 3 eggs until well combined and you have a consistent yellow color. You don't want to see streaks of egg whites. Slowly add in the three eggs and stir. Please see post for troubleshooting tips. Add crumbled bacon and stir.
- Top with additional grated Parmesan Cheese and freshly cracked black pepper. Serve and Enjoy.
Nutrition
ABOUT THE RECIPE AUTHOR, LOUISE LONG
Louise is a full-time recipe creator and food blogger @ The Salted Pepper. She has over 30 years of experience with cooking and recipe development. She owned a restaurant for several years and was a full-time RN until retiring to blog full-time.
Louise has several very active Facebook groups that help people with the basics of cooking and getting the most out of the Ninja Foodi.
Ninja Foodi Fresh & Healthy Meals
Seeing the need for easy, delicious, and high quality recipes, she is focusing all of her efforts at this time creating recipes specifically for the Ninja Foodi. Her recipes are easy for the home cook to follow and provide step-by-step instructions.
Louise is also a YouTube creator and you can find most of her recipes in video format on The Salted Pepper YouTube channel.
She is very responsive to messages and eager to help in any way she can.

 Quick & Easy Chicken Carbonara is going to blow your mind! Are you ready for one of the best tasting meals ever?

Cassie Mcmillen
Amazing recipe. I subbed the chicken breasts for thighs and loved the result (I know it’s even less healthy) but to me worth it!
Louise
I bet that was delicious! I'm so glad you enjoyed it!
Mandy Clinch
Please please know the difference between pasta and noodles.
They are a totally different product in recipe, method of making, cooking, taste and texture.
A food blogger should know the difference. Spaghetti is not a type of noodle.
Louise
I do know the difference. I also know that many people refer to spaghetti as spaghetti noodles and my job as a food blogger is not to stand on semantincs, but to communicate effectively with my readers. Since everyone seems to know what I'm talking about, including you, it seems as if I succeeded in communicating clearly so that everyone understands what ingredient to use in the recipe.
Silvia
This was really good and super easy, will become another favorite, thank you for making my life easy.
Silvia
Barry Davis
Hi can you reheat the next day?
Louise
Yes, I like to put my leftover pasta in a covered container and use the steam function to reheat.
B
Second time I have used this recipe both tomes amazing result.
This time I have at least two portions left over,is it safe to reheat for the next day.
Thanks az
Louise
absolutely! Sometimes I like to add a little extra cream to bring back all that delicious creaminess.