

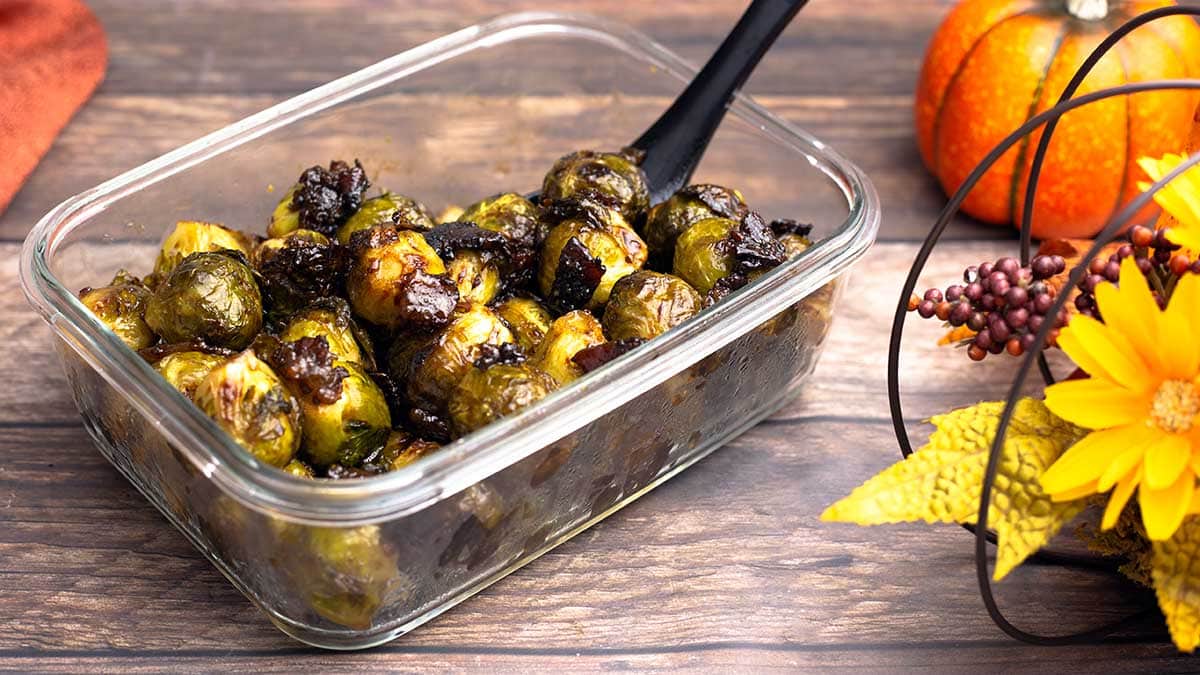
Candied Brussels Sprouts is one of those dishes that takes the ordinary Brussels sprout and gives it a fancy makeover! And, let me tell you, this makeover is glorious!
Would you like to save this recipe?
I realize not everyone is a fan of the Brussels Sprout. It seems to be one way or the other, you either really LOVE them or you really DON'T. I happen to really LOVE them. It doesn't matter to me if they are cooked to the point of mush, I still like them. I'm weird, though, and most people would agree that the secret to the best Brussels sprout is to cook them perfectly.
This post may contain affiliate links. If you make a purchase after clicking a link, I may earn a small commission. As an Amazon Associate, I earn from qualifying purchases.
I completely agree with this and while I can eat them any which way you give them to me, I do prefer them to be on the firmer side versus the mushy side. The problem is getting them cooked just right while not burning the outside; especially when you want to candy them like I did in this recipe.
No worries though! The Ninja Foodi makes cooking perfect Brussels sprouts easy!
Do I have to have the Ninja Foodi to make this recipe for Candied Brussels Sprouts?
Nope, but it sure does make it easy! I love cooking with the Ninja Foodi and, if you are interested in learning more about it, here is an article that goes over all the various functions: How to Use the Ninja Foodi
This recipe can be made using almost any cooking appliance, including a stove/oven. Here are instructions for various different appliances.
Instant Pot or Pressure Cooker: Follow the instructions for pressure cooking the Brussels sprouts and then either use the oven or your air fryer to roast and candy them.
Stove/Oven: Boil a large pot of water on the stove and blanch the Brussels sprouts for about 3-5 minutes. Drain. Put the Brussels sprouts on a baking sheet pan (line with parchment for easier clean up) and preheat the oven to 425° F. Sauté the bacon pieces in a frying pan until they are almost cooked and pour over the Brussels sprouts. Bake on 425° F for about 5 minutes and coat the Brussels sprouts with the remaining glaze, toss and continue to bake until the glaze has reduced and the Brussels sprouts have browned some.
Air Fryer Oven: Blanch the Brussels sprouts either in your pressure cooker or on the stove (see directions above). Set your Air Fry Oven to 425° F (or use the closest temp to this) and cook the bacon until it is almost done. Add the Brussels sprouts and pour over the glaze. Continue to air fry until the Brussels sprouts are done and the glaze has thickened. Stir several times during air frying.
Can I make Candied Brussels Sprouts without Bacon?
Yes, absolutely! You can skip the bacon completely and coat the Brussels sprouts with the glaze, broil in the Ninja Foodi as directed or follow the directions above if using a different appliance.
Use ⅓ of the glaze at a time to develop a nice coating on the Brussels sprouts and cook to your liking.
You can also use a bacon substitute, if you prefer. I haven't worked with these products, so, unfortunately, I can't give you exact instructions on times and temp.
What can I serve with this recipe?
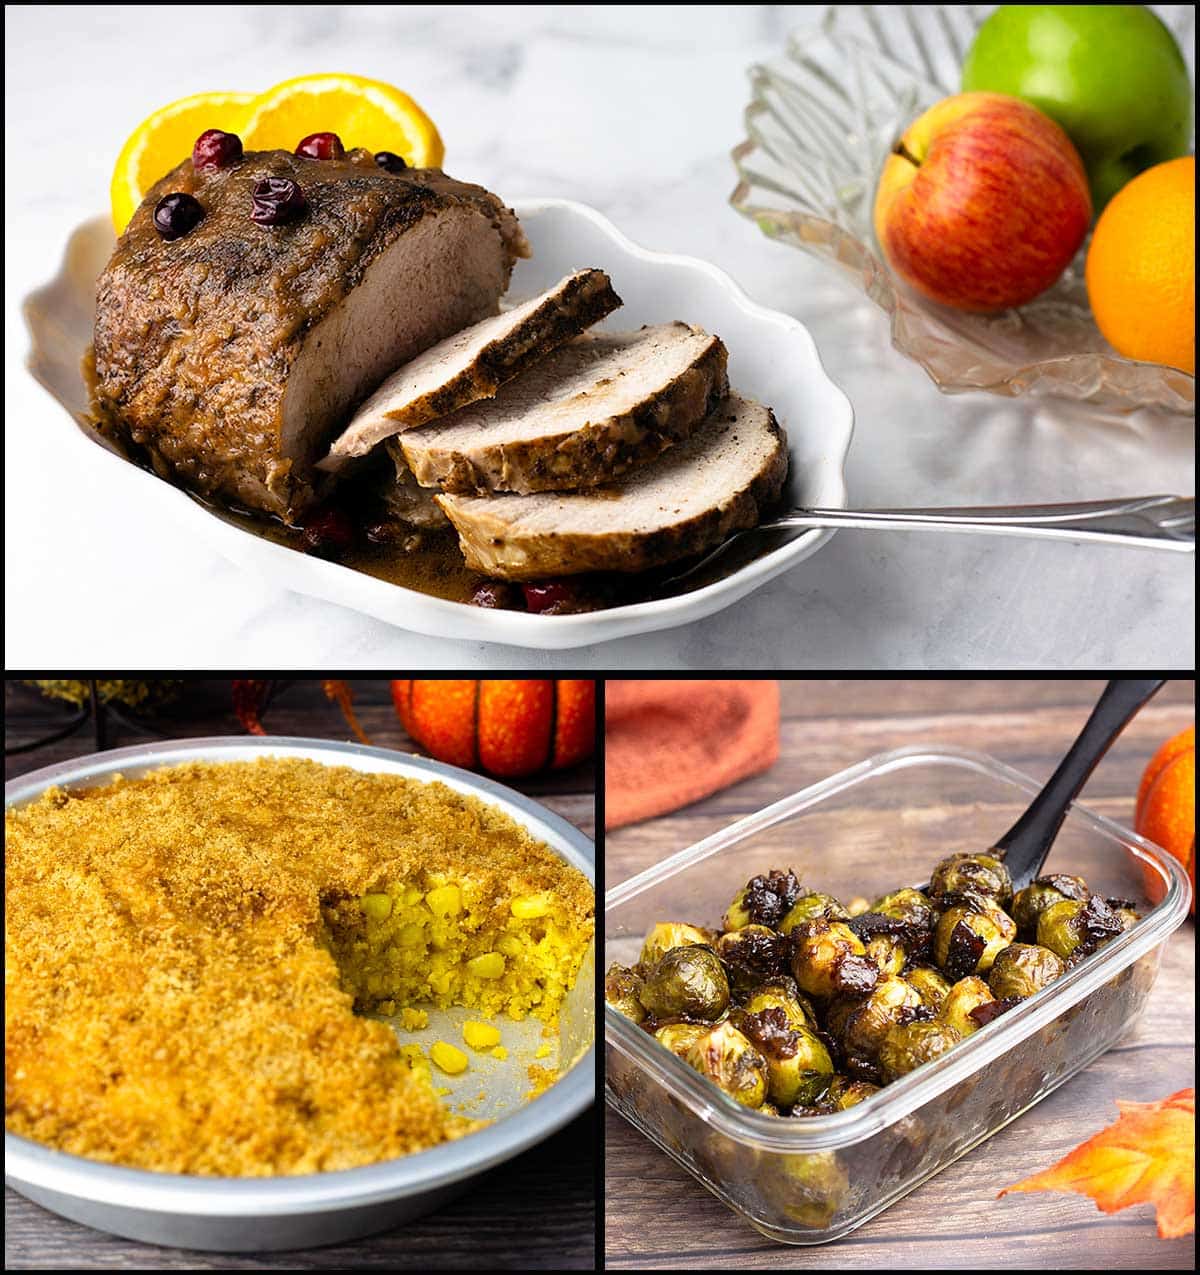
Anything! Brussels sprouts go really well with almost all types of food, including, chicken, pork, beef, and even some types of fish. These Candied Brussels Sprouts would be great served with a Roasted Pork Loin with Apple Gravy (recipe is in my Flavors of Fall cookbook) and this delicious corn pudding (AKA cornbread).
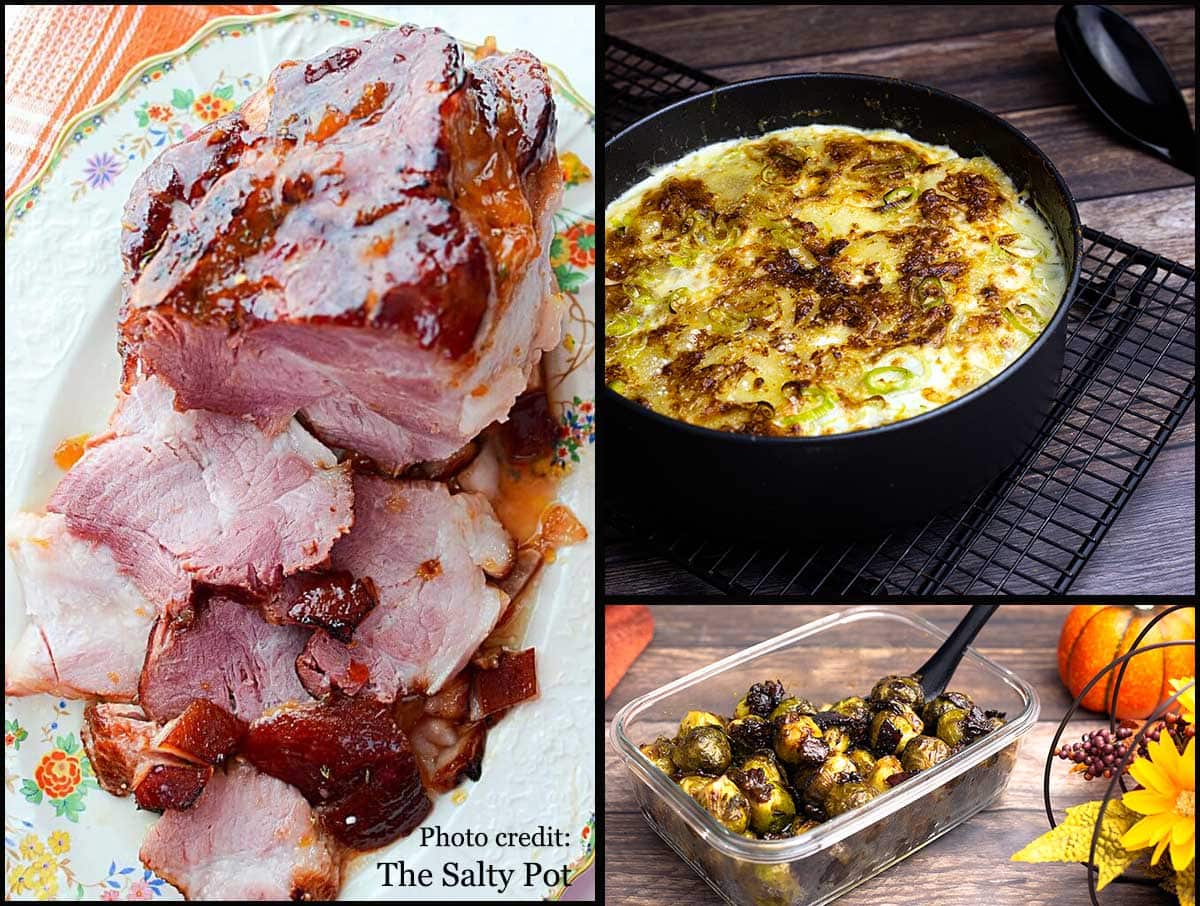
Another absolutely perfect meal would be this Peach Glazed Ham by The Salty Pot, these Candied Brussels Sprouts and my amazing Scalloped Potatoes. Oh my goodness... this would be the PERFECT holiday meal!
Let's not forget about dessert!
You can finish either of these wonderful meals off with a variety of desserts, but the two that come to mind are; Key Lime Pie for the Pork Loin Dinner and Turtle Cheesecake for the Peach Glazed Ham dinner. YUM!

How to Make Candied Brussels Sprouts in the Ninja Foodi
The first thing you want to do is get your marinade/glaze mixed up. Combine the brown sugar, balsamic vinegar, and mustard into a medium-sized mixing bowl. I use a (affiliate link)Grey Poupon country dijon mustard, but any dijon mustard you like will work fine. We will be using about ¼ of the marinade for the bacon and the remaining for when we cook the Brussels sprouts.
Cut the bacon into bite-sized pieces. Place the bacon into a ziploc bag or container that can be covered. Pour just enough marinade to cover the bacon. You only want to use between ¼ and ½ of the marinade, leaving enough for the Brussels sprouts later on. Refrigerate for at least 4 hours and up to 24 hours.

Once the bacon is marinated, let it come to room temp while you cook the Brussels sprouts.
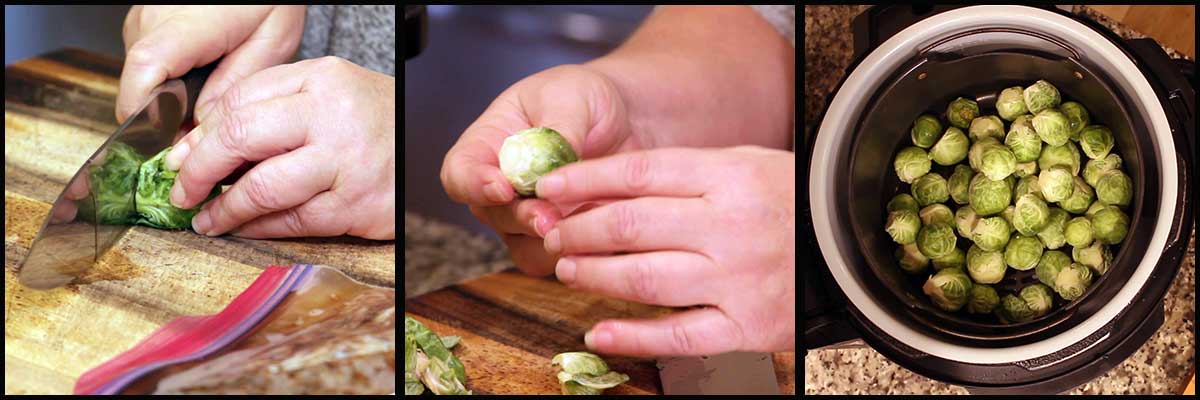
Wash the Brussel sprouts and cut off the ends. I also peel away any outside leaves that are dry or browning. Place the Brussels sprouts in the air crisper basket. Place 1 cup of water in the inner pot. Put the basket into the inner pot and put the pressure lid on. Turn the valve to seal and set the pressure to high and the time to zero minutes. Just in case that is confusing, you just use the arrow down button until it reaches 00:00 and hit start.
The Brussels sprouts cook in the time it takes the pot to build pressure. We only want them slightly cooked because we are going to broil them with that delicious glaze! When the time is up, immediately release the pressure and remove the basket from the inner pot.
Dump the water and turn the sear/sauté on high and let the pot heat for just a minute or two. Pour in the marinated bacon pieces with the marinade and sauté on high until almost cooked. The marinade will reduce and the bacon will become a little sticky. Because of the color of the marinade, you won't see a change in color in the bacon, but a way to tell if it is done is when you see more bacon fat than marinade in the bottom of the pot. Remove and place the bacon into a bowl.
You can rinse the pot if you want or skip it. Preheat on broil for 5 minutes.

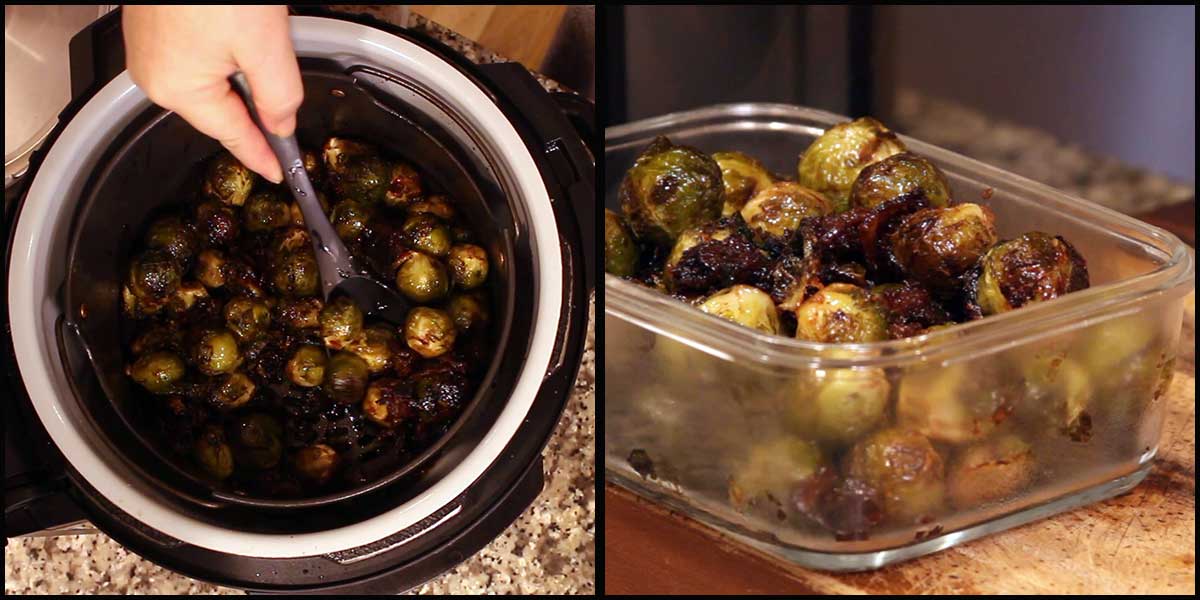
Place the air crisping basket with the Brussels sprouts back into the inner pot and add the cooked bacon. Give it a toss to combine and drizzle about 1-2 Tablespoons of the reserved marinade over the Brussels Sprouts.
Put the TenderCrisp lid down and select the broil function. Set the time for 20 minutes. After 5 minutes, open the lid and toss around the Brussels sprouts. Add more glaze and broil another 2-3 minutes. Repeat, by adding the glaze to the top and broiling in 2-3 minute increments until the Brussels sprouts are cooked the way you like them.
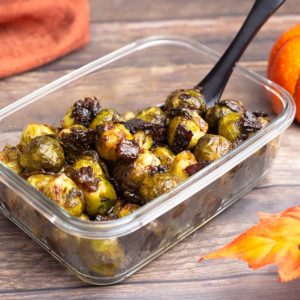
Serve & Enjoy!
Candied Brussels Sprouts
Ingredients
- ½ cup brown sugar packed
- ½ cup balsamic vinegar
- 2 tablespoon mustard Grey Poupon country style
- 4 strips bacon thick-cut
- 20 ounces Brussels Sprouts
Would you like to save this recipe?
Instructions
- Combine the brown sugar, balsamic vinegar, and mustard in a medium size mixing bowl. Stir to combine.
- Cut the bacon into bite size pieces and place in a plastic baggy or sealable container.
- Pour just enough marinade over the bacon to cover it. You want to have at least half of the marinade left for the brussels sprouts. Place the bacon in the refrigerator for at least 4 hours and up to 24 hours. Cover the remaining marinade/glaze and refrigerate until use.
- Cut the stems off of the washed Brussels sprouts and peel off any outer leaves that are dry or browning.
- Put one cup of water into the inner pot. Put the Brussels Sprouts into the Air fry basket and put the pressure lid on. Turn the valve to seal and set on high pressure for zero minutes. *See note section for more information. When the display reads "done", immediately release the pressure.
- Remove the basket with the Brussels Sprouts from the inner pot and set aside. Dump the water from the inner pot.
- Turn the sear/sauté on high. Add the bacon and the marinade that is in with the bacon to the inner pot. Sauté on high and stir frequently until the bacon is almost cooked and the marinade has reduced. This takes about 5 minutes or so.
- Remove the bacon and any liquid left from the inner pot and place in a small bowl. Rinse the pot. Preheat the Ninja Foodi on broil for 5-10 minutes.
- Place the basket of Brussels sprouts into the inner pot and dump in the cooked bacon. Toss to distribute the bacon. Drizzle about 1-2 Tablespoons of the reserved glaze on top and broil for 5 minutes. Toss, add more glaze, and broil another 2-3 minutes. Repeat with adding glaze and broiling 2-3 minutes until the Brussels Sprouts are nice and brown, covered with the glaze, and are your desired texture. This usually takes 12-17 minutes.
- Serve & Enjoy!
Notes
Nutrition
ABOUT THE RECIPE AUTHOR, LOUISE LONG
Louise is a full-time recipe creator and food blogger @ The Salted Pepper. She has over 30 years of  experience with cooking and recipe development. She owned a restaurant for several years and was a full-time RN until retiring to blog full-time.
Louise has several very active Facebook groups that help people with the basics of cooking and getting the most out of the Ninja Foodi.
Ninja Foodi Fresh & Healthy Meals
Seeing the need for easy, delicious, and high quality recipes, she is focusing all of her efforts creating recipes specifically for the Ninja Foodi. Her recipes are easy for the home cook to follow and provide step-by-step instructions.
Louise is also a YouTube creator and you can find most of her recipes in video format on The Salted Pepper YouTube channel.
She is very responsive to messages and eager to help in any way she can.
I WOULD LOVE TO SEE WHAT YOU ARE COOKING UP IN YOUR NINJA FOODI! TAG ME @THESALTEDPEPPER ON YOUR FAVORITE SOCIAL MEDIA PLATFORM WHEN YOU MAKE A DISH!
BE SURE TO FOLLOW THE SALTED PEPPER RIGHT HERE ⇓⇓⇓⇓⇓
Carol says
Could you use frozen brussel sprouts?
Louise says
Yes, I think that would work as long as they are frozen when you PC them, the PC time should thaw them fine. Please let me know if you try it!
Angie says
What settings would you use for the Speedi pls?
Louise says
I think steam and crisp would work for this recipe. You would want to steam the Brussels sprouts and then once the Speedi switches over to the crisping function add the sauce. I bet you could even add the cut up bacon to the Brussels sprouts and let it steam/crisp as well.
Karen Crook says
I’m not a big fan of Brussels sprouts but this was sooo good!
Louise says
I'm so glad you liked it!