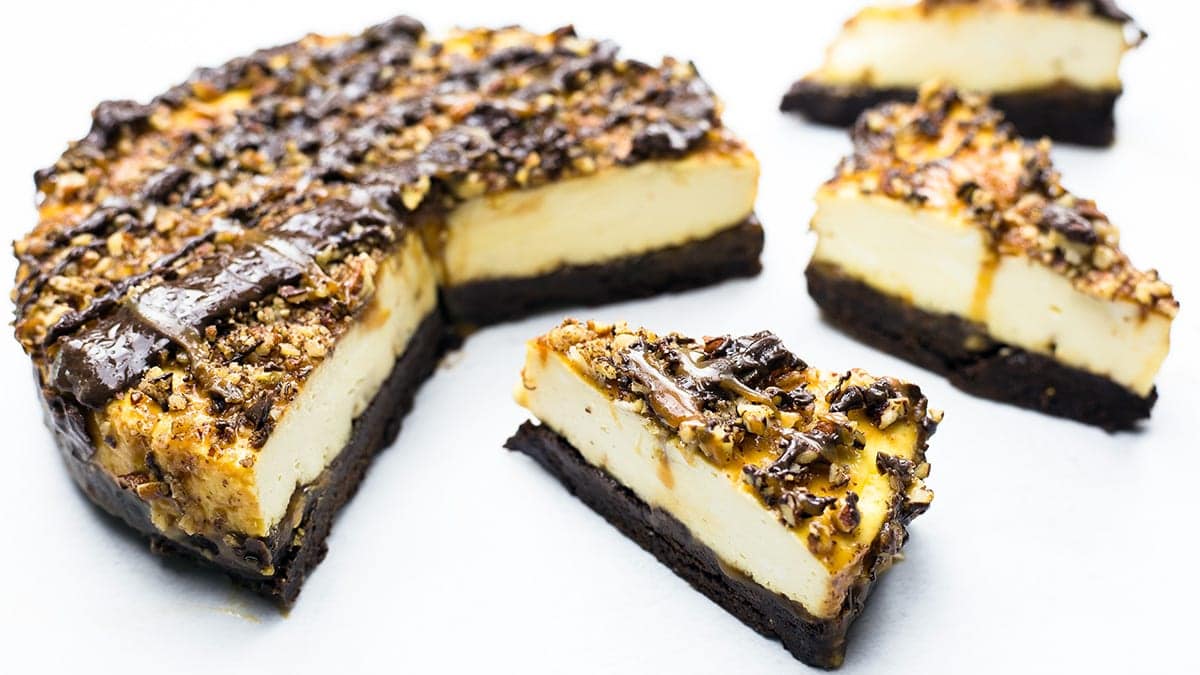
It took me awhile to wrap my head around pressure cooking a cheesecake. I couldn't understand how cooking a cheesecake in a wet cooking environment and under pressure would work. It does! In fact, it works perfectly!
This post may contain affiliate links. If you make a purchase after clicking a link, I may earn a small commission. As an Amazon Affiliate, I earn from qualifying purchases.
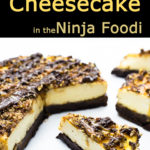
If you haven't tried a pressure cooked cheesecake, this Turtle Cheesecake Recipe is the perfect one to try!
How do You Make a Cheesecake in the Ninja Foodi?
I absolutely love the Ninja Foodi and if you aren't familiar with this amazing small kitchen appliance, I really recommend reading this article on How to Use the Ninja Foodi. It goes over the basics of the Ninja Foodi, and I bet if you don't have one yet, you will soon after reading the article!😍
The process of making a cheesecake in the Ninja Foodi or other pressure cooker is surprisingly easy and very similar to making one in the oven.
You start off making the crust and in this Turtle Cheesecake recipe, we are making a homemade brownie crust. You can also choose to use a cookie crust or a graham cracker crust like I used in this recipe for Mint Cheesecake.
If you don't want a brownie crust (trust me it's so good), then just follow the instructions in the Mint Cheesecake recipe for a chocolate graham cracker crust or use your favorite cookie to make the crust.
Can I use a Brownie Box Mix to make the Crust for this Turtle Cheesecake Recipe?
Yes, you can. Just be aware that you will not use the whole mix for the crust or your brownie to cheesecake ratio will be off. Too much brownie and not enough cheesecake.
I have formulated the measurements for the brownie crust to work perfectly with a 7" springform pan.
If you use a boxed brownie mix, try to get one that produces a fudgy brownie and not a cake-like brownie because you don't want too much rise in the brownie.
The recipe I developed is so simple to make, it doesn't take any longer than mixing up a box mix, so I really hope you give it a try. The end result is so fantastic, the crust is a mix between fudge and a brownie. Yummy!
Can I use a Different Crust in this Turtle Cheesecake Recipe?
Yes, of course! You can substitute any cheesecake crust you like; graham cracker, chocolate cookies, peanut butter cookies (that sounds delish), sugar cookies, praline cookies or anything else you can think of that can be crushed and formed into a crust.
If you love nuts, you can make a crust out of toasted nuts.
You will want to toast and crush about 1 ½ cups of nuts (pecans would be my choice), mix in ¼ cup of sugar and 4 tablespoon of melted butter.
Spread the mixture into the bottom of the springform pan and bake in the Ninja Foodi on 300° F for about 5-7 minutes to allow the crust to set up.
What size pan do I need to Make this Cheesecake Recipe?
The measurements are formulated for a 7" Springform pan and if you have that size, I do recommend using it for the best results. The pan I use is from Pampered Chef and I have been very happy with the quality.
I also like that it was designed for a pressure cooker which is a wet cooking environment so I am less likely to have issues with rusting.
If you have an 8" Springform pan, this recipe will still work, but you will have less height to your cheesecake.
You can also try increasing the measurements by 1 ½ which will add more volume to the cheesecake in an 8" Springform pan.
I have not tested this, so please use your judgement when filling your pan. You might have some batter left over.
Do I Have to Make the Caramel from Scratch?
Of course not! Although, I find it fun to make and so EASY in the Ninja Foodi. You can use store-bought caramel sauce like this kind.
You can also buy the caramel candies from Kraft or Brach's. You can usually find them in the candy aisle of your local grocery store.
If you don't want to have to unwrap all of those candies, you can get these caramel bits that are designed for melting and already unwrapped: Kraft Caramel Bits.
To make the caramel from the caramel bits or wrapped candies, just melt them with a Tablespoon or two of heavy whipping cream until you get the consistency you want.
If you do decide to make the caramel from scratch (and I really hope you do), don't use too much cream. The idea is to create a caramel sauce that is pourable, but not so thin that it runs off the cheesecake and pools around it.
Tips for Making Cheesecake in the Ninja Foodi
Making a cheesecake in the Ninja Foodi or other pressure cooker is pretty straightforward, but there are some tips I've learned from trial and error that I want to share with you.
Use a Parchment Round
While there is no need to grease the springform pan, I do recommend using a parchment round on the bottom so that you can easily remove the cheesecake.
In the video I did for this Turtle Cheesecake Recipe in the Ninja Foodi, I didn't use parchment and everything was fine until I refrigerated the cheesecake and then tried to cut a slice.
When refrigerated, caramel can absorb water from the cheesecake and even from the humidity in the refrigerator. This caused some of my caramel to leak down to the brownie.
While this didn't affect the taste at all, it did make it pretty hard to remove the cheesecake from the bottom of the springform pan. I even ended up scratching the bottom of my pan, so to avoid that... use a parchment round.
You can cut these rounds yourself from a sheet of parchment paper or you can buy already cut rounds like these precut 7" size from Amazon. They come in various sizes, so make sure to get the size that fits your pan.
Room Temperature Ingredients
For this recipe (and many baking recipes) it is strongly recommended that you bring your ingredients to room temperature.
This specifically refers to the butter, eggs and cream cheese.
You can bring the eggs to room temp rather quickly by putting them in a warm water bath for about 10 minutes. You can do this with butter too, just make sure it is in a sealed baggy and the water bath isn't hot enough to melt the butter.
Unfortunately, there really isn't a great way to bring cream cheese to room temperature (at least that I know of) except for letting it sit on the counter until it reaches room temp. This usually takes a few hours, depending on how hot or cold your kitchen is.
Don't Overbeat the Cheesecake Batter
You do want to beat the sugar and the cream cheese until it is smooth and free of lumps, but once you add the eggs, don't overbeat it.
When you are using a mixer to whip up a cake batter, you are incorporating air into the batter. This is usually a good thing for cakes, but not necessarily for cheesecake.
Excess air can affect the texture of the cheesecake, so I add one egg at a time and mix just until it is incorporated. I turn the mixer off in between adding the the two eggs.
Use a Knife that is Safe for Non-Stick Surfaces
Most springform pans have a non-stick surface and, even if you use the parchment round, you do not want to use any metal utensils.
I like to use a Nylon Knife from Pampered Chef. It's easy to use, dishwasher safe and, of course, safe for non-stick pans.
There are a few options I found on Amazon; like this knife, Bakeware Buddy Non-Stick Surface-Safe Plastic Knife or this one Curious Chef TCC50027 Medium Nylon Plastic Knife, White & Green.
I have ruined many non stick baking pans because I didn't have the right tool! In fact, I scratched my springform pan while making this recipe because I didn't listen to my own advice and didn't use parchment or a nylon knife.
Cover the Cheesecake with a Paper Towel
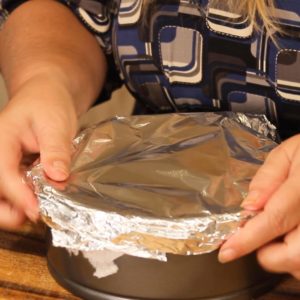
When cooking a cheesecake under pressure (which is a wet cooking environment), you are going to get a little water on the top of your cheesecake.
To reduce this, place a paper towel over the cheesecake and then cover in foil or another pressure safe covering.
I don't put the paper towel directly on the cheesecake, I lay it over the pan and then secure with foil.
Don't Cover the Cheesecake when Cooling
I recommend not covering the cheesecake when you put it into the refrigerator to cool.
Condensation from the warm cheesecake and cool air can collect on the top of your cheesecake. If you do want to cover it, consider placing a paper towel over the top to help absorb the condensation.
You can also carefully blot off the excess moisture with a paper towel before covering in caramel.
If there is too much moisture on top of your cheesecake, the caramel may slide off quite a bit. This happened to me and while it did not affect the taste at all, I really wanted that thick layer of caramel.
So, that's it for the tips. If you have one to share, I'd love to hear from you! Leave a comment at the end of this post!
How to Make Turtle Cheesecake in the Ninja Foodi
The first thing I recommend with almost all of my recipes is to gather your ingredients. This includes ingredients for all three components of the recipe: the brownie crust; the cheesecake filling; and the delicious caramel sauce.
After you have all of your ingredients ready, it's time to make the caramel. If you aren't making your own caramel, I still suggest melting the caramel (unless it is already a pourable consistency) with 1- 2 tablespoon of heavy cream in the bottom of the inner pot before you proceed with making the brownie mix.
This allows the caramel to cool down before topping the brownie crust. You can watch me make this Turtle Cheesecake Recipe right here on YouTube: Turtle Cheesecake in the Ninja Foodi
How to Make Homemade Caramel in the Ninja Foodi
You will need 1 ½ cups of white sugar, 8 tablespoon salted butter and ½ cup of heavy cream.
Turn the Ninja Foodi's Sear/Saute function on high and dump in the white sugar. Allow the pot to heat the sugar and once you start seeing a few clumps, start stirring with a heat resistant spatula or wooden spoon.
I like to use my small Mix N Scrape from Pampered Chef because it is heat resistant up to 650° F, it is the perfect size for stirring in the inner pot, and it will not scratch the non-stick surface. It's easy to clean, the caramel slides right off, and it is dishwasher safe.
You can also use a wooden spoon or other silicone spatula as long as it is high heat resistant.
When the small sugar clumps start to form, start scraping the bottom of the inner pot and move the sugar around almost constantly. This prevents the sugar from burning -- burnt caramel doesn't taste that good.

If you start to smell a burnt smell, turn down the heat to med hi or med and continue stirring. You may need to adjust the heat back up after a few minutes to allow all the sugar to clump.
Once all the sugar clumps, your first reaction might be... I messed this up. You haven't! Just keep on heating the sugar and stir constantly, those clumps will slowly melt into the most beautiful amber liquid and you will start to smell caramel.
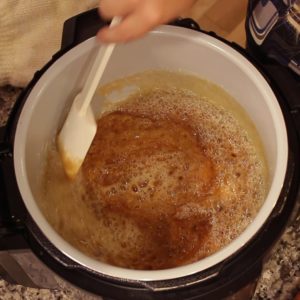
When all the clumps have become liquid, add the cubed butter all at once and the mixture will begin to bubble. Continue stirring constantly and cook for one minute. Turn the Ninja Foodi off.
Slowly add in the heavy cream. If you want a thicker caramel, add in ¼ cup. For a thinner caramel, add the ½ cup. *You can always add more cream to thin it out later, so if you aren't sure how much to add just use ¼ cup and reserve the rest.
The caramel I made in the video for the Turtle Cheesecake Recipe, was on the thinner side and did run off of the top of the cheesecake. It tasted delicious, but if you want a thicker caramel layer, only add ¼ cup of heavy cream.
Remove the caramel from the inner pot into a microwave safe container. We will need to reheat the caramel before putting it on the cheesecake.
Congratulations! You just made a homemade caramel sauce!
How to Make the Brownie Crust for this Turtle Cheesecake Recipe
Notice I say "Brownie Crust for this Turtle Cheesecake Recipe?" This is because I don't want you to run into the kitchen and make the brownies, put them in a pan, cook them and expect to have a pan of brownies. You probably won't be happy with the outcome. At least I wasn't.
This recipe for brownies, started out as a true brownie recipe. I wanted a super fudgy and decadent brownie, but what I ended up with was not exactly perfect for brownies. What it is perfect for, is this Turtle Cheesecake Recipe or any cheesecake recipe where you want a brownie crust.
This recipe doesn't have any leaveners in it, like baking powder, so there isn't any rise to the brownies. If you wanted to try to turn this recipe into pan brownies, add 2 teaspoon of baking powder to the flour and see if that does the trick.
I plan on doing this soon, but I got pretty excited about making a cheesecake with a brownie crust so the brownie recipe was put on hold. Be sure to let me know in the comments if you try it!
Don't worry though, I am working on the PERFECT brownie recipe and I'll get it accomplished soon.
Okay, I'm pretty long winded today! Sorry about that. Sometimes I get carried away because I want you to have all the information you need to be successful in making my recipes!
Time to make the Brownie Batter
Preheat the Ninja Foodi on Bake/Roast at 375° F for 5 minutes.
In a medium size bowl, melt 2 ounces of dark chocolate chips (you can use semi sweet or milk chocolate) with ¼ cup of salted butter.
I usually do this in the microwave in 30-second intervals (stirring after each) and it takes about 1 minute, but you can do it in the Ninja Foodi by boiling 2 cups of water and setting the bowl on the rack (in low) to allow the steam to melt the chocolate and butter. Try not to let the water level touch the bottom of the bowl.
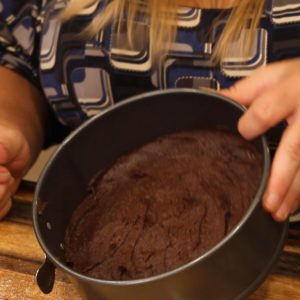
In a second bowl, combine ⅔ cup white sugar with 1 egg and lightly beat to combine.
Add cooled chocolate/butter mixture and stir to combine.
Add ⅓ cup flour and ⅓ cup cocoa powder. I like to use Ghiradelli Cocoa Powder, but you can use any brand you like. Just make sure it is unsweetened.
Add ¼ teaspoon sea salt and ½ teaspoon vanilla extract. Stir to combine and pour into parchment lined springform pan. Spread brownie batter evenly in pan.
Bake at 375° F on the rack in the low position for 9 minutes.
Remove and allow to cool.
Time to Make the Cheesecake Batter
Using a stand mixer or a hand mixer, combine 16 ounces of room temperature cream cheese with ½ cup white sugar. Mix until combined and fluffy.
Add one egg at a time, beating until it is just incorporated. Scrape down sides before adding second egg.
Add 1 teaspoon vanilla extract and mix until combined.
The batter should be smooth, but don't overmix.
Time to Assemble and Bake the Turtle Cheesecake
Your caramel should have had time to thicken up and cool. The consistency you want is thick, but pourable.
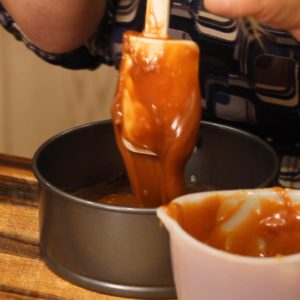
If you need to reheat, you can do this in 15 second intervals in the microwave. Stir between each 15 seconds. The caramel will heat up fast, sometimes 15 seconds is all you need.
Pour about ½ of the caramel onto the center of the brownie. I leave about ½-1" space between the caramel and the edge of the brownie to try to avoid too much of the caramel seeping down the edges.
Pour the cheesecake filling on top of the caramel. Spread the filling around to cover the entire brownie layer and smooth the top.
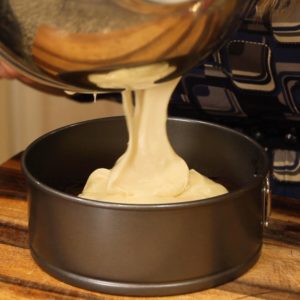
Place a paper towel over the top of the springform pan and top with foil or another pressure safe covering. This prevents too much water from getting onto the cheesecake.
Add 1 cup of water to the inner pot of the Ninja Foodi and put the springform pan on the rack in the low position into the Ninja Foodi.
Put on the pressure lid and turn the black valve to seal. Set the pressure on high for 25 minutes.
When the 25 minutes is up, allow to natural release for 15 minutes, then manually release the remaining pressure. Sometimes the red button will depress before the 15 minutes is up. Keep the cheesecake in the Ninja Foodi for the full 15 minutes so it sets up correctly.
Remove the cheesecake from the Ninja Foodi and carefully remove the covering. Try not to let any of the water on top fall onto the cheesecake. If there is any water on top of the cheesecake, gently blot dry with a paper towel.
Refrigerate for at least 4 hours (overnight is even better). You need the cheesecake completely cooled before adding the caramel topping.
Let's finish up!
Once the cheesecake has completely cooled, run a cake tester or other thin object that is safe for non stick surfaces around the edge of the cheesecake. This is necessary because of the caramel layer between the brownie and the cheesecake.
One of my favorite tools is the Pampered Chef cake tester! It works for so many things, I keep several around at all times.
Remove the cheesecake from the springform pan and place on a cooling rack. I suggest removing the bottom of the springform as well. This should be very easy if you used a parchment round. *Put a piece of parchment paper under the cooling rack for easy clean up.
Reheat the caramel slightly by microwaving in 15 seconds intervals, stirring after each 15 seconds.
Gently melt chocolate. I do this in the microwave, but don't heat longer than 15 seconds at a time and stir between heating or you can overheat the chocolate, which makes it difficult to work with.
Toast whole pecans in the Ninja Foodi by putting them in the basket and broiling for 2 ½- 3 minutes. This does a great job! If you have pecan pieces, then turn the Ninja Foodi on high sear/sauté and heat them, while stirring, for a few minutes or until they become darker in color.
Nuts burn pretty quickly, so keep an eye on them.
Crush the toasted nuts using a food processor or place the cooled nuts into a bag and crush with a rolling pin or mallet.
Pour all but 1-2 tablespoon of the caramel over the top of the cheesecake. Allow the caramel to drip over the sides of the cheesecake.
Top with crushed nuts.
Decorate with melted chocolate by streaming the chocolate over the top of the cheesecake.
Decorate with caramel by streaming the caramel over the top of the cheesecake in the opposite direction.
I like to refrigerate or freeze for 30 minutes or so before serving to allow the caramel to set up. Make sure to have the cheesecake on a baking pan lined with parchment because the caramel may drip as it comes in contact with the moisture of refrigerator.
Cut small slices. This cheesecake can easily serve 10-12 people, the slices should be small. It is very rich and I promise, a small slice is all you need!
Serve & Enjoy!
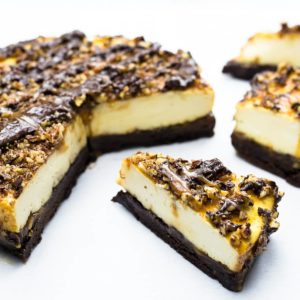
Turtle Cheesecake Recipe in the Ninja Foodi
Equipment
- Stand or hand mixer
- 7" Springform Pan
Ingredients
Homemade Caramel Sauce
- 1 ½ cups sugar white granulated
- 8 tablespoon butter salted, room temp
- ½ cup heavy whipping cream
Brownie Batter for Crust
- 4 tablespoon butter salted
- 2 ounces chocolate dark, semi sweet, or milk
- ⅔ cup sugar white granulated
- 1 large egg
- ⅓ cup flour all purpose
- ⅓ cup cocoa unsweetened
- ¼ teaspoon sea salt
- ½ tsp vanilla extract
Cheesecake Filling
- 16 ounces cream cheese room temp
- ½ cup sugar white granulated
- 2 large eggs room temp
- 1 tsp vanilla extract
Toppings
- ½ cup pecans roasted, see post for details
- 3 ounces chocolate melted, dark, semi sweet, or milk
Instructions
Homemade Caramel
- Turn the Ninja Foodi on High Sear/Saute and add 1 ½ cups granulated sugar.
- Allow the sugar to heat, stirring frequently until crystals start to form.
- Once the sugar crystals start forming, begin stirring constantly. If you start to smell any burning smell, reduce the heat to med-hi or medium for a few minutes. Continue stirring while all the sugar clumps into crystals.
- Once all the crystals have formed, they will begin to melt and form an amber liquid. You may have to adjust the heat back up to high for this to happen. Make sure to stir continuously with a high heat resistant and non stick safe scraper or wooden spoon.
- When all of the sugar crystals have melted into liquid, add the butter all at once. The mixture will begin to bubble, cook for one minute. Turn the Ninja Foodi off.
- Slowly add the cream. You can use between ¼ cup and ½ cup depending on the consistency you want. See post for more details.
- Remove the caramel from the inner pot and allow to cool. The mixture will thicken as it cools.
Brownie Batter for Crust
- Preheat the Ninja Foodi on Bake/Roast at 375° F for 5 minutes. In a medium size bowl, melt 2 ounces of dark chocolate chips (you can use semi sweet or milk chocolate) with ¼ cup of salted butter.
- In a second bowl, combine ⅔ cup white sugar with 1 egg and the vanilla extract. Lightly beat together. Add in the melted chocolate/butter mixture and whisk to combine.
- Add ⅓ cup flour and ⅓ cup cocoa powder and ¼ teaspoon sea salt to the wet batter and stir to combine. I like to use Ghiradelli Cocoa Powder, but you can use any brand you like. Just make sure it is unsweetened. Pour the batter into a parchment lined 7" springform pan. Spread evenly.
- Bake at 375° F on the rack in the low position for 9 minutes. Remove and allow to cool.
Cheesecake Batter
- Using a stand mixer or a hand mixer, combine 16 ounces of room temperature cream cheese with ½ cup white sugar. Mix until combined and fluffy.
- Add one egg at a time, beating until it is just incorporated. Scrape down sides before adding second egg.
- Add 1 teaspoon vanilla extract and mix until combined. The batter should be smooth, but don't overmix.
Cheesecake Assembly and Bake
- Pour about ½ of the caramel onto the center of the brownie. I leave about ½-1" space between the caramel and the edge of the brownie to try to avoid too much of the caramel seeping down the edges. If the caramel is too thick to pour, heat it in the microwave for 15 seconds.
- Pour the cheesecake filling on top of the caramel. Spread the filling around to cover the entire brownie layer and smooth the top.
- Place a paper towel over the top of the springform pan and cover with foil.
- Add 1 cup of water to the inner pot of the Ninja Foodi and put the springform pan on the rack in the low position into the Ninja Foodi.
- Put on the pressure lid and turn the black valve to seal. Set the pressure on high for 25 minutes.
- When the 25 minutes is up, allow to natural release for 15 minutes, then manually release the remaining pressure. Sometimes the red button will depress before the 15 minutes is up. Keep the cheesecake in the Ninja Foodi for the full 15 minutes so it sets up correctly.
- Remove the cheesecake from the Ninja Foodi and carefully remove the covering. Try not to let any of the water on top fall onto the cheesecake. If there is any water on top of the cheesecake, gently blot dry with a paper towel.
- Refrigerate for at least 4 hours (overnight is even better). You need the cheesecake completely cooled before adding the caramel topping.
Finishing Touches
- Run a cake tester or other thin object that is safe for non stick surfaces around the edge of the cheesecake.
- Remove the cheesecake from the springform pan and place on a cooling rack. *Put a piece of parchment paper under the cooling rack for easy clean up.
- Reheat the caramel slightly by microwaving in 15 seconds intervals, stirring after each 15 seconds.
- Gently melt chocolate. I do this in the microwave, but don't heat longer than 15 seconds at a time and stir between heating or you can overheat the chocolate, which makes it difficult to work with.
- Toast whole pecans in the Ninja Foodi by putting them in the basket and broiling for 2 ½- 3 minutes. This does a great job! If you have pecan pieces, then turn the Ninja Foodi on high sear/sauté and heat them, while stirring, for a few minutes or until they become darker in color.
- Pour all but 1-2 tablespoon of the caramel over the top of the cheesecake. Allow the caramel to drip over the sides of the cheesecake.Top with crushed nuts. Decorate with melted chocolate by streaming the chocolate over the top of the cheesecake.Decorate with caramel by streaming the caramel over the top of the cheesecake in the opposite direction.Refrigerate for at least 30 minutes before serving
- Cut small slices. This cheesecake can easily serve 10-12 people, the slices should be small. It is very rich and I promise, a small slice is all you need!Serve & Enjoy!
Nutrition
ABOUT THE RECIPE AUTHOR, LOUISE LONG
Louise is a full-time recipe creator and food blogger @ The Salted Pepper. She has over 30 years of experience with cooking and recipe development. She owned a restaurant for several years and was a full-time RN until retiring to blog full-time.

She published her first cookbook in the Fall of 2018 and is very interested in writing several more.
Louise is also the creator of an online Ninja Foodi Pressure Cooking Course with over 100 instructional step-by-step videos. People absolutely rave about the course and all the value they have received from it.
Louise has several very active Facebook groups that help people with the basics of cooking and getting the most out of the Ninja Foodi.
Louise is also a YouTube creator and you can find most of her recipes in video format on The Salted Pepper YouTube channel.
She is very responsive to messages and eager to help in any way she can. Get more Information about Louise & contact information
I WOULD LOVE TO SEE WHAT YOU ARE COOKING UP IN YOUR KITCHEN! TAG ME @THESALTEDPEPPER ON YOUR FAVORITE SOCIAL MEDIA PLATFORM WHEN YOU MAKE A DISH!
BE SURE TO FOLLOW THE SALTED PEPPER RIGHT HERE ⇓⇓⇓⇓⇓

Tesa Jordan
While this looks amazing, right out of the shoot, I am afraid of all the steps that could ruin this... burning the sugar for instance! I am the only one in the house that can eat cheese (my husband is allergic!) so I guess I'll stick to store-bought... this is way too labor-intensive for one person!
Louise
The steps are broken down so they are very easy to follow. Just an FYI, it freezes really well!
Brooke
How would I modify this for a 6inch spring pan?
Louise
I would probably reduce the ingredients by 25%.
Brooke
Should I cook for same time length?
Rosanne
Hi Louise. I made your turtle cheesecake for a family dinner. The brownie batter was extremely salty. I went back to look to see what I did wrong. In step #3 of the brownie batter for crust it said "Add ⅓ cup flour and ⅓ cup cocoa powder and ¼ sea salt to the wet batter and stir to combine.". I assumed it was supposed to be a 1/4 cup of sea salt because the two previous were cups but went back to the list of ingredients it was supposed to be a 1/4 tsp not a 1/4 cup. 🤦♀️. Could you please add the 1/4 tsp to the written instructions in step 3 of the brownie batter for crust so someone else doesn't ruin your lovely recipe which was otherwise delicious.
Louise
Oh no! I will definitely fix that and I'm so sorry the instructions weren't clearer.
Rosanne
Well...I redeemed myself with my family. I made this recipe again with the correct measurements and it was delicious! Thank you for all of your great recipes...your blog is my go to for Ninja recipes.
Louise
YAY! I'm so glad you are enjoying the recipes!