
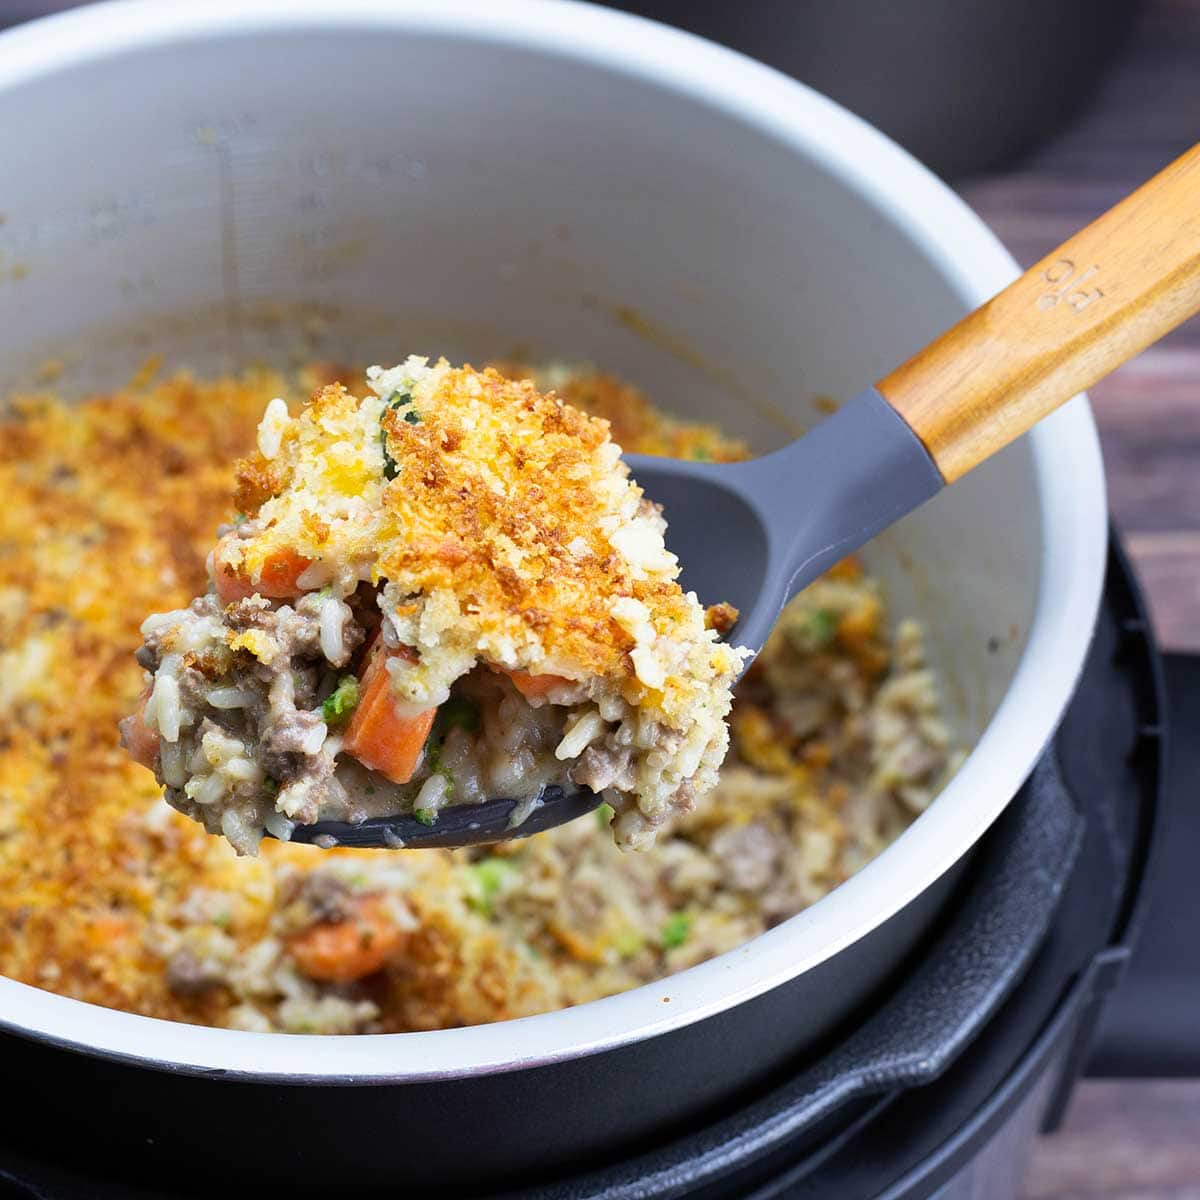
When you need a simple dump-and-cook meal that is going to satisfy even the pickiest eaters, this is it! Cheesy Ground Beef & Rice Casserole has everything you need for a perfect dinner!
Would you like to save this recipe?
The first time I tested this recipe, it was shockingly good! I mean really good! I immediately called Jeff over and he said throw it out right now. He LOVED it, too!
This post may contain affiliate links. If you make a purchase after clicking a link, I may earn a small commission. As an Amazon Associate, I earn from qualifying purchases.
He wanted me to throw it out because we are eating low carb and trying to stay away from rice and things like that and it was addictingly good!
Thankfully, his friends at work gladly took it and the next two batches I made and they loved it too!
There really isn't a simpler dinner than one where you throw everything into the pot and pressure cook. Then, of course, with the Ninja Foodi Pressure Cooker & Air Crisper, the Instant Pot Duo Crisp or a crisping lid that fits onto a regular instant pot, you get to add this incredible topping and crisp it up all in the same pot. LOVE IT!
If you enjoy one-pot dinners, then you might also be interested in these recipes.
One-Pot Meals in the Ninja Foodi or Instant Pot Duo Crisp
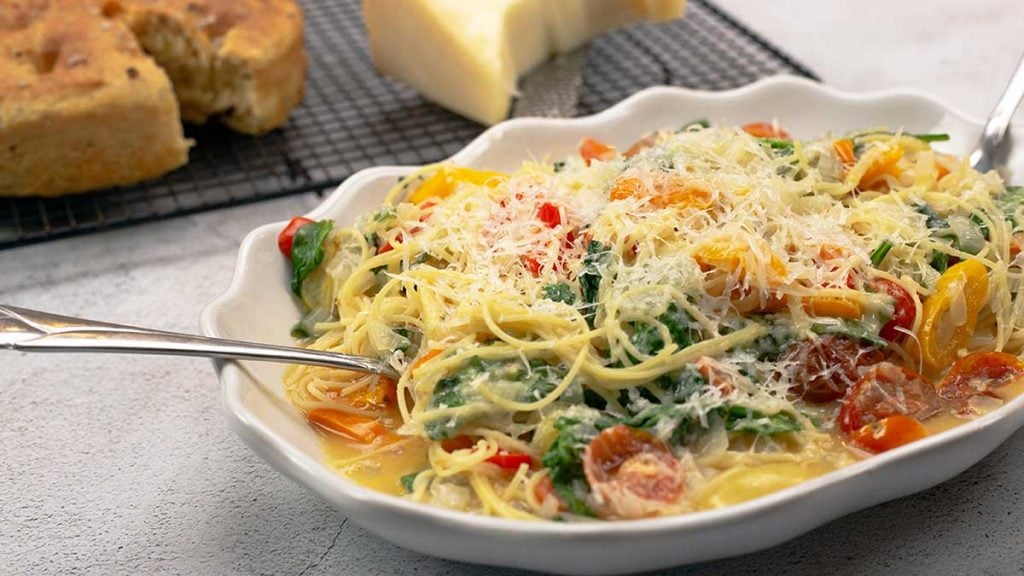
This Lemon Garlic Pasta is so light, flavorful, and beautiful that it's the perfect dish, anytime!
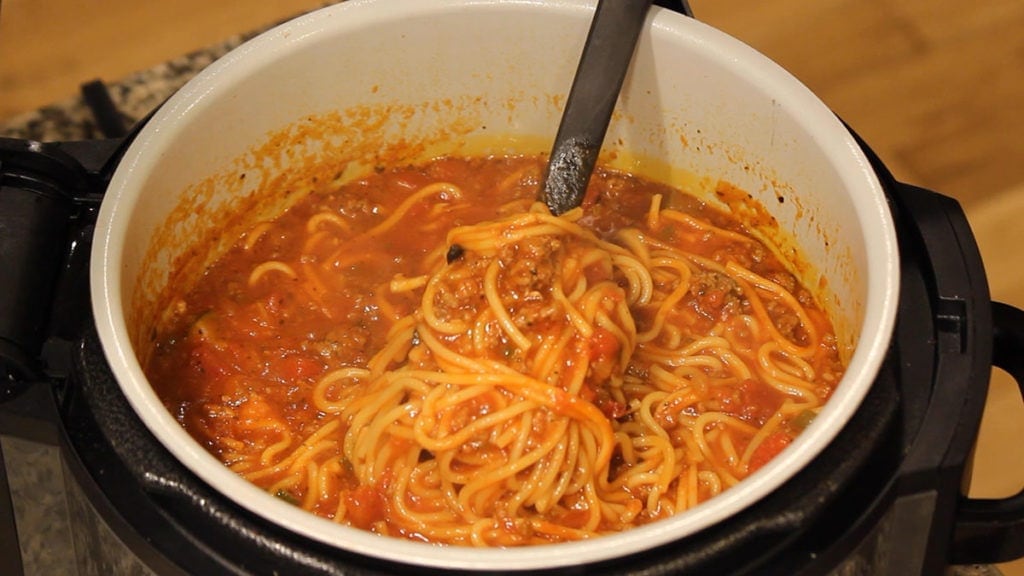
Or if you prefer a more traditional pasta recipe, this one-pot spaghetti is one of my most popular recipes.
While one-pot pasta dishes are very popular and I have several more, there are also other kinds of one-pot dishes that you may not have considered.
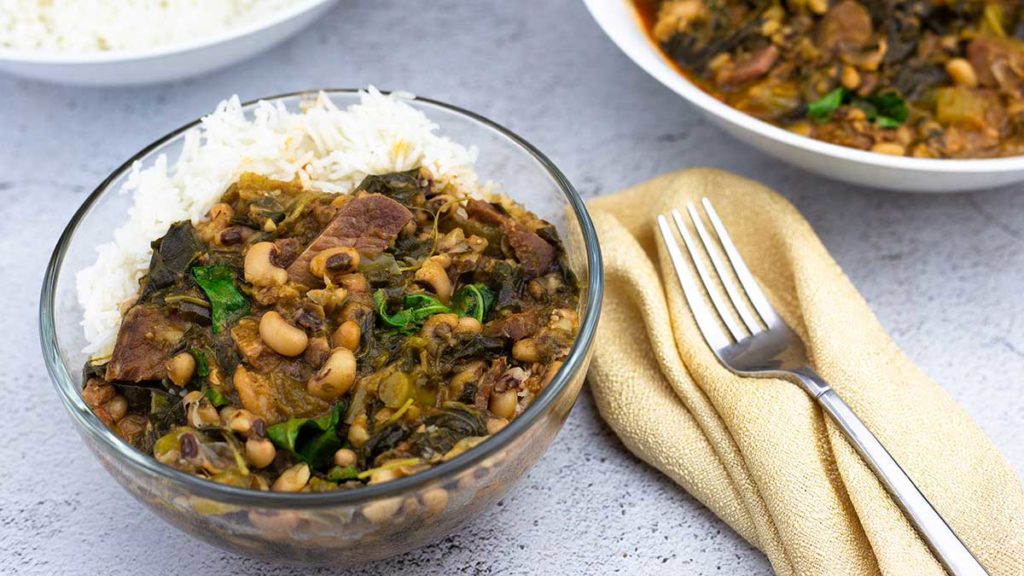
For example, this recipe for Hoppin' John is so good and easy to make! If you haven't had it before, give it a try. I think you'll be very surprised!
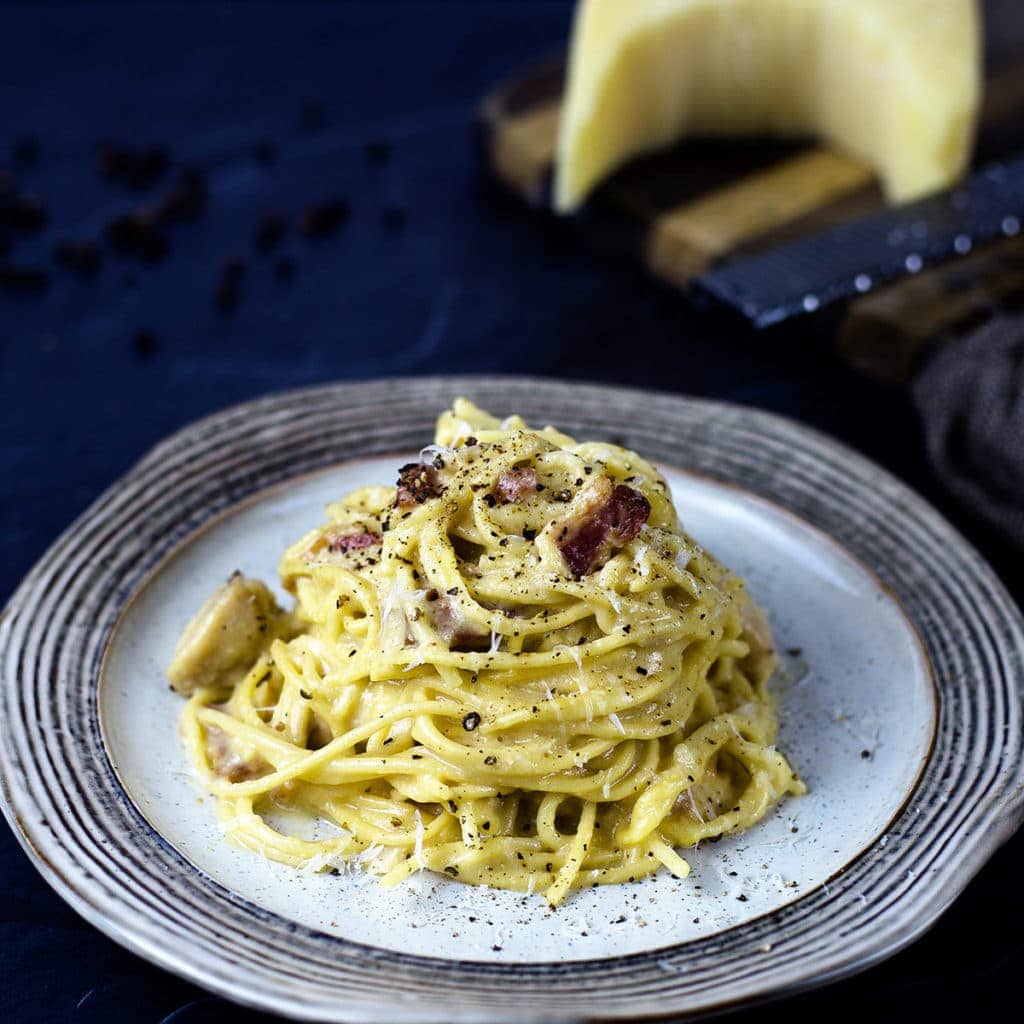
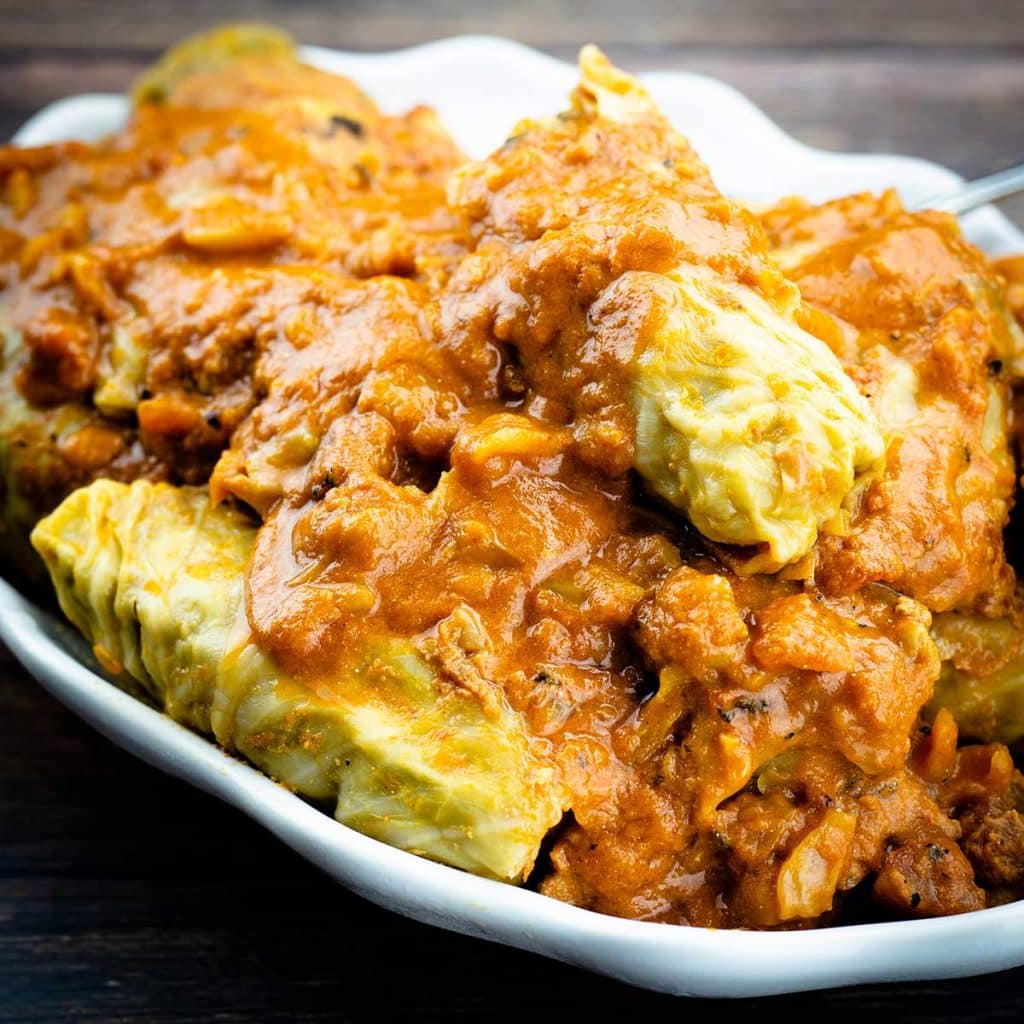
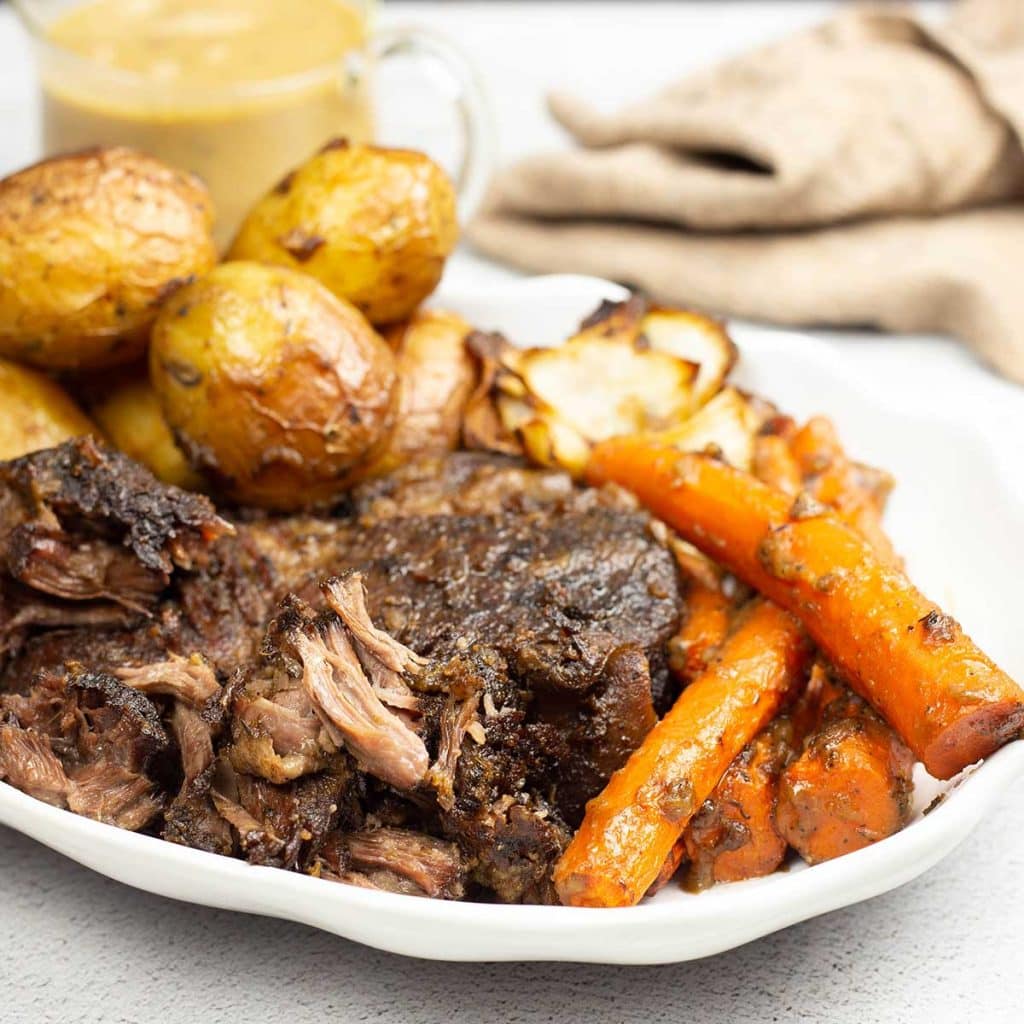
There are plenty of other recipes for one-pot meals, like chicken carbonara, pasta primavera, stuffed cabbage rolls, pot roast, seafood boil, and many more!
Some are dump-and-pressure-cook and others require a little more time to make, but they are all very easy!

Can I use Ground Turkey or Ground Chicken?
Yes, that would be no problem at all. You can simply replace the ground beef with whatever ground meat you prefer.
The only thing I might do differently if using ground turkey or ground chicken is add a little more seasonings, because there is not as much flavor in turkey and chicken in my opinion.
They are also drier than ground beef, but that shouldn't make any difference in this recipe.
Ground sausage would also be really good. Or you can do a combination of ground meats and that would be fine.
What Type of Rice Should I use?
I used a parboiled rice in this recipe, but there are several kinds of rice that would work just as well.
If you want to learn more about parboiled rice, here is an article I found: Benefits of Parboiled Rice
Plain white rice would be fine, but I would rinse it before using.
White Jasmine rice or even Basmati will work, just rinse it before using so it doesn't clump together.
I would not use Instant Rice. Instant Rice will cook so fast that it might become very gummy in this recipe.
If you wanted to use a brown rice, you will have to increase your liquid and time. I would increase the beef stock to 1½ cups and increase the pressure cook time to 20 minutes.
What Type of Vegetables Can I use?
That is really up to your preference. I found that using a frozen Normandy Blend of vegetables worked great.
You can use any type or combination of frozen vegetables you like. I do suggest taking them out of the freezer just before starting to make this recipe so they thaw a little.
Even though we only go under pressure for 2 minutes, I think they will get too soft in that time. However, if you like soft vegetables, feel free to add them in before pressure cooking.
You can also use fresh vegetables, but you will need to think about how they cook. For example; carrots take a longer to cook than zucchini or squash, so I would add them in before pressure cooking and cut them into 1-2" pieces.
You can also use leftover vegetables! Simply throw them in with the cheese and cream and they will be warm in the time it takes to Air Crisp the topping.
Can I use a Different Topping?
Of course! You can do so much with this basic recipe to change it up and make it how you like it.
A ritz cracker with butter topping would be incredible. You could use plain bread crumbs with cheese and butter, or all cheese.
The possibilities are endless for toppings! Use your favorite and be sure to let me know what you try!
Can I make a Keto Cheesy Ground Beef Casserole?
Absolutely, but the ingredients and way you would cook it would be different.
For a keto version, obviously skip the rice and the panko. You can use crushed pork rinds and cheese as the topping, but don't add the butter because there is plenty of fat in the cheese and pork rinds and nothing to absorb it. If you add butter, you will end up with a very greasy topping.
Since you will omit the rice, you will not need the beef stock. Adding it would cause the casserole to be too liquidy.
Without the thin liquid, you don't want to pressure cook it. Instead, use the sear/sauté function to brown the ground beef, onions, and garlic. Add in the cream, cheese, and vegetables and cook over low until everything is melted and cooked through. If you think you need a bit more moisture, go ahead and add a little beef stock, but only add a little at a time.
Put your topping on and AC at 375℉/190℃ until the topping is crisp and the cheese is melted.
Without the rice, the volume will be less, so I'm estimating that the keto version would serve 4-6 people.
Serve & Enjoy.
How to make Cheesy Ground Beef and Rice Casserole in the Ninja Foodi
The first thing I recommend doing is taking the frozen vegetables you want to use out of the freezer to let them thaw some.
Turn the Ninja Foodi on high sear/sauté. Add in the ground beef, the diced onions, salt & pepper, and the parboiled rice. Stir to mix and allow to cook for about 3-5 minutes or until the ground beef is browning.
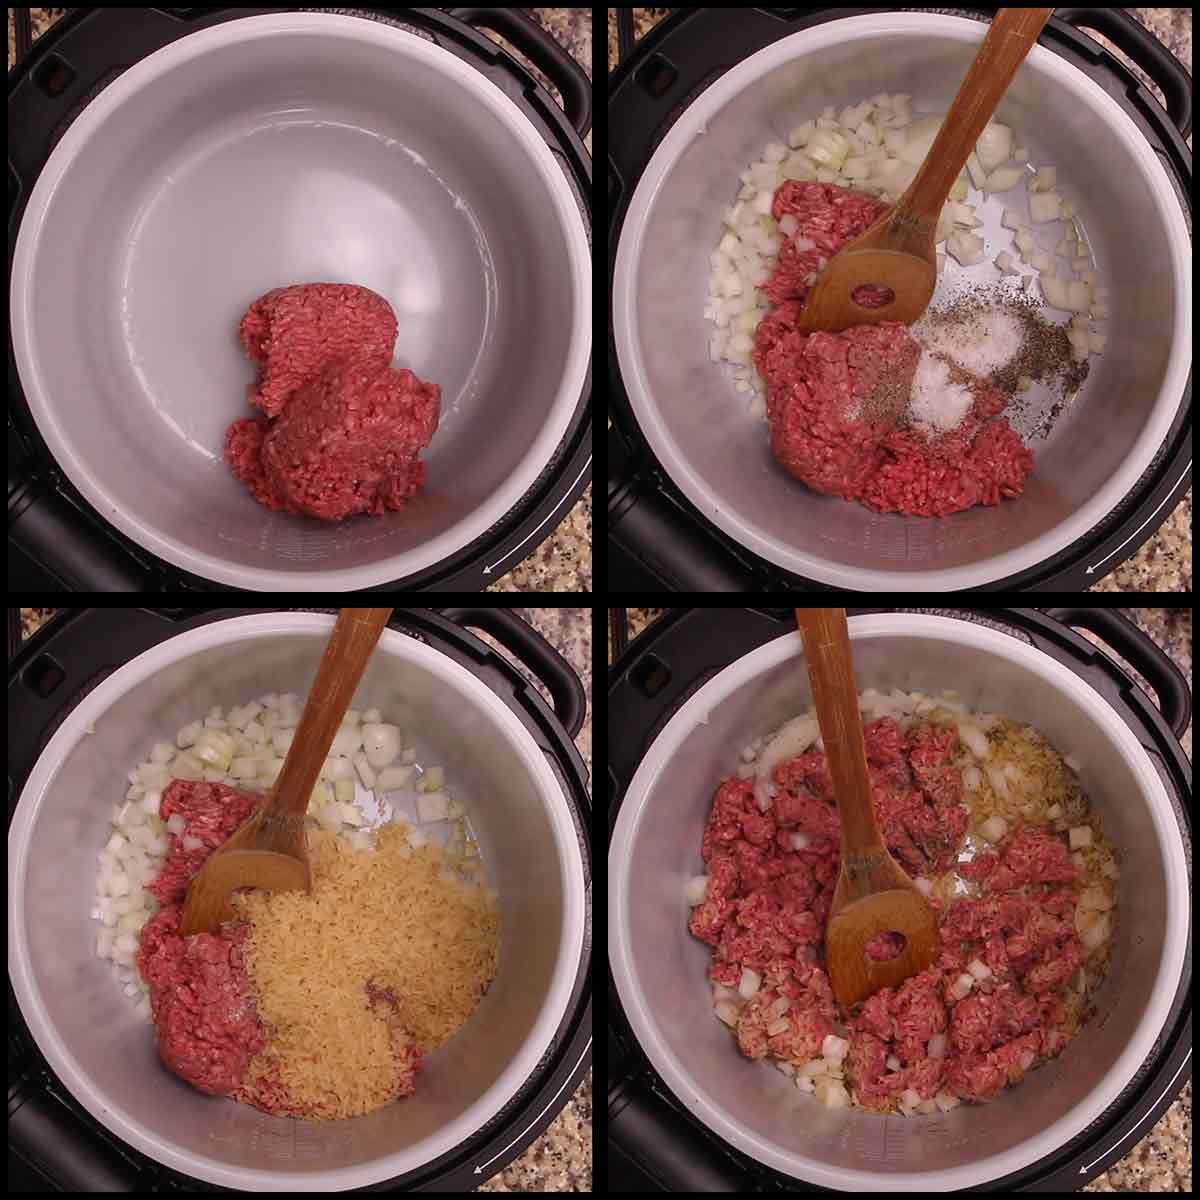
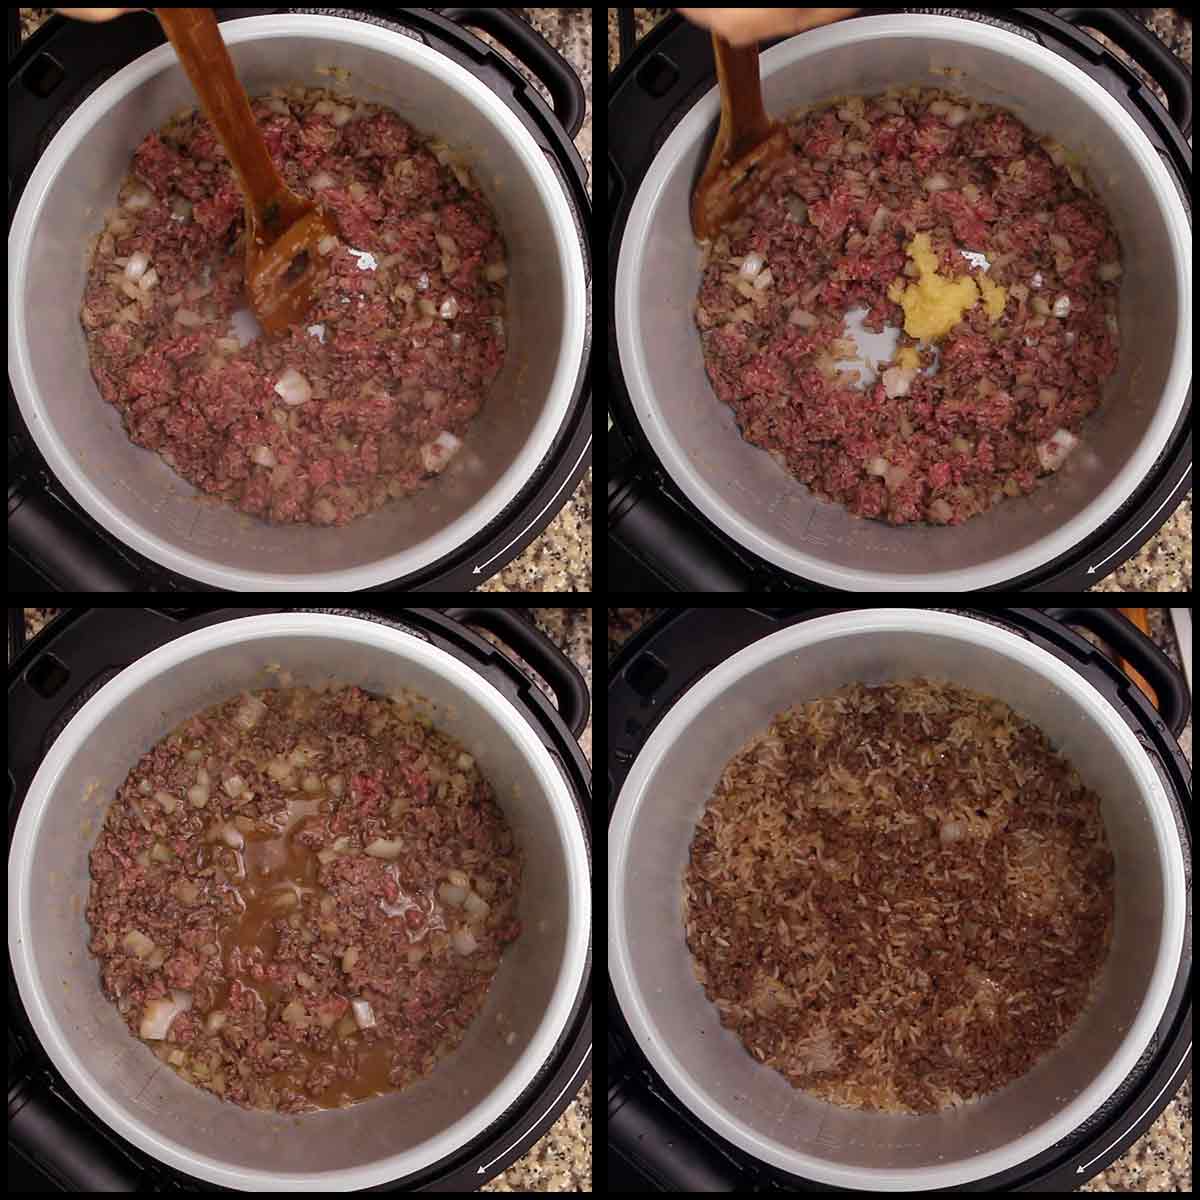
Once the ground beef starts to brown, add the garlic. I don't add the garlic in earlier because it could burn. Burnt garlic is horrible and should be avoided at all costs. I used about 6 garlic cloves and minced them for about 1 Tablespoon of minced garlic.
If you love cooking with garlic, this (affiliate link)garlic press is fantastic. It's so much less expensive to buy whole heads of garlic and mince your own.
Sauté until the meat is at least 50% cooked through. This takes just a few minutes. Deglaze the pot with 1 cup of beef stock and make sure to scrape along the bottom of the pot to remove anything that could be stuck on.
Put the pressure lid on and turn the valve to seal. Set the pressure for 2 minutes on high. When the time is up, allow the pot to naturally release the pressure for 5 minutes and then manually release the remaining pressure.
I'll warn you now, it's not going to look too pretty right now! Don't worry, it turns out great!
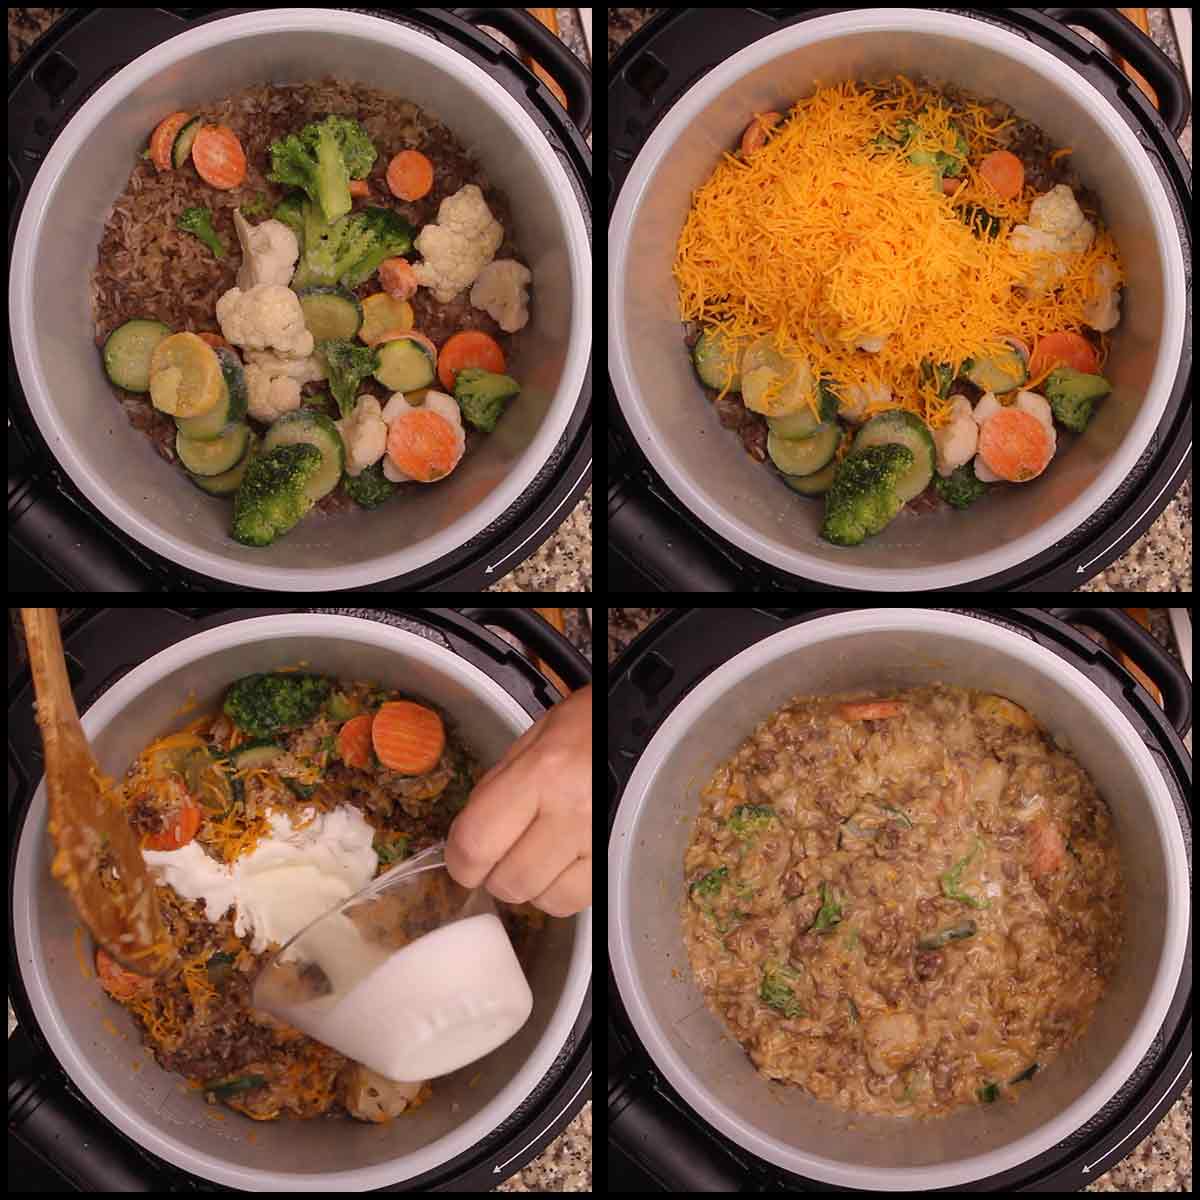
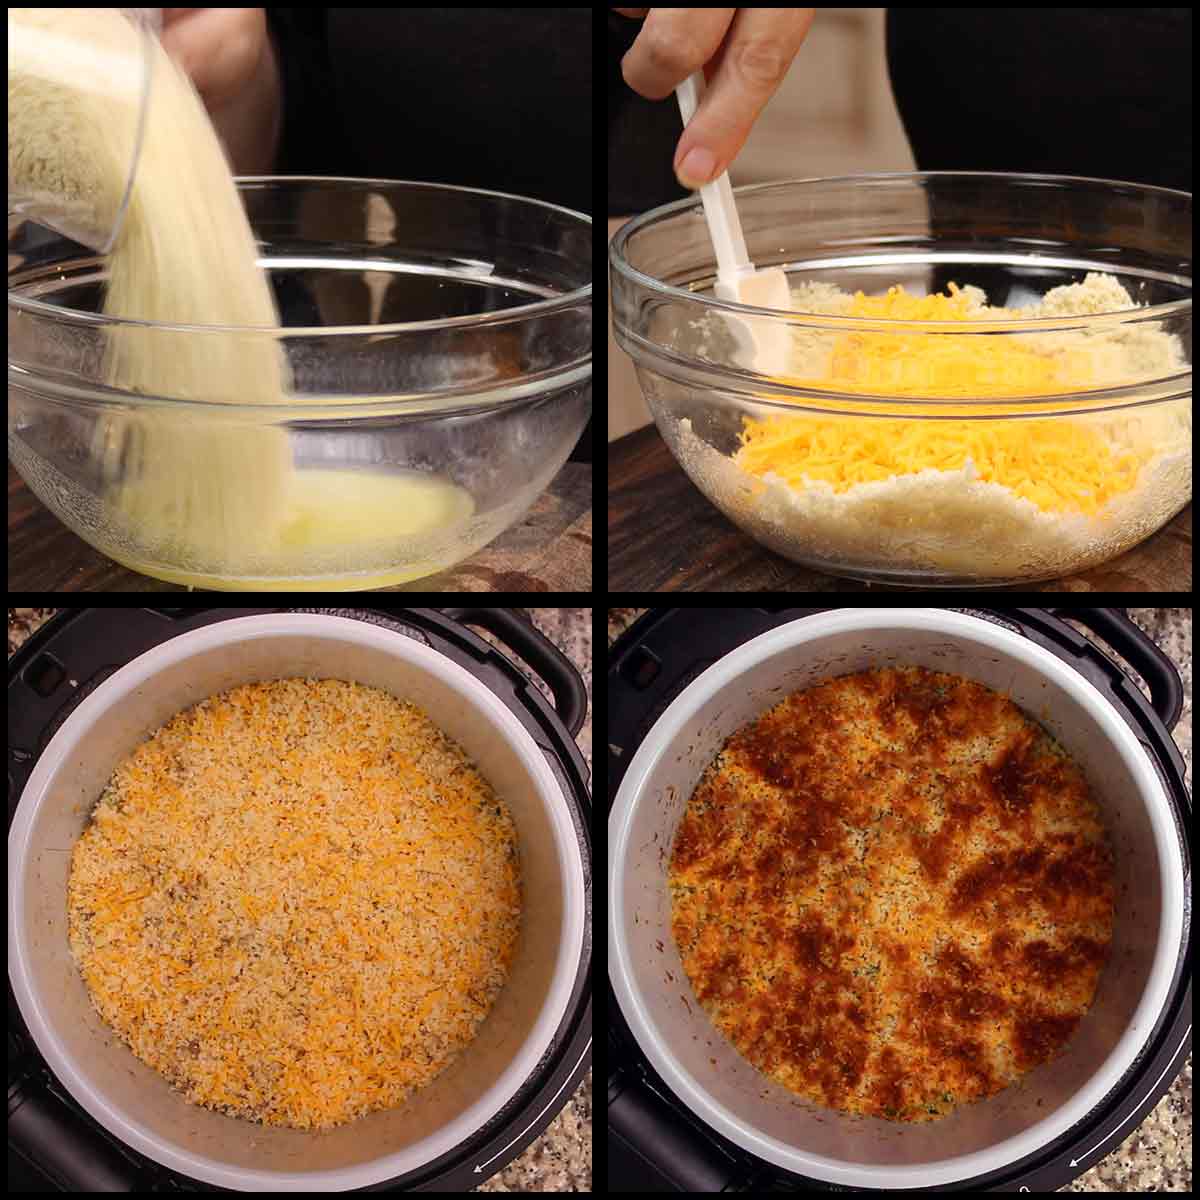
Stir in the frozen vegetables, 2 cups of shredded cheese (I used shredded sharp cheddar), 2 Tablespoons of butter (optional) and the cream. Put the PC lid back on and turn the valve to vent. Let the pot sit on the keep warm while you make the topping.
This allows those vegetables to soften and melts the cheese. Frozen vegetables are usually blanched before freezing, so they don't need to be cooked like fresh ones do. If you want to use fresh vegetables, you will want to cook them first. Or put them in before the PC time, if they can handle that.
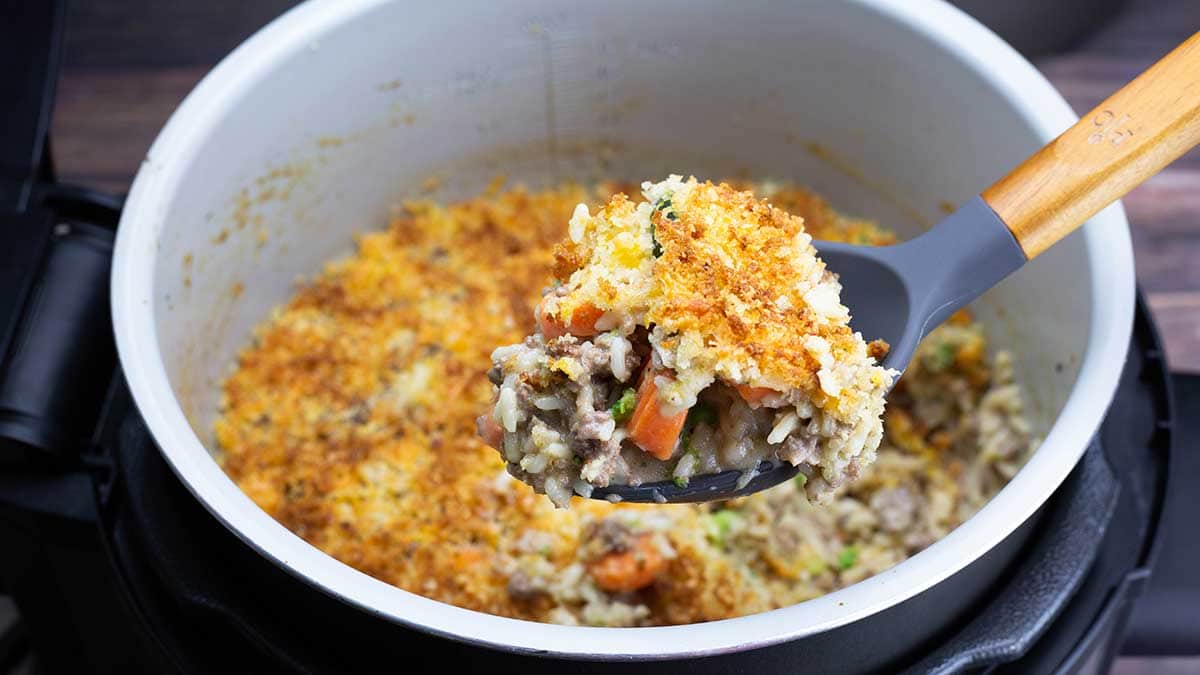
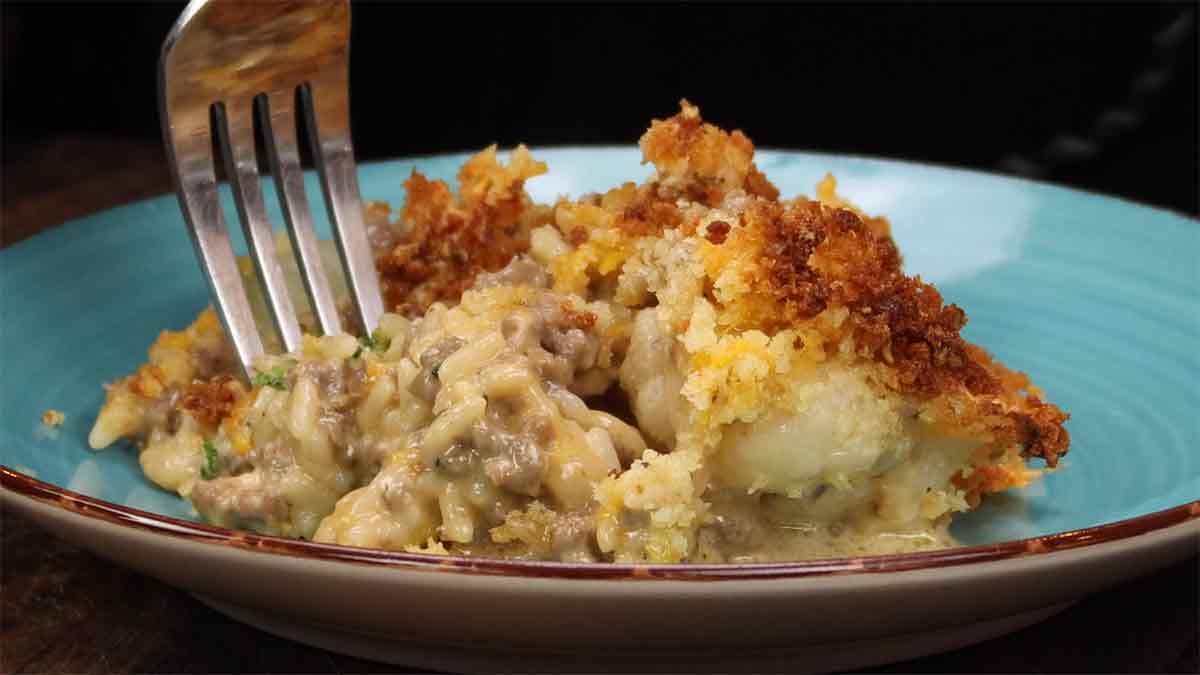
You can certainly serve the cheesy ground beef and rice casserole right now, but this topping really takes it to the next level of greatness!
Melt 3 Tablespoons of salted butter and mix with the 1 cup of panko. Add the remaining ¾ cup of shredded cheddar cheese and mix together.
Spread the topping on the top of the cheesy ground beef and rice casserole in an even layer.
Put down the TenderCrisp lid and select air crisp on 365℉/185℃ for 10 minutes. I recommend checking on it after 5 minutes and then every 2 minutes until the top is nice and brown.
Scoop & Serve!

Cheesy Ground Beef & Rice Casserole with Vegetables ~ Pressure Cooker Recipe
Ingredients
- 1 lb ground beef
- 1 small onion diced
- 1½ teaspoon fine grind sea salt
- 1 teaspoon black pepper
- 1 cup parboiled rice
- 6 cloves garlic minced
- 1 cup beef stock
- 2¾ cup shredded cheddar divided in recipe
- ½ cup heavy whipping cream
- 4 cups frozen vegetables any kind you like (see post for details)
- 5 tablespoon salted butter divided in recipe
- 1 cup panko
Would you like to save this recipe?
Instructions
- Turn the Ninja Foodi on high sear/sauté. Add the ground beef,onions, salt, pepper and rice. When the ground beef starts to cook, break it up and stir occasionally.
- After the ground beef is partially cooked, add in the minced garlic and cook 2-3 minutes.
- Deglaze the pot with beef stock and make sure to scrape the bottom to remove anything that may be stuck to the bottom.
- Put the pressure lid on and turn the valve to seal. Set the pressure on high for 2 minutes. When the time is up, natural release the pressure for 5 minutes and then manually release the remaining pressure.
- Add 2 cups of shredded cheddar cheese, 2 tablespoon of butter, cream, and frozen vegetables. Stir to combine. Put the pressure lid back on with the valve to vent and let sit for 5 minutes while you get the topping mixed up. Check the vegetables to make sure they are cooked the way you like them. Add more time if needed.
- Combine 3 tablespoon of melted butter the panko and mix. Add the remaining ¾ cup of shredded cheese and mix.
- Spread the topping on top of the casserole in an even layer. Put the crisping lid down and select the air crisp function on 365°F/185°C for about 8-10 minutes. I check after 5 minutes and then every 2 minutes until the top is brown like you like it and the cheese is melted.
- Serve & Enjoy!
Notes
Nutrition
About the Recipe Author, Louise Long
Louise is a full-time recipe creator and food blogger @ The Salted Pepper. She has over 30 years of experience with cooking and recipe development. She owned a restaurant for several years and was a full-time RN until retiring to blog full-time.

She published her first cookbook in the Fall of 2018 and is very interested in writing several more.
Louise is also the creator of an online Ninja Foodi Pressure Cooking Course with over 100 instructional step-by-step videos. People absolutely rave about the course and all the value they have received from it.
Louise has several very active Facebook groups that help people with the basics of cooking and learning more about the appliances they love.
Ninja Foodi Pressure Cooker & Air Crisper 101
Ninja Woodfire Outdoor Grill & Smoker
Louise is also a YouTube creator and you can find most of her recipes in video format on The Salted Pepper YouTube channel.
She is very responsive to messages and eager to help in any way she can. Get more Information about Louise & contact information
I WOULD LOVE TO SEE WHAT YOU ARE COOKING UP IN YOUR KITCHEN! TAG ME @THESALTEDPEPPER ON YOUR FAVORITE SOCIAL MEDIA PLATFORM WHEN YOU MAKE A DISH!
BE SURE TO FOLLOW THE SALTED PEPPER RIGHT HERE ⇓⇓⇓⇓⇓
Sofiya says
Delicious! Me and my husband loved it, and it made for tasty leftovers.
Louise says
I'm so glad you enjoyed it!
Eita says
Just made this and it was so quick and easy. Super tasty too! Even my hubby, who isn't a fan of cheesy goodness, liked it. Definitely going in my regular dinner rotation!
Louise says
Thank you so much and I'm so glad you both enjoyed it!
Carol Christian says
I can’t find parboiled rice. Does regular rice take longer and need more liquid?
Louise says
As long as you aren't using instant rice, brown or wild rice, you should be fine with the same times/liquid amounts.
Maria says
This was pretty darn good and so fast to get on the table. I added a half a packet of taco seasoning, a drizzle of taco sauce and just smidge more broth since i have an 8 quart ninja. Everything else i did as written. Super yummy! My picky 16 year old son approves… which says alot! Lol. Thanks!!
Judy McAllaster says
Yummy for sure. I used the IP but with so little liquid it gave me the burn notice. I did use the crisper top for ip and it worked like a charml. i probably would only make half next time however I must figure out how to prevent the burn display.