

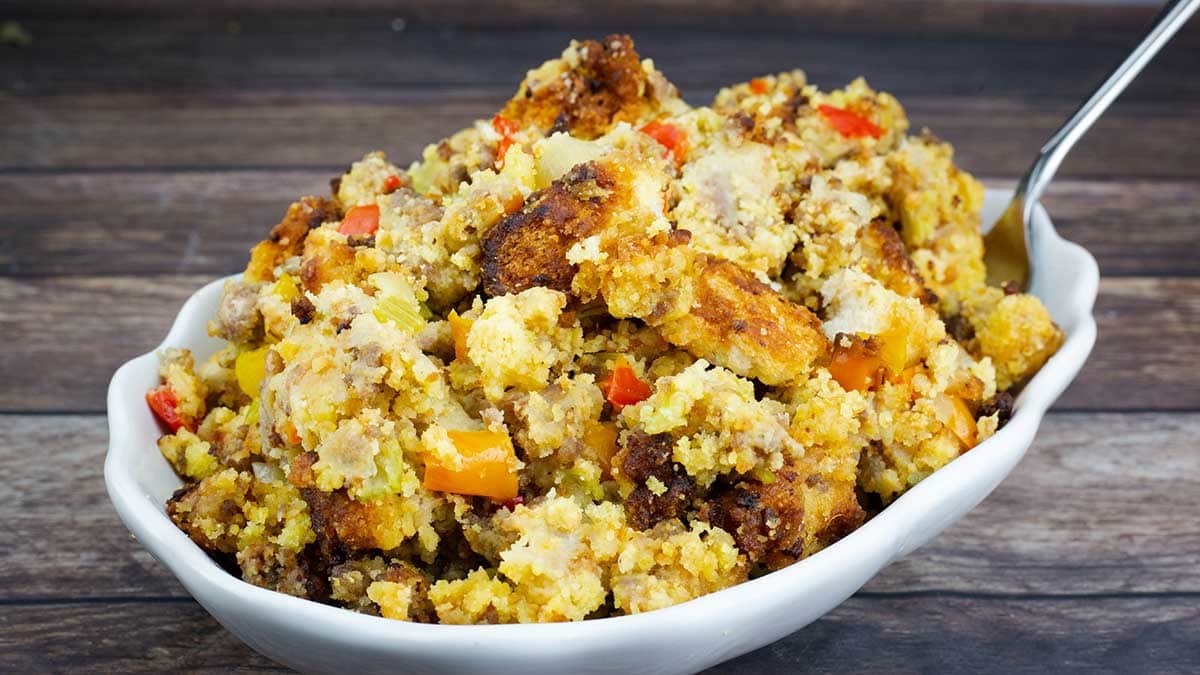
The perfect combination of flavors and textures makes this cornbread and sausage stuffing a crowd pleaser! It's simple to make and uses basic ingredients that can be customized to suit your preferences easily.
Would you like to save this recipe?
I like to make it in the Ninja Foodi Pressure Cooker & Air Crisper because of the deep pot and I can sauté the veggies and sausage, mix in the bread cubes and air fry to finish the stuffing all in one pot.
The Instant Pot Duo Crisp will also work great or if you have an Instant Pot with a detachable air fryer lid. No worries, though, if you don't have any of these appliances; you can use a large skillet on the stove, a large mixing bowl to combine everything and a casserole dish to bake it in the oven.
No matter how you choose to make it, I know you will love this easy cornbread stuffing recipe. It's the perfect Thanksgiving stuffing or to serve any day of the week with some delicious pork chops and a sweet potato casserole!
Frequently Asked Questions
Nothing really! In the Northern part of the US, it is common to refer to it as stuffing, while in the south, it is almost always called dressing. The terms are interchangeable and refer to the same type of dish.
Technically, you could say that stuffing is something you make to stuff something with and dressing is cooked separately and used to "dress" the main dish. However, in more recent years it has become less and less common to stuff a turkey or chicken due to safety concerns, so the two terms rarely mean something different.
In Pennsylvania Dutch Country, it is often referred to as filling and they usually use a combination of stuffing ingredients and mashed potato ingredients. It's delicious!
Absolutely! Simply reduce the ingredients to the portions you want to make. All the instructions stay the same. You can also double the recipe; however, you won't be able to fit all of the stuffing in the inner pot of the Ninja Foodi or Instant Pot, so plan on having a large mixing bowl and a couple of large casserole dishes to bake at least half of it in the oven.
Yes, it is a very important step. Using cornbread that hasn't been allowed to dry will result in your stuffing becoming mushy and it will not have the texture you want. Undried cornbread will simply disintegrate when the liquid is added. There are several ways to dry out your cornbread and I go over those below in the written article.
Ingredients & Substitutions
Bread
A combination of cornbread and white bread is used in the recipe to achieve the perfect balance of flavor and textures. While you can certainly use all cornbread, I have found that it results in a more mealy texture since the cornbread breaks down more than regular bread when moistened.
I used my homemade recipe for a sweet cornbread, but left out the corn kernels, because (and trust me on this one) when you dry out the cornbread, you also dry out the corn and dried corn is most unpleasant in a stuffing. I also skipped adding the honey butter. Here is the recipe: Homemade Cornbread
You can also make your own cornbread recipe or 2 boxes of Jiffy cornbread mix and that will be fine in this recipe. If you want to skip the step of drying the cornbread, then grab 16 ounces of dried cornbread cubes.
I used dried white bread, a total of 12 slices or 6 cups (8 ounces), but you can use any bread you like. Or, you can grab the dried bread stuffing mix.
Sausage
A lot of the flavor in this sausage cornbread stuffing comes from the sausage, so if you are going to skip the sausage or switch to a turkey sausage, you may need to add more seasonings.
I used a maple breakfast sausage that comes in the tube in this sausage stuffing recipe, but I also tried it with a spicy pork sausage (Italian sausage) and thought it was delicious either way, but using the breakfast sausage was just a bit easier and I really enjoyed the slight sweetness of the maple.
Use whatever sausage you love and if you want a bit of bite to the sausage and are using sausage in a casing, don't remove the casing, just cut it up into bite size pieces. If you are using sausage in a casing, but want the sausage to blend into the cornbread dressing, then remove the casing before sautéing.
If you aren't sure if the sausage you are using will season the stuffing enough, you can test it before baking the entire batch. Simply mix all of your ingredients together and then bake or pan fry about 1 Tablespoon of the stuffing to taste for flavors. You can also taste it before baking since we aren't using any raw eggs or anything else that can't be eaten without being cooked. Just make sure your sausage was cooked all the way before adding in the bread, if you plan on eating some before baking.
Vegetables
I used a simple vegetable mixture of onion, celery, and peppers in this recipe and think it's perfect! The flavors of the peppers are outstanding, so please don't skip them altogether unless you really don't like peppers and then, of course, skip them.
I used a yellow onion, but any onion will work just fine. Mine was medium in size and, when diced, equalled about ½ cup or so, but feel free to use a large onion or 2 yellow onions, if you prefer.
You can use any combination of bell peppers you like. I used a red, an orange, and a yellow bell pepper. I've also thrown in a green bell pepper and it's been just fine.
If you like a little spice, use some jalapeño peppers!
You can also add any extras into your stuffing that you like. I think Granny Smith apples would be delicious.
Seasonings
This cornbread sausage stuffing recipe calls for a very simple spice blend of sea salt, black pepper, thyme, and poultry seasoning. However, you can get so creative with your seasoning blend. If you wanted to put a Cajun spin on it, add in your favorite Cajun spices and maybe use Andouille sausage. Or, take it more Mexican and add in cumin, jalapeños, fresh corn kernels, and fresh cilantro at the end.
I used chicken broth to moisten the stuffing, but you could use any seasoned broth you like. If you have some turkey stock and plan on serving this stuffing with turkey, then definitely use that.
I also added some maple syrup which I absolutely love in the dressing, but it is totally optional.
Methods for Drying Bread for Stuffing or Dressing
There are several ways you can dry your bread before making stuffing. My favorite way is using my Ninja Foodi XL Air Fry oven on dehydrate. It will make it easier and quicker (and less messy) if you cube your bread before allowing it to dry out. The size you make your cubes is up to you, but I usually make them about 2- to 4-inch cubes. I usually cut my white bread cubes into smaller pieces than the cornbread cubes.
Cornbread usually takes a little longer to dry than a plain white bread and the size of your cubes will affect how long it takes, so use these times as guidelines only. You will want your cubes of bread to be dry throughout.
Dehydration Method
Cube your bread and set on the dehydration racks in a single layer. Set the dehydrator to 140℉/60℃ and allow the bread cubes to dry for about 8 hours.
Countertop Method
Cube your bread and place (in a single layer) on baking trays or cooling racks. I prefer the cooling racks because they allow air to flow all around the cubes of bread and they dry faster. If you are using baking trays, you will need to flip the bread cubes every 12 hours or so.
Leave the bread covered with a breathable towel on your counter for 48-72 hours or until they are dry.
Oven Method
Set your oven to the lowest setting (200℉/93℃ or lower is best) and place the cubed bread on baking trays. Bake for 2-3 hours and flip the bread cubes. Bake for another 2-3 hours or until the bread is dry and slightly toasted.
Air Fryer Method
This is my least favorite method and requires the most hands-on time.
Place the cubes of bread in your air fryer basket or directly in the inner pot, if you have the Ninja Foodi PC & AC or IPDC, but only fill about ¼ of the way up. Turn the air fryer on the lowest setting and air fry until the bread is dry. You will want to toss the bread frequently and cook in small batches for the best outcome. It is important to dry out the inside of the bread as well as the outside, so if you are seeing the outside getting too dark, but the inside is still soft, then your lowest air fry setting is too hot for this method and you will need to switch to another method.
How to Make Cornbread and Sausage Stuffing Using Various Cooking Methods
The Prep
No matter which method you choose to make your cornbread and sausage stuffing, the prep is exactly the same.
First of all make sure your cornbread cubes and bread cubes are dry enough. They should be dry throughout the entire cube. This is especially important with the cornbread because if it still is soft in the center, it will most likely disintegrate when liquid is added.
Dice your onion, peppers, and celery into about ½" dice. Measure out your spices and chicken or turkey broth/stock.
Stovetop
No matter which baking method you use below, the instructions all start with these stovetop instructions.
Melt the butter in a large skillet over medium-high heat. Add sausage and break into bite-size pieces. Add vegetables and seasonings. Stir and sauté until the sausage is cooked and the vegetables are soft.
Combine the cornbread and white bread in a large mixing bowl and add the sautéed vegetables and sausage. Add in the chicken broth and maple syrup. Mix until well combined and all the bread has softened slightly.
*You can also use a large pot on the stove that will hold the bread and mix it all stove top.
Transfer to a baking dish to bake, if desired.
Oven Method
Sauté as stated above. Transfer dressing/stuffing to a casserole dish. Bake covered in a preheated oven at 375℉/190℃ for 15-20 minutes. The initial baking time will depend on the depth of your casserole dish, the deeper it is, the longer it will take to heat all the way through. Uncover and bake at 375℉/190℃ for 5-10 minutes or until the top is brown and crispy and the stuffing is hot all the way through.
If you like crispy bits of bread throughout your stuffing, stir and bake for another 5 minutes.
Ninja Foodi Indoor Grill Method
Sauté as stated above. Transfer dressing/stuffing to the inner liner of the grill or a baking dish that fits. Bake uncovered at 350℉/175℃ for 8-10 minutes. Stir the dressing and bake another 8-10 minutes.
If you like crispy bits of bread throughout your stuffing, stir and bake for another 5 minutes.
Air Fryer Method
Sauté as stated above. Transfer dressing/stuffing to your air fryer basket and set the temperature for 325℉/160℃. Air fry for 5-10 minutes or until the stuffing has browned on top.
Stir and air fry another 5-10 minutes.
If you like crispy bits of bread throughout your stuffing, stir and bake for another 5 minutes.
Ninja Foodi Air Fry Oven Method
For the XL oven, follow the same instructions as the oven method, but lower the times, if needed.
For the Flip oven, follow the same instructions as the oven method, but lower the temperature down by 25°F and lower the cook time if needed.
How to Make Cornbread and Sausage Stuffing in the Ninja Foodi
Prep
First of all, make sure your cornbread cubes and bread cubes are dry enough. They should be dry throughout the entire cube. This is especially important with the cornbread because, if it still is soft in the center, it will most likely disintegrate when liquid is added.
Dice your onion, peppers, and celery into about ½" dice. Measure out your spices and chicken or turkey broth/stock.
Sauté
Turn the Ninja Foodi and select sear/sauté on high. Add the butter and allow to melt. Add in the sausage and break it up with a wooden spoon, or what I use is the Mix 'N Chop from Pampered Chef. Break up the sausage into as small or as big of chunks that you want in your stuffing.
If you are using link sausage with the casings on, you will want to cut them into bite size pieces before adding them to the pot.
Once the sausage is broken up, add in your diced vegetables and stir. Cook for 2-3 minutes.
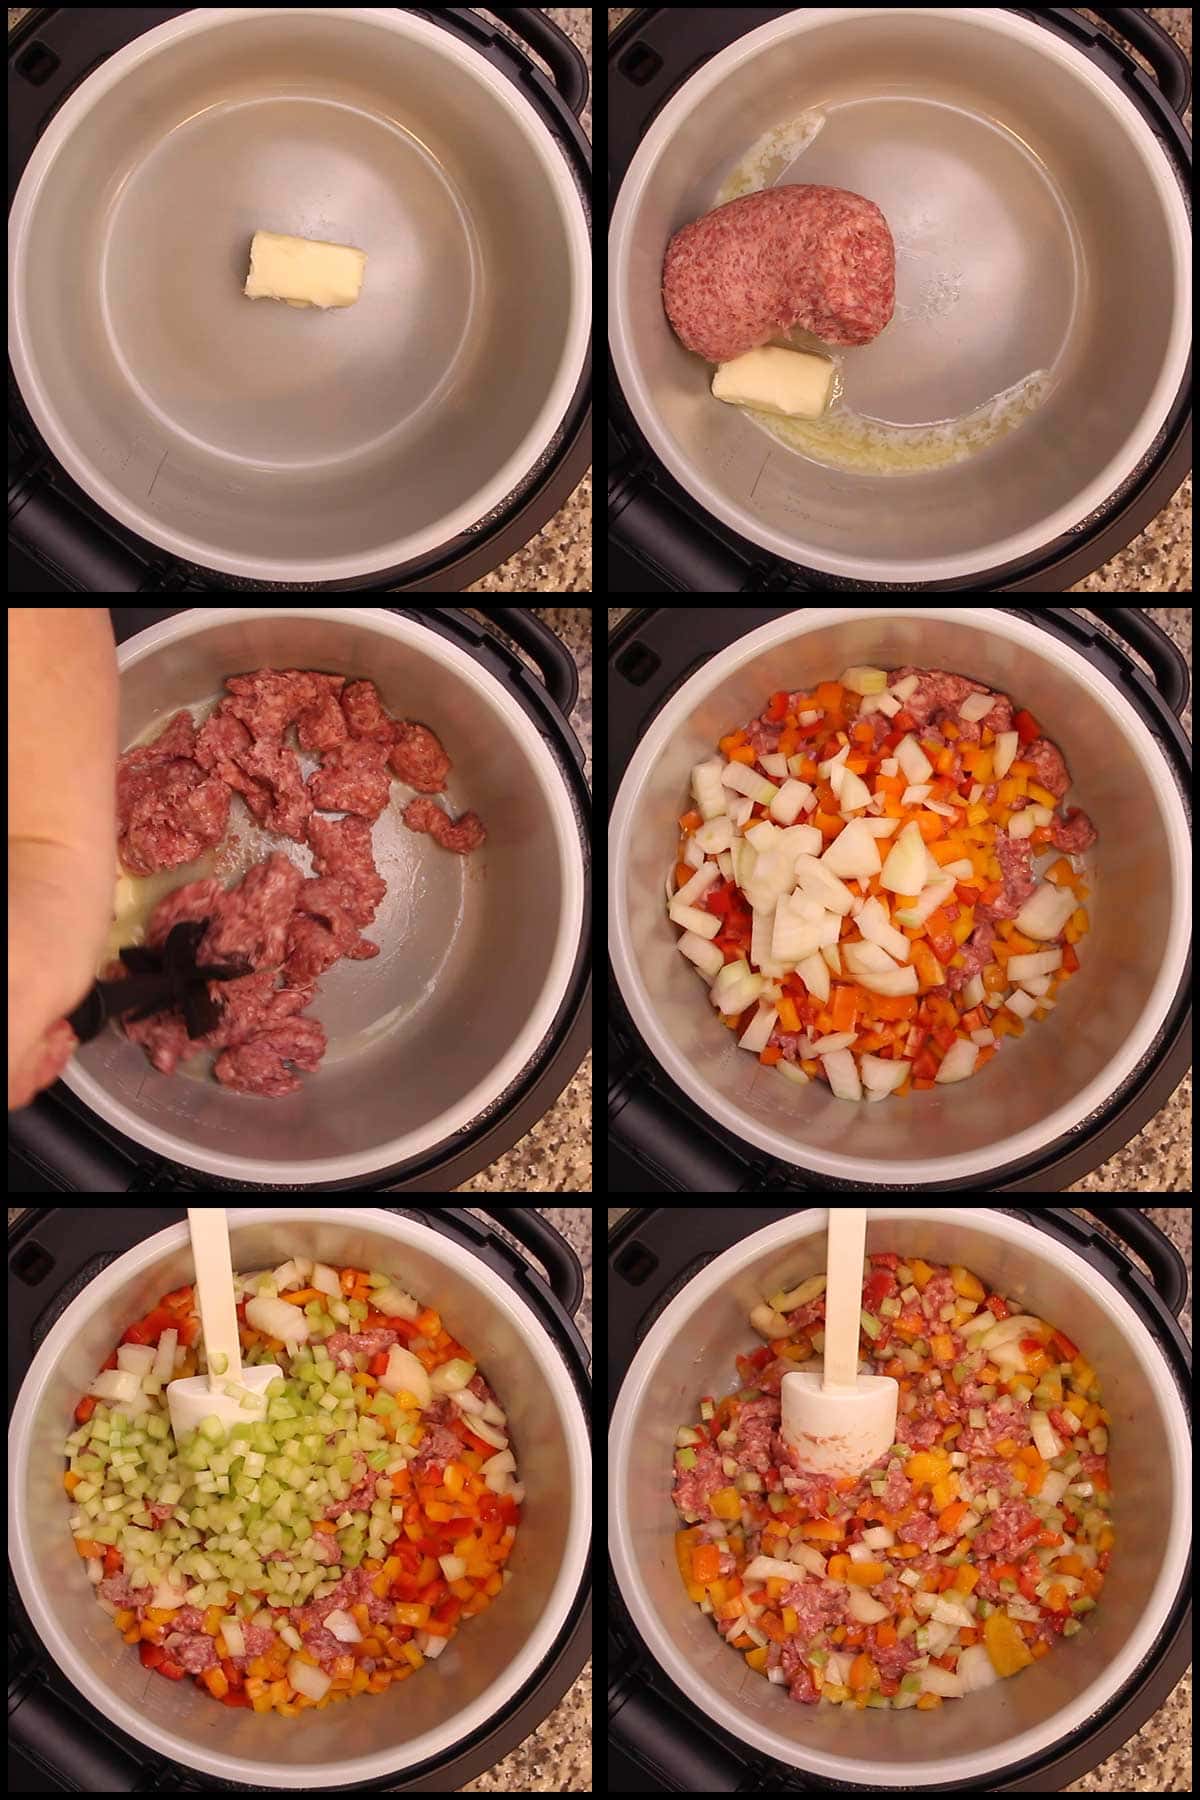
Next, add in the seasonings and stir again. Leave the pot alone and let the sausage and vegetables brown. When you hear sizzling, you can stir to flip the sausage and veggie mixture over.

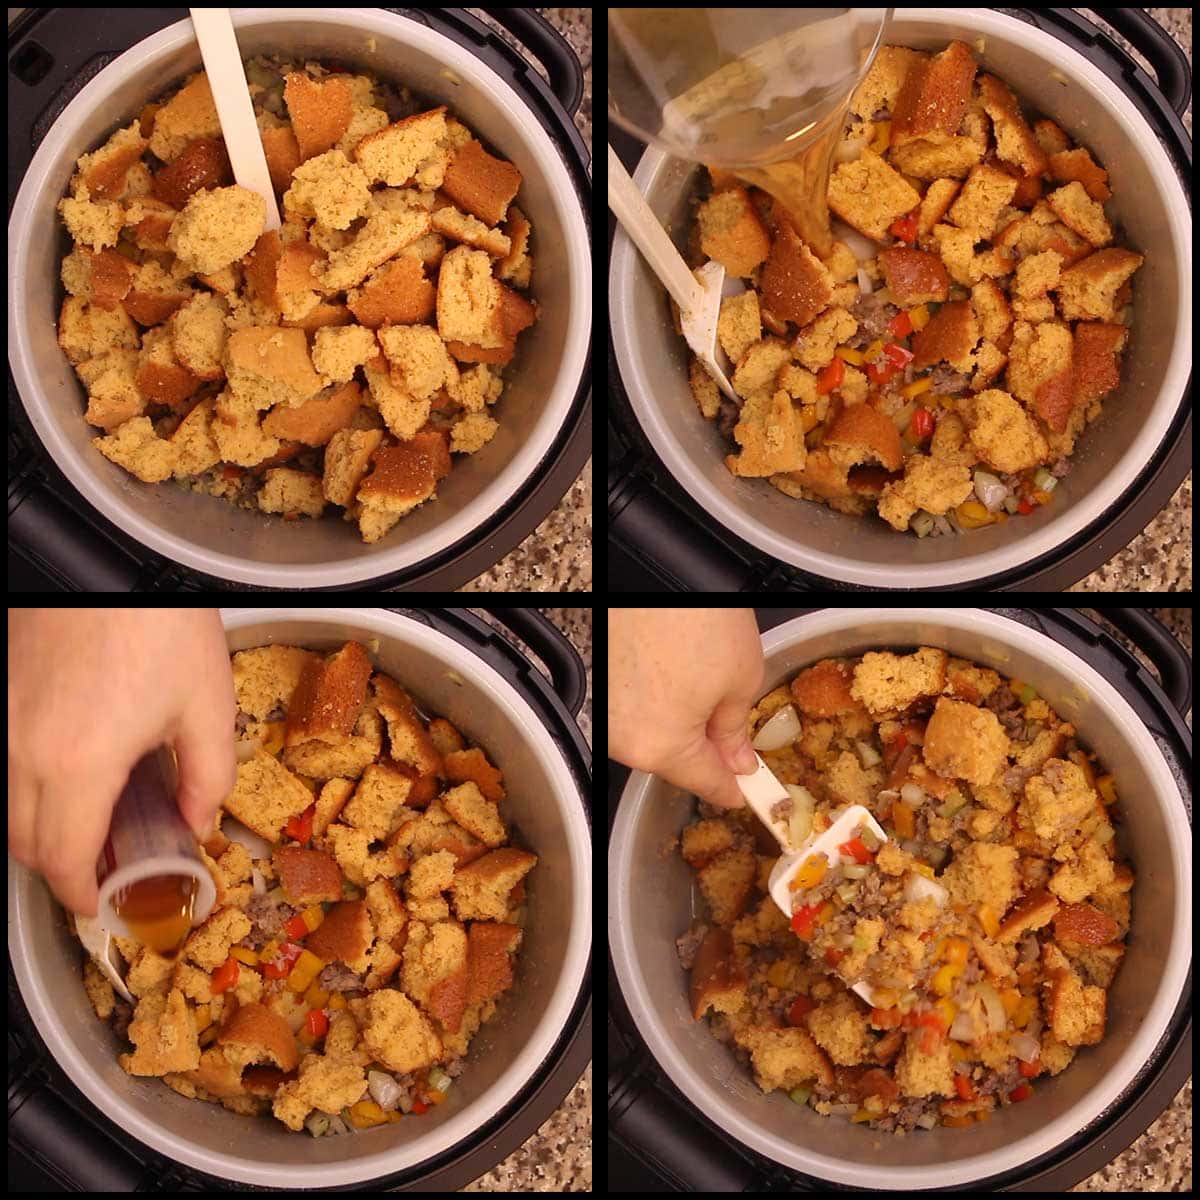
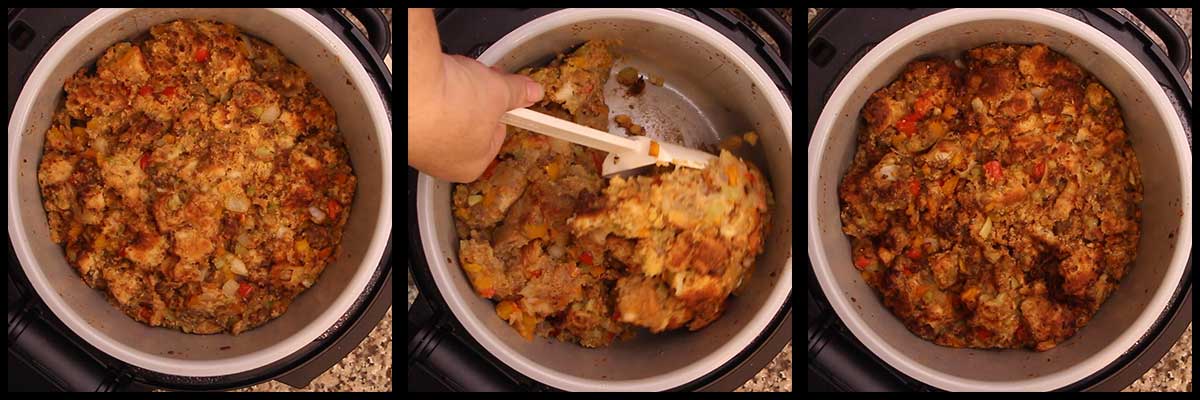
Once the vegetables are softened and the sausage is cooked all the way, add in your dried cornbread. Add in ½ cup chicken stock, maple syrup if using and gently fold the mixture to moisten the cornbread. The pot will be full, but will reduce to allow room for the white bread cubes once the cornbread stuffing is moistened.
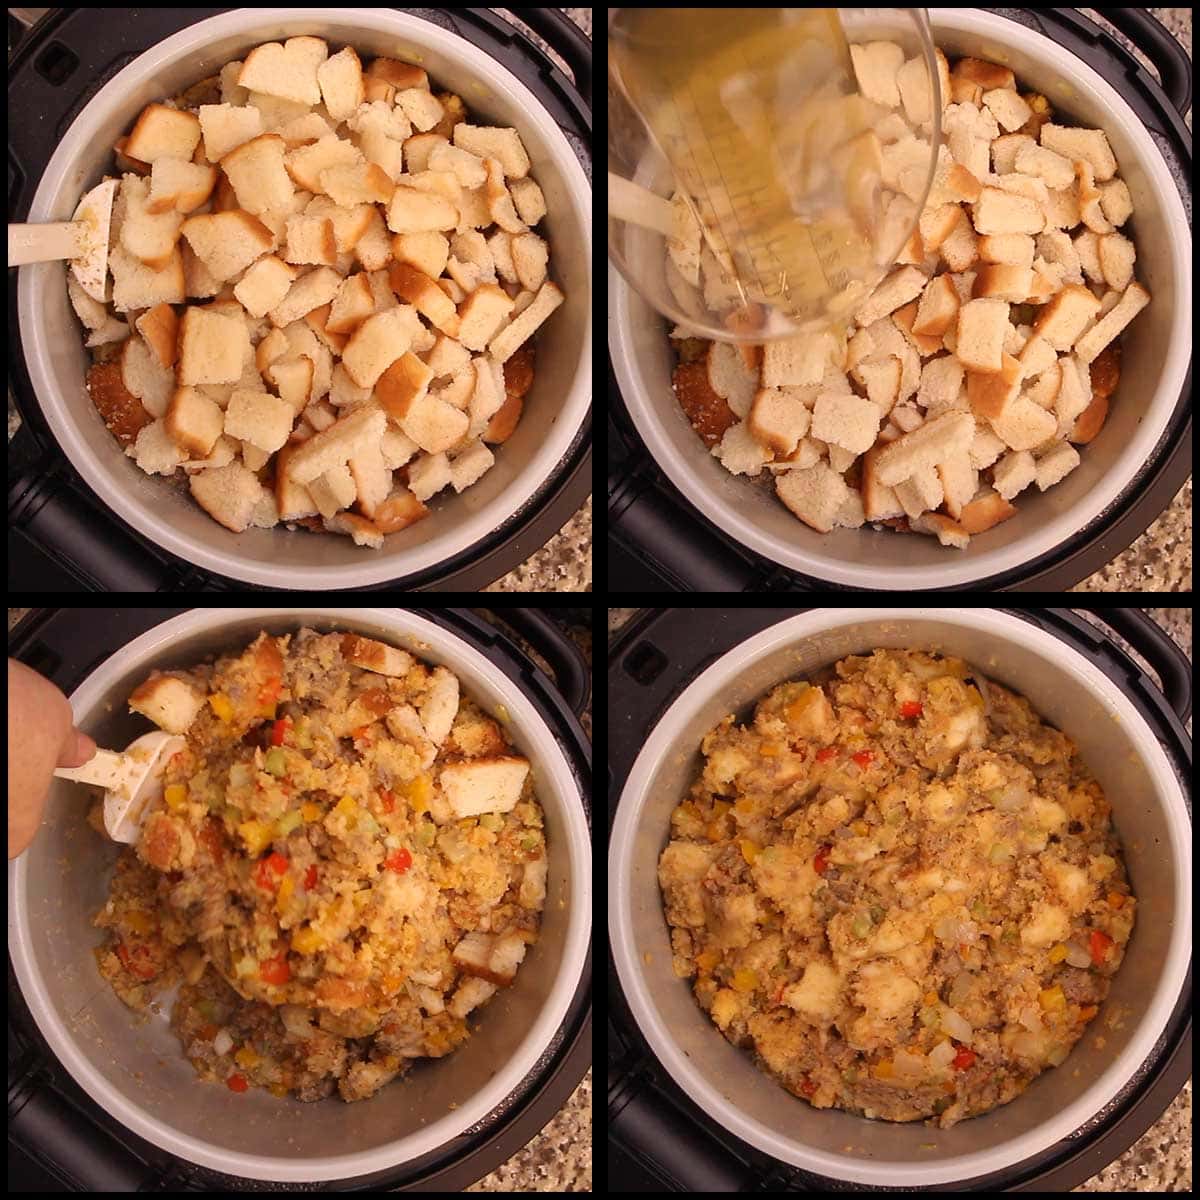
Add in the bread cubes and the remaining ½ cup of chicken broth and fold until moistened. If you need to add more broth, you absolutely can, but give it a few minutes for the bread to absorb everything or you might end up with too much liquid.
Bake/Roast
Once the bread is moistened and the stuffing is well mixed, lower the crisping lid and select the bake/roast function and set the temperature to 350℉/175℃ for 30 minutes.
After 8-10 minutes, open the lid and stir. Continue cooking for another 8-10 minutes and stir again. Stir and cook another 5-10 minutes. I usually bake for a total of 25-30 minutes, stirring 3 times.
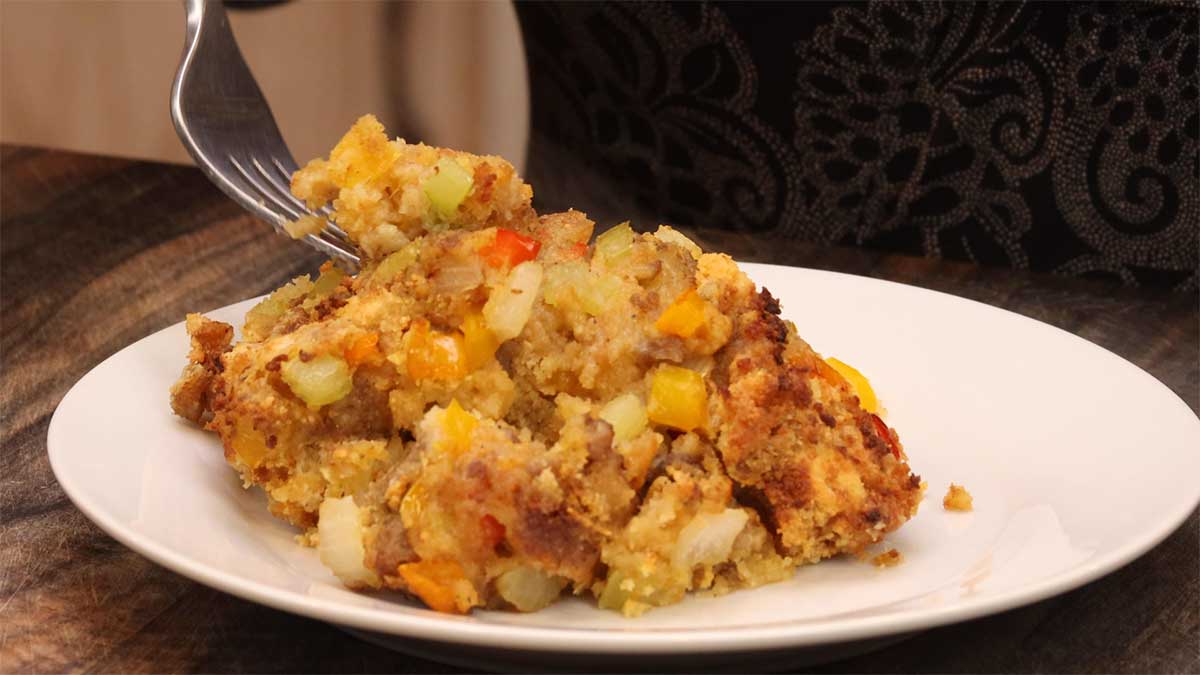
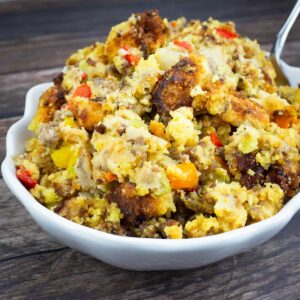
Serve & Enjoy!
Cornbread & Sausage Stuffing Recipe
Ingredients
- ¼ cup butter salted or unsalted
- 1 lb maple breakfast sausage or any kind you like
- 1 medium yellow onion
- 1 red pepper
- 1 yellow pepper
- 1 orange pepper
- 3 stalks (ribs) celery
- 16 ounces dried cornbread cubes
- 8 ounces dried bread cubes
- ¼ cup maple syrup optional
- 1 cup chicken stock
Seasoning Blend
- 1 teaspoon fine grind sea salt
- 1 teaspoon black pepper
- ½ teaspoon dried thyme leaves
- ¼ teaspoon poultry seasoning
Would you like to save this recipe?
Instructions
- Make sure your cornbread and bread cubes are dried completely. Chop the onion, celery, and peppers into ½" dice.
- Turn the Ninja Foodi (see other cooking methods in recipe notes) on high sear/sauté and add the butter and sausage. Break the sausage up into bite size pieces. Add the diced vegetables and cook for 3-5 minutes.
- When the pot is sizzling, add the seasoning blend, stir and continue cooking for another 3-5 minutes or until the vegetables are soft and the sausage is cooked through.
- Add the dried cornbread, maple syrup, and ½ cup chicken broth and fold until the cornbread reduces in volume and absorbs the liquid.
- Add the bread cubes and remaining chicken broth. Fold until the white bread absorbs the liquid and softens. If after folding and sitting for a minute, the bread still looks dry, add a bit more chicken broth.
- Close the crisping lid and select bake/roast on 350℉/175℃ and the time for 30 minutes. Bake for 8-10 minutes and fold the mixture a few times and bake another 8-10 minutes. This allows the browned top to go into the dressing and expose the softer parts to the heat. This is completely optional though. If you Don't want crispy parts in your stuffing, you can stop now. Repeat until the stuffing is done to your liking. I usually bake for 25-30 minutes folding 3 times.
- Serve & Enjoy
Notes
Oven Method
Sauté as stated above. Transfer dressing/stuffing to a casserole dish. Bake covered in a preheated oven at 375℉/190℃ for 15-20 minutes. The initial baking time will depend on the depth of your casserole dish, the deeper it is, the longer it will take to heat all the way through. Uncover and bake at 375℉/190℃ for 5-10 minutes or until the top is brown and crispy and the stuffing is hot all the way through. If you like crispy bits of bread throughout your stuffing, stir and bake for another 5 minutes.Ninja Foodi Indoor Grill Method
Sauté as stated above. Transfer dressing/stuffing to the inner liner of the grill or a baking dish that fits. Bake uncovered at 350℉/175℃ for 8-10 minutes. Stir the dressing and bake another 8-10 minutes. If you like crispy bits of bread throughout your stuffing, stir and bake for another 5 minutes.Air Fryer Method
Sauté as stated above. Transfer dressing/stuffing to your air fryer basket and set the temperature for 325℉/160℃. Air fry for 5-10 minutes or until the stuffing has browned on top. Stir and air fry another 5-10 minutes. If you like crispy bits of bread throughout your stuffing, stir and bake for another 5 minutes.Ninja Foodi Air Fry Oven Method
For the XL oven, follow the same instructions as the oven method, but lower the times if needed. For the Flip oven, follow the same instructions as the oven method, but lower the temperature down by 25° and lower the cook time if needed.Nutrition
About the Recipe Author, Louise Long
Louise is a full-time recipe creator and food blogger @ The Salted Pepper. She has over 30 years of experience with cooking and recipe development. She owned a restaurant for several years and was a full-time RN until retiring to blog full-time.

She published her first cookbook in the Fall of 2018 and is very interested in writing several more.
Louise is also the creator of an online Ninja Foodi Pressure Cooking Course with over 100 instructional step-by-step videos. People absolutely rave about the course and all the value they have received from it.
Louise has several very active Facebook groups that help people with the basics of cooking and learning more about the appliances they love.
Ninja Foodi Pressure Cooker & Air Crisper 101
Ninja Woodfire Outdoor Grill & Smoker
Louise is also a YouTube creator and you can find most of her recipes in video format on The Salted Pepper YouTube channel.
She is very responsive to messages and eager to help in any way she can. Get more Information about Louise & contact information
I WOULD LOVE TO SEE WHAT YOU ARE COOKING UP IN YOUR KITCHEN! TAG ME @THESALTEDPEPPER ON YOUR FAVORITE SOCIAL MEDIA PLATFORM WHEN YOU MAKE A DISH!
BE SURE TO FOLLOW THE SALTED PEPPER RIGHT HERE ⇓⇓⇓⇓⇓
Helen Hallman says
Love Your Recipes Shine On & Keep Em Coming!!! Happy Holidays To You and Yours Yummy Let's Eat ll
Louise says
Thanks so much! Happy Holidays to you and your family!
Will says
Hey Louise! Me again! Can you please give instructions for drying the cornbread and bread using the dehydrator? Thank you!
Linda says
Does that mean you should cook it through as shown, cover, put in fridge, then warm up on serving day, or put it all together, toss, then cover and put in fridge , then begin the cooking and crisping process the say it’s served?
Christina Kidd says
Can you prep this and then bake the next day, etc? Oven just went on the fritz and have company coming for Thanksgiving, so thinking about getting dishes made , refrigerate and then cook then hold in warming drawer. Thank You!
Louise says
Yes, absolutely! I would definitely cook covered at a lower temp to warm through before crisping it up and you might need a little more liquid the next day.