
Making your own variety of Focaccia Bread in the Ninja Foodi is so easy and absolutely delicious! I have used this same recipe and changed up the add-ins to make all kinds of different flavors that best suit the dish I'm serving.
Would you like to save this recipe?
I thought about calling this recipe Rosemary Garlic Focaccia Bread, or Sun Dried Tomato & Garlic Focaccia Bread, or even the mouthful: Focaccia Bread with Rosemary, Roasted Garlic, and Sun Dried Tomato. As you can see, I didn't.
I simply called it Focaccia Bread in the Ninja Foodi because it doesn't matter what you add into the dough, and not everyone is going to like the combination of flavors I used.
This post may contain affiliate links. If you make a purchase after clicking a link, I may earn a small commission. As an Amazon Associate, I earn from qualifying purchases.
So, this way, you can create your own delicious Focaccia bread using the ingredients you love! I'll go over several different varieties that you may like a little later in the post. First let's find out what Focaccia bread is and how it differs from other breads.
What is Focaccia Bread?
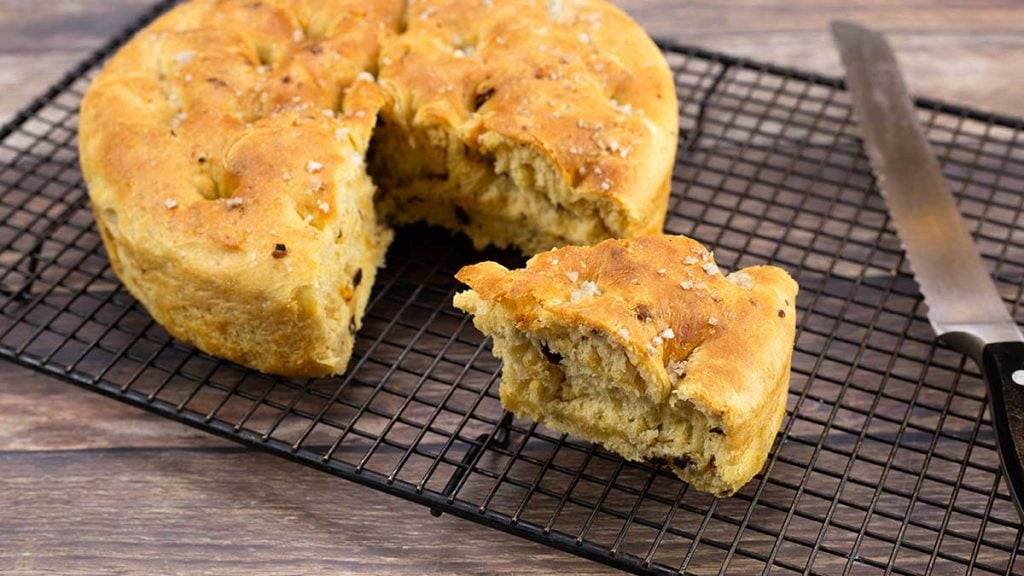
Focaccia Bread is an Italian bread that is baked in olive oil. It is not a high rising bread and tends to be about 1-2" tall when baked.
It does use yeast, but very little in order to prevent a taller loaf of bread. You can make Focaccia bread in a round pan or a large rectangular sheet pan. In fact, I'd bet this recipe would be great made in the Ninja Foodi Digital Oven. I'll have to give that a try next time I make it.
Focaccia bread is usually made with herbs, most commonly rosemary. You can tell Focaccia bread apart from other types of breads by the dimples on the top. It is usually sprinkled with a course sea salt.
The outer crust is crispy with a delicious flavor that comes from olive oil and the inside is soft and when the right ingredients are added, it's bursting with flavor.
What Would I Serve With Focaccia Bread?
Focaccia bread is great with any meal and it is often served as a pre-dinner bread with a dipping sauce of olive oil, herbs, and garlic.
Focaccia bread goes great with spaghetti, so make up a loaf before you make this delicious Ninja Foodi Spaghetti Recipe!
Focaccia bread can be served with anything from seafood dishes to antipasto platters. I bet it would be wonderful with this easy Shrimp Scampi or even these Italian Stuffed Chicken Breasts!
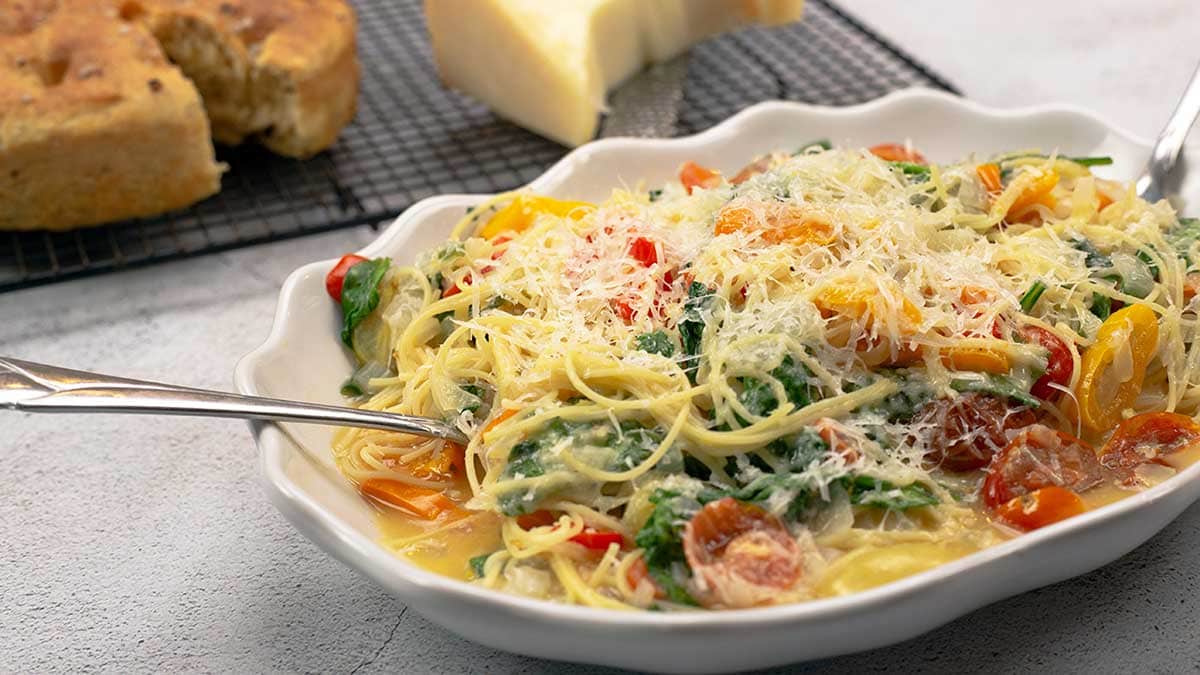
Most recently, I served it with this Lemon Garlic Pasta that I made in the Ninja Foodi and I seriously thought I was in a fine dining restaurant. You can serve this combination any day of the week because it's so easy, and make it for your special guests because it's that elegant. They don't have to know how easy it is... I won't tell.
What Types of Focaccia Bread can I make?
To me, this is where cooking really gets interesting because you can take a base recipe and transform it into anything you want. The base recipe for Focaccia Bread would be the yeast, salt, flour, olive oil, sugar, and water. The rest is up to you, but here are few combinations that sound wonderful to me.
Mediterranean Focaccia Bread: I would add in oregano, roasted garlic, sun dried tomatoes and olives (green or black) or any combination of those ingredients.
Herb and Garlic Focaccia Bread: You could add in any herbs you like and either roasted garlic or smashed garlic cloves. If you want to add minced garlic, I would only add a few cloves or it might be overpowering.
Pizza Focaccia Bread: Add in diced pepperoni and a little parmesan cheese finely grated. This would be fantastic served with Homemade Marinara Sauce for dipping!
What Kind of Yeast Should I Use?
There are two main kinds of yeast available at most grocery stores; instant dry yeast and active dry yeast.
Either is fine in this recipe and can be used interchangeably in bread recipes, the only difference is one requires proofing and one doesn't.
Instant dry yeast does not need to be mixed with warm water and proofed before using, you can simply add it into the dry ingredients and follow the recipe from there.
However, I'm a worry wart by nature and I'm always worried that my yeast won't work, so, even though I use instant dry yeast, I proof it just to be sure.
Active dry yeast does have to be proofed prior to use to activate it. So, if you are unsure which type you have, play it safe and proof it like I do.
HOW TO PROOF BREAD WITHOUT THE DEHYDRATION FUNCTION
You do not need any special equipment to proof bread, simply putting it in an oiled bowl with a damp towel covering it and letting it sit on the counter away from drafts is just fine.
It usually takes about an hour or so to proof bread on the counter, unless your kitchen is very warm or very cold. If it’s very warm, it will take less time and if it’s very cold, it will take longer.
The most important thing is not the time it takes, but that it doubles in size. This creates the nice texture of your bread.
I like to use the dehydration function on the Ninja Foodi for a perfectly controlled environment to proof bread in half the time it takes on the counter, but don’t worry if you don’t have that function.
Not all of the Ninja Foodi models have the dehydration function, but you can still proof your bread in half the time using the bake roast function.
After you have your dough mixed up and before you begin to knead it, put the TenderCrisp lid down and select bake/roast on 250°F/121°C for 5 minutes. Once the time is done, leave the lid closed while you knead the bread. Waiting about 5 minutes before putting the bread in to the Foodi will give the pot time to cool down some. If the pot is still really hot, let it sit with the lid open for a few minutes. You should be able to touch the bottom without it burning you. If it is too hot, you might start to cook the bread and/or kill the yeast.
Place the rack with the pan of covered dough into the Ninja Foodi. Close the TenderCrisp lid and leave the Foodi OFF. Let the residual heat proof your bread for 30 minutes.
Can I make this Focaccia Bread in the Oven?
Absolutely! If you don't have the Ninja Foodi and want to make this bread, there are only a few changes that I would suggest.
If you are proofing the bread on the counter, let it proof 60 minutes each time.
I would also increase the temp of the oven to 425℉/218℃ and bake uncovered for 25 minutes.
Check the bread after 20 minutes and adjust temp if needed.
Enjoy!
How to make Focaccia Bread in the Ninja Foodi
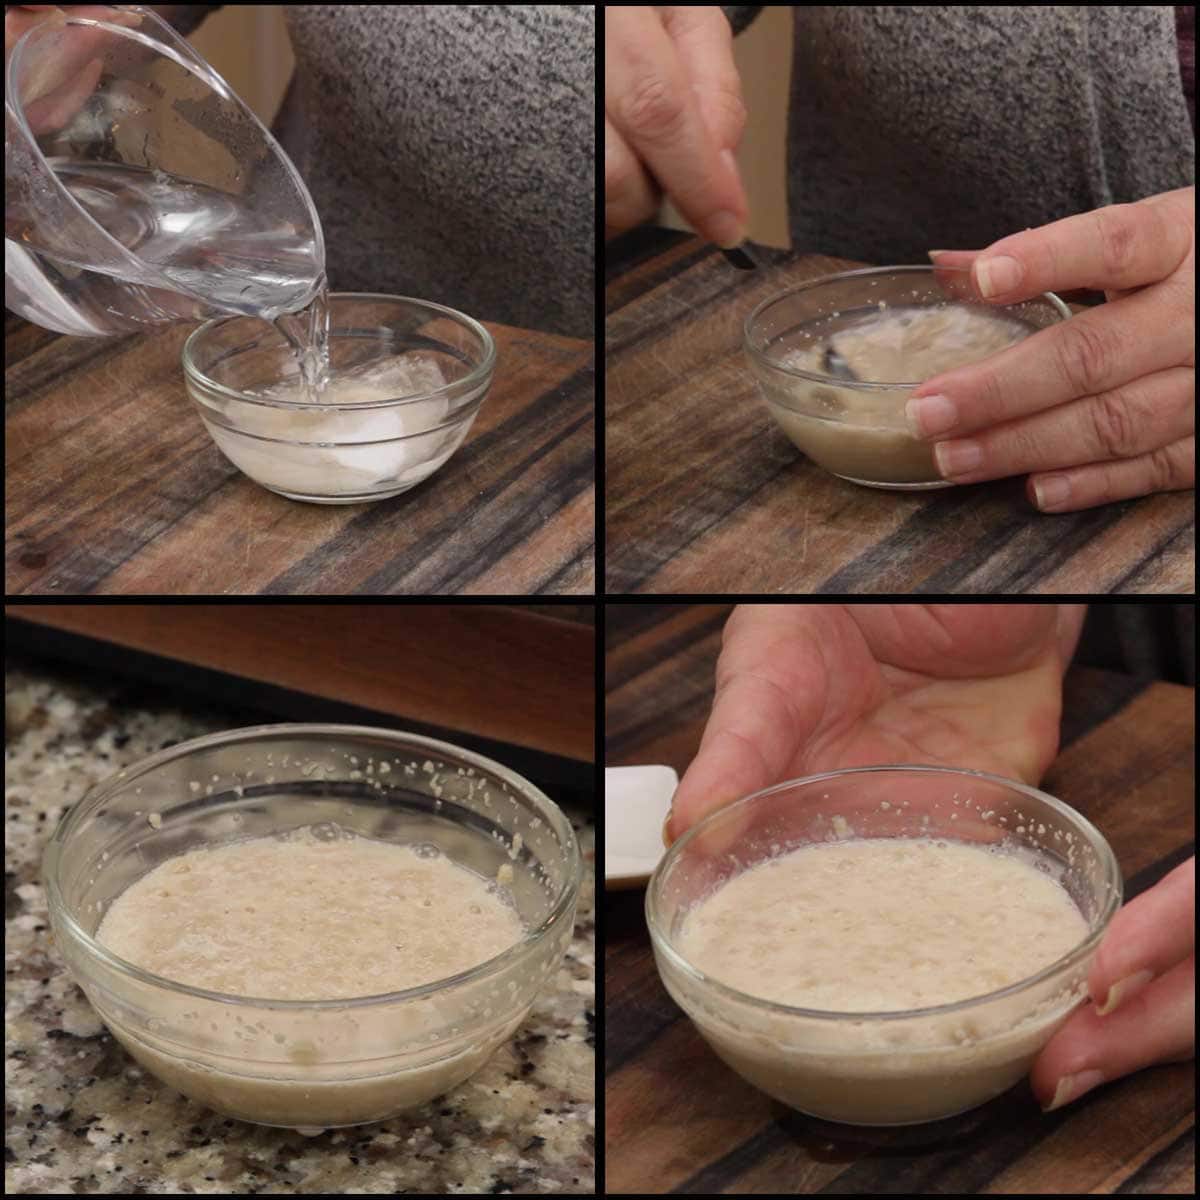
The first thing you want to do is proof your yeast, unless you are using instant yeast (see above).
Put the yeast and the sugar into a small bowl and add about 2 tablespoon of warm water. The temp of the water should be between 105-115℉/40-46℃. Any hotter and the heat could kill the yeast.
Stir the mixture and let it sit for 5-15 minutes until it is frothy and bubbly.
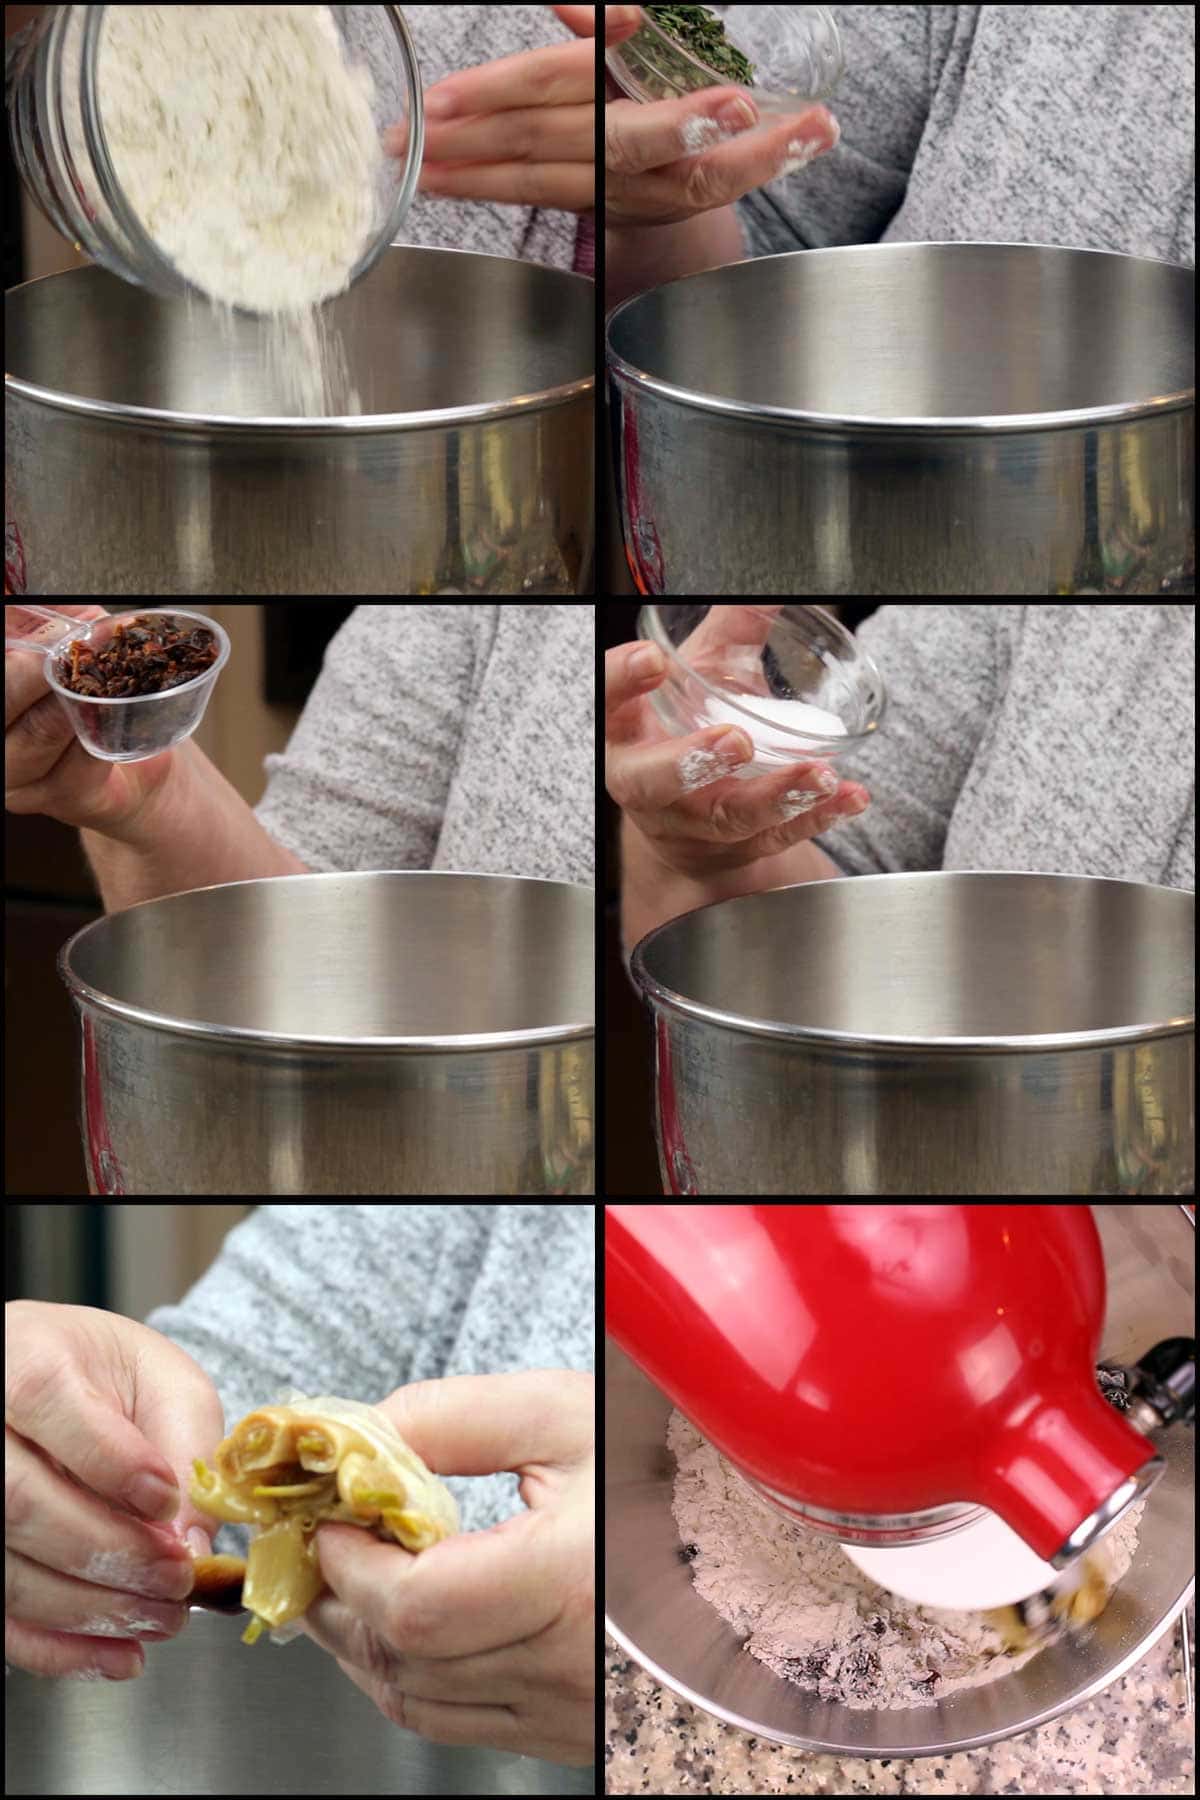
While the yeast is proofing, combine the flour, salt, rosemary, sun dried tomatoes, and roasted garlic into the bowl of your stand mixer.
*Roasted garlic gives this focaccia bread a subtle garlic flavor without being overpowering. I do not suggest replacing it with raw garlic, but if you do, only use about 1 teaspoon of minced raw garlic.
If you need directions for roasting garlic, you can find them here:
How to Roast Garlic in the Ninja Foodi
If you don't have a stand mixer, you can still make this recipe by using a large mixing bowl and stirring the ingredients together.
Turn the stand mixer on low and mix the dry ingredients for 30 seconds or so.
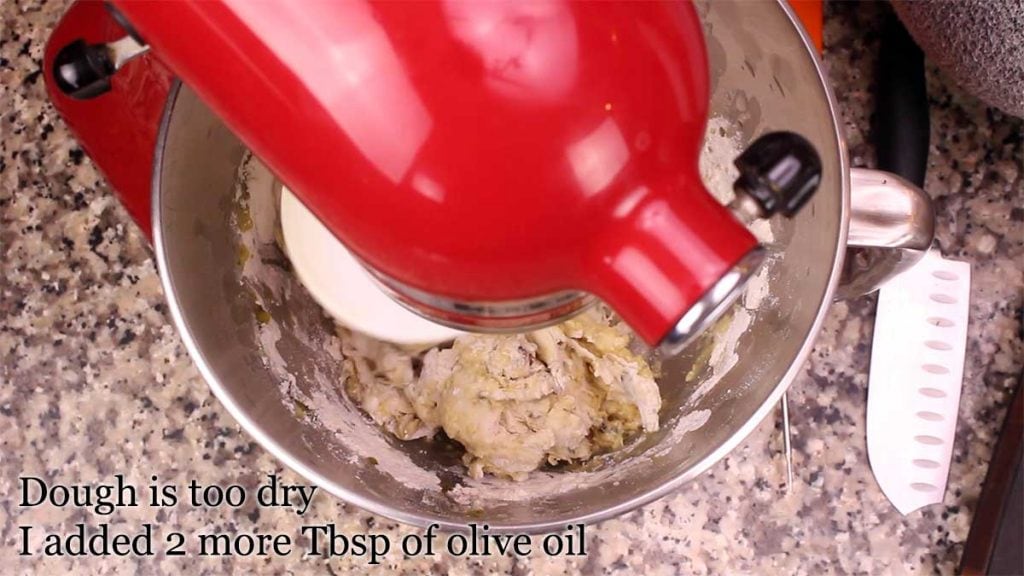
With the mixer on low, start adding in the wet ingredients. Add in the yeast, water, and 2 Tablespoons of olive oil. Mix on low for a few minutes (I use the dough hook for the entire process) and then determine if you need to add more olive oil.
The picture below shows the dough after 2 tablespoon of olive oil and I ended up adding an additional 2 tablespoon of olive oil to get the dough to the right consistency. I suggest adding in 1 tablespoon of additional olive oil at a time to make sure you don't end up with too wet of a dough.
However, if you do end up with a wet dough, just add 1 tablespoon of flour at a time until it becomes the correct consistency.
Here is how you want your dough to look, and the feel should be soft, but not sticky. If it is sticking to your hands, add 1 tablespoon of flour at a time until the dough is soft, but not sticky.
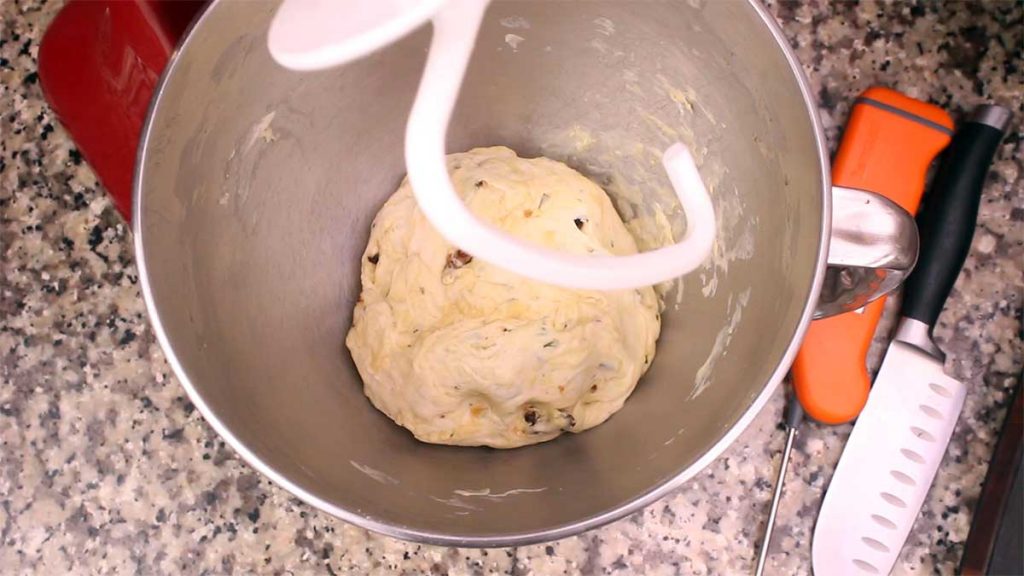
Turn the mixer on medium speed and knead the dough with the dough hook for 5 minutes.
If you don't have a mixer and are doing this by hand, knead the dough on a floured work surface for 10 minutes. If you need more instruction on how to knead dough, you can watch this short video:
Once the dough is kneaded, it should feel soft and just a tad tacky, but not sticky. If it is sticking to your fingers, add a touch of flour and knead until it's no longer sticky.
Place about 1 tablespoon of olive oil in the (affiliate link)8" Fat Daddio pan and remove the dough from the mixer. Place the dough into the pan and coat the bottom with olive oil. Flip the dough over and cover with a damp towel. I like to use (affiliate link)flour sacks, but any damp kitchen towel will do. I don't suggest using paper towels because they dry out too fast.
Place the pan on the rack in the low position and lower into the Ninja Foodi. Close the TenderCrisp lid and select the dehydration function on 105℉/40℃ and proof the bread for 30 minutes. *if you don't have the dehydration function, see the section above for proofing without it.
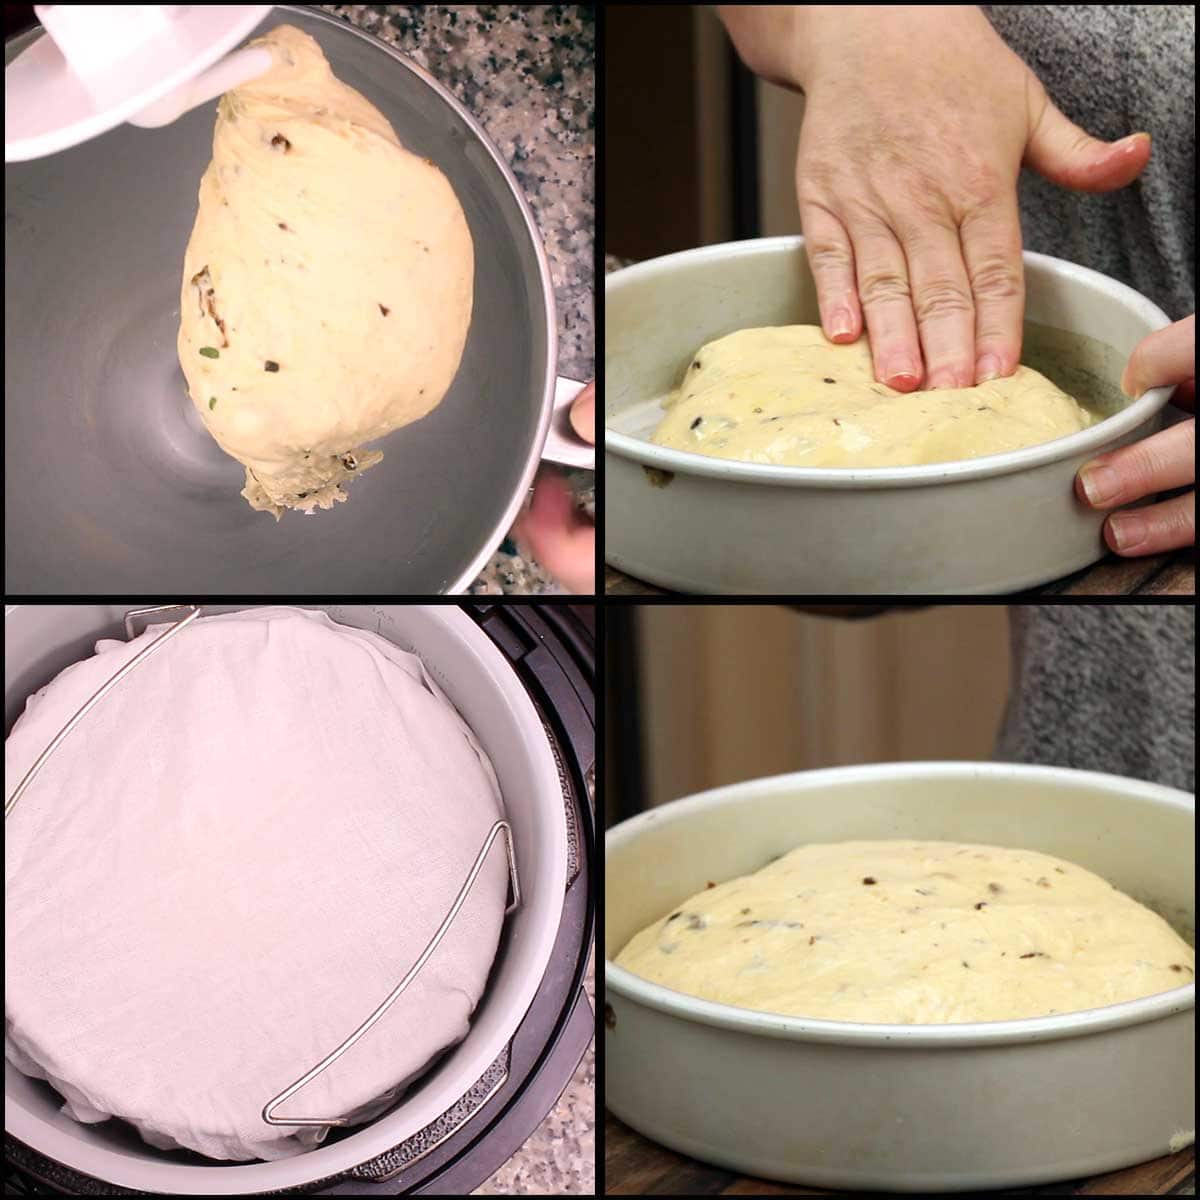
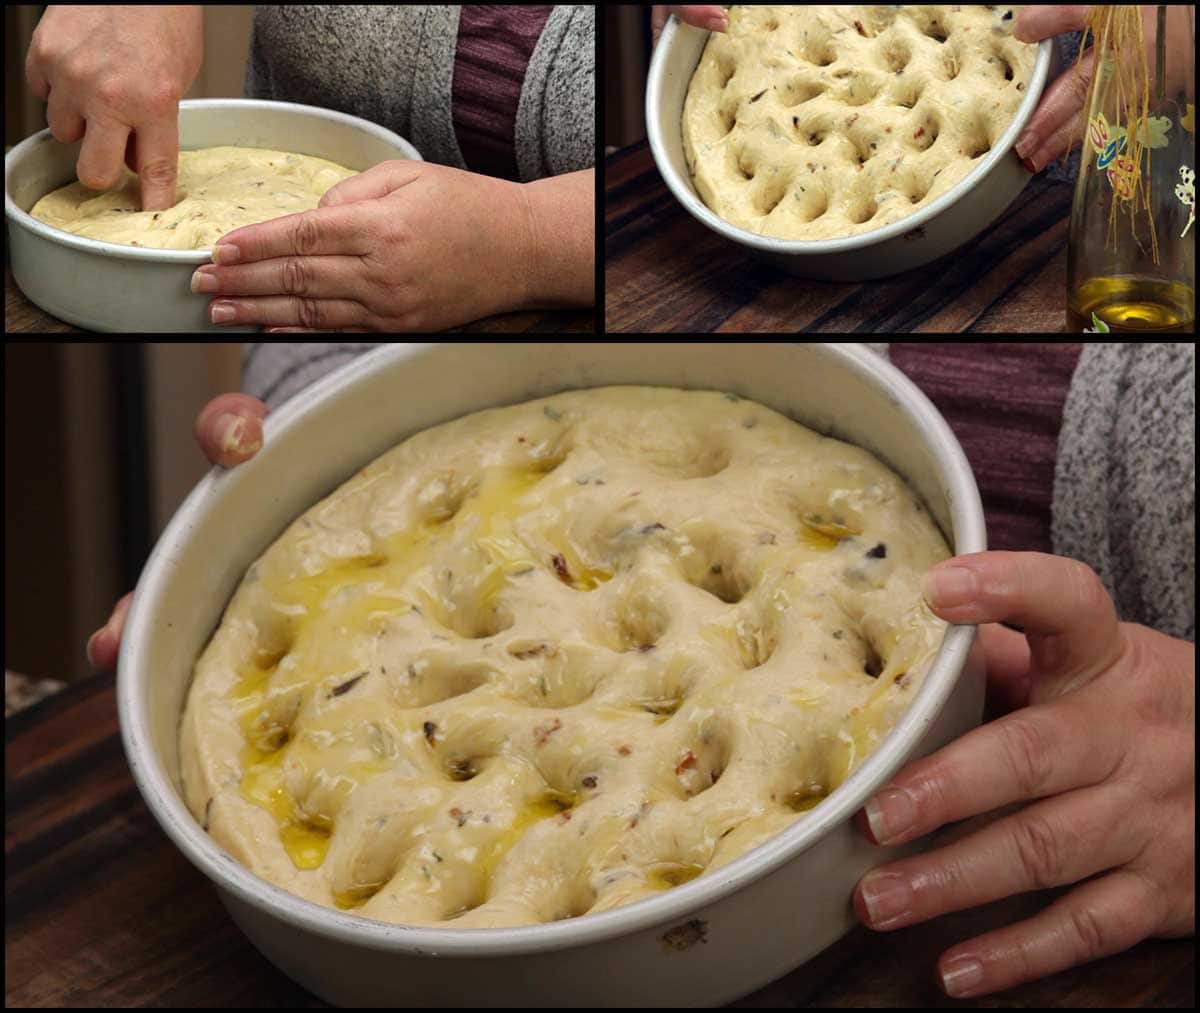
Once the dough has proofed the first time, press it down into the pan so it is equally spread out.
To make the holes that will result in the signature dimples on the top of Focaccia Bread, poke holes in the dough with your finger. Make sure your finger goes all the way through the dough and hits the bottom of the pan.
If you don't make holes all the way through the bread, they will close up too much during the second proofing and the baking time.
If the dough is sticking to your fingers, put a little olive oil on your finger before poking the holes.
Drizzle the remaining tablespoon of olive oil over the top of the dough and cover with a moist towel. Place the pan on the rack in low and proof again for 30 minutes.
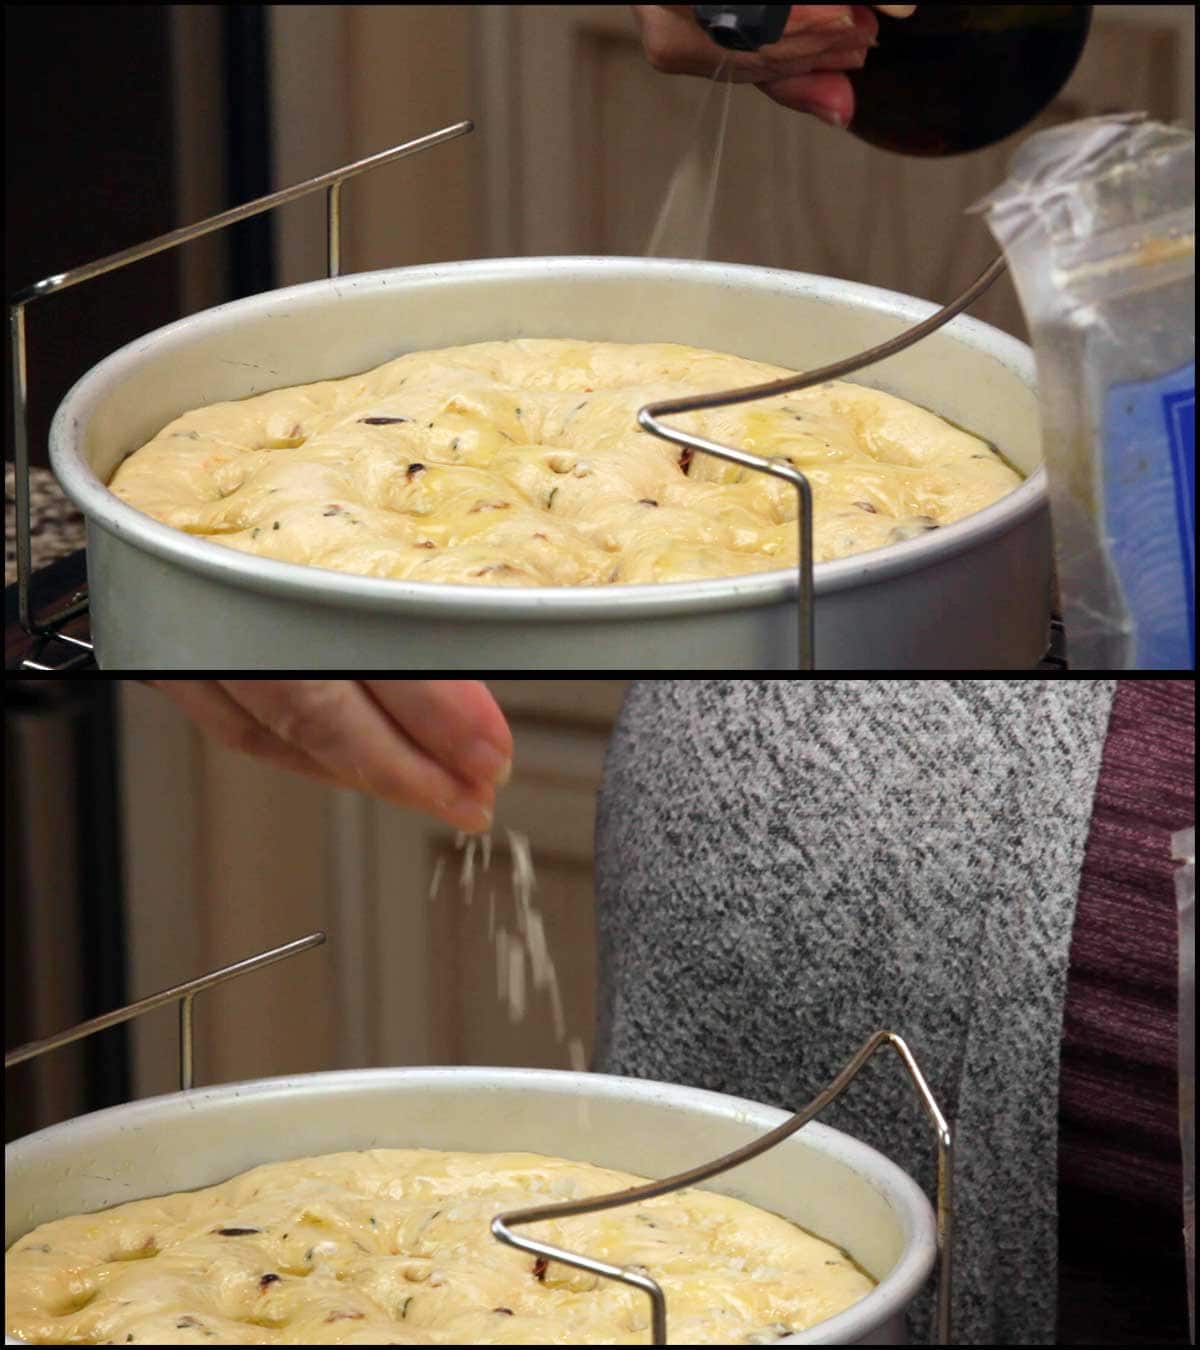
When the dough has finished proofing the second time, remove the rack from the Foodi and preheat the Ninja Foodi on broil (grill on the UK Models) or the highest setting you have on your Ninja Foodi for 10 minutes.
Remove the damp towel and spritz the top with olive oil. Sprinkle (affiliate link)coarse sea salt over the top.
This step is completely optional, but gives that traditional crunch of salt that is present in most Focaccia breads.
If you don't have coarse sea salt, skip this step. Don't add table salt or even fine grind sea salt because it will be too salty and won't give the crunchy texture that coarse salt does.
When the Foodi has finished preheating, cover the pan with foil or a (affiliate link)silicone cover and place it on the rack in the low position into the Foodi. Close the TenderCrisp lid.
Select the bake/roast function on 375℉/190℃ and set the time for 25 minutes. I usually check on the bread at about minute 20 and turn the rack around if some areas are getting more done than others.
You can also remove the cover and bake the last 5 minutes uncovered, but what I did in the video is baked covered for the whole 25 minutes, then uncovered, spritzed the top with oil and AC on 400℉/204℃ for 2 minutes and that worked perfectly!

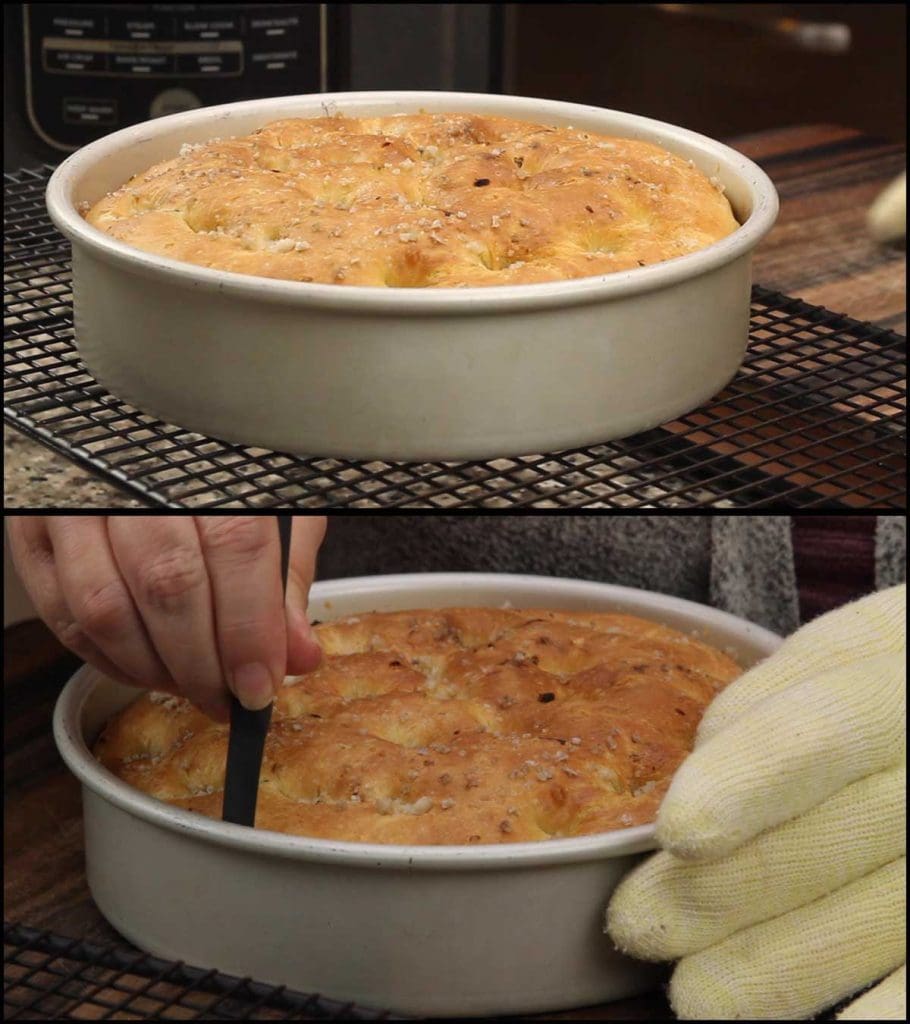
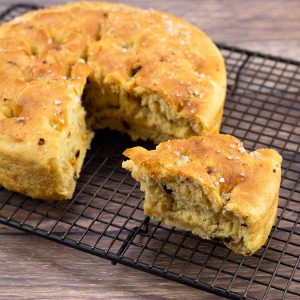
Remove the pan from the Ninja Foodi and allow to cool on a cooling rack for 10 minutes.
Run a (affiliate link)cake tester around the edges to make sure nothing is stuck.
Flip the bread out onto the cooling rack. Let it cool another few minutes.
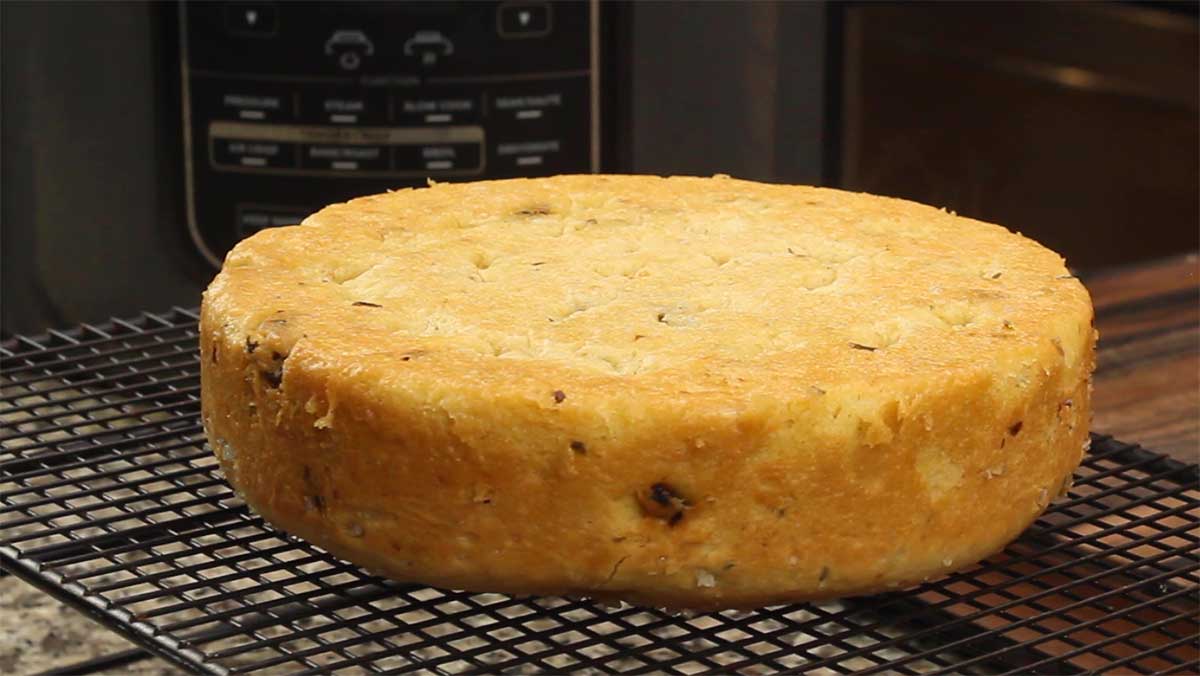
Flip back over and cut a piece!
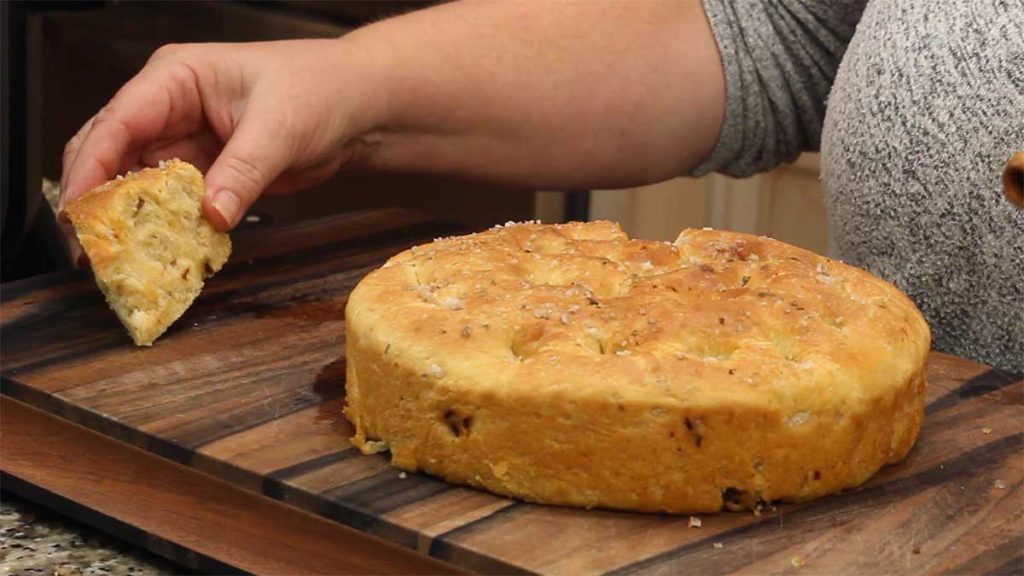
Focaccia Bread in the Ninja Foodi
Ingredients
- 1 teaspoon yeast
- 1½ teaspoon sugar
- ⅔ cup warm water divided, temp around 105-115°F/40-46°C
- 2½ cups all purpose flour
- 2 tablespoon fresh rosemary chopped or 1-2 teaspoon dried rosemary leaves (optional)
- ¼ cup sun dried tomatoes chopped (optional)
- 1 bulb roasted garlic optional
- 1½ teaspoon sea salt fine grind
- 6 tablespoon olive oil divided in recipe
- coarse sea salt for top optional
- olive oil for spritzing top
Would you like to save this recipe?
Instructions
- Place the yeast and the sugar in a small bowl and add about 2 tablespoon of warm water. Give it a stir and set it aside to proof. When it is ready, you will see it become frothy and bubbly. This can take anywhere from 5 minutes to 15 minutes.
- While the yeast is proofing, mix the dry ingredients in the bowl of your stand mixer. Add the flour, chopped rosemary, sun dried tomatoes, roasted garlic, and the 1½ teaspoon fine grind sea salt.
- Place the bowl on the stand mixer with the dough hook and turn on low speed to mix the dry ingredients. Add in the yeast and the remaining water. Mix for about 30 seconds and scrape down sides.
- Add in 2 Tablespoons of olive oil and mix on medium speed for about a minute. What you are looking for is the dough ball to come together and not look too dry. The amount of olive oil you need to add may vary, so add up to 2 additional Tablespoons (1 tablespoon at a time) until you get the desired consistency. See post for pictures of what the dough should look like. Scrape the sides of the mixing bowl if needed.
- Once the dough is soft and pliable, but not sticky, use the dough hook to knead the bread on medium speed for 5 minutes.
- Add 1 tablespoon of olive oil to a 8" Fat Daddio Pan and place the dough ball in the pan and rub it in the olive oil. Flip the dough over. Cover with a damp towel or flour sack and place the pan on the rack in the low position and place the rack in the Ninja Foodi. Set the dehydration temp to 105°F/40°C and dehydrate to proof the bread for 30 minutes.
- The dough should almost double in size in 30 minutes. Remove the rack and set the pan on a flat surface.
- Press the dough into a flat layer in the 8" Fat Daddio Pan. Make multiple holes in the dough by sticking your finger into the dough all the way until you touch the pan. You need to make the holes completely through the dough because when it rises, it will close them up and leave you with the signature dimples in the top of your focaccia bread. If your dough is sticking to fingers and the holes aren't forming correctly, add some olive oil to your finger and that will help. Drizzle the remaining tablespoon over the top.
- Cover the pan with a damp towel or flour sack and place the pan back on the rack and place the rack into the Ninja Foodi and proof another 30 minutes at 105°F/40°C.
- Remove the rack and uncover the pan. Preheat the Ninja Foodi on broil (grill in the UK) for 10 minutes. Spritz some olive oil on top and sprinkle on course sea salt if using. Cover the pan with foil or a (affiliate link)silicone cover.
- When the Ninja Foodi has preheated, place the rack (low position) with the covered pan into the Ninja Foodi and select the bake/roast function on 375°F/190°C for 25 minutes. Check the bread around the 20 minute mark and if you see darker places, rotate the rack and bake another 5 minutes.
- If the top is not brown enough, spritz the top with olive oil and use the air crisp setting on 400°F/204°C for about 2 minutes. Check every minute so you don't over brown the top.
- Remove the rack and set the pan on a (affiliate link)cooling rack for 10 minutes. Run a (affiliate link)cake tester around the edges to make sure nothing is sticking to the sides. Flip the pan over on the cooling rack to release the bread. Flip the bread back over and let cool about 5-10 minutes. Serve & Enjoy!
Notes
Nutrition
About the Recipe Author, Louise Long
Louise is a full-time recipe creator and food blogger @ The Salted Pepper. She has over 30 years of experience with cooking and recipe development. She owned a restaurant for several years and was a full-time RN until retiring to blog full-time.

She published her first cookbook in the Fall of 2018 and is very interested in writing several more.
Louise is also the creator of an online Ninja Foodi Pressure Cooking Course with over 100 instructional step-by-step videos. People absolutely rave about the course and all the value they have received from it.
Louise has several very active Facebook groups that help people with the basics of cooking and learning more about the appliances they love.
Ninja Foodi Pressure Cooker & Air Crisper 101
Ninja Woodfire Outdoor Grill & Smoker
Louise is also a YouTube creator and you can find most of her recipes in video format on The Salted Pepper YouTube channel.
She is very responsive to messages and eager to help in any way she can. Get more Information about Louise & contact information
I WOULD LOVE TO SEE WHAT YOU ARE COOKING UP IN YOUR KITCHEN! TAG ME @THESALTEDPEPPER ON YOUR FAVORITE SOCIAL MEDIA PLATFORM WHEN YOU MAKE A DISH!
BE SURE TO FOLLOW THE SALTED PEPPER RIGHT HERE ⇓⇓⇓⇓⇓
Alexa Forbes says
This turned out well except pale and undercooked on the underside, I flipped the bread and popped it back in for 5 mins so this would cook from the top. Does your bread cook right through without doing this?
Louise says
I didn't have that issue with this recipe, I have pictures of the underneath of what mine looked like in the written post if you want to see what the bottom looked like. What type of pan did you use? That can make a difference. Also, what size and type of Foodi did you use? I'm wondering if that may have something to do with it.
Shirl says
Louise, I love this bread and have made it a few times but the dough never really rises to double in size… still it turns out ok…. But today I made it and it didn’t rise at all really… I’ve done the yeast just like you say… what am I doing wrong?? The bread is delicious but I need to figure out what I need to do so it rises like yours.
Louise says
What kind of yeast are you using? The only thing that would really cause the dough not to rise is the temp is too hot and it kills the yeast or too much garlic/salt can also have an impact. Focaccia bread is not a high rising bread, mine is only about 2" when baked.
Jo says
I have a question! I'm new to the foodi but not new to bread. Unless I missed it, you talk about baking with the pan covered in foil or silicone, but you don't talk about uncovering it. Do you leave it covered for the full baking time?
Thanks!
Louise says
All of that information is in the written article. I have done it both ways. It really depends on how your bread is browning. Leaving it uncovered for too long usually results in the top burning.
Katrina says
Made this for the first time today it was lovely soft moist very tasty
Thank you Louise as always a great recipe