
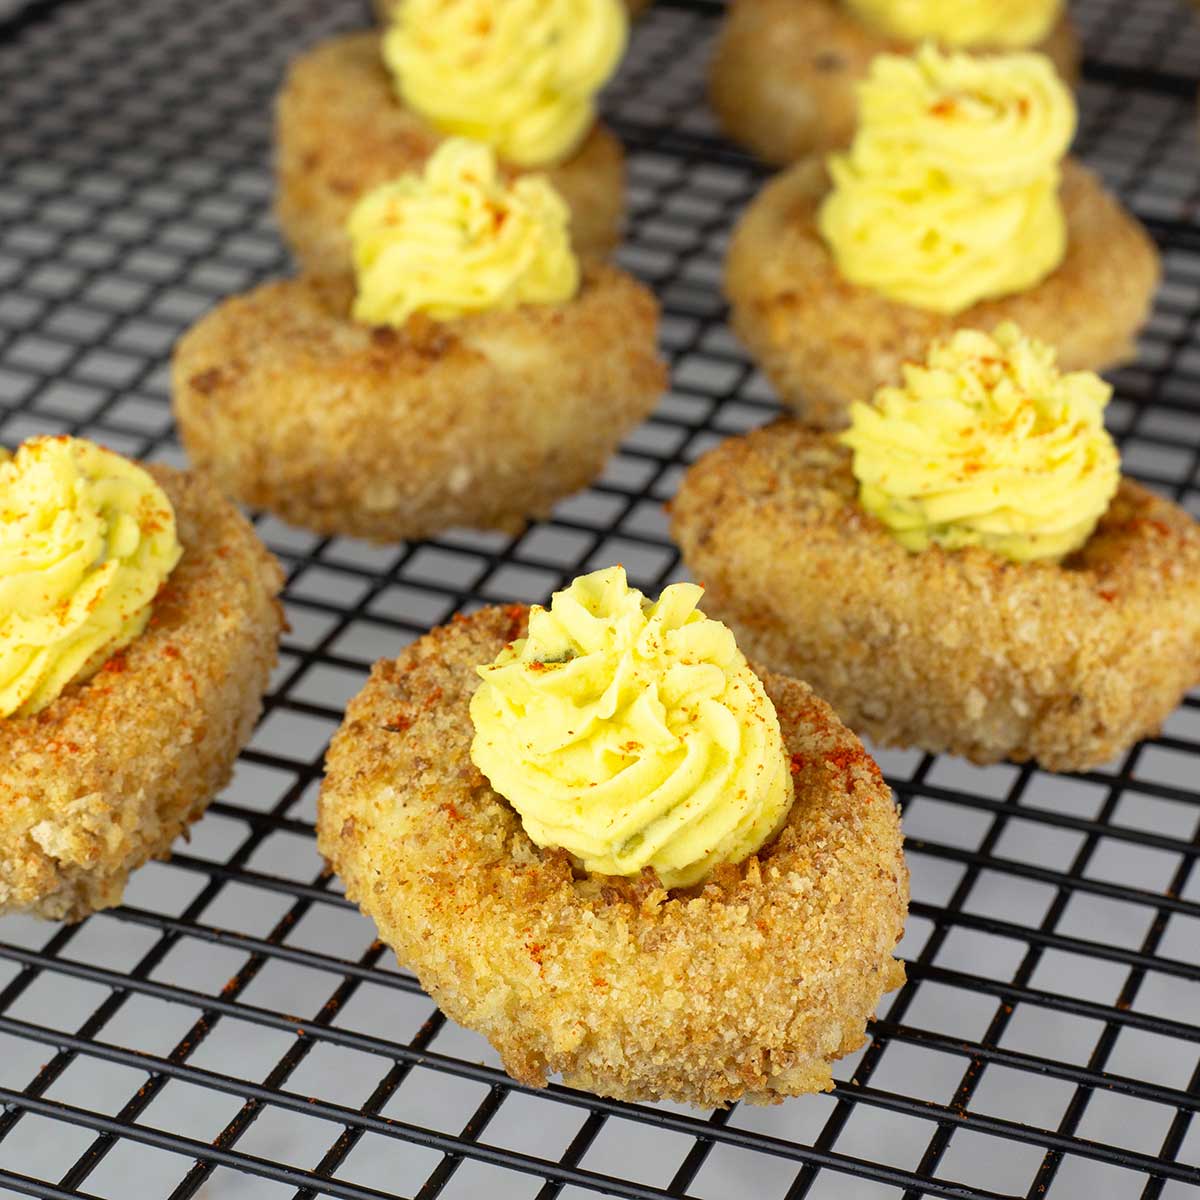
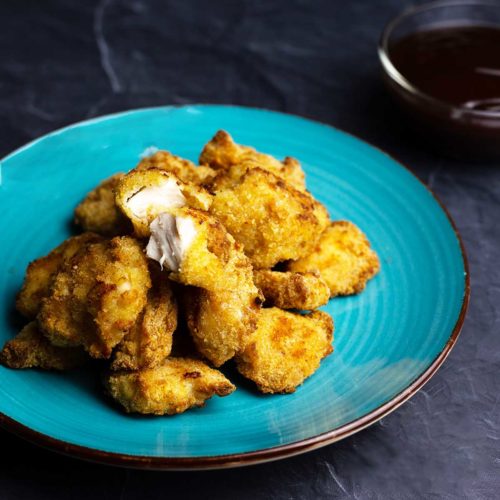
Take your deviled eggs to a whole new level with this easy and delicious recipe for Fried Deviled Eggs. The best news is you don't have deep fry them if you don't want to. Your air fryer makes them unbelievably crunchy and delicious.
You may be thinking, crunchy deviled eggs doesn't even sound good, but I'm here to tell you they are the BEST deviled eggs I've ever had! Traditional deviled eggs are usually all one texture, soft. The egg whites are firm, but still soft, and then you have the yolks mixed with mayo and seasonings that is creamy and soft.
With Fried Deviled Eggs, the egg white is covered in breadcrumbs and panko which adds another layer of texture and they are fantastic!
Would you like to save this recipe?
While I prefer to air fry them, you can certainly use your deep fryer or a pot of oil on the stove to make them. I will give directions for cooking methods in the post. If you haven't jumped on the air fryer band wagon yet, I'm here to tell you that it is one of the most used appliances in my house. Which is kind of ironic because when I first heard of an air fryer many years ago, I figured it was just like a convection oven and I didn't bother getting one.
I was so wrong! Once I bought my Ninja Foodi Pressure Cooker & Air Crisper and started using the air crisp (same as air fry) function, I was blown away.
Check out all of these delicious recipes that I've made in my air fryer and they are just as good or better than deep fried!


Frequently Asked Questions
You can make them about an hour before you serve them, but unfortunately you can't make them the day before and keep them in the fridge because the bread crumbs will absorb moisture and won't stay crispy.
Once assembled, the eggs should be eaten or discarded within 2 hours if they are left out at room temperature. You can put them into an airtight container in the fridge for longer storage, but the breading does soften up, in my experience.
Absolutely! You can make as many fried deviled eggs as you want to. Simply hard boil as many eggs as you want and then increase the ingredients accordingly to batter and fry the whites and make the creamy yellow egg mixture.
The cook time will be the same whether you fry one egg or many eggs. I can fit 12 battered egg halves in my air fryer, but your air fryer may be different. If you want to deep fry them instead, you will want to deep fry just a few at a time so you don't cool down the oil too much.
Ingredients & Substitutions
Eggs
I used large hard boiled eggs in this recipe, but any size is fine. Just alter the rest of the ingredients based on the volume of egg yolks you have.
Flour
I used all-purpose flour with simple salt and pepper for seasoning. You can get creative here and change up the seasonings however you like.
Flour alternatives, like almond flour aren't going to work that well in this recipe because the purpose of the flour is to absorb the wet batter and help it adhere to the egg white. You can try to use a small amount of coconut flour, which is absorbent.
I am not sure if gluten-free flour will work, because I haven't worked with it enough to know if it is absorbant or not. I'm thinking it will work just fine if it is a 1:1 substitution for all purpose flour.
Wet Batter
I used a combination of mayonnaise, spicy mustard, and a beaten egg for the wet batter. I absolutely loved the flavor this added, but you can just use a beaten egg if you prefer.
You can also your favorite mustard. A dijon mustard would be delicious. You may be able to use Greek yogurt or sour cream in place of the mayonnaise, but I didn't try it that way.
Dry Breading
I did a 2:1 ratio of bread crumbs to panko bread crumbs for my dry breading. I felt this gave the coverage needed, as well as the crunch. However, you can play around with that or try using just one or the other.
You could also use gluten free bread crumbs or crushed pork rinds if you wanted to reduce the carbs.
Deviled Egg Filling
I used my go-to deviled egg recipe for the egg yolk mixture which is a traditional deviled egg filling. Feel free to make yours however you like.
I used mayonnaise, mustard, white wine vinegar, salt, pepper, and sweet pickle relish. Some people prefer using cream cheese or sour cream. If you haven't tried a little vinegar in yolk mixture, give it a try! It really adds a nice balance of flavor and cuts the fat in the mayo.
Dill pickle relish is another common replacement for the sweet pickle relish. You can even add in your favorite hot sauce, if you like.
Garnishes
I only garnished my fried deviled eggs with a sprinkle of paprika, but you can do so many different things to make your deviled eggs one-of-a-kind. Try frying up bits of bacon and adding to the top or a small fried shrimp with a touch of cocktail sauce. Don't go heavy on the cocktail sauce, though; it can easily overpower the creamy yolk mixture. You could also use black or green olives, sun dried tomatoes, Chopped chives, capers, and smoked salmon is also a great flavor combination. Get creative and try new toppings until you find your favorite!
How to Make Deep Fried Deviled Eggs
Follow the same instructions for hard boiling the eggs and breading the eggs. My favorite way is to use my Instant Pot or Ninja Foodi to pressure cook the eggs.
If you are using a deep fryer, go by the manufacturer's instructions on how much oil to add. If you are deep frying on the stove, fill a heavy-bottomed pot (not thin aluminum) with about 3-4" of oil. You don't want the oil to go more than halfway up the sides of the pot or you risk it overflowing when the eggs are added. Heat the oil to 350℉/176℃. The oil temperature is critical when deep frying. If the oil is not hot enough, it can cause the breading to absorb too much of the oil and not crisp up. If it is too hot, you can burn the breading. When using a stand-alone deep fryer, you can usually set the temp, but on the stove you will have to adjust it to keep the correct temperature. I usually land on medium heat, but that will vary by the type of stove you have. Use a candy thermometer or a high heat thermometer to measure the temperature of the oil. Also remember to give the oil time to reheat in between batches.
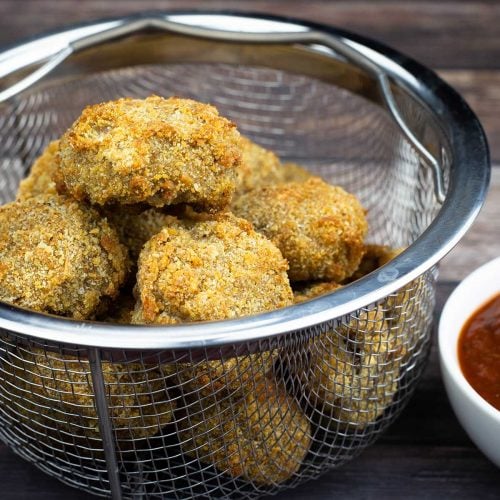
Carefully place 3-4 of the breaded egg white halves into the oil. I find using a kitchen tool called a spider is the best way to do this. Fry the eggs in the oil for about 3-4 minutes and flip them over, if necessary, to get both sides golden brown.
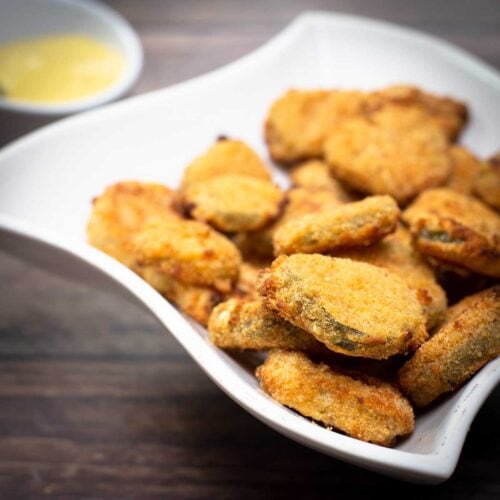
When they are done frying, remove from the hot oil with a spider or another slotted spoon (make sure it's metal or high heat resistant) and either place them onto a paper towel to drain or put the directly onto a cooling rack where the excess oil will drip off. Repeat in batches of 3-4 until all of the eggs are fried.
Let them sit on the cooling rack for about 10-15 minutes so they have time to cool completely before you put your egg yolk mixture on top.
Follow the same instructions for filling the eggs as written in the recipe.
How to make Fried Eggs in an Air Fryer
Prep
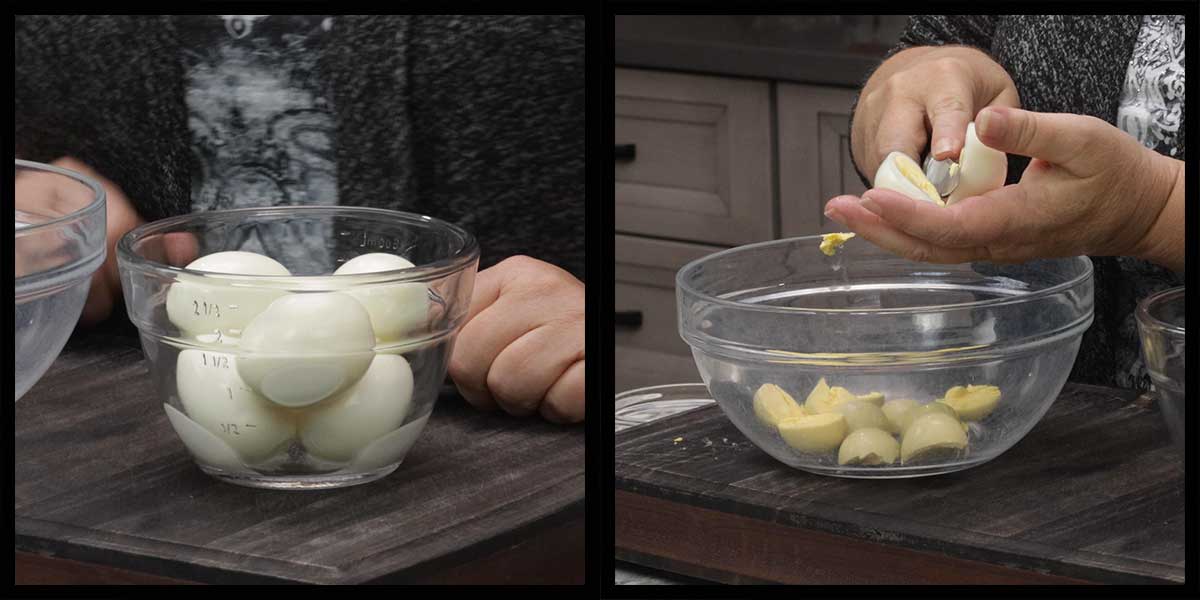
Hard boil and chill 6 large eggs. I did a lot of testing for hard boiling eggs and, if you want to pressure cook the eggs, you can follow this recipe: Pressure Cooker Hard Boiled Eggs
Cut each hard boiled egg in half lengthwise and place the yolks into a medium bowl.
Measure out the remaining ingredients for breading the egg whites and making your egg yolk mixture.
Making the egg yolk mixture
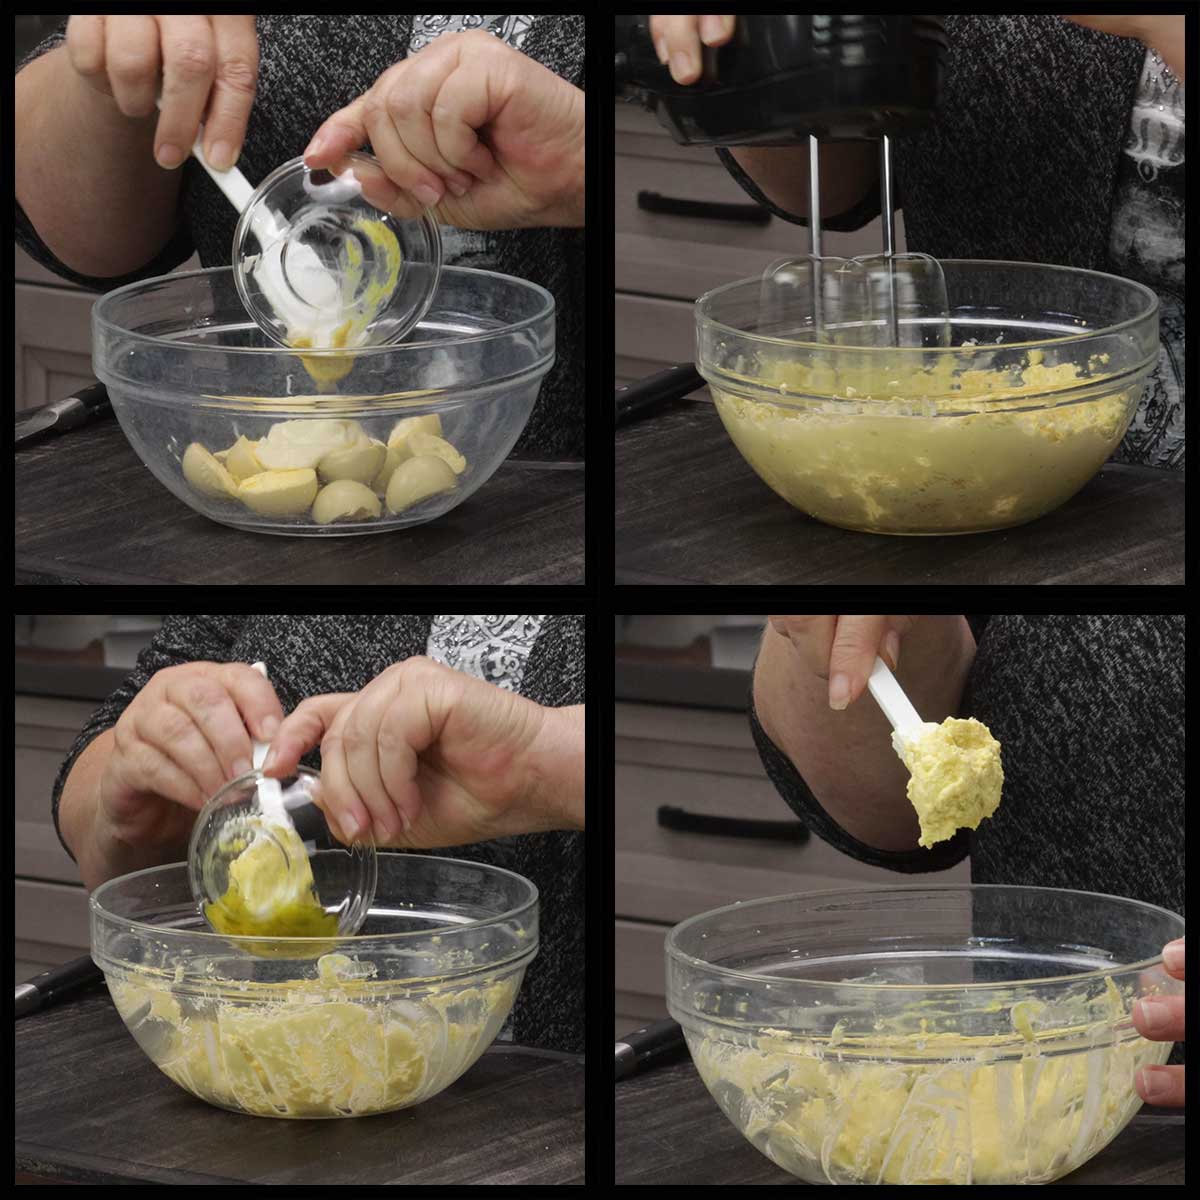
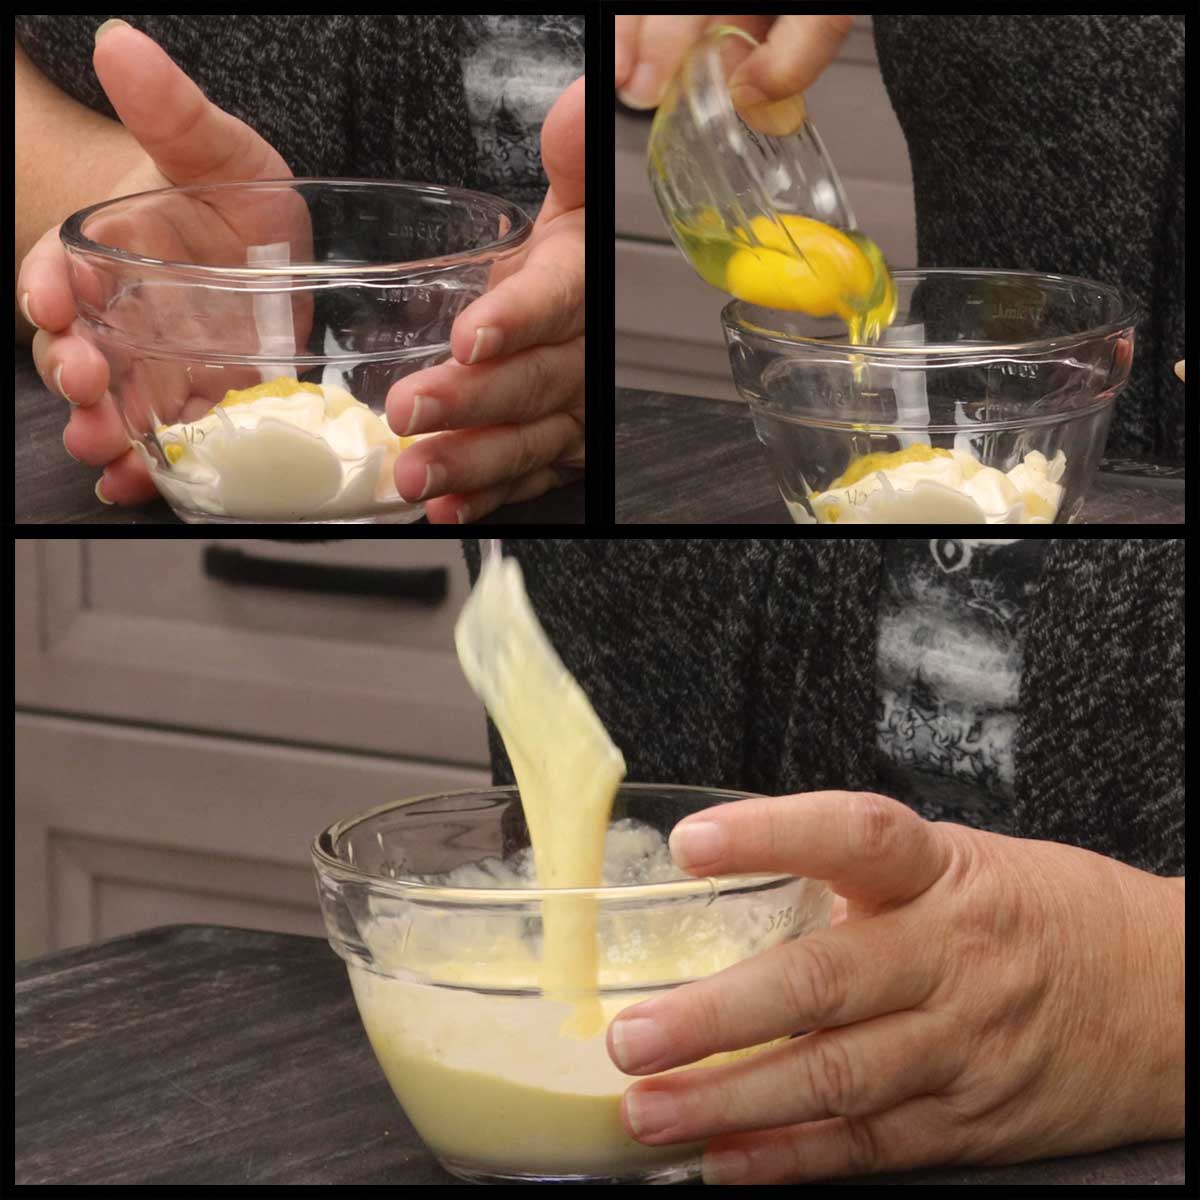
Put 2-3 Tablespoons of mayonnaise into the bowl with the egg yolks. Add in the mustard, vinegar, and seasonings. I don't put in the pickle relish until after I whip the egg yolks. If you are unsure how much mayo you will need, start with 2 Tablespoons and then add more until you get the desired creaminess.
Use a hand mixer to whip up the egg yolks and then fold in the sweet pickle relish. You can also use the back of a fork to blend the egg yolks, but I like to use a mixer so they are smooth and fluffy. Cover and place the mixture into the refrigerator until you are ready to fill your eggs.
Breading the Egg White Halves
I found that using 2-quart size ziplock baggies and one small bowl worked best. However, you can certainly use 3 separate shallow bowls or breading trays, if you prefer.
Flour
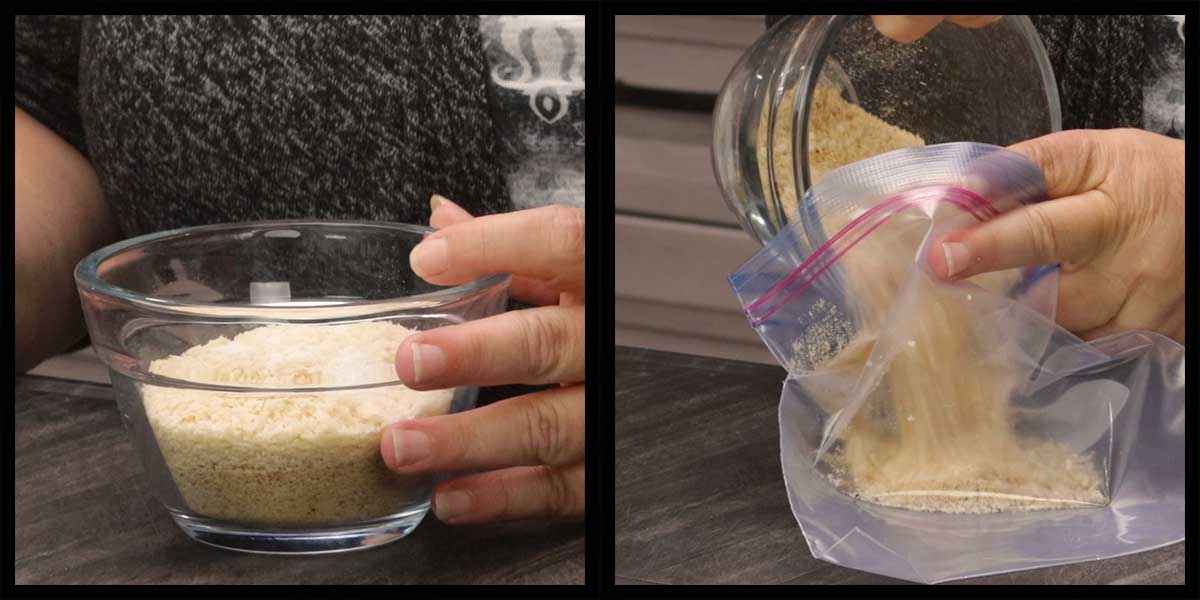
Place flour into a plastic bag that is big enough to fit all of the egg white halves. I used a quart-size ziplock and that works great for 12 egg halves. Season the flour with salt and close the bag and shake to distribute the salt throughout the flour.

Wet Batter
In a small bowl that holds about 1 cup, lightly beat a whole egg. Add in the mayonnaise, mustard, and vinegar. Whisk with a fork to combine.
Dry Breadcrumbs
Place the fine bread crumbs, the panko, and the salt into another quart size ziplock baggie. Seal and shake to combine ingredients.
Breading Process
LIne up your dredging station so you can move easily from the flour to the wet batter to the bread crumbs.
Preheat the air fryer just as you start to bread the eggs. I like to preheat with the basket or cooking surface in the air fryer and use the hottest setting. I used my Ninja Foodi Pressure Cooker & Air Crisper to test this recipe and preheated on broil which is about 450℉. If you are using a different air fryer, choose the hottest setting. You want to preheat for at least 10 minutes, but it may take you longer to bread the egg halves, so set it for 20 minutes.
Put the egg white halves into the bag of flour and shake around until the egg whites are covered in flour.
Gently remove one egg white half from the bag of flour and shake any excess flour off. Place the egg half into the wet batter and turn it over in the mixture with a fork until it is completely coated. This can take several turns because at first the flour will act as a barrier to the wet batter, but after turning several times it will be coated. Lift the egg white up with a fork and allow the excess batter to drip off.
Open the bag of bread crumbs and lay it flat on the counter with the bread crumbs lining the bag. Try to place the egg white onto the bread crumbs and not let it touch the bag itself. The plastic bag can cause the wet batter to come off in spots and then the bread crumbs won't stick. Spoon over the bread crumbs until the egg is coated, then shake it around in the bag for better coverage.
If you can see any egg white, then add a little of the wet batter and spoon on some dry breadcrumbs. It's important that the entire egg is covered with no egg white showing or that part of the egg white will brown and get rubbery.

Here is a quick video showing you the process since it's a little hard to explain in writing.
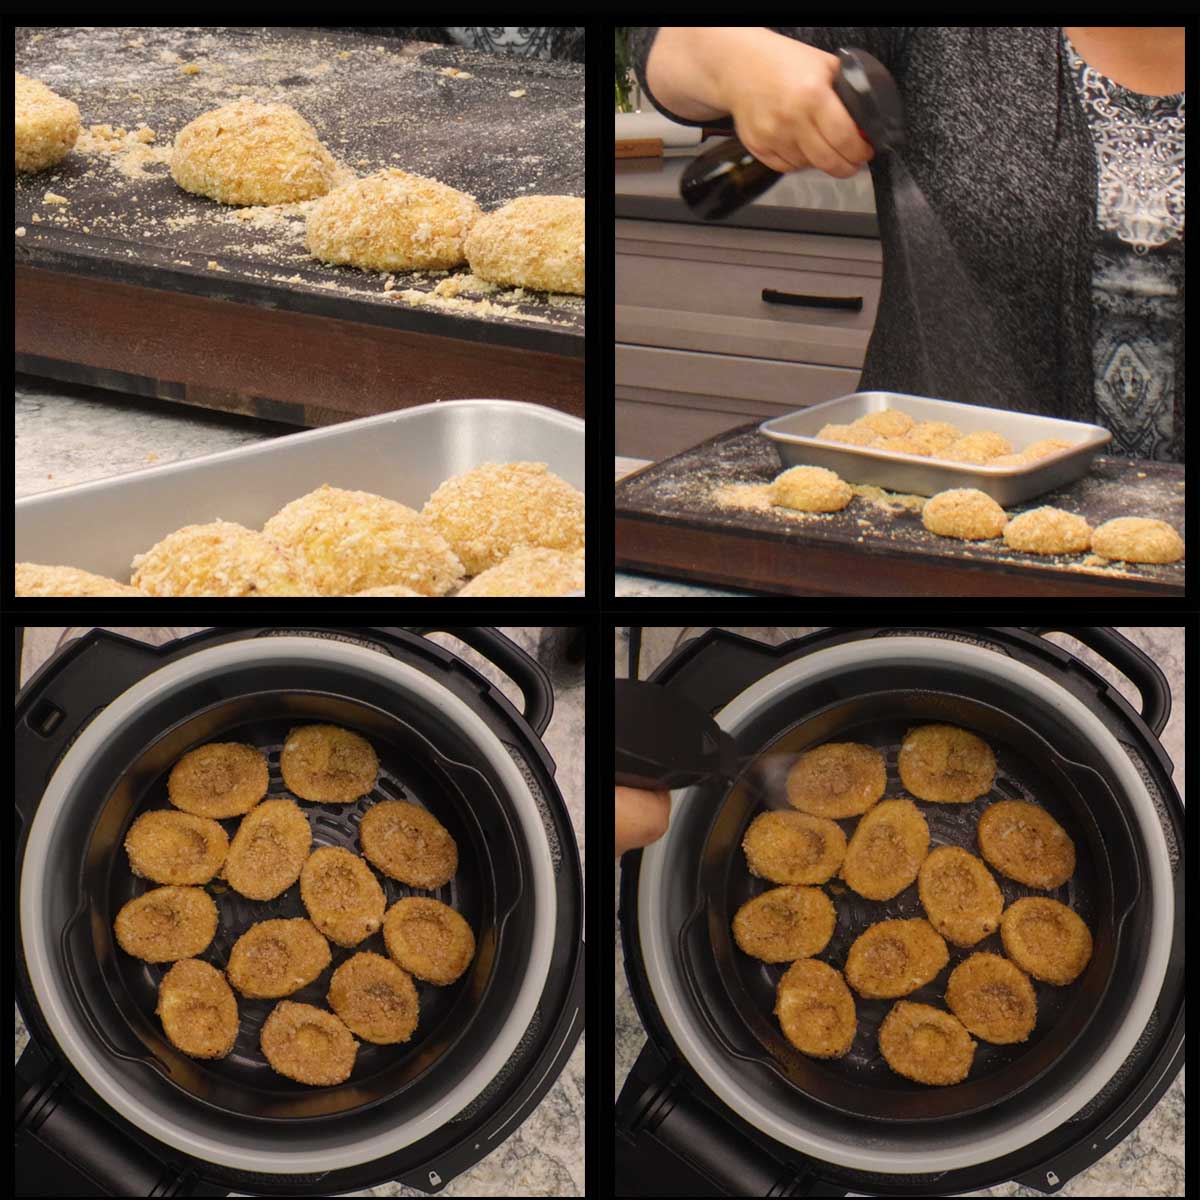
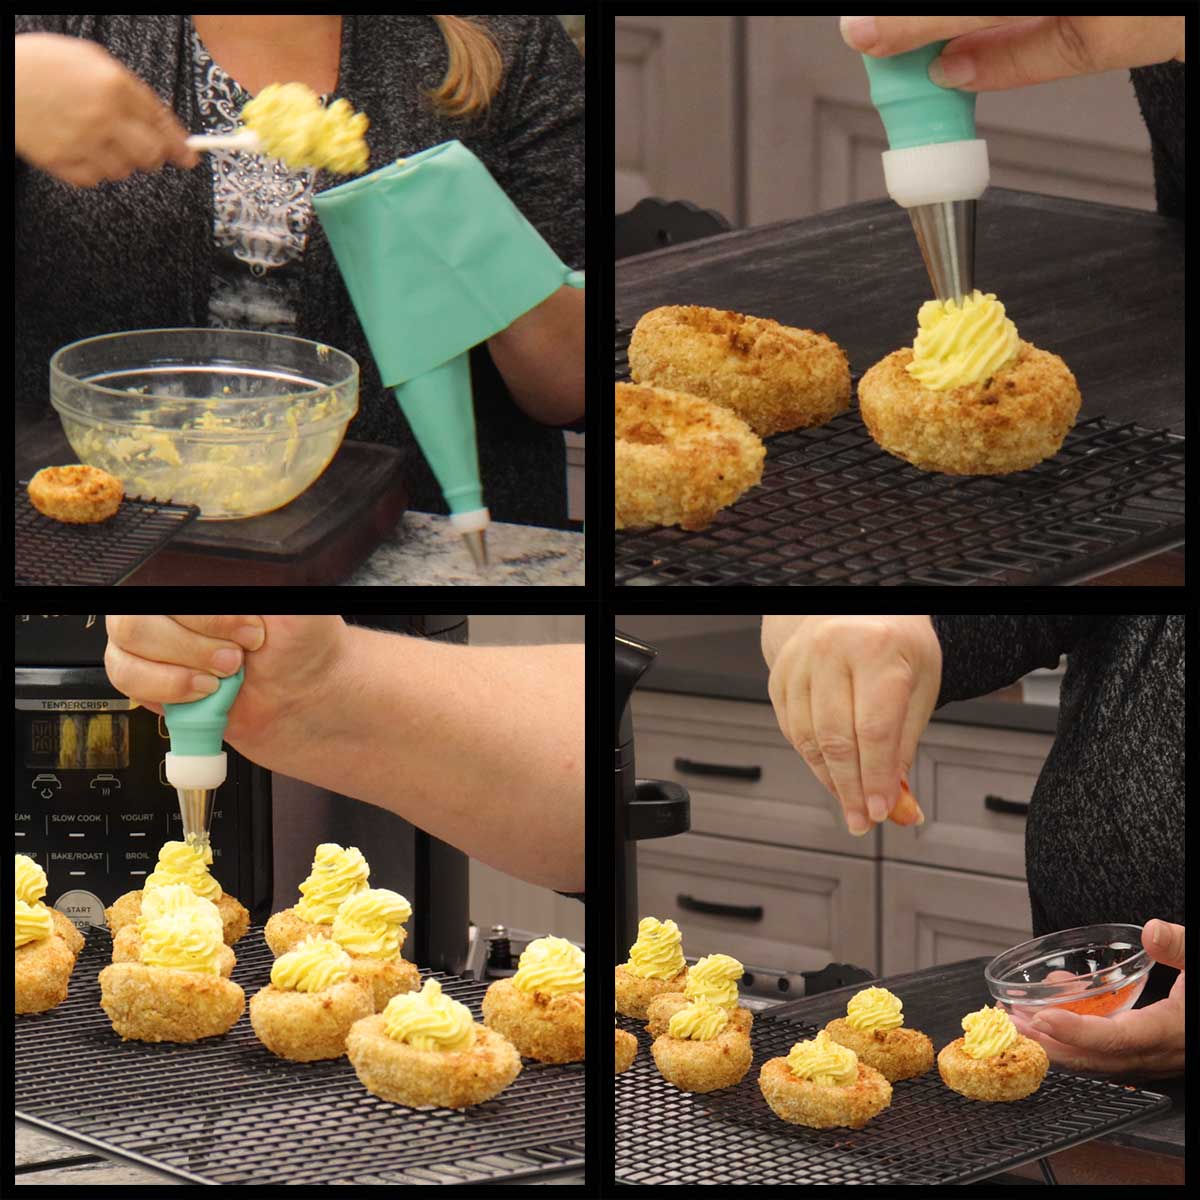
Remove and place rounded side up on a tray.Once all the egg white halves are breaded and on your tray, spritz the rounded bottom with oil. I use avocado oil, but you can use any oil you like. Neutral flavored oils will work best.
Place the battered egg whites into the air fryer basket or whatever crisping surface your air fryer has rounded side down. Spritz the tops with oil.
Air Frying Deviled Eggs
Air Fry on 390℉/200℃ for 5 minutes. You don't need to flip or check on them during the first 5 minutes. Every air fryer is going to work slightly differently, so if you know that your air fryer doesn't cook very fast, then you may need to add more time and/or increase the temperature. If you know that your air fryer cooks things quicker than recipes usually state, then check on the eggs after 3-4 minutes.
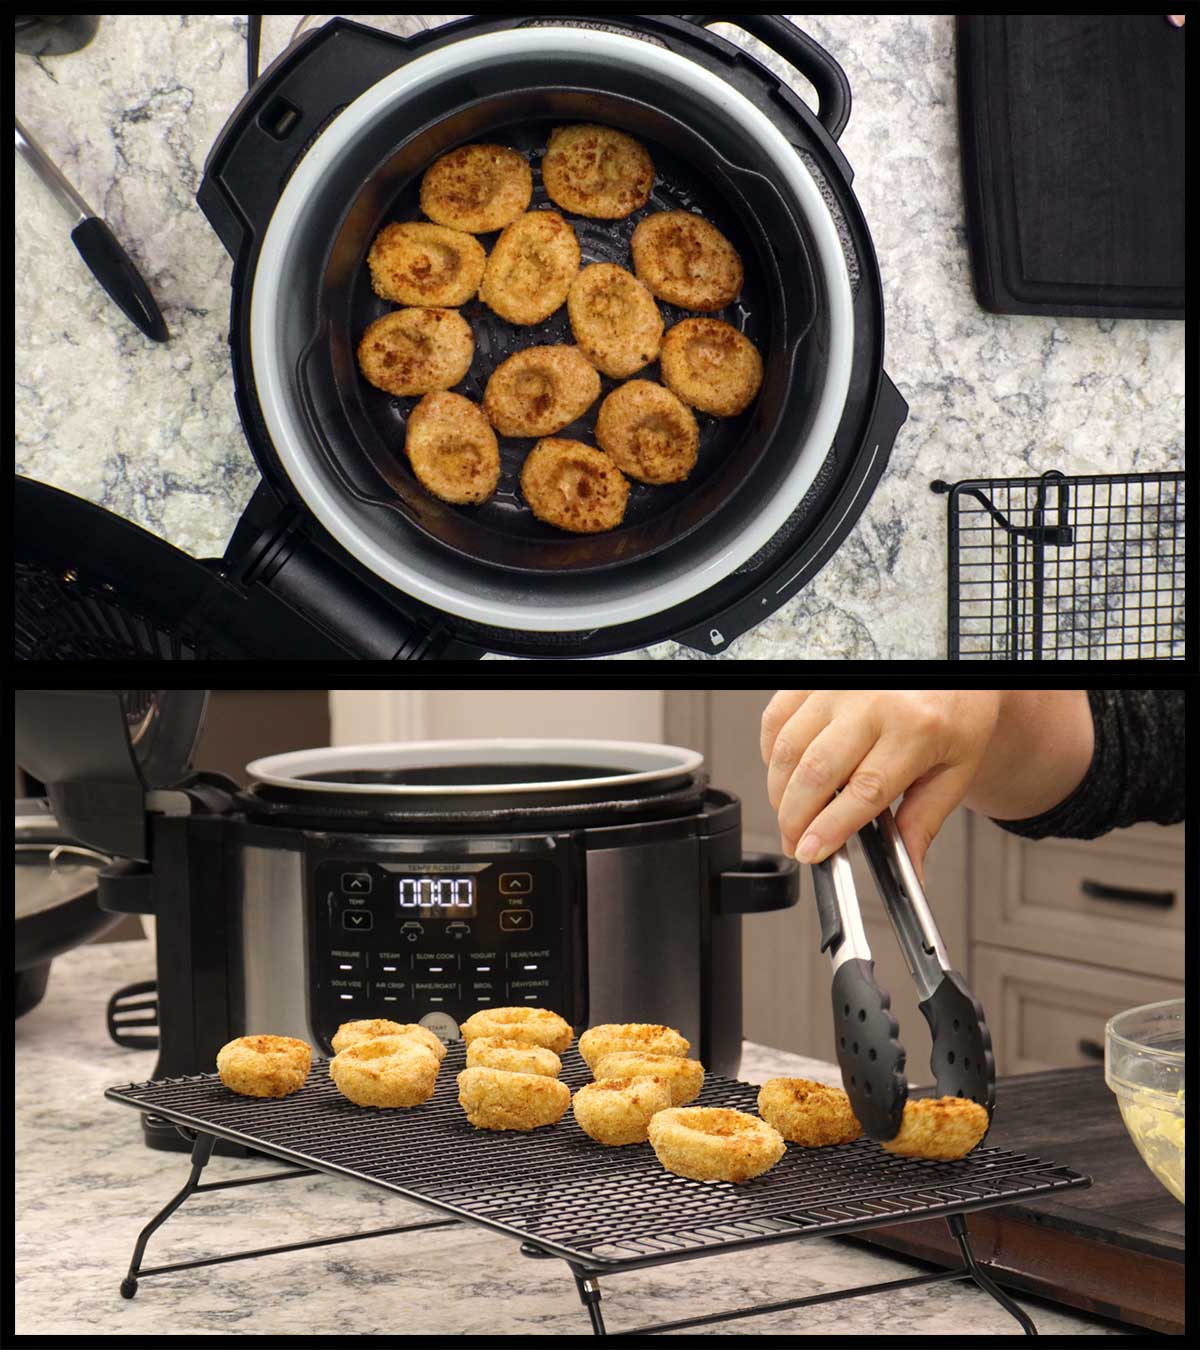
Once they are golden brown, turn the air fryer off and leave them in the basket for about 3-5 minutes to give the coating a chance to cool and set before you remove them from the air fryer.
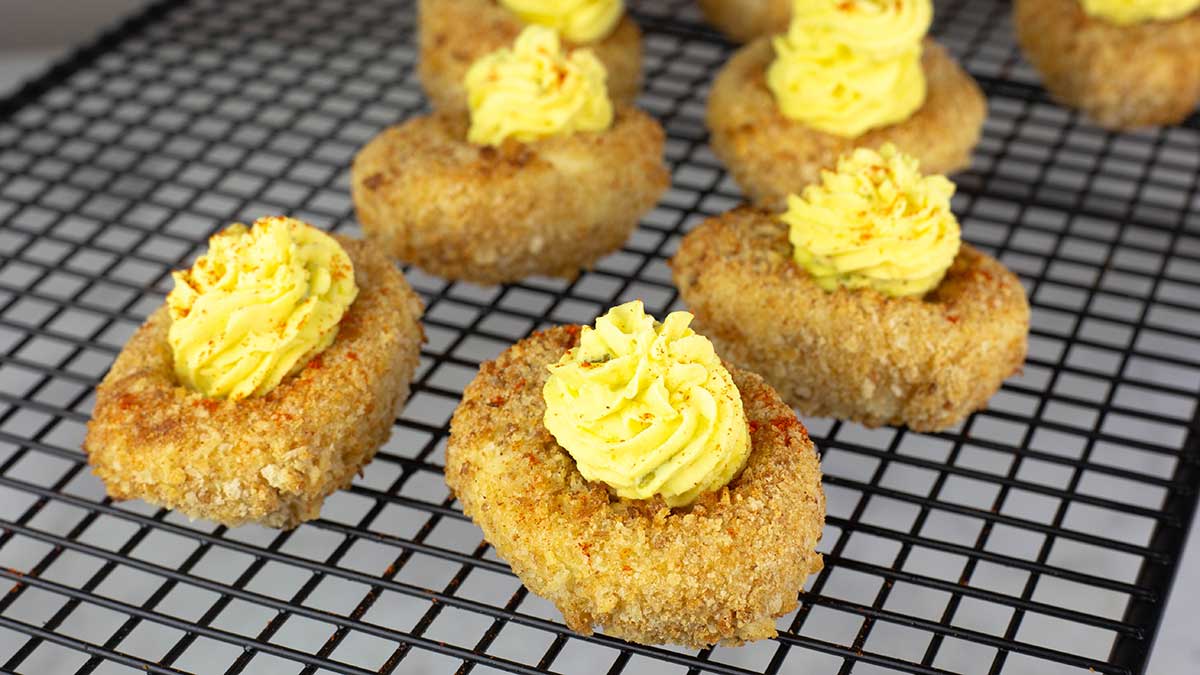
Place the egg white halves on a cooling rack and let them cool 10-15 minutes before filling with the deviled egg mixture.
Filling & Garnishing
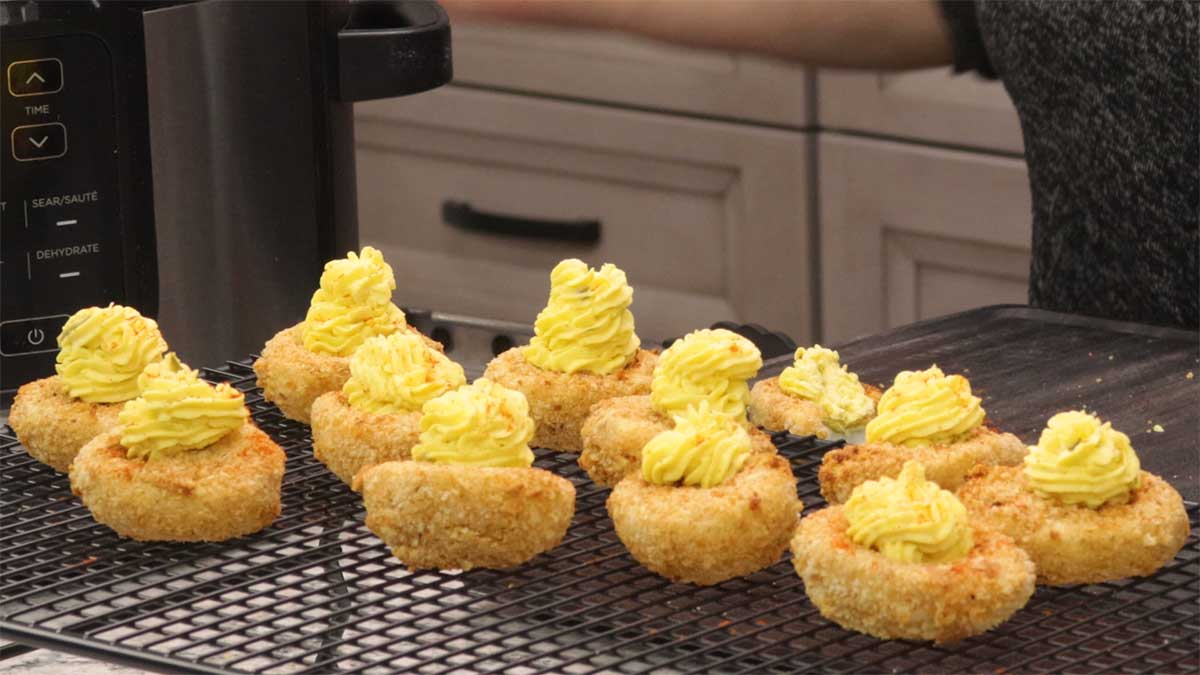
Remove the yolk mixture from the fridge. Once the eggs are cook, you can spoon equal amounts of the filling and place in the center of the breaded and fried egg white or using a piping bag to pipe the filling on top.
Garnish with a sprinkling of paprika if you want to keep them simple, or use some crispy crumbled bacon, or any other topping that you want.
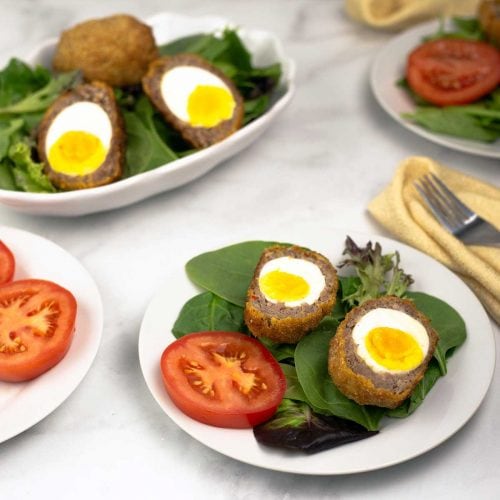
Serve & Enjoy! -
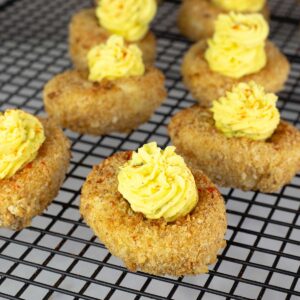
Fried Deviled Eggs Recipe
Ingredients
- 6 large hard boiled eggs
- oil for spritzing
- paprika optional
Breading Ingredients
- ¼ cup all purpose flour
- ¼ teaspoon fine grind sea salt
- ½ cup fine bread crumbs
- ¼ cup panko bread crumbs
- ½ teaspoon fine grind sea salt
- 3 Tablespoons mayonnaise
- ½ teaspoon white wine vinegar
- ½ teaspoon spicy mustard
- 1 large egg lightly beaten
Deviled Egg Filling Ingredients
- 6 egg yolks
- 3 Tablespoons mayonnaise
- ½ teaspoon white wine vinegar
- ½ teaspoon spicy mustard or any mustard you like
- 1 Tablespoon sweet pickle relish
- salt and pepper to taste
Would you like to save this recipe?
Instructions
Prep for Recipe
- Hard boil 6 large eggs and allow to cool completely. Here is my recipe: Pressure Cooker Hard Boiled Eggs
- Cut the eggs in half lengthwise and place the yolks into a medium size bowl and place the whites on a tray.
Deviled Egg Filling
- Add 3 Tablespoons of mayonnaise, ½ teaspoon of mustard, ½ teaspoon of white wine vinegar to bowl with the egg yolks.
- Using a hand mixer, whip the egg yolks with the other wet ingredients until smooth. You can also use a fork, but it won't be as smooth or as light and airy.
- Fold in the sweet pickle relish. Cover the bowl and put it in the refrigerator until you are ready to fill your deviled eggs.
Breading the Egg Whites
- Add the flour and ¼ teaspoon of sea salt to a quart size ziplock bag and shake to blend together
- Combine the bread crumbs, panko, and ¼ teaspoon of salt into another quart size ziplock baggie and shake to combine.
- In a small bowl, combine 3 Tablespoons of mayonnaise, ½ teaspoon of white wine vinegar, ½ teaspoon mustard, and 1 large raw egg. Whisk with a fork until well combined.
- Place all of the egg white halves into the bag that has the flour/salt mixture and shake to cover the eggs.
- Remove one egg white half from the bag of flour and tap to remove any excess flour. Place the egg white into the bowl with the wet batter and flip with a fork to coat the entire egg. This can take several flips.
- Remove the coated egg white with a fork and place it on the breadcrumbs in the bag. Use a spoon to spoon the breadcrumbs over the egg and then shake in the bag.
- Remove the coated egg white half and place it oval side up on a tray. Repeat the same process for all of the egg white halves.
Air Frying
- Preheat the air fryer on the hottest setting for a full 10 minutes prior to air frying the deviled eggs.
- Spritz the rounded part of the egg with oil. Once the air fryer is preheated, place the eggs in the basket or tray of the air fryer oval side down. Try not to let them touch each other and they should be in a single layer. Spritz the tops with oil.
- Air Fry on 390℉/200℃ for 5 minutes. Don't flip. When the time is up, open the air fryer and let them sit for 5 minutes so the coating cools and firms up. Remove the eggs and let them cool on a wire rack for about 5-10 minutes before filling them with the yolk mixture.
Deep Frying
- Follow the instructions for your deep fryer if that is what you are using and heat the oil to 350℉/176℃. If you are using a pot on the stove, make sure it is a heavy bottomed pot and not a thin aluminum pot. Fill the pot about 3-4" with oil, make sure not to go past halfway up the pot sides. Heat on medium high until the oil has reached 350℉/176℃.
- Add 3-4 breaded egg white halves to the deep fryer or pot with hot oil. The amount you can add at once depends on the size of your pot, but don't do more than 6 at a time or the temperature of the oil will reduce too quickly and can lead to the breadcrumbs absorbing too much oil and not crisping.
- Fry the egg white halves for about 3-4 minutes and flip them over if necessary. Make sure to maintain the oil temperature at 350/176℃ by adjusting the heat as necessary and monitor the temp with a candy thermometer or high heat thermometer.
- Remove the fried egg white halves when they are golden brown using a spider or a slotted metal spoon. Place them on a paper towel or on a cooling rack. Repeat the process until all of the eggs are fried. Let them cool 5-10 minutes before filling with the deviled egg mixture.
Filling the Deviled Eggs
- You can either spoon the yolk mixture into the well of the egg or use a piping bag with an open tip to pipe the mixture into the egg.
- Sprinkle with paprika or top with preferred garnishes. Serve & Enjoy!
Nutrition
About the Recipe Author, Louise Long
Louise is a full-time recipe creator and food blogger @ The Salted Pepper. She has over 30 years of experience with cooking and recipe development. She owned a restaurant for several years and was a full-time RN until retiring to blog full-time.

She published her first cookbook in the Fall of 2018 and is very interested in writing several more.
Louise is also the creator of an online Ninja Foodi Pressure Cooking Course with over 100 instructional step-by-step videos. People absolutely rave about the course and all the value they have received from it.
Louise has several very active Facebook groups that help people with the basics of cooking and learning more about the appliances they love.
Ninja Foodi Pressure Cooker & Air Crisper 101
Ninja Woodfire Outdoor Grill & Smoker
Louise is also a YouTube creator and you can find most of her recipes in video format on The Salted Pepper YouTube channel.
She is very responsive to messages and eager to help in any way she can. Get more Information about Louise & contact information
I WOULD LOVE TO SEE WHAT YOU ARE COOKING UP IN YOUR KITCHEN! TAG ME @THESALTEDPEPPER ON YOUR FAVORITE SOCIAL MEDIA PLATFORM WHEN YOU MAKE A DISH!
BE SURE TO FOLLOW THE SALTED PEPPER RIGHT HERE ⇓⇓⇓⇓⇓
Kathleen Ahearn says
I can't wait to try this recipe. Looks delish.
Louise says
I hope you love them!