

With just a few simple ingredients and about an hour of time, you can make the BEST homemade flour tortillas!

Would you like to save this recipe?
You may be asking, why would I make them when the store-bought tortillas are so inexpensive and easy to find? Well, there is one answer and it's simple. Fresh tortillas make everything taste better!
You don't need a tortilla press to make flour tortillas, you only need a rolling pin or something that can double as a rolling pin.
Recently, Jeff and I were visiting the Bahamas and I made these homemade flour tortillas and then realized the house we rented didn't have a rolling pin. Jeff asked if the bottle of rum we had would work and after cleaning the outside, it worked great!
Ingredients & Substitutions
Flour
I have tested this recipe using all purpose flour, bread flour, and gluten free flour and the only one that didn't work for me was gluten free flour. So, if you are gluten free, please find a recipe that uses gluten free flour or perhaps try a gluten free flour specific for bread making. I didn't have that kind on hand unfortunately.
As far as all purpose and bread flour goes, you can use either one or a combination of the two. I wrote the recipe using all purpose flour because it is usually what most people have on hand and it works great in this recipe.
If you want to use bread flour, you absolutely can. The ones I made with bread flour did roll out a little easier because it has higher protein and develops stronger gluten bonds. However, you may need to increase the water in the recipe when using bread flour.
Oil
I recommend a neutral flavored oil like avocado oil, vegetable oil, or canola oil. You can use olive oil, but make sure it doesn't have a strong flavor, or your tortillas will carry that flavor.
If you want a lower-fat tortilla, you can omit the oil and use a little more water. The dough is just a tad harder to roll thin without the oil.
Salt and Baking Powder
Salt and Baking Powder are key ingredients and I don't recommend skipping either one.
Salt is going to give your tortilla flavor. You can decrease or increase the salt according to your preference. You can also try a salt substitute.
The Baking Powder gives just a little leavening to the dough to help create those beautiful bubbles that give the signature brown spots on a homemade tortilla.
*Do not substitute baking powder with baking soda in this recipe unless you also use some form of acid to counteract the baking soda, or you will end up with a salty and metallic-tasting tortilla.
You can use baking soda along with cream of tartar as a substitute. You want to mix ½ teaspoon of cream of tartar with ¼ teaspoon baking soda and then measure out ½ teaspoon for the recipe.
Water
I recommend using warm water when mixing the dough. This will keep the dough more pliable and easier to roll out.
How to Make Homemade Flour Tortillas
What I love about this recipe is anyone can make them! You don't need any fancy equipment, and kneading the dough for tortillas takes no time at all.
Mixing the Dough
To a large mixing bowl, add the all-purpose flour, salt, and baking soda. Mix to combine.
Add the oil and water to the flour mixture and mix with either a silicone/rubber spatula or a wooden spoon.

At first, the dough will look very dry and crumbly. Don't be tempted to add any extra water at this stage. The flour needs a good 5-10 minutes before you can accurately judge the hydration.
As you mix the dough, a shaggy dough forms and when most of the flour is incorporated into the dough, remove it from the bowl and place on a flat, clean work surface. I like to use a (affiliate link)pastry mat.
I don't usually flour the surface at this stage because there will be loose flour in the bowl that is transferred to the work surface and the dough is still pretty dry at this point.

Pull the dough and any loose flour together to form a ball and then begin to knead the dough by pressing the palm of one hand down on the dough with the other palm on top of your hand and push the dough forward.
Fold the dough over on itself and repeat this process until the dough forms a smooth ball of dough. If the dough is still crumbly and breaking, knead it a little longer.
This is not the same as kneading bread dough and it shouldn't take longer than 3 minutes of active kneading to have a smooth dough.
If your dough still appears craggly and dry, you can add a little more water, but be careful not to add too much. This dough should be soft and smooth, but not sticky or tacky to the touch.

Wrap the dough in plastic wrap and let it sit at room temperature for 30 minutes. This resting period is very important and gives the dough time to relax enough for you to be able to easily roll it out thinly.

Rolling the Dough
Once the dough has rested, unwrap it and divide the dough into 8 equal balls. If you want to be precise, you can weigh each ball and for 6" tortillas they should weigh 1½ ounces.
Quick Tip
Divide the dough into six equal balls (2 ounces each) for larger 8" tortillas
Place a small amount of flour down on your work surface and you can also flour your rolling pin.

Quick Tip
Adding tension to the top of the dough ball helps keep its circular shape when rolling it out. Below is a quick video of me doing this with rolls and the process is the same.
Press the dough ball flat and flour the top. Begin to roll the dough out into a circular shape. You want it to be about 8" in size for a 6" tortilla because it will snap back some after you are done rolling it out.

You can either repeat this process for all the dough balls and place the uncooked tortillas in between pieces of parchment or you can roll one and cook it, then roll another one and cook it.
I usually roll out 1-2 and then start cooking them. Roll out a couple more and cook those.
Cooking the Tortillas
I would say the most nuanced part of making homemade tortillas is the cooking process. I recommend using either a cast iron pan or a non stick frying pan.
You do not want to add any fat or cooking spray to the pan and controlling the heat is the most important part of the process.
It's kind of like making pancakes, the pan has to be just the right temperature so bubbles form, but not hot enough to burn the pancakes.
Once you cook up a few tortillas, you will have better insight into the correct temperature settings for your pan and stove. The instructions below are guidelines based on what works for me.
Heat your cast iron or non-stick pan on medium-high heat for about 8-10 minutes.
Place the rolled out tortilla into the hot pan and within 15-20 seconds you start to see a few large and small bubbles. If you don't see the bubbles, it means your pan wasn't hot enough, but just leave the tortilla in the pan at this point.
Cook on one side for 45-60 seconds, then flip it over. Cook an additional 30-45 seconds, and then remove the tortilla.
Place the tortilla into a basket lined with a tea towel and cover with the towel to keep them warm.
Repeat this process for the remaining tortillas.

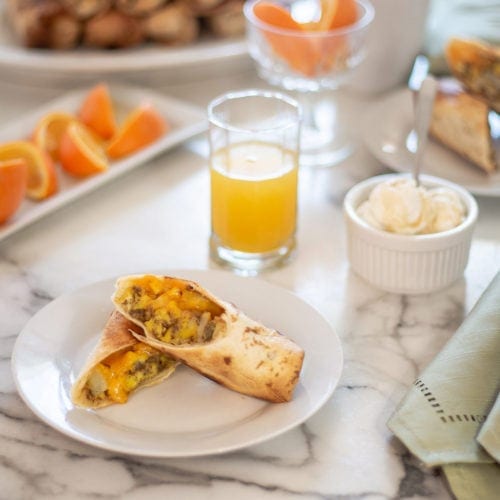
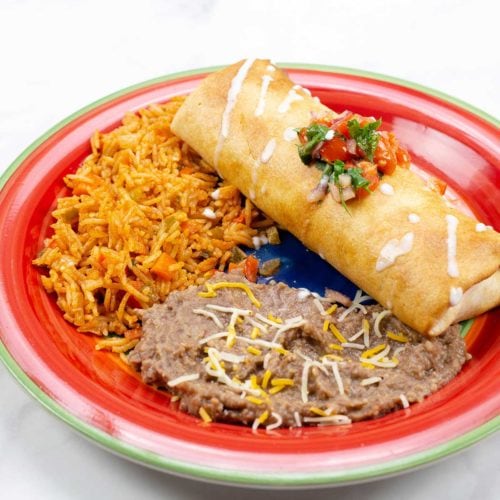
Use your tortillas to make shrimp tacos, cheese quesadillas, breakfast burritos, chimichangas, and more!

I bet once you taste your homemade flour tortillas, you won't buy store-bought again!
Storage & Reheating Instructions
How to Store Leftover Tortillas
Homemade tortillas are best eaten fresh and that is why this recipe is for a small batch.
I recommend storing them at room temperature for up to two hours and keep them warm by wrapping them in a towel.
You can make the dough and freeze it, but honestly, it is quicker to mix it up fresh than to wait for it to thaw.
Quick Tip
If you do have leftover tortillas, wrap them in plastic wrap and then foil and store at room temperature for up to 2 days or in the refrigerator for up to 4 days.
How to Reheat Flour Tortillas
The best way to reheat flour tortillas is wrapping them in foil and warming them in the oven on a low temperature or you can wrap them in a damp paper towel and microwave them for 30 seconds or so.
What to Serve with Homemade Flour Tortillas
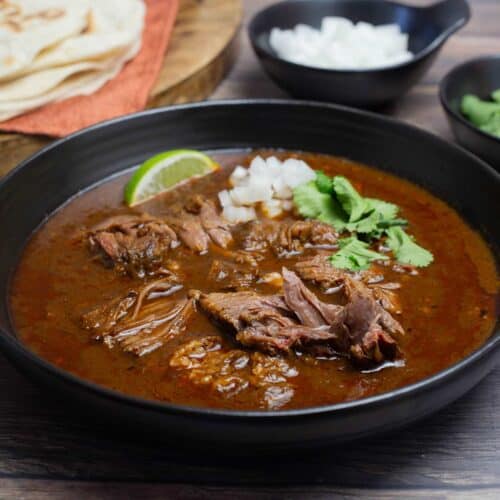
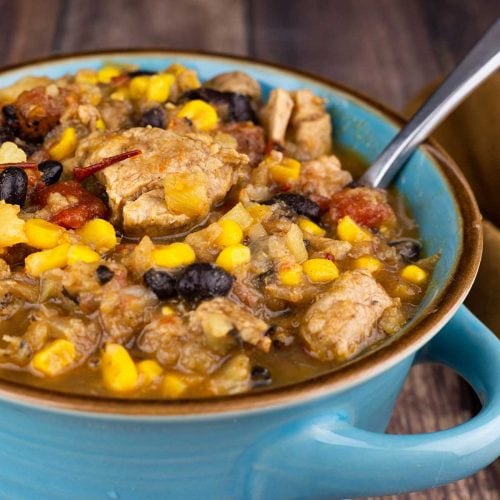
You can use your flour tortillas to make all kinds of different tacos, burritos, quesadillas, and you can also serve them warm to dip into Mexican inspired stews and soups.
Here are some recipes to try!


Homemade Flour Tortilla Recipe
Ingredients
- 1½ cups all-purpose flour
- 1 teaspoon kosher or fine grind sea salt
- ½ teaspoon baking powder
- 2 Tablespoons avocado oil or any neutral oil
- ½ cup warm water
Would you like to save this recipe?
Instructions
- Mix the dry ingredients in a large mixing bowl.1½ cups all-purpose flour, ½ teaspoon baking powder, 1 teaspoon kosher or fine grind sea salt
- Add the oil and water to the dry ingredients and stir together with a wooden spoon or spatula. The mixture will look very dry and crumbly at first. Keep mixing until a shaggy ball of dough forms. There will be some flour pieces that haven't been incorporated yet.2 Tablespoons avocado oil, ½ cup warm water
- Turn the dough out onto a clean work surface and place any loose flour pieces on top of the shaggy dough ball. Press the dough with one palm of your hand over the other palm like you are kneading dough. Press the dough forward. Fold the dough back onto itself and repeat this process, turning the dough every few presses. After 2-3 minutes, the dough will become a smooth ball. If your dough is still dry and cracking after you knead it for a few minutes, you can add 1 teaspoon of water at a time until the dough is smooth and soft to the touch. This dough should not be sticky or tacky to the touch so if you add too much water, you will need to add a little flour and knead that in.
- Wrap the dough ball in plastic wrap and let it rest at room temperature for 30 minutes. This is very important and gives the dough time to relax so it is easy to roll out into thin tortillas.
- Divide the dough into 8 equal pieces (1½ ounces each) for 6" tortillas OR 6 equal pieces (2 ounces each) for 8" tortillas. Shape each dough ball and create tension on top (there is a video in the recipe article above if you aren't sure how to do this) so they roll out into a circular shape. Loosely cover the dough balls with plastic wrap except the one you are rolling out.
- Lightly flour your work surface and press one dough ball into a flat disc. Sprinkle the top with flour. Using a rolling pin, roll the dough into an 8" circular shape for 6" tortillas and 10" circular shape for 8" tortillas. The reason you roll them out bigger is because they will snap back when you finish rolling and they also shrink a bit when cooked.
- Heat a cast iron or non-stick pan over medium-high for about 7-10 minutes. Do not add oil or any kind of fat to the pan. The pan needs to be dry.
- Lay the flour tortilla flat in the pan and let it cook for 45-60 seconds. After about 15-20 seconds, you will see bubbles start to form. If you don't see bubbles, your pan wasn't hot enough and just let the tortilla cook a little longer. Flip the flour tortilla over and let it cook another 30-45 seconds. Remove it and place it in a basket or container lined with a tea towel. Cover with the towel to keep it warm while you repeat the process with the remaining tortillas. Cooking the tortillas may require you to adjust your heat up and down to achieve the perfect results. This will vary by stove and pan, but don't worry, after a making a few you will be a pro!
- Serve & Enjoy!
Notes
Nutrition
About the Recipe Author, Louise Long
Louise is a full-time recipe creator and food blogger @ The Salted Pepper. She has over 30 years of experience with cooking and recipe development. She owned a restaurant for several years and was a full-time RN until retiring to blog full-time.

She published her first cookbook in the Fall of 2018 and is very interested in writing several more.
Louise is also the creator of an online Ninja Foodi Pressure Cooking Course with over 100 instructional step-by-step videos. People absolutely rave about the course and all the value they have received from it.
Louise has several very active Facebook groups that help people with the basics of cooking and learning more about the appliances they love.
Ninja Foodi Pressure Cooker & Air Crisper 101
Ninja Woodfire Outdoor Grill & Smoker
Louise is also a YouTube creator and you can find most of her recipes in video format on The Salted Pepper YouTube channel.
She is very responsive to messages and eager to help in any way she can. Get more Information about Louise & contact information
I WOULD LOVE TO SEE WHAT YOU ARE COOKING UP IN YOUR KITCHEN! TAG ME @THESALTEDPEPPER ON YOUR FAVORITE SOCIAL MEDIA PLATFORM WHEN YOU MAKE A DISH!
BE SURE TO FOLLOW THE SALTED PEPPER RIGHT HERE ⇓⇓⇓⇓⇓
Leave a Reply