
Do you struggle with making a great pound cake, like I do? The struggle is over with this homemade pound cake in the Ninja Foodi!
This recipe is very easy, uses ingredients you probably have on hand, and doesn't take any skill at all! Even if you are the master of all things pound cake (and we do want to hear your secrets!), the ease and flavor of this recipe might surprise you!
I struggle with making a good homemade pound cake. I always have. Either the flavor is off (kind of floury) or it's falling apart (not ideal for pound cake) or it's like eating cardboard... definitely not a good homemade pound cake!
This post may contain affiliate links. If you make a purchase after clicking a link, I may earn a small commission. As an Amazon Associate I earn from qualifying purchases.
I'm not surprised that the best homemade pound cake I ever made is in the Ninja Foodi! I seriously think this pot is magical!
This recipe for Homemade Pound Cake in the Ninja Foodi is super easy to make, takes less time than using the conventional oven, and tastes great! Sign me up!
Why is it called a pound cake?
When the pound cake originated way back in the early 18th century, it is said that the recipe called for 1 pound of the four ingredients.
Pretty simple, right? That's what I thought! So, why is it that every time I've made a pound cake (until this recipe), I've always used various measurements/weights of the main ingredients? Was I making a true pound cake?
What ingredients are in a Homemade Pound Cake?
Not that many! You only need 4 ingredients to make a pound cake. Flour. Sugar. Butter. Eggs. That's it! There are many variations to a basic pound cake that call for added ingredients, but you can always alter those to suit your taste.
Since I've never had much luck with pound cakes, I decided to go back to the basics and make a more traditional pound cake. Sometimes simpler is better.
When making a homemade pound cake in the Ninja Foodi, we do need to alter the ingredients to fit the 7" Fat Daddio Ring Mold. Turns out that is just as easy as the original pound cake recipe; just ½ the ingredients!
We are setting trends here for sure! We are making half-pound cake! It's that simple: ½ pound flour, ½ pound sugar, ½ pound butter, and ½ pound eggs.
In this recipe, I use vanilla extract and the zest from one orange, as well as a little Demerara sugar. You certainly can skip those ingredients or switch the vanilla extract to almond, the orange zest to lemon zest, and skip the Demerara sugar all together... but I hope you don't! Especially that Demerara sugar!
You'll be amazed at what the Demerara sugar does to the top of the pound cake!
What is Demerara sugar?
Demerara sugar is a larger grain than white sugar and is brown in color. It is less processed than traditional white sugar and adds a great toffee flavor. You can find it right here>>>> Demerara Sugar
It is a little different than Turbinado sugar (brand name: Sugar in the Raw) as the grains are slightly larger, but you could use either in this recipe and be just fine. Either will hold up just fine under pressure cooking and yes, this homemade pound cake is pressure cooked! Before you run away screaming, "NO, I don't like pressure cooked cakes!"... please take a minute to read the next section.
There are so many different sugars available. I find it quite interesting to experiment with different kinds. Here is a great article that I read on different kinds of sugars: The Ultimate Guide to Buying and Using Sugar
Are Pressure Cooked Cakes Better Than Baked?
Not necessarily! I'm a traditionalist at heart and often take the long way of preparing something because I have found, through trial and error, that shortcuts can sometimes sacrifice quality. I can't see 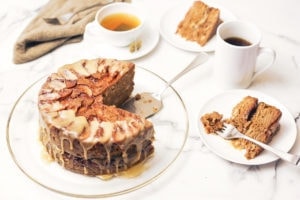 spending even 30 minutes making something unless it's going to taste good.
I will say that I have had success and failures with pressure cooking cakes. For example, this recipe for Ninja Foodi Apple Cake with Caramel Glaze is the best apple cake I've ever eaten. It's beautiful too!
I've also had not-so-great success when pressure cooking cakes. One time I ended up with a rubbery mess that was still raw in the middle. I've learned that there is a time and a place for pressure cooking cakes and, through many trials of this homemade pound cake, I think pressure cooking is the best way to do it.
Can I Bake this Pound Cake instead of Pressure Cooking it?
Yes. You can. I made this cake 5 times and it turns out I got it "almost" right the first time and spot on the last time!
I pressure cooked it the first time and it was great, but I wanted to see if it was better baked in the Ninja Foodi. Same ingredients, same mixing process (that does matter), different cooking process and this is what I found.
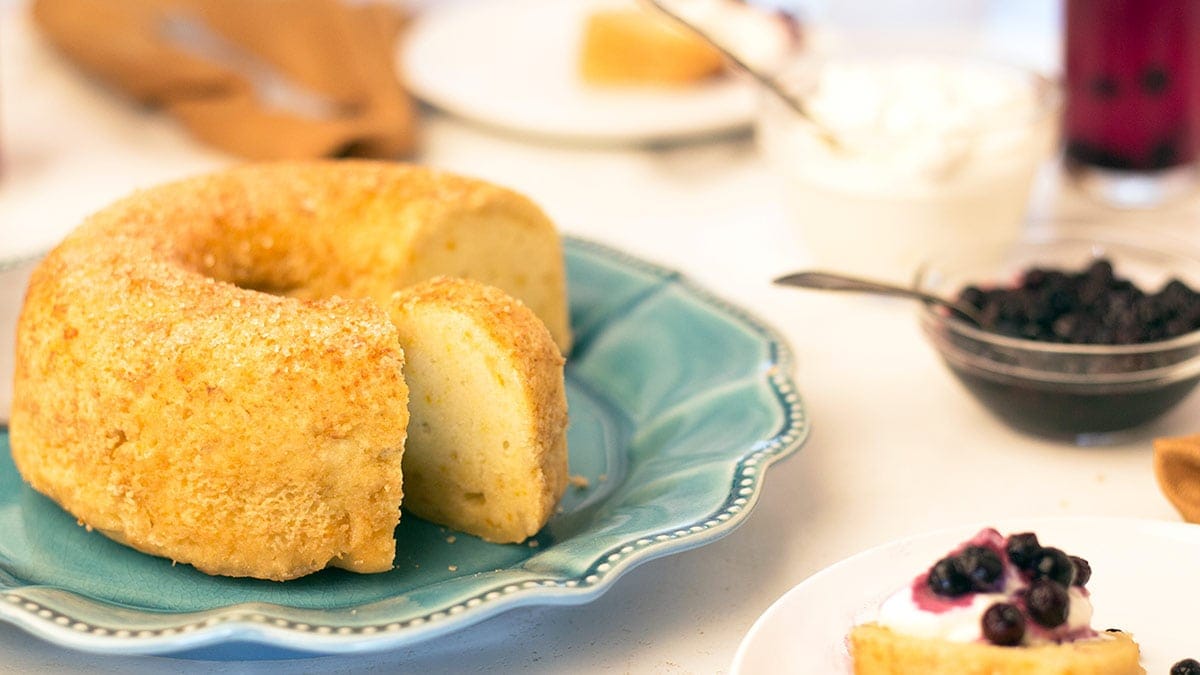
Pressure Cooking: Resulted in a perfectly cooked, but moist cake that was full of flavor. It was not light and fluffy, but pound cake isn't light and fluffy. It sliced beautifully, smelled amazing, and tasted great. The Demerara sugar on top was slightly crunchy, pretty amazing after pressure cooking.
So why didn't I stop there? Because I like to explore all options when cooking to see what the best result will be.
Baking: The first time I baked this pound cake, I thought it was going to be the winning one! It looked beautiful; really beautiful. A cake tester inserted came out clean. I was surprised about the short cooking time, but hey... the Ninja Foodi is magical.
I turned the cake onto a cooling rack and just laughed. The top was cooked perfectly, the bottom was cooked perfectly. The entire middle was raw and just collapsed all over the place! I really wish I had taken a picture to show you! I was too concerned with cleaning it up before it oozed onto the floor.
I then attempted to bake 2 more; lowering the temp in the beginning on one and keeping the temp the same, but covering the second one. They both took forever to bake! I mean forever!
The first one was kind of underdone in places and gummy. The second one was good, but was it better than the pressure cooked one? Not really. It might have been a little lighter in texture, but it took twice as long to make.
After doing a blind taste test, with my husband as the guinea pig, it was determined that baking this homemade pound cake did not result in a better cake and it is so much easier to pressure cook it!
If you want to bake this recipe instead of pressure cooking it, here is the best way I found to do it:
Bake in 7" Fat Daddio Ring Pan on the rack in the low position on 300° F for 20 minutes. Cover with foil and increase the heat to 350° F for 60 minutes. Allow to cool completely.
Do Pans Matter when Baking Cakes?
Absolutely! Different cake pans transfer heat differently. Different Sizes affect the cooking/baking time.
It is very important to understand this so you can adjust recipes to fit the pans you have. I'm the last person that wants you to run out and buy a new pan just because a recipe calls for it. You don't have to, but you might need to make adjustments.
Here are the common types of pans you might have on hand.
8" aluminum ring/bundt pan: You don't have to change the ingredients in this recipe to use an 8" pan, but you do need to decrease the cook time and pressure cook for 25 minutes. Use the same time for browning at the end.
An 8" ring/bundt pan will result in a shorter cake, but that's not going to be a huge deal. If you want to have the same height, you will want to use ¾ lb of the four main ingredients and you can keep the other ingredients the same.
Aluminum loaf pan: This one might be a bit tricky because you have to cook the center without over cooking the outside. I don't have a loaf pan that fits the Ninja Foodi, so I am only making untested suggestions here. I would pressure cook for 40 minutes and natural release all of the pressure.
Silicone pans: Silicone is great for cooking under pressure or baking, but it does not conduct heat as well as glass or aluminum. If you have a silicone cake mold you want to use, due to the numerous sizes and shapes, it is best that you ask about baking times in our Facebook Group: Ninja Foodi 101.
You can also send me an email and I will be happy to try to help you adapt this recipe to the type and size of pan you have.
Here are a few tips for making homemade Pound Cake
Use a stand mixer: It is quick & easy to make this cake with a stand mixer, but you can also use a hand mixer or good old fashioned elbow grease.
Weigh your ingredients: It's always better to weigh your ingredients when baking than to measure by volume like you do with a measuring cup. Kitchen scales are pretty inexpensive and you can find one similar to the one I have right here.
If you don't have a scale, don't worry... I will provide the approximate volume measurements too.
Whip your butter and sugar: you really want to whip up the butter and sugar for a good 5 minutes 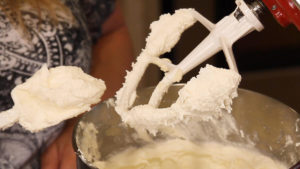 so that is light and fluffy and airy. This recipe does not use any leaveners like baking soda or baking powder, so the whipped butter and sugar are going to give the pound cake some lift and keep it from being too dense.
The whipped butter and sugar should resemble whipped cream. You will still be able to see the sugar granules, but the mixture will be light and fluffy.
If you want to read more about whipping butter and sugar, you can check out this article from King Author Flour on Creaming Butter and Sugar.
Don't over-mix your cake batter: Once you whip that butter and sugar and add in the eggs & vanilla, it is time to add the flour. This is when you don't want to over-beat the mix. I like to add in ¼ cup of flour at a time and mix on low for just a minute until the flour is incorporated and I repeat this until all of the flour is incorporated. Then I turn off the mixer.
What can happen if you over-mix your cake batter is the gluten in the flour will start to form gluten strands and this in turn creates a denser and chewier cake. Great for bread, not so great for cake.
Sift your flour before using: I know, who wants to do this?! No one and, truth be told, I skip it a lot... but not for pound cake. You want to aerate the flour so the particles of flour mix with the fat in the sugar/butter/egg mixture evenly. Once the fat has coated the flour, water won't get in as much to activate the gluten. This is a good thing in cake making.
The easiest way I have found to sift flour is by using a fine sieve strainer or a metal colander like this one.
Let's make a Homemade Pound Cake in the Ninja Foodi!
This is so simple and it's one of those recipes you don't have to write down or look up because you already know the exact ingredients.
- ½ pound of butter (room temp) which is 2 sticks of butter or 1 cup of butter
- ½ pound white sugar which is equal to 1 cup white sugar
- ½ pound eggs (room temp) which is equal to 4 large eggs. *If you have jumbo eggs and don't have a scale, I would use 3 plus the white from the 4th.
- ½ pound all purpose flour which is equal to 1 ¾ cups.
- 1 tablespoon pure vanilla extract (optional)
- zest from one orange (optional)
In the stand mixer, combine the butter and sugar and beat until light and fluffy. Remember to scrape down the side of the bowl every few minutes. My favorite thing to use for scraping is this Mix N Scraper from Pampered Chef.
Add one egg at a time and mix on low until incorporated. Repeat for all of the eggs.
Add in the vanilla extract; and I really recommend using real vanilla extract instead of imitation in this cake. When you only have a few ingredients in a recipe, it is important to use the highest quality ingredients you can. The vanilla extract I usually use isn't fancy, but it is a real vanilla extract and you can find it here.
Add in the sifted flour ¼ cup at a time and mix only until it is incorporated. Don't over-mix.
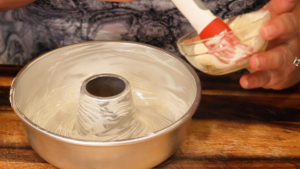 Butter your 7" Fat Daddio Ring Mold Pan. The easiest way to do this is by using a basting brush. I love this silicone basting brush from Pampered Chef for applying the butter.
Add in the 3 tablespoon of Demerara Sugar and roll the granules around in the pan until it is coated. I try not to coat the inner ring so there is less chance of the cake sticking to the center.
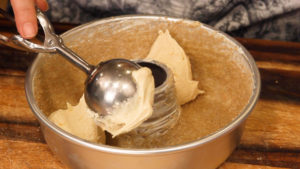 When you are done with the sugar, add the cake batter and smooth the top with a spatula. Place aluminum foil over the cake pan and tent it a bit so the cake doesn't rise and stick to the foil.
Place 2 cups of water into the inner pot of the Ninja foodi. Set the covered cake on the rack in the low position. Set the pressure to high for 25 minutes. Make sure the valve is to the seal position.
When the time is up, allow to natural release for 20 minutes. You may notice the red pin depress between minute 15-17, that means all the pressure has been released. Don't open the lid or remove the cake until the full 20 minutes is up or your cake might not be cooked all the way through.
Allow to cool on the rack for about 5 minutes and then invert onto a cooling rack.
*Optional step: Return the cake to the rack in the low position and place into the Ninja Foodi. Turn on the bake/roast function on 400° F for 5-10 minutes or until desired browness has been achieved. Make sure to check on it every 2 minutes.
Remove and allow to cool for about an hour. 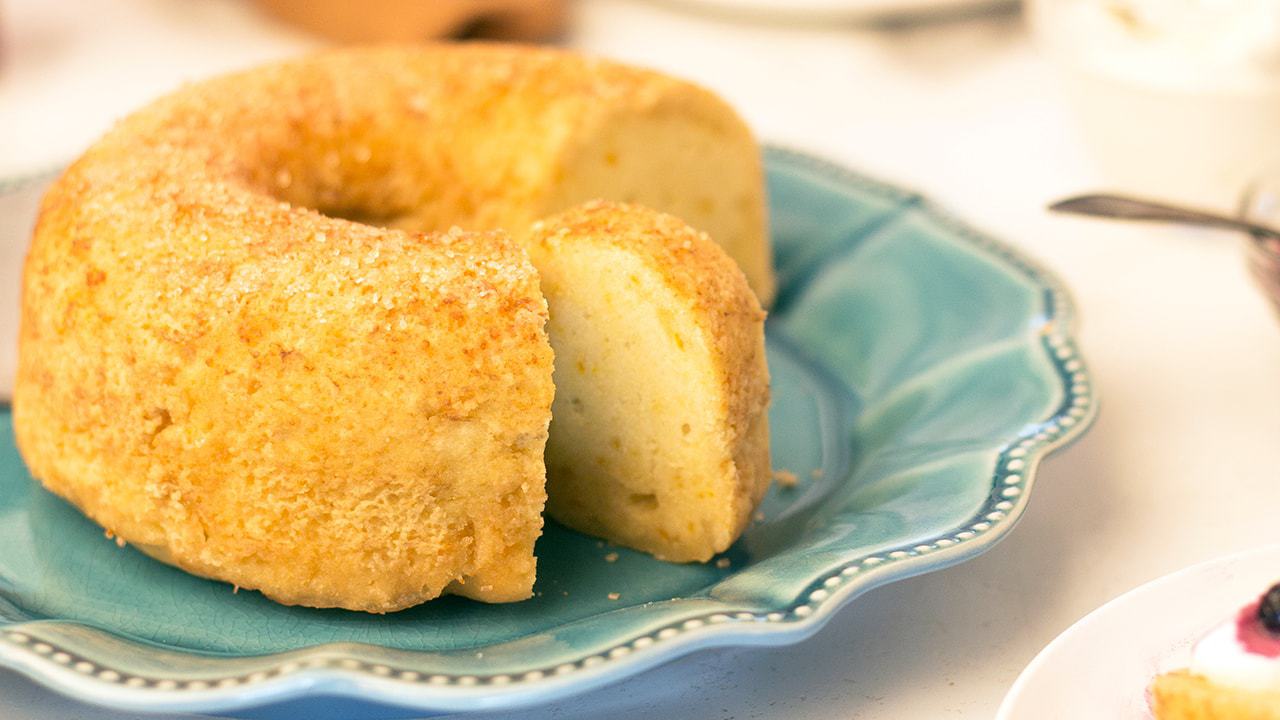
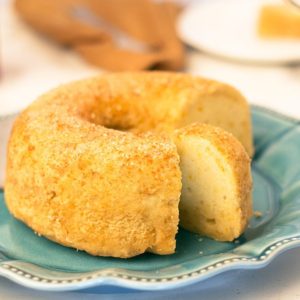
Homemade Pound Cake in the Ninja Foodi
Ingredients
- ½ lb butter 2 sticks or 1 cup room temp
- ½ lb sugar 1 Cup
- 4 large eggs room temp
- 1 tablespoon Vanilla Extract
- ½ lb flour 1 ¾ cups
- 1 orange zest only
- 1 tablespoon butter for greasing pan
- 3 tablespoon Demerara Sugar
Would you like to save this recipe?
Instructions
- Using a stand mixer, combine the butter and the sugar and beat using the paddle attachment until the mixture is light and fluffy. Scraping down the sides every few minutes.
- Add one egg at a time and beat on low until incorporated. Repeat with remaining 3 eggs.
- Add in 1 Tablespoon of vanilla extract and mix just to incorporate.
- Slowly add flour and mix in stand mixer. Mix on low just until all the flour is incorporated, don't over mix.
- Add the zest from one orange and stir to incorporate.
- Butter 7" Ring Mold pan. Add 3 tablespoon of Demerara sugar to the pan and move it around so it sticks to the sides. Try to avoid the center. Add the batter to the cake pan.
- Put 2 cups of water in the inner pot of the Ninja Foodi. Cover the cake with foil and tent it just a bit. Put on the rack in the low position in the Ninja Foodi. Set pressure on high for 25 minutes. Make sure the black valve is in the seal position. When the time is up, allow to natural release for 20 minutes*.
- When the natural release is up, manual release any pressure. There might not be any and the red pin may already be depressed. Set on cooling rack and cool for 5 minutes.
- Invert cake onto cooling rack and gently place the cake back on the rack in the low position. Return the cake to the Ninja Foodi. Set the Bake/Roast function to 400°F and bake 5-10 minutes or until the top is golden brown.
- Remove and allow to cool on the rack for about an hour. Serve & Enjoy!
Notes
- the red pin may depress around minute 15-17 of the natural release, do not open the lid or remove the cake until the full 20 minutes or it may not be cooked all the way through.
Nutrition
ABOUT THE RECIPE AUTHOR, LOUISE LONG
Louise is a full-time recipe creator and food blogger @ The Salted Pepper. She has over 30 years of experience with cooking and recipe development. She owned a restaurant for several years and was a full-time RN until retiring to blog full time.
Louise has several very active Facebook groups that help people with the basics of cooking and getting the most out of the Ninja Foodi.
Ninja Foodi Fresh & Healthy Meals
Seeing the need for easy, delicious, and high quality recipes, she is focusing all of her efforts creating recipes specifically for the Ninja Foodi. Her recipes are easy for the home cook to follow and provide step-by-step instructions.
Louise is also a YouTube creator and you can find most of her recipes in video format on The Salted Pepper YouTube channel.
She is very responsive to messages and eager to help in any way she can.
Helen says
Boy oh boy did I screw up. I forgot the aluminum foil. It’s a beautifully shaped piece of dough, I’ll try again, after I get over the truma. I love your recipes, thank you,
Louise says
Oh no! I hope the next one turns out better for you. I'm surprised it didn't cook even without the foil, I guess too much moisture was present and made it kind of gummy.
Colleen says
Hi Louise,
I made this today with 6oz coconut sugar instead of white sugar and I substituted 1/2 the butter for coconut oil & 1/2 the flour for almond flour. I like lemon, so I used that zest instead and 1/2tsp of pumpkin pie spice. It came out perfect! The almond flour really makes it special. I’m gonna serve it with fresh strawberries & whip cream. Thanks for the recipe.
Mamcia says
Love, love, love. Simple, easy just what I needed 🙂 made one yestarday( gone in 30min) and one today (kids request) I was so sceptical about pressure cakes but Im glad that Igive it a try. Thank You for the recipe 🙂
Louise says
I'm so glad you liked it!
Laura Scheitle says
I did not weigh the ingredients but used exact measurements, pressured on Hi for 25 minutes and after natural release Tokyo foil off and the top was swimming in butter . I h ave no idea what happened. I used 2 sticks butter
Louise says
Did the pound cake cook despite the butter on top? It almost sounds like the butter split from too much heat. I'm not sure why that would have happened because I haven't experienced that with this recipe. I'd like to figure it out, so if you don't mind sharing with me what pan you used and which size foodi you cooked it in, that would be great.
Angela Irving says
I meant baking powder. ☺️