Have you been wondering how to cook a turkey in the Ninja Foodi? Then you are in the right place!
Can you believe I fit a 10 lb whole turkey in the Ninja Foodi? The best part is how wonderful it turned out! I'm sure the first thing you want to know is what size Ninja Foodi do I have. I have both the 6.5 qt and the 8 qt.
The first turkey I bought was an 8 pound turkey and that fit in the Ninja Foodi 6.5 qt. Unfortunately, I overcooked it! I followed my formula for a whole chicken and pressure cooked the turkey for 32 minutes. While it was moist and delicious, it was overcooked and registered about 196° F on my thermometer.
This post may contain affiliate links. If you make a purchase after clicking a link, I may earn a small commission. As an Amazon Affiliate, I earn from qualifying purchases.
I could tell immediately it was overcooked because the leg bones were exposed, but I was really surprised that the flavor and texture were still perfect. So, even if you overcook it, it still is great... just not very pretty! I wish I would have snapped a picture!
Anyway, I am big fan of a pressure cooked turkey and will be doing this from now on! Unless of course, I'm hosting Thanksgiving and need a bigger turkey. Even then, I might consider cooking 2 smaller turkeys instead of 1 large one. Maybe even season them differently. The lightbulb is going off in my head right now!
Let's get into how to cook a turkey in the Ninja Foodi, it's super easy!
What size turkey will fit in my Ninja Foodi Pressure Cooker & Air Crisper?
So, there are 3 sizes of the Ninja Foodi Pressure Cooker & Air Crisper now and I'm really sorry to say, but I don't think I've ever seen a turkey small enough to fit in the newer 5 quart model. Maybe a small turkey breast, but not the whole turkey. No worries though, if you have the 5 qt Ninja Foodi, look for the smallest turkey breast you can find and see if it fits! Heck, take the inner pot with you and check right in the store. People might look at you strangely, but who cares! If you do this, please snap a picture and send it to me!
The 6.5 qt will fit up to an 8 pound turkey. I know this because I made one. The only issue that I can see with an 8 pound turkey is not being able to put down the TenderCrisp lid to crisp the skin. This isn't a deal breaker for me because I like the idea of having the turkey cooked in under an hour and putting it in a roasting pan in the oven to crisp up just before serving.
This will give you time to use the Ninja Foodi for your delicious side dishes. I have some wonderful recipes coming soon, like a corn pudding, scalloped potatoes, mashed sweet potatoes with a topping that will blow your mind, and a few others!
If you can find a turkey smaller than an 8 pound, you will probably be able to close the TenderCrisp lid and crisp it right in the pot.
The 8 qt will fit up to a 10 pound 4 ounce turkey. Mine weighed in at 10.38 pounds and it fit fine for pressure cooking. I ran into the same issue as the I did with the 8 pound in the 6.5 quart, it just sits a little too high to close the TenderCrisp lid. Of course you can do the same thing I recommend above and pressure cook the turkey ahead of time and crisp it up in the oven just before serving. Or, you can get an 8 pound turkey and that will fit perfectly in the 8 quart Ninja Foodi.
Should I brine my turkey before cooking?
From that point forward, I have never cooked a turkey without brining it first.
Some argue against brining, saying that, while the turkey meat stays moister, the juices aren't flavorful. I disagree completely and have found that, not only does the turkey meat not dry out, it tastes great AND the juices are not watery like some claim.
Of course, this is my opinion only. If you haven't brined a turkey before, I encourage you to try it once and make up your own mind.
How to brine a turkey using the Ninja Foodi
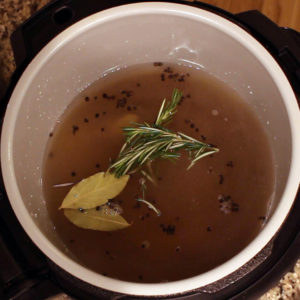
The brining process is easy and it's made even easier with the Ninja Foodi! You simply throw the brine ingredients into the inner pot with some water and pressure cook for zero minutes. This means that you set the time on the Ninja Foodi to zero and once the Ninja Foodi comes up to pressure, the display will read done and you can immediate release the pressure.
The ingredients in the brine are infused into the water during the time to pressure. It used to take me a long time to boil the brine on the stove, but now I can get it done in a fraction of the time.
I have always used a recipe from the Pioneer Woman for her Favorite Turkey Brine Recipe and it's perfect, so I felt no need to change any of the ingredients. I did change the amounts so that everything fits in the inner pot of the 6.5qt or the 8 qt.
What you will need for this wonderful brine recipe:
- 8 cups water
- 1 cup apple cider
- ½ cup fine grind sea salt or Kosher salt
- ⅔ cup brown sugar
- 1 Tablespoon whole peppercorns
- 2-3 cloves of minced garlic
- 3 sprigs of fresh rosemary
- 2 bay leaves
- 1 orange, we only use the peel
Instructions:
- Gather all of your ingredients. Turn the Ninja Foodi on high sear/sauté and add 8 cups of water and 1 cup of apple cider. I made my own apple cider in the Ninja Foodi and it is wonderful, you can find the cookbook with this recipe and many more here: Flavors of Fall Ninja Foodi Cookbook Of course, you can also use store-bought apple cider.
- While the liquid is heating, add the salt and brown sugar and mince your garlic and add to the pot. Add the peppercorns, rosemary springs, and bay leaves. Do not add in the orange peel yet. Many times when you pressure cook citrus peels it releases the bitterness in the peel and the pith and infuses the liquid with bitterness.
- Put the pressure lid on, turn the valve to seal. Set the Ninja Foodi to high pressure and the time for zero minutes. To do this, just hit the down arrow until the display reads 00:00 and hit start. The brine will boil during the time to pressure and that is all we need to do.
- While the Ninja Foodi is coming to pressure, peel the rind off of the orange. Try not to get too much of the white part or pith. It is bitter.
- When the Ninja Foodi beeps that it is done, immediately release the pressure.
- Remove the lid and add in the orange peels.
- Add 3 cups of ice to cool the liquid down. You cannot put the turkey in a hot brine, so it needs to cool down to room temp or colder. You can either put it in the fridge or cool it down in the pot sitting in a sink full of ice water.
- Put your thawed turkey in the inner pot once the liquid is cool. Make sure to remove anything that might be in the turkey cavity. If the turkey is not completely submerged and you have more room in the pot, add some water to bring the liquid level up.
- Cover the pot and put in the fridge for 16 to 24 hours. I like to use this silicone lid when I want to store food in the inner pot, but you can cover with foil or even the pressure lid. Just be sure to clean the pressure lid very well after using to cover raw turkey.
- When the turkey has finished brining, dump the liquid into the sink using a strainer to catch the solid ingredients. Discard the solids and rinse the sink.
- Fill the sink with cold tap water and put the turkey in the sink. Rinse it well with cold tap water and let it sit in the water for about 15 minutes. This will remove any excess salt.
- Your turkey is now brined and ready for you to season up and cook!
If you want to see exactly how I brined and cooked my 10 pound turkey, the step-by-step video link is right HERE: How to Cook a Whole Turkey in the Ninja Foodi
How to determine your pressure cook time for a whole turkey
You guess! Just kidding. Although, that is exactly what I did the second time around. The first turkey I pressure cooked was an 8 pound turkey and I did it in the 6.5 qt Ninja Foodi. I figured the turkey would cook just like a chicken and used my formula of 4 minutes per pound. Nope, not even close. The turkey was way overdone. Don't get me wrong, it was still moist and delicious (that's the beauty of pressure cooking), but it wasn't very attractive with the bones sticking out all over the place.
I desperately searched for another 8 pound turkey and just couldn't find one. My poor husband went to 4 different stores looking for one, as well, and none were to be had. So, if you want to cook a whole turkey in the Ninja Foodi and you want to do it in the 6.5 qt or even in the 8 qt, start looking NOW.
A 10 pound turkey will fit in the 8 qt, but you most likely will not be able to use the TenderCrisp lid to crisp it up. My first choice would be an 8 pound turkey for the 8 qt for sure.
Okay, back to timing. I formed an educated guess based on my experiences and decided that after a certain number of pounds, the 4 minutes per pound is too long. I also kept in mind that we would most likely be crisping up the skin either in the oven or in the Ninja Foodi and that will raise the temperature some. I always err on the side of undercooked instead of overcooked because we can fix undercooked.
Even in my video, the turkey was overcooked slightly and I only went under pressure with a 10 pound turkey for 21 minutes.
Please know that this is only a guideline as there are many factors that change cooking times. Always rely on an accurate thermometer to determine doneness.
My suggestion is to take the total weight of the turkey and multiply it by 2 and then subtract 1 to get the pressure cooking time.
For example:
- 8 pounds multiplied by 2 is 16, subtract 1 and the cook time will be 15 minutes.
- 10 pounds multiplied by 2 is 20, subtract 1 and the cook time will be 19 minutes.
Also, keep in mind the time to pressure and adjust timing accordingly. The formula above is taking into consideration a time to pressure around 18 minutes. If your time to pressure is much quicker, you may want to add a minute or two to the total cook time. If it is much longer, decrease the time by a minute.
The amount of liquid you put in matters too, my recipe calls for just ½ cup of water and if you add more that can increase your time to pressure.
Remember, it is always better to undercook than overcook. You can even go back under pressure for another minute or two if you need to, but once the turkey is overdone, there is no reversing it. However, the beauty of pressure cooking a turkey is that even if you overcook it, the meat will not be dry. It may not look pretty, but it will still taste delicious!
If you pressure cook your turkey and follow my formula, I really want to hear your feedback! I hope everyone has great success!
*** Through your wonderful feedback, I wanted to update this post to let you know that organic turkeys are taking longer to cook. So, if you have an organic turkey, I would suggest cooking for 2 minutes per pound and adding 3-5 minutes of PC time.
How to cook your turkey in the Ninja Foodi
Now that you have determined how long to cook your turkey, let's get into how to do it. This process will be the same if you brine or don't brine your turkey.
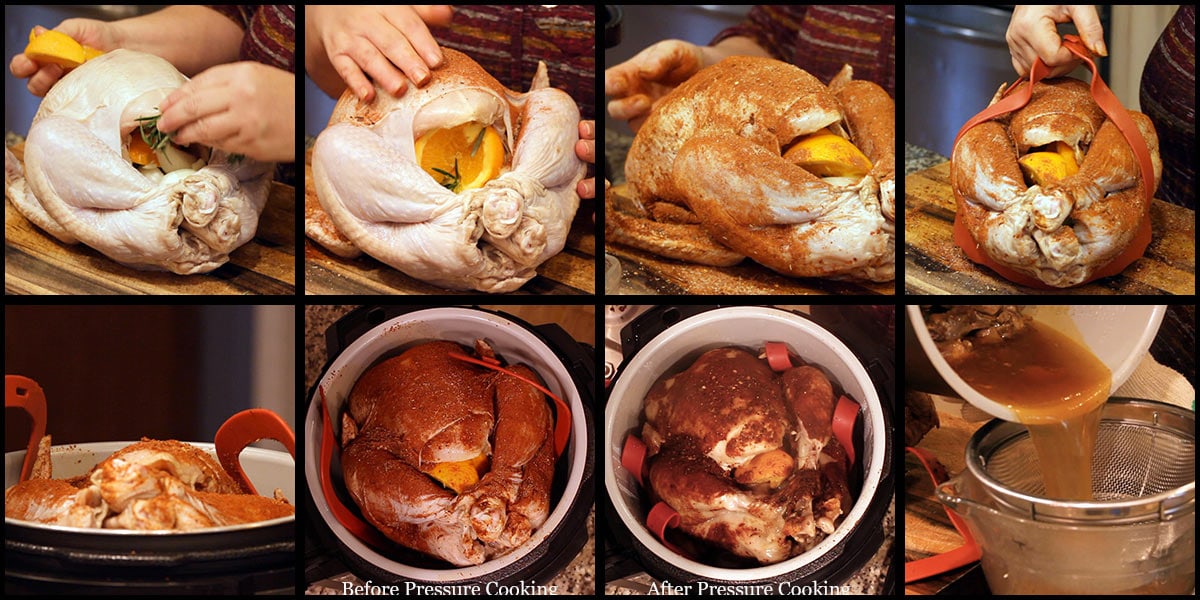
Make sure the turkey is well-rinsed and remove anything inside the cavity. Usually, there is a packet that contains the heart, liver, and gizzard. Sometimes the neck is in there, too. I don't throw those away. I put them in the pot when I pressure cook the turkey to flavor the stock, but that is optional.
Pat the turkey dry with paper towels. The rub will adhere better if the turkey is dry.
Rub the turkey all over with the dry rub. You can use my recipe or your own concoction or simple salt and pepper. I do recommend seasoning the outside of the turkey.
Put ½ cup of plain water or chicken stock in the inner pot of the Foodi. You don't need more than this because the turkey is going to give off a lot of liquid.
You will want to put your turkey on a (affiliate link)silicone sling or if it is small enough, you can use the rack in the low position. If you don't have a silicone sling, you can make one out of foil. If you want to see what that looks like, I show it this recipe for Apple Cake with Caramel Glaze.
Lower the turkey into the pot and put the pressure lid on. Turn the valve to seal. Set the time based on the size of your turkey. Allow the pressure to natural release for 15 minutes. Release the remaining pressure.
Remove the turkey and strain the liquid into a bowl. If your turkey is small enough, you can put the turkey back into the Ninja Foodi to crisp up the skin using the AC function. Or, you can always transfer the turkey to a roasting pan and crisp it up with the broil setting (or high heat setting) in the oven just before serving.
And, that is how you cook a turkey in the Ninja Foodi! Easy Peasy!
What if I want to cook just the Turkey Breast?
UPDATE: I just finished my recipe post for Turkey Breast and I've made some changes! For a turkey breast OVER 6 pounds that you want to pressure cook and air crisp, multiply the weight by 2 and subtract 4 to get your total minutes of cook time. If you don't plan on Air Crisping the formula below will work fine. You can find my Turkey Breast recipe right here: Ninja Foodi Turkey Breast
Although, I haven't done this yet, I did get some feedback from someone who did. She had a 6 pound turkey breast (bone in, skin on) and pressure cooked it on high for 15 minutes with a 15 minute natural release. She said it was fantastic, but overcooked. The temp was 170°F.
So, based on that information, she told me she would suggest pressure cooking a 6 pound turkey breast for 10 minutes with a 15 minute natural release. This makes total sense to me.
I think the formula for a turkey breast that is bone in and skin on would be pretty similar to the whole turkey, but since the breast meat cooks faster, instead of subtracting 1 minute from the time, let's subtract 2 minutes.
So, for turkey breasts that weigh 6 pounds or more, multiply the number of pounds by 2 and then subtract 2. 6 times 2 equals 12, minus 2 equals 10 minutes.
Since I have not had any experience yet with turkey breasts under 6 pounds, I'm hesitant to give any advice. I will update this section or create a new post on cooking just the turkey breast after I experiment with different sizes.
How to carve your turkey
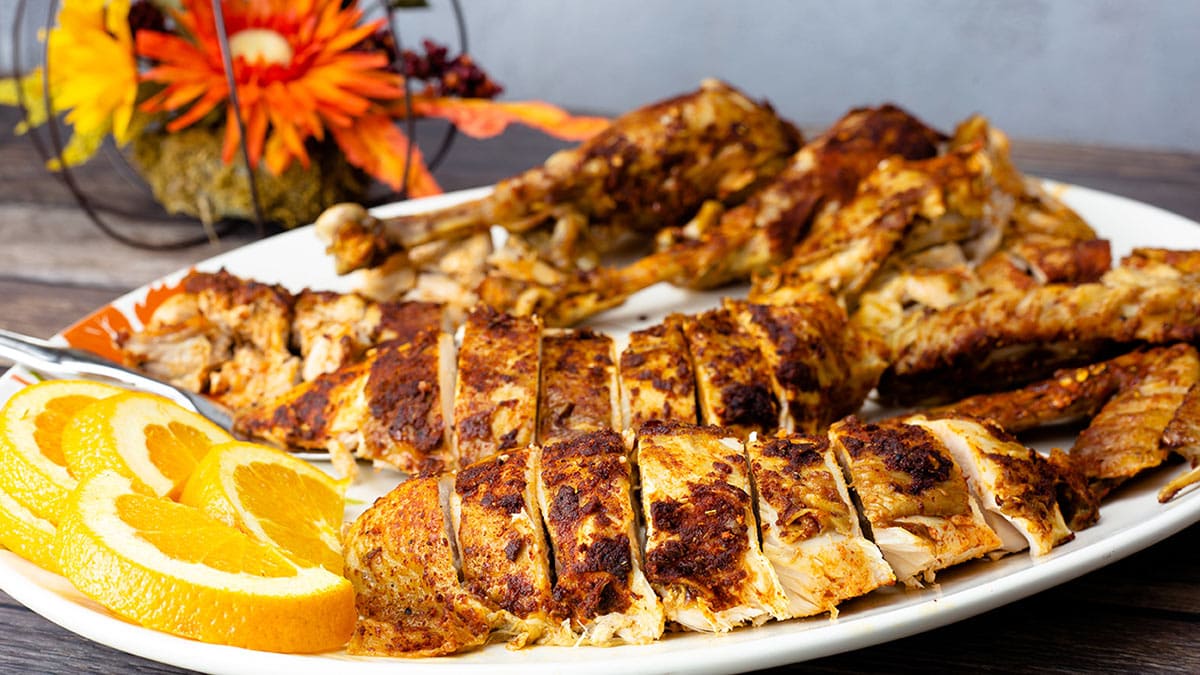
No matter how you choose to cook your turkey, the carving principles are the same. While there are many ways to approach carving a turkey or a chicken for that matter, the way the professionals do it results in the most usable meat and the prettiest presentation.
I am no expert on this for sure, but here is a video showing you the basic steps to carving your turkey. You can find the full video on YouTube right HERE: How to carve a turkey
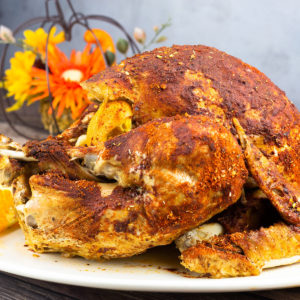
Whole Turkey in the Ninja Foodi or Pressure Cooker
Print Recipe Pin RecipeIngredients
Seasoning Blend for Turkey Rub
For the Turkey
- 8 lb turkey
- 2 stalks celery
- 4 cloves garlic
- ½ onion
- 1 orange
- 3 sprigs rosemary
Instructions
- Pat the turkey dry after rinsing. Stuff the cavity with the celery, onion, peeled garlic cloves, orange slices, and rosemary.
- Rub the seasoning blend all over the turkey. You won't use all of it, but reserve the rest for later.
- Place the turkey on a silicone sling or you make one out of foil.
- Add ½ cup of water into the inner pot. Lower the sling with the turkey into the inner pot.
- Put the pressure lid on and turn the valve to seal. Select high pressure and set the time to 15 minutes. See notes additional information on timing.
- Let the turkey natural release for 15 minutes and then release the remaining pressure.
- Check the temperature, it should read at least 160° F. If the temperature has not reached 160° F, you can bring it up to the correct temperature by roasting. The temperature will rise an additional 5-10° during the crisping or while it rests if you are skipping that step.
- If your turkey is small enough, you can crisp the skin using the Roast or Broil function on the Ninja Foodi. Or, you can crisp the skin in the oven.
- Carve and serve the turkey! See post for carving instructions. Enjoy!
Notes
Nutrition
ABOUT THE RECIPE AUTHOR, LOUISE LONG
Louise is a full-time recipe creator and food blogger @ The Salted Pepper. She has over 30 years of  experience with cooking and recipe development. She owned a restaurant for several years and was a full-time RN until retiring to blog full-time.
Louise has several very active Facebook groups that help people with the basics of cooking and getting the most out of the Ninja Foodi.
Ninja Foodi Fresh & Healthy Meals
Seeing the need for easy, delicious, and high quality recipes, she is focusing all of her efforts creating recipes specifically for the Ninja Foodi. Her recipes are easy for the home cook to follow and provide step-by-step instructions.
Louise is also a YouTube creator and you can find most of her recipes in video format on The Salted Pepper YouTube channel.
She is very responsive to messages and eager to help in any way she can.


Rob
Louise , another hit . I am a single guy and like to cook things not to incredibly complicated . Followed your recipe including rub and brine ,came out great .pressure cooked my bird just under 10lb turkey for 16 minutes then put in the oven broiler for 15 min came in at 168 degree . My opinion taste =9 presentation = 5 ease= 9 .I was finished in an hour . Overall awesome !
Louise
I'm so glad to hear that!
Jenn
This looks great -- thanks so much for your recipe! I actually wanted to try the Steamcrisp function on my Foodi XL - I can't seem to find anyone else brave enough to try a whole turkey in their Foodi! According to the cookbook that came with the Foodi XL, a whole chicken 5-7lbs should be steam crisped on 365 degrees for 60-80 min. My turkey is exactly 10lbs, do you think I should just pressure cook & air fry per your instructions, or bravely attempt to steam crisp and increase the time?
We did chicken quarters on the steam crisp function and they were delicious!
Louise
In theory the steam/crisp would work great for a turkey, but the issue with the steam/crisp is the short steam time compared to the overall cooking time of a 10 pound turkey. Then there is the issue with the turkey being in such a small space and relying on the fat to circulate dry heat (after the steam dissipates) to cook it evenly and fully while not burning or drying out the top of the turkey. I'm sure it can be done, but without ever trying it, I can't really advise on time/temp. It's completely up to you if you want to try it out, just make sure to allow for enough time and plan B.
Anne Robinson
Hello from U.K. I have a 3kg turkey breast roll , stuffed with sausage meat and various herbs , wrapped in bacon … any suggestions re booking it in the ninja 15 in 1 ?
Very kind regards
Anne
Louise
I would use bake/roast at a low temp, like 135C and bake it so the bacon fat renders and the bacon crisps up. Make sure the internal temperature where the stuffing is reaches 74C. I don't know how long it will take, but I would plan on 90 minutes. You may have to tent with foil towards the end if the bacon is getting too done.
Karen Crook
This was sooo good, absolutely scrums and delicious! I think it’s amazing that I could put my 10 lb turkey in the Foodi and it turned out so well. The flavor was amazing? Browned it in the oven after pressure cooking. Such a hit with my family. Best turkey I’ve ever had.
Louise
AWESOME!
Linda Gray
I have always baked the turkey in a bag and used the broth to make my noodles. Can you use the broth of the turkey after PC for the noodles??? I want to try cooking the turkey in my Ninja but I would also still like having my noodles. The broth from the turkey is so rich and makes the noodles delicious.