
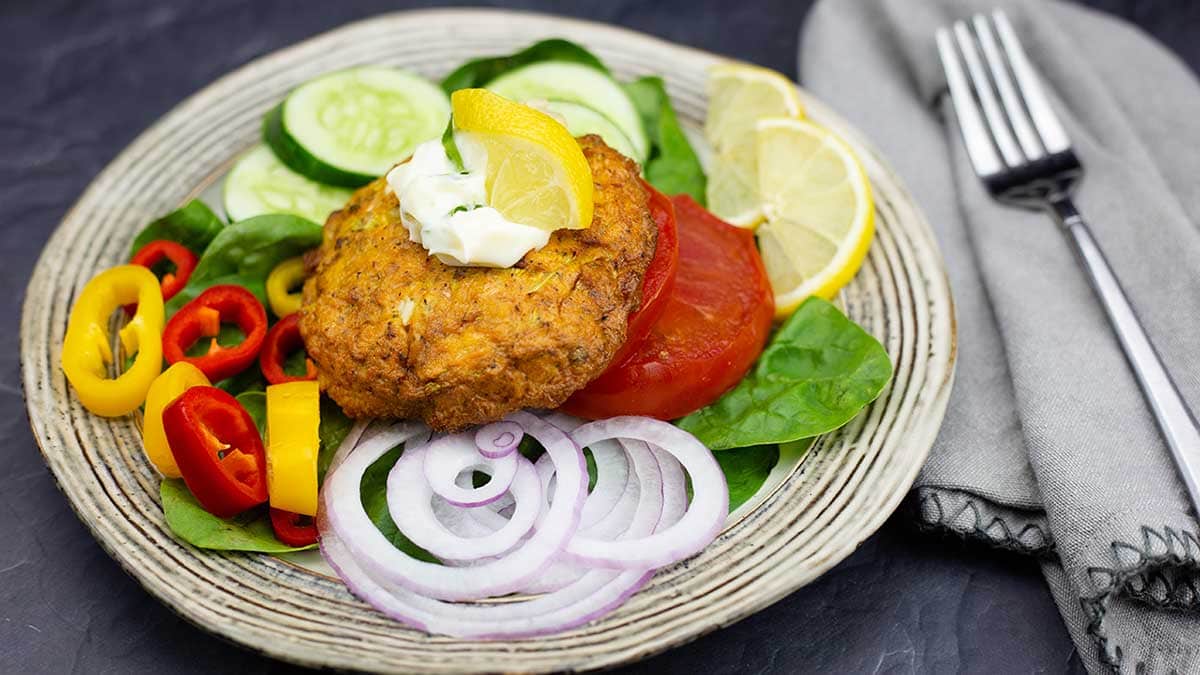
These Low Carb Salmon Patties are so easy to make, taste wonderful, and they are so versatile! The basic seasonings will pair well with almost anything and they are super healthy!
Would you like to save this recipe?
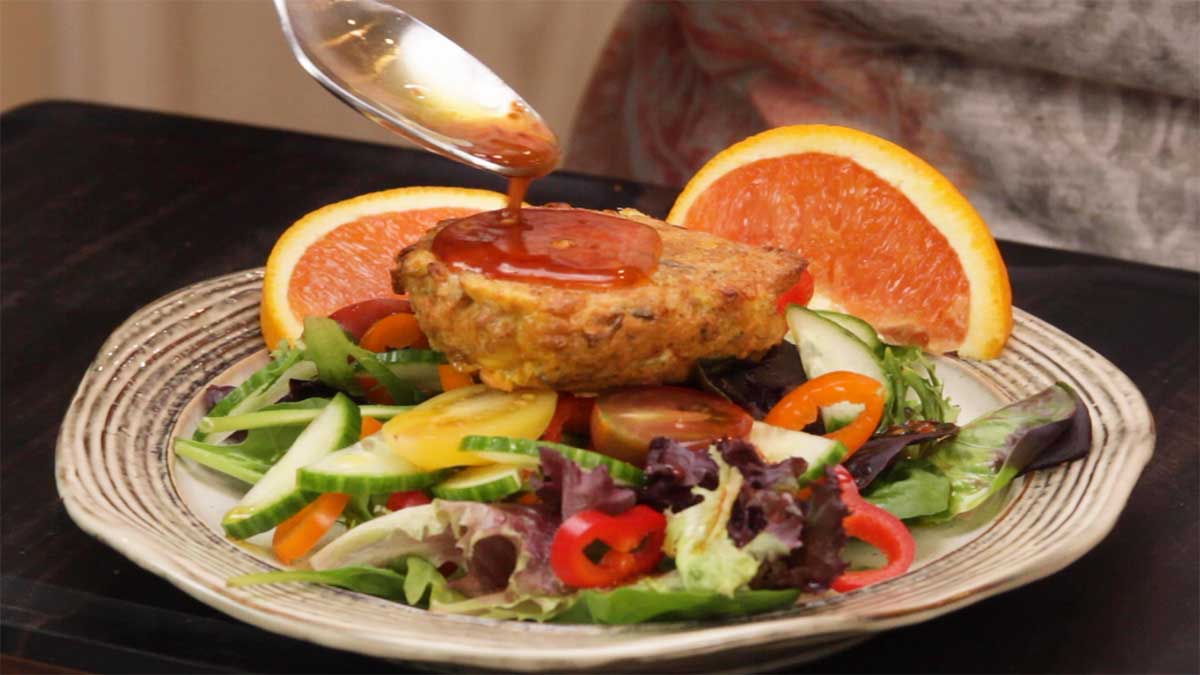
During the testing of this recipe, I made about 10 of them and I don't even really like salmon... BUT, I loved these low carb salmon cakes! I usually put them on a salad and used whatever type of dressing I felt like.
This post may contain affiliate links. If you make a purchase after clicking a link, I may earn a small commission. As an Amazon Associate, I earn from qualifying purchases.
They paired perfectly with whatever flavors I felt like that day, even an Asian salad dressing!
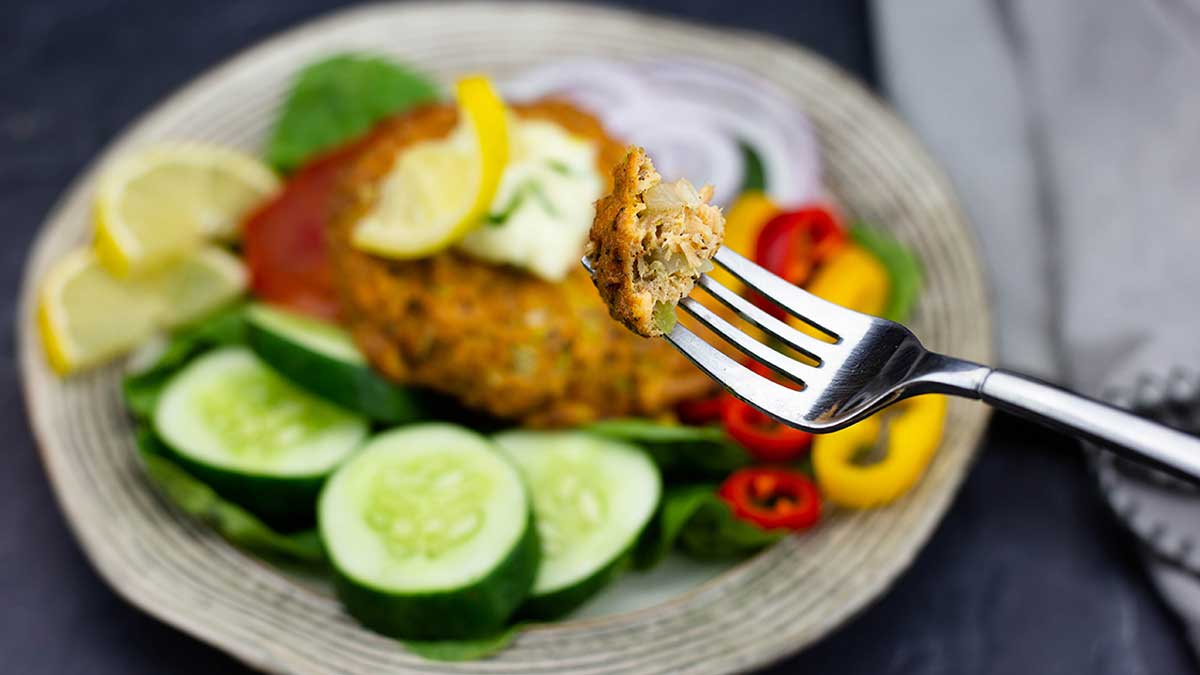
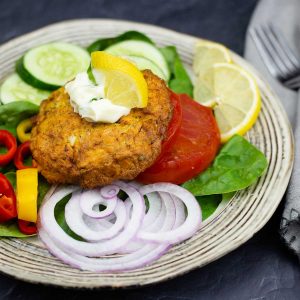
On the days when I "cheated" and felt like a sandwich, I put the salmon croquette on a bun with lettuce, tomato, onion, and a tarragon mayo. Delicious!
You can even serve them beside some roasted veggies and bit of squeezed lemon.
Frequently Asked Questions
Absolutely! I do it all the time. Reheat in the microwave or in the Ninja Foodi on the bake/roast function on 300℉/150℃ for about 8 minutes.
They will stay good in the fridge for 2-3 days
Yep! You can make up as many salmon patties as you want. Just increase all the ingredients according to how many you want to make.
Yep. You can freeze them uncooked or cooked. A tip for freezing is to place them on a sheet tray lined with parchment and put them in the freezer. When they are frozen solid, transfer to a freezer bag and then you can pull one out anytime you want it.
Of course! I encourage you to experiment with the basic recipe and spice it up however you like.
What is the Difference Between Salmon Patties, Salmon Cakes & Salmon Croquettes?
I wondered the same thing when I saw the name croquettes pop up on Facebook. Someone was asking for a recipe for Salmon Croquettes and I literally had no clue what that was!
So, I did what I always do when I don't know what something is. I Googled it. A funny thing happens when you Google Salmon Croquettes. Recipes for what I call Salmon Cakes and Salmon Patties pop up. So, are they the same thing?
That is up for discussion! If you look up the term croquette, it usually refers to foods that have a binder (mashed potatoes or ground meat) and a filler (like egg and bread crumbs), are cylinder in shape (like a log), AND breaded then deep fried.
Some common types of croquettes are; potato croquettes, meat croquettes, and vegetable croquettes.
So, salmon croquettes would be similar to a salmon cake or salmon patty, but, in my opinion, would have to be breaded on the outside to really be considered a croquette. Since I'm keeping these Salmon Patties low carb, I didn't add any breading.
If you wanted to use this base recipe and make salmon croquettes, you absolutely can and I'll go over my suggestions for that below.
As far as Salmon Patties or Salmon Cakes go, the terms are interchangeable and, in my experience, mean the same thing. I've also heard salmon cakes be referred to fish cakes, although I think it is more common to use cod or another flaky type of fish.
As with everything in the food world, there are multiple names for similar foods and, at the end of the day, it makes no difference what you call something as long as you love it and want to eat it!
How to Make Salmon Croquettes in the Ninja Foodi
Since the main difference between salmon patties and salmon croquettes is the breading on the outside, it is easy to turn this recipe into a croquette.
You will need to make a few changes though, starting with the filler. In my low carb salmon patties, I don't add any type of filler to keep them as low cal and low carb as possible, but they will not hold up when breaded as well as if you added a filler.
I would recommend adding some type of bread crumb or even crushed Ritz crackers and a little mayonnaise or even a thick bechamel sauce to the mixture to really hold it all together.
Chill the formed patties for about 30 minutes, then lightly coat with flour, egg, and then either bread crumbs or a 50/50 mixture of bread crumbs and panko.
Make sure the Ninja Foodi is preheated on broil with the basket or (affiliate link)Sear 'n Sizzle in the inner pot for a full 10 minutes.
Spritz the basket or Sear 'n Sizzle with a little oil, set the croquettes on the the grate or in the basket and spritz the top with oil. Air Crisp on 390℉/200℃ for a full 5 minutes. Flip and spritz again if needed. Air Crisp another 5 minutes or until the breading is nicely brown and crispy.
Serve & Enjoy!
How to Make Salmon Cakes or Patties with a Filler
I've made salmon patties with and without fillers (like breadcrumbs or crackers), and, honestly, I like them better without. However, adding a filler will increase the amount you can make with the same amount of salmon, so I wanted to give my suggestions for using a filler.
I have probably made salmon patties over 100 times for my residents when I owned an assisted living. They loved them!
I never followed a recipe; instead, I just threw in various seasonings and made them different each time. The filler I used always stayed the same, though.
Here is basically how I made them:
Yield: 6-8 patties
- 14 ounces of canned salmon
- about 10-15 Ritz Crackers, crushed
- 1 egg
- ½ cup mayo
- desired seasonings (usually either salt, pepper, dried dill OR Old Bay seasoning)
I didn't have the Ninja Foodi then, so I heated a pan on the stove with butter and pan fried them until they were golden brown.
They would be just as delicious broiled in the Ninja Foodi using the directions in this recipe.
What Type of Salmon is Best to Use?
You can use any cooked salmon you like, but what I find the easiest is canned salmon. If you aren't used to buying canned salmon, there are several kinds and some have small pin bones in them.
You can certainly still make these salmon patties with the kind of salmon that has bones, but it is so much easier to get the kind without.
The best canned salmon I have found is a product that Sam's Club sells. It's called Member's Mark Canned Atlantic Salmon and has nice chunks of salmon without bones!
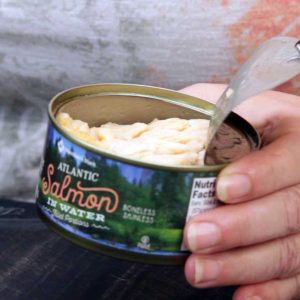
It also isn't fishy tasting and, for someone like me who doesn't love salmon, this is important.
If you don't have a Sam's Club near you or aren't a member, you can also find canned salmon in most grocery stores. In my experience, the 14 oz cans usually have bones and the ones that are boneless are smaller cans and clearly will say boneless.
Don't get too caught up in finding boneless salmon though, the bones aren't a big deal. I used to make a salmon and pesto dip with salmon that had bones and they crush up so easily, what I couldn't remove I just left. The bones aren't like hard bones in a chicken wing, they are very soft and full of calcium.
You might also see red salmon and pink salmon in the can. I'd go for pink salmon in this recipe, for sure. Not only does it have a little softer texture, it isn't as rich in flavor and won't overpower your seasonings.
Do I Have to Make These in the Ninja Foodi PC & AC?
Nope. This is a simple recipe that can be cooked a ton of different ways. Here are my time and temp suggestions.
Traditional Oven: Preheat on broil. Place salmon patties on a tray and broil for 7 minutes. Flip and broil another 7 minutes or until they are lightly brown and cooked through.
Stovetop: Heat a skillet with about a tablespoon of butter or oil over medium high heat. Add the salmon patties and cook on one side about 5 minutes. Flip and cook another 5 minutes. Lower the heat if needed.
Ninja Foodi Digital Air Fry Oven: Place the salmon patties on the tray. Set the oven to Air Fry at 400℉ and cook for 5 minutes. Flip and cook another 2-5 minutes.
Ninja Foodi Indoor Grill: Preheat on AC at 375℉ with the air fry basket in the grill. Spritz the basket with oil and place the salmon patties in the basket. AC on 375℉ for 5 minutes. Flip and cook another 2-5 minutes.
Do I have to have the Sear 'N Sizzle Grill Grate to make this recipe?
Nope, but it works great! If you have one, I definitely suggest using it on the griddle side.
In case you don't know about the (affiliate link)Sear 'N Sizzle grill grate, it is the best Ninja Foodi Accessories ever! Basically, it turns the Ninja Foodi PC & AC into a little grill.
If you want to see a demonstration video on it, I have one on YouTube. Here is the link: Grill Grate Sear 'N Sizzle Review & Demonstration.
You cannot get these anywhere except through the company directly, here is my affiliate link: (affiliate link)Sear 'N Sizzle grill grate
Don't worry if you don't have the grill grate and want to make this recipe, I have tested it using the basket and it works just fine. The MOST IMPORTANT thing to remember when using the basket is to preheat a FULL 10 minutes on broil and spritz the bottom with a little oil. Otherwise, your salmon cakes may stick.
Did you know?
That you can regrow celery from the ends? I was so excited when I put the end of my celery bunch in water and not only did it root, it grew new stalks.
Even if the stalks are big enough to use in place of regular celery, the beautiful green leaves and tender stalks are great for this recipe!
Check it out!
How to make Low Carb Salmon Patties in the Ninja Foodi PC & AC
One of the best things about this recipe is how easy it is to make. Once you grab the ingredients, a mixing bowl, a plate, and a little parchment and most of the work is done already.
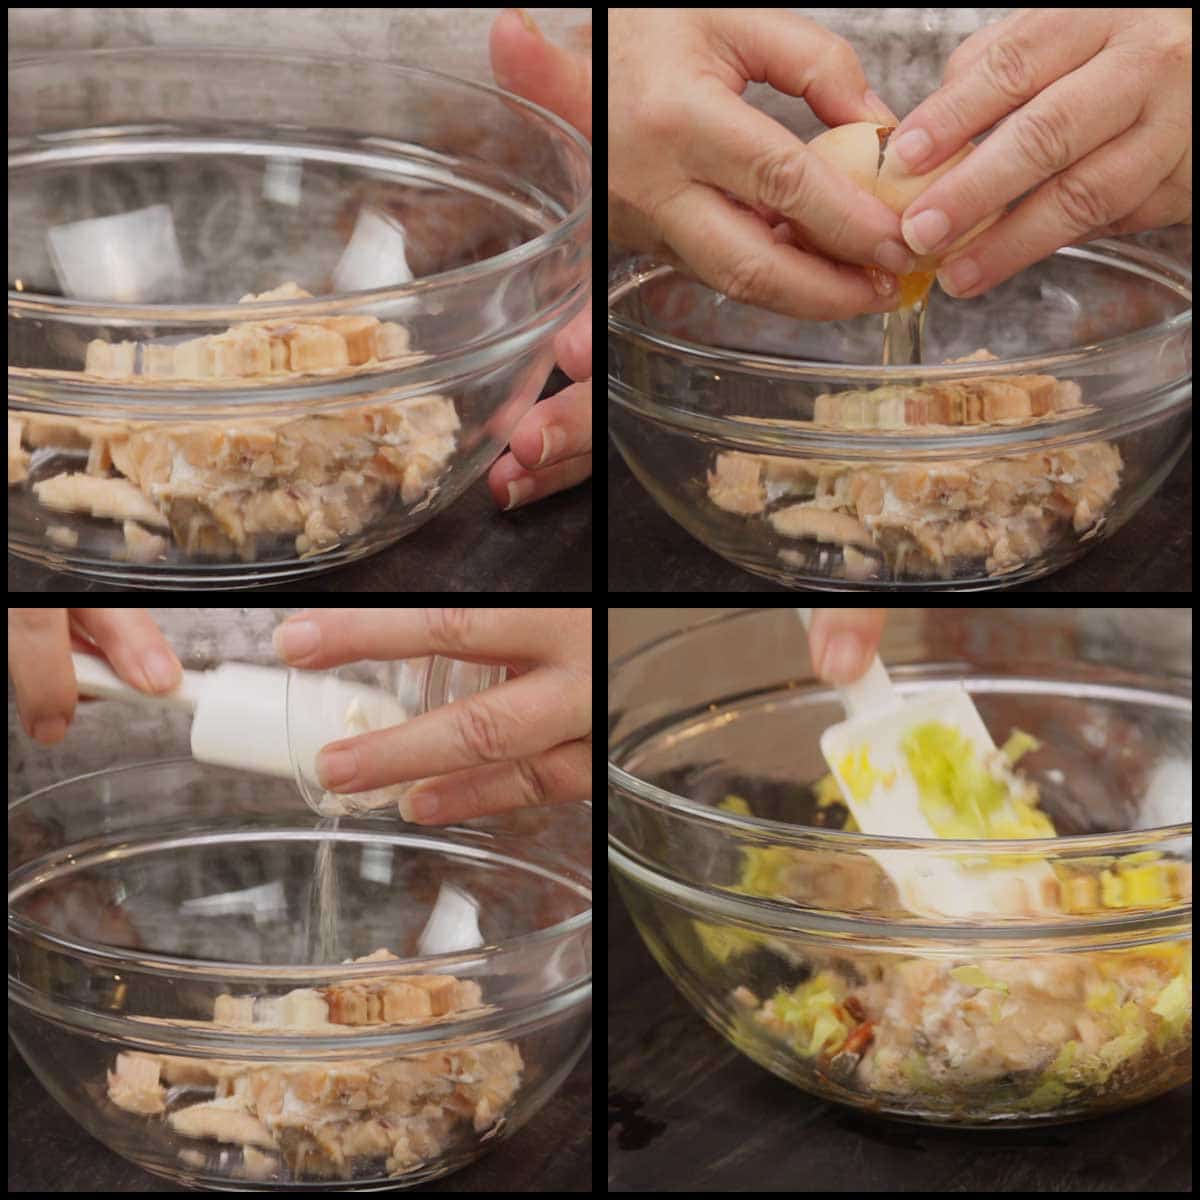
Drain the water from the salmon and put the salmon chunks in a medium size mixing bowl.

Finely dice the celery. You can use a small stalk of celery or use the very center piece that usually gets thrown away. You know, the one that is really tender with leaves. That part works the best in this recipe. You will need about ¼ cup. I love the way the leaves of the celery look in this recipe, so please use them!
Add the egg (you don't even have to beat it) directly to the bowl, along with the seasonings and the celery. Mix to combine. Make sure the seasonings are mixed evenly.
Form the salmon patties. It's easiest to do this by hand because there isn't any filler and the mixture is very loose and wet. Scooping doesn't work as well.
Place them on a parchment lined tray or plate that will fit in your fridge and refrigerate for 30 minutes. This firms up the patties and keeps them from falling apart or sticking when they are cooked.
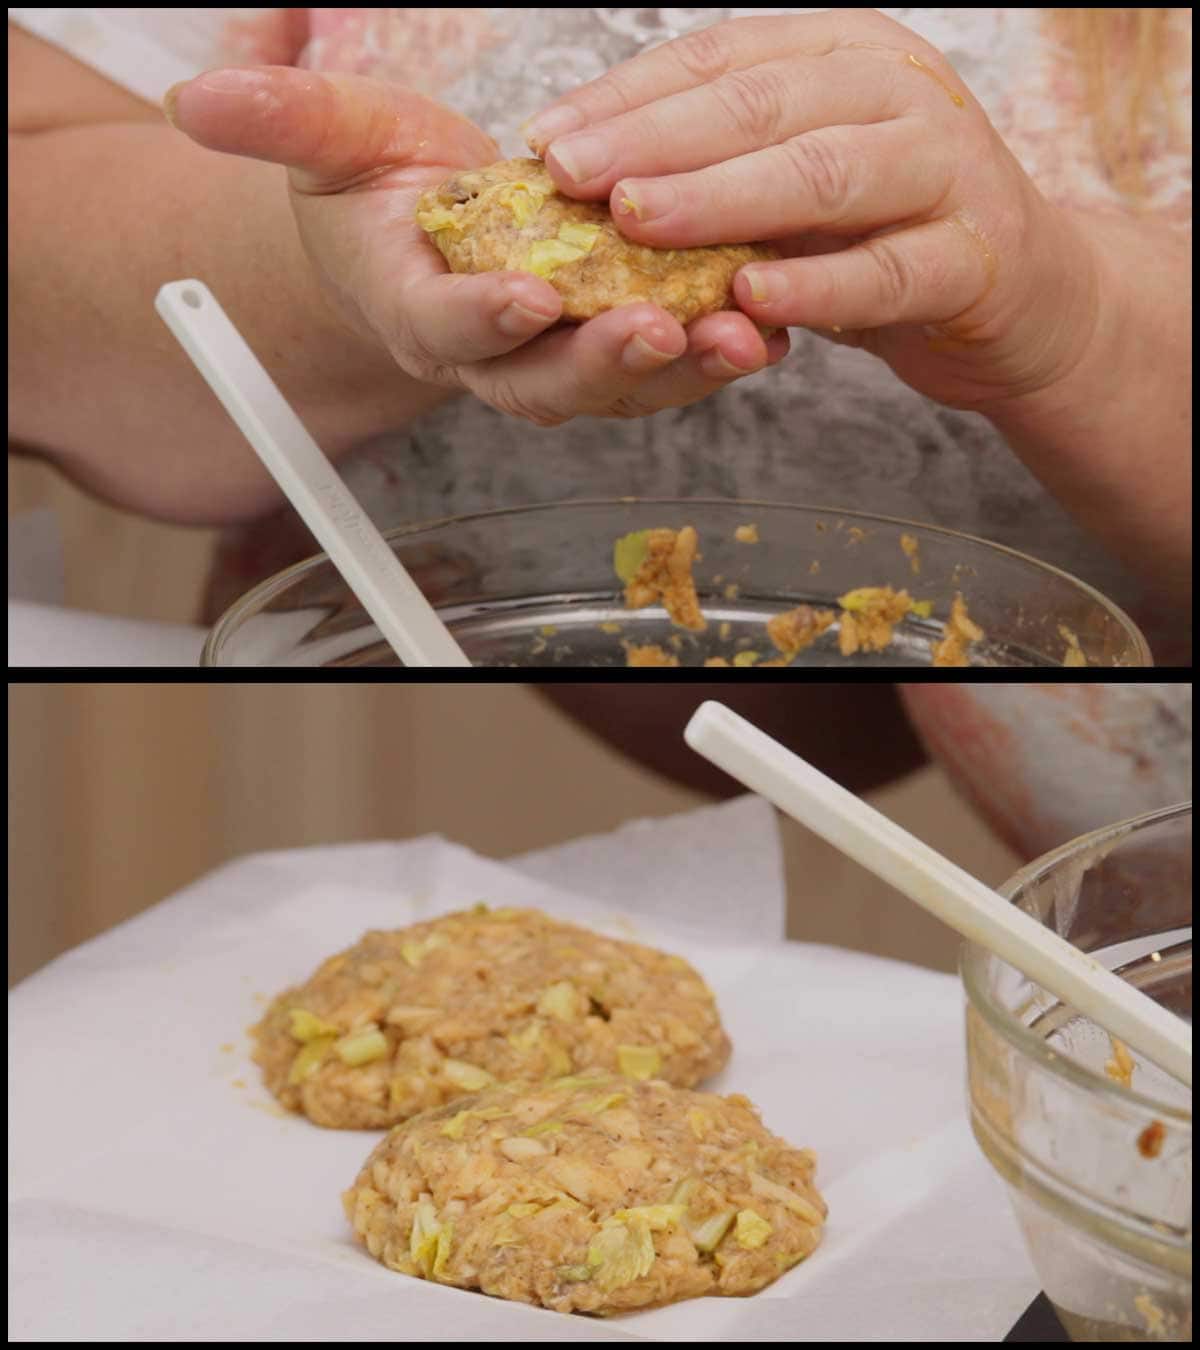
Refrigerate for at least 30 minutes. You can keep them in the fridge for a few hours, but don't keep them too much longer than that or they may dry out.
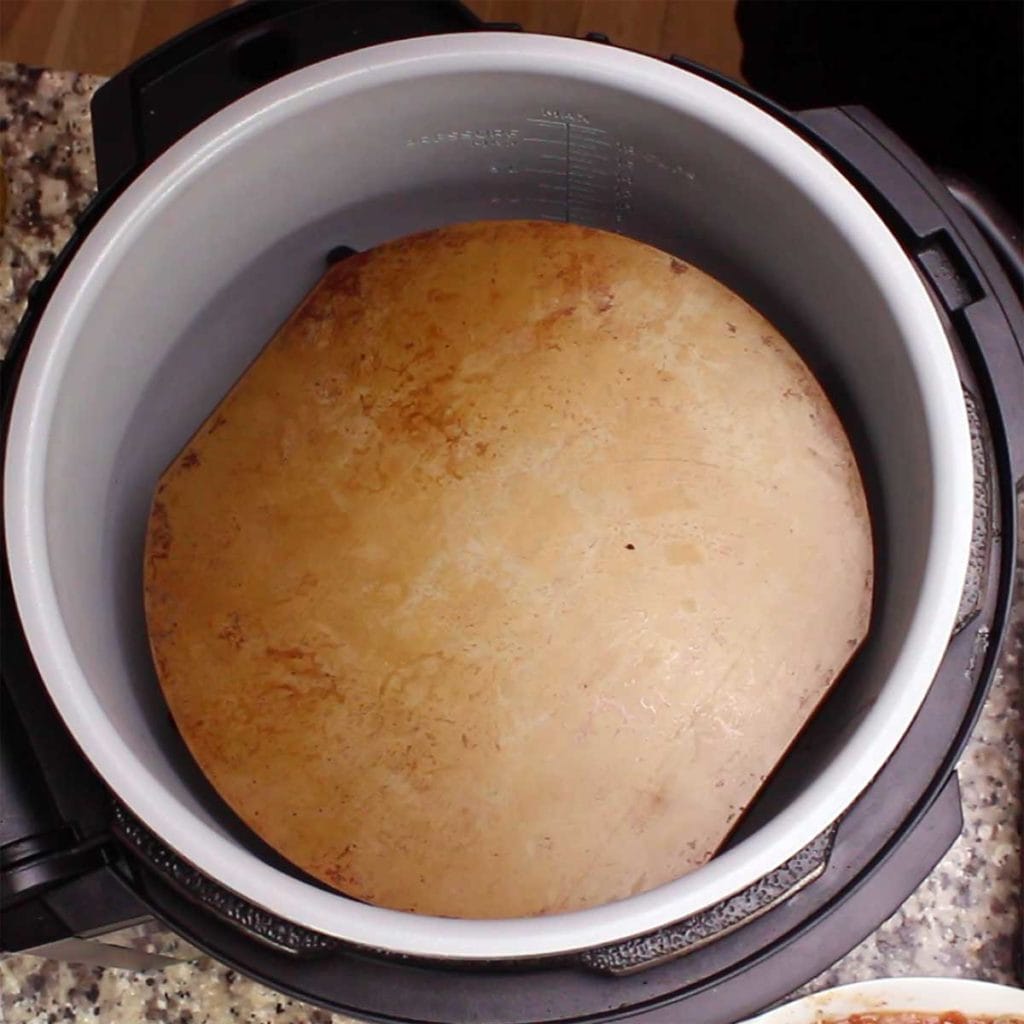
10 minutes before the salmon patties are ready to come out of the fridge, preheat the Ninja Foodi WITH the grill grate or the basket in the inner pot. This is probably the MOST IMPORTANT step and don't skip it.
If you are using the grill grate, you can use the basket legs as the support. Just put the legs in, pointy side down and the grate on top. If it seems wobbly, move it around a bit, there is a way it fits and is stable.
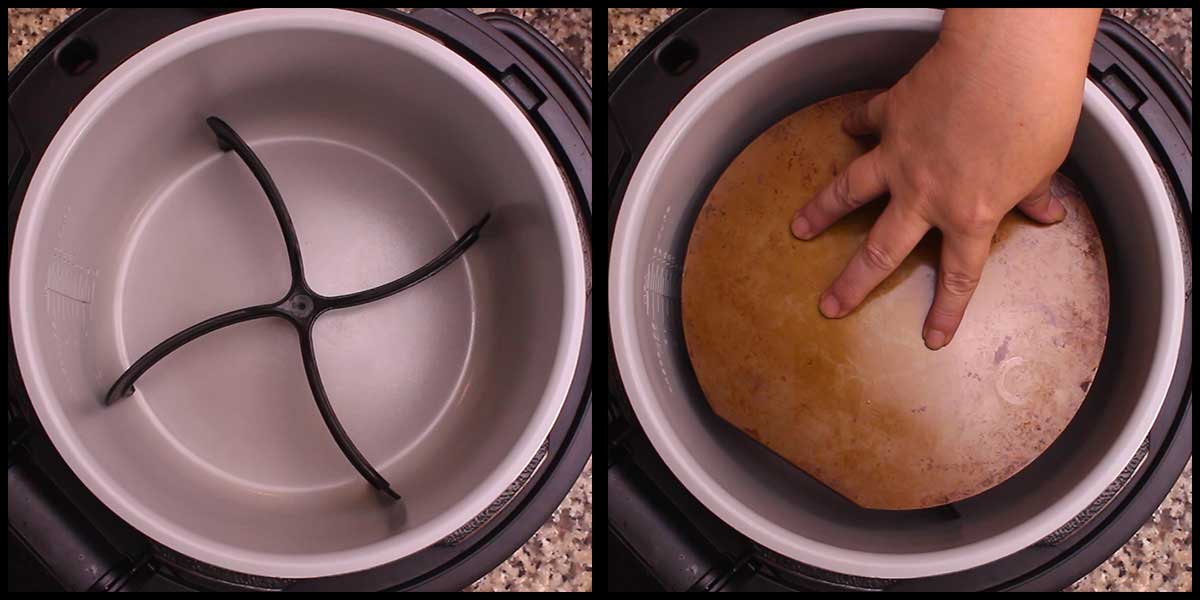
If you don't preheat for a FULL 10 minutes, your salmon patties might stick and it will be a mess.
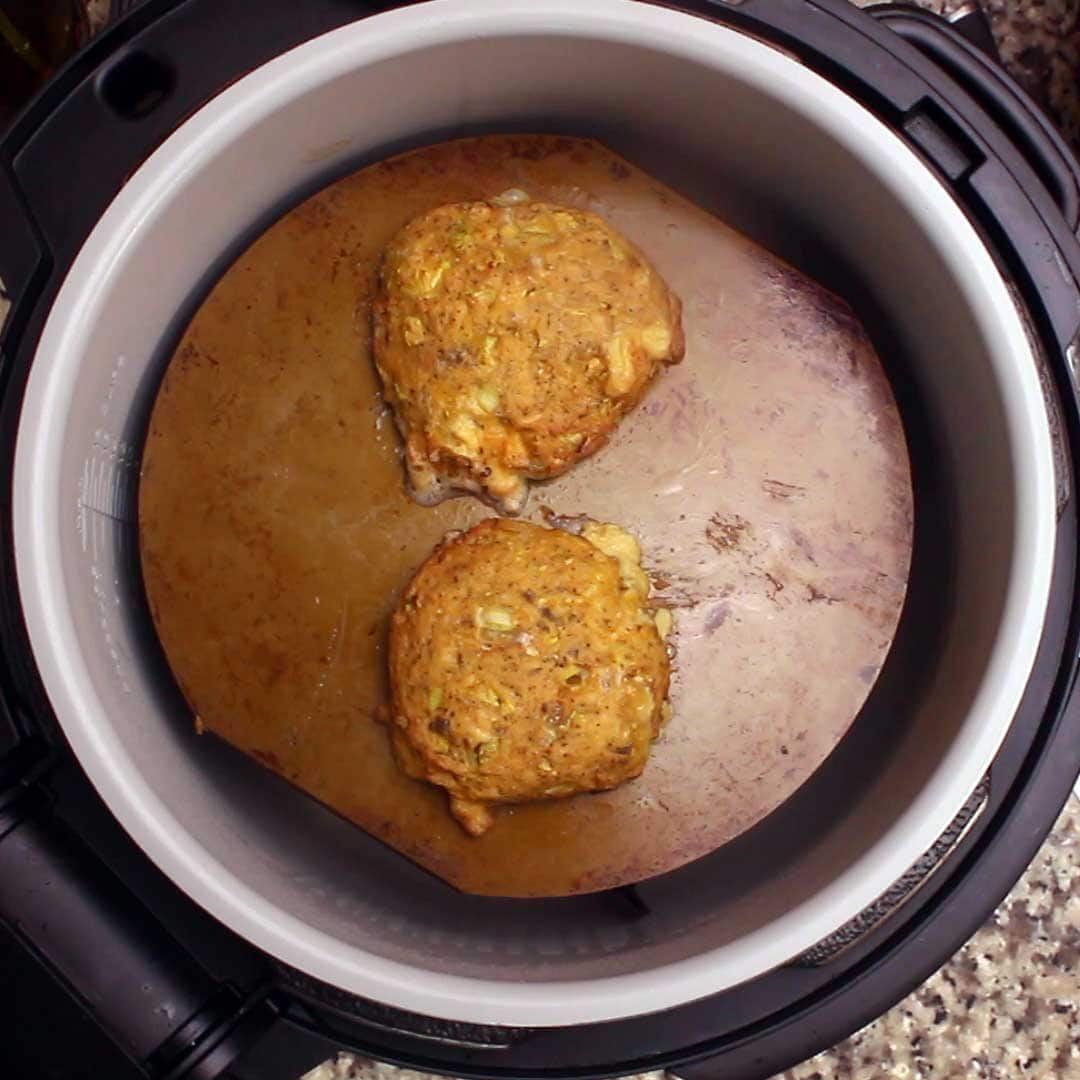
Once the grill grate or basket is preheated, spritz with a little oil. This is more important when using the basket, but I also spritz the grill grate. Place the salmon patties in the basket or on the grill grate and broil for 5 minutes.
Keep the lid closed and don't do anything during these 5 minutes because, if you try to flip too early or lose too much heat, your patties may stick.
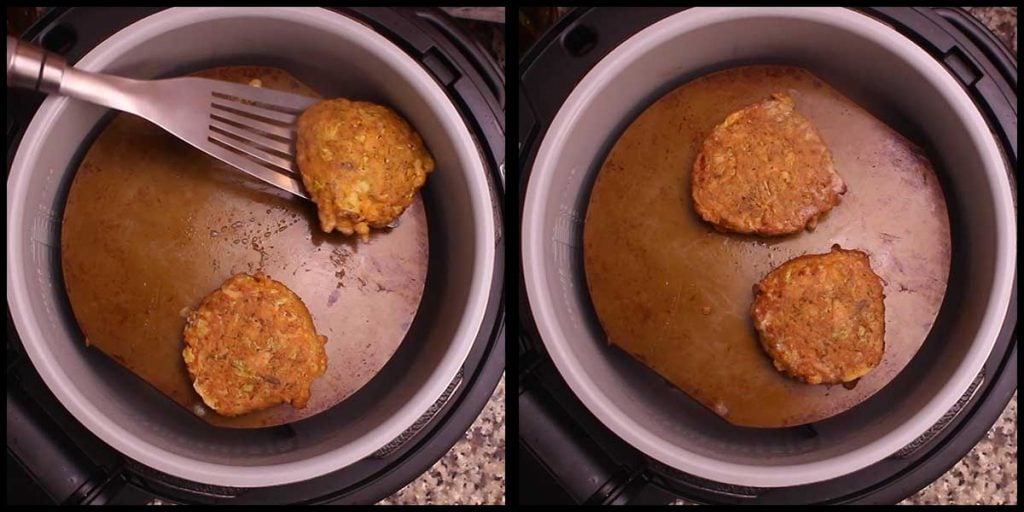
After 5 minutes, open the lid and flip. You may see a little egg that has leaked out and cooked, I just remove it with my spatula.
If, for some reason, they are sticking when you go to flip them, don't flip them. Just let them cook another minute or so and they will release. Flipping isn't even necessary in this recipe, but it's in my nature to flip!
Flip the salmon patties over and broil for another 2-3 minutes.
Serve and enjoy!
Low Carb Salmon Patties
Ingredients
- 7 ounces canned salmon
- ¼-½ teaspoon fine grind sea salt see notes below
- ¼ teaspoon black pepper
- ½ tsp Italian seasoning
- ½ teaspoon paprika
- ½ teaspoon onion powder
- ½ teaspoon garlic powder
- 1 large egg
- 1 stalk celery finely diced, about ¼ cup see notes
Would you like to save this recipe?
Instructions
- Finely dice the celery and drain the Salmon.
- Add all of the ingredients to a mixing bowl and mix well. Form the salmon cakes and put them on a plate or tray lined with parchment paper.
- Refrigerate the salmon cakes for 30 minutes.
- When the salmon patties have been in the fridge for 20 minutes, begin preheating the Ninja Foodi. Make sure that the basket or your sear n sizzle grate is in the inner pot during the preheat time. Preheat on broil for a full 10 minutes. This prevents the salmon patties from sticking.
- Spritz the basket or sear 'n sizzle grate with oil, place the salmon patties on the surface and broil for 5 minutes. Flip and broil another 2-3 minutes. Serve & Enjoy!
Notes
Nutrition
About the Recipe Author, Louise Long
Louise is a full-time recipe creator and food blogger @ The Salted Pepper. She has over 30 years of experience with cooking and recipe development. She owned a restaurant for several years and was a full-time RN until retiring to blog full-time.

She published her first cookbook in the Fall of 2018 and is very interested in writing several more.
Louise is also the creator of an online Ninja Foodi Pressure Cooking Course with over 100 instructional step-by-step videos. People absolutely rave about the course and all the value they have received from it.
Louise has several very active Facebook groups that help people with the basics of cooking and learning more about the appliances they love.
Ninja Foodi Pressure Cooker & Air Crisper 101
Ninja Woodfire Outdoor Grill & Smoker
Louise is also a YouTube creator and you can find most of her recipes in video format on The Salted Pepper YouTube channel.
She is very responsive to messages and eager to help in any way she can. Get more Information about Louise & contact information
I WOULD LOVE TO SEE WHAT YOU ARE COOKING UP IN YOUR KITCHEN! TAG ME @THESALTEDPEPPER ON YOUR FAVORITE SOCIAL MEDIA PLATFORM WHEN YOU MAKE A DISH!
BE SURE TO FOLLOW THE SALTED PEPPER RIGHT HERE ⇓⇓⇓⇓⇓
Reagan says
Hi, what is this insert for the foodi you’re using? I can’t find it online!
Louise says
It's the sear 'n sizzle grill grate, here is my link: https://glnk.io/27ly/the-salted-pepper