
Looking for the easiest way to make delicious homemade yogurt in the Ninja Combi?
The Ninja Combi's sous vide function makes the process incredibly simple with consistent results every time.
Would you like to save this recipe?
Whether you prefer regular yogurt or greek yogurt, this method will give you perfect results every time!
You can make both Cold Start Yogurt and Yogurt from milk that needs to be heated and the instructions for both are in this recipe article and in the recipe at the bottom of the page.
Suggested Kitchen Tools for Ninja Combi Yogurt
- Ninja Combi
- Glass Bowl
- Plastic Wrap
- Whisk
- Yogurt Strainer if you want Greek yogurt
Ingredients & Substitutions
Milk
I recommend using whole milk in this recipe and for the easiest method, use ultra pasteurized milk like Fairlife.
Ultra pasteurized milk does not require heating (as long as the milk is unopened) before adding in the yogurt starter which reduces the time it takes to make yogurt by several hours.

You can also use whole milk in this recipe, but it will require an extra step of heating the milk to 182℉/83℃ and then allowing it to cool to below 105℉/40℃ before adding the yogurt starter.
For more details on the differences between using whole milk and ultra pasteurized milk when making homemade yogurt, here is an article that goes into the specifics: Homemade Yogurt in the Ninja Foodi
Yogurt Starter
When making homemade yogurt you need a yogurt starter to introduce the good bacteria to the milk so that it sets up into yogurt. It's the bacteria or active cultures in the yogurt that multiply during the fermentation process and break down (feed off of) the lactose and other components in the milk which turns the milk from liquid to a thicker yogurt.
The easiest starter is plain yogurt with active cultures that you can purchase at most groceries stores. You can also use some yogurt from your last batch if you routinely make homemade yogurt, but make sure it isn't too old or that could inhibit the fermentation process.
There are also packets of yogurt starter you can buy, but honestly it is cheaper and easier to purchase plain yogurt and I get small containers from Walmart (store brand) which is the perfect amount for making yogurt using up to 1 gallon of milk.
Optional Ingredients
I prefer to make my yogurt without sweeteners and other flavors, but I have been experimenting with adding these to the milk base prior to fermenting the yogurt and it worked just fine.
You can whisk in sugar to the milk and starter mixture prior to putting it in the Combi to incubate (ferment). If you are heating your milk prior to making yogurt, add it in during the heating phase so the sugar dissolves.
The amount you use is up to you, but I would start with ½ cup for a gallon of milk and see if it is sweet enough for you. *You can warm a little of the milk if you are using ultra pasteurized and whisk in the sugar so it dissolves, but make sure you let it cool to below 105℉/40℃ before adding the starter.
Liquid sweeteners should be added after the fermentation process is done.
I have also tried flavored oils like (affiliate link)Lorann lemon oil mixed in with the milk and starter and it worked fine. You will only need a small amount and can go by taste. So, add 2-3 drops of the oil into the milk and starter mixture and then taste it. Add more to taste.
How to Make Yogurt in the Ninja Combi
Making yogurt in the Combi is so easy and straightforward, especially if you use an ultra pasteurized milk like Fairlife.
If you prefer to use regular whole milk, you absolutely can, but I recommend using a pot on the stove to heat and then cool the milk because it is a little cumbersome to use the sear/sauté function on the Combi with that much liquid.
Mise En Place (prep for recipe)
The only prep needed is to gather your supplies and set the Ninja Combi up to incubate the milk and starter to make the yogurt.
You will want to put the crisping tray into the Combi pan and then pour in 2 cups of water.
That's it! Now let's get the milk and starter mixed up.

Mixing the milk and yogurt starter
In a medium size bowl (make sure it fits on the crisping tray and can slide into the Combi before you get started), add about 2 cups of the Fairlife milk and 4 Tablespoons of plain yogurt (it can be regular or Greek yogurt) to the milk.
Whisk it in until you no longer see any lumps of yogurt. The reason why I only add part of the milk at first is to make it easier to whisk in the yogurt.
Add the remaining milk and whisk again to incorporate.

Cover the bowl with plastic wrap or another covering. You can use aluminum foil or silicone covers. The purpose of this is to keep the water condensation out of the yogurt.

Incubating (fermenting) the yogurt
Place the covered bowl on the crisping tray in the Combi pan and slide it into the lower level of the Ninja Combi and close the door.
Quick Tip
Don't be tempted to put the milk directly in the Combi pan or it will overheat even on the lowest sous vide setting.
Select the Sous Vide function and set the temperature to 120℉/45-50℃ and the time for 8 hours. Press start and you are done!
Don't worry, the temperature of the milk and starter does not reach 120℉/45-50℃ when using this method because it is sitting on the crisping tray above the heated water.

Finishing the Yogurt
Once the 8 hours is up, remove the bowl from the Ninja Combi and you will see that the milk/starter has set up into yogurt.
Quick Tip
The longer you ferment your yogurt, the tangier it is. I like to ferment for 8 hours, but you can go as low as 6 hours for a milder yogurt or up to 12 hours for a tangier yogurt.
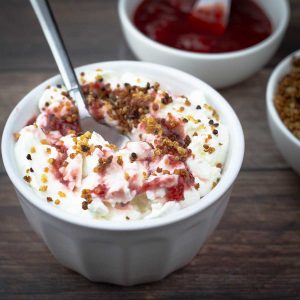
You may see some yellowish liquid on top. That is the whey. You can either mix it into the yogurt for plain regular yogurt or strain it to make Greek yogurt.

If you aren't going to strain the yogurt, refrigerate it for at least 4 hours (covered) before serving.
If you want to turn your yogurt into Greek yogurt, follow the instructions below.

Straining Yogurt to make Greek Yogurt
The only difference between regular yogurt (thinner with the whey mixed in) and Greek yogurt is the removal of the whey.
In Greek-style yogurt, the yogurt is strained for several hours to remove the whey which results in a much thicker yogurt. The amount of time you strain the yogurt will determine its thickness.
You can transfer the yogurt into a (affiliate link)yogurt strainer like the one pictured below (this exact one is no longer available on Amazon) or you can use a (affiliate link)flour sack or another type of cloth with a small weave so the whey can drip out leaving the Greek yogurt behind.

Once the whey has been removed, you will have a thick Greek yogurt.
You do not need to throw away the whey, you can use it to add protein to other recipes like bread by substituting the water in the recipe for whey.

Storage Instructions for Homemade Yogurt
How to Store Homemade Yogurt
Refrigeration
Store the yogurt in the refrigerator in an airtight container and it will last at least 7 days.
Freezer
I do not recommend freezing yogurt, but you can blend it with frozen fruit and make a quick frozen yogurt that is delicious!
Frequently Asked Questions
The key difference between cold start yogurt and regular yogurt lies in the heating process during preparation. With regular yogurt making, milk is first heated to around 182°F (82°C) and then cooled down to about 105°F (40°C) before adding the culture.
Heating the regular milk ensures that the "bad" bacteria are killed which isn't necessary with ultra pasteurized milk like Fairlife UNLESS the Fairlife milk is open and then it should be treated like regular milk.
You can make a half of a batch of yogurt by cutting the ingredients in half. The fermentation time remains the same.
If you are using the NInja Combi to make yogurt, then 52 ounces of milk is about the max that can fit into a bowl and still fit in the Combi.
If you follow this technique in the Ninja Combi and use fresh ingredients, you should not encounter any problems with the yogurt thickening, but if you do, here are the top reasons why your yogurt didn't set up.
Temperature issues - The milk must stay lower than 115℉/46°C) during fermentation. If it gets too hot, it kills the cultures. This is why you put the milk and starter in a bowl that sits on top of the water during the sous vide process.
Culture problems - Using old or dead starter culture, or not using enough starter.
Protein content - Using low-fat milk or milk alternatives without enough protein can result in thin yogurt. I recommend using only full fat whole milk.
While I haven't tested the recipe in other sous vide appliances, you should be able to make it the same way as long as your milk and starter are in a covered bowl and sitting just above the heated water.
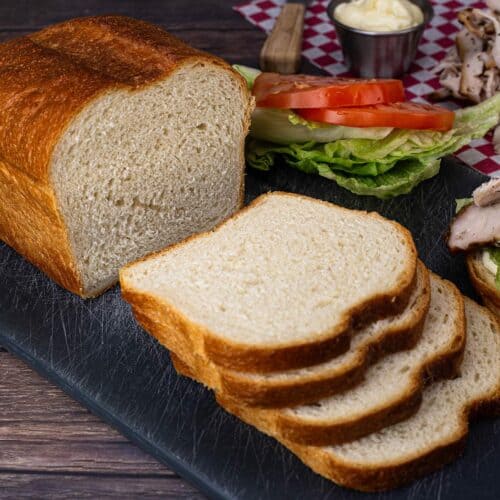
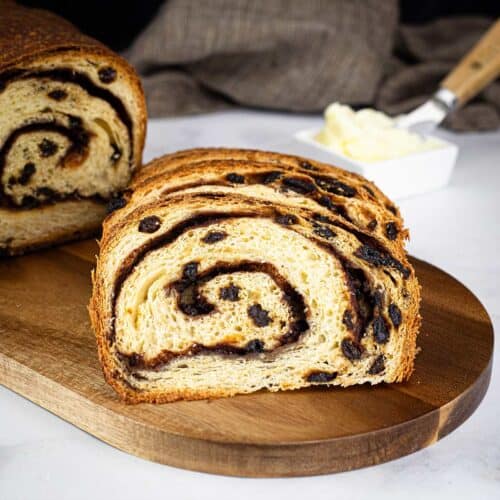
Ninja Combi Recipes
The Ninja Combi is a great small kitchen appliance and it is capable of doing so many things. One of my favorite things to make in it is homemade bread! The Combi Crisp function acts like a mini steam oven and bakes the bread perfectly.
It is also great for one-pot meals and so much more. Here are some recipes for inspiration.


Homemade Yogurt ~ Ninja Combi Recipe
Equipment
- (affiliate link)Ninja Combi
Ingredients
- 2 cups water
- 52 ounces Whole Fairlife Milk see recipe notes if using regular whole milk
- 4 Tablespoons Plain Yogurt with Active Cultures as a starter
Would you like to save this recipe?
Instructions
- Add 2 cups of water to the Combi pan and place the crisping tray into the pan.2 cups water
- In a medium size glass mixing bowl (one that will fit into the Combi and hold the ingreeints), whisk 2 cups of the ultra pasteurized milk (see recipe notes if you are using regular milk) with 4 Tablespoons of the yogurt starter until you have a smooth mixture.Add remaining milk and whisk together. Cover the bowl with plastic wrap or another covering.52 ounces Whole Fairlife Milk, 4 Tablespoons Plain Yogurt with Active Cultures as a starter
- Place the bowl onto the crisping plate in the Combi pan and slide the pan into the Ninja Combi on the lower level and close the door.Select the Sous Vide function and set the temperature for 120℉/50℃ and the time for 8 hours. Press Start.
- When the time is up, remove the bowl and you will have homemade yogurt! You can either strain it for Greek yogurt or refrigerate for 4 hours and then serve it as is for regular yogurt.
Notes
Nutrition
About the Recipe Author, Louise Long
Louise is a full-time recipe creator and food blogger @ The Salted Pepper. She has over 30 years of experience with cooking and recipe development. She owned a restaurant for several years and was a full-time RN until retiring to blog full-time.

She published her first cookbook in the Fall of 2018 and is very interested in writing several more.
Louise is also the creator of an online Ninja Foodi Pressure Cooking Course with over 100 instructional step-by-step videos. People absolutely rave about the course and all the value they have received from it.
Louise has several very active Facebook groups that help people with the basics of cooking and learning more about the appliances they love.
Ninja Foodi Pressure Cooker & Air Crisper 101
Ninja Woodfire Outdoor Grill & Smoker
Louise is also a YouTube creator and you can find most of her recipes in video format on The Salted Pepper YouTube channel.
She is very responsive to messages and eager to help in any way she can. Get more Information about Louise & contact information
I WOULD LOVE TO SEE WHAT YOU ARE COOKING UP IN YOUR KITCHEN! TAG ME @THESALTEDPEPPER ON YOUR FAVORITE SOCIAL MEDIA PLATFORM WHEN YOU MAKE A DISH!
BE SURE TO FOLLOW THE SALTED PEPPER RIGHT HERE ⇓⇓⇓⇓⇓
Leave a Reply