Quick Chili? Doesn't chili take hours and hours of simmering to develop those flavors? Not anymore! You can make Quick Chili in the Ninja Foodi that tastes like it simmered for hours... in under 30 minutes!
Still not convinced? Give me a chance, please. I know there are chili gurus out there that pride themselves on taking 2 and 3 days to make a good batch of chili. I was one. Seriously, I was.
There is absolutely nothing wrong with taking your time to develop flavors and spending weeks, months, and even years perfecting that winning pot of chili. I have done this too many times to count during my brief time of entering local chili cook-offs.
Now, I was not going to big events or nationally recognized competitions, but I did compete against some folks that were VERY serious about their chili!
I'm very proud to say that my recipe for Thai Curry Chili came in first place in two competitions and second in another.
Would you like to save this recipe?
Since I have only competed in four competitions, this is a pretty good track record.
I pride myself on chili making and this recipe for Quick Chili is no exception. It's good. Really Good.
Do I have to have a Ninja Foodi to make this recipe?
No, you don't. You can make this recipe for Quick Chili on the stove or in an Instant Pot. If you don't have a Ninja Foodi and are interested in learning more about it, this post on How to use the Ninja Foodi. In this article, I go over the various functions and various models of the Ninja Foodi.
Even if you have been cooking in a pressure cooker for years, you might find this post on Pressure Cooking 101 interesting. I know I learned a lot doing research for it!

Stove top: In a large stockpot, sauté the meat, onions, and seasoning for 5 minutes. Add in the garlic and saute for 2 minutes. Add in the rest of the ingredients and simmer on low for 1-2 hours or until the sirloin is the desired texture.
Instant Pot: Follow the same instructions as for the Ninja Foodi.
Is this a Dump and Cook Recipe?
Pretty much, yes. The only thing that I don't add in until after the pressure cooking time is the canned beans. You probably can add them in and I did in this recipe for Instant Pot Chili, but I decided to add them in at the end this time and they were perfect.
I do sauté the meats with the onions and garlic for a few minutes, but after that it is a dump and cook. Super easy, super delicious, and super quick!
Can I use Different Meats in this Quick Chili?
Yes, absolutely! When choosing the type of meat you want to use remember to adjust the pressure cooking time for that type of meat.
You can probably get away with decreasing the time to 5 minutes or even increasing it to 20 or more minutes. Of course longer than 10 minutes will take away the "quick" in this chili.
Here are my cook time recommendations for different meats:
All Ground Beef: You will not need to change anything in the recipe if you want to use all ground beef. The only thing you may want to do is drain the fat after sautéing for a few minutes.
Brisket: Cut the brisket into bite-size pieces and sauté for a few minutes. Set the pressure cooker for 20-30 minutes. Brisket takes longer than other cuts of beef.
Ground Chicken or Turkey: After sautéing the ground chicken/turkey until it is ½-3/4 of the way done, you can set the pressure cooker to 5 minutes.
Chicken Breasts: Cut into bite-size pieces and sauté for a few minutes. Set the pressure cooker for 5 minutes.
Already Cooked and Shredded Meat: If the meat is already cooked, set the pressure cooker for 2-5 minutes.
Is this Quick Chili Spicy?
That is a hard question to answer because everyone's tolerance for spice is different. Some would consider this a spicy chili and some would consider it mild. I love spice, but not overwhelmingly hot, so I consider this Quick Chili to be perfectly spiced.
If you like your chili super spicy, double or triple the ground chipotle and the Cholula.
If you like your chili mild, omit the chipotle and jalepeno pepper. Or you can try this version of Instant Pot Chili, which is very mild and kid friendly. If you are cooking this in the Ninja Foodi, you can follow the Instant Pot directions without any changes.
So, Let's get to making this Quick Chili!
If you prefer to watch me make this chili, you can watch this video on YouTube for Quick Chili in the Ninja Foodi or at the end of the recipe.
First (and I say this a lot), prep your ingredients. This makes any recipe flow very smoothly and avoids surprises. I can't tell you how many times, I've gotten to the middle of a recipe and realized that I didn't have something.
Measure out all of your spices and make the chili seasoning. Of course you can also use your favorite chili seasoning or even a packet, but I do recommend giving this blend a try. I like to make my own spice blends because I can control the salt content and the spice level.
Trim and cube the sirloin into ½" pieces. Dice the onions and peppers. Mince the garlic.

Turn the Ninja Foodi on High Sauté and add in ground beef. Add the sirloin to the inner pot with onions and seasonings. Sauté for 5 minutes.
Add in the garlic and sauté for 2 minutes or until the ground beef is 50%-75% cooked.
Add in the peppers. If using a jalepeno pepper, it is a good idea to try a small bite to see how spicy it is because they vary in heat. Then you can decide if you want to add more or less or if you want to add the seeds/membrane. Most of the heat is in the seeds and the membrane.
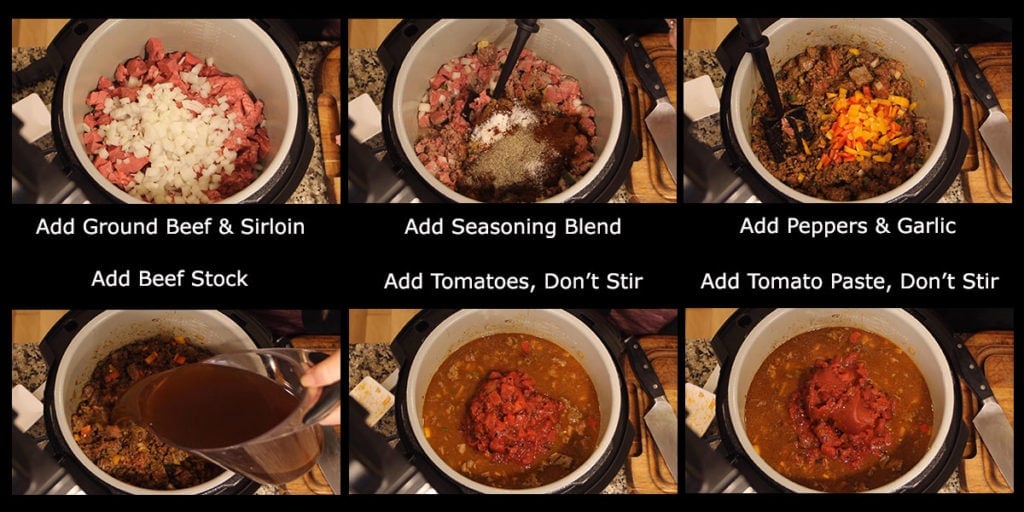
Pour in the 3 cups of beef stock and the Cholula. Use a plastic or wood utensil to scrape along the bottom of the pan to remove any pieces that might be stuck. This will avoid them burning during the pressure cooking process and giving you that dreaded "water" notice.
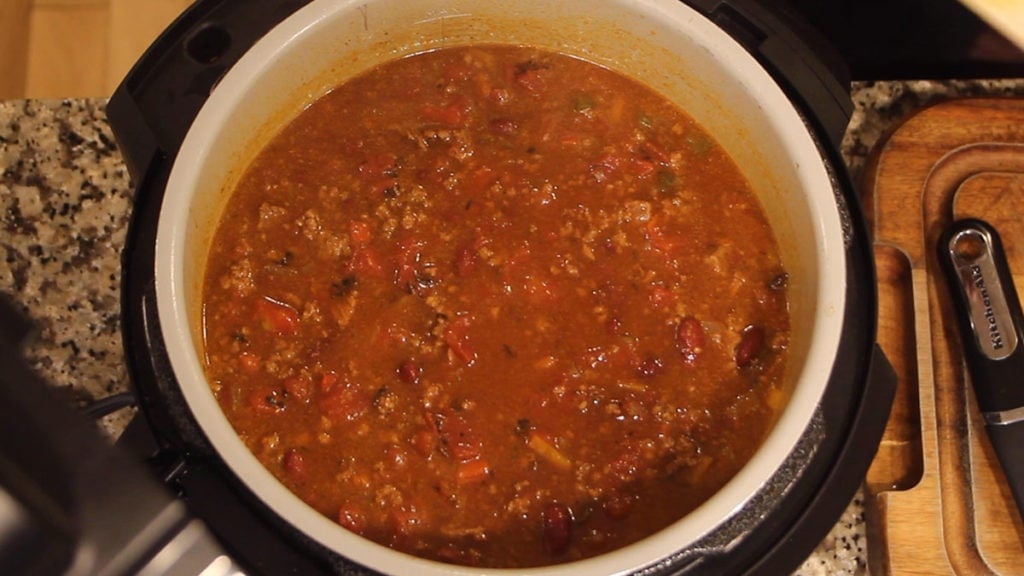
Add in the fire roasted tomatoes and top with the tomato paste. DO NOT STIR.
Put on the pressure lid and make sure the black valve is on seal. Set the Ninja Foodi to high pressure for 10 minutes. Allow to natural release for 3 minutes, then manually release the remaining pressure.
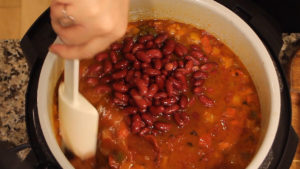
Remove the lid. Add the kidney beans and stir. Close the TenderCrisp lid and allow to sit with the Ninja Foodi off for 5 minutes.
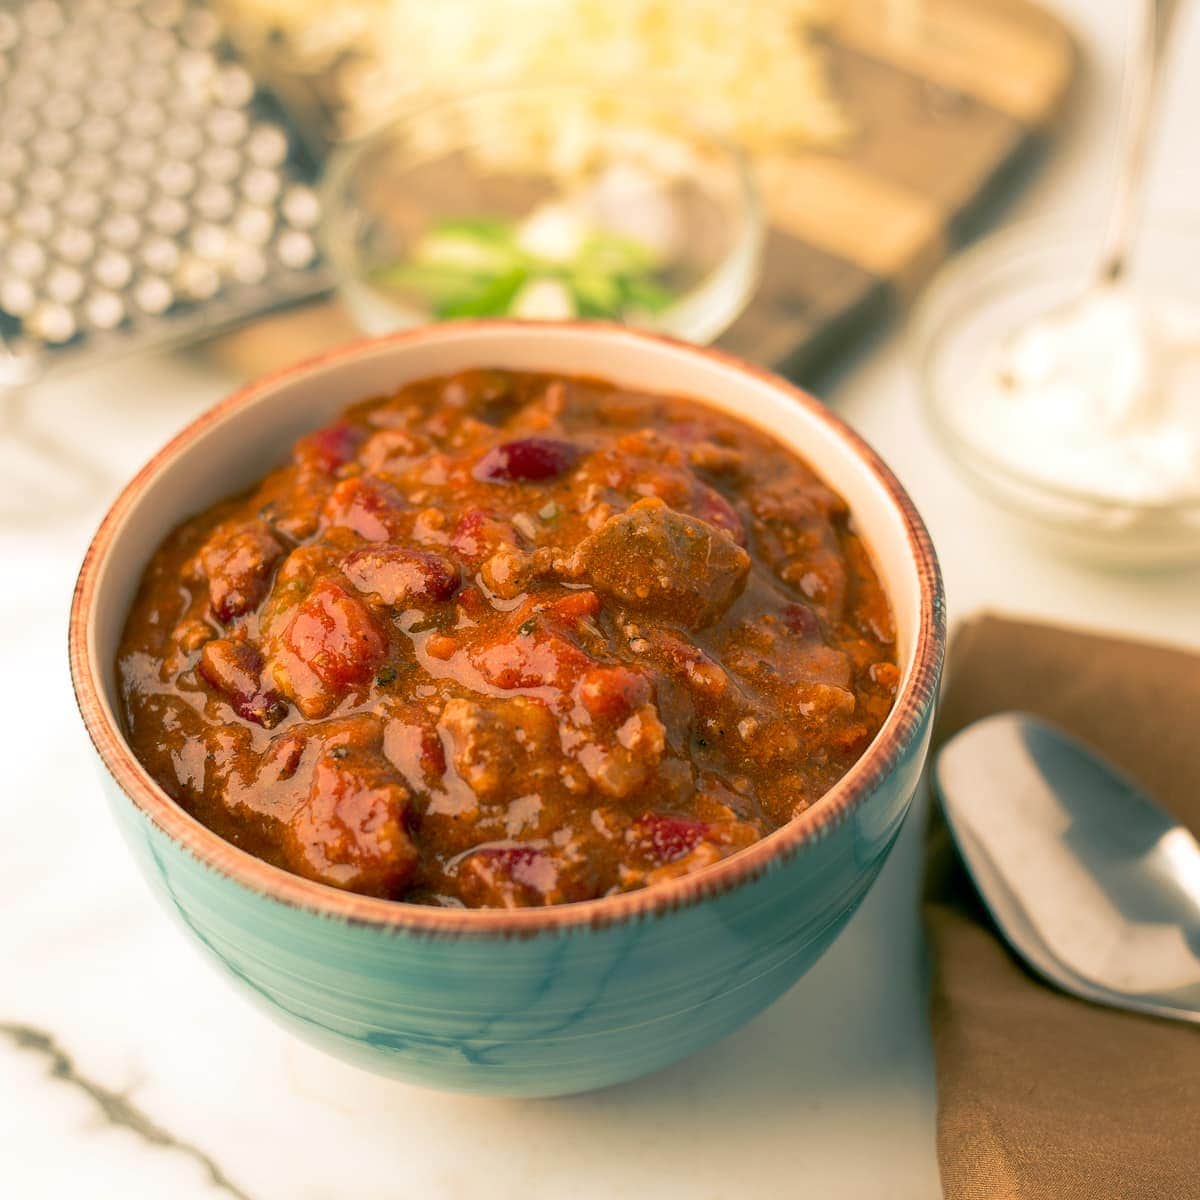
Serve and Enjoy!

Quick Chili in the Ninja Foodi
Ingredients
- 1 ½ lb top sirloin
- 1 ½ lb ground beef
- 1 onion
- 3-4 cloves garlic minced. About 1-2 tsp.
- 1 green pepper
- 1 jalepeno pepper
- 2 cups beef stock
- 29 ounces fire roasted tomatoes 2 14.5 oz cans
- 1 tablespoon Cholula
- 6 oz tomato paste
- 32 ounces kidney beans canned and drained
Seasoning Blend
- 2 tablespoon Chili Powder
- 2 tablespoon Cumin
- 1 tablespoon Sea Salt
- 1 tablespoon Smoked Paprika
- 1 ½ teaspoon Black Pepper
- ½ teaspoon Chipotle
Would you like to save this recipe?
Instructions
- Dice up onion, jalapeno pepper, and green pepper. Mince garlic. Combine seasonings in a medium bowl.
- Turn the Ninja Foodi on High Saute and add in ground beef. Trim and cube the sirloin into ½" pieces. Add to the inner pot with onions and seasonings. Saute for 5 minutes.
- Add in the minced garlic and saute for 2 minutes or until the ground beef is 50%-75% done.
- Add in the green pepper, jalapeno pepper, Cholula, and beef broth. Use a plastic scraper to scrape along the bottom of the pot to make sure nothing has stuck to it.
- Add in the fire roasted tomatoes and do not stir. Place the tomato paste on top and do not stir. Put on the pressure cooker lid and make sure the valve is to seal. Set the pressure to high for 10 minutes.
- Allow to natural release for 3 minutes and then manually release the remaining pressure. Remove the lid and add in the drained kidney beans. Stir to incorporate. Now is a good time to give it a little taste to see if you want to add any more spice or seasoning. Close the TenderCrisp lid and allow to sit for 5 minutes to thicken. If you are not serving it right away, you can turn on the keep warm button with the pressure lid on vent.
- Serve and top with your choice of toppings. Enjoy!
Notes
Nutrition
About the Recipe Author, Louise Long
Louise is a full-time recipe creator and food blogger @ The Salted Pepper. She has over 30 years of experience with cooking and recipe development. She owned a restaurant for several years and was a full-time RN until retiring to blog full-time.

She published her first cookbook in the Fall of 2018 and is very interested in writing several more.
Louise is also the creator of an online Ninja Foodi Pressure Cooking Course with over 100 instructional step-by-step videos. People absolutely rave about the course and all the value they have received from it.
Louise has several very active Facebook groups that help people with the basics of cooking and learning more about the appliances they love.
Ninja Foodi Pressure Cooker & Air Crisper 101
Ninja Woodfire Outdoor Grill & Smoker
Louise is also a YouTube creator and you can find most of her recipes in video format on The Salted Pepper YouTube channel.
She is very responsive to messages and eager to help in any way she can. Get more Information about Louise & contact information
I WOULD LOVE TO SEE WHAT YOU ARE COOKING UP IN YOUR KITCHEN! TAG ME @THESALTEDPEPPER ON YOUR FAVORITE SOCIAL MEDIA PLATFORM WHEN YOU MAKE A DISH!
BE SURE TO FOLLOW THE SALTED PEPPER RIGHT HERE ⇓⇓⇓⇓⇓
Elbridge Price says
In my opinion, using cubed up steak is essential. It makes this chili to be the best. Some folks say that they omit the steak but IMO, that’s a huge mistake. The pressure cooker turns the steak into a melt-in-your mouth experience!,
Louise says
I'm so glad you like it!
Beth says
What size is a serving, please?
Louise says
About a cup or so, but serving size is variable depending on your appetite. It makes about 10 cups of chili.
Tom says
This is probably one of the best chili recipes I've had. And I've tried a lot. I love the Chipotle and smoked paprika. I currently use those in my rib rubs. The only things I eliminate are the cholula and beans. I'd use the cholula but I don't use hot sauce any other time and don't want it to go to waste. And I just prefer my chili without beans. Thank you very much for sharing.
Louise says
I'm so glad you like it!
Megan says
Love this chili recipe! It’s so simple, and a staple for us. I omit the steak and just do 3lbs of ground beef, and reduce the stock to just 1 1/2 cups (I like a thicker chili). Flavors are great and easy to follow!
Louise says
I'm so glad you like it!
Jordan Peot says
Very good recipe, but it came out a little soupy for me. If you prefer your chili a bit thicker, I would crush a few cups of tortilla chips into it after adding the beans.
Louise says
You can also decrease the liquid a bit next time or let it simmer a little longer. I have gone back and forth about decreasing the liquid because I agree it is a little soupy at first. However, a lot of that depends on the meat used and the juices it gives off, so I have left it at 2 cups, but 1.5 cups is probably plenty. It will thicken as it sits and the next day it is perfect. I'm glad you enjoyed it!
Beatriz Hill says
I only make this chili recipe in my house. It's soo good. This time I used all the ingredients. It never disappoint.
Louise says
I"m so glad you enjoy it!
Bouchra says
Bouchra M
I have been drooling over this recipe but haven’t tried it it:( I’m finally gonna go for it but I don’t like beans in my chili.
Should I change anything else to the ingredients or liquid or keep as is.
Never been disappointed by any of your recipes ( loved all of them)
Louise says
I would reduce the liquid by at least 1/2 cup. Let me know how it goes!