

To say I was surprised that the Ninja Speedi didn't have a yogurt button is an understatement. In fact, I had all the supplies ready to go to make some yogurt and decided to use the Speedi instead of my Ninja Foodi Pressure Cooker & Air Crisper and that is when I noticed there wasn't a yogurt function. Now what?
You make yogurt using a different function! Back in 2018 when the Ninja Foodi first came out it didn't have a yogurt function either and I successfully created a yogurt recipe using the dehydration function. While I thought about using the same function in the Speedi, my concern was temperature control. The Ninja Speedi is a 6qt cooking appliance and the Ninja Foodi yogurt recipe used a 6.5qt or an 8qt model. That may not seem like a huge difference, but the heating element in the speedi would be very close to the milk and I was afraid of overtemping it.
Would you like to save this recipe?
Instead, I decided to use the sous vide function and that worked perfectly in all of my test batches. Ninja Kitchen may decide to add a yogurt function in newer versions of the Speedi and, if they do, I would use that, but for now we can still make delicious yogurt in the Ninja Speedi!
Ingredients & Substitutions
You only need two ingredients to make homemade yogurt. Milk (or dairy-free substitute) and a yogurt culture. There are a few things you should know about the ingredients you choose. So, if you haven't made yogurt before, be sure to read this section before substituting any recipe ingredients.
Milk or Dairy-Free Substitute
I like to make my yogurt from whole milk, but you can use a lighter fat content like 2% milk or even skim milk, but your yogurt won't be as rich. I have read that you can also use heavy cream or half & half (half cream and half whole milk) when making yogurt, but I haven't tried that.
There are two basic methods to making yogurt, traditional and cold start. I will get into how to do each one in the article, but when you are deciding on which milk to purchase it is important to know what kind of yogurt you are making.
For the traditional method which includes heating the milk and cooling it down before adding in the starter, you can use any kind of dairy milk you like. If you want to make cold start yogurt, you have to use ultra pasteurized milk like Fairlife. Since the milk won't be heated, it has to be ultra pasteurized to ensure that any bad bacteria has been killed. You also want to start off with a fresh unopened container of ultra pasteurized milk when making Cold Start Yogurt. One thing to note about Fairlife is you won't necessarily see "ultra pasteurized" on the label, but it is ultra pasteurized.
Dairy-Free Yogurt can also be made by using coconut milk or nut milks. It's important to note that you cannot use store-bought almond milk or other nut milks to make yogurt because of the preservatives in them. In order to successfully make yogurt from nut milk, you have to make your own. You can use canned coconut milk with the cream, but not coconut milk that you see in the cartons. Dairy-Free Yogurt also requires a special starter, which I will talk about below.
Yogurt Starter
You have to have a yogurt starter to make yogurt. The easiest starter for a milk-based yogurt is using plain yogurt as the starter.
You can use any kind of plain regular yogurt or Greek-style yogurt, but avoid flavored yogurts as they can interfere with the incubation of your yogurt. You do want to make sure that you get a yogurt with live active yogurt cultures. Usually the containers will say it right on the label and most popular brand names of yogurt at your local grocery store do contain active cultures.
While this may seem strange to buy yogurt to make yogurt, you only have to buy it the first time. After that, you use your homemade yogurt as the starter for the next batch. You can freeze the yogurt in 2-4 Tablespoon amounts and then thaw one of them before making your next batch of homemade yogurt. I recommend taking the starter to freeze from the batch of yogurt when it's freshly made. As yogurt ages the good bacteria that turns milk into yogurt also becomes less active. Freezing it does not kill the active cultures, but you do want to add it in after thawing.
There are many other kinds of yogurt starters you can buy online for non-dairy and dairy-based yogurt. When I made my Vegan yogurt for my Ninja Foodi 101 online course, I used (affiliate link)Cultures for Health Vegan Yogurt starter and it worked great.
Tips for Making Homemade Yogurt
- Use fresh milk. Unopened containers are best, but you can use opened containers as long as the milk is still good. You should only use unopened ultra pasteurized milk when making cold start yogurt. Once ultra pasteurized milk is opened, it can become contaminated and needs to be treated like whole milk for making yogurt.
- Make sure all yogurt making supplies are clean. This includes the inner pot and any other utensils you will use while making the yogurt. This will reduce the chance of bad bacteria contaminating the yogurt.
- Be patient. Making yogurt takes time and is not something you can make quickly. It can take 4-6 hours of incubation time before you even start to see yogurt forming from the milk.
- Incubation time matters. The time of incubation determines how the homemade yogurt tastes. Incubate for 6-8 hours for mild yogurt and 8-10 hours for tangier yogurt.
How to Make Homemade Yogurt in the Ninja Speedi
The following steps are for making yogurt with whole milk that is heated and cooled before adding the culture. If you want to make cold start yogurt, skip to the next section.
Mise En Place (Prep)
- Make sure the Ninja Speedi inner pot is clean and dry. Any utensils you are using to whisk or stir the yogurt should also be clean and dry.
- Remove your yogurt starter from the fridge. It's best if the starter is room temperature when you add it to the cooled milk.
Heating the Milk
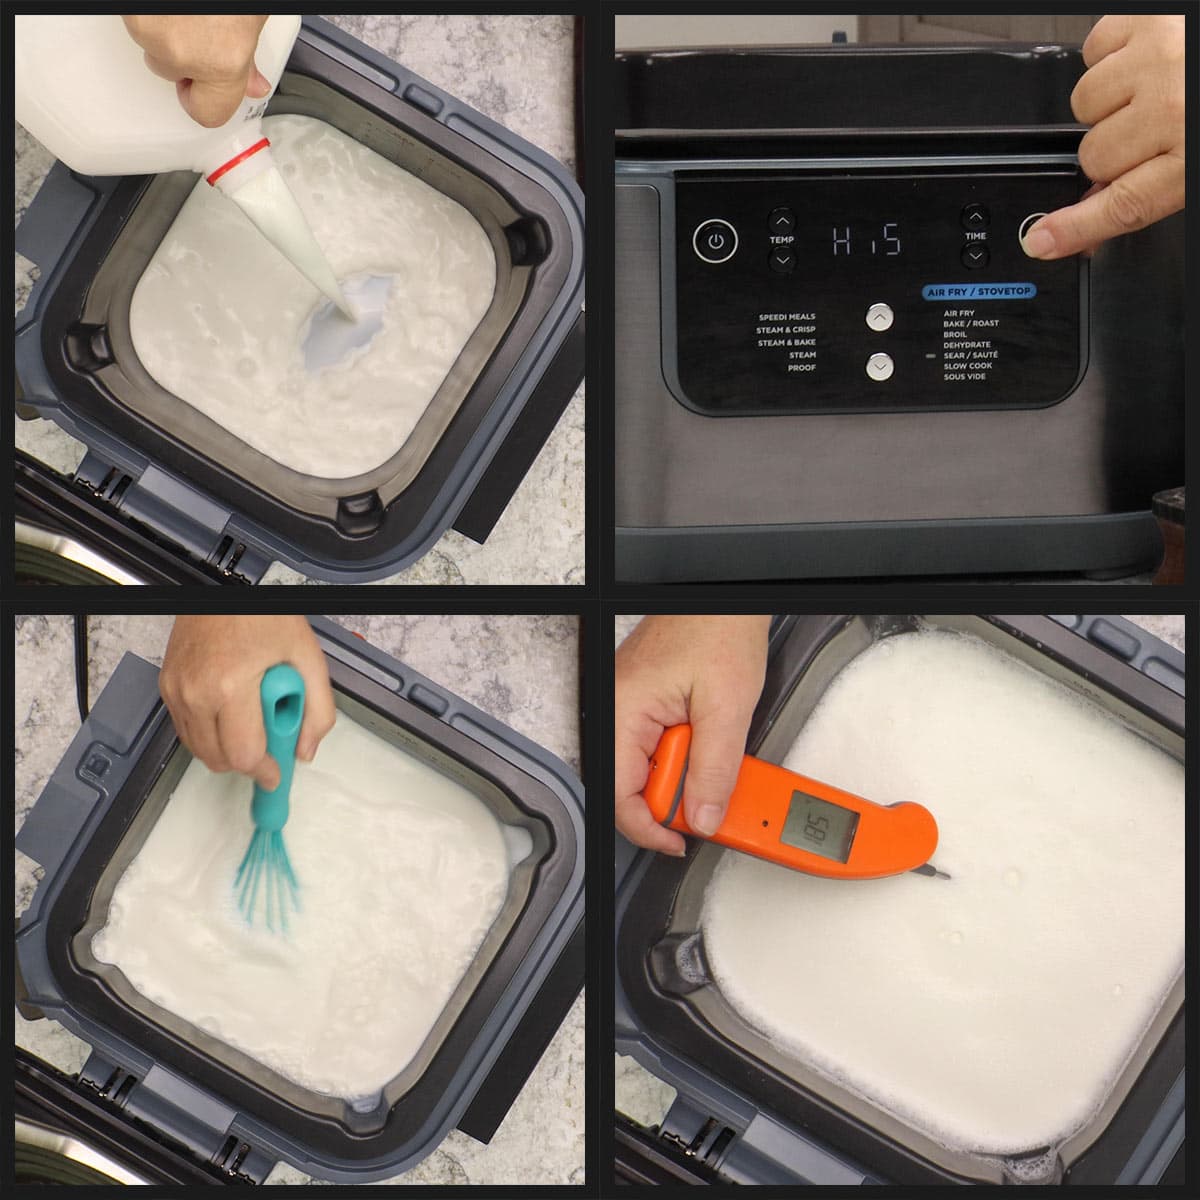
Pour the milk into the inner pot of the Ninja Speedi and select the sear/sauté function on high. Heat the milk while whisking frequently until it reaches a minimum temperature of 181℉. This can take up to 40 minutes. Make sure to whisk frequently so the milk doesn't scorch on the bottom of the pot. Reduce the heat if you need to leave the room for more than 5-10 minutes.
*You can also heat the milk using slow cook on high which may take longer, but will have less chance of scorching. Or, you can heat the milk in a large pot on the stove which is oftentimes quicker.
Cooling the Milk
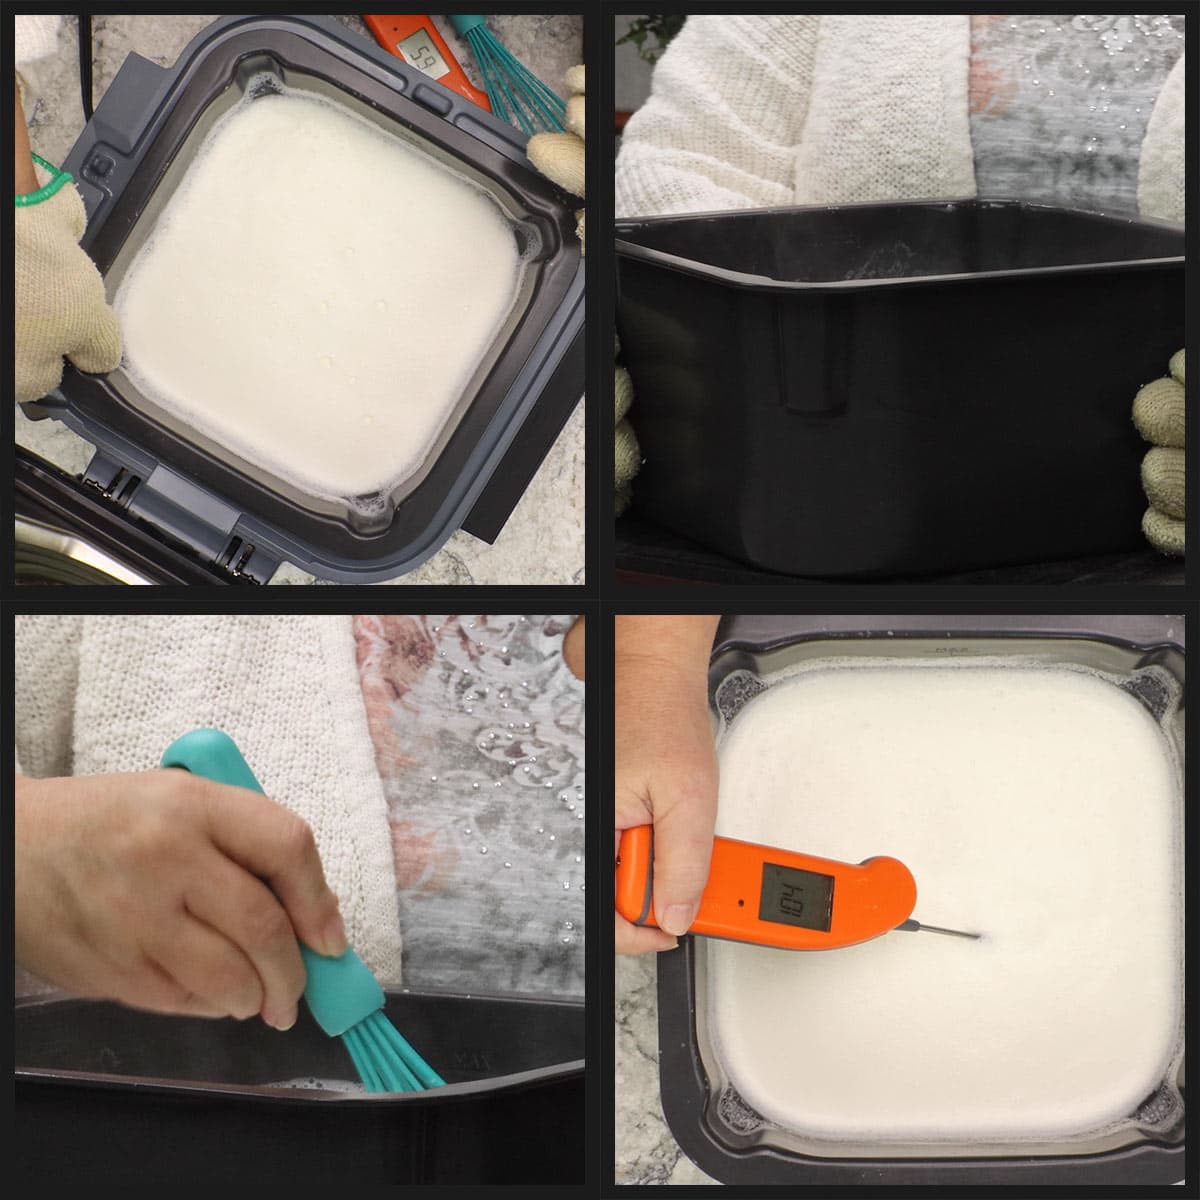
Once the milk has reached a minimum of 181℉, turn the Speedi off and let the milk cool down. You can do this by simply leaving the pot in the Speedi and allowing it to cool naturally which will take several hours or you can remove the pot and put it on the counter to cool a little faster. Whisking frequently will also speed up the cooling process.
If you want to cool the milk really fast, place the inner pot in a sink full of ice water that goes about ½ way up the side of the inner pot. This will cool the milk in about 20-30 minutes, especially if you whisk frequently.
You want the milk to cool down to about 104℉ before adding the starter.
Adding the Starter
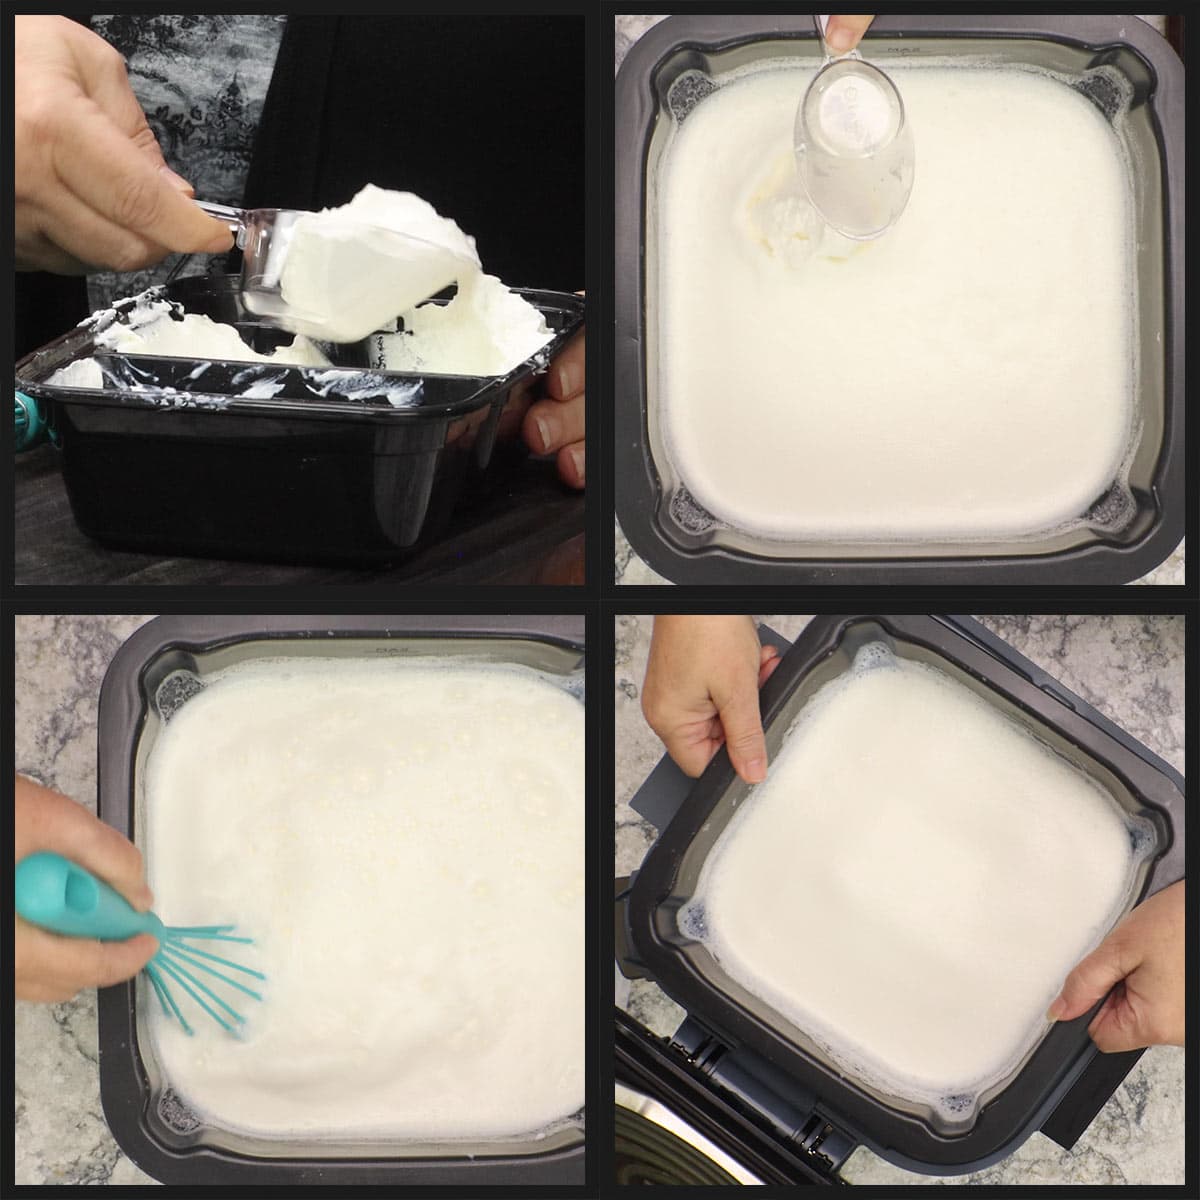
Once the milk has cooled down to around 104℉, mix in the ¼ cup of plain yogurt (can be regular or Greek yogurt).
Whisk or stir well to incorporate the yogurt starter into the milk.
Sous Vide
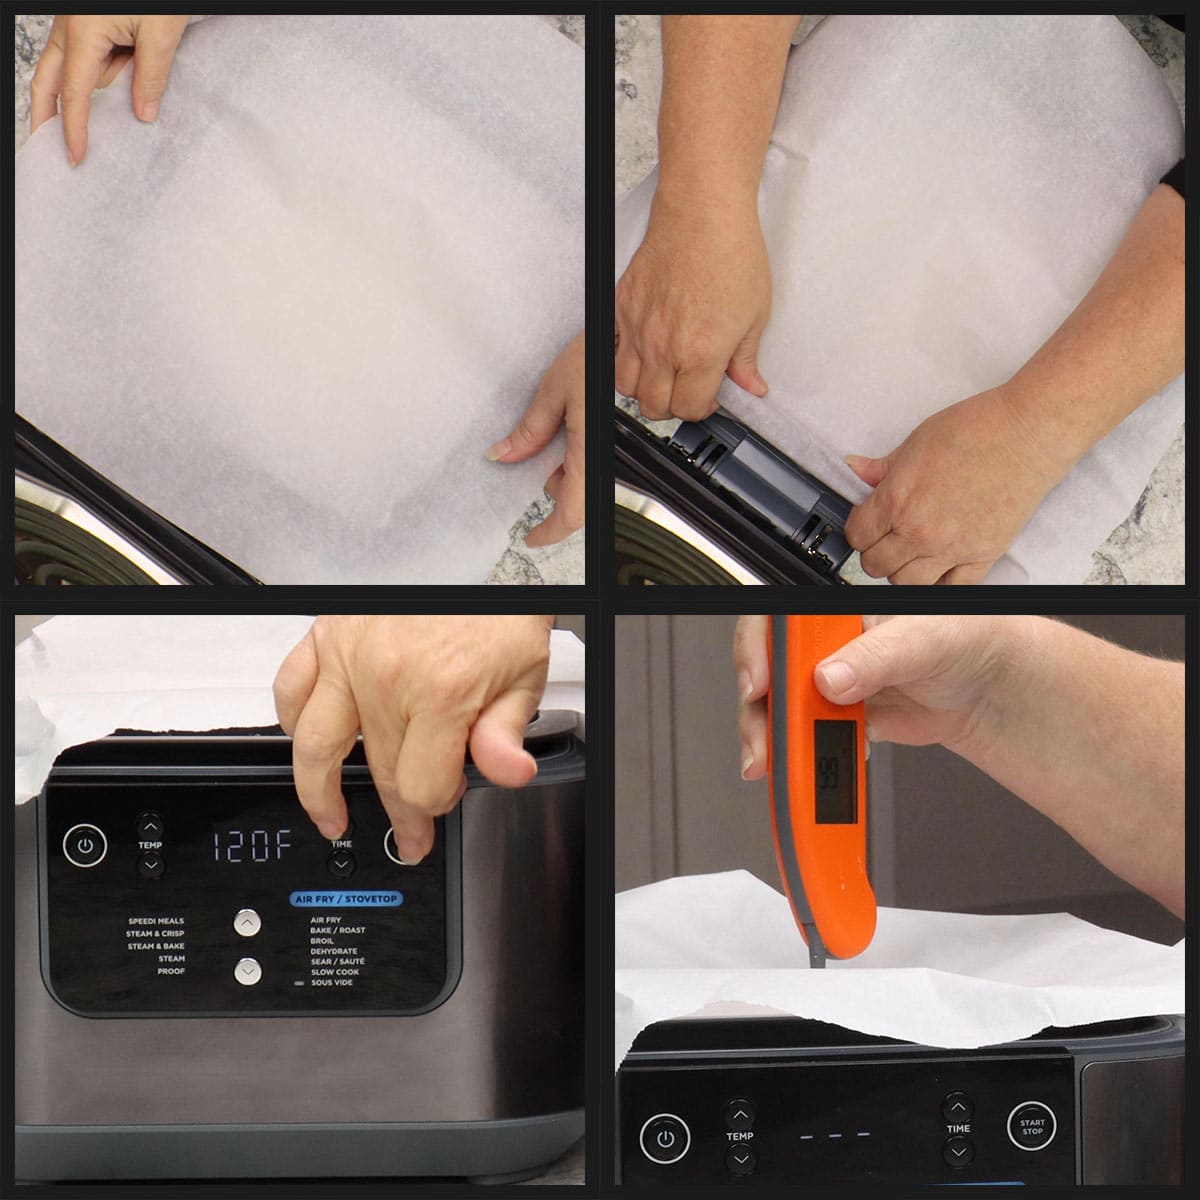
Cover the inner pot with parchment paper and tuck it under the edges of the inner pot. This keeps the milk from being contaminated during the incubation process. You don't want to lower the Ninja Speedi lid or you will trap in the heat and potentially overheat the milk which can result in killing the yogurt starter.
Select the sous vide function and set the temperature to 120℉ and the time for 8 hours. Hit start. You will see the Speedi go through the pre-heat process and then tell you to add food. You don't need to do anything, the Speedi will automatically switch from preheat to sous vide after a short period of time.
Incubate the yogurt using the sous vide function. The time you incubate for determines the tanginess of the yogurt. 6-8 hours is best for mild yogurt. If you want tangier yogurt, increase the time to 10 hours.
The first time you make yogurt in your Ninja Speedi, I recommend using an(affiliate link) instant read thermometer to check the temperature every 30-60 minutes to make sure the temperature of the milk isn't going above 125℉, which can kill the starter.
If you find the temperature going up above 125℉, turn the Ninja Speedi off and close the lid. You can finish making your yogurt with the Speedi turned off. Just let it sit for the remaining time and the warmth inside the pot will encourage the good bacteria to multiply and turn the milk into yogurt.
I found that my milk never heated up more than 125℉ and, although this is on the threshold of being too hot, my yogurt turned out perfect each and every time.
Chilling the Yogurt
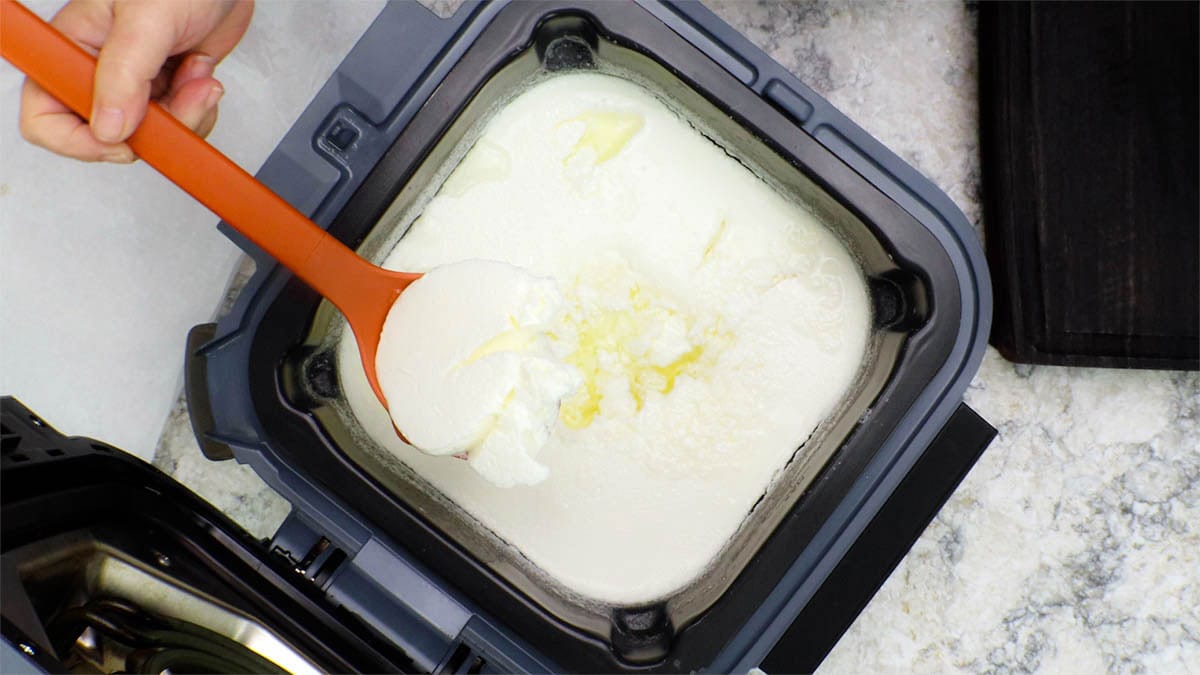
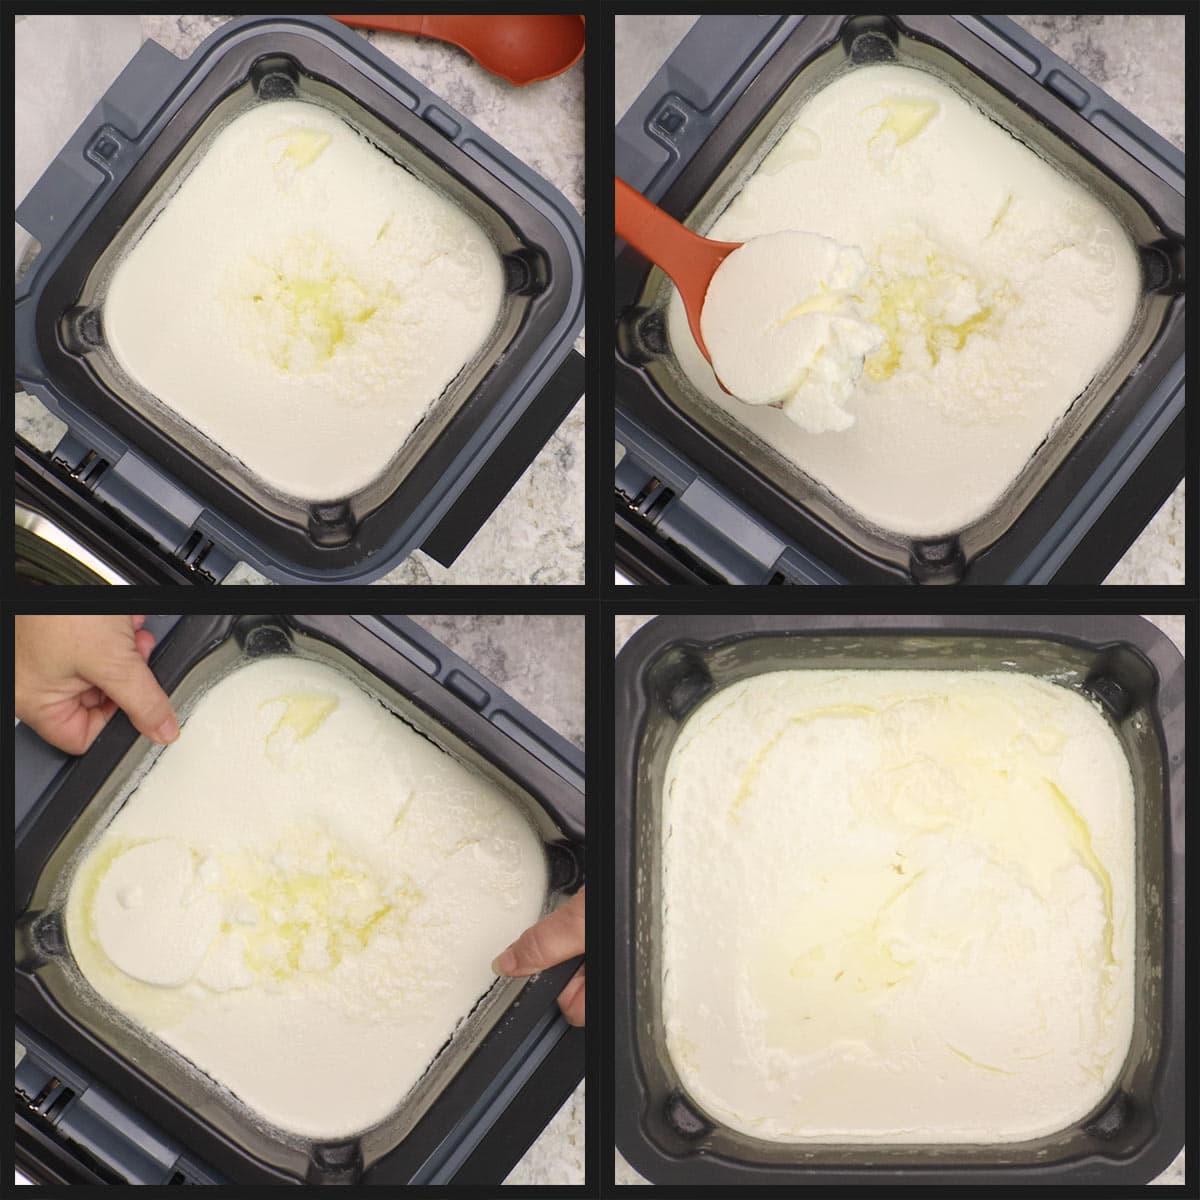
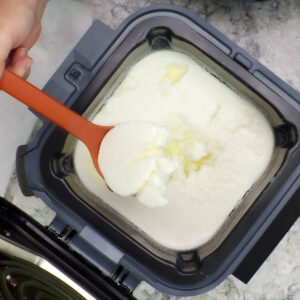
Once the set time is up, remove the parchment paper and you have made yogurt! You will see the yogurt separating from the whey. If your yogurt has started to form, but appears too liquidy and you can't see the whey separating, you can close the lid of the Ninja Speedi and give it another hour or two.
The first time I made yogurt in the Ninja Speedi, it was the 6th or 7th hour before the yogurt started to form, but on other batches it has started to look like yogurt after 4 hours.
If your yogurt looks set, remove the inner pot from the Ninja Speedi and chill it in the refrigerator. If you don't have room for the inner pot, you can transfer the yogurt to another container to chill.
Once it has chilled for about 6 hours, you can serve your yogurt. If you want to strain it for Greek yogurt, see the next step.
Making Greek Yogurt
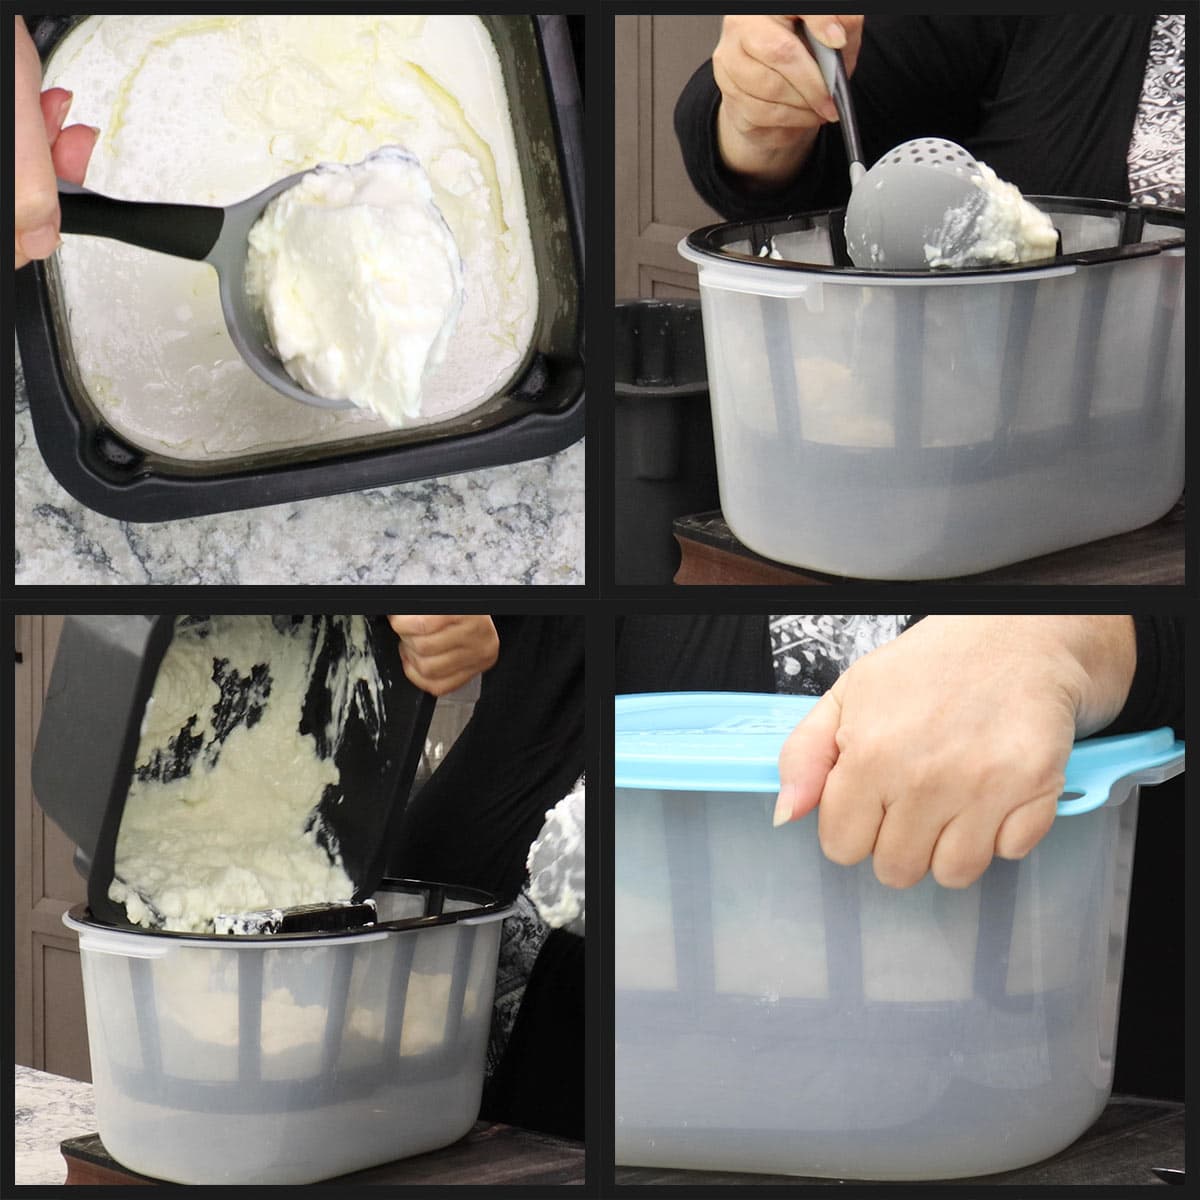
If you like thick Greek yogurt like I do, then you will want to strain it to remove the extra whey. This also reduces the lactose in the yogurt, so if you are lactose insensitive, definitely strain the yogurt.
I make so much yogurt that I bought a nifty yogurt strainer that holds at least a gallon of yogurt at one time. It has a lid and makes it super easy to strain the yogurt in the refrigerator. If you are interested in purchasing it, you can find it on Amazon: (affiliate link)Strainer for making Greek Yogurt
Before I had the strainer, I used flour sacks. They work great, but are a little messier. If you want to use (affiliate link)flour sacks and aren't sure how to do it, see this post for Homemade Yogurt in the Ninja Foodi.
Strain the yogurt for 2-8 hours. The longer you strain it, the thicker it will get. I usually leave mine overnight.
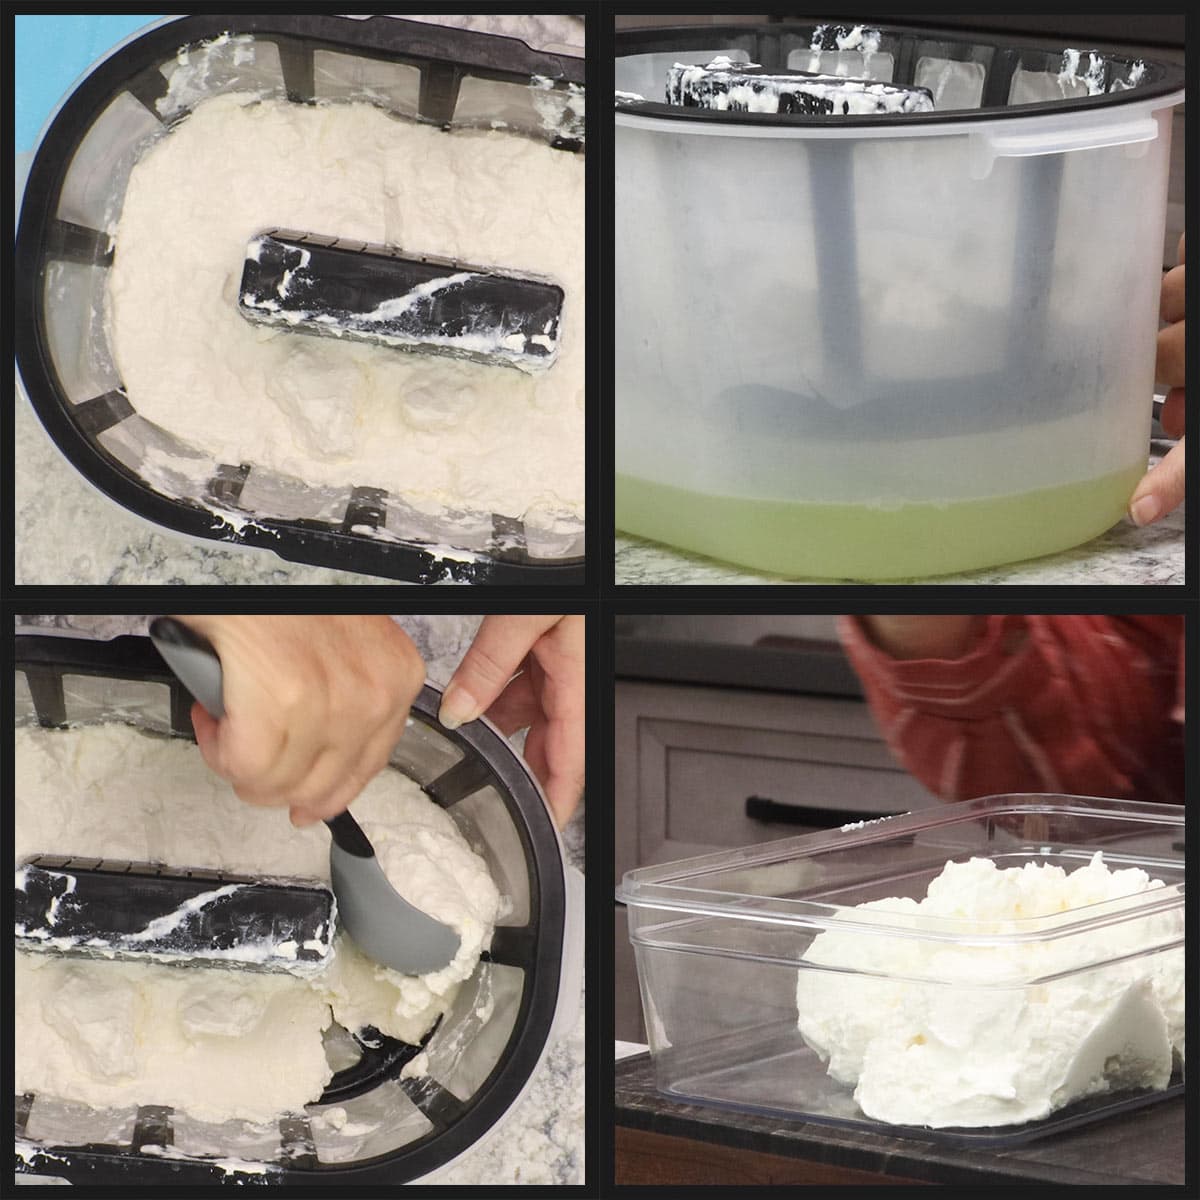
When you remove the strained yogurt, you will see a lot of whey in the bottom of the container or in the bowl if you used another method of straining. Don't discard the whey!
You can use the whey in place of water when making bread or add it to smoothies for extra protein. You can freeze the whey in airtight containers or freezer bags. I have heard that people use the whey as a yogurt starter, but I haven't tried that myself.
You can store the yogurt right in the strainer or transfer it to an airtight container and refrigerate up to 2 weeks.
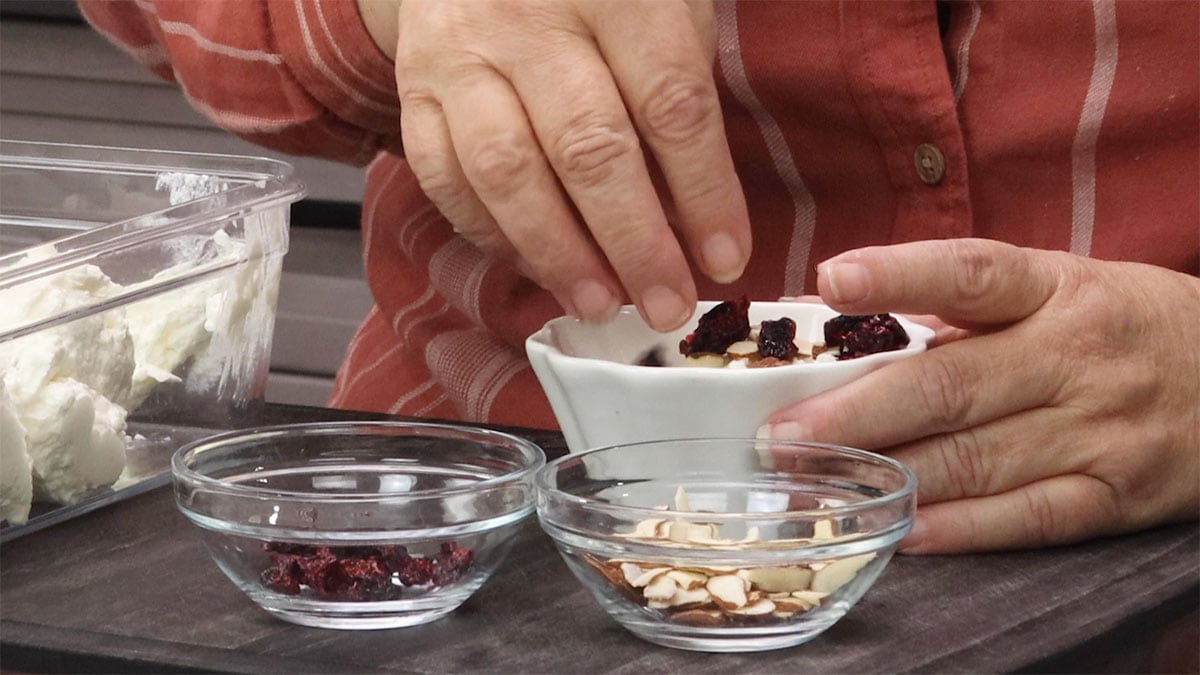
Topping yogurt with goodies
My favorite way to serve homemade yogurt is with a drizzle of honey, dried cranberries and sliced almonds. If you want to make your own dried cranberries, here is my recipe: How to Dehydrate Cranberries
Another of my favorites is making a quinoa crumble and you can find the recipe here: Quinoa Granola Recipe
You can also make a sweetened fruit mix by adding some sugar to fresh fruit and letting it sit for about 30 minutes. Then mix the fruit with the yogurt for a flavored yogurt.
How to Make Cold Start Yogurt in the Ninja Speedi
Cold Start Yogurt is more costly to make, but it does speed up the process quite a bit. You MUST use an ultra pasteurized milk when making cold start yogurt. One of the most common brands is Fairlife.
Although whole milk that buy in the grocery store has been pasteurized, it can have small amounts of bacteria in it and cannot be used for Cold Start Yogurt. This doesn't make it dangerous to consume because we refrigerate it, but when you incubate milk to make yogurt, you are keeping the temperature in the danger zone and any pathogens that are in the milk can multiply in this environment.
Ultra pasteurized milk is heat treated at higher temperatures and, as long as the carton hasn't been open, it is perfectly safe to use for Cold Start yogurt.
To make cold start yogurt, you skip the heating and cooling of the milk.
Place the milk into the inner pot of the Ninja Speedi and whisk in the yogurt starter. Place the parchment paper over the top of the pot and tuck it under the lip of the inner pot.
Select the sous vide function and set the temp for 120℉ and the time for 8 hours. It is very important to check the temperature of the milk while it is incubating the first time you use the Speedi to make cold start yogurt. Fairlife milk is thinner than heated and cooled whole milk and there is a chance that the temperatures will get higher than 125℉. If this happens, turn the Speedi off and close the lid. Let the yogurt incubate in the Speedi with it turned off for the remaining time.
Once the milk has incubated and formed yogurt, chill it right in the Ninja Speedi inner pot or transfer it to another container for chilling. Chill for at least 6 hours.
Once chilled, the yogurt is ready to serve or you can strain it to make Greek yogurt.
Frequently Asked Questions
What is the Difference between Regular Yogurt and Greek Yogurt?
Straining is the only difference. Greek yogurt is thicker than regular yogurt and that is because the yogurt is strained after fermentation to remove more of the whey. This is great news if you are lactose intolerant, because you can reduce the lactose in your yogurt simply by straining it and turning it into a Greek-style yogurt.
Personally, I strain all of my yogurt until it is very thick. I like it to resemble sour cream in thickness. I have found that chilling the yogurt prior to straining it does improve the yield.
Yes, absolutely. Just reduce the ingredients by half and sous vide for 8 hours on 120℉.
I sweeten after making the yogurt. You can add honey, syrup or make a concentrated sugar syrup by heating 4 parts sugar to 1 part water until the sugar dissolves. Chill the syrup and mix into the yogurt. I recommend straining the yogurt before adding syrups or fruit so your yogurt doesn't become too runny.
Ninja Speedi Homemade Yogurt Recipe
Equipment
Ingredients
- 1 gallon whole milk
- ¼ cup plain yogurt
Would you like to save this recipe?
Instructions
- Pour the milk into the inner pot of the Ninja Speedi. Select Sear/Sauté and heat the milk to 182-185°F. Whisk frequently during the heating process to avoid scorching on the bottom.
- Cool the milk down to 104℉. You can do this by simply leaving it sit at room temperature for a few hours or put it in a sink full of ice water to cool faster. You can also remove the pot from the Speedi and whisk frequently to cool faster without using an ice bath.
- Add the yogurt starter and whisk well. Place a piece of parchment paper over the top of the inner pot and tuck in the sides. Select the sous vide function and set the temperature to 120℉ and the time for 8 hours. Hit start.
- After the 8 hours is up, remove the inner pot and place it in the refrigerator to chill for at least 6 hours. After chilling your yogurt is ready to serve. See recipe notes for making Greek yogurt.
- Refrigerate any unused yogurt in airtight containers. Your yogurt will last up to 2 weeks.
Notes
Nutrition
About the Recipe Author, Louise Long
Louise is a full-time recipe creator and food blogger @ The Salted Pepper. She has over 30 years of experience with cooking and recipe development. She owned a restaurant for several years and was a full-time RN until retiring to blog full-time.

She published her first cookbook in the Fall of 2018 and is very interested in writing several more.
Louise is also the creator of an online Ninja Foodi Pressure Cooking Course with over 100 instructional step-by-step videos. People absolutely rave about the course and all the value they have received from it.
Louise has several very active Facebook groups that help people with the basics of cooking and learning more about the appliances they love.
Ninja Foodi Pressure Cooker & Air Crisper 101
Ninja Woodfire Outdoor Grill & Smoker
Louise is also a YouTube creator and you can find most of her recipes in video format on The Salted Pepper YouTube channel.
She is very responsive to messages and eager to help in any way she can. Get more Information about Louise & contact information
I WOULD LOVE TO SEE WHAT YOU ARE COOKING UP IN YOUR KITCHEN! TAG ME @THESALTEDPEPPER ON YOUR FAVORITE SOCIAL MEDIA PLATFORM WHEN YOU MAKE A DISH!
BE SURE TO FOLLOW THE SALTED PEPPER RIGHT HERE ⇓⇓⇓⇓⇓
Franny says
Hi Louise, thank you for this recipe! I’m UK based and my Speedi doesn’t have the sous vide setting, what alternative function can I use? Thank you ☺️
Louise says
I would try using the proof setting if you have that. The temp should be less than 40°C during the proofing state.
Francesca says
Thank you Louise, unfortunately this machine doesn’t even have that!
Louise says
Oh no! Send me an email with the functions you have on your Speedi and let me see if I can figure out a way for you to do it. My email is: louise@thesaltedpepper.com
Karen says
Hi, Thank you for this recipe. I have a question on the cold start using Ultra-pasteurized milk. Do I need to first bring the milk up to 104 degrees before adding in the starter and then continue with the directions, or do I add the starter in the cold milk and just set it at 120 degrees? Thank you.
Louise says
As long as your ultra pasteurized milk has not been open, you can whisk in the starter and proceed right to the incubation at 120F.
Karen says
Wonderful! Thank you so much!
Diana Ripley says
Thank you for this. I, too, was surprised about not having a yogurt setting. I thought you couldn't let the heat go above 110 so I am very encouraged by this. I will give it a try.
Thank you!
Louise says
The temp of the milk and starter won't get much above 110F even with the sous vide temp set to 120F. Enjoy!