
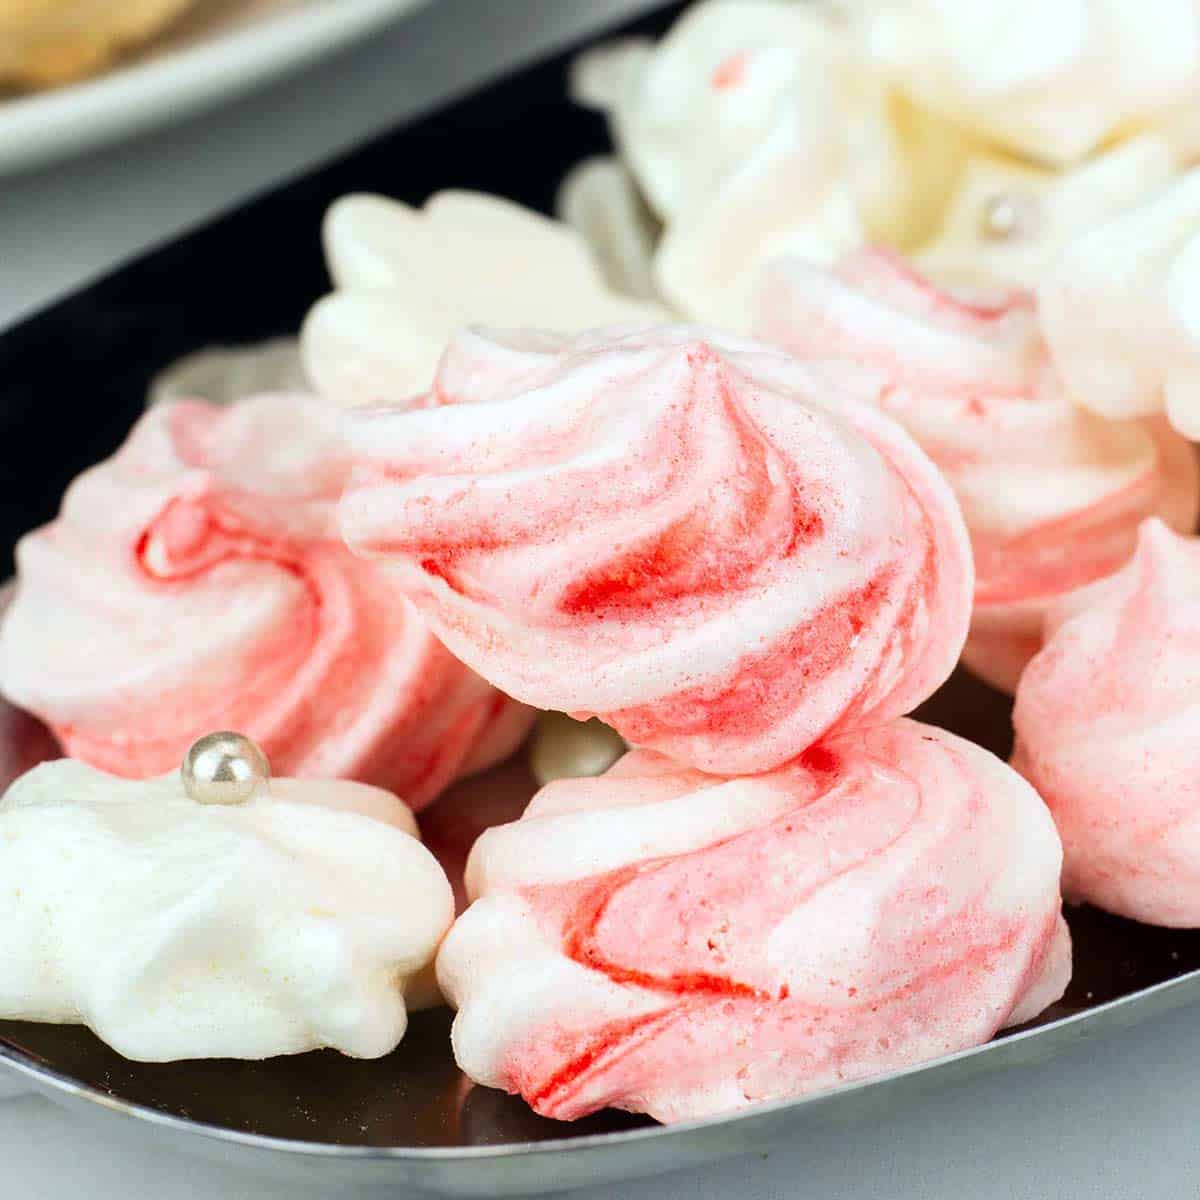
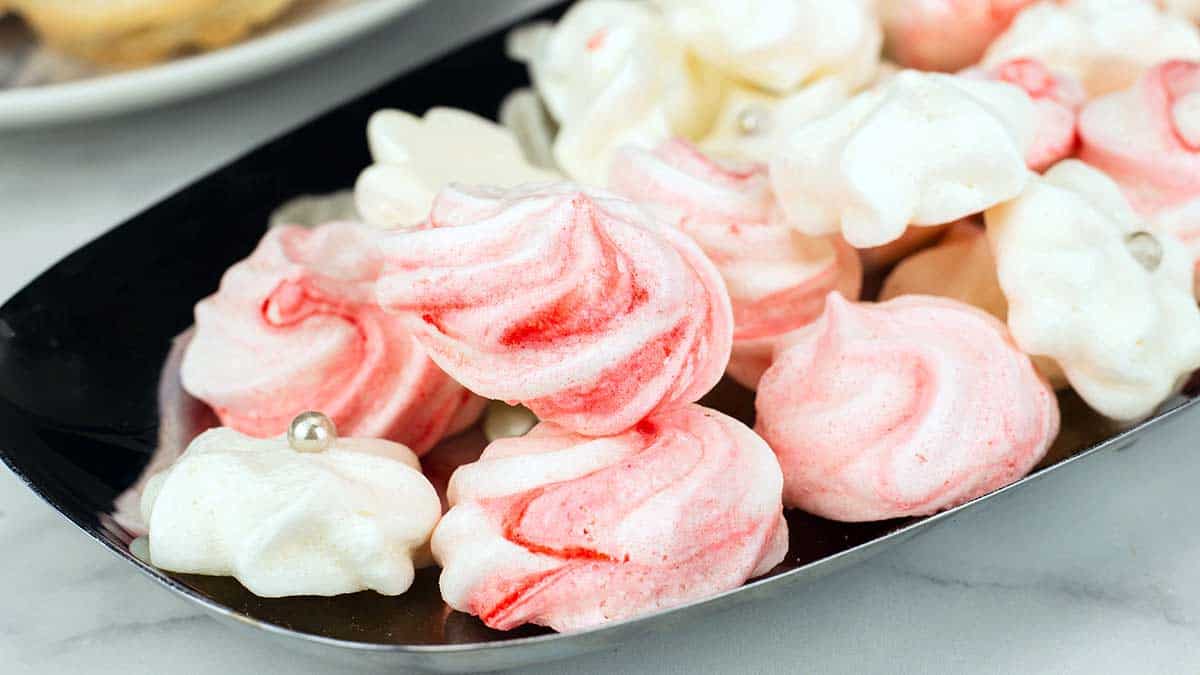
Peppermint Meringue Cookies are the perfect little cookie for the holiday season. They only require 3 ingredients, are super easy to make, and make the perfect addition to your cookie trays! They taste just like candy canes, but after the initial crunch of the cookie, they simply melt in your mouth.
Would you like to save this recipe?
If you aren't sure what a peppermint meringue cookie tastes like, I would compare it to a peppermint puff candy. Although they are made very differently, both dissolve in your mouth as you eat them. The initial crunch of the meringue cookie simply gives way to this magical dissolving peppermint flavor. The cookies are very light and airy and make the perfect treat to satisfy any sweet tooth!
I used a large closed star piping tip to pipe mine designs out, but you don't need any fancy decorating equipment or skills, simple dollops of the meringue are just as beautiful! You can decorate them with different colors and different flavors to make a variety of beautiful meringues and I'll show you the easiest way I've found to get beautiful swirls of color into the meringue cookies with zero hassle!
Suggested Kitchen Tools for Meringue Cookies
- Stand Mixer with the whisk attachment
- Parchment paper
- A dehydrator or oven that can be set at 175°F or lower
- Piping bag with a large star tip (optional)
- Dehydrator trays or cookie sheets
Ingredients & Substitutions
Technically, you only need two ingredients to make meringue cookies: sugar and egg whites.
However, adding some flavoring like vanilla extract or peppermint like this recipe calls for transforms the cookies into little bites of heaven.
Egg Whites
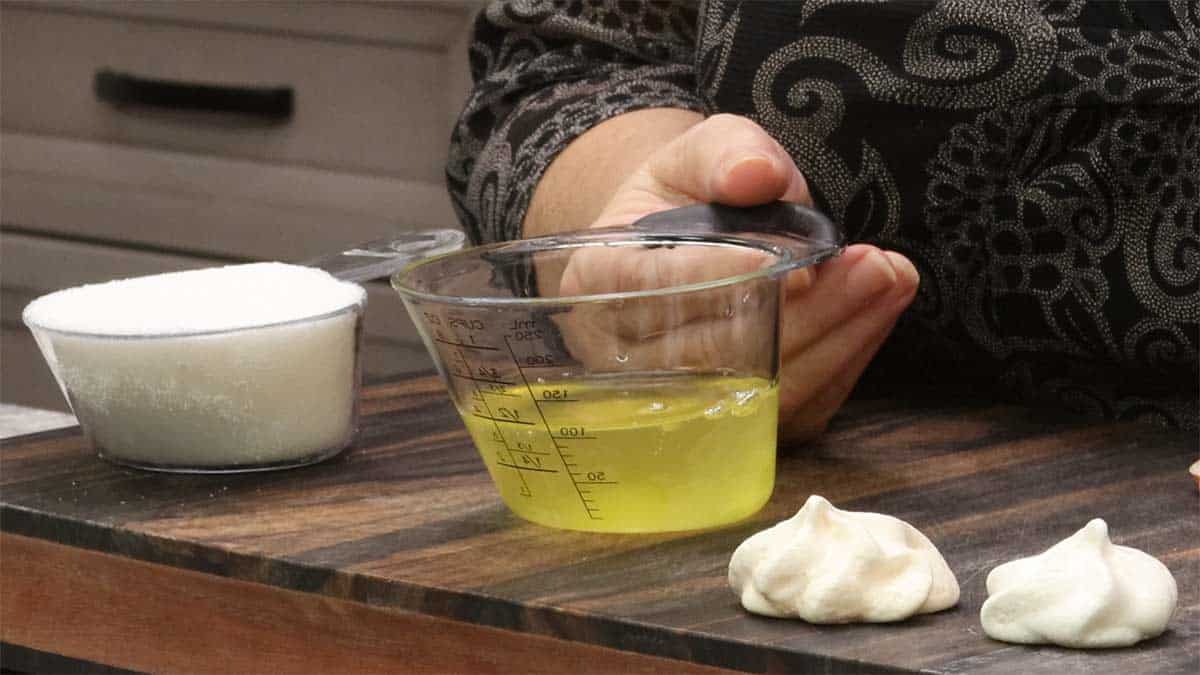
I use 5 large egg whites at room temperature for this recipe which equals ½ cup. Since eggs come in different sizes, and even what you buy in the grocery stores can vary a bit, use enough egg whites to make ½ cup for one batch of cookies.
Don't Throw the Yolks Out
You can use the yolks to make delicious and easy cremé brûlée, to make lemon curd, or you can freeze them for use later.
They sell meringue powder and I'm sure it's fine to use in these cookies, but I have never tried it. If you want to use the meringue powder in place of the egg whites, follow the instructions on the container of meringue. Usually, 1 Tablespoon of the powder is equal to 1 large egg white, but this could vary by brand.
The most important thing when using fresh eggs is to make sure that you do not get any of the yolk into the white when you separate them. Just a drop of fat in the egg whites can prevent them from whipping up correctly. I recommend separating one egg at a time in two small bowls and then transfer the egg white to another bowl after making sure none of the egg yolk made it in.
You also want your egg whites to be at room temperature before whisking them which helps them whip up easier and quicker. You can also add in some cream of tartar or a little lemon juice to stabilize the egg whites, but I have never needed to do this so it isn't in the recipe. The rule of thumb for using cream of tartar is ⅛ teaspoon per egg white, so in this recipe, you would use ¾ teaspoon of cream of tartar or 1 teaspoon of lemon juice.
Sugar
I use regular granulated sugar in this recipe and that is what I recommend if you want white meringue cookies.
I have tried various types of sugar substitutes and, no matter how low of a temperature I baked or dehydrated them on, they turned very dark brown and the flavor wasn't that great either. If you want to cut back on the sugar and replace some of it with a sugar substitute I would start with 75% regular sugar and 25% sugar substitute and then adjust from there.
I have seen recipes that use powdered sugar in place of granulated sugar, but I have not tried it. If you want to substitute powdered sugar in this recipe you will want to use 1 cup of powdered sugar.
I have read that you can use brown sugar instead of white sugar and make meringue cookies, but I have not tried it. I would expect the meringues made with brown sugar to be darker in color and a little chewy. The flavor could be quite nice so please let me know if you try it!
Flavorings
You can choose any kind of flavoring you want, just make sure it is either an extract or bakery emulsion and NOT OIL BASED. Anything fat-based will cause your egg whites not to whip up like they need to for the meringue cookies.
When using peppermint extract in place of peppermint bakery emulsion, I would make your first batch with ¾ teaspoon of the extract instead of 1 teaspoon. (affiliate link)Peppermint bakery emulsion has a more rounded flavor and that is why I use it instead of extract and too much extract can leave an aftertaste in the meringue cookies that isn't pleasant. You can certainly adjust the amount of extract or emulsion to suit your tastes. For a hint of peppermint flavor, only use ½ teaspoon.
I purchase the peppermint bakery emulsion on Amazon and here is my affiliate link: (affiliate link)Lorann bakery emulsion
If you want to create a red/pink and white swirl in your meringue cookies you will need to have some red food coloring, gel is best. My favorite brand is (affiliate link)Americolor gel food coloring.
Extras
There are so many different kinds of meringue cookies you can make from the base recipe. By pairing different flavors of extracts or bakery emulsions with other ingredients you create your own custom meringue cookies!
Some of my favorite combinations are listed below.
- Almond Joy Meringue Cookies: Use coconut extract or emulsion for the base cookie and fold in mini chocolate chips and a few almond slices on top.
- Lemon Meringue Cookies: Use lemon extract in the base and drizzle with lemon icing.
- Chocolate Chip Meringue Cookies: Use vanilla extract in the base and fold in mini chocolate chips.
- Almond Meringue Cookies: Use Almond extract or bakery emulsion in the base and decorate with toasted crushed almonds.
These are just a few variations that I have tried. Get creative and use the flavors and extras that you love!
Tips for Making Meringue Cookies
- Don't make them on a humid day. Humidity can prevent them from drying enough and they may end up chewy and sticky.
- Make sure the mixing bowl and all utensils are clean and dry and free from any oil residue. Oil/fat prevents the egg whites from whipping up.
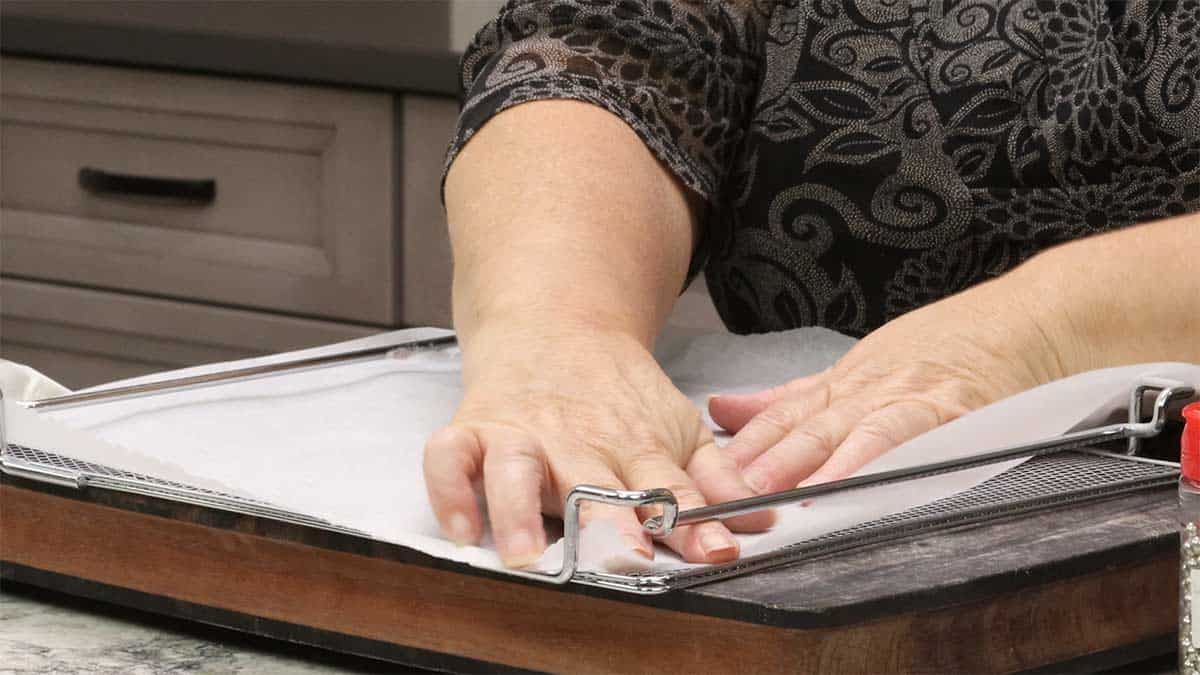
- Line the sheet pan or dehydrator tray with parchment or the cookies will stick
- Make them in the evening so they can sit in the oven or dehydrator overnight to finish drying.
- Store the cooled meringue cookies in plastic freezer bags at room temp for 2-3 days and in the freezer for longer storage.
How to Make Peppermint Meringues
You can make meringue cookies in the oven, but I found using a dehydrator instead worked great. I will give the cooking instructions for both methods below, but the basic technique for making the meringue cookies stays the same.
Mise En Place (Prep)
- Separate 5 large eggs when they are cold and put the yolks in one bowl and the whites in another bowl. You should have ½ cup of egg whites. Use or freeze the yolks in another recipe and leave the whites on the counter to come to room temperature.
Quick Tip: Use Cold Eggs
It is much easier to separate the yolks from the whites when the eggs are cold. You are less likely to get any yolk into the white and that is very important when making meringue cookies.
- Make sure your mixing bowl and utensils are clean and dry and without any oil or fat residue.
- Measure out the sugar
- Line your baking trays or dehydrator trays with parchment paper
Making the Meringue
Put the room-temperature egg whites in the clean bowl of a stand mixer or in a large bowl. Using the whisk attachment on the stand mixer or a hand-held electric mixer, whisk the egg whites on medium speed until they start to become frothy.
If you are using a hand mixer, you may have to increase the speed to high to get foamy egg whites, this all depends on the power of your hand mixer.
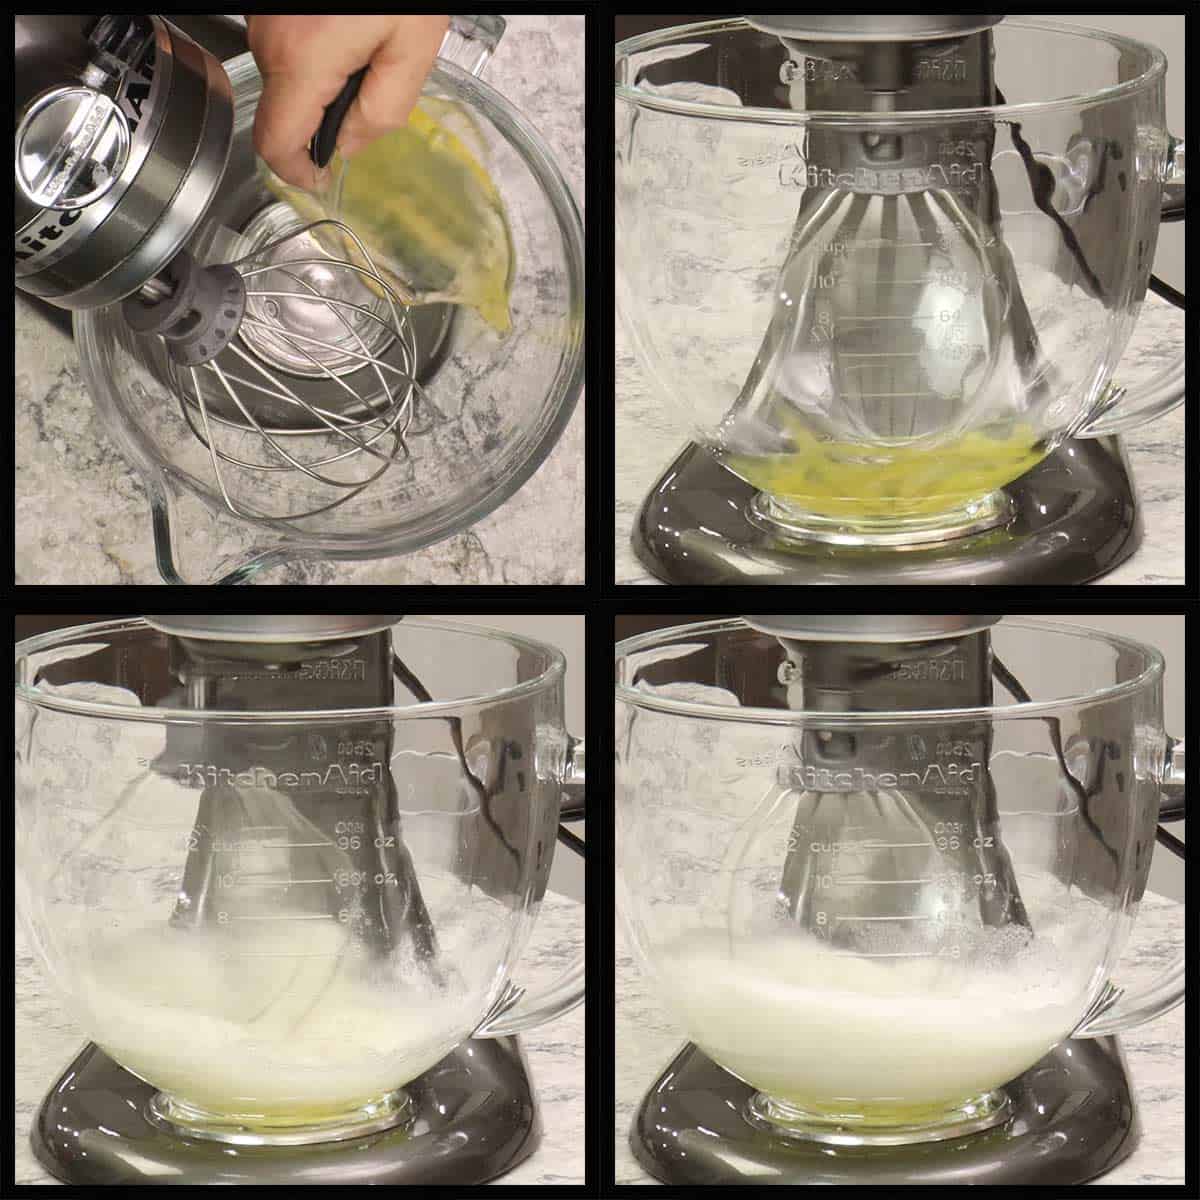
Once the egg whites become frothy with white bubbles that resemble foam, slowly stream in the sugar while continuing to whisk on medium speed.
When the sugar is added, keep the mixture on and add in the bakery emulsion.
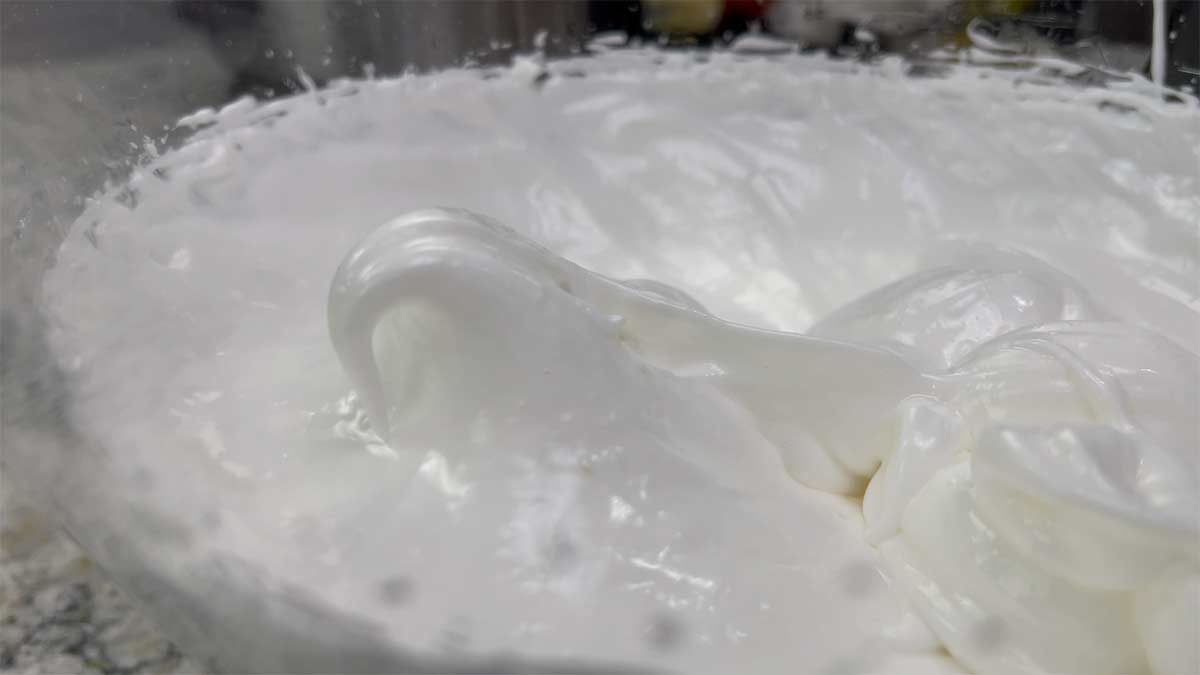
Increase the mixer speed to high and whisk until the egg whites form stiff peaks.
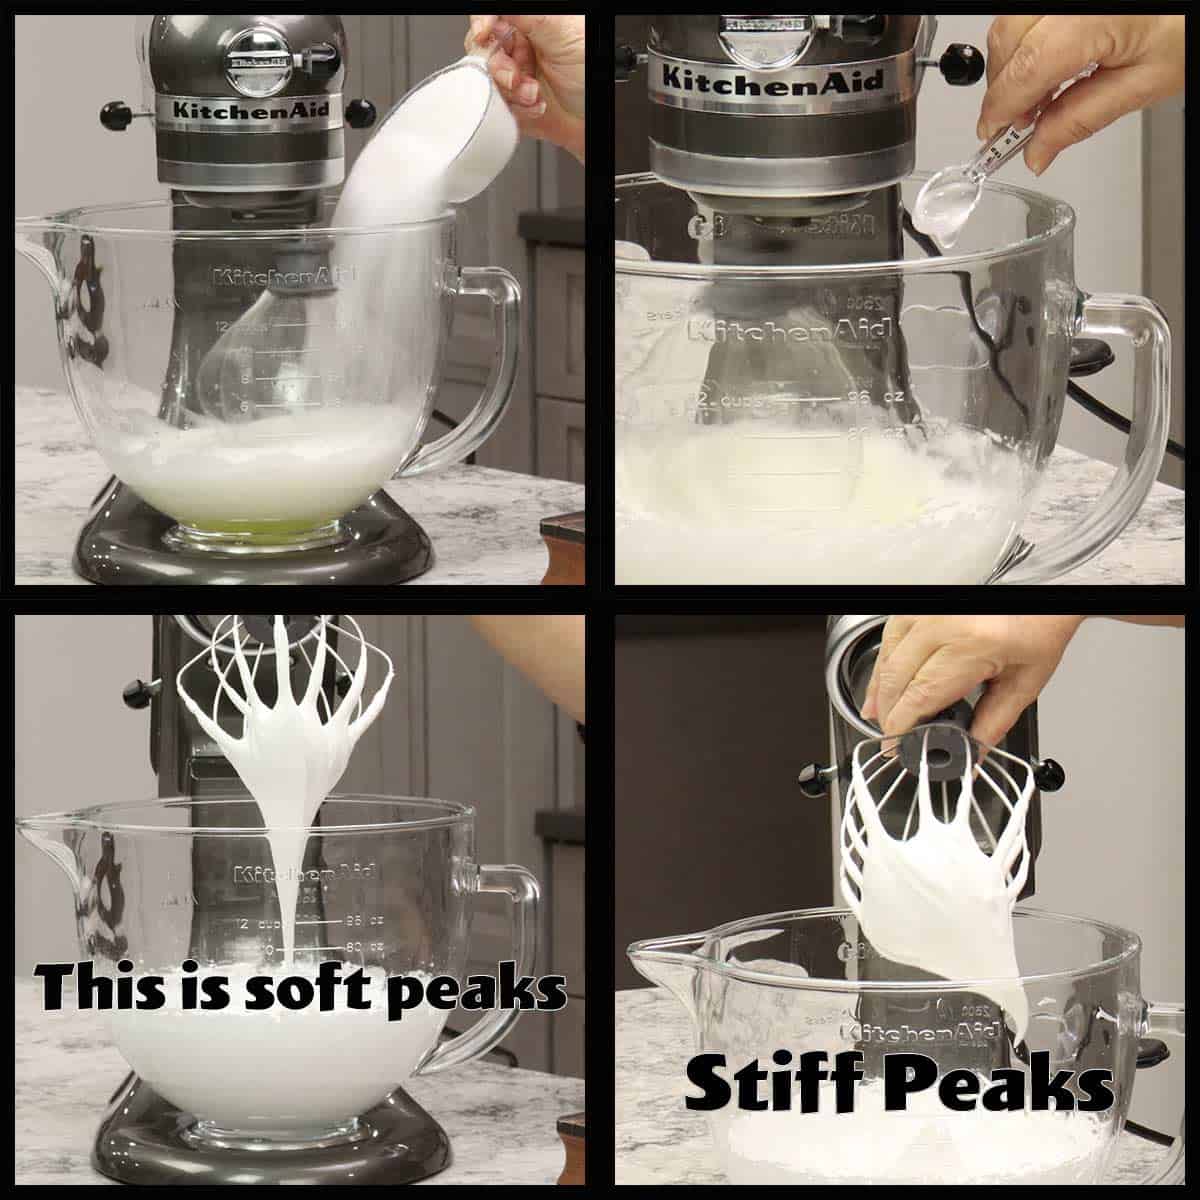
You know your meringue is done when you lift the whisk attachment and egg whites stay stiff and are very glossy.
Forming the Meringue Cookies
There are so many different ways to form the meringue cookies and you do not need any special decorating equipment!
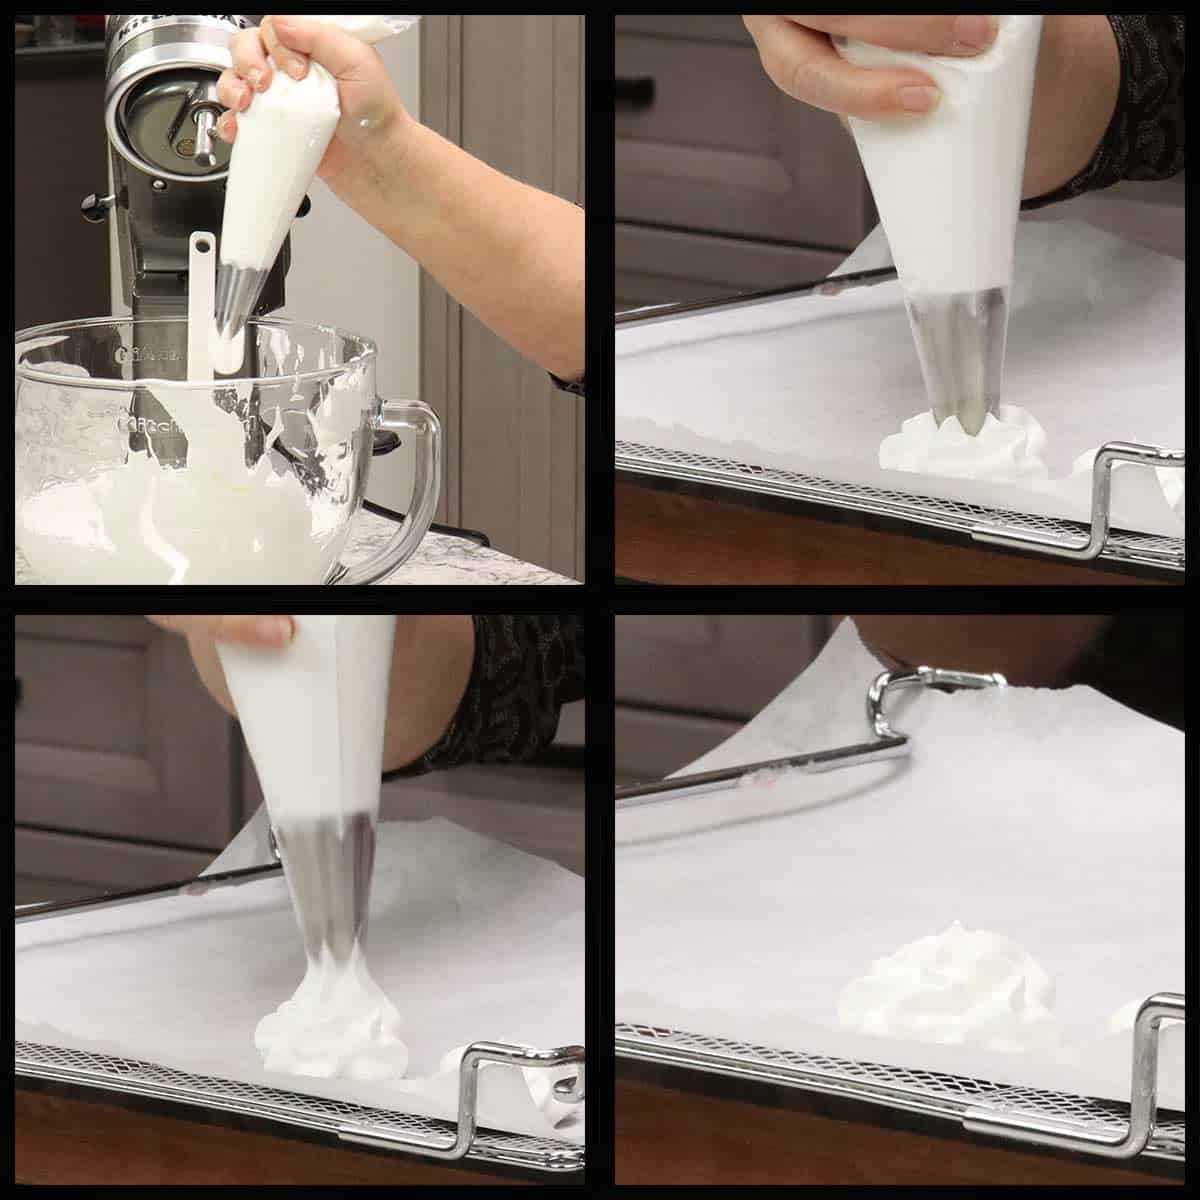
The one thing to keep in mind is the bigger the cookie, the longer it is going to take to bake or dehydrate. I like to keep mine no bigger than about 2" wide and about 1-1½" high.
If you have added anything solid into the meringue batter, like chocolate chips, you probably just want to use a spoon or small scoop because they will be difficult to pipe out unless the tip you use is really big.
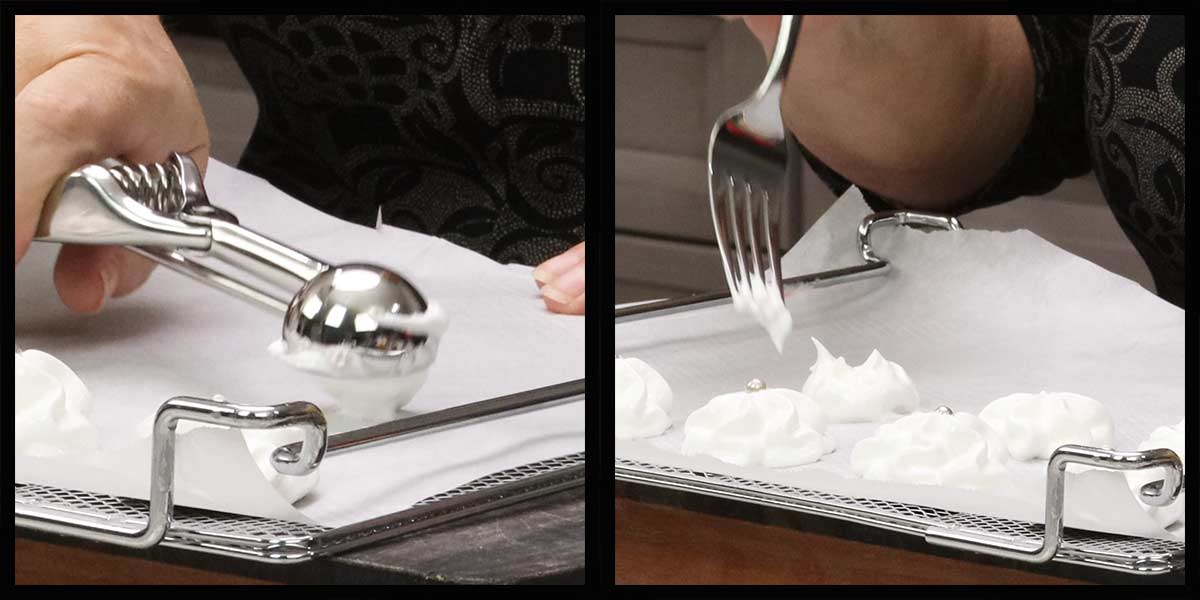
The easiest way to make the meringue cookies without any special equipment is to scoop about 1 Tablespoon of the meringue mixture onto your prepared cookie sheets or dehydrator trays and then make a few swipes with a fork to create some peaks and valleys.
My favorite way to make Peppermint Meringue Cookies for Christmas is to use a large close star tip like the (affiliate link)Wilton 2D decorating tip, however, you can use any kind of decorating tip and get creative with the designs!
I use (affiliate link)disposable decorating bags when I am working with meringue and food coloring because it is so messy, but any piping bag will work just fine.
You can even use a plastic bag like a ziplock freezer bag and cut the corner off.
Make sure to cuff the pastry bag at the top before filling, it is much easier that way and it keeps your hands clean.
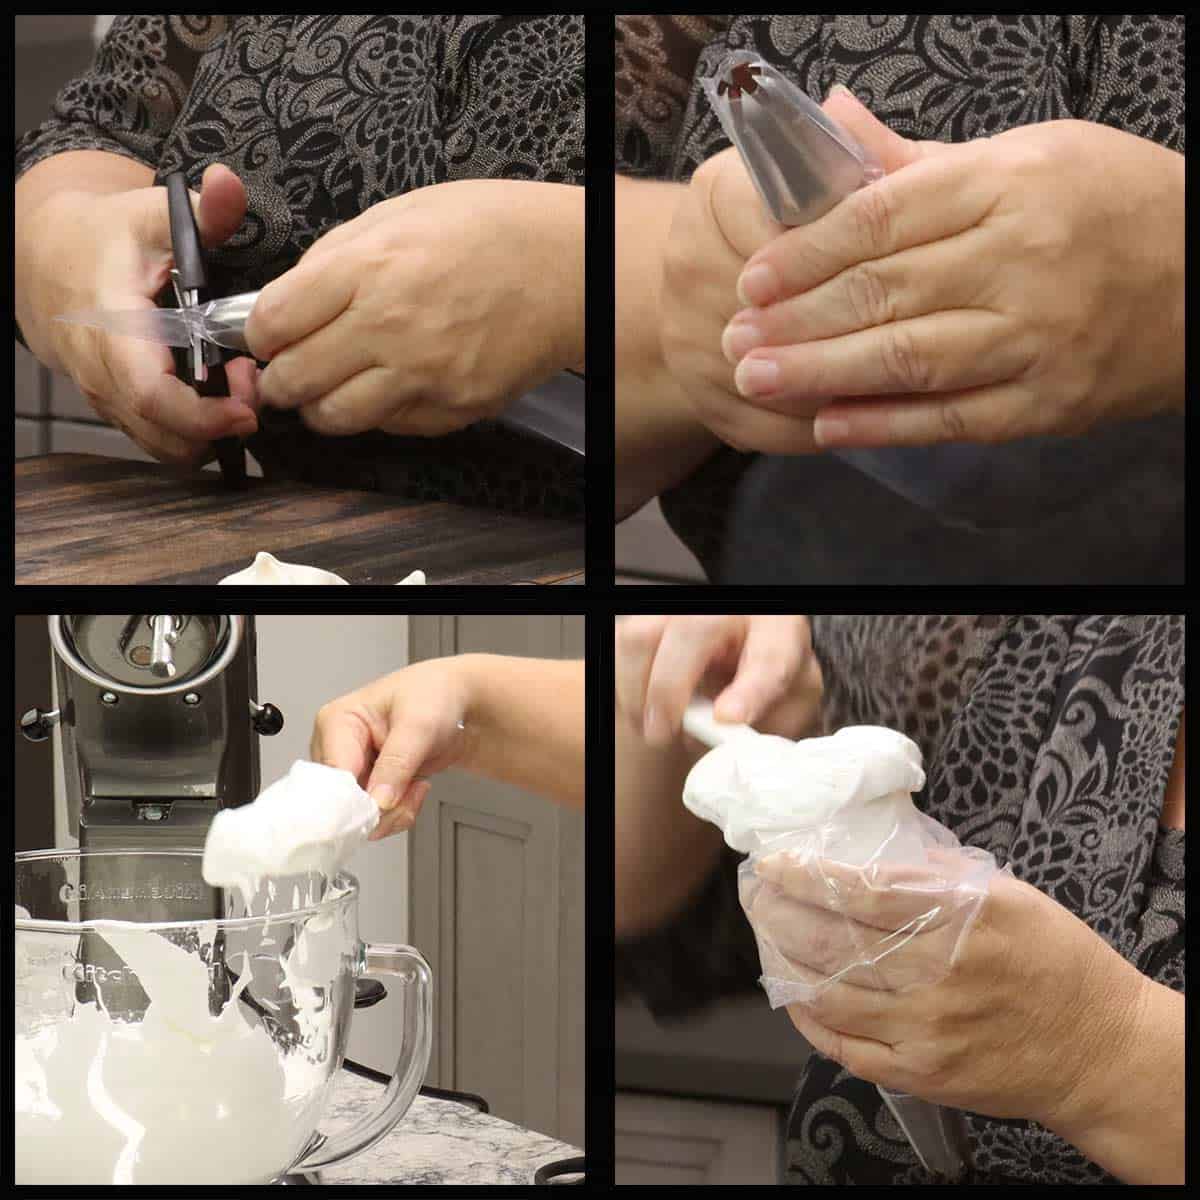
Once you have your pastry bag filled with the meringue, squeeze some out into the bowl to get any trapped air out that can mess up your designs.
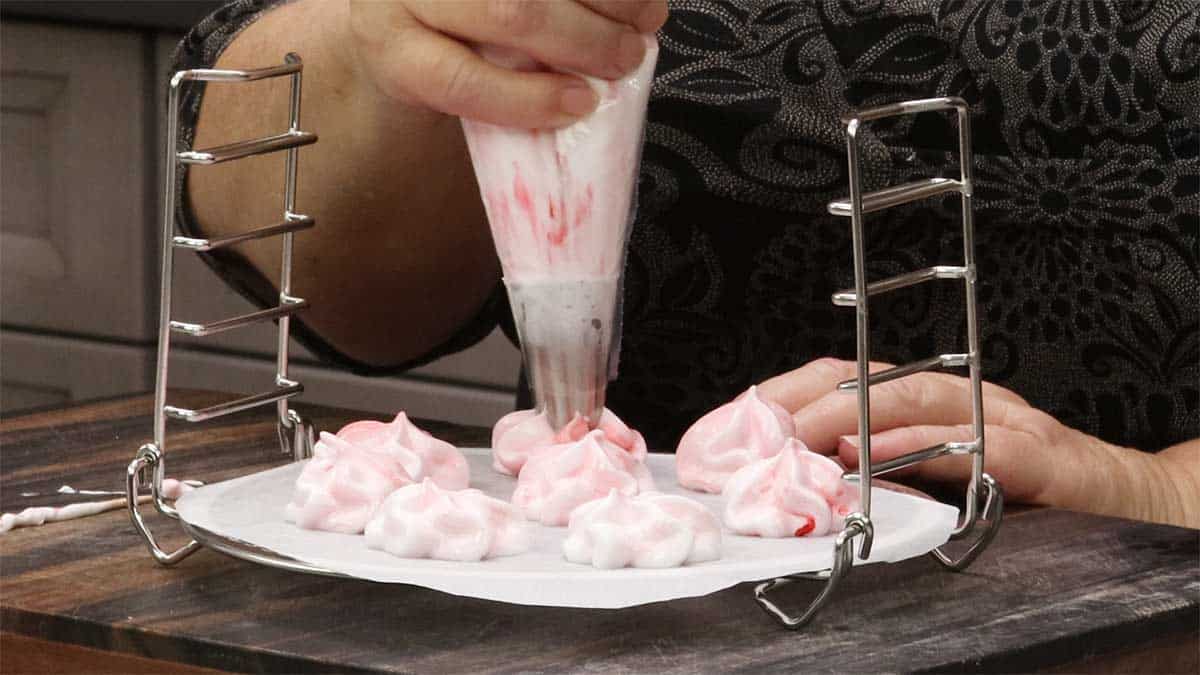
To make the swirl designs, hold the pastry bag straight up and down with the tip close, but not touching the parchment paper. Gently squeeze the bag as you make a small circle and then stop squeezing the bag and pull straight up.
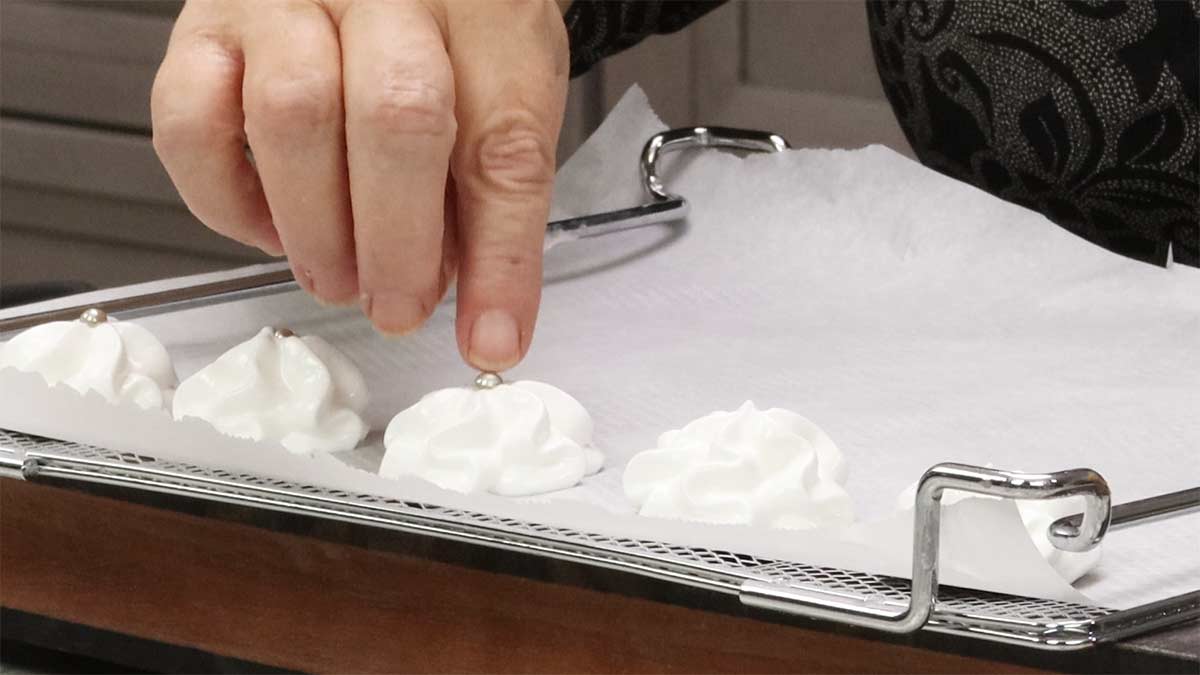
After you are done, you can top each one with a (affiliate link)silver sugar pearl if desired.
This is probably easier to understand if you watch the short video below.
Adding Color to the Meringue
I've seen some people use a small paintbrush to draw lines of food coloring inside of a piping bag to get red stripes, but I find that to be too labor intensive and honestly, I'm just not that patient or talented. They do make some beautiful cookies though!
Instead of taking the time to do that, I simply stick a toothpick into gel food coloring and stroke the food coloring through the finished meringue mixture. Super simple! Just don't stir the meringue after adding the food coloring! I use about 6-8 toothpicks dipped in the food coloring for a full batch of meringue cookies.
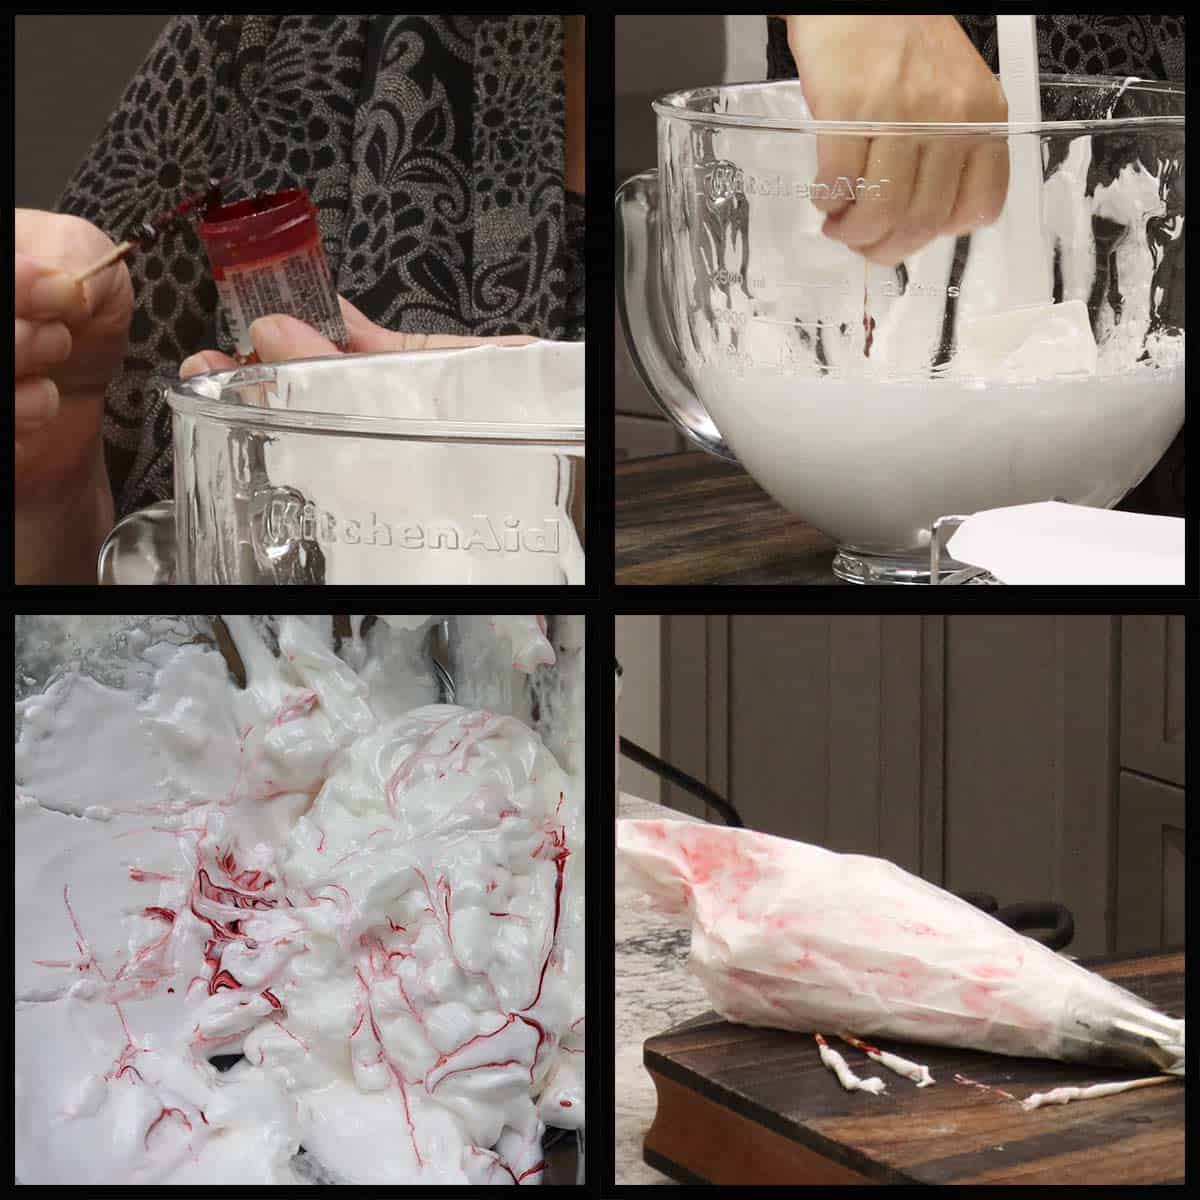
Then fill your piping bag and you will have beautiful swirls of color through the meringue cookies. Each one will look different, but they are all going to be gorgeous!
Baking or Dehydrating the Meringue Cookies
I have baked meringue cookies several different ways, at several different temperatures, and for various lengths of time and the absolute BEST method was using the dehydration function on the Ninja Foodi XL oven or the Ninja Foodi Pressure Cooker & Air Crisper.
Any dehydrator that can be set to 175℉/80℃ will work great, but the amount of meringues you can make at once will depend on the size of your dehydrator. For smaller dehydrators like the Ninja Foodi Pressure Cooker and Air Crisper, I recommend making a smaller batch of the meringue or you can use two different appliances that have the dehydrating function and make a full batch.
Ninja Foodi XL Oven Directions
The Ninja Foodi XL Oven is my preferred appliance to make these cookies in and they always turn out perfectly!
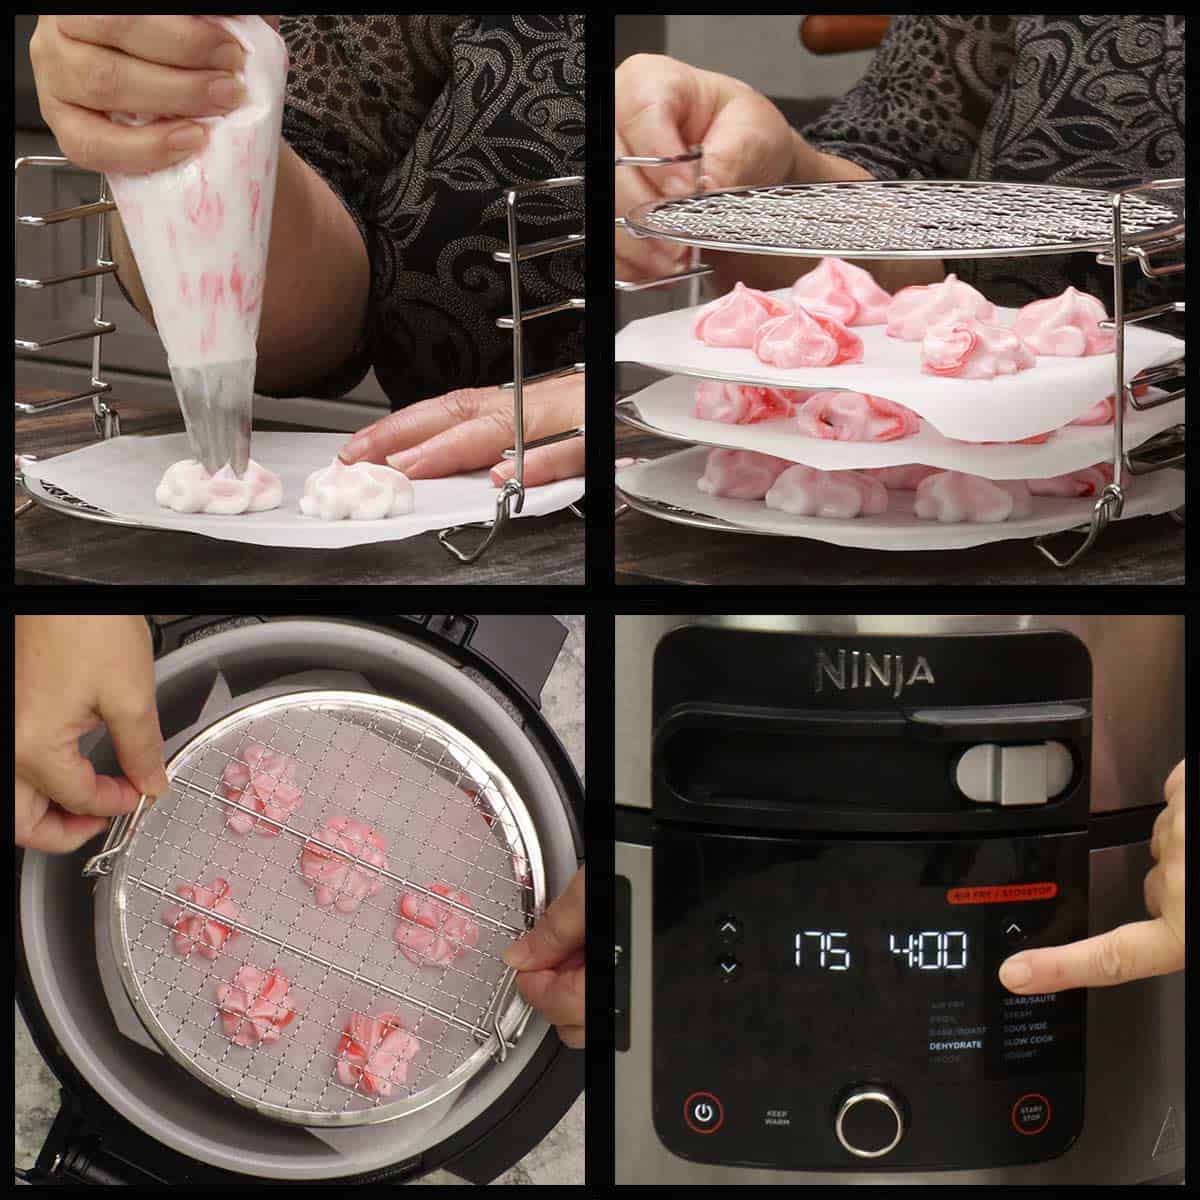
Line the (affiliate link)dehydration trays with parchment paper and pipe or scoop out your cookies. If you don't have the dehydration trays, you can use the mesh tray and the solid tray lined with parchment.
Place the trays into the oven on levels 1 and 3. Select the dehydration setting and set the temperature at 175℉/80℃ for 4 hours. Close the door and walk away.
You do not need to do anything during the 4 hour time and when it is up, just leave the meringues right in the oven with the door closed for another 4 hours or up to 8 hours.
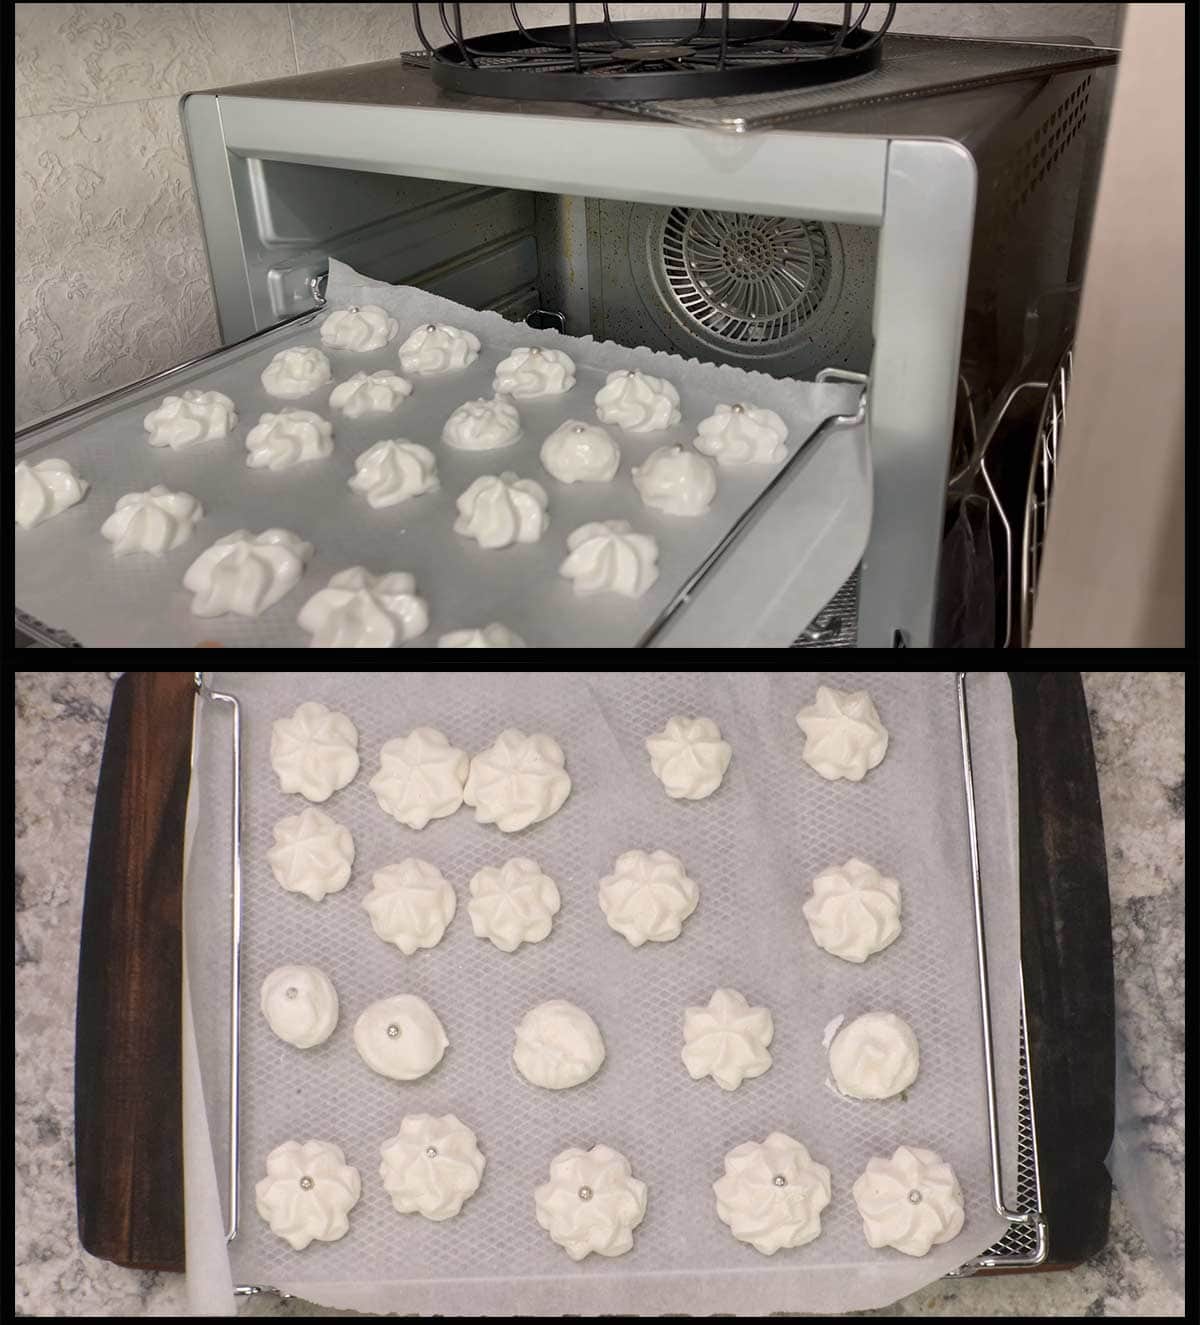
Remove them from the trays and enjoy!
Ninja Foodi Pressure Cooker & Air Crisper Directions
In order to make these easily and all at once in the Ninja Foodi Pressure Cooker & Air Crisper, you will need the dehydrating trays. There are many different manufacturers of these trays and my favorite brand is on Amazon, here is the link: (affiliate link)Ninja Foodi Dehydration Rack
You will want to cut parchment circles to line each layer of the rack with, but skip the top rack. That is used for keeping the meringues from flying into the heating element and you don't want to put parchment on it.
To make a batch of meringue so all the cookies fit on the 4 layers of the dehydration rack, you will want to adjust the ingredients as follows.
- 3 egg whites
- ½ cup sugar
- ½ teaspoon peppermint extract or emulsion
You will create 4 layers of cookies on the rack and then leave the top empty but put it on so the cookies don't fly up into the heating element. *I only have 3 layers in the picture below because I split a full batch between the XL oven and the Foodi.
If you don't have the dehydration rack, you can make them on the rack that comes with the Foodi and do one level (2 if you have the double rack for the 8qt Foodi), but it will be time-consuming and probably easier to use your oven.
Once the time is up, leave the cookies in the Ninja Foodi for another 4-8 hours. I usually just leave them overnight with the Foodi turned off and the lid closed.
Remove from the Ninja Foodi and they should feel dry and be crunchy on the outside and melt in your mouth on the inside! Enjoy!

Oven Directions
This is my least favorite method, but if you don't have a dehydrator, then the oven will work. Your meringues might become slightly darker in the oven than in the dehydrator.
Preheat the oven to 200℉/95℃.
Line your baking sheet pans with parchment and scoop or pipe out the meringue cookies, spacing them about 1" apart.
Place the trays in the oven on the middle rack if possible and bake for 90 minutes. Turn the oven off and leave the meringues in the oven to cool for 4 hours.
Remove from the oven and enjoy!
How to Store Meringue Cookies
Room Temperature
I have found that the peppermint meringue cookies can last up to a month at room temperature when stored correctly. However, if they are allowed to absorb any moisture, this time frame will be drastically reduced.
I recommend using freezer bags and squeezing as much air out as possible and then store them at room temperature. I would check them every few days and if they seem to be getting softer, get them into the freezer for longer storage.
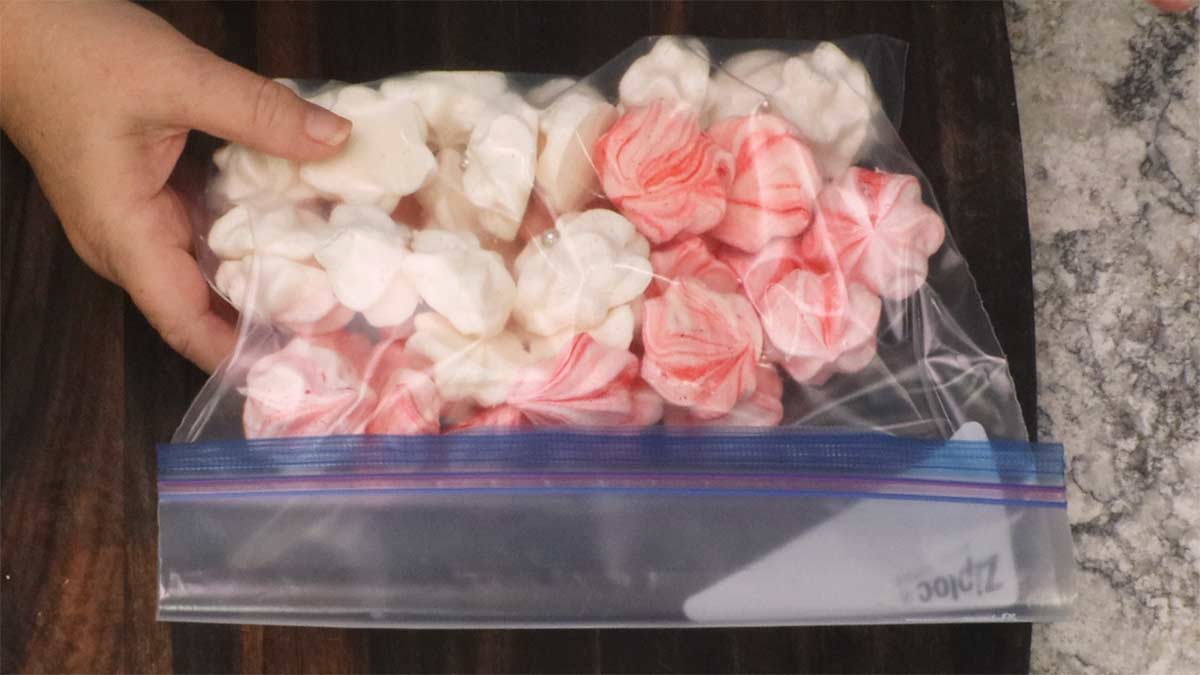
Freezer
If you want to make sure the meringue cookies last as long as possible, seal them in a freezer bag with as much air squeezed out as possible and store them in the freezer.
Frozen Meringue Cookies
You can eat the meringue cookies directly from the freezer and they are delicious!
I tried this with the batch of meringues I made for the video and 2 months later they are just as good as the day I made them!
Frequently Asked Questions
I have not tried this, but it is possible. You would want to increase the sugar in the recipe to 1 cup to provide the correct level of sweetness after adding in the cocoa powder. I would use about ¼ cup of cocoa powder that has been sifted and fold it into the egg whites after they have formed stiff peaks.
You can double the peppermint meringue ingredients to make a double batch. For a half of a batch, decrease the egg whites to 3, the sugar to ½ cup, and the flavoring to ½ teaspoon. The cooking time remains the same.
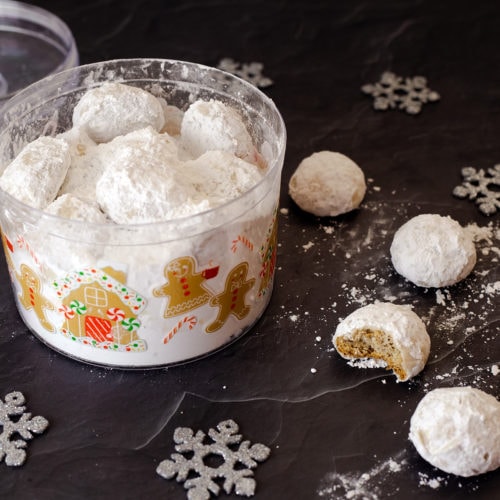
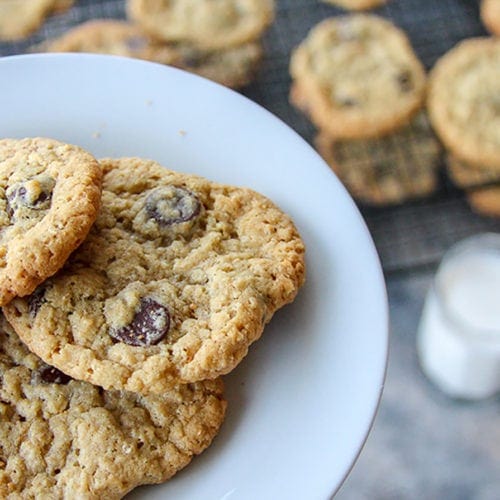
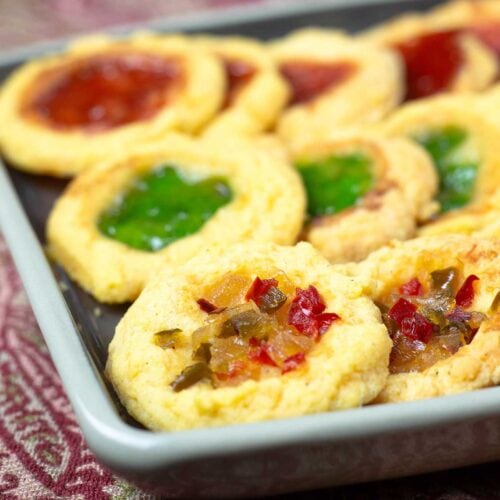
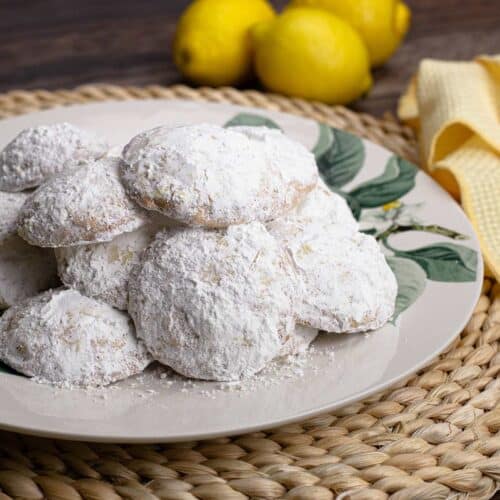
More Cookie Recipes!
Whether it is the holiday season or not, cookies are always fun to make and these recipes are some of my favorites! The Savory Cheddar ones are great for gifting to friends and family who don't have a sweet tooth!

Peppermint Meringue Cookie Recipe
Equipment
- Dehydrator or oven
Ingredients
- ½ cup egg whites about 5 large eggs separated
- ¾ cup granulated sugar
- 1 teaspoon (affiliate link)peppermint bakery emulsion or ¾ teaspoon peppermint extract
- red gel food coloring optional
Would you like to save this recipe?
Instructions
Making the Meringue
- Add the room temperature egg whites to a clean bowl of your stand mixer or a large bowl if you are using an electric hand mixer. Whisk on medium speed for about 3-5 minutes or until your eggwhites become frothy.½ cup egg whites
- With the mixer on, stream in the granulated sugar and once incorporated add in the flavoring. If you are using peppermint extract, I would use about ¾ teaspoon.¾ cup granulated sugar, 1 teaspoon peppermint bakery emulsion
- Increase the speed of the mixer to high and whisk until stiff peaks form. This means that when you lift the whisk attachment the egg whites stand up and don't droop over.
Adding Color to the Meringue
- Stick a toothpick into the red (or whatever color you want) gel food coloring and make strokes through the meringue after it has formed stiff peaks. Do not mix the meringue unless you want solid color meringues. I usually dip the toothpick into the gel food coloring 6-8 times. Fill the piping bag with the meringue (do not mix the food coloring in unless you want solid color meringues) and pipe swirls onto prepared trays. This swirl of color is only going to work with a piping bag.
Making the Cookies
- Line your baking trays or dehydration racks with parchment paper. Fill a pastry bag with the meringue and using a large closed star piping tip, pipe swirls about 2-3" in diameter and 1" in height. Or simply scoop out about 1 Tablespoon of the meringue on to the parchment and make little swirls in the top with a fork.
Dehydrator Instructions
- Place the trays with the meringue cookies into the dehydrator and set the temperature to 175℉/80℃ and set the time for 4 hours. When the time is up, leave the cookies in the dehydrator for 4-8 hours.
Oven Instructions
- Preheat the oven to 200℉/90℃. Place the trays of merinuges on the center rack or as close to the middle of the oven as you can. Bake for 90 minutes and turn the oven off. Leave the meringues in the oven for at least 4 hours, but overnight is better.
Storage
- Once the meringues have sat in the dehydrator or oven and are completely cool, place them in a freezer bag and sqeeze as much air out as possible. Store at room temperature. They have stayed fresh for me at room temp for a month. I recommend freezing them for longer storage.
Notes
- Don't make them on a humid day. Humidity can prevent them from drying enough and they may end up chewy and sticky.
- Make sure the mixing bowl and all utensils are clean and dry and free from any oil residue. Oil/fat prevents the egg whites from whipping up.
- Line the sheet pan or dehydrator tray with parchment or the cookies will stick
- Make them in the evening so they can sit in the oven or dehydrator overnight to finish drying.
- Store the cooled meringue cookies in plastic freezer bags at room temp for 2-3 days and in the freezer for longer storage.
Nutrition
About the Recipe Author, Louise Long
Louise is a full-time recipe creator and food blogger @ The Salted Pepper. She has over 30 years of experience with cooking and recipe development. She owned a restaurant for several years and was a full-time RN until retiring to blog full-time.

She published her first cookbook in the Fall of 2018 and is very interested in writing several more.
Louise is also the creator of an online Ninja Foodi Pressure Cooking Course with over 100 instructional step-by-step videos. People absolutely rave about the course and all the value they have received from it.
Louise has several very active Facebook groups that help people with the basics of cooking and learning more about the appliances they love.
Ninja Foodi Pressure Cooker & Air Crisper 101
Ninja Woodfire Outdoor Grill & Smoker
Louise is also a YouTube creator and you can find most of her recipes in video format on The Salted Pepper YouTube channel.
She is very responsive to messages and eager to help in any way she can. Get more Information about Louise & contact information
I WOULD LOVE TO SEE WHAT YOU ARE COOKING UP IN YOUR KITCHEN! TAG ME @THESALTEDPEPPER ON YOUR FAVORITE SOCIAL MEDIA PLATFORM WHEN YOU MAKE A DISH!
BE SURE TO FOLLOW THE SALTED PEPPER RIGHT HERE ⇓⇓⇓⇓⇓
Leave a Reply